Hola mi bella comunidad de #hive, espero tengan una linda noche.🤗 Hoy vengo con una genial idea decorativa para adornar las paredes de nuestro hogar.
Un lindo cuadro de muñeca a base de hojas. Claro no debemos arrancarlas de la planta, son aquellas que caen el suelo.
Hello my beautiful #hive community, I hope you have a nice night.🤗 Today I come with a great decorative idea to decorate the walls of our home.
A cute doll-based painting made of leaves. Of course we should not tear them off the plant, they are those that fall to the ground.

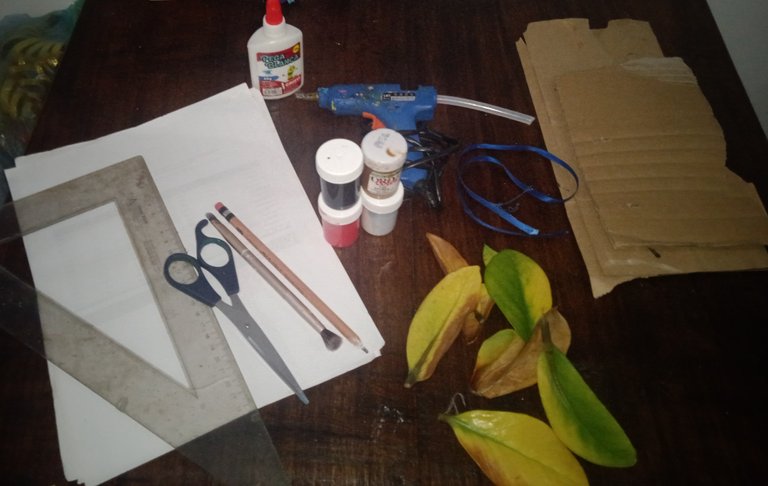
Utilizaremos: hojas de alguna planta, pero las que caen al suelo, cartón, hojas blancas, pintura, pegamento (blanco y silicón) lápiz, tijera y pincel, cinta y una regla.
We will use: leaves of a plant, but those that fall to the ground, cardboard, white leaves, paint, glue (white and silicone) pencil, scissors and brush, tape and a ruler.
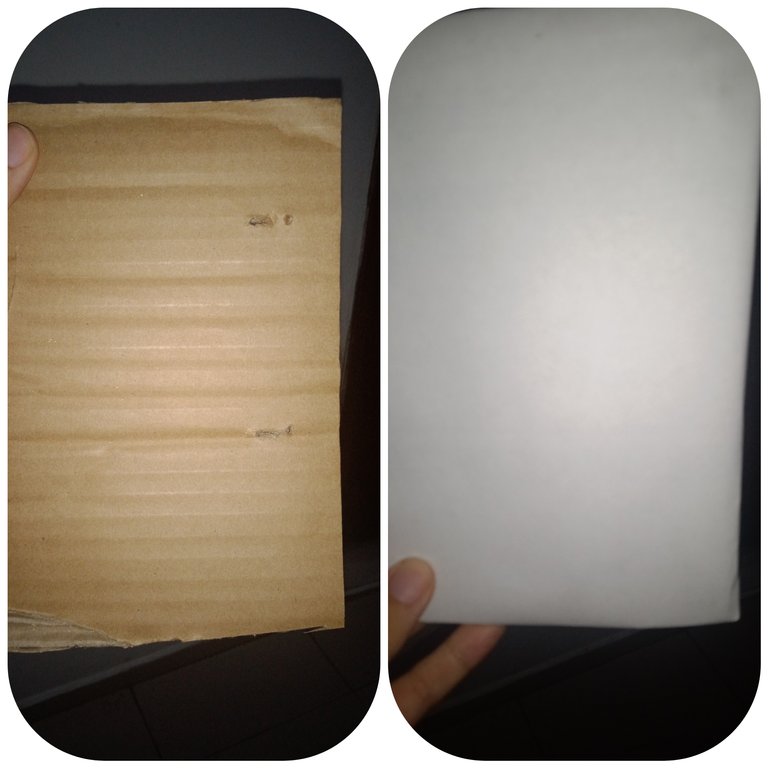
Paso 1
Con un lápiz y la regla damos forma cuadrada a nuestro cartón. El tamaño es opcional. Luego con hojas blancas procedemos a forrar.
Step 1
With a pencil and the ruler we give our cardboard a square shape. The size is optional. Then with white sheets we proceed to line.
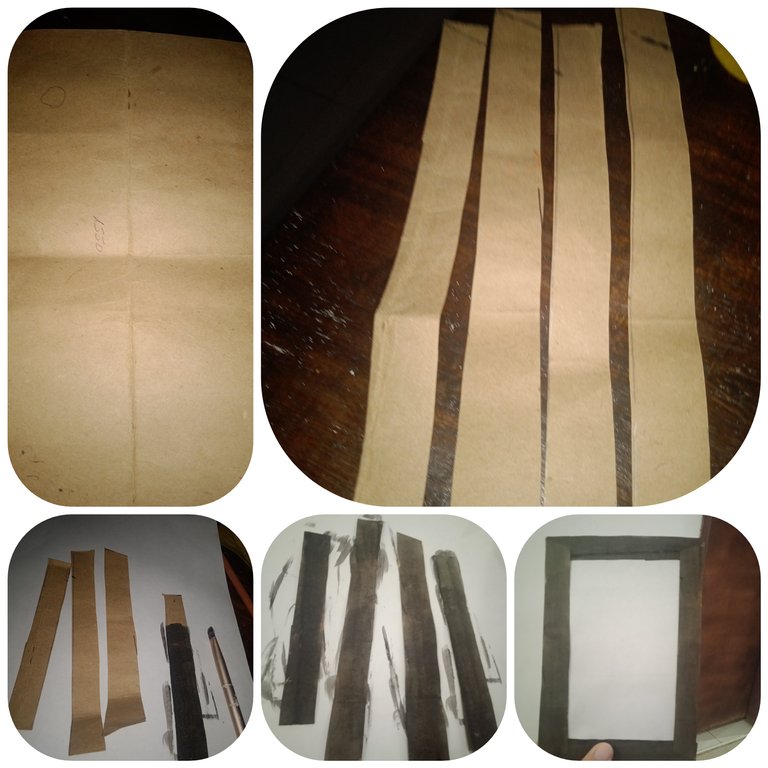
Paso 2
Con otro pedazo de cartón más flojito procedemos hacer cuatro tiras de 2cm de ancho picamos y pintamos de negro. Una vez seca, pegamos a nuestro cuadro.
Step 2
With another weaker piece of cardboard we proceed to make four strips of 2cm wide, chop and paint black. Once dry, we glue it to our painting
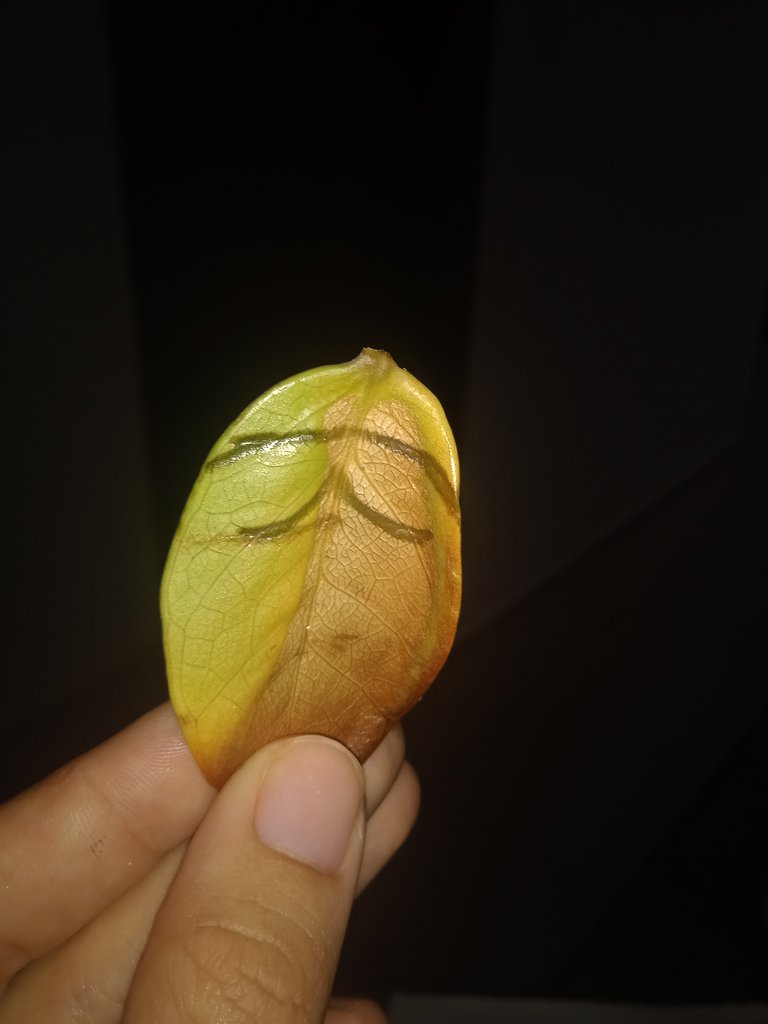
Paso 3
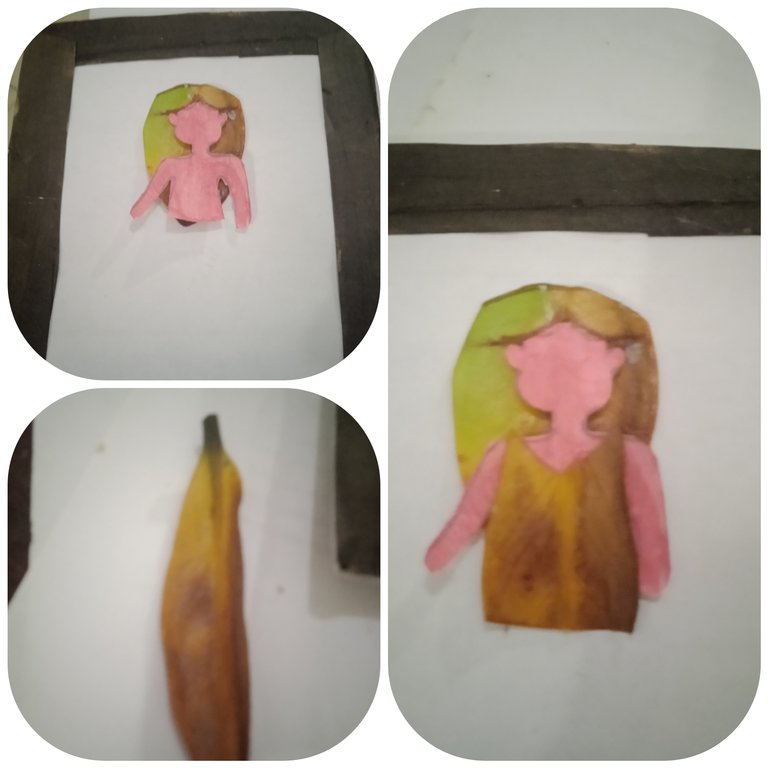
Para el interior de nuestro cuadro haremos una linda muñeca, la cual empezaremos por el cabello. Con una hoja picamos el tallo de la misma y le damos una forma redonda, cortamos en el centro de la hoja, haciendo la forma del cabello de la muñeca.
Step 3
For the interior of our painting we will make a cute doll, which we will start with the hair. With a leaf we chop the stem of it and we give it a round shape, we cut in the center of the leaf, making the shape of the doll's hair.
Paso 4
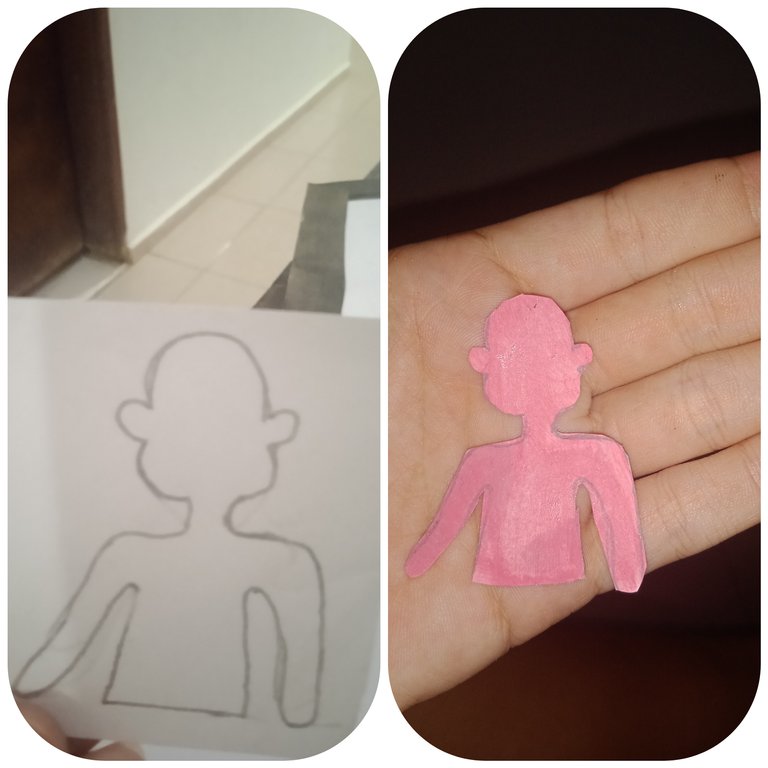
En una hoja en blanco hacemos la cabeza y el tronco de la muñeca, cortamos y pintamos.
Step 4
On a blank sheet we make the head and trunk of the doll, cut and paint.
Paso 5
Pegamos la hoja a la muñeca, que simulara el cabello. Y procedemos a pegar todo junto al cuadro. Con otra hoja aparte haremos una camisa para la muñeca.
Step 5
We glue the sheet to the doll, which simulates the hair. And we proceed to glue everything together to the painting. With another separate sheet we will make a shirt for the doll.
Paso 6
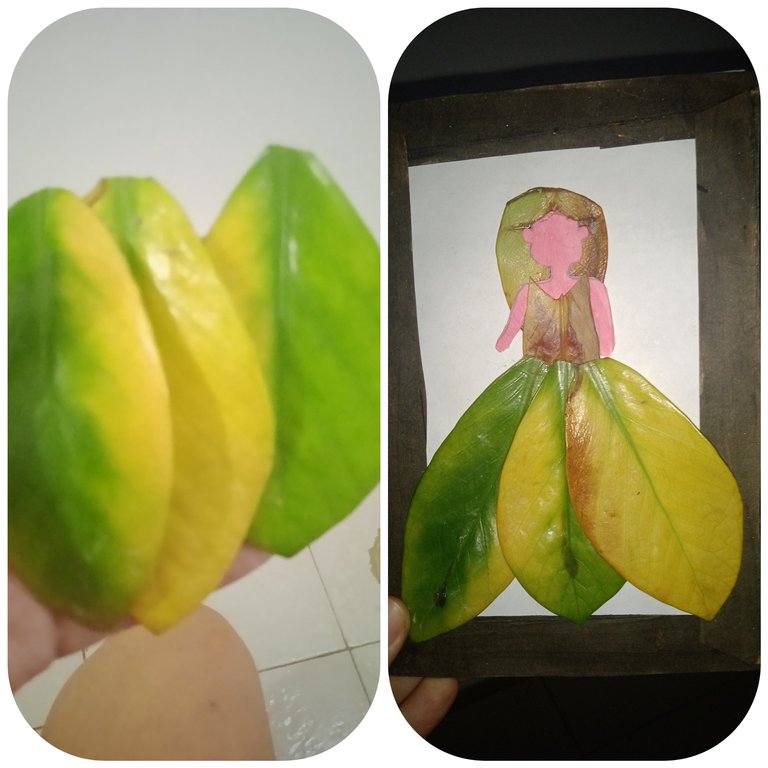
Con tres hojas más grande, pegamos y formaremos la falda de la muñeca.
Step 6
With three larger sheets, we glue and we will form the skirt of the doll.
Paso 7
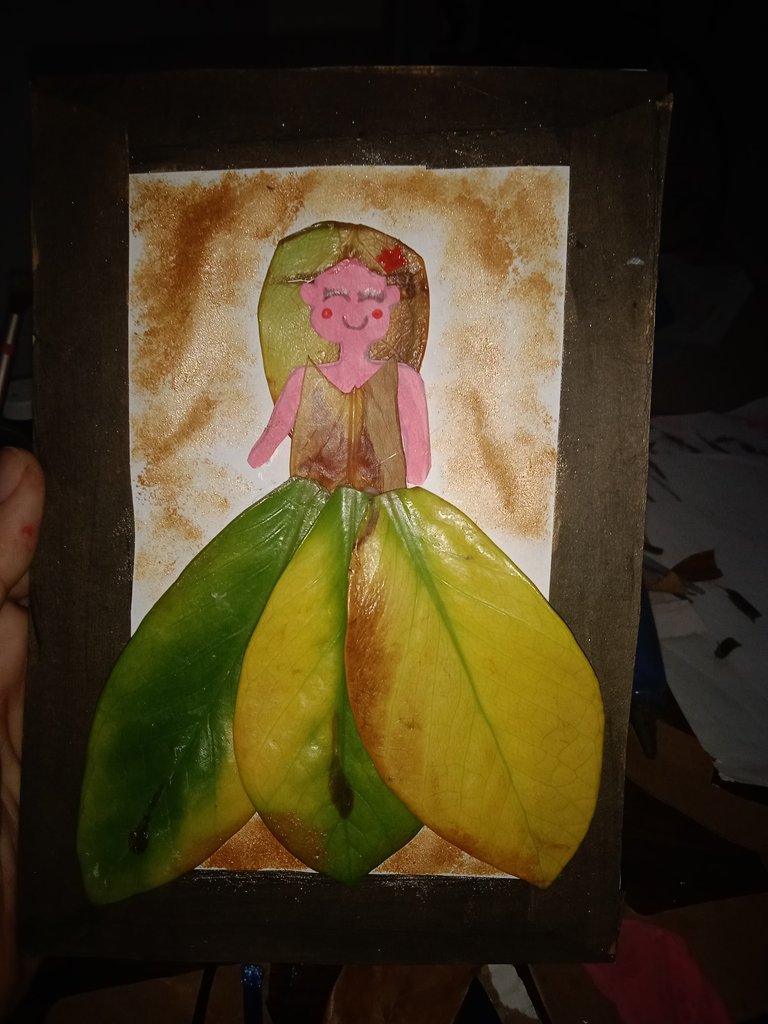
Hacemos los detalles, ya sean los ojos, boca, o lo que nosotros queramos. Con una esponja y color dorado hacemos el acabado del fondo.
Step 7
We do the details, be it the eyes, mouth, or whatever we want. With a sponge and gold color we finish the background.
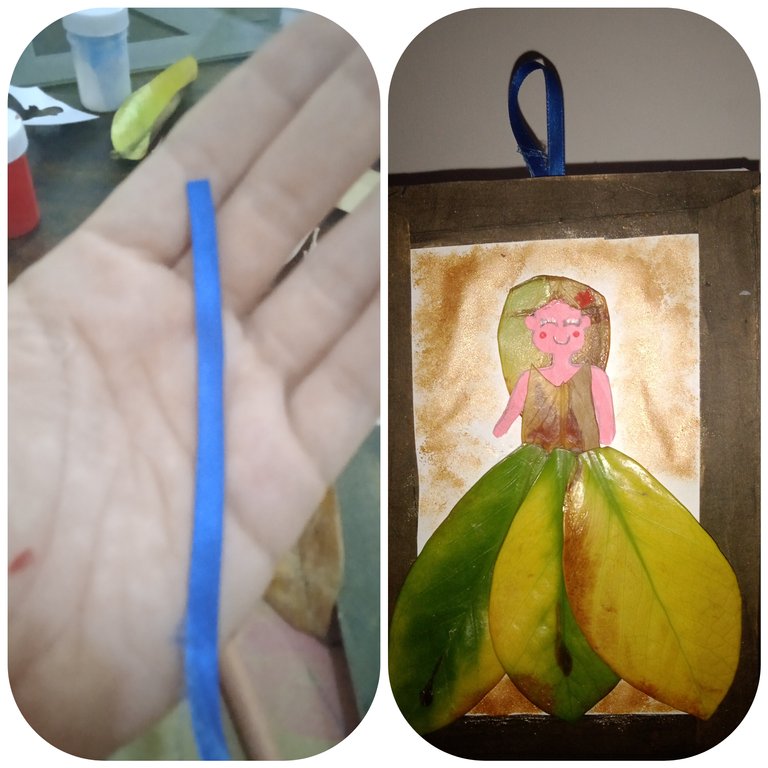
Paso 8
Finalmente con un pedazo de cinta pegamos a nuestro cuadro. Que servirá para colgarlo en la pared.
Step 8
Finally with a piece of tape we glue our picture. That will be used to hang it on the wall.
Así obtendremos un lindo y muy fácil cuadro para decorar cualquier pared de nuestro hogar. Espero les haya gustado y lo pongan en práctica 🥰 Saludos. Feliz noche. 🤗
Thus we will obtain a nice and very easy painting to decorate any wall in our home. I hope you liked it and put it into practice Greetings. Good night. 🤗