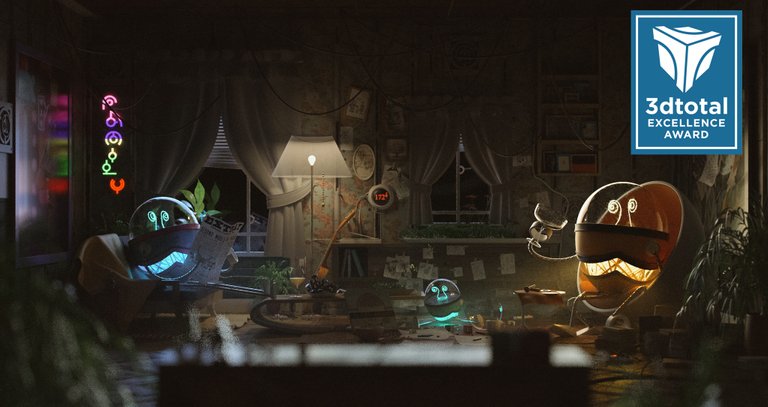
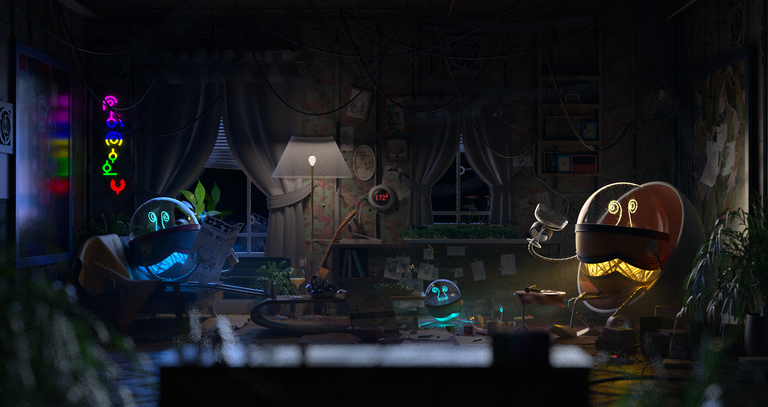
Hello #hive @onchainart After my interview with 3DTotal for receiving 3DTotal Excellence Award, I have been writing a breakdown tutorial on how I created this CGI art render, So i have decided to share with you guys in here !
Step 1 : Layout and Set dressing
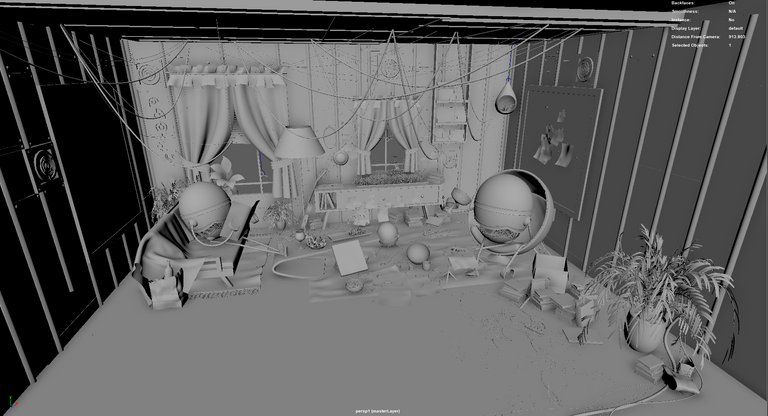
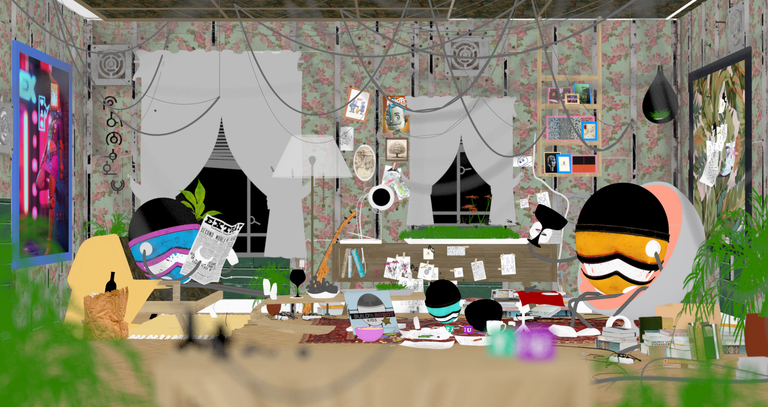
As a start I always like to make my scene look busy with elements lying around to make it look more interesting, And more objects means more details in the shot, Specially when its in light/shadow, So what i do is i start first by setting up my camera and once i am happy with the angel i start shuffling around the objects around to fit the frame

Step 2 : Creating Basic Lights
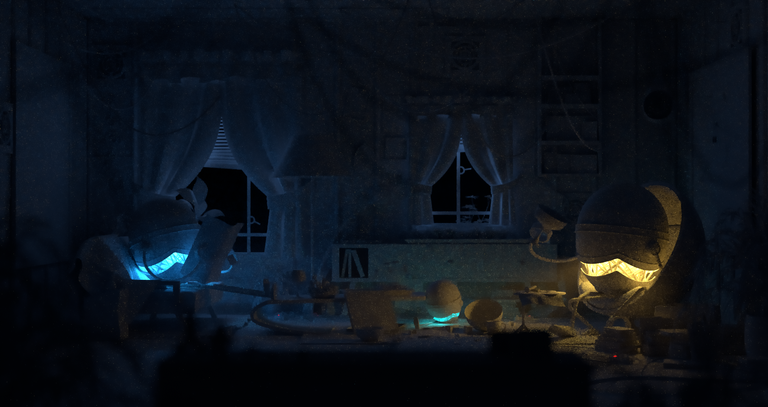
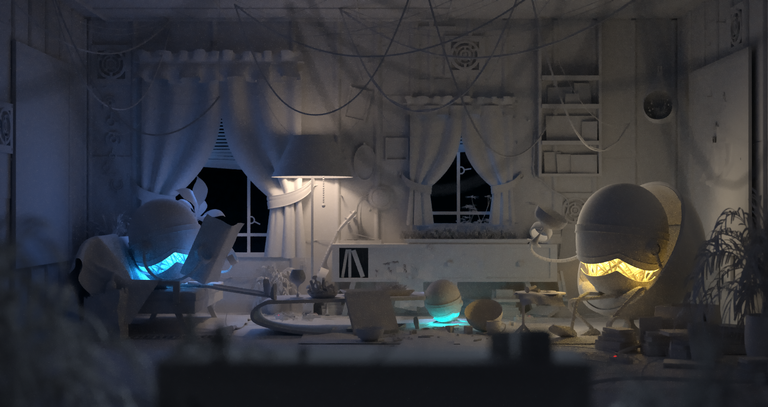
I was keen on creating something interesting with the lights, I have many elements to take advantage of, So instead of creating the obvious day lights i had to create a nice mix between cold and warm, Creating cold lights to come outside of the window, And a nice warm light in the living room

Step 3 : Lighting Details
After creating the basic lights and set up the mood of the shot, I started creating extra details with the light, I got my hero’s of the shot which is the Robots, So i wanted to create a balanced mix between orange and blue without distracting with many colors so i kept it simple and neat, Because the main focus of the shot was the Robots
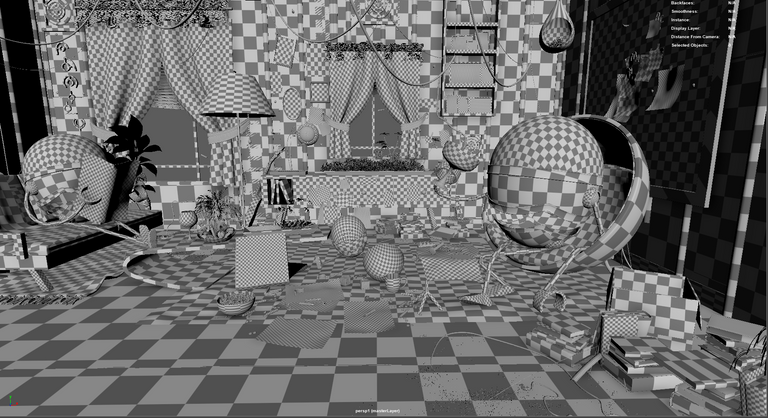
Step 4 : Unfolding UV’s
After I'm done with my lights, And the whole shot set up is ready, I start my next step of work’s which is UV unfolding, I start by assigning a checker to my material so it helps to make sure there is no stretching in the UV or any flipped UV’s, After i'm done i start to layout and re arrange my UV’s, What helps me sometimes is using UDIM for some elements to save some time creating shaders.
Step 5 : Texturing
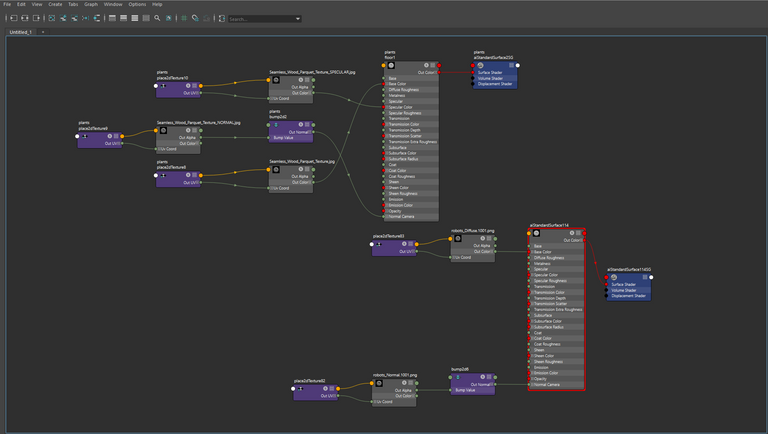
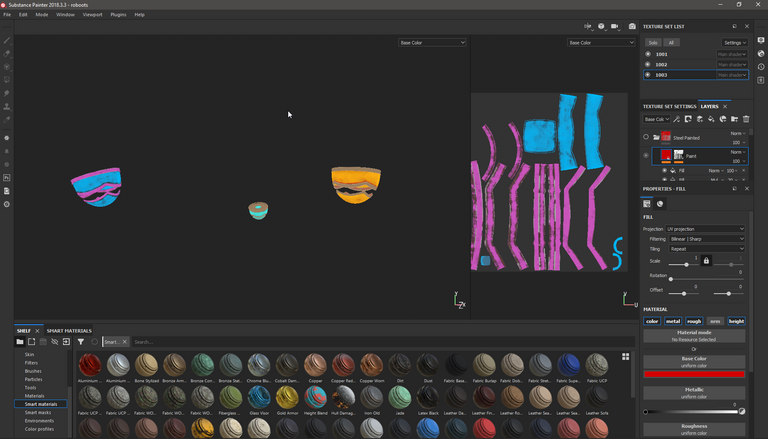
After all my UV’s are done, I started my next step which is starting assigning textures to my elements, I used substance painter as it is easier for me to see how my textures looks like before baking them to the objects and render them, I have used a mix of the smart materials in the software and some realistic textures i have found online ( texturehaven.com )
After I’m done i start to plug in all my textures to the shaders and adjust the shaders a bit according to the lights, I tend to use ( diffuse \ roughness \ normal ) as my basic textures and i can always add on if needed
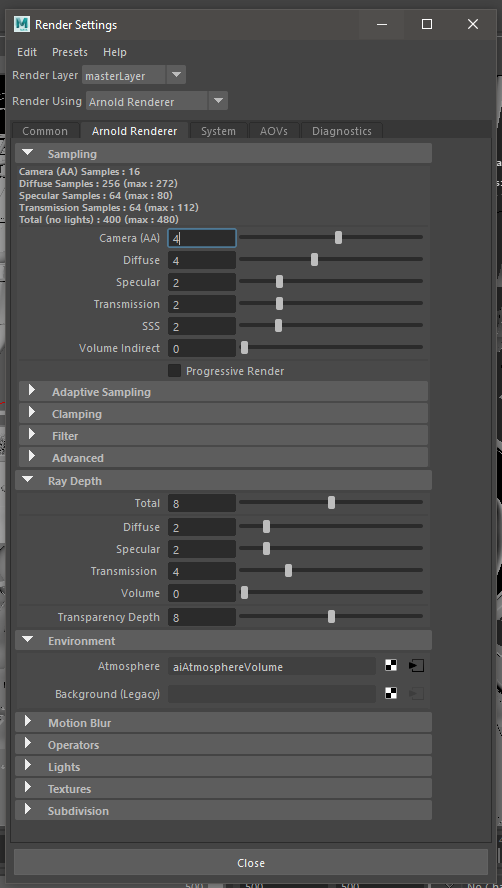
Step 6 : Setting up for render
After I’m done with my shot and finished my lights/shaders, I started to prep for render, Using Arnold render engine is quite tricky when it comes to samples and at the same time I do not want my render to take long hours so i tried to keep it clean and not expensive to render
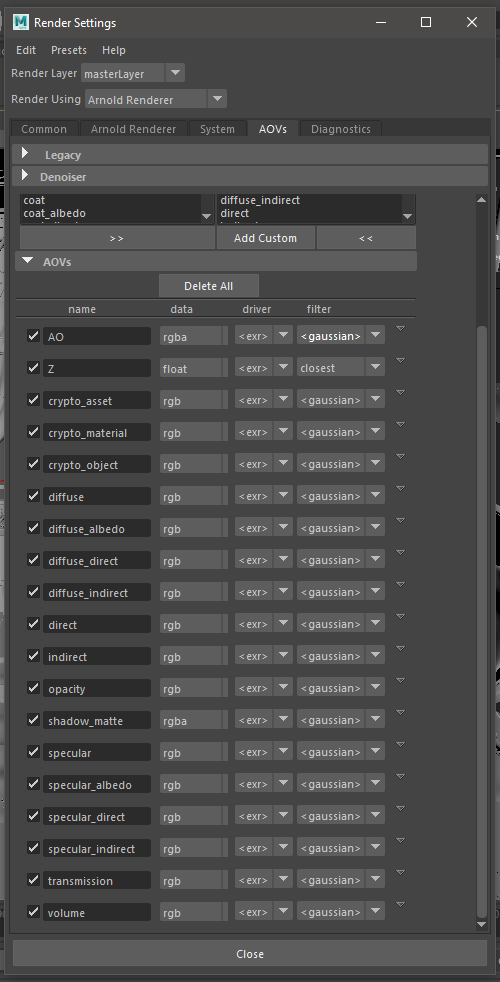
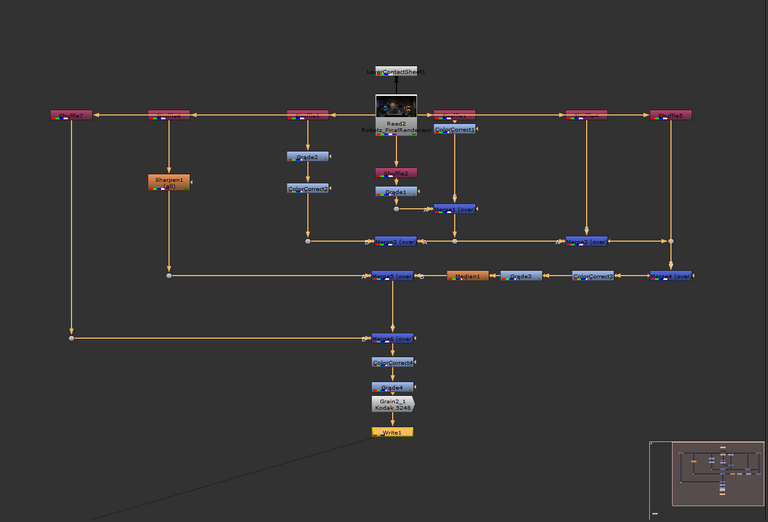
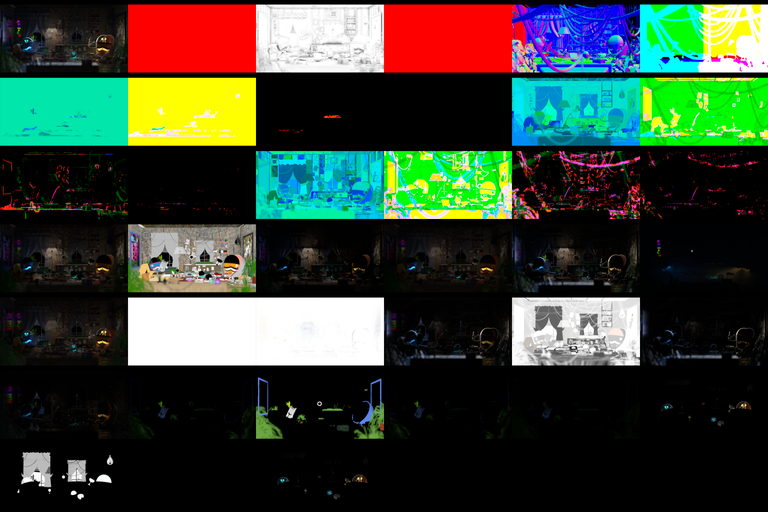
Step 7 : Composting
After the render is done, I start setting up my AOV and compiling them in Nuke, Using color correction and grades to merge and balance the final output
Step 8 : Final Touches Edit
This is new to most CGI artists as i like to use Lightroom to do the final touches and color grading to the final image, The colors control i get in Lightroom is very helpful, And as a photographer i tend to use it too often, Which make it a comfortable tool for me to use

Let me know if you want more details, Or you can share with me your fav step !
Software used : Maya | Arnold | Nuke | Lightroom
https://vimeo.com/ahmadturki
artstation
https://www.artstation.com/ahmadturki
I love seeing other people's process posts :D and such a difference between how a pro does things and how a luser like me does things XD I tend to just make the set and then pick a camera angle (because I'm usually at least attempting to do vaguely realistic or at least somewhat plausible sets).
I haaaaaaaaaaaaaaaaate uv unwrapping ;-;
Compositing and this colour correction stuff are things I'm going to have to pick up eventually (or at least I know I have to figure out compositing but I kind of know how to do it in theory, colour correcting is one of those things where I'm not sure if I need to learn it or if I already do it because I've found throughout time that I sometimes just do things XD) so always glad to have people sharing so I have a starting point :D
hehehe thank you my friend <3 <3 i really appreciate it 🙏 , Usually for my scene i just lay out stuff and set up a nice camera and move on from there .
for the UV hahah funny thing it is actually my fav part to do ! been doing UV's unfolding since 2009 haha, i got used to it :D
for color correction the only way to practice it by training your eyes when watching movies or music videos or arts, to see how colors can blend in together and mix nicely ! and i am here if there's anything you need help with :)
Your post has been voted as a part of Encouragement program. Keep up the good work!
Try https://ecency.com and Earn Points in every action (being online, posting, commenting, reblog, vote and more).
Boost your earnings, double reward, double fun! 😉
Support Ecency, in our mission:
Ecency: https://ecency.com/proposals/141
Hivesigner: Vote for Proposal
Congratulations @ahmadturki! You have completed the following achievement on the Hive blockchain and have been rewarded with new badge(s) :
You can view your badges on your board and compare yourself to others in the Ranking
If you no longer want to receive notifications, reply to this comment with the word
STOP