Hello #hive @onchainart ! Merry late Christmas and happy early new year ! Wanted to share my last post of the year with a cool CGI Tutorial for my latest 3DTotal contribution ^^
So heres the breakdown for my Landed Artwork, Hope you guys like it :) and if you have any question on any of the steps feel free to let me know <3
Time: 1 Hour
Step 1 : Creating The Terrain
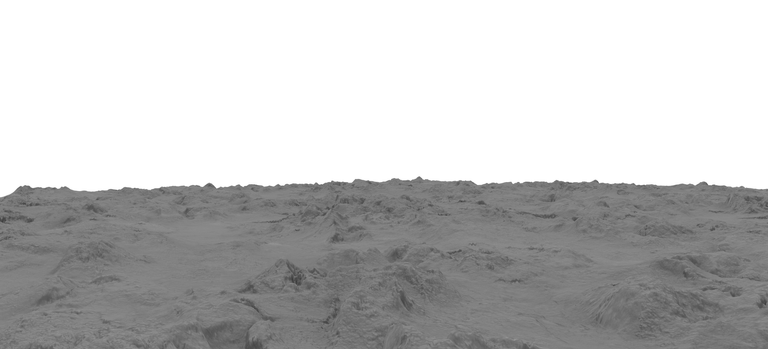
I started with just a plan, Playing around with displacement maps, Since its just easier than creating a terrain model with Zbrush, So i went to (texturehaven.com ) and got myself a high rez map and that's how i started this project
Step 2 : Setting Up The Environment

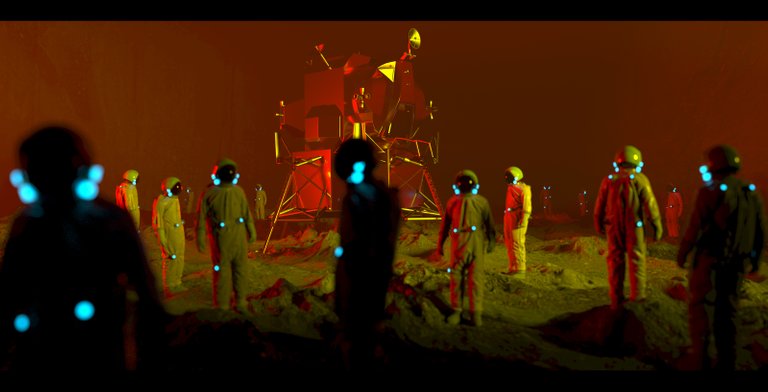
After setting up my base, I added a mountain to create the feel that the place is steep, Which would create more mystery to the image overall, And since i am a big fan drama movies i always like to add more dramatic feels to my renders
Step 3 : Setting Up The Camera
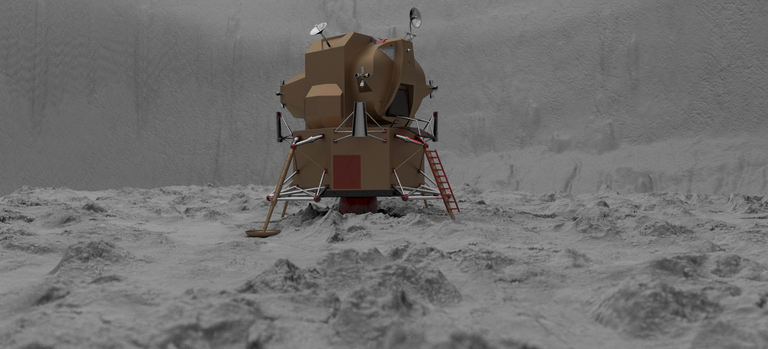
After i was done with the environment i had to set up the hero of my shot which in this case it is the space ship, I wanted to keep it simple and not busy as the main focus to my artwork was presenting the lights
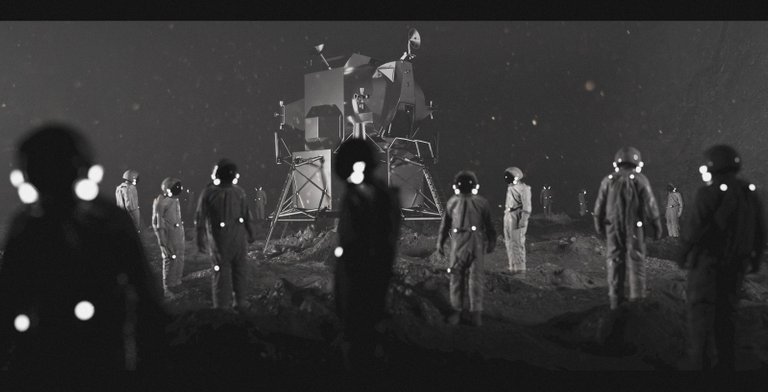
Step 4 : Laying Out The Astronauts
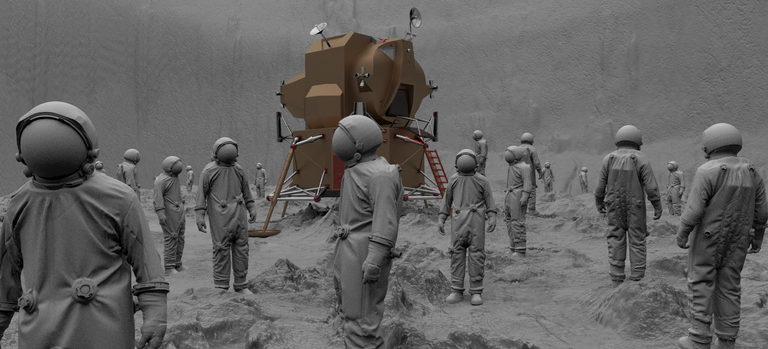
After going through CG trader’s models i found cool Astronauts models courtesy of Angelo Ferretti, And then what i did is i just laid them out in an abstract style, Each one of them looking somewhere as they were looking for something, And whatever it is i leave it for people to decide
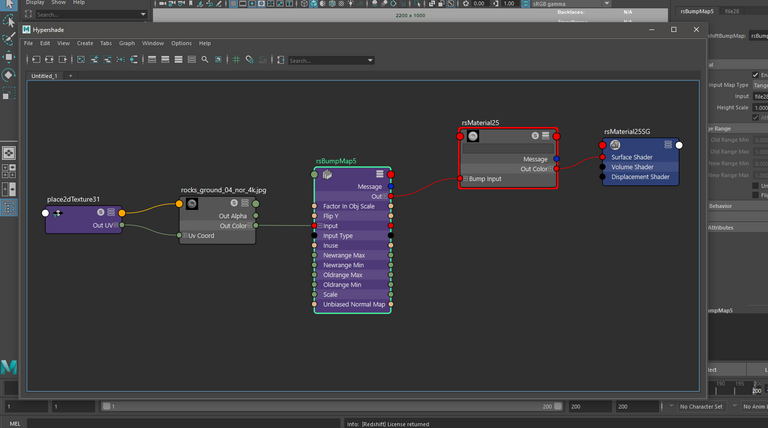
Step 5 : Adding the Colors !
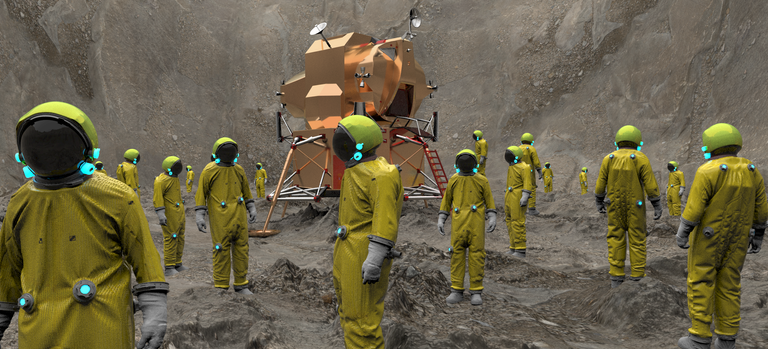
Now everything is all laid out, I wanted to keep my textures and colors as simple as possible as my focus point is the overall composition, And while most of the scene going to be dark there was no need adding textures as we won't see much of that, So i used emission to emit the some light from the astronauts, Which will add more details to the overall image
Step 6 : Setting Up The lights
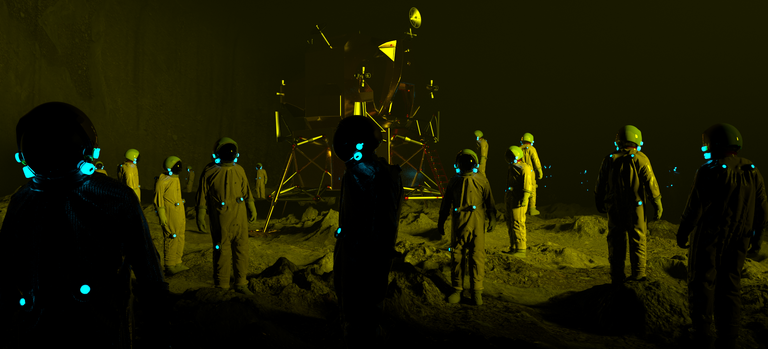
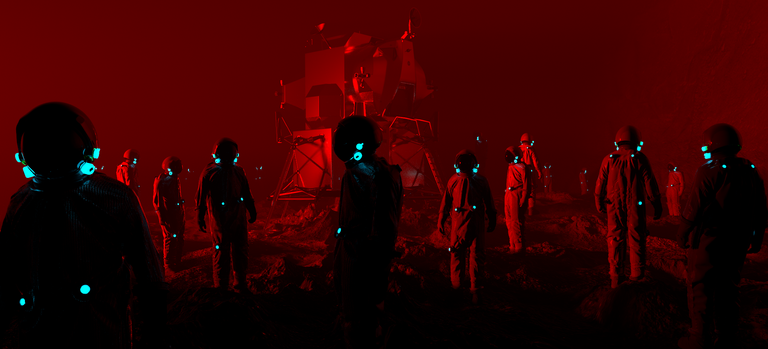
I kept the lights to 2 light, I wanted to create a mix between Yellow and Red, Yellow was my key light and red was more of a rim/fill light, I was inspired by the Cyberpunk theme, Keeping it a bit futuristic and interesting.
I always like to play around with the lights color, I understand sometimes it may affect the overall look of the render but sometimes it just works beautifully without much post work comp tweaks
Step 7 : Put the Focus Point
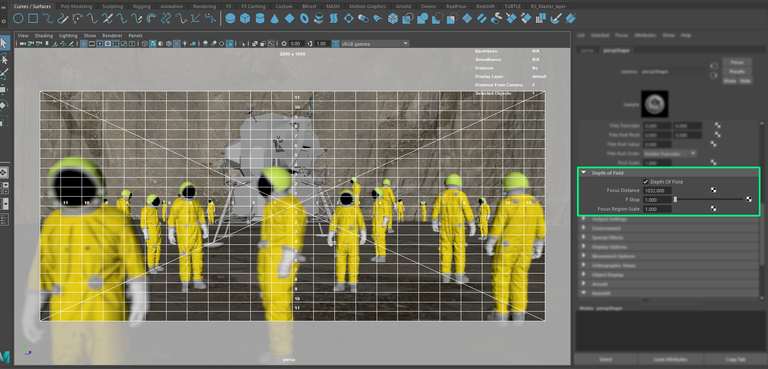
Now everything is all set up and ready for my render, I had to add my fav tool in Maya which is the Depth Of Field option in my camera, I usually like to use the Maya rendered depth of field to see it live in my render other than just render a Depth pass and optimize, I believe rendered can be prepared by 90 % in Maya and then you can add in the last 10 % in comp and so on, So I put my focus point on the spaceship, And at the same time get some nice bokeh effect from the astronauts emission lights
Step 8 : Prepare For Render
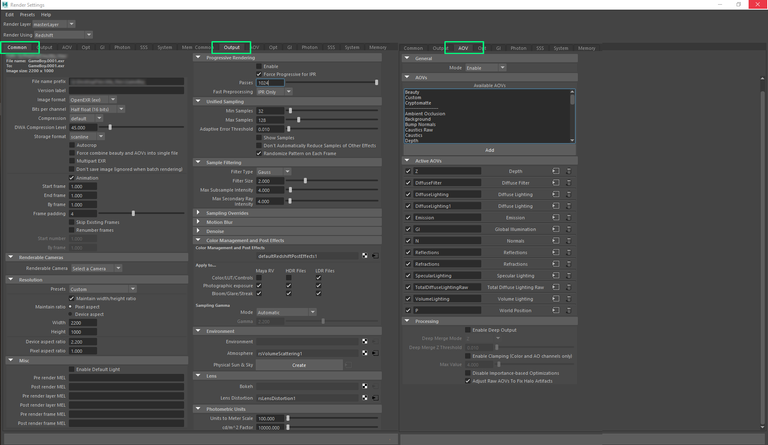
After setting up my camera, The last stage for my render is setting up the render settings, I rendered with resolution of 2200 X 1000 as i like to keep my renders wide and highrez, For the sampling i always go with Min samples of 32 and Max of 128 as the render will come out clean so no point of going more than that
Step 9 : Composition
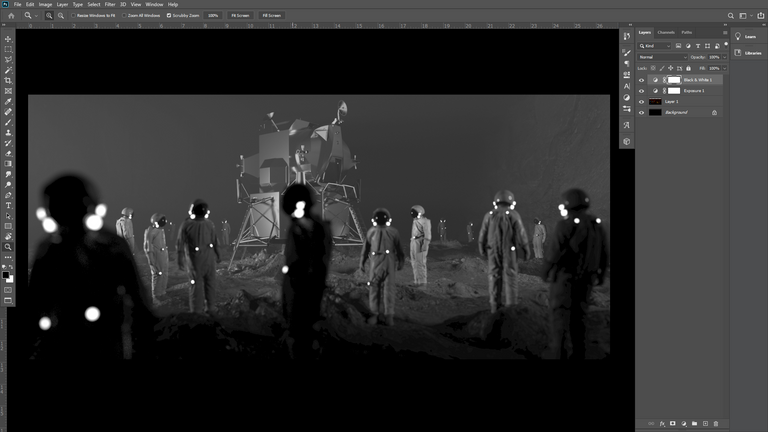
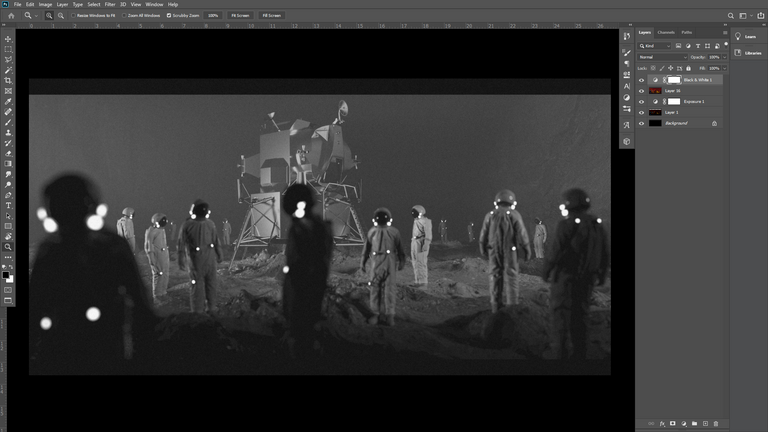
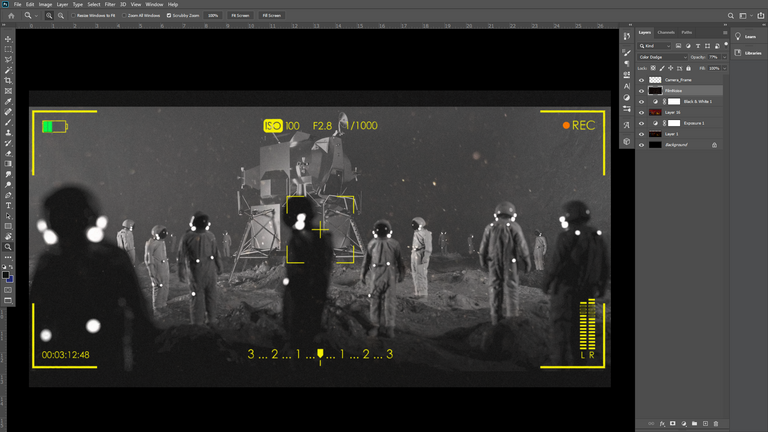
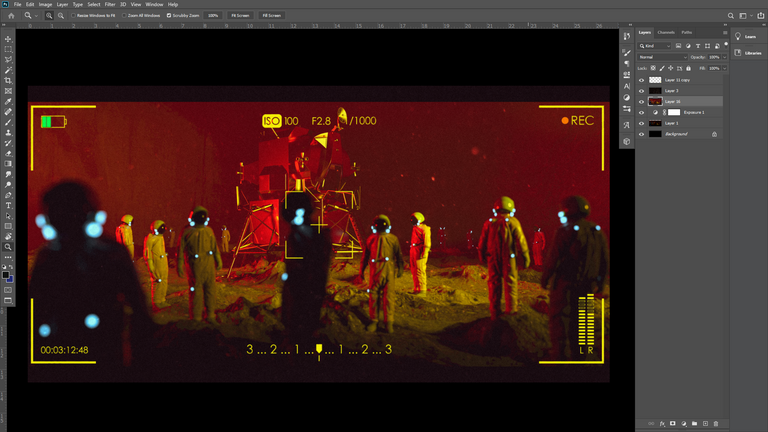
I started to play around first with Black and White values, What i liked about it that it gave the render more cinematic look, So i decided to keep both versions, And in Photoshop i added few elements like adding some dusty particles and a camera frame to add to the mystery of the render
Software used : Maya | Redshift | Photoshop
https://vimeo.com/ahmadturki
artstation
https://www.artstation.com/ahmadturki
Congratulations @ahmadturki! You have completed the following achievement on the Hive blockchain and have been rewarded with new badge(s) :
You can view your badges on your board and compare yourself to others in the Ranking
If you no longer want to receive notifications, reply to this comment with the word
STOPDo not miss the last post from @hivebuzz:
!discovery 45
This post was shared and voted inside the discord by the curators team of discovery-it
Join our community! hive-193212
Discovery-it is also a Witness, vote for us here
Delegate to us for passive income. Check our 80% fee-back Program