Bienvenidos mi querida comunidad de hive!👋😊🌷🌹❤️ Muy contenta de compartir junto a ustedes una entrega más para esta semana! Deseando que se encuentren excelentes.😙❤️
Welcome my dear hive community!👋😊🌷🌹❤️ Very happy to share with you one more installment for this week! Wishing you are excellent.😙❤️
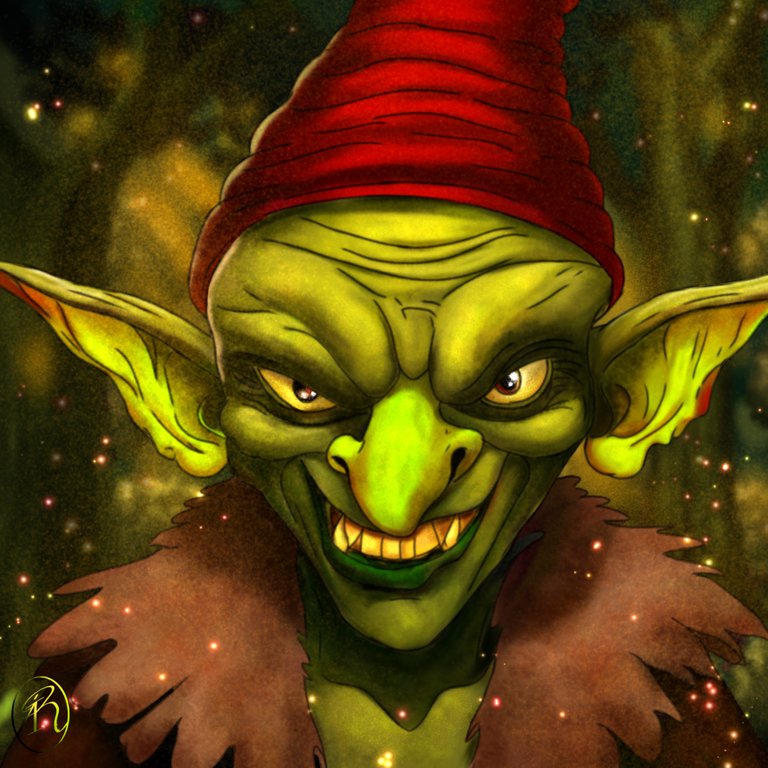
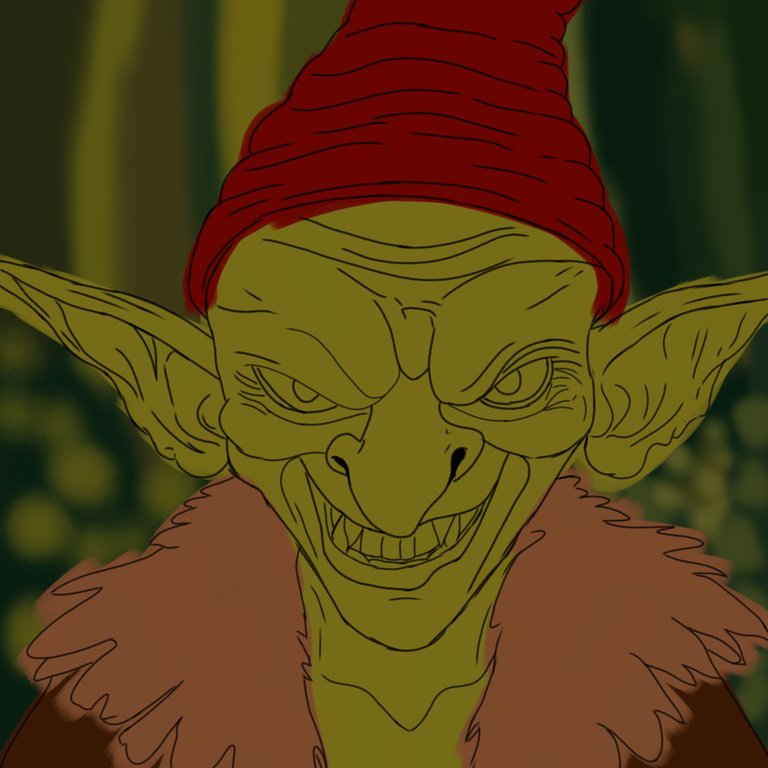
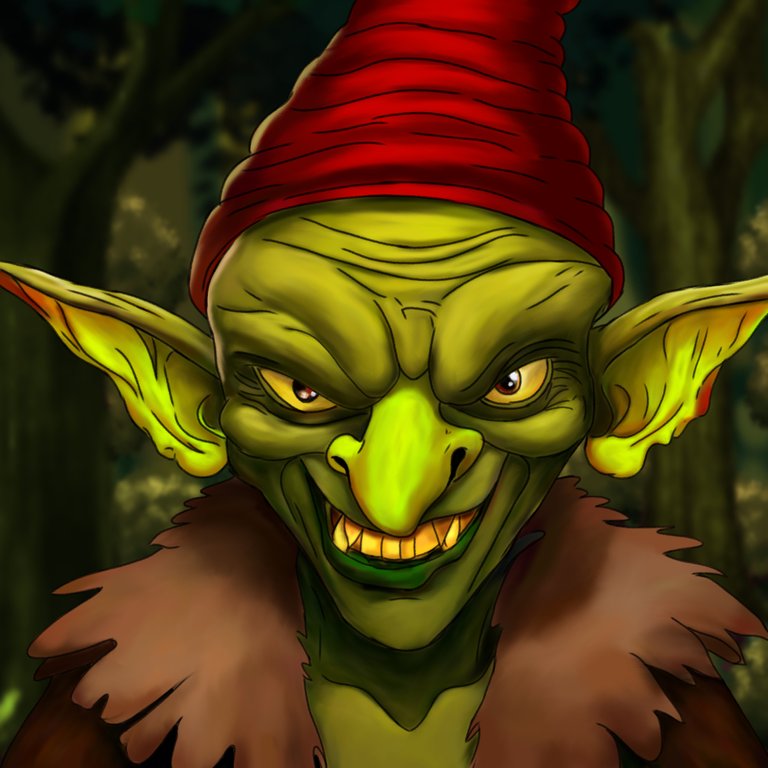
Esta noche vengo a compartirles esta pieza que inicie este día desde temprano para el Social Media Challenge de Splinterlands de esta semana, con el que participaré con la carta de GOBLIN SORCERER, de un duende hechicero que quise representar a un estilo semi realista utilizando un color verde más claro, retratando a este pequeño duendecillo experto en las artes ofensivas. Trate de mantener esa e presión características de este personaje, espero lo disfruten!😙😊🌷💕
Tonight I come to share this piece that starts this day early for this week's Splinterlands Social Media Challenge, with which I will participate with the GOBLIN SORCERER card, of a sorcerer goblin that I wanted to represent in a semi-realistic style using a color lighter green, portraying this little pixie expert in the offensive arts. I tried to keep that characteristic pressure of this character, I hope you enjoy it!😙😊🌷💕
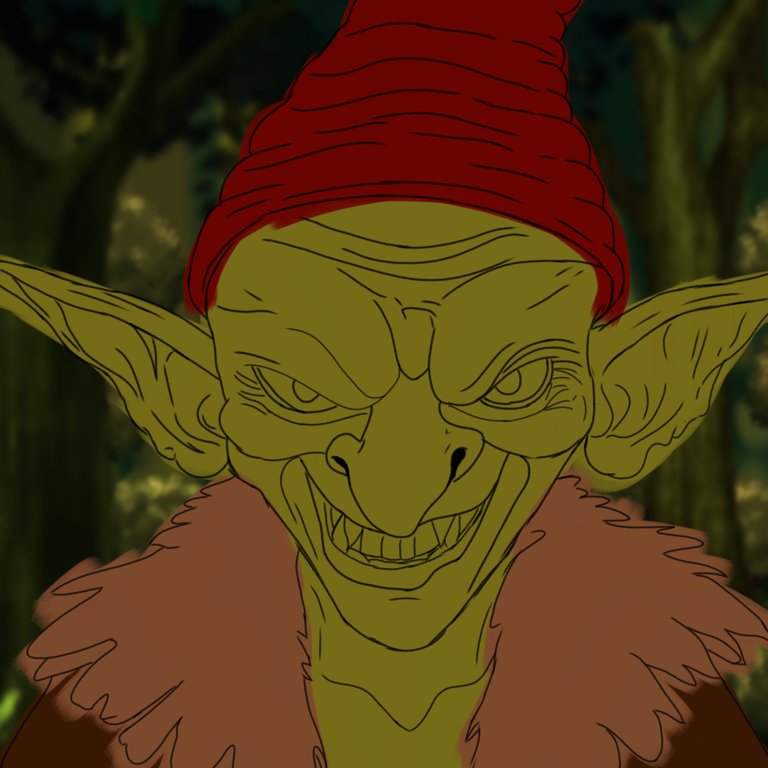
Link de la Imagen de Referencia/Reference Image Link

Etapas del Dibujo/Drawing Stages
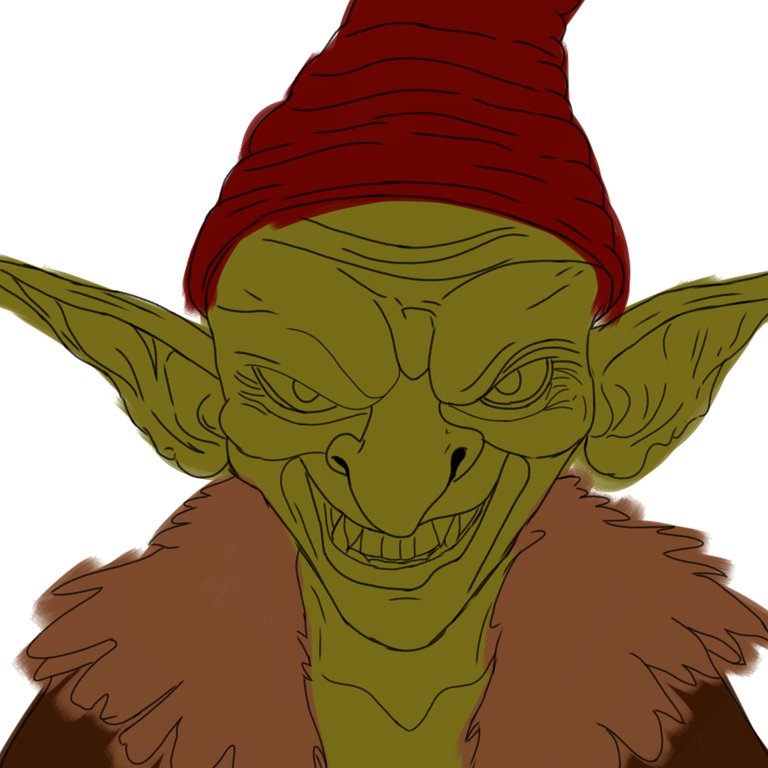
Comencé el boceto utilizando la brocha tipo lápiz, con un grosor más pronunciado. Después, en una nueva capa como de costumbre aplique los colores base con la brocha que todavía utilizo que es la tipo plano real, usando el método de mezcla normal. Después en una nueva capa por debajo aplique colores de fondo usando una base de verde y utilizando el aerógrafo de partículas que luego difumine un poco con gauseano.
I started the sketch using the pencil brush, with a more pronounced thickness. Then on a new layer as usual apply the base colors with the brush I still use which is the real flat type, using the normal blending method. Then on a new layer below apply background colors using a green base and using the particle airbrush which I then blend a bit with Gaussian.
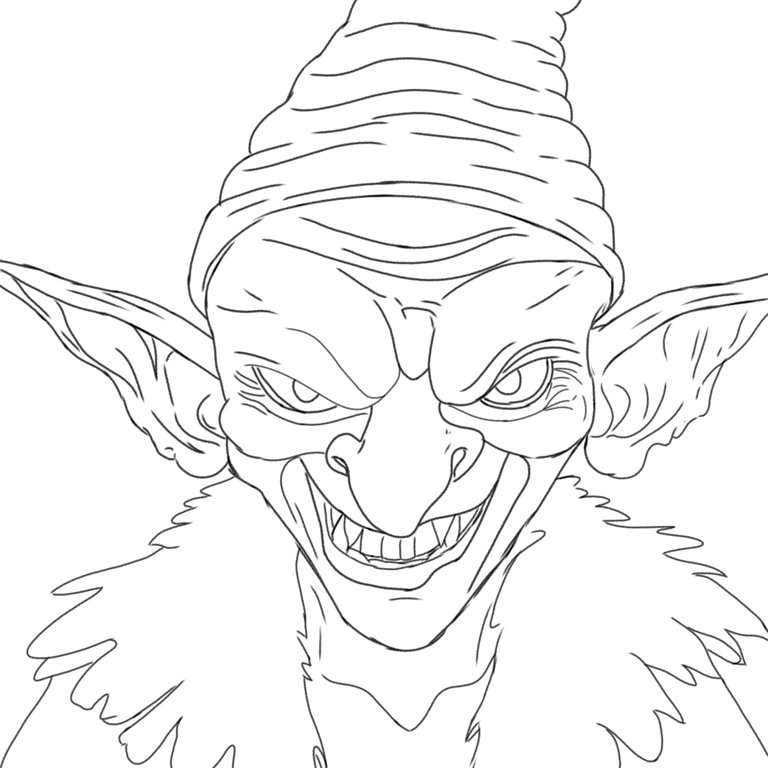
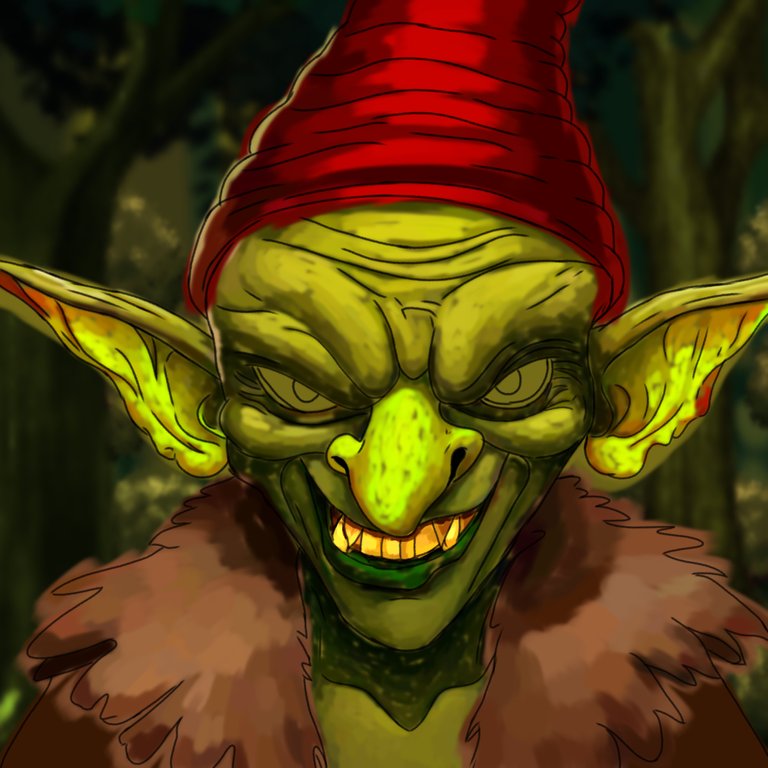
Para esta fase, agregue algunos troncos con pincel tronco y arbustos de fondo usando el mismo pincel árbol y aplique el gauseano, para este fondo seguí con el método de mezcla normal. Seguí con pinceladas más detallas ubicando las sombras y partes más iluminadas, usando para esto la brocha tipo acuarela. Luego, aplique el difumino para suavizar y mezclar un poco para hayar armonía en los colores. Aplique el borrador en lo sobresaliente fuera del delineado.
For this phase, I added some trunks with the trunk brush and background bushes using the same tree brush and applied the Gaussian, for this background I continued with the normal blending method. I continued with more detailed brushstrokes, locating the shadows and more illuminated parts, using the watercolor brush for this. Then, apply the smudger to soften and blend a bit to achieve harmony in the colors. Apply the eraser to the protrusion outside of the liner.
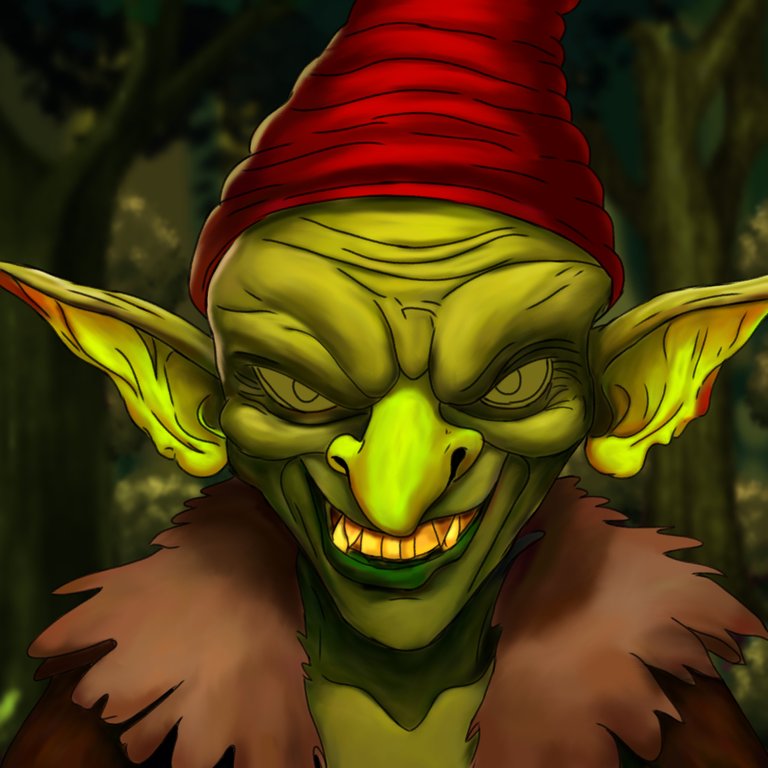
En esta etapa final, recree los ojos usando el mismo pincel y los difumine para suavizar los trazos y mezclar un poco también, ya después de agregar los elementos, en una nueva capa en superposición aplique un poco de textura en la piel con opacidad baja y también con el método de mezcla añadir con la brocha tipo nube.agregue la brocha tipo Puntillismo para la piel y aplique en los ojos con método de mezcla añadir el pincel tipo purpurina para darle un brillo tenue. Agregue un poco de iluminación en el fondo con la brocha tipo Aerógrafo de partículas y así mismo lo hice en una nueva capa con opacidad baja para darle un poco de iluminación en general a la pieza e integrar con el entorno. Finalice agregando mi pincel favorito con unos pequeños destellos para darle ese toque que caracteriza a este ser. Que lo hayan disfrutado querida comunidad! Gracias por su tiempo y en valorar mi trabajo. En cada pieza avanzó en tiempo.. 😊😙🌷💕
In this final stage, recreate the eyes using the same brush and smudge them to soften the strokes and blend a bit too, already after adding the elements, in a new layer in overlay apply some texture on the skin with low opacity and also with the blend method add with the cloud brush.add the Pointillism brush for the skin and apply on the eyes with the blend method add the glitter brush to give it a soft shimmer. I added some background lighting with the Particle Airbrush brush and did the same on a new layer with low opacity to give the piece some overall lighting and blend in with the environment. I finished by adding my favorite brush with some small sparkles to give it that touch that characterizes this being. Enjoy it dear community! Thank you for your time and for appreciating my work. In each piece he advanced in time.. 😊😙🌷💕
Redes Sociales/ Social Networks
Sigueme en/ Follow me in:
👉Instagram: @catrynart
👉 Twitter: @catrynart
Herramientas Usadas/Used Tools
- Tablet Android/ Android Tablet
- Programa Ibis Paint X/ Ibis Paint X Program
- Traductor Deepl/ Deelp Translator
- Servidor de Imagenes Imgbb/ Imgbb Image Server
- Dactilopintura Digital/ Digital Fingerprint Painting
🌺¡HASTA EL PRÓXIMO POST!🌺
Detenerse es Retroceder
To Stop is to go Backwards
Thanks for sharing! - @yonilkar

This is so amazing art.