
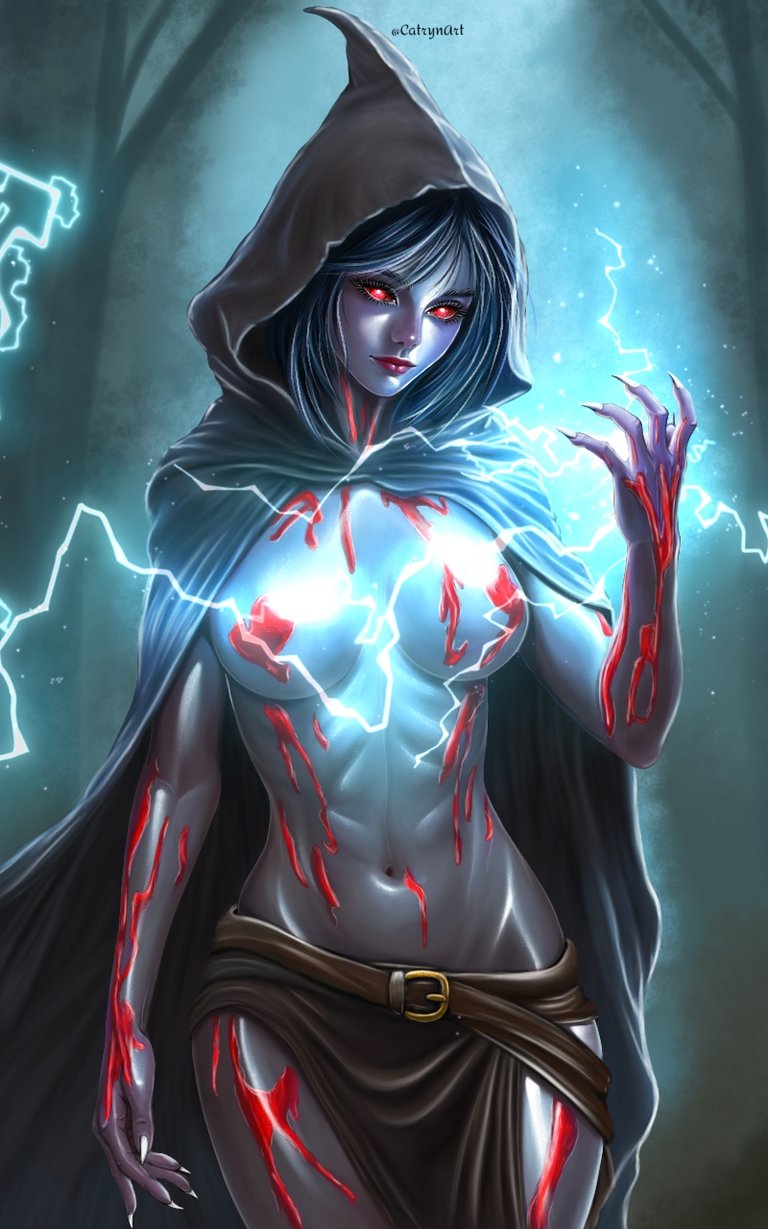
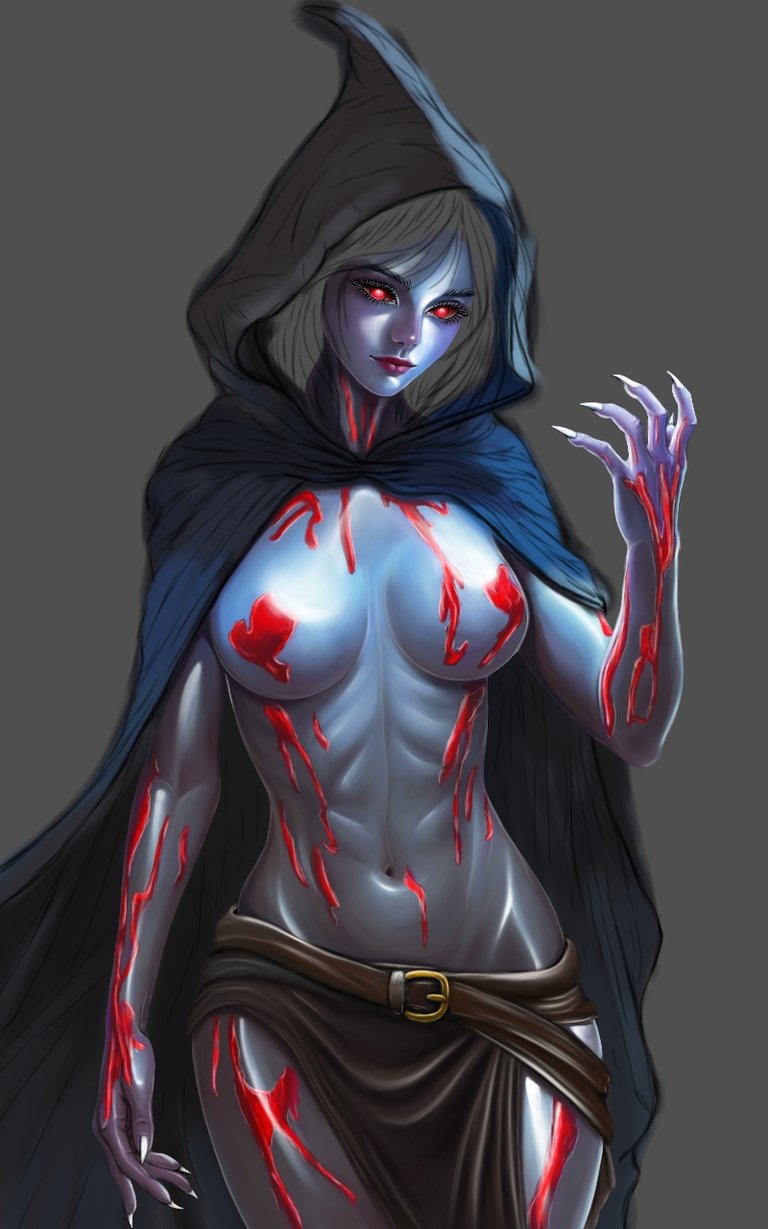
Hola comunidad de Alien Art Hive, les deseo un excelente día esperando se encuentren muy bien cada uno de ustedes, quiero compartirles mi participación de esta semana para el concurso de splinterlands, basándome en la carta de Insidious Warlock, haciendo mi interpretación a un personaje femenino, en un intento mas humanizado en su aspecto aunque estos son brujos ya definidos en su morfología humana. Me tome varios días a pesar de muchos quehaceres cotidianos para dedicarme con calma a definir y detallar ya que son las cosas que hacen la diferencia. Espero que les guste mucho!.
Hello Alien Art Hive community, I wish you an excellent day, I hope each of you are very well, I want to share with you my participation this week for the splinterlands contest, based on the Insidious Warlock card, making my interpretation to a female character, in a more humanized attempt in their appearance although these are warlocks already defined in their human morphology. I took several days in spite of many daily chores to dedicate myself calmly to define and detail as these are the things that make the difference. I hope you like it a lot!.
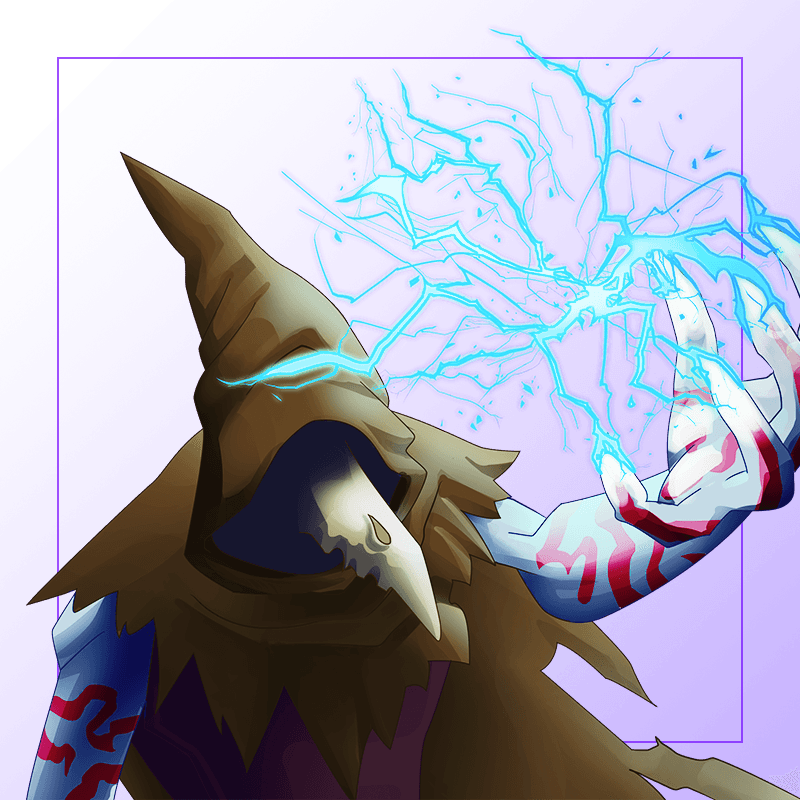
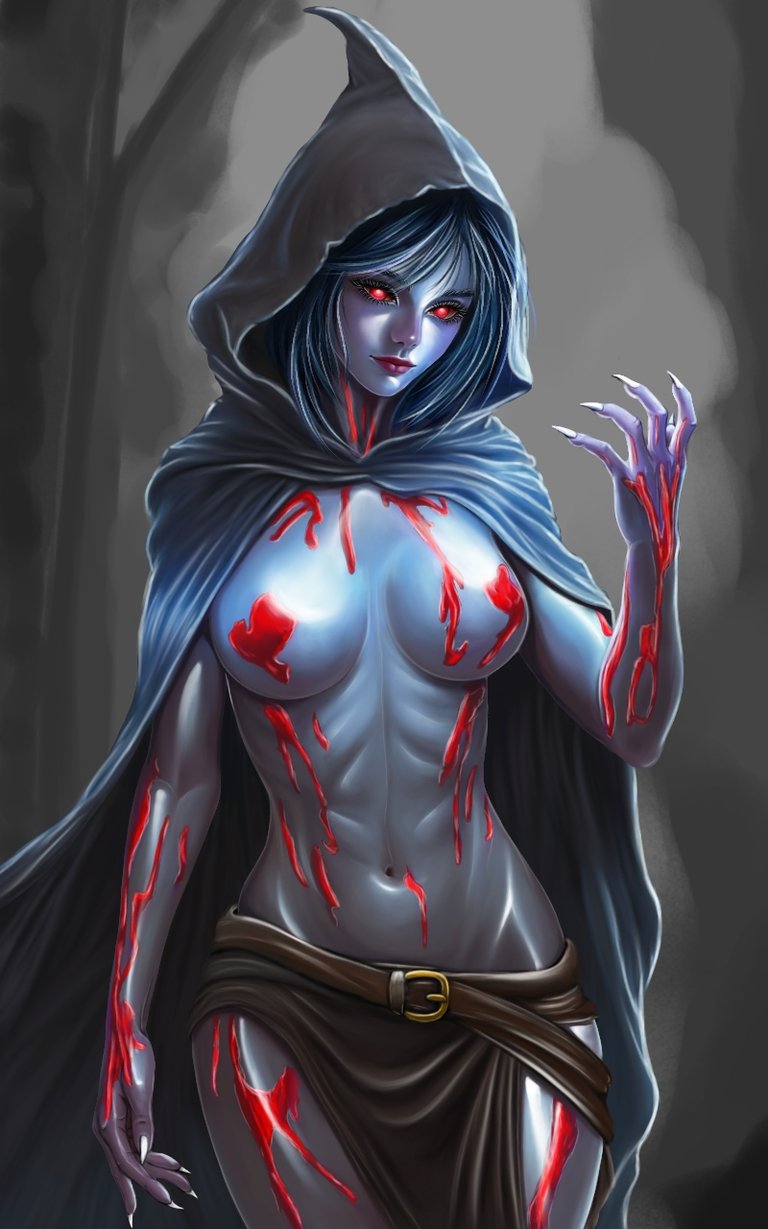
Link de la Imagen de Referencia/Reference Image Link

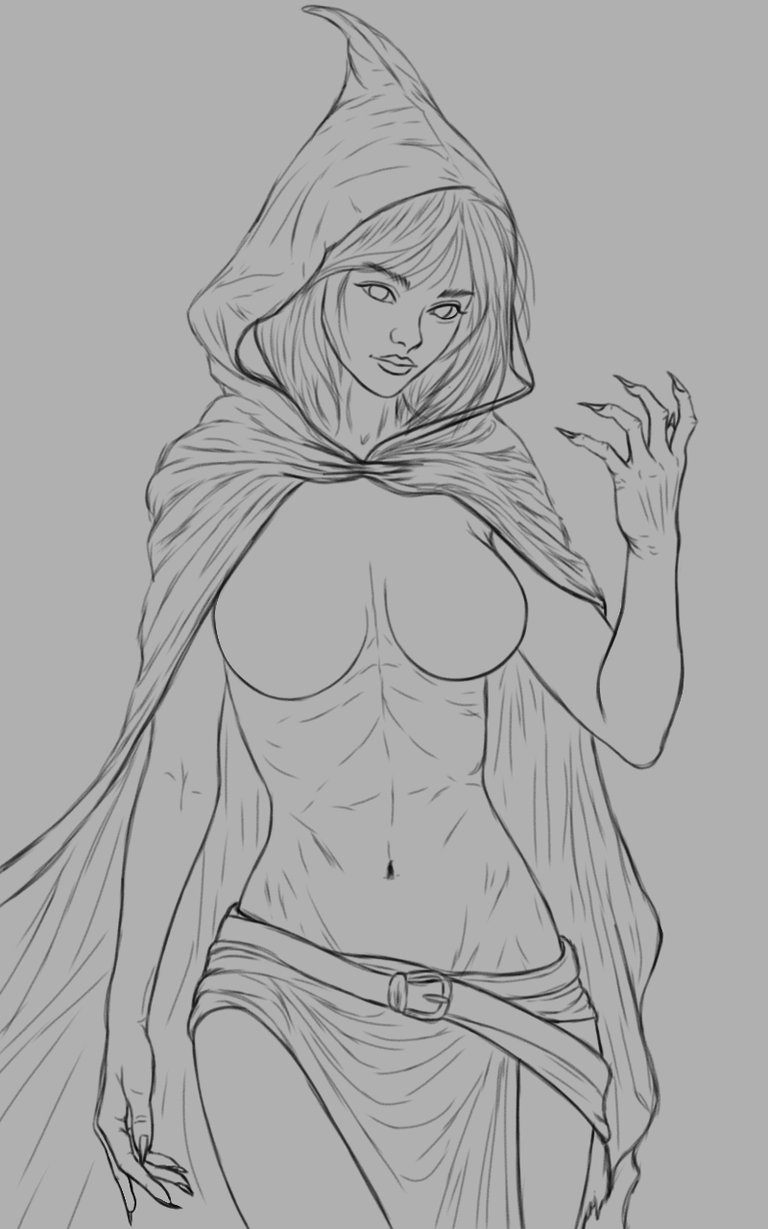
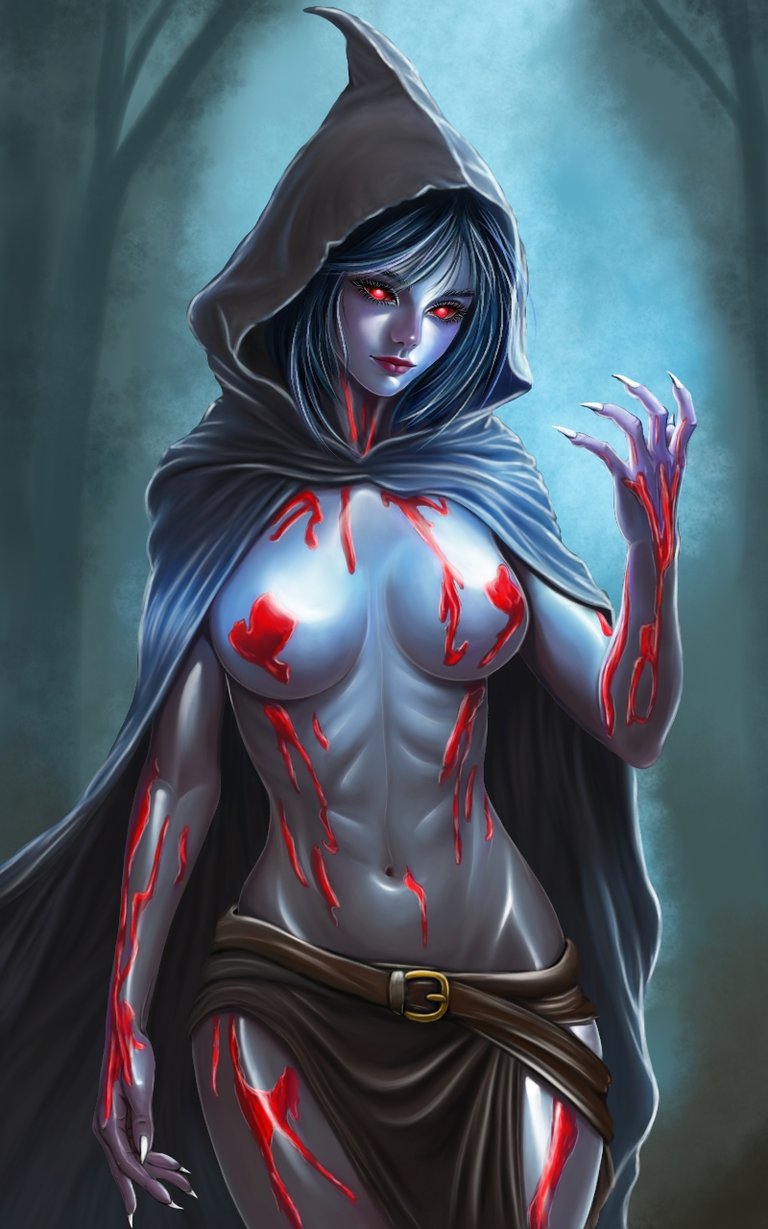
Etapas del Dibujo/Drawing Stages
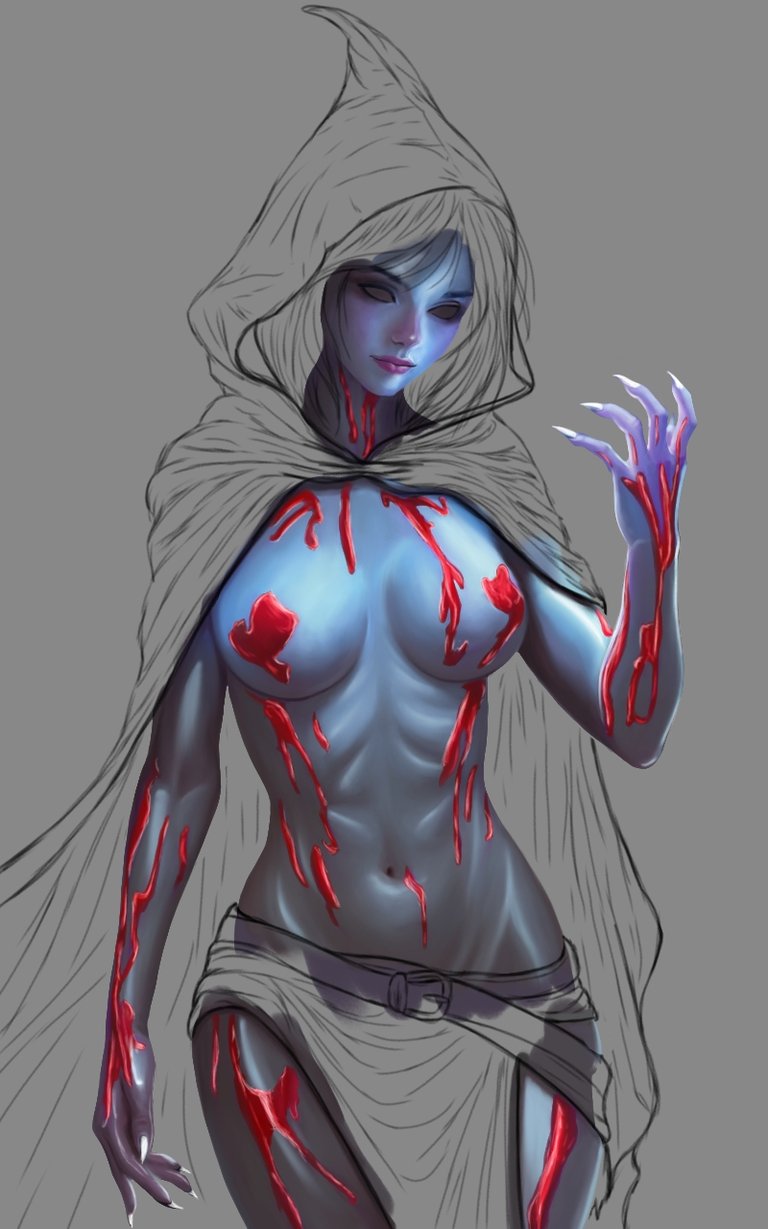
Quiero contarles un poco como fui realizando cada etapa, empezando con el boceto en limpio ya en este paso donde previamente fui definiendo con bocetos base pero me gusto mucho pulir detalles ya que me ayudan a definir bien lo que quiero y así trabajar con un poco mas de precisión la base de color y también las sombras y la iluminación, donde fui trabajando por capas suavizando con difumino y también usando una brocha suave con método normal de mezcla. La franjas en su piel las fui trabajando también por capas terminando con una capa de iluminación, definiendo sus ojos en otra capa y agregando otras tanto para sombras y brillos.
I want to tell you a little about how I went through each stage, starting with the clean sketch already in this step where I was previously defining with base sketches but I really liked to polish details as they help me to define well what I want and thus work with a little more precision the base color and also the shadows and lighting, where I was working in layers softening with blurring and also using a soft brush with a normal blending method. The stripes on her skin I was also working in layers finishing with a layer of illumination, defining her eyes in another layer and adding other layers for shadows and highlights.
 |  |  |
 |  | 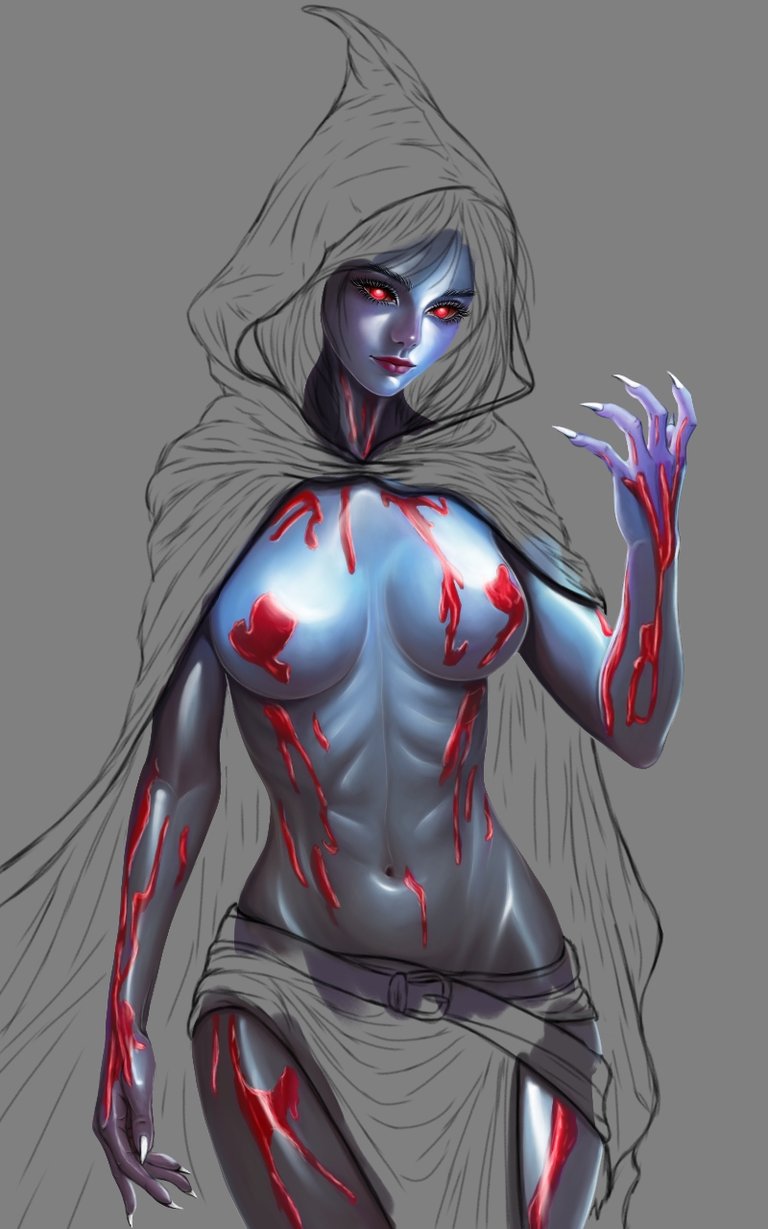 |
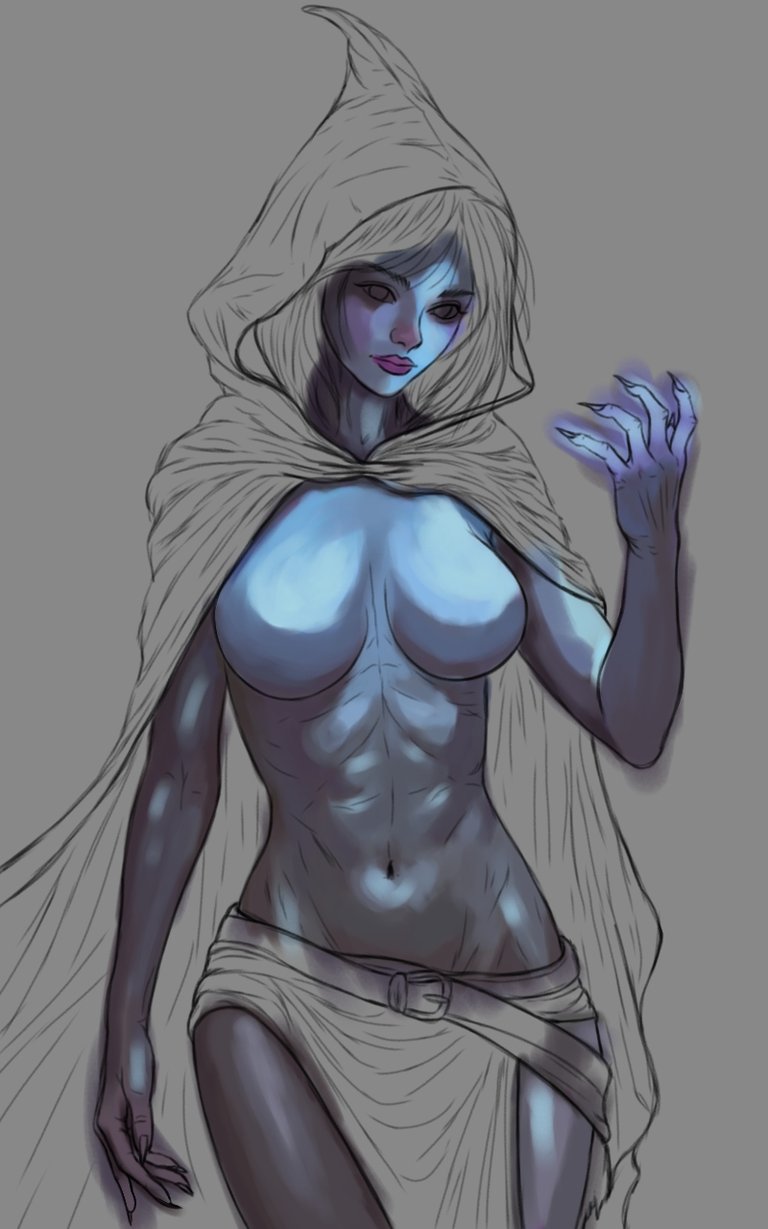
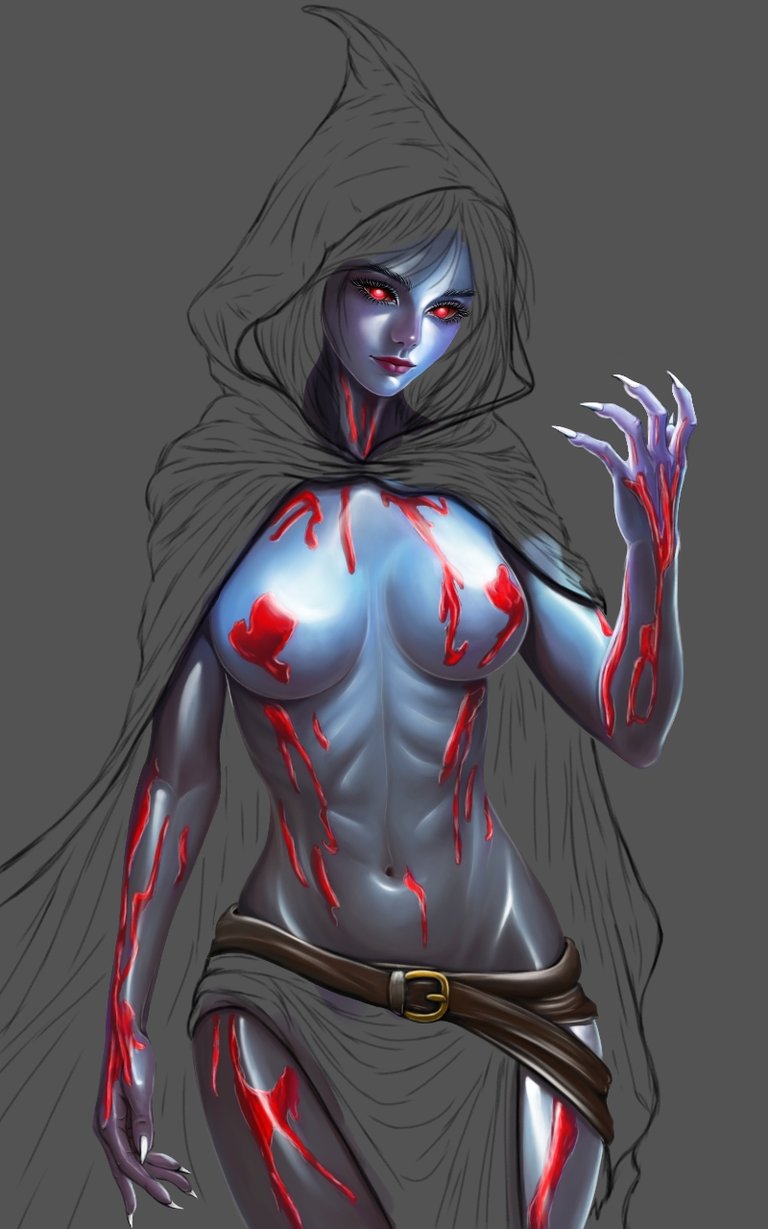
Luego, continúe con las prendas trabajándolas en capas con método normal de mezcla también y con la brocha suave, fui usando capas con tonos mas claros y endureciendo un poco mas las sombras para así crear los pliegues, difuminando y definiendo con una capa de iluminación usando un pincel suave, después seguí trabajando en su cabello en una nueva capa pincelando tonos oscuros como base para luego utilizar la brocha tipo pelo y empezar a definir su cabello con mechones oscuros primero y luego con mechones iluminados. Para el fondo use la misma brocha suave y aplique el ajuste de color.
Then, I continued with the garments working them in layers with normal blending method also and with the soft brush, I was using layers with lighter tones and hardening the shadows a little more to create the creases, blending and defining with a layer of illumination using a soft brush, then I continued working on her hair in a new layer brushing dark tones as a base to then use the hair brush and start defining her hair with dark locks first and then with illuminated locks. For the background use the same soft brush and apply the color adjustment.
 |  |  |
 |  |  |
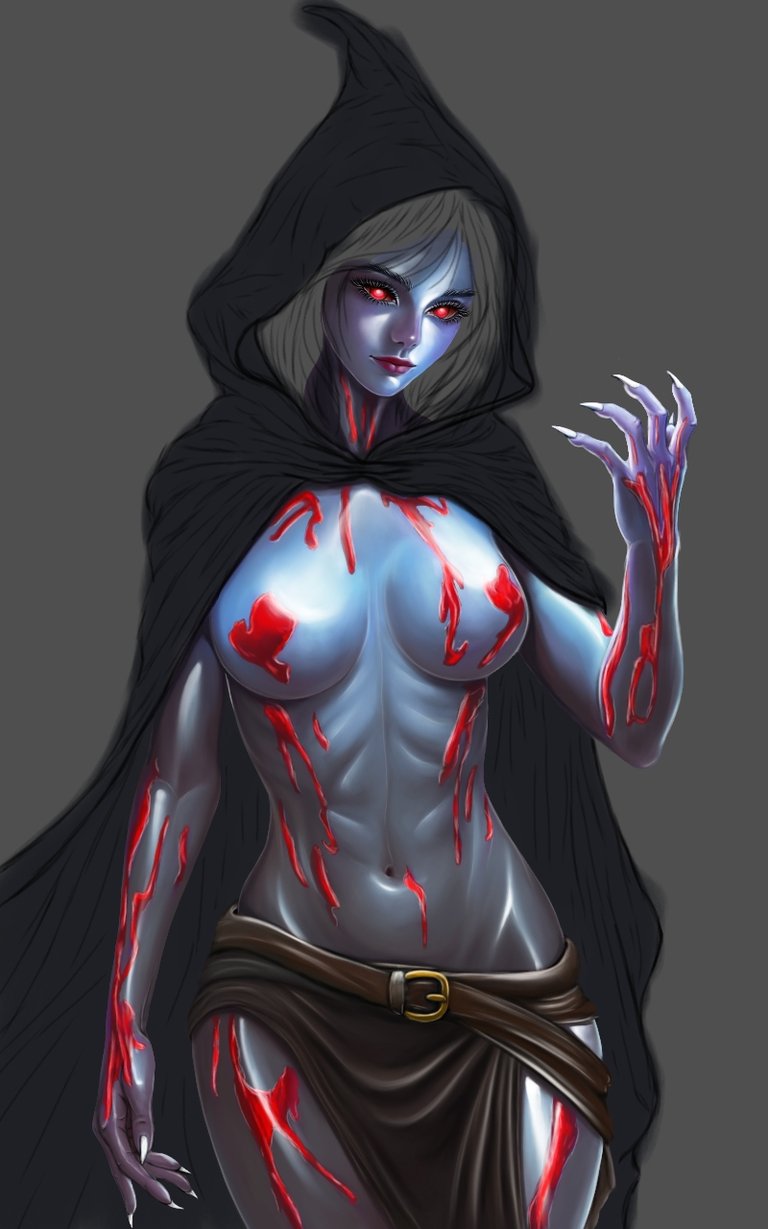
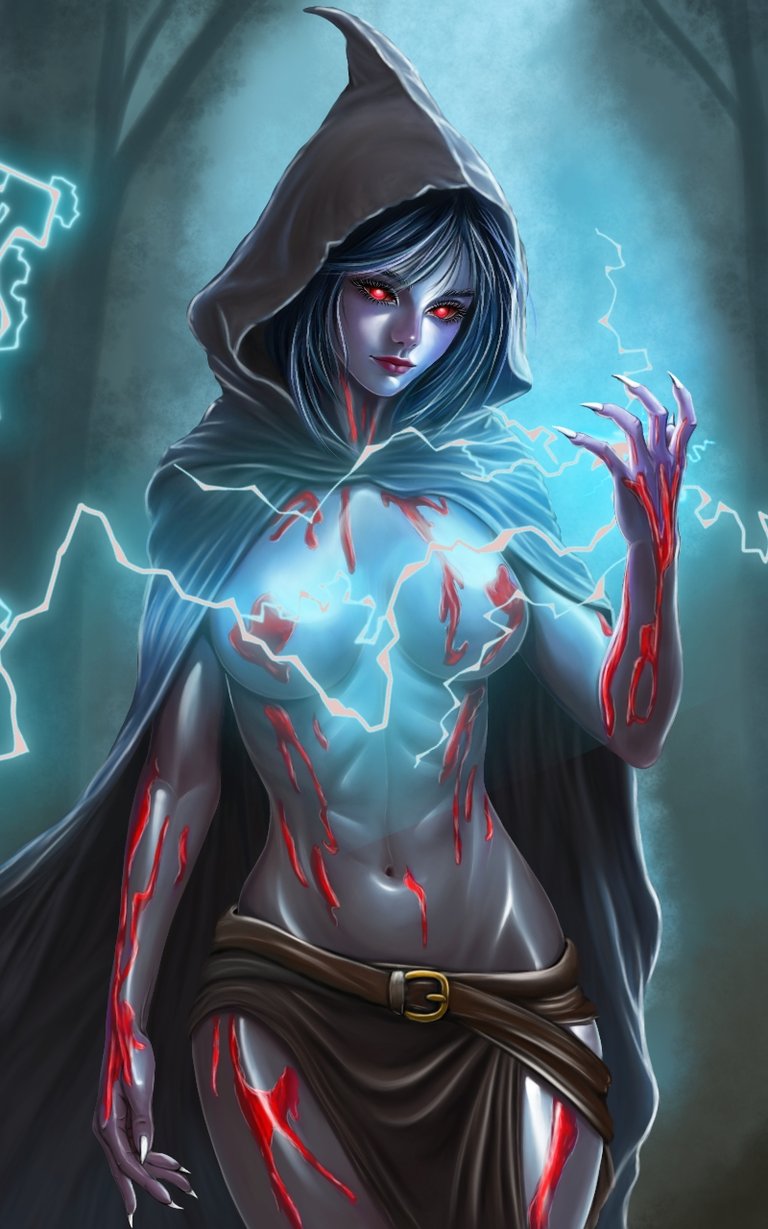
Fui definiendo un poco mas el fondo con un pincel texturizado ajustando la textura al tono de fondo, después agregue el rayo colocándolo en una capa normal primero donde vi que se veía un poco opaco en algunas secciones así que cambien el método a brillo, abriendo otra capa en superposición y también otra de brillo donde agregue un poco de destellos con opacidad baja a los ojos y también al resto de la piel donde se ubica la iluminación, terminando con puntos de brillo. Gracias por acompañarme en esta otra parte!.
I was defining a little more the background with a textured brush adjusting the texture to the background tone, then I added the lightning placing it in a normal layer first where I saw that it looked a little opaque in some sections so I changed the method to brightness, opening another layer in overlay and also another one of brightness where I added some sparkles with low opacity to the eyes and also to the rest of the skin where the lighting is located, finishing with points of brightness. Thanks for joining me in this other part!.
 |  | |
Herramientas Usadas/Used Tools
- iPad Pro
- Procreate
- Ibis Paint X
- Deelp Translate
Redes Sociales/ Social Networks
Sigueme en/ Follow me in:


"Descubre quién eres, y hazlo a propósito"
*"Find out who you are, and do it on purpose"
Yooo the lightning effects is very cool!😯
Thanks so ☺️
Congratulations @catrynart! You have completed the following achievement on the Hive blockchain And have been rewarded with New badge(s)
Your next target is to reach 65000 upvotes.
You can view your badges on your board and compare yourself to others in the Ranking
If you no longer want to receive notifications, reply to this comment with the word
STOPCheck out our last posts: