Bienvenidos mi querida comunidad de hive!👋😊🌷🌹❤️ Muy contenta de compartir junto a ustedes una entrega más para este fin de semana! Deseando que se encuentren excelentes.😙❤️
Welcome my dear hive community!👋😊🌷🌹❤️ Very happy to share with you one more installment for this weekend! Wishing you all excellent 😙😙❤️
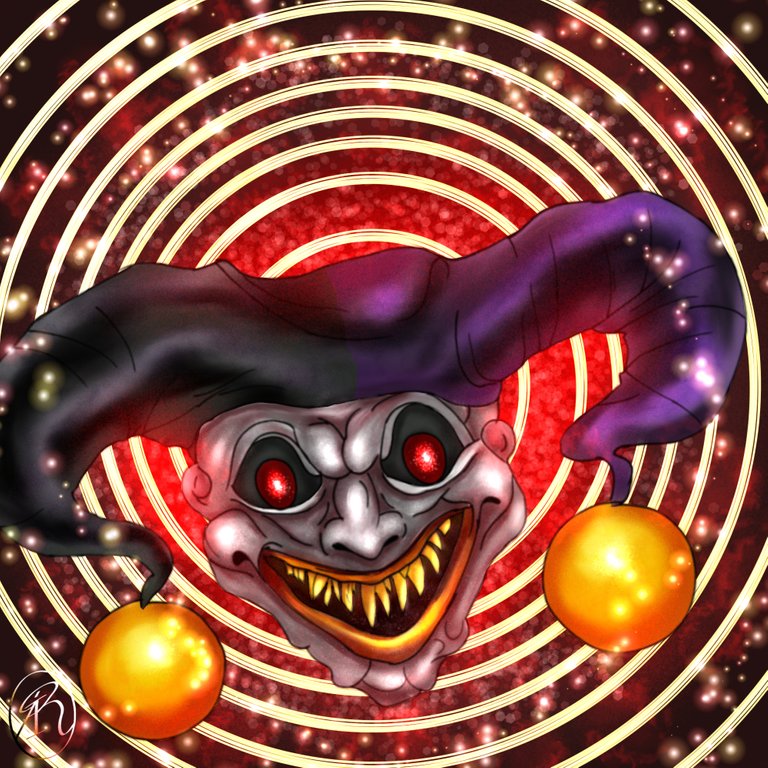
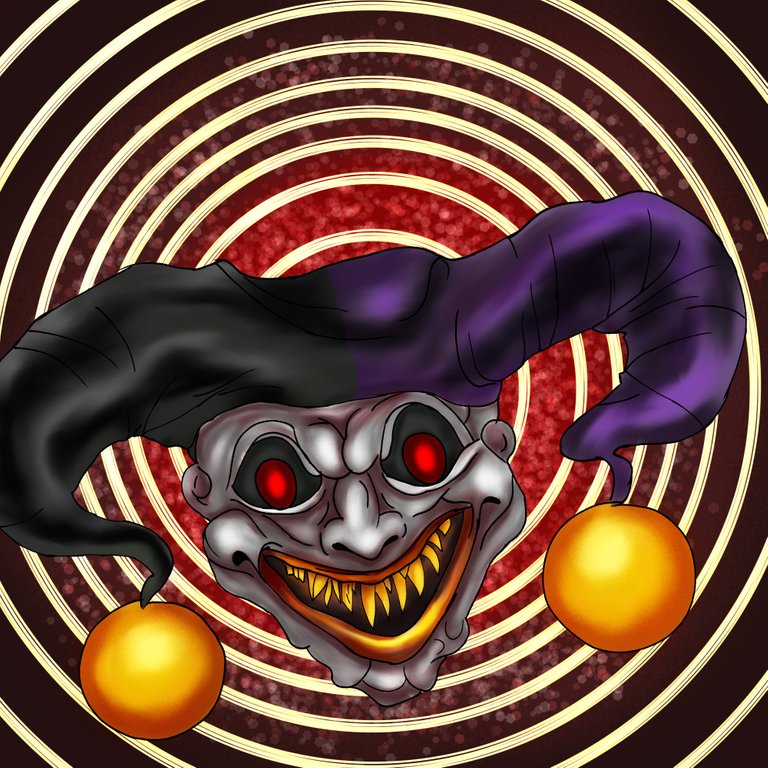
Les quiero compartir mi entrada al Social Media Challenge de Splinterlands, para el cual escogí la carta de TWISTED JESTER, un eternal oscuro el cual vive atormentado con los recuerdos de su vida pasada, donde constantemente recuerdo la lúgubre mortandad de su familia. Un recuerdo que aún permanece vívido dentro de él. Una representación de su rostro en un momento de su euforia tenebrosa cuando se une su recuerdo con lo oscuro de su entidad. Espero disfruten este proceso para esta carta que espero volver a representarla.🙂👍🌹
I want to share my entry to the Splinterlands Social Media Challenge, for which I chose the TWISTED JESTER card, a dark eternal who lives tormented with memories of his past life, where I constantly remember the gloomy death of his family. A memory that still remains vivid within him. A rendering of his face in a moment of his dark euphoria as memory of him merges with the darkness of his entity. I hope you enjoy this process for this letter that I hope to represent it again.🙂👍🌹
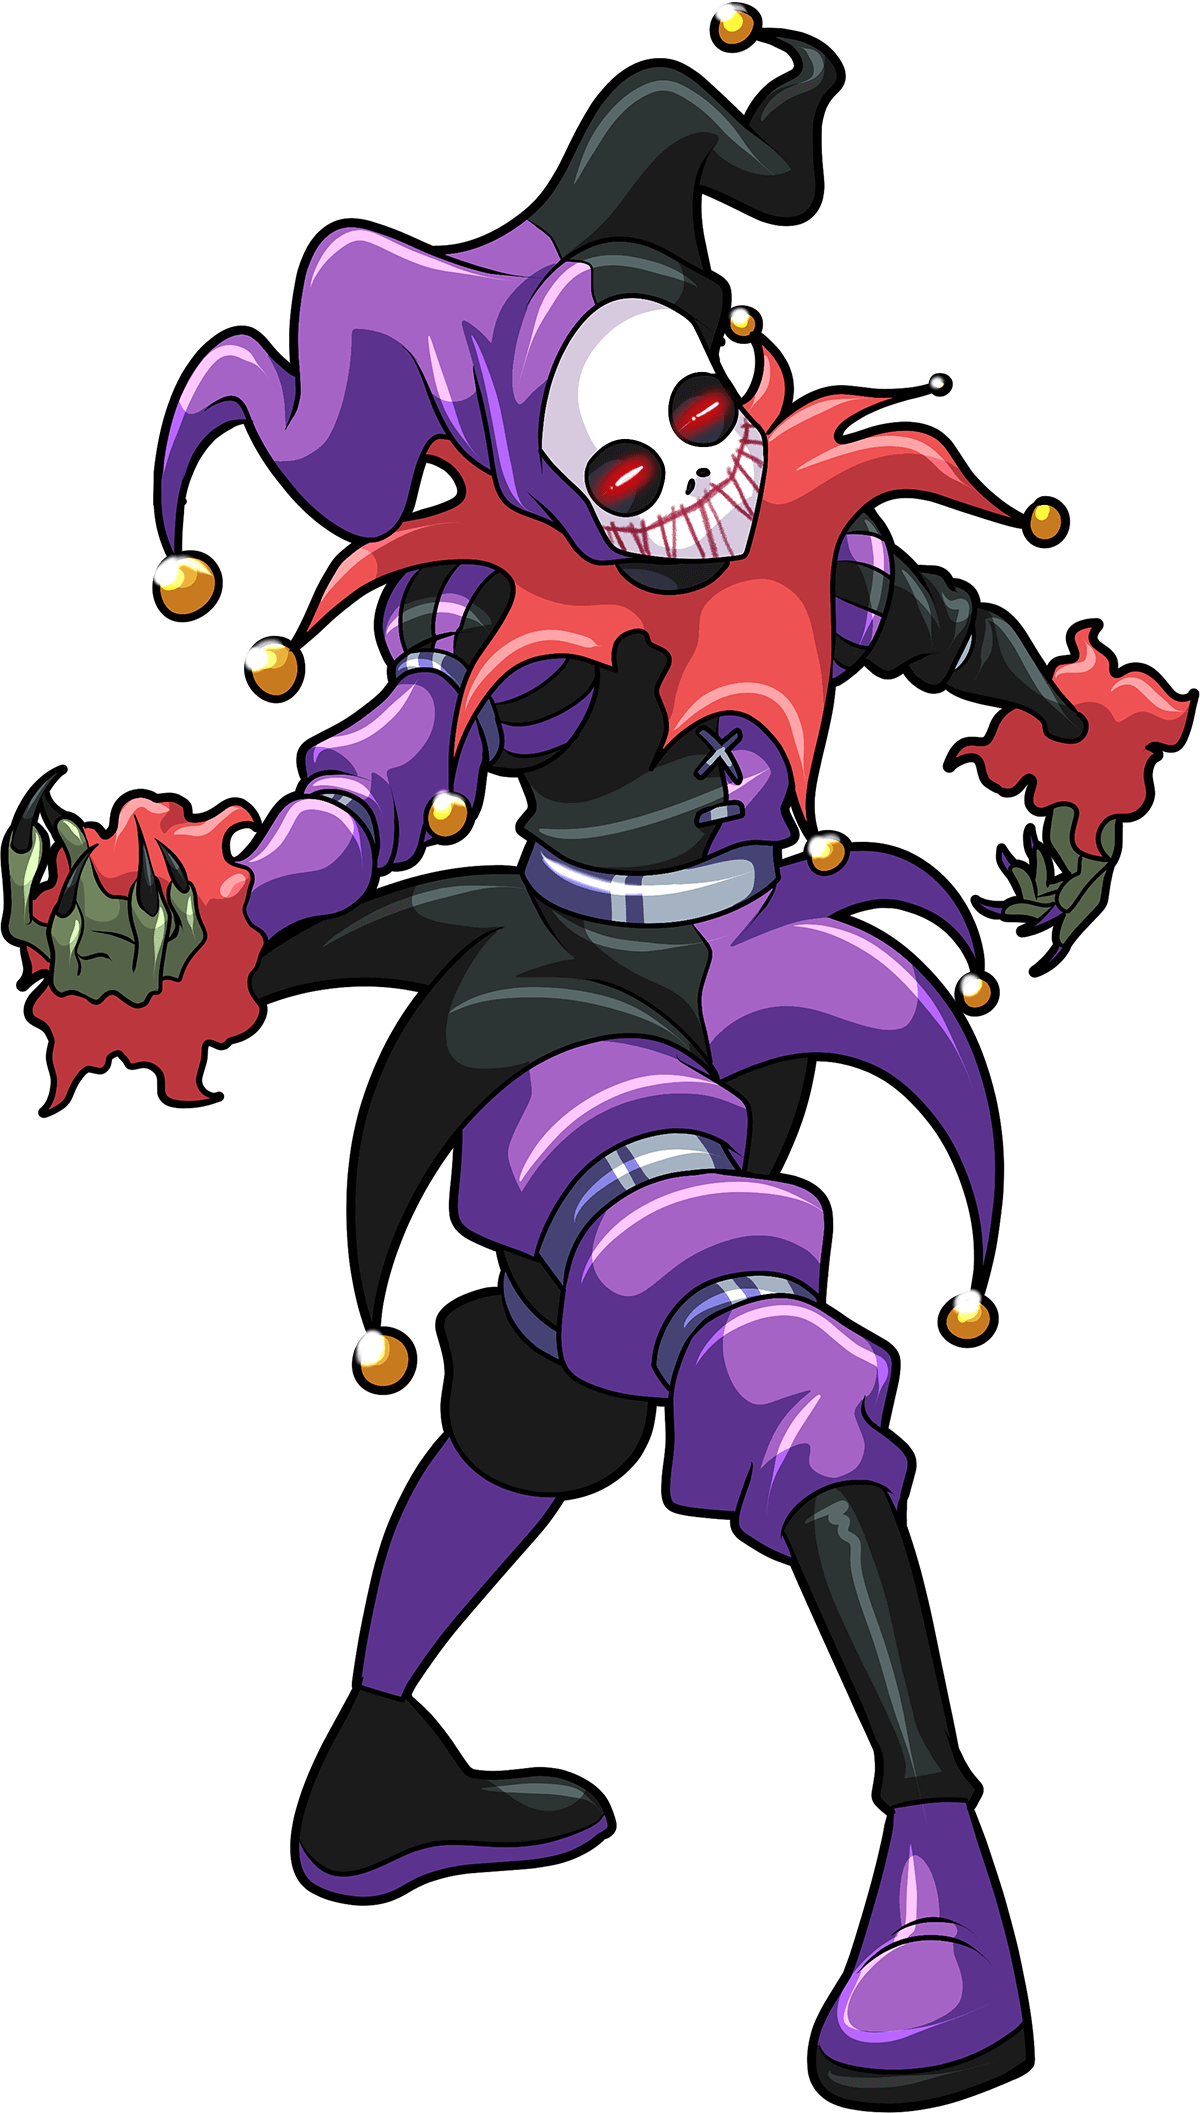
Link de la Imagen de Referencia/Reference Image Link

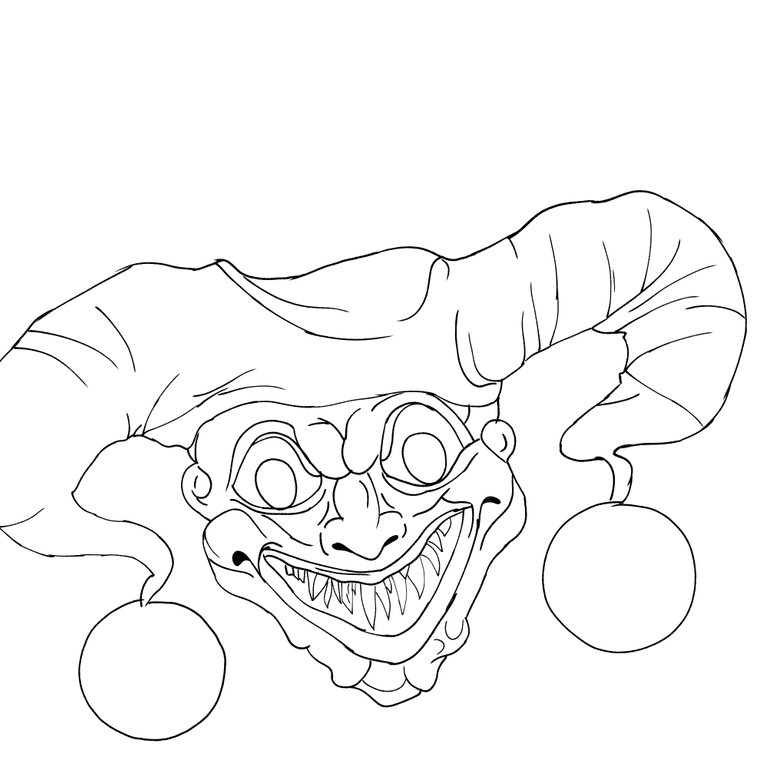
Etapas del Dibujo/Drawing Stages
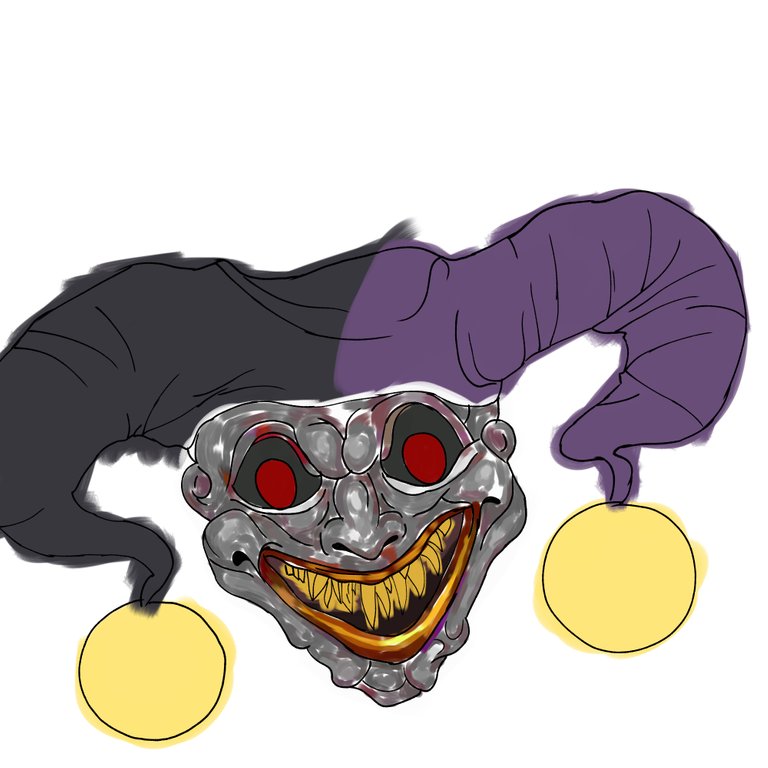
Inicie realizando un boceto de delineado usando la brocha pluma Maru suave, luego en una capa con el método de mezcla normal fui aplicando la base de colores. Y seguí con las pinceladas para ir definiendo, usando la brocha tipo plano real, usando colores opacos y pálidos para la piel de su rostro y un poco de saturación para la profundidad.
I started by making an eyeliner sketch using the soft Maru pen brush, then in one layer with the normal blending method I applied the base colors. And I continued with the brushstrokes to define, using the real flat brush, using opaque and pale colors for the skin of her face and a little saturation for depth.
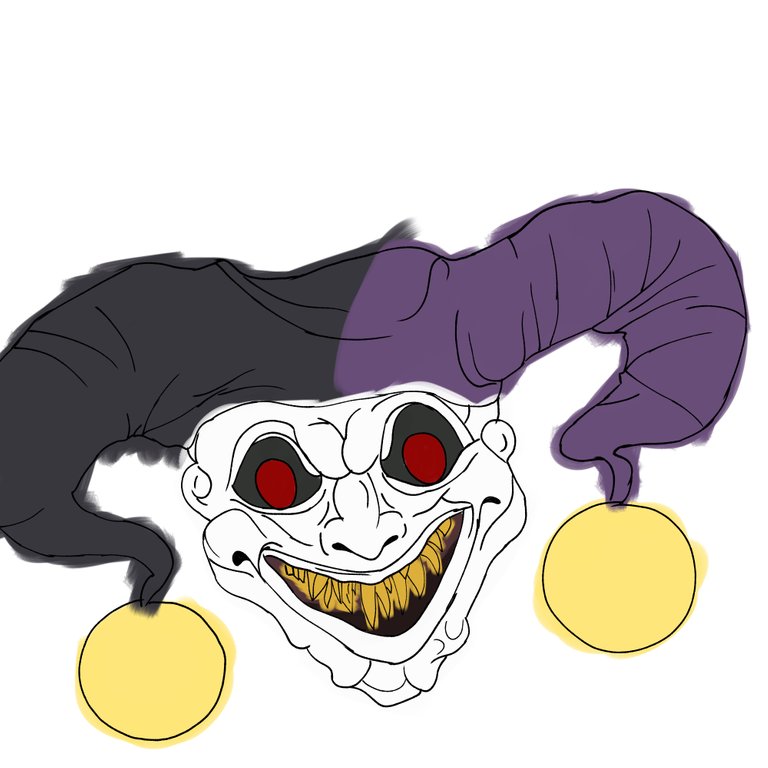
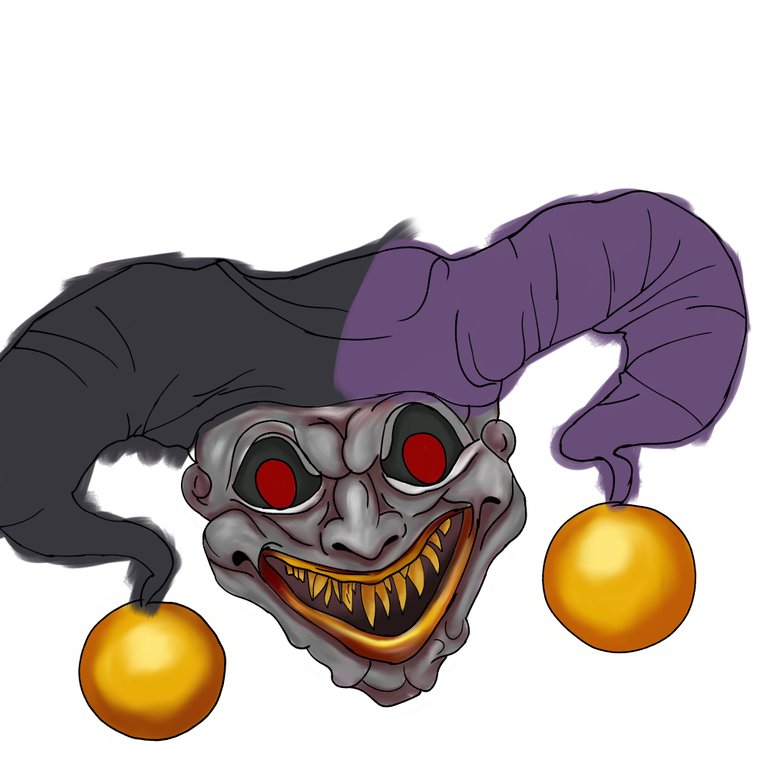
En esta fase fui mezcla con difumino para suavizar y seguir pincel ando con el mismo método de mezcla normal y pincel, borrando así lo excedente fuera del delineado. Para el gorro, clone la capa y me fui a filtro a ajuste de color y cambie a un tono gris aseo la capa que clone y luego pase a borrar la mitad y así tener los dos tonos de color de este sombrero de dos puntas, después uni las capas. De seguido, pase a cambiar el tono del fondo a un vino tinto oscuro.
In this phase I mixed with a blender to soften and continue brushing with the same normal mixing method and brush, thus erasing the excess outside the outline. For the hat, I cloned the layer and I went to filter to color adjustment and change the layer that I cloned to a clean gray tone and then delete the half and thus have the two color tones of this two-cornered hat, then I joined the layers. Next, move on to changing the background tone to a dark red wine.
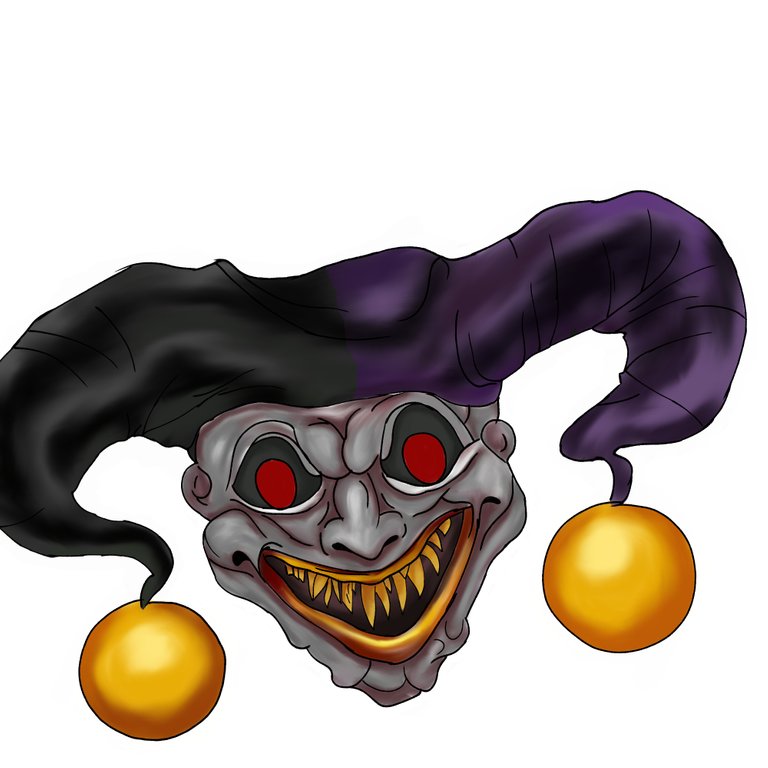
Finalmente, resalte algunas zonas con una capa en superposición usando el Aerógrafo de partículas, después en el fondo agregue círculos con la regla usando el pincel plano redondo, y aplique en una capa con añadir alguna iluminación usando la pluma tipo purpurina. Oscureci un poco más los bordes del fondo en la capa superposición y agregué un rojo vibrante en el centro en la misma capa con el aerografo. Seguí en una capa con método de mezcla añadir y una pluma tipo Puntillismo, agregando un poco de textura con la opacidad baja del pincel también use la pluma tipo nube real opacidad muy baja. Resalte algunos brillos más y usando el aerógrafo de particulas con opacidad baja agregue una iluminación tenéis rojiza en su contorno. Termine agregando destellos con punto de brillo. Espero lo hayan disfrutado, despiendome hasta la próxima entrega!! GRACIAS !!❤️😙🌹🙌💕😄
Finally, highlight some areas with an overlay layer using the Particle Airbrush, then in the background add circles with the ruler using the flat round brush, and apply on a layer with adding some lighting using the glitter pen. I darkened the edges of the background a bit more on the overlay layer and added a vibrant red to the center on the same layer with the airbrush. I continued on a layer with blend method add and a Pointillism pen, adding a bit of texture with the low opacity of the brush I also used the real cloud pen very low opacity. Highlight some more highlights and using the particle airbrush with low opacity add a reddish highlight to its outline. Finish by adding sparkles with a point of glitter. I hope you enjoyed it, saying goodbye until the next installment!! THANK YOU!!❤️😙🌹🙌💕😄
Redes Sociales/ Social Networks
Sigueme en/ Follow me in:
👉Instagram: @catrynart
👉 Twitter: @catrynart
Herramientas Usadas/Used Tools
- Tablet Android/ Android Tablet
- Programa Ibis Paint X/ Ibis Paint X Program
- Traductor Deepl/ Deelp Translator
- Servidor de Imagenes Imgbb/ Imgbb Image Server
- Dactilopintura Digital/ Digital Fingerprint Painting
🌺¡HASTA EL PRÓXIMO POST!🌺
Detenerse es Retroceder
To Stop is to go Backwards
Congratulations @catrynart! You have completed the following achievement on the Hive blockchain And have been rewarded with New badge(s)
Your next target is to reach 13000 upvotes.
You can view your badges on your board and compare yourself to others in the Ranking
If you no longer want to receive notifications, reply to this comment with the word
STOPTo support your work, I also upvoted your post!
Thanks for sharing! - @alokkumar121
