Arte Digital | Digital Art
Greetings dear community, welcome once again to a new art process. I'm in love with this job, it's the way I feel right now, I kept away from the bad, from what is not right. It feels good to open your eyes on time and prevent toxic diseases from infecting you, it is a serious illness that must be treated urgently, it comes around you, it blinds you, it is difficult to get out, it only gives you an opportunity and that is when it attacks you, if you accept forgiveness it is too late, much more when it affects important beings in your life. That false and hypocritical forgiveness is the decisive definitive to decide to end or continue sunk in the irremediable. I do not know very well the name that this disease may have, but it covers different symptoms such as bipolarity, believing that one is better than everyone in all aspects, jokes disguised with a lot of reality in it, espionage for mockery, nonconformity and many others. Something really toxic and contagious if we don't wake up in time. Free, that's how I feel and very happy, I hope I never find another person like him. Come join me to see the creation process...
¡Espero te guste! | I hope you like!
Presentación del diseño | Desing presentación
Materiales | Materials
- Mini laptop
- Tableta Huion H950P
- Programa Adobe Photoshop 2019
- Mini laptop
- Huion H950P tablet
- Adobe Photoshop 2019 program
❍﹏﹏﹏﹏﹏﹏﹏﹏﹏﹏﹏﹏﹏﹏﹏﹏﹏❍
Proceso | Process
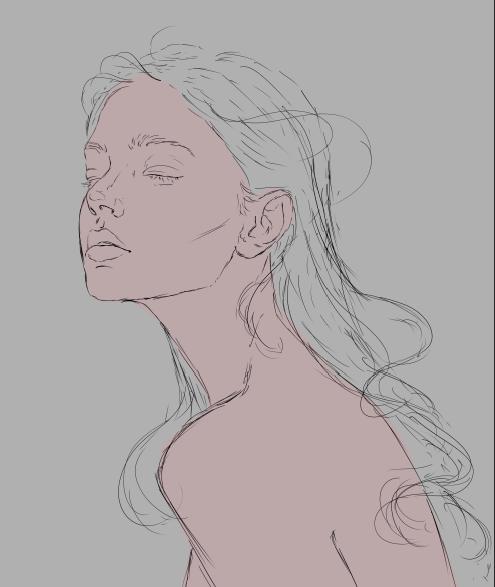
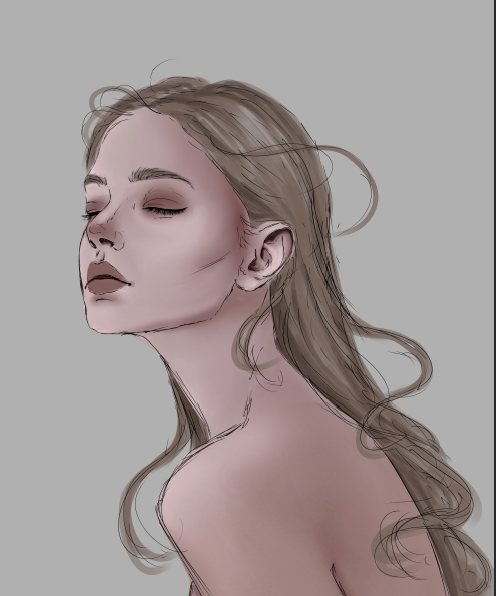
El primer paso para llegar a un trabajo final es obtener el boceto, este contiene mayor parte de lo que queremos lograr:
The first step to reach a final work is to obtain the sketch, it contains most of what we want to achieve:

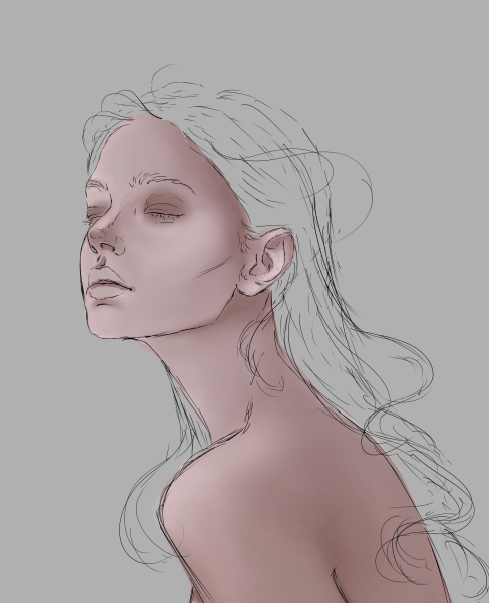
En este paso selecionamos los colores de la piel, un tono principal que funcionara como base, partiendo de este un tono medio y adicional a este uno oscuro para las sombras, y un color mas claro para las zonas altas o donde por ley debe ser mas claro el color:
In this step we select the colors of the skin, a main tone that will work as a base, starting from this a medium tone and additional to this one dark for the shadows, and a lighter color for the high areas or where by law it must be more clear color:

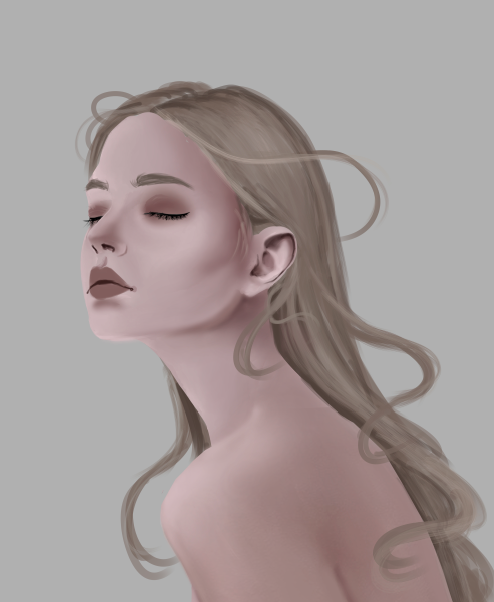
En este paso lo que hice fui mezclar todos los tonos de color que agregue anteriormente, para este paso use un pincel difuso funciono perfecto para suavizar y mezclar los colores agregados anteriormente, tambien añadi su cabello un tono base para continuar dando forma a sus labios y forma y volumen en sus parpados cerrados:
In this step what I did was I mixed all the color tones that they added previously, for this step I used a diffuse brush it worked perfect to soften and mix the colors added previously, I also added a base tone to her hair to continue shaping her lips and shape and volume in their closed eyelids:
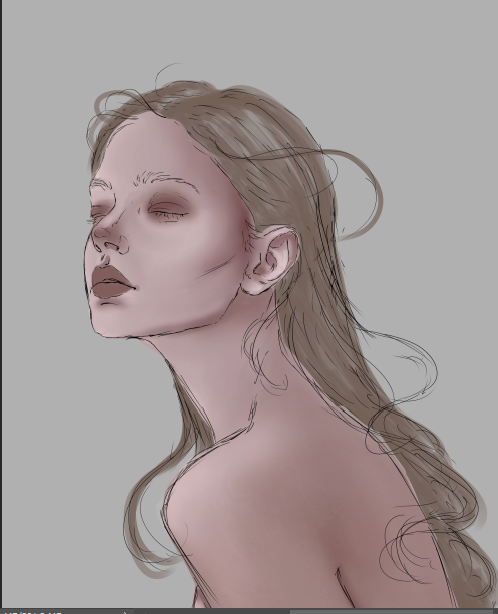
Continue dando forma a sus pestañas y agregando zonas profundas en su cabello, elimine las lineas del boceto inicial y detalle con el pincel suave de cerdas para cebello:
Continue to shape her lashes and add areas deep into her hair, removing the lines of the initial sketch and detailing with the soft bristle stubble brush:
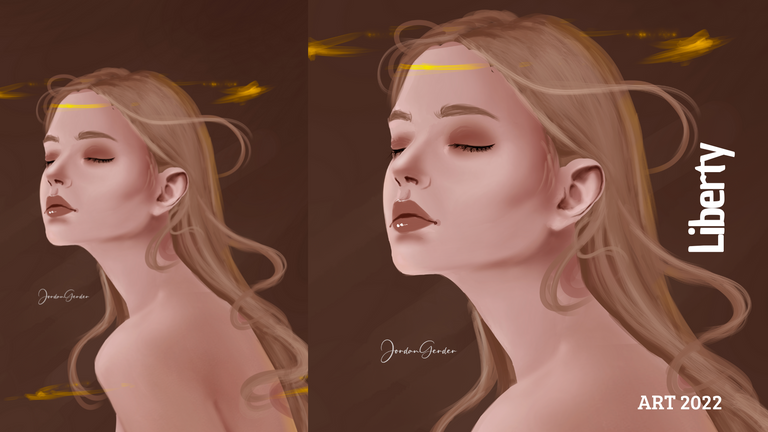
Nos enfocamos en algunos detalles y asi fue como obtuve el resultado final:
We focused on some details and this is how I got the final result:
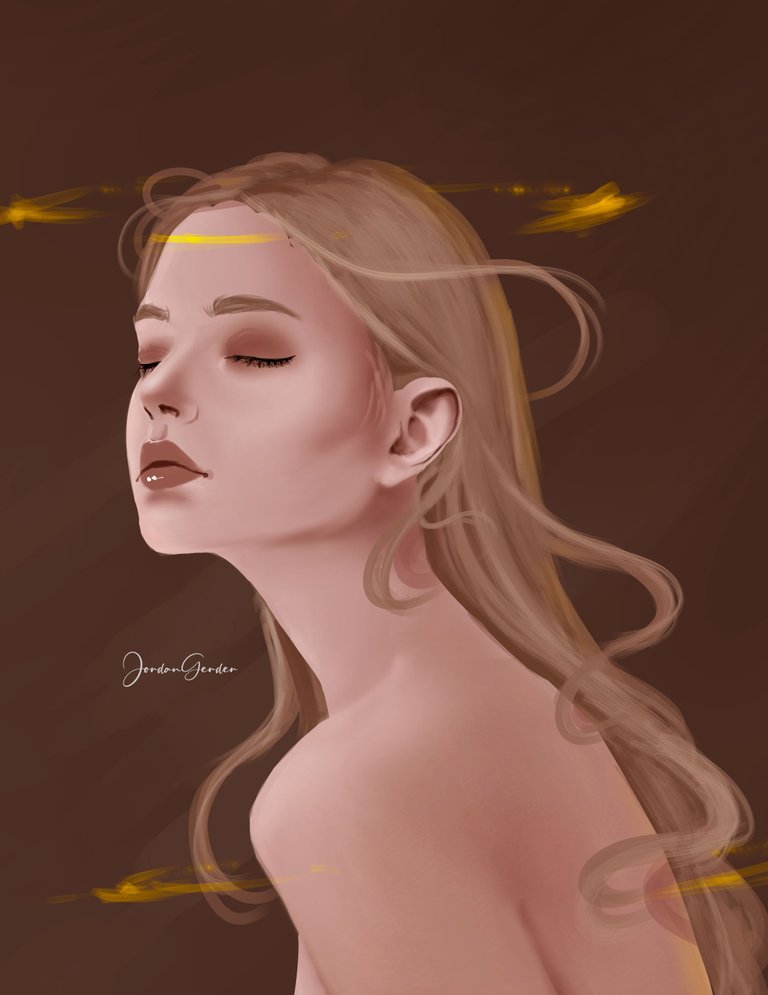
Obtuvimos un resultado increible disfrute mucho del proceso de creacion. Espero les haya gustado lo he elaborado con cariño para todos los espectadores que visitan esta publicacion, nos vemos en la próxima 😍
We got an incredible result, I really enjoyed the creation process. I hope you liked it, I have elaborated it with love for all the viewers who visit this publication, see you in the next one 😍
¿Cómo pintar la piel en Photoshop? (piel difusa) | How to paint skin in Photoshop? (fuzzy skin)

Presentación del diseño | Desing presentación
Materiales | Materials
- Mini laptop
- Tableta Huion H950P
- Programa Adobe Photoshop 2019
- Mini laptop
- Huion H950P tablet
- Adobe Photoshop 2019 program
Proceso | Process
The first step to reach a final work is to obtain the sketch, it contains most of what we want to achieve:
In this step we select the colors of the skin, a main tone that will work as a base, starting from this a medium tone and additional to this one dark for the shadows, and a lighter color for the high areas or where by law it must be more clear color:
In this step what I did was I mixed all the color tones that they added previously, for this step I used a diffuse brush it worked perfect to soften and mix the colors added previously, I also added a base tone to her hair to continue shaping her lips and shape and volume in their closed eyelids:
Continue to shape her lashes and add areas deep into her hair, removing the lines of the initial sketch and detailing with the soft bristle stubble brush:
We focused on some details and this is how I got the final result:
We got an incredible result, I really enjoyed the creation process. I hope you liked it, I have elaborated it with love for all the viewers who visit this publication, see you in the next one 😍
¿Cómo pintar la piel en Photoshop? (piel difusa) | How to paint skin in Photoshop? (fuzzy skin)
Beautiful art, I congratulate you, and I understand you, nothing like seeing the final result of our work.
Muchas gracias ❤️
Thank you for sharing this post on HIVE!
Your content got selected by our fellow curator jasonmunapasee & you just received a little thank you upvote from us for your great work! Your post will be featured in one of our recurring compilations which are aiming to offer you a stage to widen your audience within the DIY scene of Hive. Next time make sure to post / cross-post your creation within the DIYHub community on HIVE and you will receive a higher upvote ;) Stay creative & HIVE ON!
Please vote for our hive witness <3
I really loved the sketch work! If you overlayed it your colour, it would also make a really nice piece. I love the work on the lips too. And also.. nice work on translating to both spanish and english - me encanta!