So what do you do with a beautiful antique camera that can no longer take traditional photographs because it is no longer light-tight?
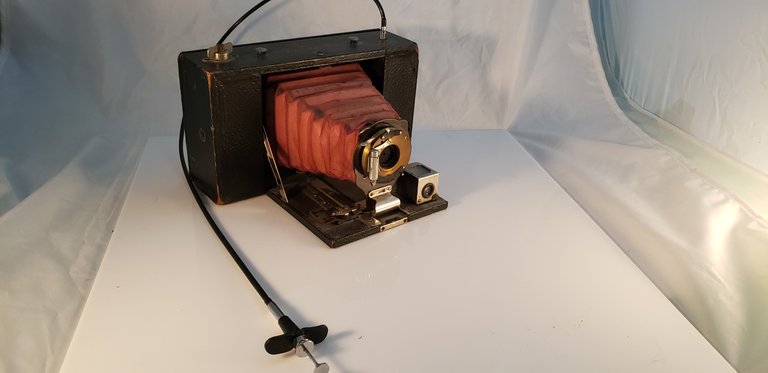
Well, if you're me, you'd be looking into one of two (or both) things:
- Clean it up and turn it into a nice piece to look at;
- Clean it up and put a raspberry pi with a camera attachment inside it to turn it into a modern day cheap-ass camera.
Putting a raspberry pi and camera attachment together is surprisingly not a terribly difficult thing to do. What is difficult, however, is figuring out how to place it all inside the physical antique camera and get it to take the picture (shutter release) and do something with the resulting photo.
Problems to Solve
- House all the required components within the camera
- Raspberry Pi
- Camera
- Power
- Construct some sort of shutter release
- Physical button
- Bluetooth
- App
- Do something with the resulting photo
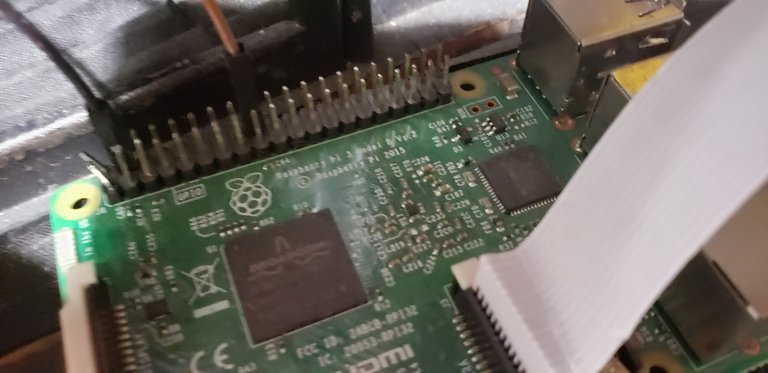
So, luckily, this particular camera has a lot of room on the inside. Finding a place to put all the components was fairly simple to do, even with a "large" Raspberry Pi 3 (a Raspberry Pi Zero would be even better - I have some, but those are for other cameras and other projects).
Issue 1: power. Resolution: portable battery. The Pi is light enough that it doesn't need a whole lot of power, and a portable battery that can charge mobile phones will run this Pi for a couple hours. They're also small enough to fit inside the camera's housing.
Issue 2: Shutter release.
The shutter release was problematic from an engineering standpoint. I wanted to shy away from using bluetooth or an app because it would have ruined the "traditional" feel of the camera, so I needed a button. Thankfully, Raspberry Pi's are designed for just this type of purpose I know how to use the GPIO plugs with a button.
What I don't want to do is solder (I'm lazy, and my soldering skills suck), so I'm stuck with using a small breadboard. Thankfully, there are small breadboards.
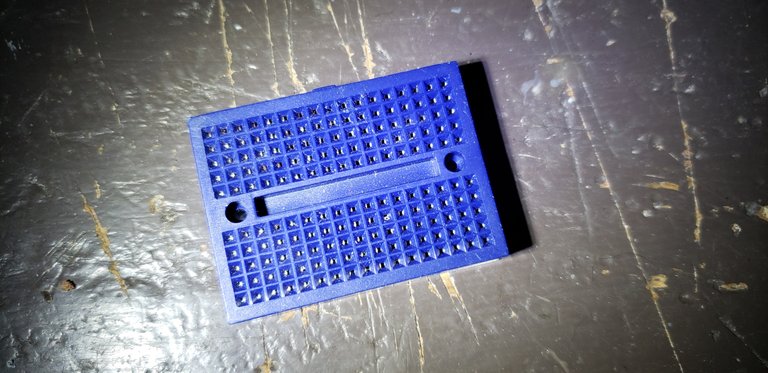
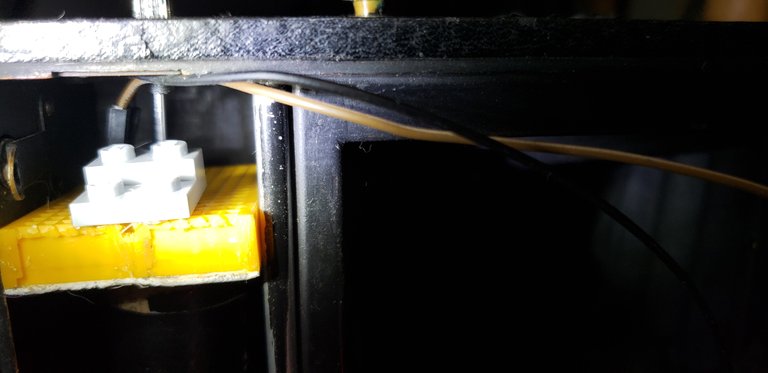
This particular breadboard served a dual purpose; not only did it hold the button, but it fit just perfectly into the enclosure where the film would normally go to hold the button snuggly in place.
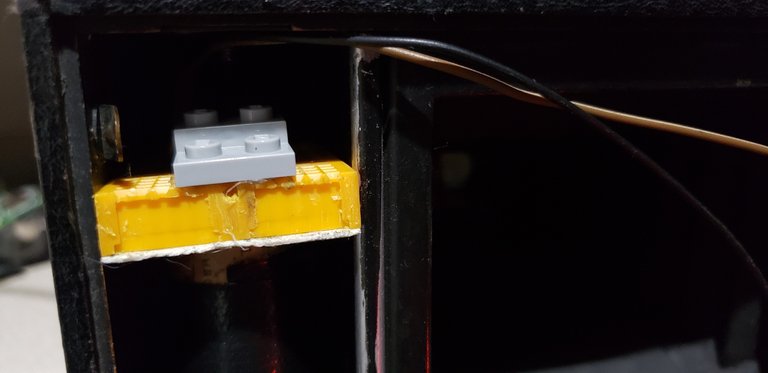
Here you can see (sort of) the shutter release pressed down onto the button.
The next step is to actually press the button, and for that I purchased a cable shutter release. It works awesome. I was able to jury-rig the cable release into the hole where the handle that orinally held the film spindle would go. This meant that not only did I not need to drill a hole into the camera (which would have made me cry), but it also looks like it was meant to perform just this function. I was able to place the button just beneath the hole, and boom, instant shutter release.
Issue 3: Take the Photo
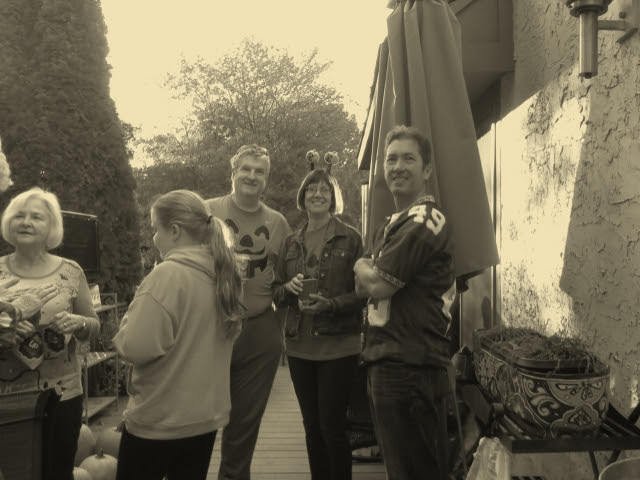
And now there is time for some fun. My goal for this camera is to mimic and "old time" photo, so I want the Pi to take the picture and convert it to sepia. Additionally, since there is no monitor, I want to be able to view the pictures over a web page which would need to be hosted on the Pi.
Building the logic to take the picture and convert it to sepia is easily done in Python, but since I don't like writing my own services to start at boot time, I wanted to use something else: node-red was just what I needed for this. Node-Red will run at system boot and is perfect to build a flow to take the picture, convert it to sepia, create a thumbnail, and place them both into a web directory:

(and if you want to import the flows on your own to see how I've done this, here:)
[{"id":"6ee01154.dbe9b","type":"camerapi-takephoto","z":"48a98329.f4f46c","filemode":"2","filename":"","filedefpath":"1","filepath":"","fileformat":"jpeg","resolution":"6","rotation":"0","fliph":"0","flipv":"0","brightness":"60","contrast":"0","sharpness":"0","imageeffect":"none","name":"","x":403.5,"y":63,"wires":[["26c35b60.c9d044"]]},{"id":"895cd5fc.bd3358","type":"rpi-gpio in","z":"48a98329.f4f46c","name":"","pin":"18","intype":"down","debounce":"25","read":false,"x":65,"y":157,"wires":[["7647021c.86e19c"]]},{"id":"645671fd.946fb","type":"debug","z":"48a98329.f4f46c","name":"","active":true,"tosidebar":true,"console":false,"tostatus":false,"complete":"false","x":842.5,"y":47,"wires":[]},{"id":"26c35b60.c9d044","type":"pythonshell in","z":"48a98329.f4f46c","name":"Sepia","pyfile":"/opt/camera/scripts/sepia.py","virtualenv":"","continuous":false,"x":512.5,"y":164,"wires":[["5908f967.176a"]]},{"id":"7647021c.86e19c","type":"switch","z":"48a98329.f4f46c","name":"","property":"payload","propertyType":"msg","rules":[{"t":"eq","v":"1","vt":"num"}],"checkall":"true","repair":false,"outputs":1,"x":144.5,"y":67,"wires":[["26bdbf2f.e79d3"]]},{"id":"f187d17.9c7a03","type":"pythonshell in","z":"48a98329.f4f46c","name":"Make Thumbnail","pyfile":"/opt/camera/scripts/makethumb.py","virtualenv":"","continuous":false,"x":752.5,"y":157,"wires":[["645671fd.946fb"]]},{"id":"26bdbf2f.e79d3","type":"function","z":"48a98329.f4f46c","name":"","func":"msg.filepath = \"/var/www/html/pictures\";\nreturn msg;","outputs":1,"noerr":0,"x":248.5,"y":160,"wires":[["6ee01154.dbe9b"]]},{"id":"5908f967.176a","type":"delay","z":"48a98329.f4f46c","name":"","pauseType":"delay","timeout":"1","timeoutUnits":"seconds","rate":"1","nbRateUnits":"1","rateUnits":"second","randomFirst":"1","randomLast":"5","randomUnits":"seconds","drop":false,"x":647.5,"y":50,"wires":[["f187d17.9c7a03"]]}]
Issue 4: Network (and printing)
And now for the last piece of the puzzle: the network. I'd like the camera to be mobile enough that I could take to places, take people's photographs, and be able to either print them or send them to them. There are a couple choices:
- Use the Pi itself to run a wireless network
- Use an external portable device to run a wireless network
I chose the latter. In particular, I chose the Canon Selphy CP1200 portable printer. It runs it's own wireless network and can be powered by a portable battery. Perfect! Not only will it host the network for the Pi and a laptop to be able to view the pictures, but it will also print!
The result is not bad, either. Of course, like any camera, good lighting is of the utmost essence.


Wow, that's amazing man! The results were quite good as well! Way to upcycle that camera, just beautiful and badass 😎
Thank you very much! I've got some others in the works, too. A camera for any occasion!
Look forward to meeting those as well!
If you appreciate the work we are doing, then consider supporting our witness @stem.witness. Additional witness support to the curie witness would be appreciated as well.
For additional information please join us on the SteemSTEM discord and to get to know the rest of the community!
Please consider using the stem.openhive.network app and/or including @steemstem in the list of beneficiaries of this post. This could yield a stronger support.
Thank you @steemstem!