Welcome back to my 2001 Ford Excursion Front Axle Rebuild series. This time I’m gonna tackle the fun task of replacing upper and lower ball joints. These would be relatively easy to do if you didn’t have to basically disassemble the whole axle in order to get to them. No wonder mechanics shop charge over $2,000 usd to change them. I would much rather bust a few knuckles and get some grease under my fingernails, than pay that. Well let’s dive into process of replacing ball joints shall we?
2001 Ford Excursion Front Axle Rebuild Part 4
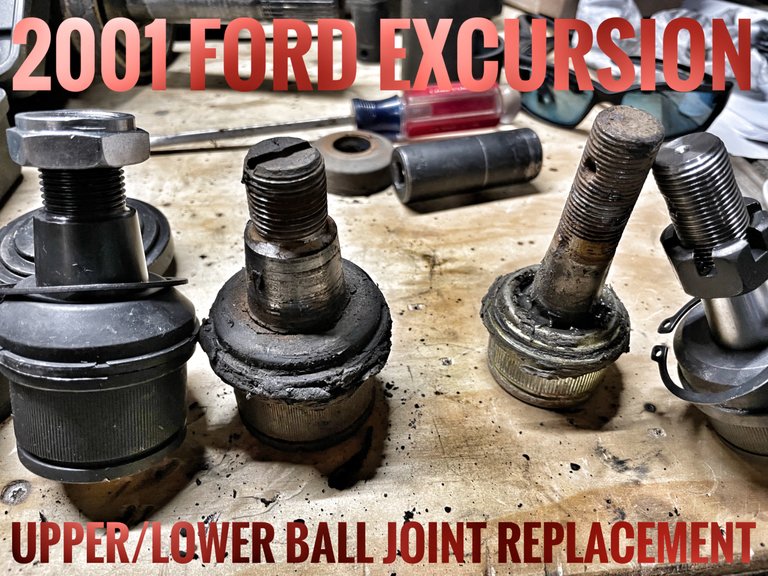
Upper & Lower Ball Joint Replacement
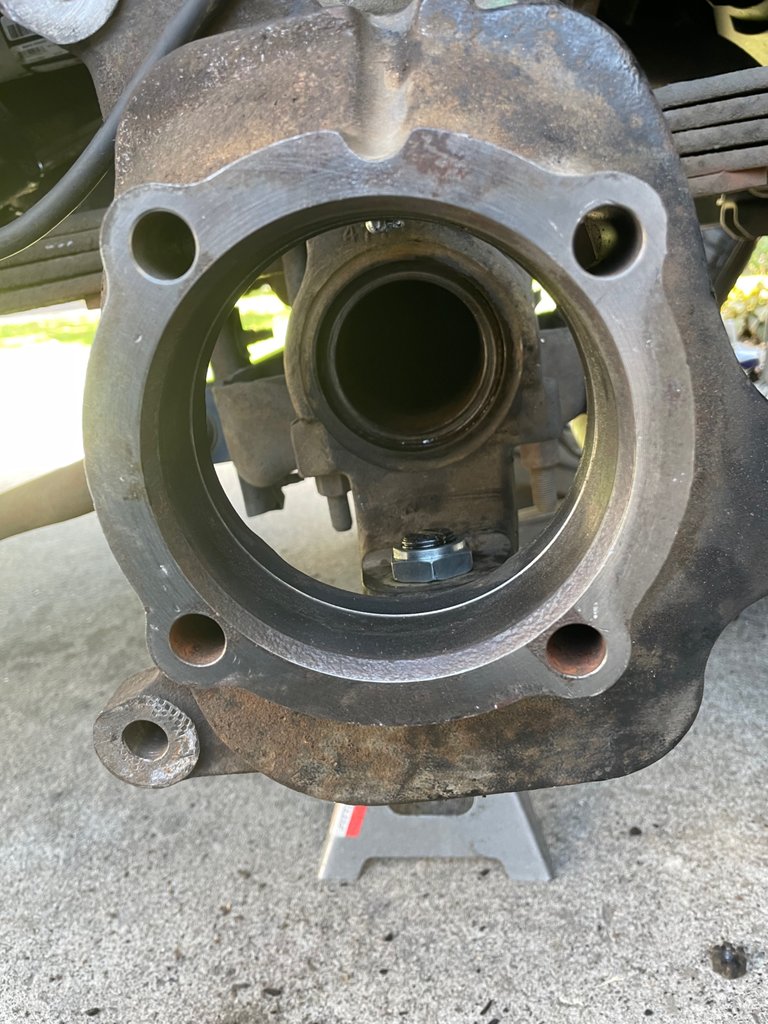
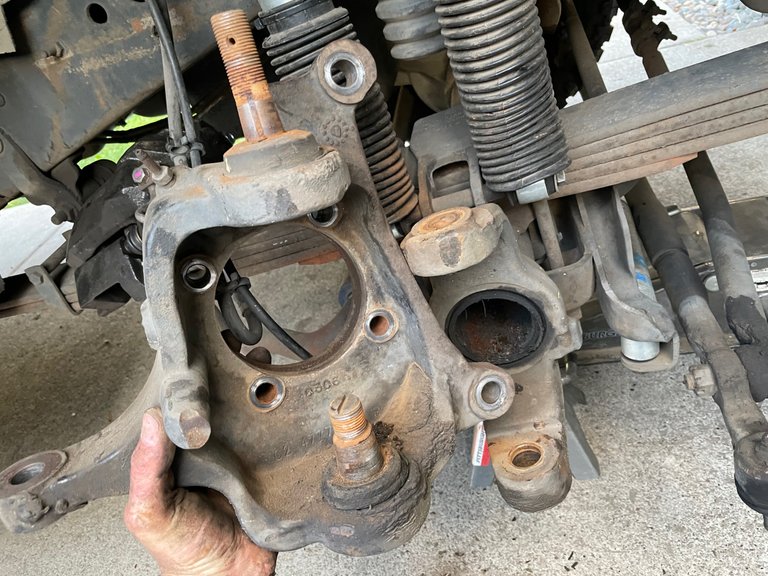
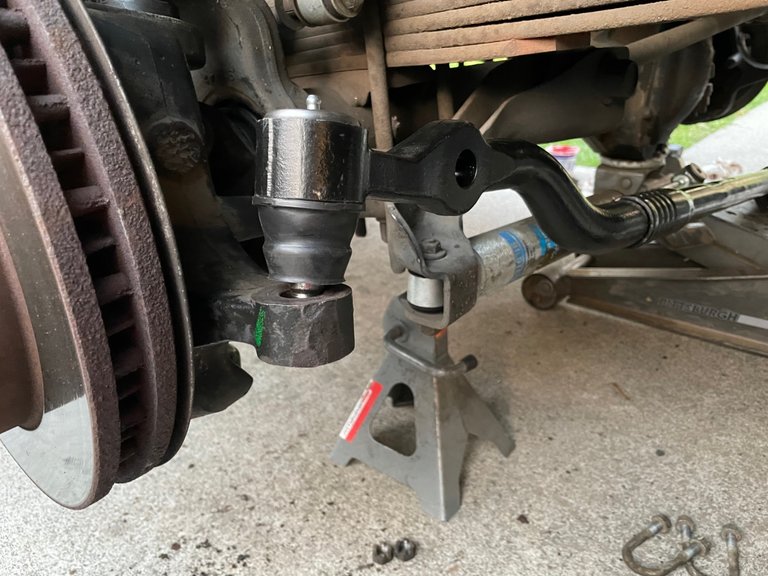
As mentioned, it’s a bit of a process to gain access to the ball joints. Remove tire, locking hub assembly, brake caliper and rotor, front hub and bearing, and remove the axle from the tube. The process of removing all the listed parts is explained in detail here: Part 1 ~ Part 2. Once you have completed part 1 & 2 your front axle should look like this
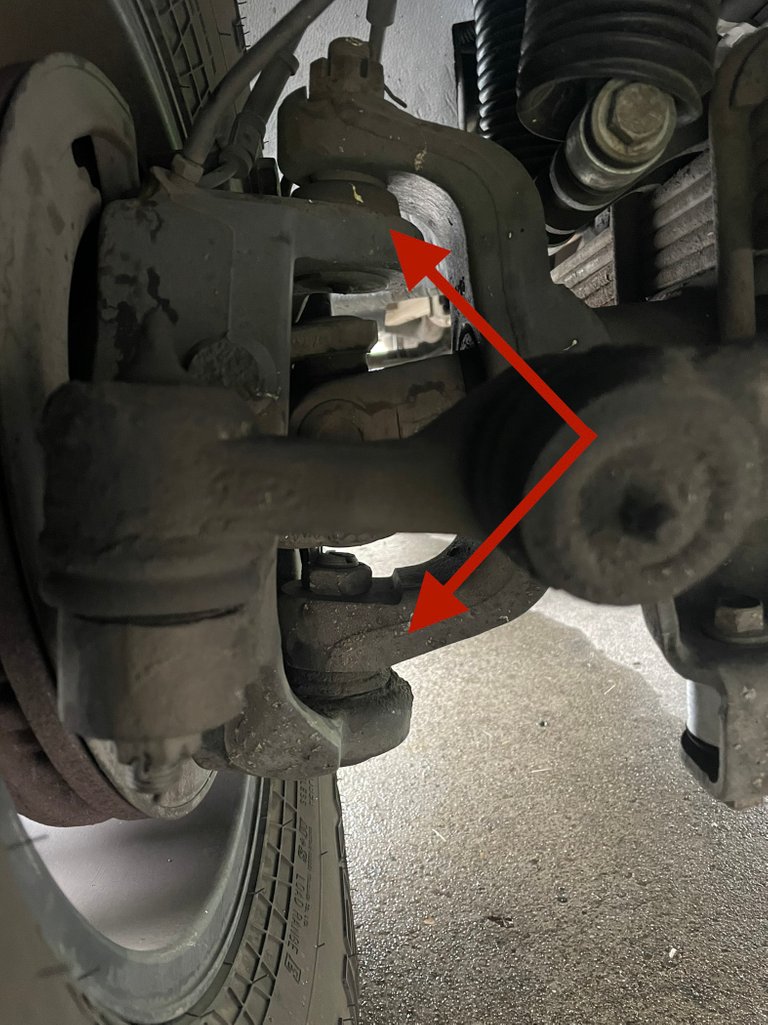
The ball joints are what allows your front tires to turn left and right. The best way to check if they are worn out is to jack the vehicle up and see if there is any movement when pushing and pulling the top of the tire. Grab the top of the tire with one hand and the bottom with the other hand. Push on the top and pull on the bottom. There should not be any movement at all. Mine made a nice clunking sound which tells me there is slop in the ball joints. You can also have someone look at the ball joints while you perform this check.
With all those other parts out of the way, we can start removing the outer steering knuckle. The ball joints are pressed into the outer steering knuckle and the ball joints hold the outer steering knuckle to the axle tube.
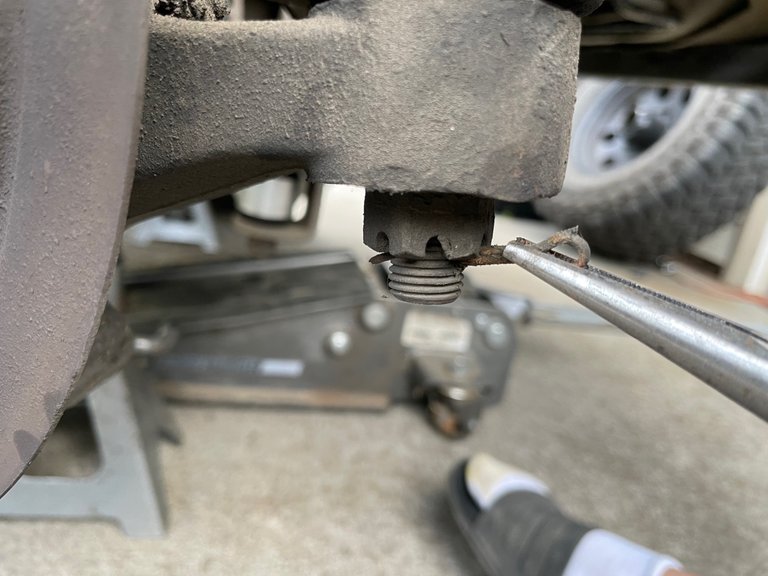
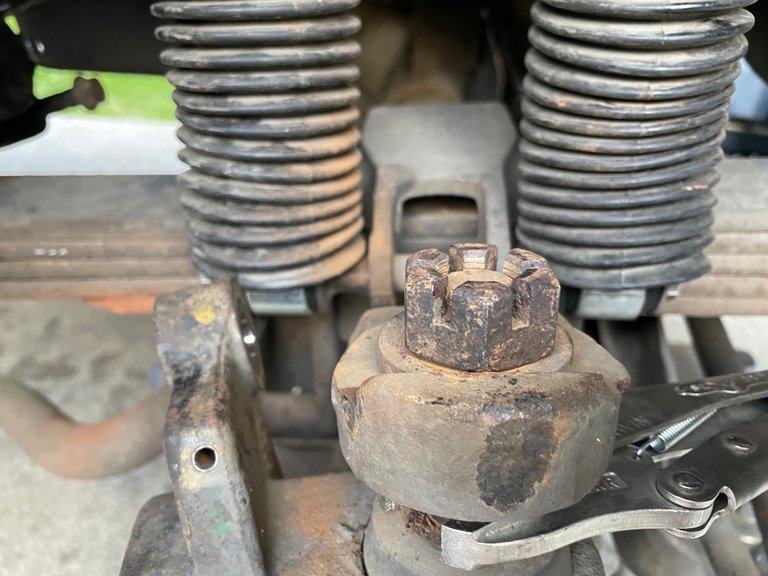
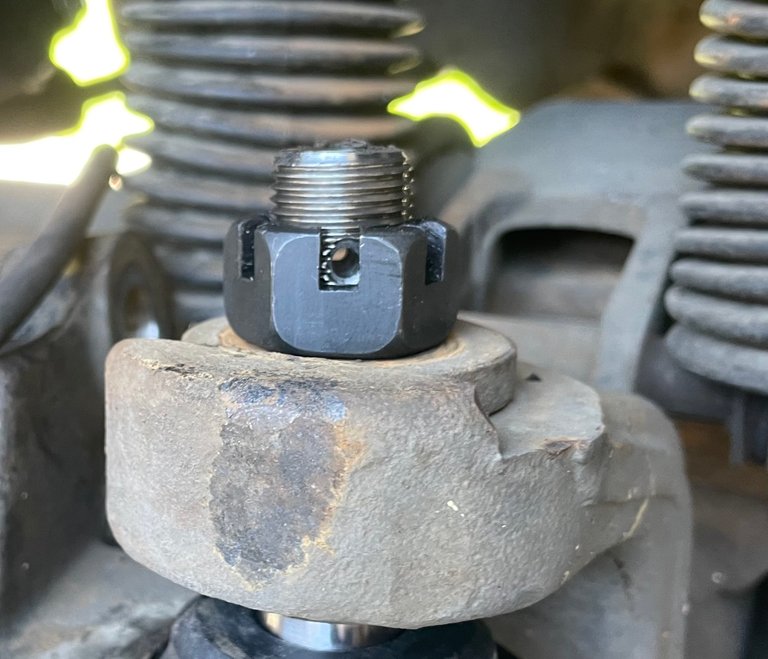
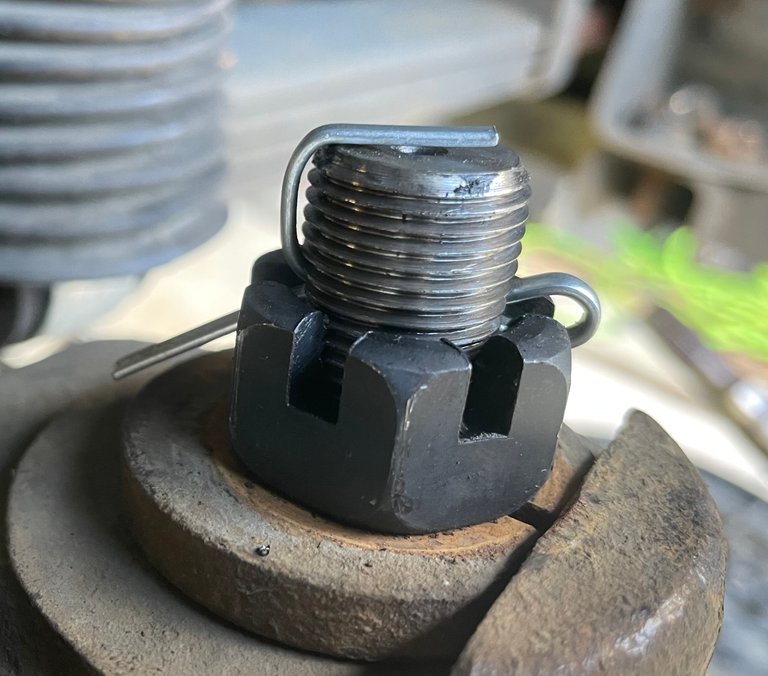
First remove the cotter keys from both of the ball joint studs. These will often break and can become a real pain to get out sometimes.
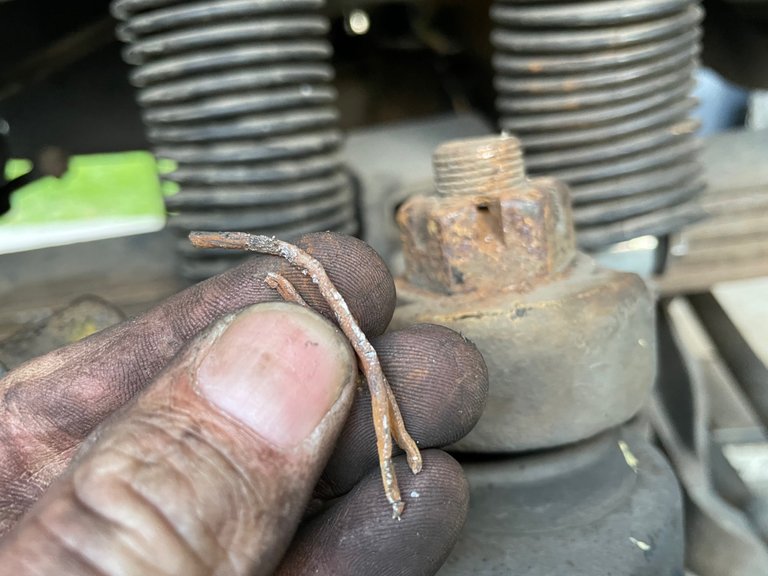
A pair of needle nose pliers and a pair of side cutters work pretty good to get those cotter keys out. Your new ball joints will come with new cotter keys so don’t worry if you destroy them.
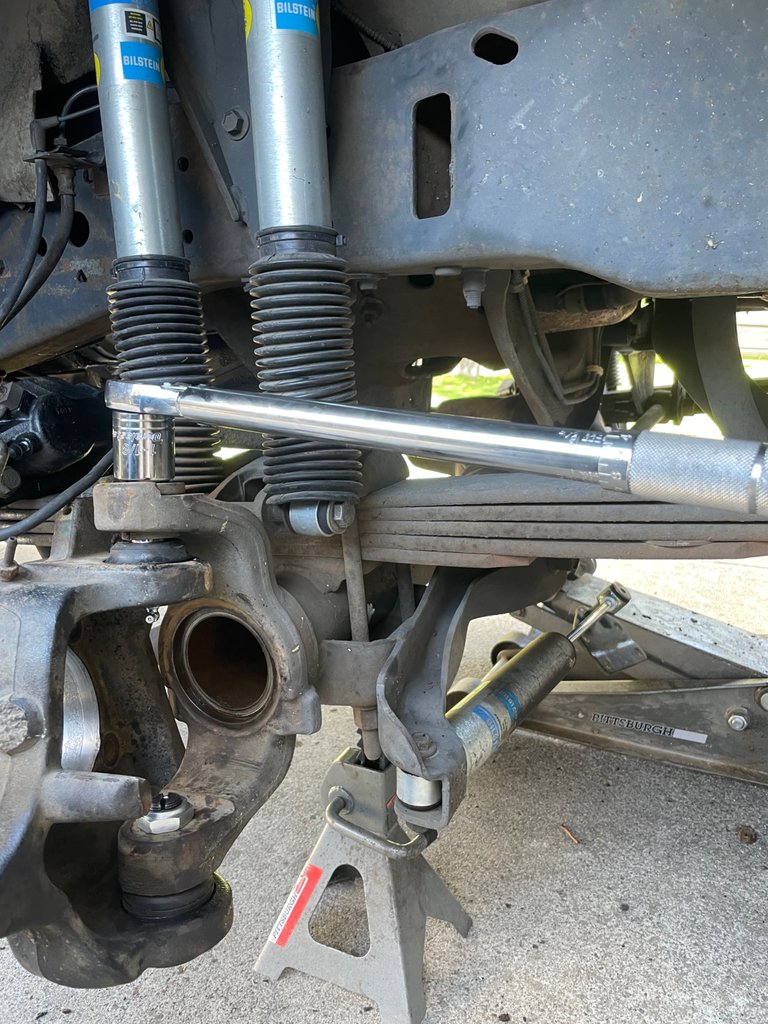
Next is to break the castle nuts loose. The lower is a 1-5/16 inch and the upper is a 1-1/8 inch. These are typically pretty rusted and nasty so don’t be shy… get the little sledge hammer out and start banging away!!
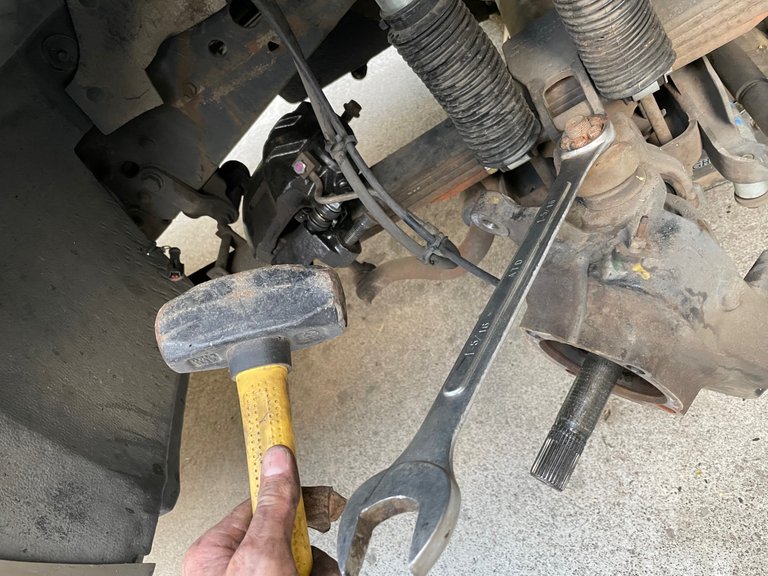
Loosen the castle nuts to the top of the ball joint stud. Don’t remove them completely. Next the tie rod needs to be removed from the outer steering knuckle.
Remove Cotter Key and Castle Nut
Hopefully you didn’t put your little sledge hammer away. Take out some of your frustrations with it by hitting the steering knuckle where the tie rod ball joint goes into it.
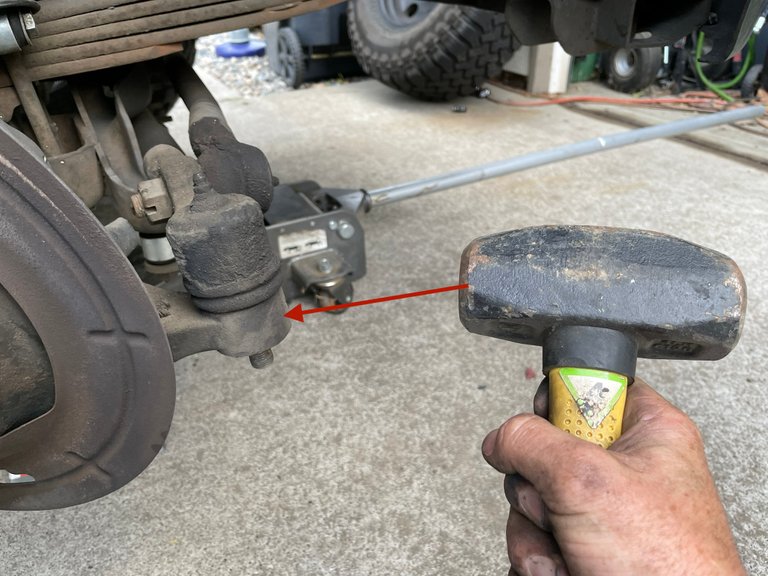
A few good blows with the sledge should knock it loose. Then give that tie rod an uppercut with the sledge to pop it outta there. Now the steering knuckle is free to swivel side to side. Push it all the way to one side and smack the crap out of both the upper and lower parts of the axle tube where the ball joints are seated. Then turn the steering knuckle the other way and bang away again.
The castle nuts are left on for a good reason. After a few blows with the sledge hammer the steering knuckle should drop down and break free from the axle tube. Without the castle nut left on you could possible end up with a black toe nail. OUCH!! It may take a couple hits on top of the castle nuts but most likely it will drop out if you hit it hard enough.
Once the steering knuckle is broke free from the axle tube, simply remove both castle nuts and remove the steering knuckle.
Replacing ball joints does require the use of a ball joint install/removal kit. You can rent these at a local auto parts store or you can do what I did and just run down to Harbor Freight and pick them up.
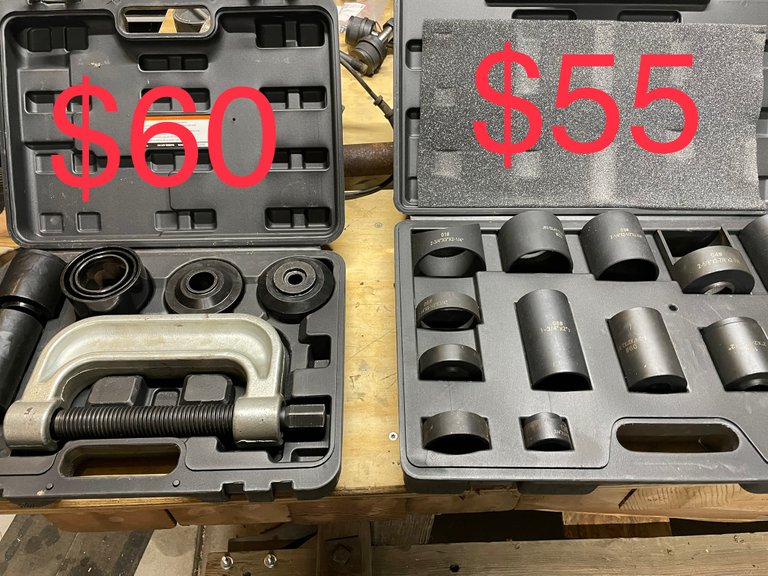
Ball Joint Service Kit ~ Ball Joint Adapter Set
Removing The Ball Joints
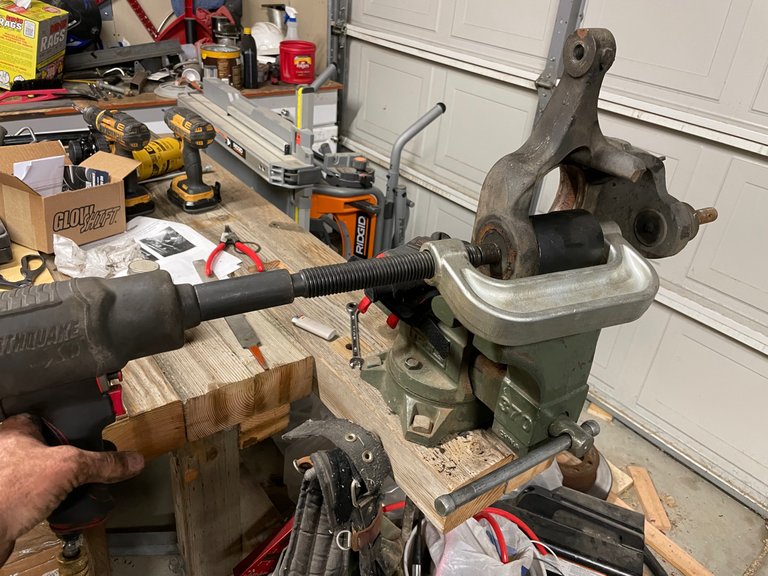
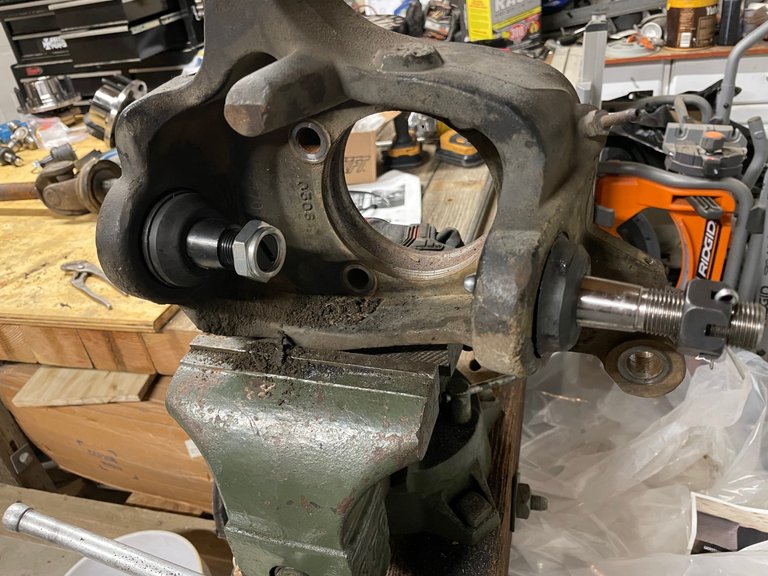
Secure the steering knuckle in a vise. Trust me, it is no fun trying to do this without a vice. The lower ball joint needs to be removed first. Start by removing the snap ring.
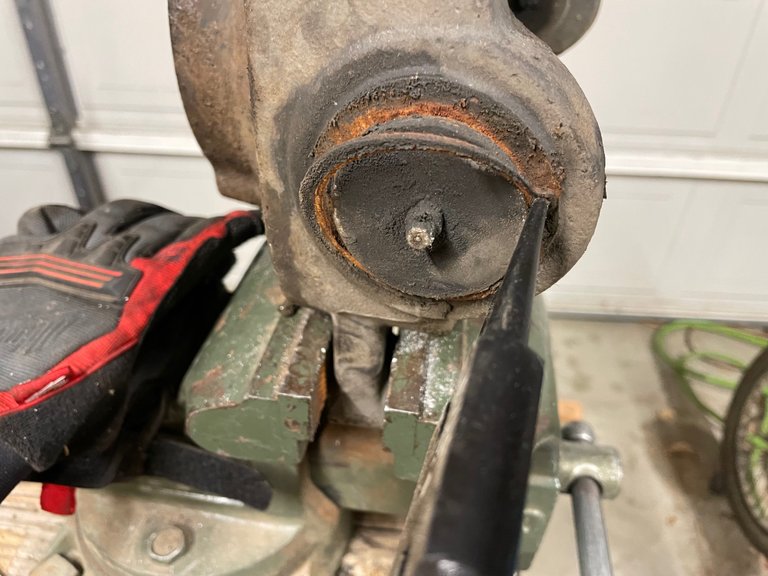
Select the proper adapter that will go over the ball joint. The stud of the ball joint will end up going in the hole of the install tool. I removed the grease zert from the bottom of the ball joint also. This gave me a flat surface to press against. Using an impact driver or 1/2 breaker bar. Start pressing it outta there.
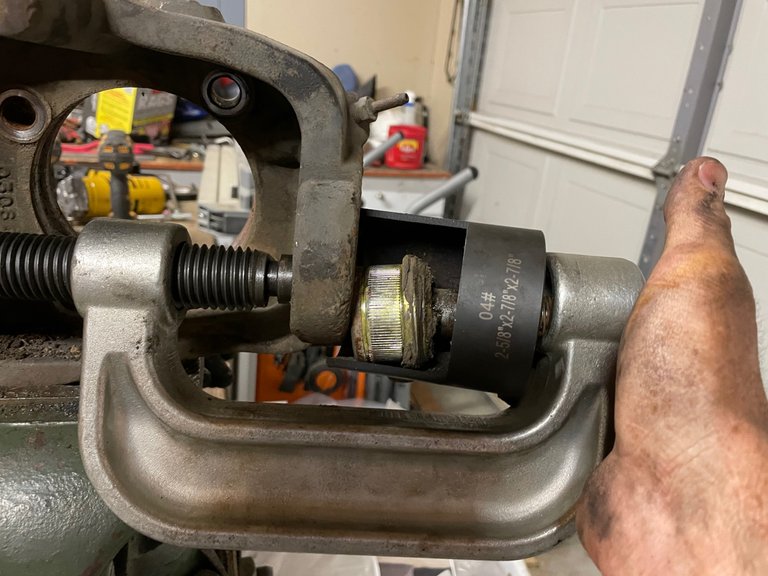
Just keep turning until the ball joint falls out
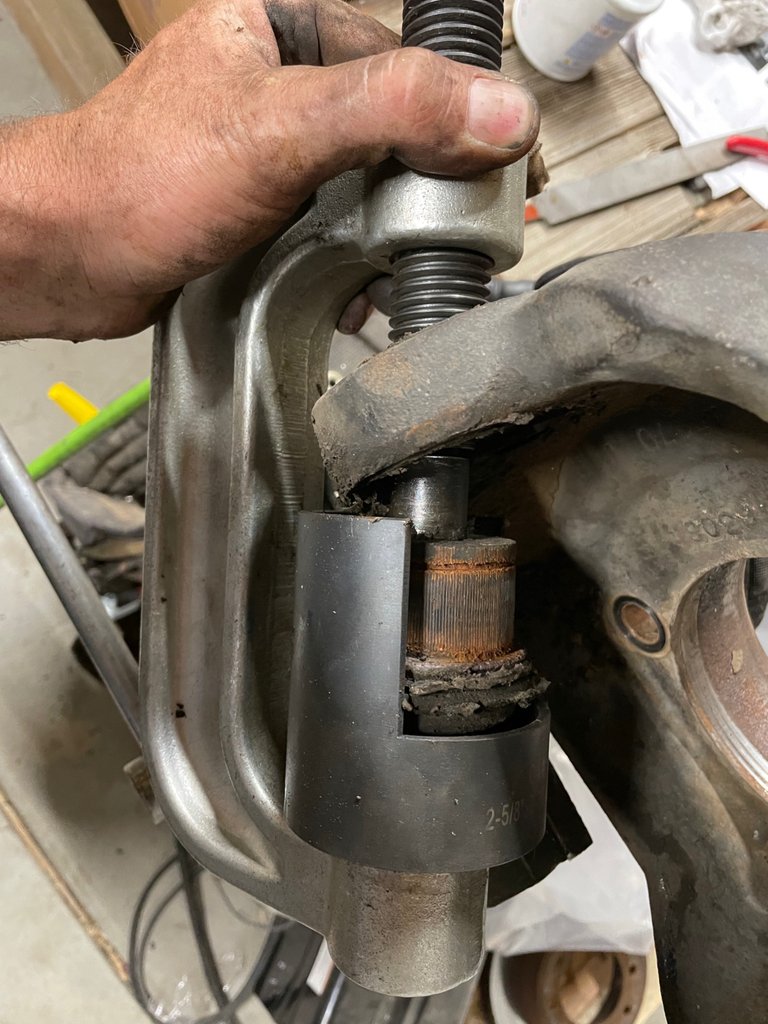
Then stick the threaded shaft of the press tool in the hole left by the lower ball joint. Using the same adapter press out the upper ball joint.
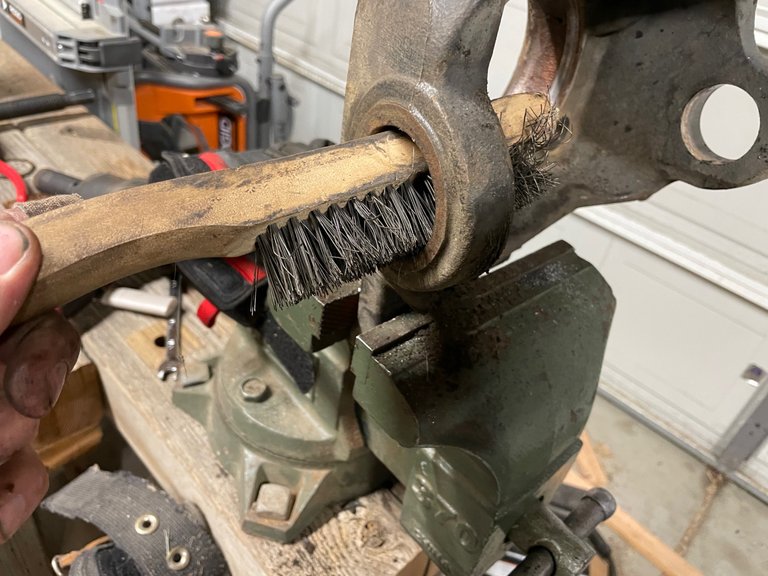
Get a wire brush and clean the hole left from the ball joints really well.
Installing the Ball Joints
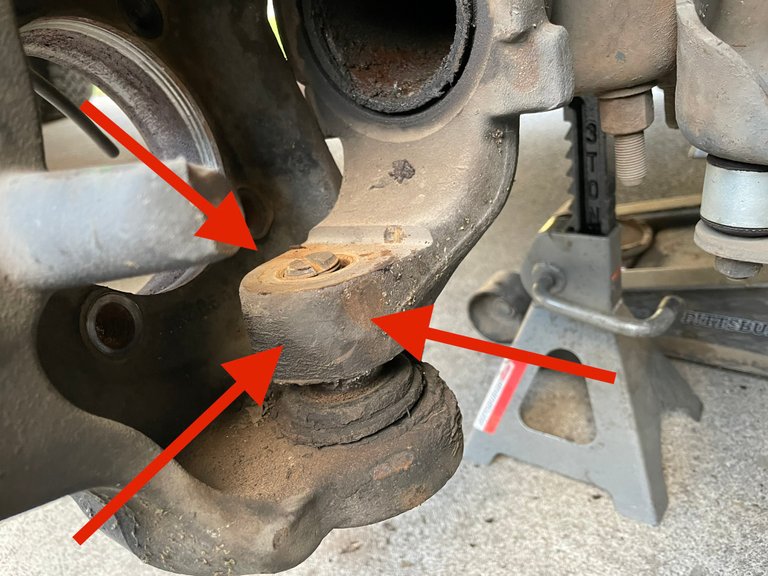
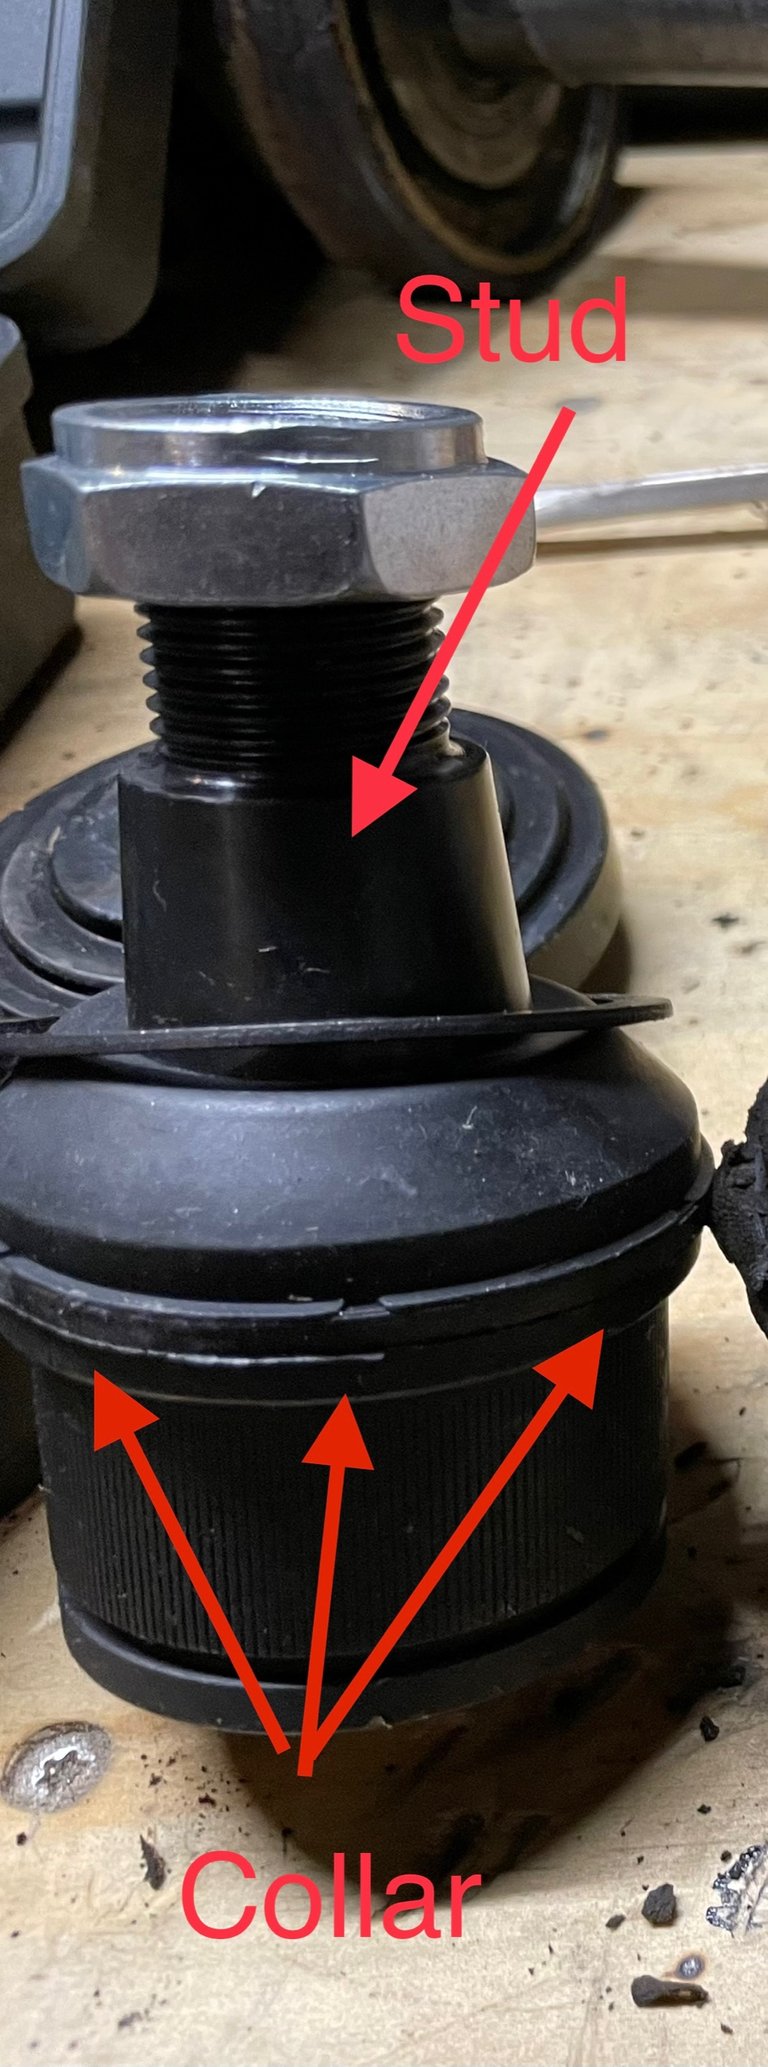
This is where things get a little tricky. Choosing the correct adapters became a bit of a circus. You need to select a cup that is big enough to go around the the bottom of the ball joint. Also you need to find an adapter that is long enough to fit over the stud and press on the collar of the ball joint. You do not want to press on the ball joint stud at all it will damage it. I also removed the rubber boot from the ball joint to expose the collar of the ball joint. I didn’t want to damage it during the install process.
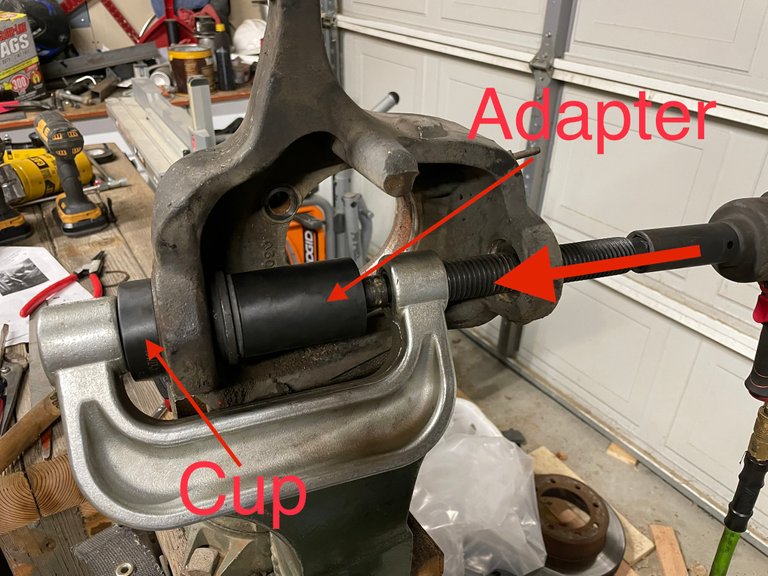
The cup sits in the eye of the install tool and around the opening where the ball joint goes. The adapter has a closed top with an indent for the threaded rod. The adapter pushes on the collar of the ball joint evenly and uses the cup on the bottom side of the knuckle to press against. This is what it should look like when pressing the new ball joint into place.
You will know when the ball joint is completely seated in place when you can install the new snap ring.
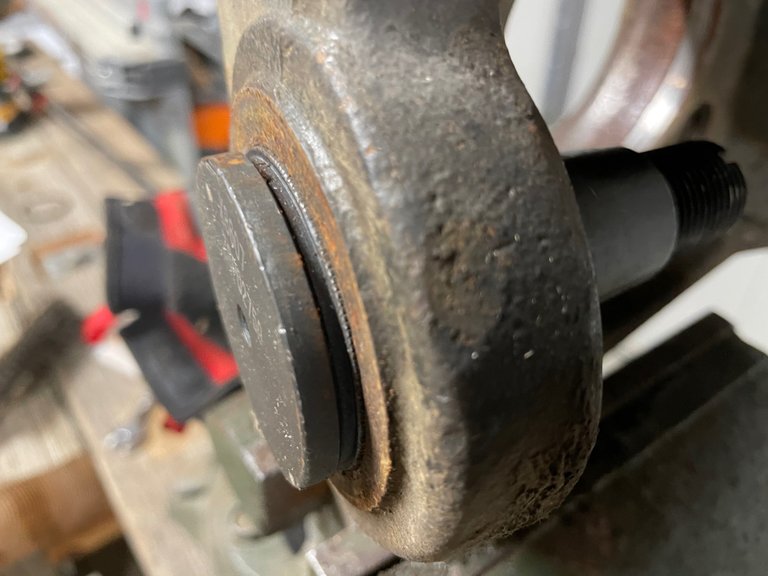
Then install the snap ring and grease zert

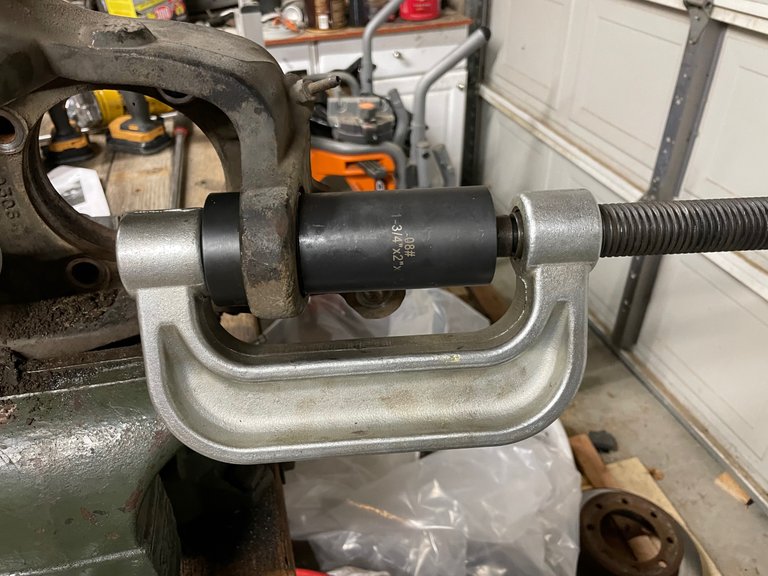
The upper one was a little tricky. I had to partially press it in using a thin cup because the install tool wouldn’t open wide enough. It ran out of threads. Then I was able to put the right cup on and finish installing the upper ball joint.
The upper is completely seated when the collar of the ball joint is pressed against the knuckle. Don’t forget to install the grease zert.
Next it’s time to re-install the steering knuckle to the axle tube. Get your torque wrench out and set it to 35 ftlbs. Torque the bottom ball joint nut to 35 ftlbs. Then torque the upper nut to 69 ftlbs
Tighten the castle nut as needed to get the cotter key in.
To get final torque on the lower ball joint, set your torque wrench at 150 ftlbs and crank that baby down. Once that nut is torqued, take the knuckle and move it side to side to make sure everything feels good and it isn’t stuck. Then re-install the tie rod and torque that nut to 60 ftlbs and install the cotter key
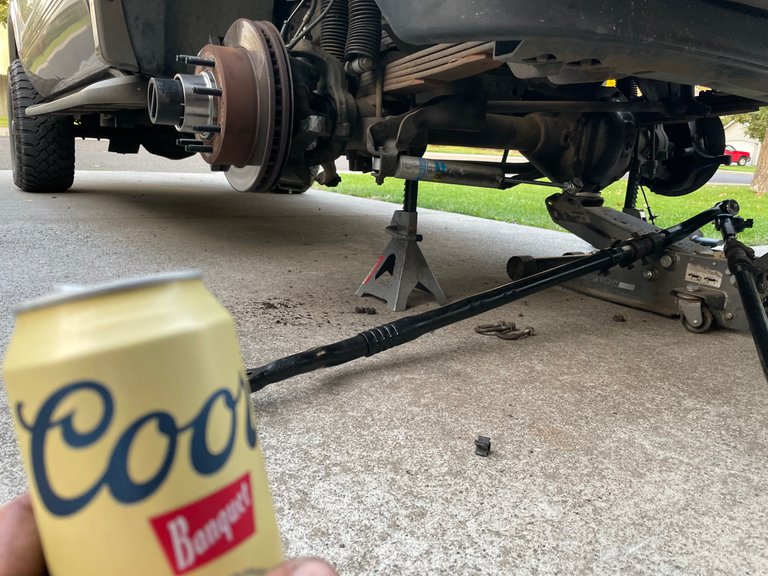
Like mentioned in prior posts, while you have the axle out it’s a good time to replace the u-joint and the vacuum and dust seal. To put everything back to get her refer to Part 2 to install the axle and Part 1 for installing the hub and bearing, brake rotors and calipers, also the wheel and tire. Don’t forget to pump some grease into those ball joints before you go driving away. Then crack a cold one for a job well done.
The final part of this Axle rebuild series will involve changing out the tie rods, tie rod ends and drag link. The final step of the process.

Your Random
Dose of...


You are truly a man's man.
!discovery 43
I'm just a cheap ass and don't wanna pay a mechanic thousands of dollars. There are somethingsI leave to them but I truly enjoy learning how and using new tools. Plus the satisfaction of saying "I did that"
I may only use the tool once but if someone I know needs it, I got it sitting in the garage collecting dust for them. 😉
This was quite some work, few men would have the skill and the will to do this on their own, good for you that you saved those money
It goes way back to when I got my first truck 1985 Nissan. My dad said you break it you fix it... and handed me the repair manual for it. Lol.
I honestly have no idea what a mechanics shop would charge for this whole process but I know I did it at a fraction of the cost. I need to call and see what they would charge… just for fun.
Haha, calling just to check the price, smooth lol.
Well it sounds like your dad was quite a tough guy, I bet it was a fun and scary experience in the same time
I must tell you that I have the utmost respect for people doing the hard jobs, from plumber to mechanic to everything we call dirty jobs , they deserve the money, if only those money would go straight in their pockets instead of paying the boss too much.
You did a good job!
View or trade
BEER.Hey @splatts, here is a little bit of
BEERfrom @rynow for you. Enjoy it!Do you want to win SOME BEER together with your friends and draw the
BEERKING.Great job, here is a !BEER for you to cool down a bit and have a well deserved relaxing rest!!
Well thank you kind sir!
This post was shared and voted inside the discord by the curators team of discovery-it
Join our community! hive-193212
Discovery-it is also a Witness, vote for us here
Delegate to us for passive income. Check our 80% fee-back Program
You are truly an amazing mechanic , with the patience of a saint.
Really detailed post, nice going. But where the heck are your work gloves? Your hands are taking a beating.