
Weekly Journal Entry — Post-Event
Welcome back to my first Weekend Ranked journal series! I have to preface everything that follows by stating that due to considerable struggles in accurately tracking match history and performance on GU Decks, I can't provide as clear a result as I'd hoped. I'll do my best to include estimates based on notes I quickly took while playing games, but it's incomplete.
Big Picture: The deck performed slightly better than expected and experienced surprising shifts in match-ups compared to my 10-match test-run. I was lucky enough to pull a useful card from packs during the run that I substituted in partway through the run. The impact wasn't immediately felt, though. I'll highlight each of these things (and more!) throughout the post, so strap in and enjoy the read ;)
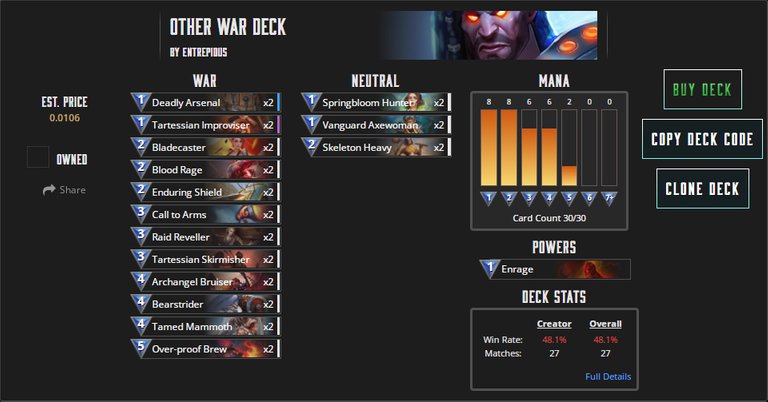
The Deck — Aggro War (Enrage)
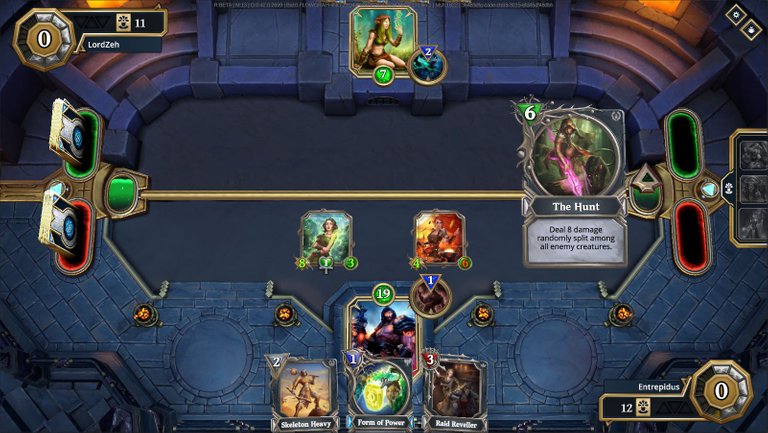
The last GU Decks update shows my rewards as being 11/12/13 out of 25:
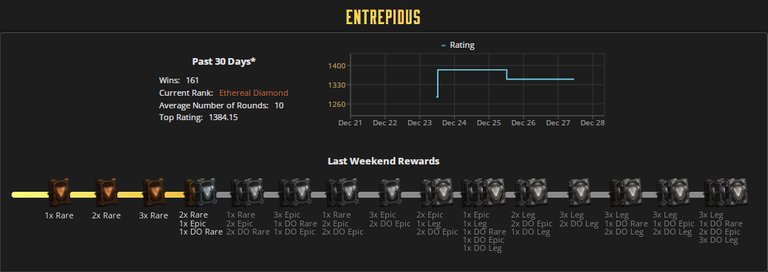
However, I know that somewhere between 6-10 matches never appeared in my match history. As many have experienced, there were several times where GU Decks was completely inactive, and any matches I completed during those periods appear to be missing. Unfortunate >:(
What I do know is, I documented a result of 18/30 for my first 30 games (even poking up into Mythic a few times before being knocked back down to Diamond), but I was only tallying wins and losses rather than the order they occurred in. I was focused on making sure I played enough matches to earn maximum GODS while also taking a stab at 30 wins for the extra pack.
Even so, what was logged is still informative.
Match Results

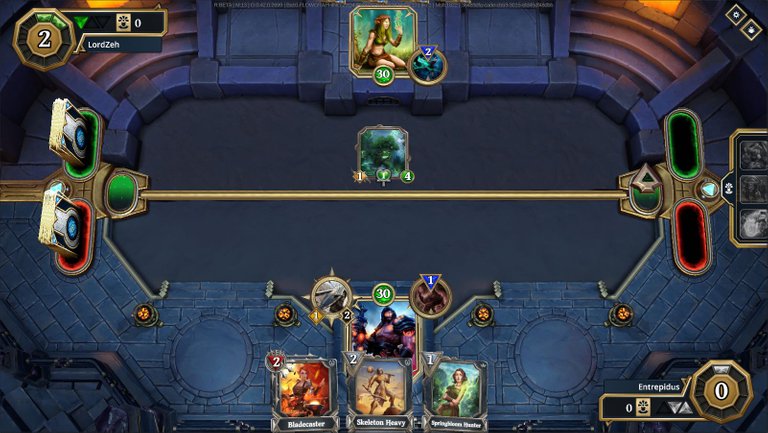
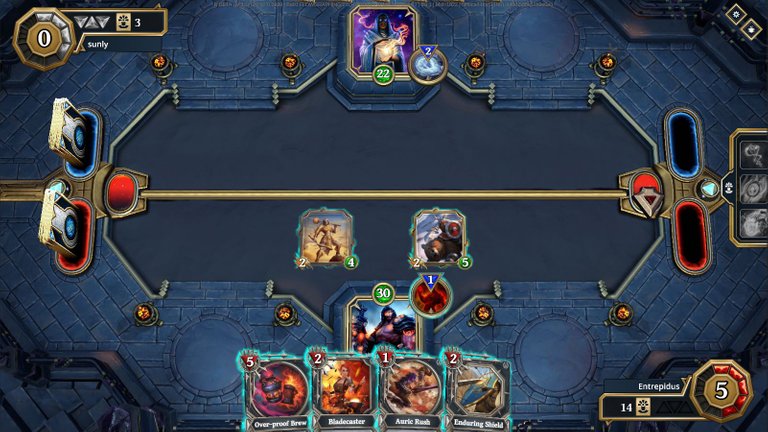
Here's the deck I began the run with (for those that missed the pre-event post), but we're going to focus on its match history:
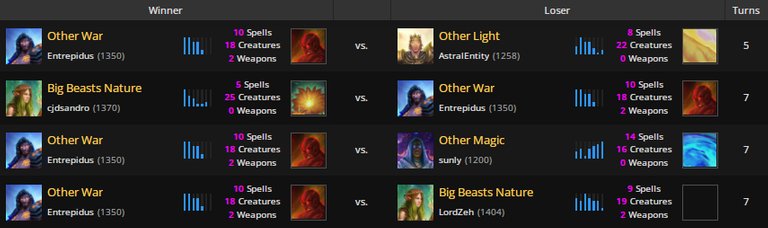
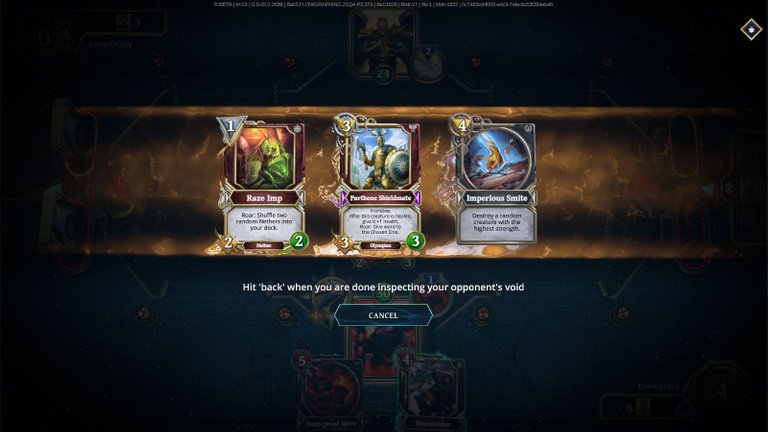
The run began 3/4 with a 50/50 trade against Nature, but this is where all match history ends for this deck. My notes show that I obtained 8/14 (well on track for my original goal of a 56% win-rate) before I paused to open packs. In one of them, I received a second copy of Tartessian Improviser:
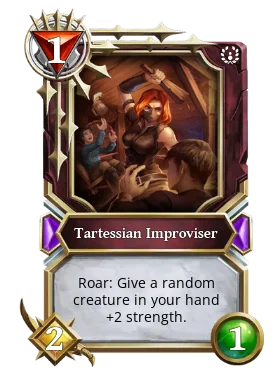
After my test-run, I briefly spoke about the possibility of upgrading the deck after the event using my earnings, but—with a pair in hand—I decided to go ahead and substitute a pair for 2x Auric Rush:
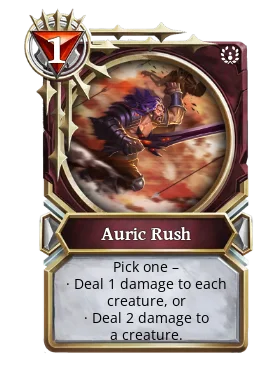
My reasoning: During my first stretch of games (and even in the test-run), I found myself wanting to save Auric Rush as removal for situations that usually didn't come to fruition. More specifically, I was more likely to use Vanguard Axewoman and Archangel Bruiser for targeted removal given that they had strong synergy with Enduring Shield that could sometimes yield 1:2 trades.
Auric Rush only yielded 1:2+ trades if there were multiple enemy creatures with 1 Health, something that was more likely to happen when I had the mana to cast Over-proof Brew, instead. For that reason, Tartessian Improviser could improve my Blitz removal depending on when and how I dropped her on the board.
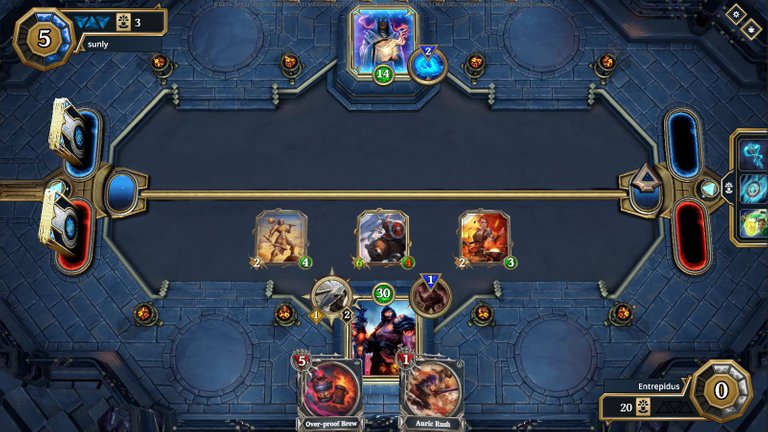
For example, let's jump ahead to the start of a match I played shortly after making the switch:
Even if my opponent had Selena's Mark (Deal 1 to random enemy Creature, Heal 1), I doubt they'd want to use it in response to this opening play. For one, it uses up their mana for the turn on a 50/50 chance of actually killing the Tartessian Improvisor, and even if successful, I'm going to be swinging for 3 after I Enrage the Springbloom Hunter.
Also, unbeknownst to them (and you, because you can't see her stats) my Vanguard Axewoman is now a 4/2. No matter what creature they deploy, I should be able to kill it. This is especially important given how strong opening Nature plays like Marsh Walker + Shieldbearer can be in securing board control. My Enraged 5/1 Vanguard Axewoman would have no problem bumping that off the board, then I'd proceed to clean house.
Note: This aggressive position only works when going first. I use a different strategy when going second.
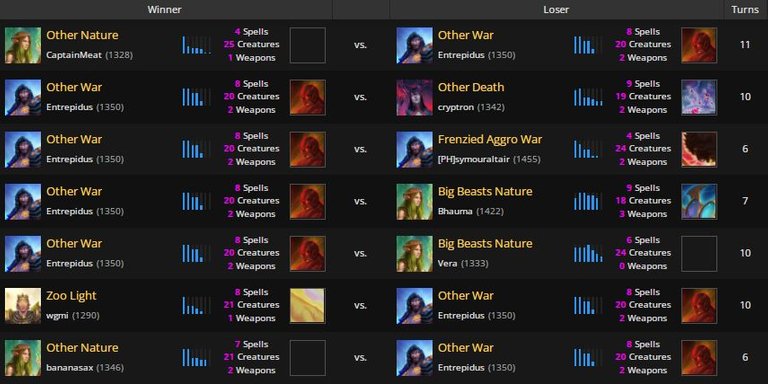
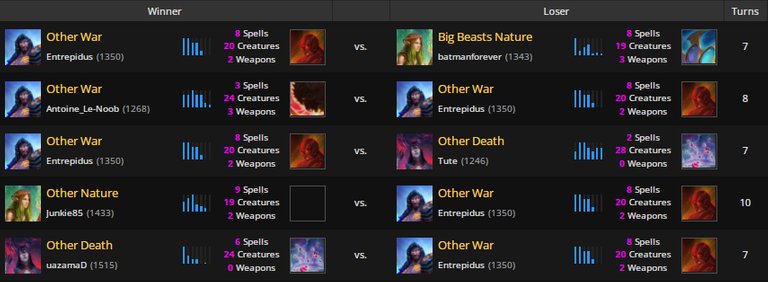
At first glance, the new deck appears to have done poorly. This is because the first several games I played after the switch are missing where I went on a short-lived winning streak (3/3) to advance into Mythic (where I was promptly rejected). This means that my record prior to this stretch was 11/17 (64.7%)

Breakdown of Visible Matches:
- Death 2/6 = 33.33%
- Deception -/- (zero matches played)
- Light 1/4 = 25%
- Magic 1/2 = 50%
- Nature 9/14 = 64.28%
- War 3/5 = 60%
- OVERALL 16/31 = 51.61% (w/3-win streak added in, 19/34 = 55.88%)
Also, the first 13 visible matches with this deck add up to 6/13 (17/30 when added to previous amount). This is one off of my 18/30 tallied matches, so I can only assume there is another match missing somewhere in the mix.
Regardless, even when only tabulating visible matches, the deck achieved a >50% win-rate and proved capable of punching up into Mythic on three occasions. My opponents ranged from low 1300's to mid 1600's, so it's safe to say that the deck is competitive in Diamond, as is.
Regarding each match-up:
Death
The majority of my losses involved me trying to sneak damage around boardwipes with Archangel Overkill splash or pumping up zombies that were given to me by sleep decks. Because I'm not currently running any relic removal, I was entirely at the mercy of the various exploits Death gets easy (unlimited!?) access to through their relics. I typically won when they didn't get the relic down by turn 3, and I lost if they did. Sometimes I also lost if I didn't go first with an aggressive starting hand.
Considering how many Death decks ran Siren of the Grave (A: All enemy Creatures go to sleep) with various echoing effects, Svart Basilisk (4-cost 4/4, R: Remove Sleep from friendly Creature, -2 Durability to opposing Relic) could be a worthwhile inclusion in the deck.
Deception
Surprisingly, even amongst the games not documented by GU Decks, I never matched against a Deception deck. This suggests that either they've momentarily fallen out of the meta, or RNGesus spared me the emotional trauma of seeing my own cards used against me.
Light
As expected, Light was a particularly rough match-up. I didn't face Light enough to say that this deck simply can't cope, but Light won whenever they used Health Ramp. My deck is aggressive starting turn 3-5 while many Light decks start pumping health from the first creature drop. Even if I managed to wipe the board early on, by the time my creatures began their face damage frenzy, removal was flying all over the place.
I usually found myself stuck trying to get my creature Strengths to 3 in order to avoid losing creatures to Light's Levy at 2 Strength or Imperious Smite/Purification Filter at 4 Strength. This was particularly difficult to do, as many of my creatures passively pump themselves. I need more matches to hone in on specific cards that are weaker when facing Light, but my lack of offensive relics could be contributing to my struggle in controlling the board. A Blitz relic might be necessary for knocking stronger Light support creatures off the board.
This is particularly true of Watchful Hound (3-cost 3/3, R: Give an enemy Creature +10 Order, A remove said Order). Having a 3-Strength relic could be a potent answer to this strong source of Light control.
I've included my single win against Light, below, to demonstrate what happened when Light didn't use the usual health pump strategy.
Magic
I need more match-ups to form an opinion, here, but I've included my winning game below.
Nature
Given my previous concerns about this match-up, I can honestly say that Tartessian Improviser provided the greatest impact for the deck in these matches. Big Beasts frequently found themselves rather vulnerable to my deck if they didn't open up aggressively enough.
A major commonality in my losses was actually RNG removal hitting exactly right multiple times in a row for a sudden flip in board control, or opening so. Dang. Fast! That in going second, I couldn't get enough creatures down to avoid losing everything I played to removal and free kills by stronger creatures.
War
The only thing I have to say about this match-up is that when I lost, it was always because of relics. Always. Blade of Styx and Ramshackle Hatchet are priced exactly right to allow trading face damage for board control precisely when I usually begin to snowball. Their 3 Strength attacks are just enough to ensure uncontested clean kills during the first few turns.
Going back to Death decks, even though I won more of my War match-ups than I lost, I believe I could shift things to a 80%+ win-rate if I included Svart Basilisk.
Big Beasts Nature Counter
Now, let's talk about the biggest surprise of this deck before we move on to full-match analysis: Countering Big Beast Nature decks.
Consider my options on turn 2.
We already know from earlier that Tartessian Improviser can facilitate a strong opening hand, but starting with Enduring Shield is similarly flexible if I have a Vanguard Axewoman in hand. The previous example didn't have Selena's Mark, but watch how its value can be undermined.
Skeleton Heavy is likely going to live, if played, but I don't want to give my opponent free damage on it or waste my Protect charges needlessly.
Drop Vanguard Axewoman and Enrage her. Yes, she's now exposed to Selena's Mark, but that's exactly what I want.
Shield slam that tree to push it into the kill zone while Protecting your "removal".
Kill the tree and watch your opponent agonize over what to do.
Oh, they immediately sniped her? Perfect >:)
Tempo is an extremely important part of Gods Unchained. You need to know when to do things and when not to do things. In this situation, sniping my Vanguard Axewoman deprived my opponent of an action. The board is now reset to its turn 1 state, but I have two more mana than I did before. I've effectively stalled my way closer to my deck's most effective mana range.
I drop Skeleton Heavy and consider my options.
Shielding the Skeleton Heavy is the most logical because Nefarious Briar, Nature's 4-cost relic removal is playable, now. It ensures I don't lose the charge while also making any form of removal inefficient. I have solid reactionary creatures in hand to remove whatever my opponent plays, but if they stall out, Tamed Mammoth is going down.
I go on to win this match (which isn't in the dang match history unless it was the "???" Nature player), but I'm stopping the example here. On to the matches!
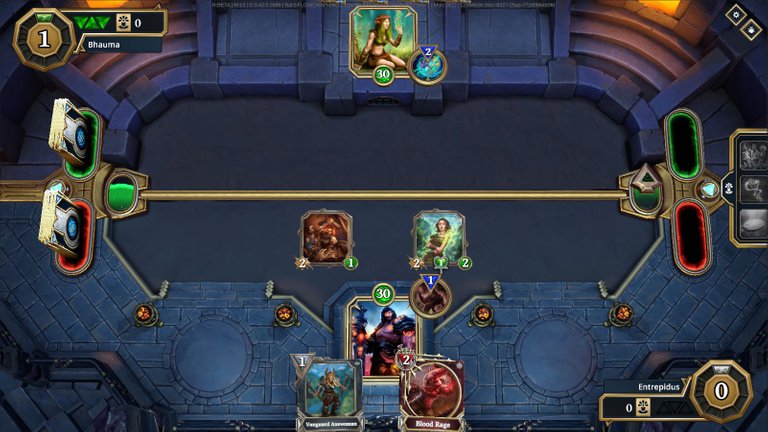
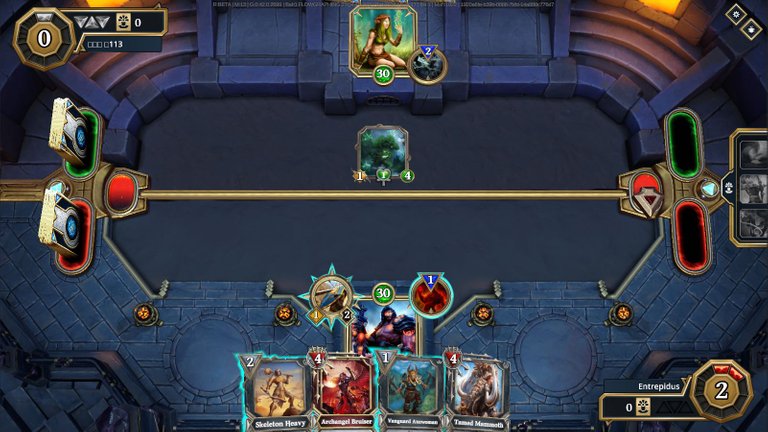
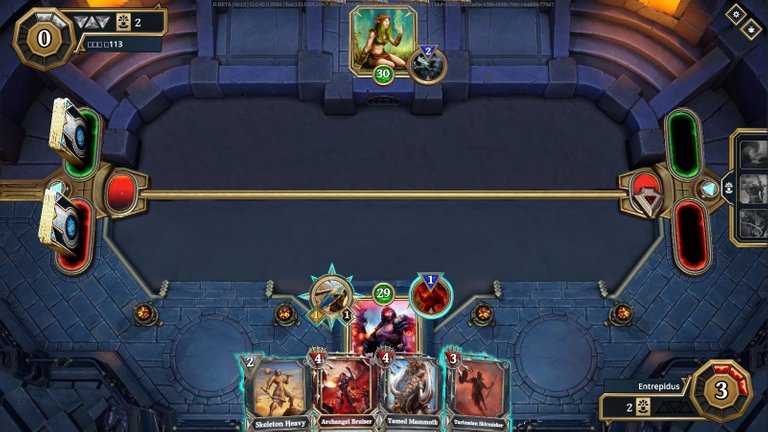
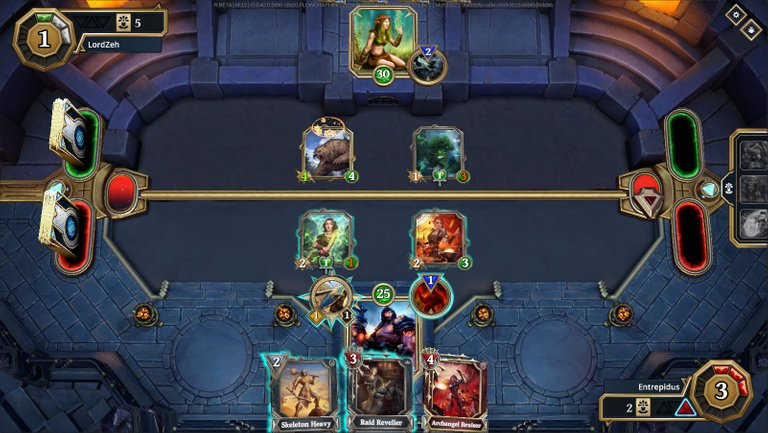
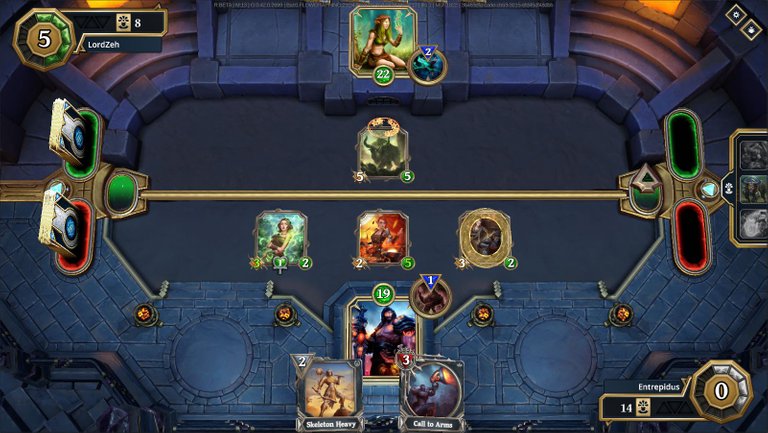
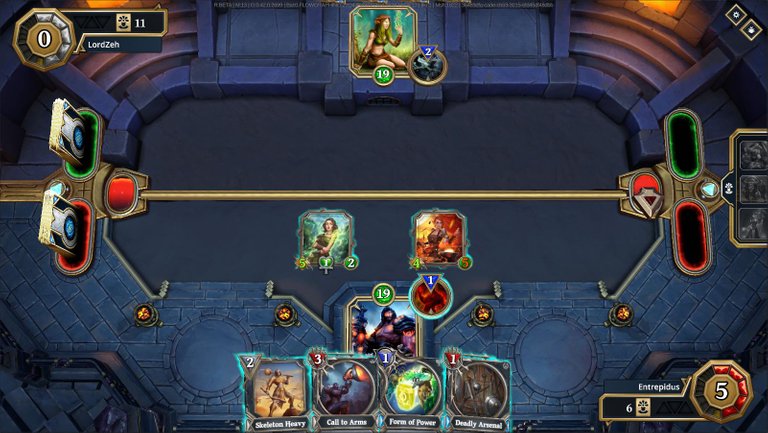
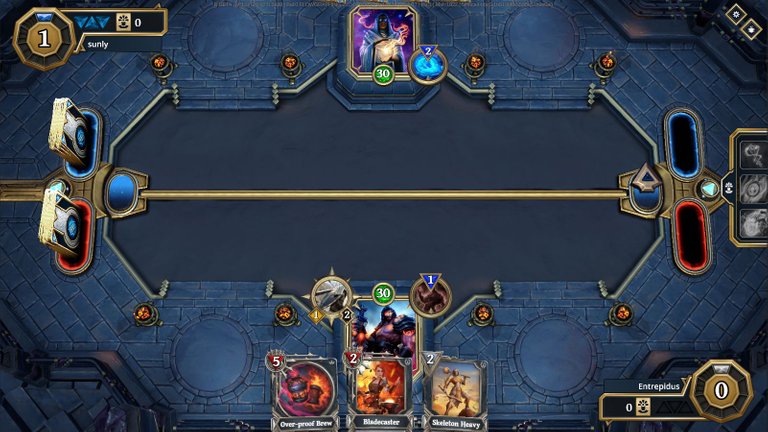
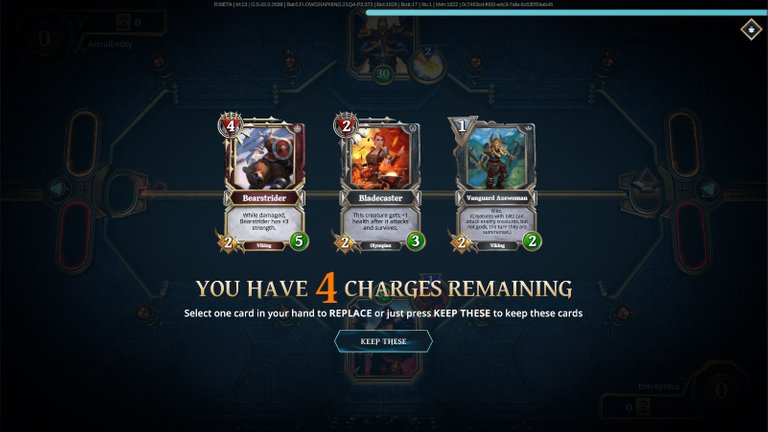
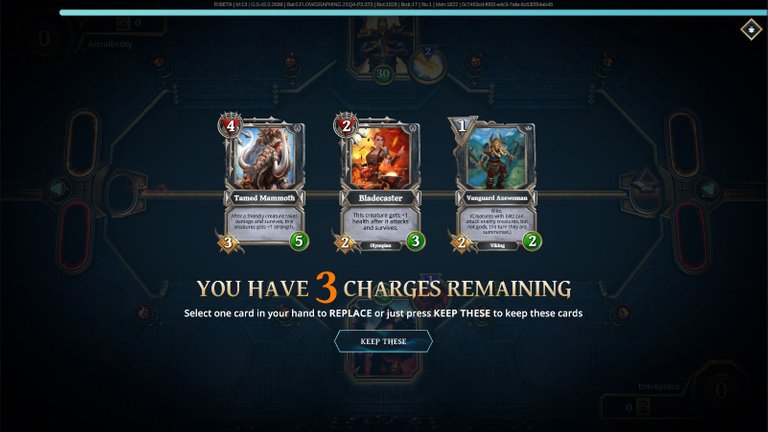
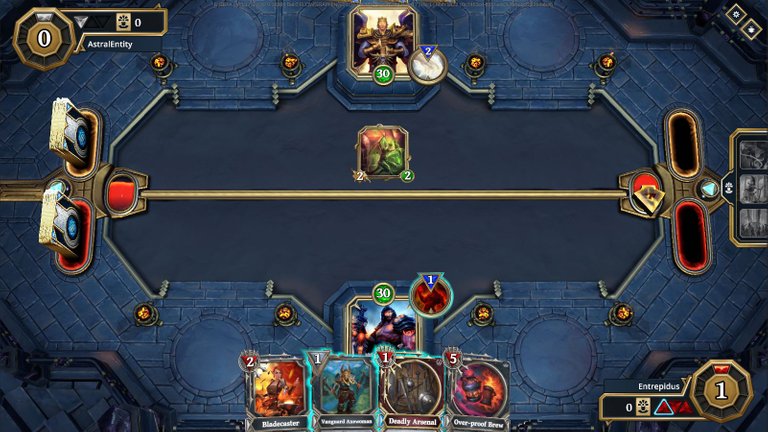
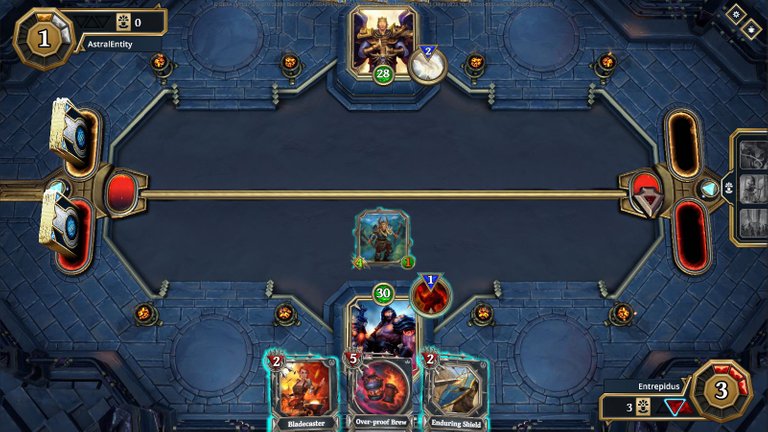
Example 1 — Big Beasts Nature

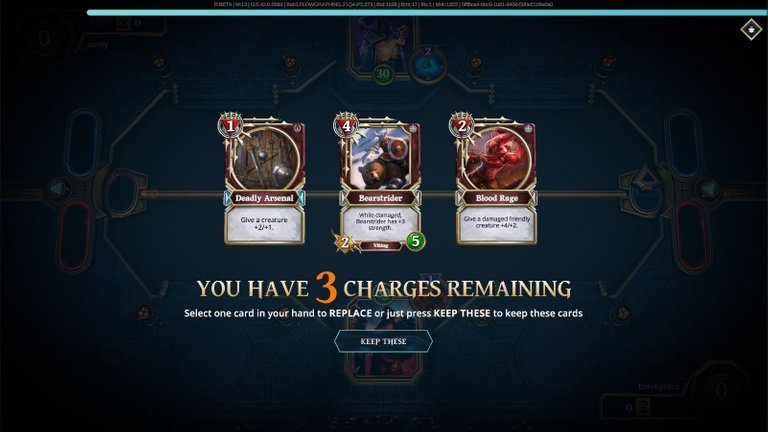
Over-proof Brew is the clear mulligan choice, here.

This seems interesting, but remember what I said about Auric Rush? I don't like using it too early because it feels slower than my alternatives. I'll mulligan it in search of more creatures.
NOTE: This match was from before I swapped in 2x Tartessian Improviser.

I've got a second creature, but I know I'm facing Nature with Selena's Mark. Deadly Arsenal is going to make for inefficient trades early on (Nature creatures are stat-heavy), so I want to push for a third creature.

Just my luck! We've got Skeleton Heavy, so I have multiple options for reacting to my opponent.
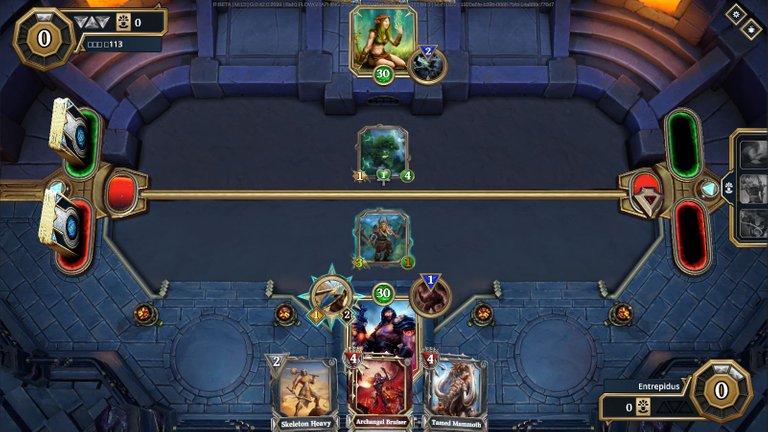
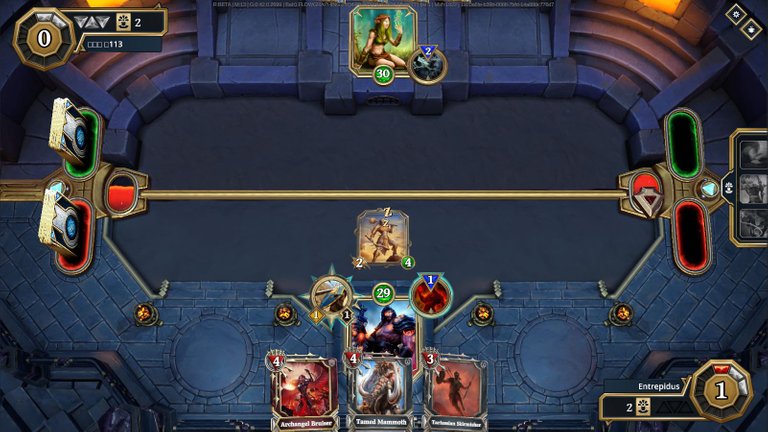
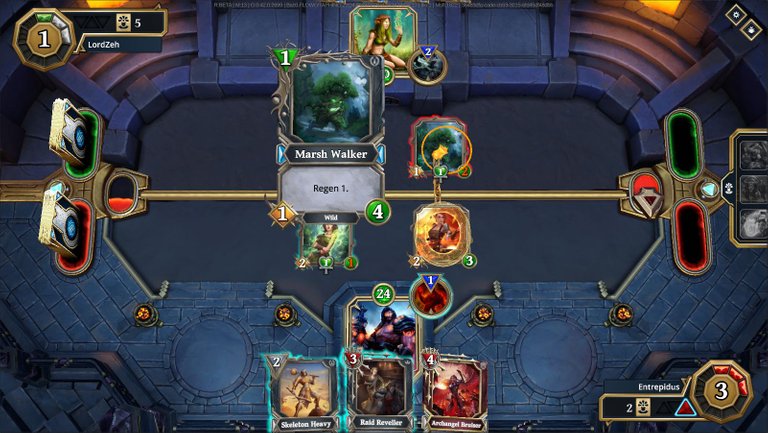
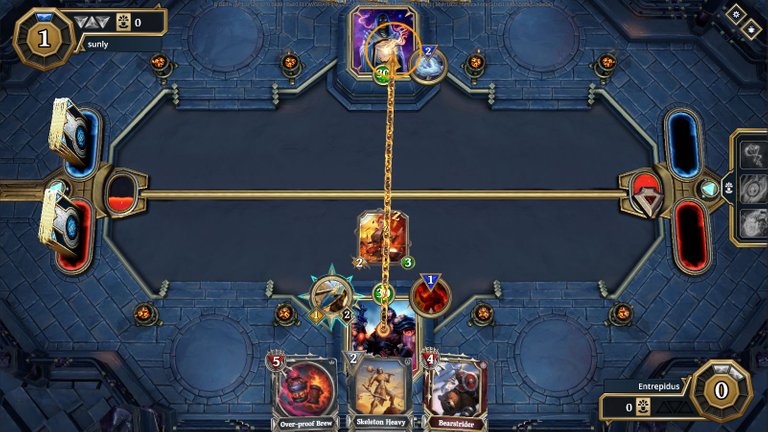
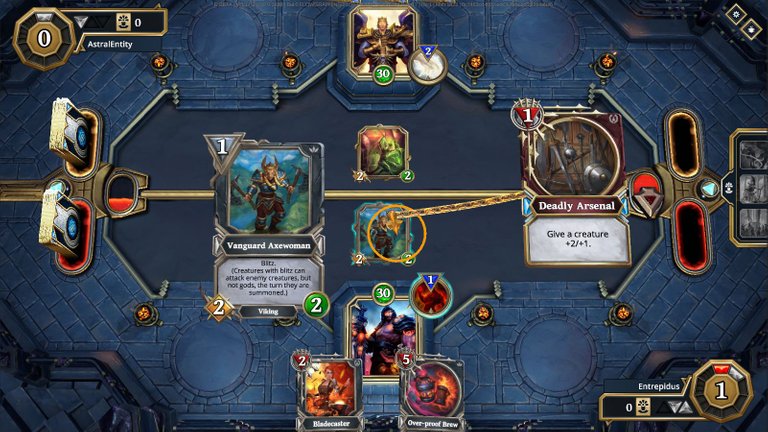
As you saw in my earlier example, drawing an Enduring Shield opens up multiple options for tackling that dang Marsh Walker. I drop it on the board and prepare myself for whatever face damage I'm about to take.
A Rabid Bear follows the Marsh Walker into battle, and my opponent swipes for my face. While it's clear that I played and protected Springbloom Hunter before dropping the Bladecaster, let's talk briefly about why.
Selena's Mark makes anything with 2 Health vulnerable to death by Marsh Walker. By Protecting my 2/2, I'm ensuring that should my opponent try to use Selena's Mark, it won't let Marsh Walker kill anything. Instead, Rabid Bear is the only issue, but if it manages to kill something, I can respond by killing it with a newly Protected creature.
I'm in a very defense posture, here, but RNGesus could ruin things for my opponent.
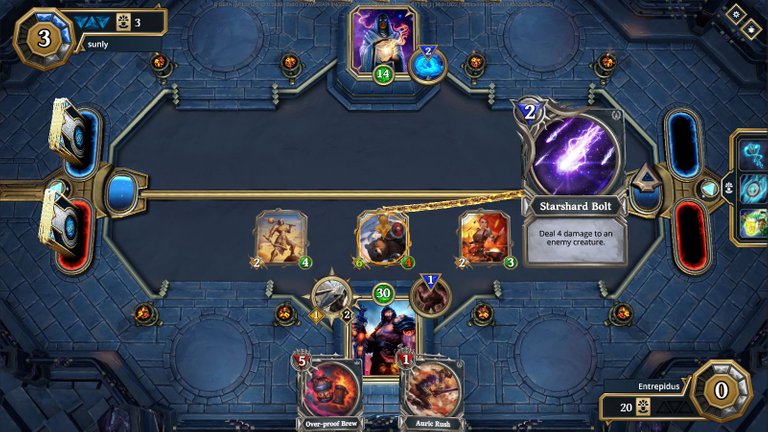
Sure enough, Selena's Mark hits my shield, Rabid Bear misses a kill (ouch, my face!), and Marsh Walker hits my Springbloom Hunter (probably a mistake). Hitting her does prevent me from Enraging her, but I didn't want to, even before drawing the Archangel Bruiser.
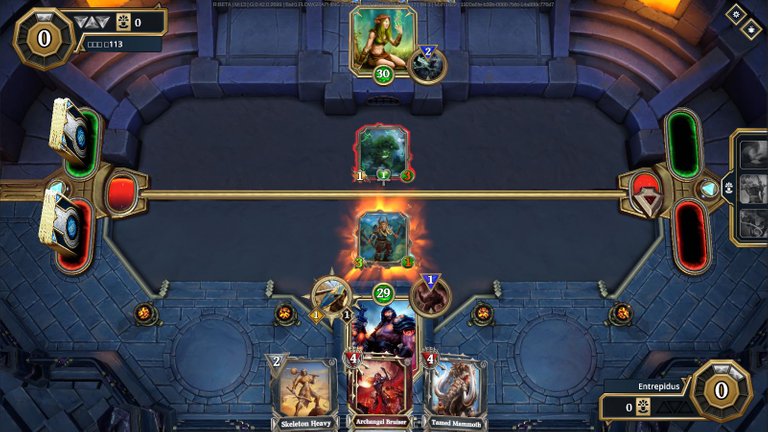
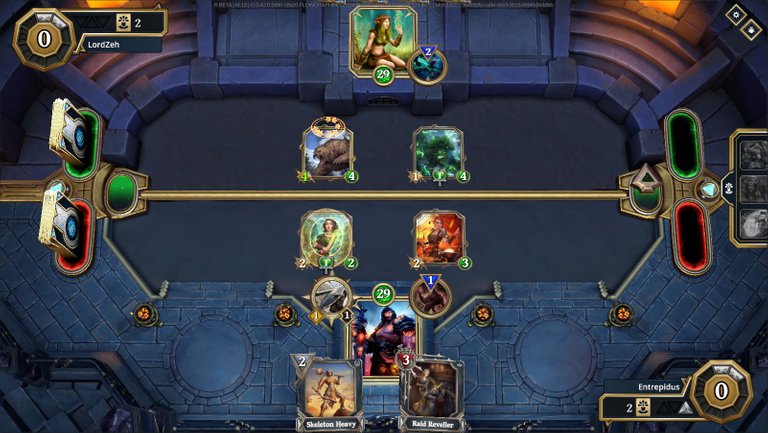
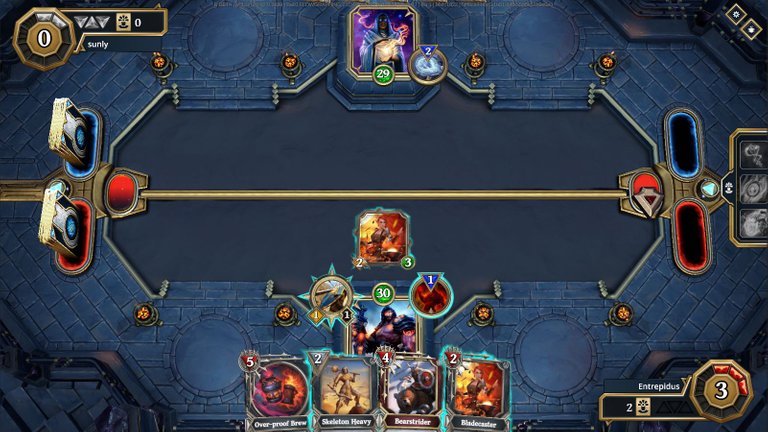
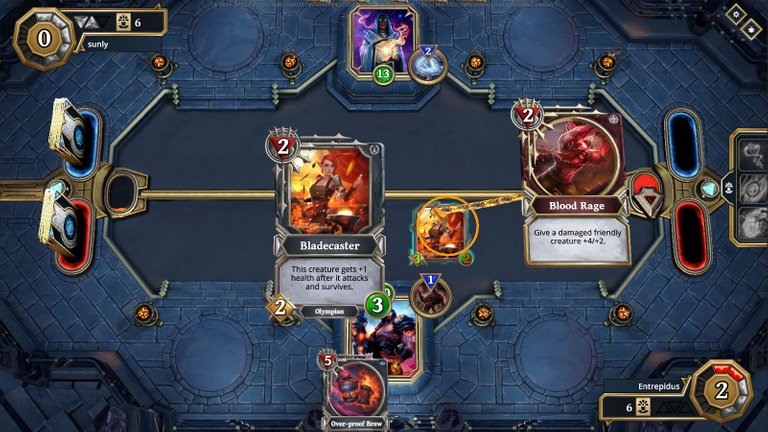
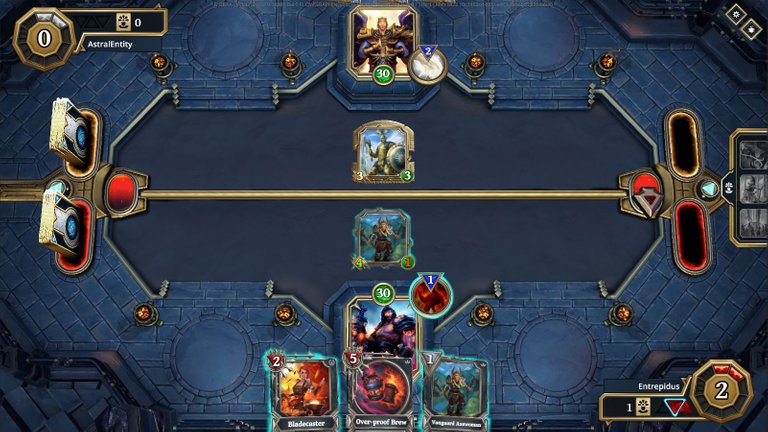
Now, let's walk through how I seize board control. First, I shield slam the Marsh Walker to push it into my Bladecaster's threat range. She gets Protected and we get a free kill.

Next, I need Frenzied to grant Archangel Bruiser Overkill (for 1 extra face damage after killing the Rabid Bear), so Springbloom Hunter throws a jab.
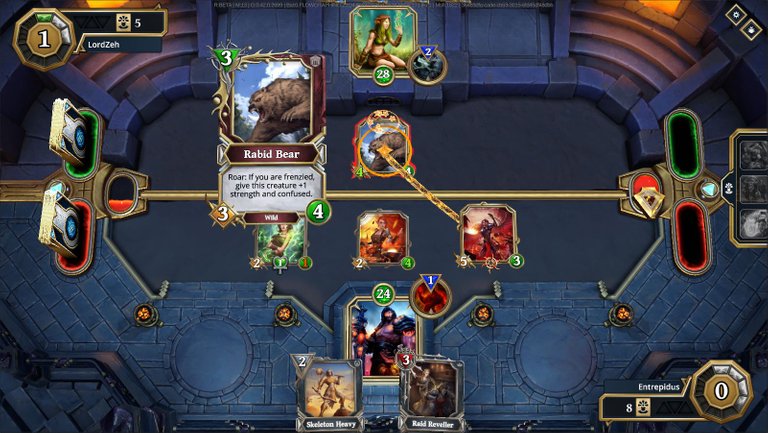
Archangel Bruiser enters the board swinging, and I get in an extra point of damage to boot. At this point, the Nature player is on defense if they can't drop multiple creatures capable of surviving my attacks.
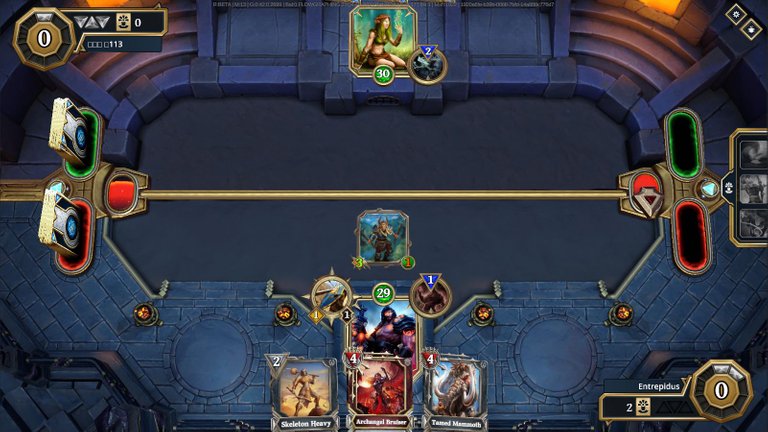
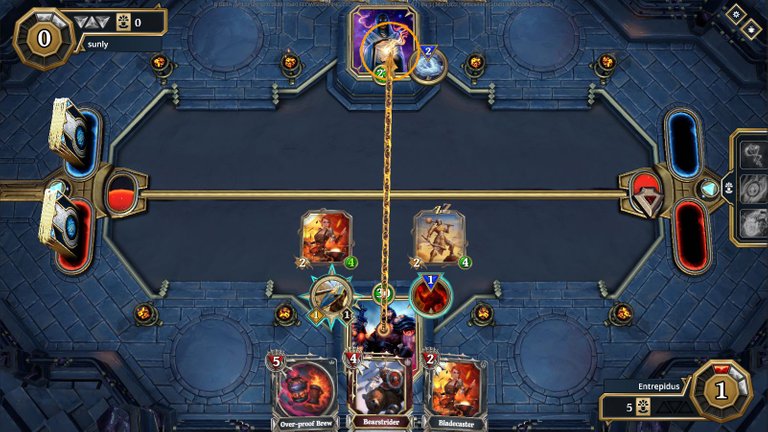
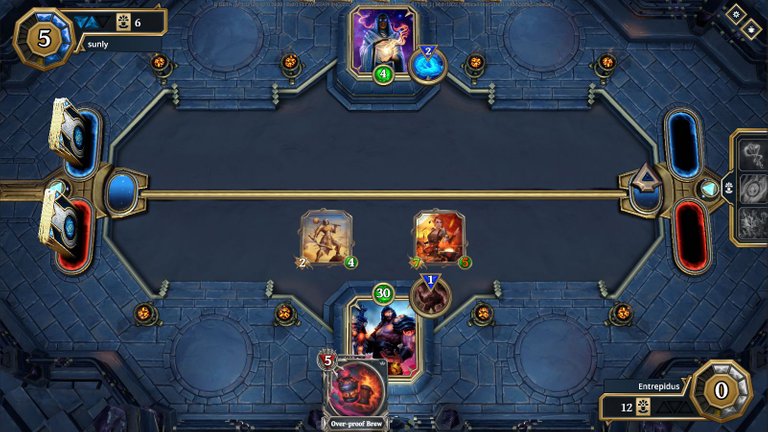
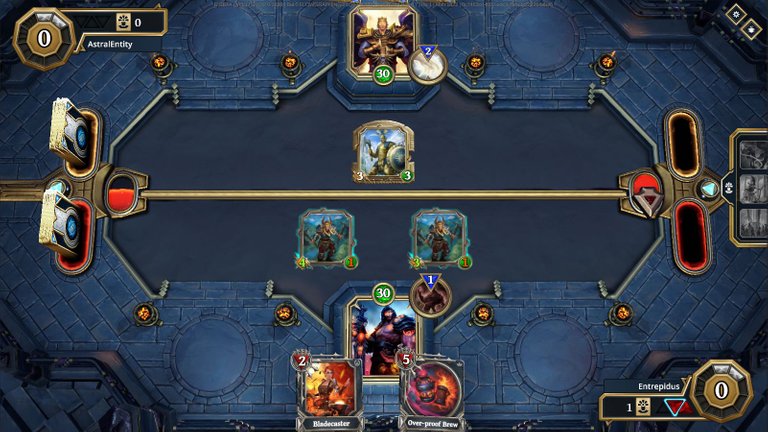
Overgrown Rhino hits the board, but it's not very threatening. Why?
Raid Reveller will kill Nature's big beastie if my opponent doesn't have mass removal to respond with. Worst case, I lose two creatures in the trade, but RNG would need to land exactly right for that to happen. It's a risk, but I can only play the numbers when facing Nature.
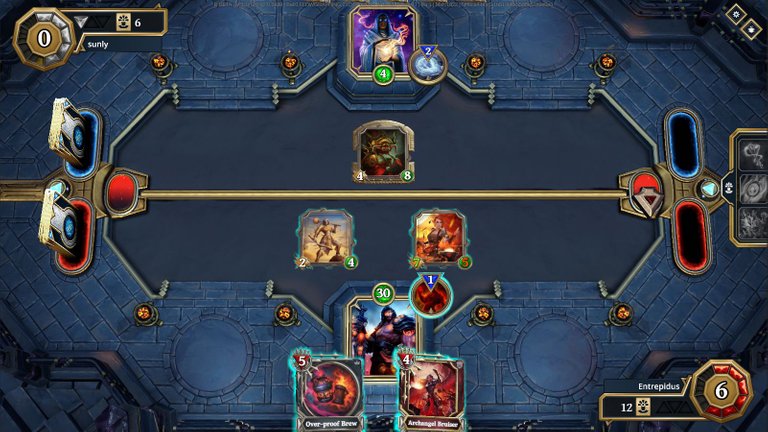
Oddly enough, even though Selena's Mark was able to remove the shield, my opponent didn't even try to swing with Overgrown Rhino (another mistake). They drop a Rabid Bear, which would have been threatening if I was down one of my creatures.
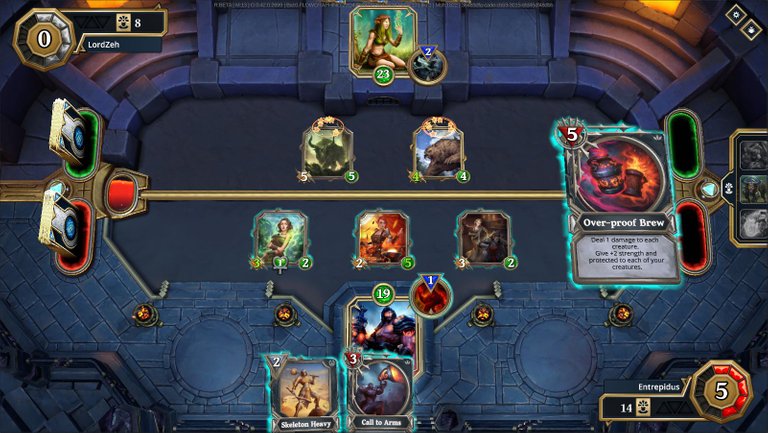
Instead, I'm instantly playing the topdecked Over-proof Brew.
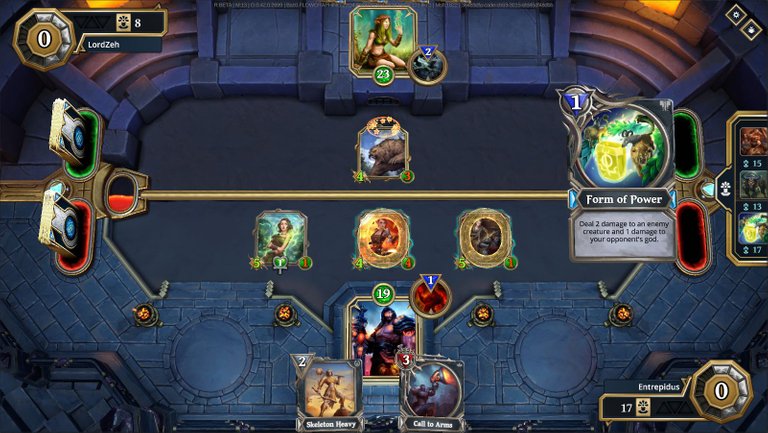
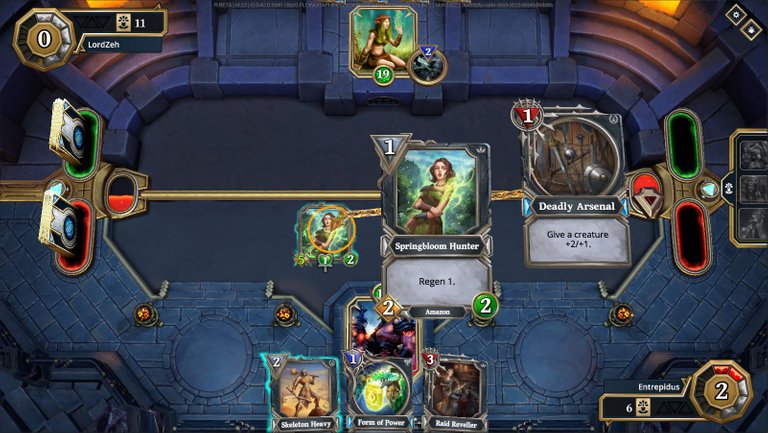
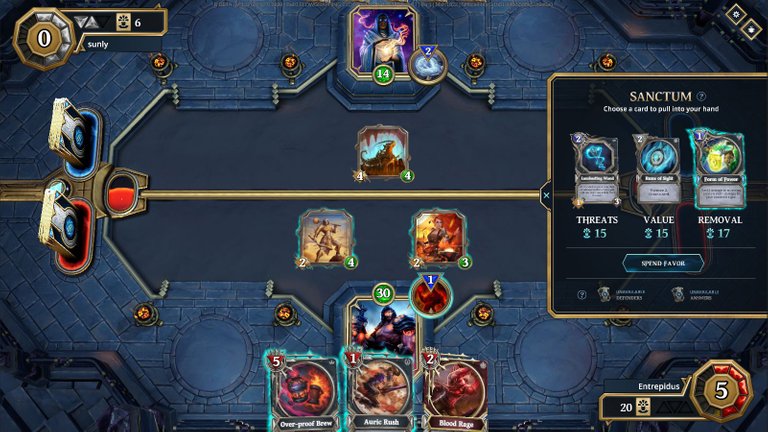
I kill the Overgrown Rhino with Springbloom Hunter knowing Regen will lift her out of Selena's Mark's threat range, and I pause to pickup Form of Power from the Sanctum to prepare for my next turn.
Bladecaster cleans up, and I leave Protect on Raid Reveller to ensure Selena's Mark isn't killing anything without help from another card.

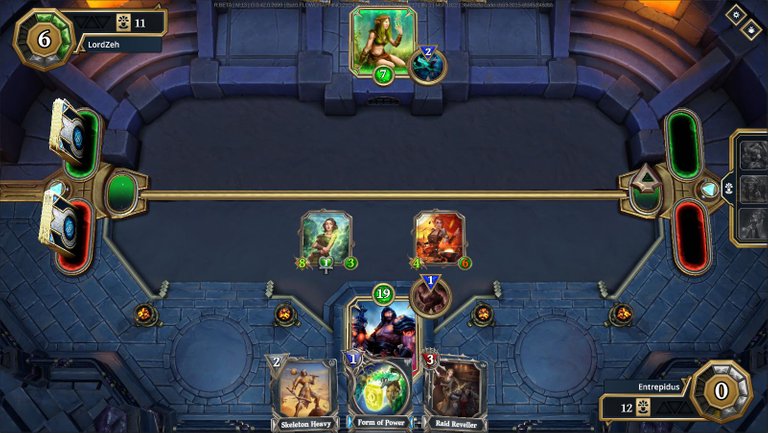
My opponent plays Lightning Strike which. . .
. . . hits the Raid Reveller. Ouch! Selena's Mark proves RNG means nothing to Nature and cleans up. I have control of the board, but Hunt is going to be possible starting next turn.
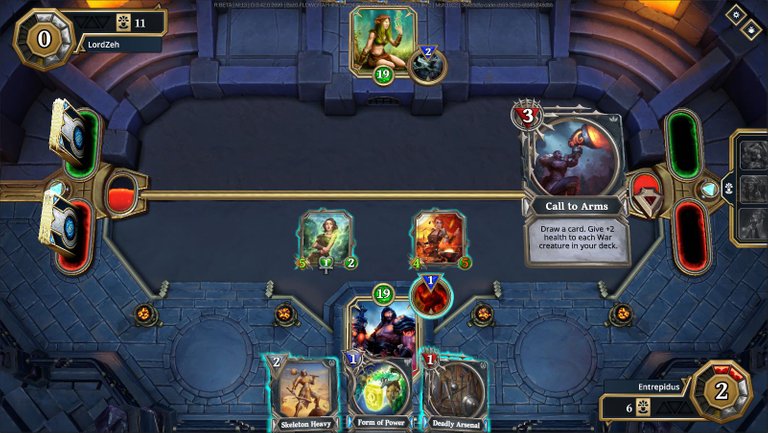
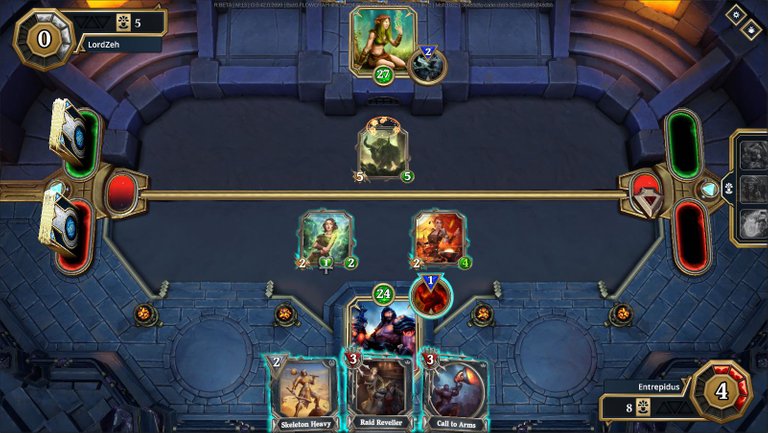
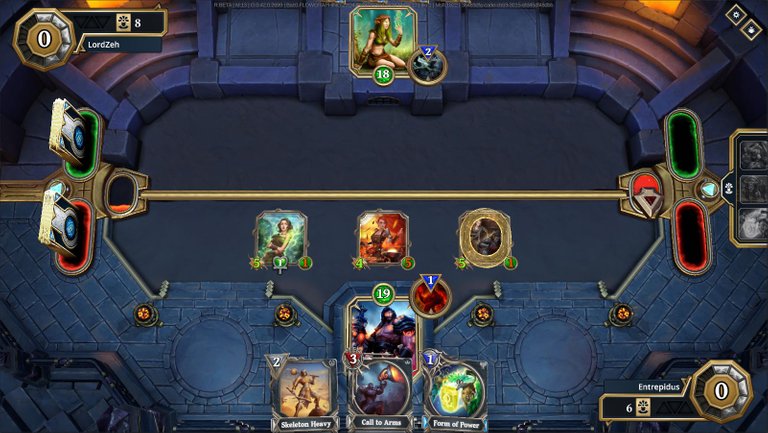
To prepare for stronger removal, I play Call to Arms to beef up my creatures and dig for options.
Raid Reveller could be useful, but I'm stacking on Springbloom Hunter to bring my opponent's health as low as possible. This also makes sense because if Hunt is coming, more creatures just means more potential targets for removal.
I finish the turn having reduced my opponent to 7 Health and with decent removal and creatures waiting in the wings.
Unsurprisingly, Hunt hits the board. Unfortunately, the damage spread kills nothing and before I can get a screenshoot. . .

. . . my opponent concedes. Huzzah!
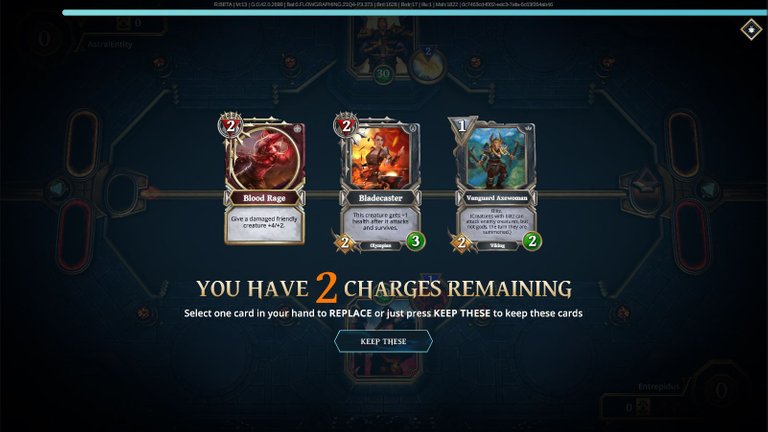
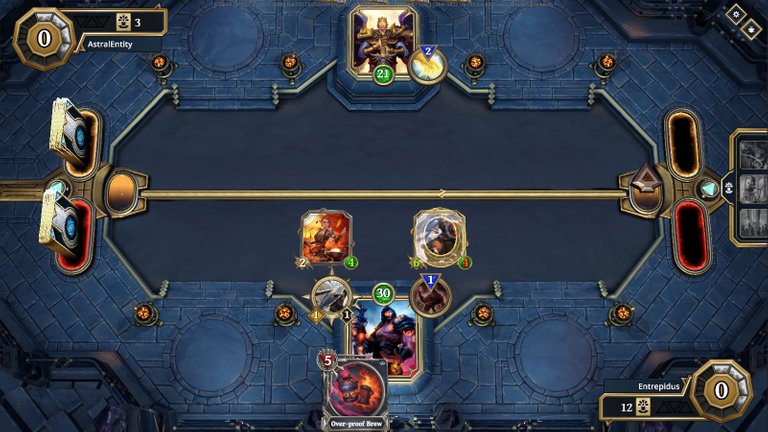
Example 2 — Control Magic
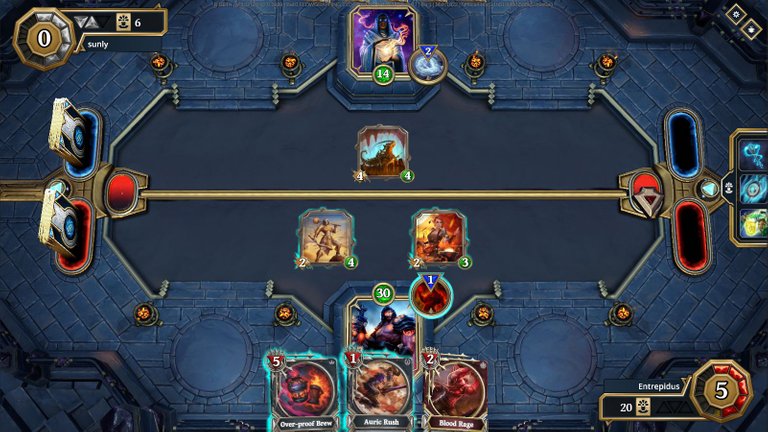
Not enough creatures! Dump the Blood Rage, as I'm unlikely to have creatures survive removal damage early on.
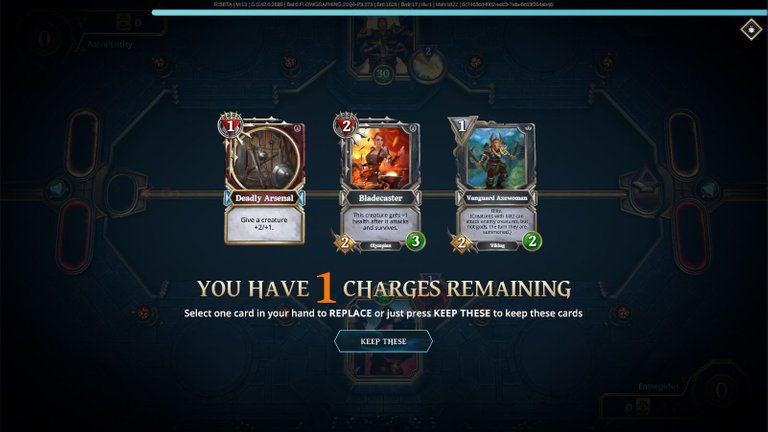
I really want to dump Bearstrider, but Deadly Arsenal is useless without a target. It has to go!
Now that I have Skeleton Heavy, Bearstrider can go. Even if I don't get a creature, we're going first, so I'm going to play Enduring Shield onto an empty board that Magic is waiting to rain death down upon.
We drew another creature, but drop Enduring Shield anyways.
I choose to play Bladecaster over Skeleton Heavy, here, because it's impossible for Magic to kill her next turn once Protected. Either my opponent removes Protect with Magebolt, or they waste cards doing the same.
I'll gain health from her attacking, and this will bring her up out of efficient removal range. What do I mean by that? At 4 Health, Magic will have to do Mage Bolt + Tracking Bolt to kill her. This is after already expending mana to remove Protect. That's not a good use of resources.
As expected, Magic either doesn't have anything playable, or they believe Magebolt is their best option. I've essentially traded half my Enduring Shield for 3 face damage and an empty turn 2.
I played Skeleton Heavy and attacked for Protect, but I probably should have attacked with Bladecaster and Protected her before bring Skeleton Heavy into play. She can scale, he can't.

This time I'm actually surprised when Magebolt removed the Protect and nothing else happens. Either my opponent had a terrible starting hand, or they're going to try wiping the board soon.
With this in mind, I'm dropping Bearstrider. Either my opponent moves to kill it, or I'm going to be swinging for the fences next turn.

As expected, Wyrmbreath is played to remove my. . .
. . . Blade Caster?! This has to be a mistake. My assumption is my opponent is unfamiliar with Bearstrider, as now I have the means to hit for far more than I should have been allowed to.
Now, if you see the Over-proof Brew, you might be wondering why I didn't play it and swing for 11 instead of 8. It comes down to costs: Dropping Enduring Shield and Bladecaster, now, is safer than trying to do it later when Magic has more mana to work with.
Protected or not, Bearstrider will die (or become a rat!) if my opponent has the cards for it, so I want to minimize my investment in that trade. Also, the only AoE removal that can wipe the board at this point is Spell Boost 1 + 2x Tracking Bolt (1 AoE +1 from Spell Boost). It's possible my opponent has this, but I think they'd have dropped Spell Boost for easier kills earlier in the match if they were running it.
This is a point where if this decision leads to a loss, I've noted it for review..
There's the removal I'm expecting, and for that price they might be able to kill something else, too.
Seeing Svart Basilisk is unexpected, and it certainly makes my previous choice less impactful. I'm not sure that I'd go so far as to say that I should have played Over-proof Brew, though.
Let's pickup Form of Power. . .

. . . then use it with Auric Rush to clear the board.
The play was cheap enough that I also have mana to Enrage/Blood Rage Bladecaster and step on someone's sandcastle.
The game's not over, but I'm in a strong position. My opponent has enough cards they could boardwipe, though, then I'd have to rely on topdecking creatures faster than they topdeck removal to finish the job.
Minotaur Phalanx hits the board, and I know it's over.

I have exactly enough to clear the Frontline obstacle with Bladecaster and Over-proof Brew while swinging for my opponent's final 4 Health with Skeleton Heavy.

My opponent understands the play and promptly taps out.
I should pause here to acknowledge that this wasn't a stereotypical strategy employed by the Magic player, but the thought process behind my decisions is still valuable. Until my opponent started making mistakes and revealing their lack of potent answers, there were numerous potential Magic spells and creatures that could have been used to complicate things.
An important aspect of the Magic domain is that they don't always need to occupy the board to interact with it and exert control. I was actively making decisions based on cards my opponent had yet to even play, and for all I know they did't even have them in their deck.
Example 3 — Unknown Light
Before we begin, this match will seem very one-sided. As my only win against Light, I'm walking through it to demonstrate how stark the contrast is between a Light deck with Health ramp and one without.
It's too soon to be holding Bearstrider, so I bench him.
Tamed Mammoth falls under the same category, so he goes back in his cage.
Blood Rage is the wrong spell to pair with these starting creatures, so let's fish for something beter.
This isn't the best hand, but it'll do.
Raze Imp (R: Shuffle 2 random Nether Creatures into your deck) tells me this isn't a meta Light deck. Knowing this, I want to be aggressive before my opponent can afford his removal.
I drop Vanguard Axewoman, stack on Deadly Arsenal and clear the board.
A Frontline creature would certainly have been annoying if I hadn't drawn another Vanguard Axewoman.
Let her loose, Enrage her, and clear the way for a solid face swipe.
Upon seeing my opponent healing themselves with their God power, it's pretty clear to me that they're sitting on removal or high-cost cards. It doesn't change what I do, as I can really only play Enduring Shield and Bladecaster to sustain pressure.
Also, if I'm expecting removal, there's a good chance I'll get a free attack in ext turn.
Sure enough, Vanguard Axewoman bites the dust.
My plays continue on auto-pilot with Bearstrider being Enraged and then Protected. I used Enrage both because I had the mana and I want to force my opponent to use another high-cost removal, if they have it. Also, at 2 Strength, Bearstrider would have been susceptible to Light's Levy. That would be a tremendous loss.

Oddly enough, my opponent promptly conceded. This tells me they didn't have removal, and the lack of creatures up to that point was likely unrecoverable.
Final Thoughts
Coming out of 30+ matches (honestly, who knows how many with GU Decks on the fritz), several important things stand out to me:
Pros
- Enduring Shield and Enrage drastically improve the potency of Blitz creatures as removal. Archangel Bruiser, especially, really shines in the mid-game. Being able to land with Overkill and Protect turns her normal use as removal into a potentially ongoing board clear.
- Tartessian Improviser creates new plays that opponents won't always expect. This is, again, most notable with Blitz.
- Tartessian Skirmisher and Bladecaster are practically made for each other. Being able to gain +1 Health each attack (for +2 per turn) while also pumping up Tamed Mammoth on the side is a particularly strong combination that can force an opponent to overtax their removal inefficiently.
- Springbloom Hunter is surprisingly effective at early poke against Magic/Deception/Magic provided you get her above 3 Health to avoid Death removal and Deception self-damage.
- Call to Arms is excellent for filling cautious turns with something productive (such as limiting board presence when board wipe is looming)
Cons
- Deadly Arsenal isn't as universally useful as you'd think +X/+X should be. I've found myself stacking up a creature only to lose both cards to removal far more often than I'd like to admit. What this means is it behaves as pseudo removal by pushing a creature into range of killing something which often results in the card setting on the bench until that "perfect moment".
- Complete lack of relic removal (and Sleep vs. Death) needs to be addressed. Certain match-ups are near auto-losses if I'm unable to deal enough damage before the relic enters play.
- Light Health Ramp is a partial counter to this deck. Including Blitz relics might be required to deal with support creatures before the a Light "phalanx" gets too strong.
- With how potent Blitz has proven to be, I don't have enough of it to reliably use it every match.
- Mulligan choices need to be on point with respect to each match-up more so than other generic meta decks. If you don't get certain creatures in your starting hand, some match-ups are lost from the start of the game (i.e. Blitz vs. +X/Regen Nature and HARD Aggro War)
- My removal is limited to 4 Blitz creatures. Some matches would have been won if theme enablers were killed with spot removal.
In closing, I'll be looking at adding relic removal and additional Blitz relics/creatures to capitalize on the parts of this deck that work the most. Svart Basilisk seems like the go-to option, but it will be challenging sorting out what can be removed to make room for them.
Until next time!
~ Ent
Man now this is a post. Very very thorough break down. This series you are doing is certainly one to stay tuned for. Stupid enduring shield lol. Sorry was having flashbacks before DO was released and Enduring shield needed its nerf. But the GU team took almost two months before they took action. So all you faced all day long was war. I digress, love the deck and your thought process behind the piloting of it. Keep up these of the chart posts!!!! I just can't get enough.
Glad you enjoy, and I'll keep chuggin' along!
Sorry Enduring Shield triggered your PTSD. . . Post Traumatic Shielding Disorder ;P
That would be a good slogan for a shirt right there. And it is all good. I am just glad that Enduring Shield is a little more manageable now. Plus your post was great to read so it was worth the momentary pain.
Congratulations @entrepidus! You have completed the following achievement on the Hive blockchain and have been rewarded with new badge(s):
Your next target is to reach 200 comments.
You can view your badges on your board and compare yourself to others in the Ranking
If you no longer want to receive notifications, reply to this comment with the word
STOPTo support your work, I also upvoted your post!
Check out the last post from @hivebuzz:
Support the HiveBuzz project. Vote for our proposal!