

Hola queridos amigos de hive, les doy la bienvenida a otro tutorial de manualidad 💖
Hello dear friends of hive, I welcome you to another handicraft tutorial 💖
¿No están cansados de que siempre se enreden los cables de sus audífonos? a mi me suele suceder a menudo, es por eso que decidí realizar una manualidad que además de hermosa y tierna nos sea útil para ordenar nuestros auriculares, mantenerlos seguros y que no se nos estropeen.
Aren't you tired of your headphone cables always getting tangled? It often happens to me, that's why I decided to make a manual that, besides being beautiful and tender, will be useful for us to order our headphones, keep them safe and not to spoil them.
Como ya se pudieron dar cuenta en mis anteriores post, me encanta recrear en mis trabajos dibujos y series animadas, esta semana me propuse hacerlo ya que es en lo que más me suelo inspirar. Así que no se diga más y conozcamos los materiales!
As you may have noticed in my previous posts, I love to recreate in my works cartoons and cartoon series, this week I decided to do it since it's what I usually get inspired by. So let's say no more and get to know the materials!
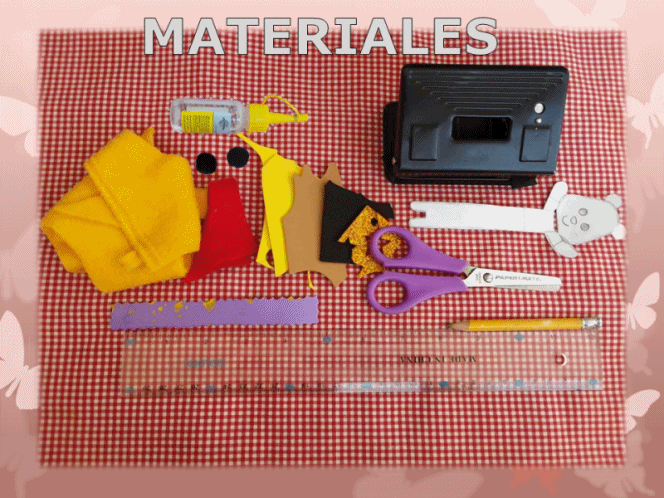
📋🎨 Para esta manualidad necesitaremos:
For this craft we will need:
- Fieltro(amarillo, rojo).
- Foami o goma eva(amarillo, marrón, negro y dorado metalizado).
- Molde de la figura(Winnie Pooh).
- Guía de medidas 11cmx1cm,(puede ser en papel o foami).
- Perforador
- Cierre mágico o broche
- Regla
- Silicon liquido
- Tijera
- Lápiz
- Felt (yellow, red).
- Foami or eva rubber (yellow, brown, black and gold metallic).
- Mould of the figure(Winnie Pooh).
- Guide of measures 11cmx1cm,(can be in paper or foami).
- Puncher
- Magic clasp or brooch
- Rule
- Liquid silicon
- Scissors
- Pencil
Procedimiento (paso a paso) |✂️📏| Process (step by step)
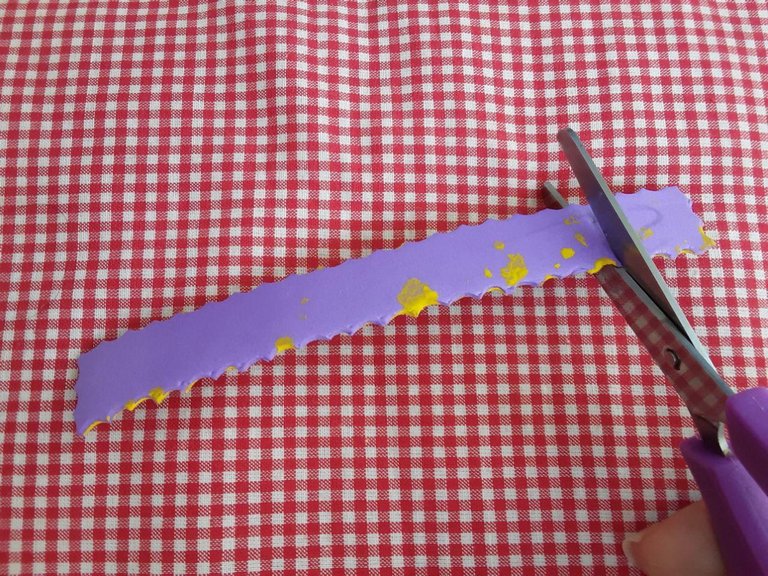
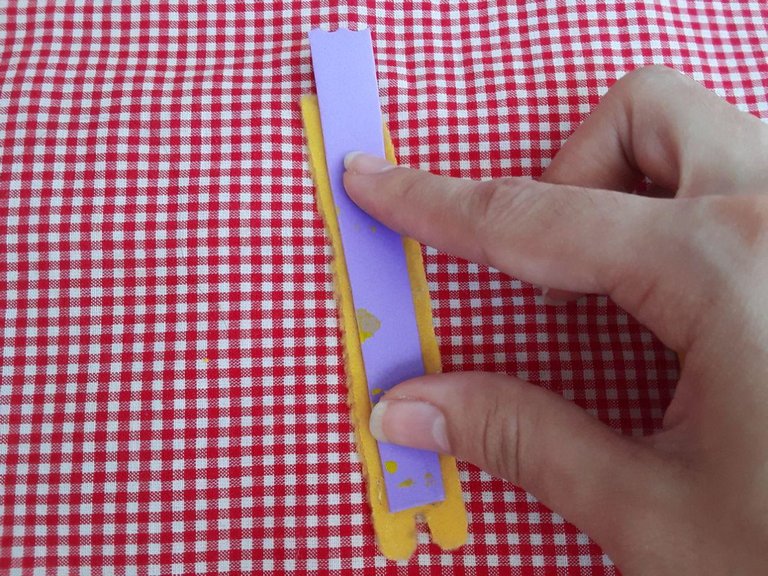
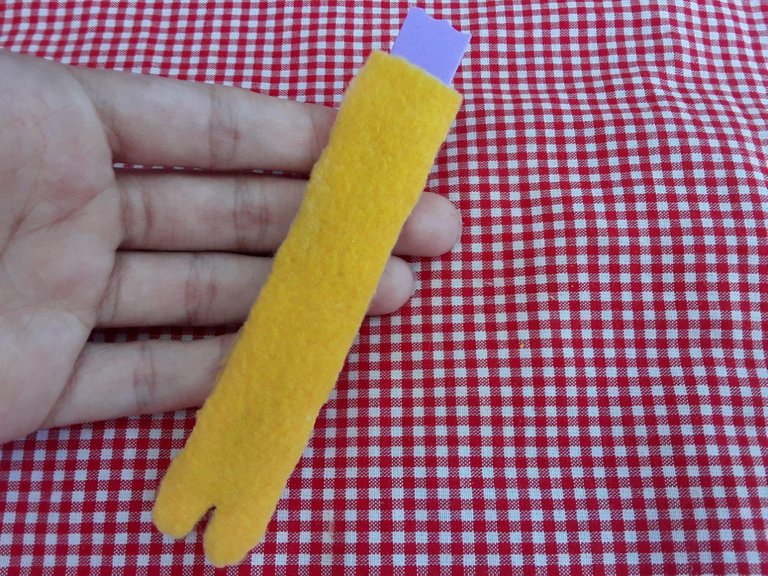
🔶 El primer paso que vamos a realizar es medir y recortar nuestra guía del porta auricular, yo utilice foami para que quedara más resistente. Las medidas que use son 11 cm de largo tal como lo muestro en la fotografía, y 1 cm de ancho aproximadamente.
The first step we are going to do is to measure and cut out our earphone holder guide, I used foami to make it more resistant. The measurements I used are 11 cm long as shown in the picture, and 1 cm wide approximately.

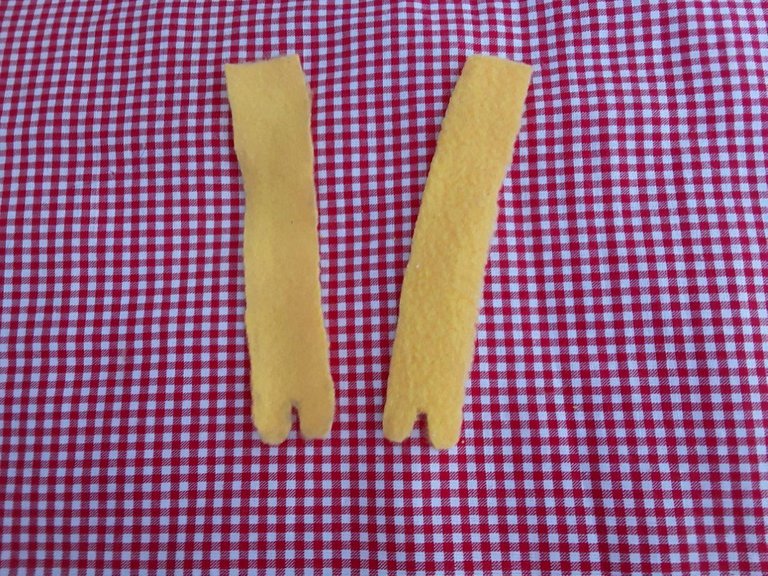
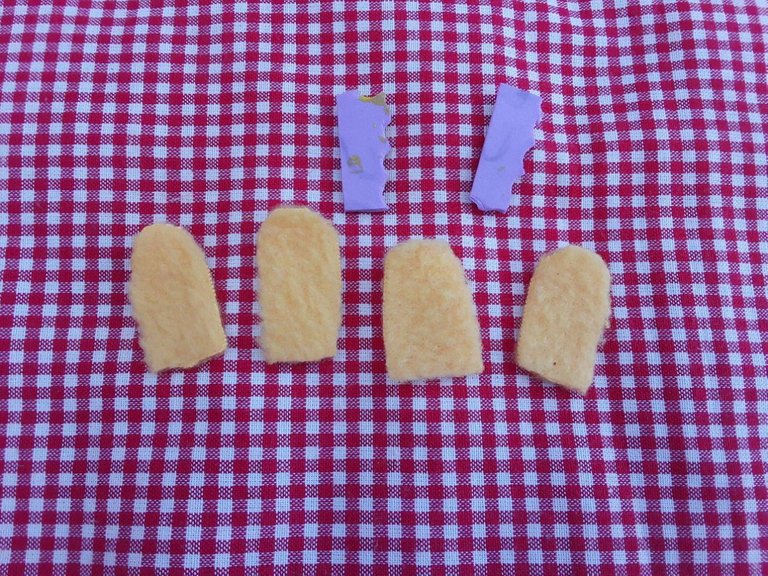
🔶 Una vez tengamos lista la medida que nos servirá para armar nuestro oso, procedemos a dibujar y recortar las piezas en el fieltro.
Once we have ready the measure that will serve us to assemble our bear, we proceed to draw and cut out the pieces in the felt.
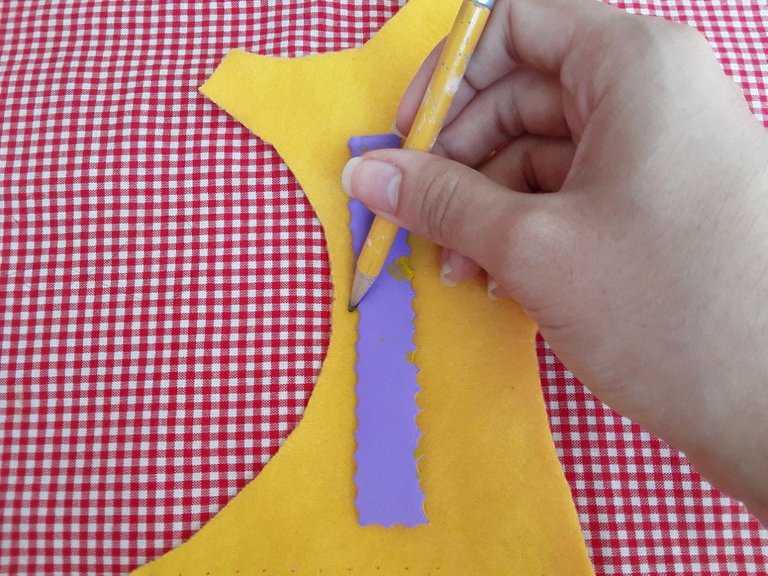
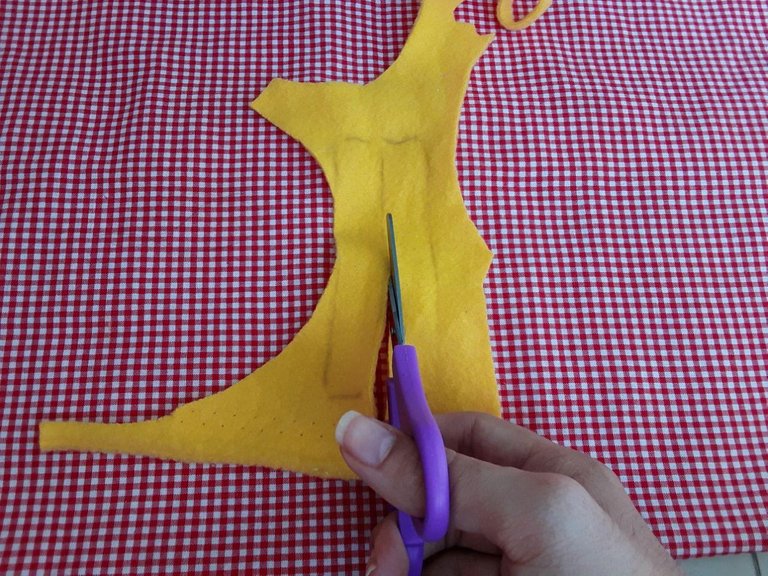
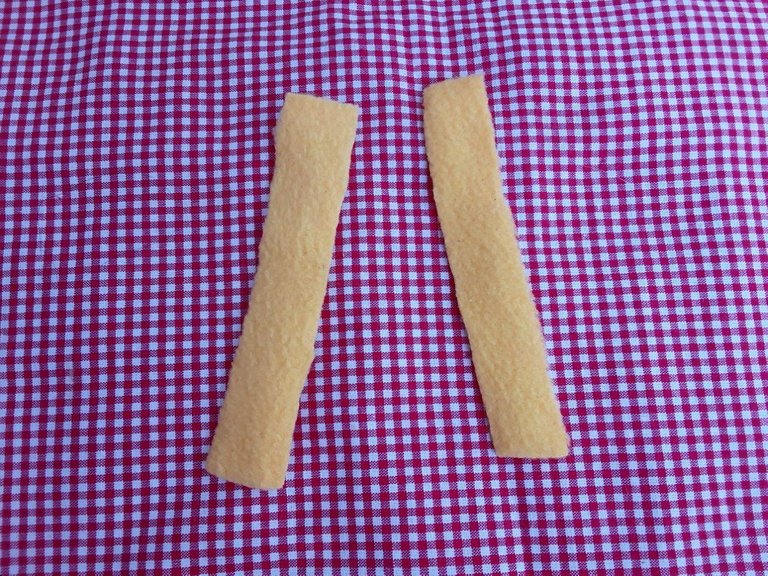
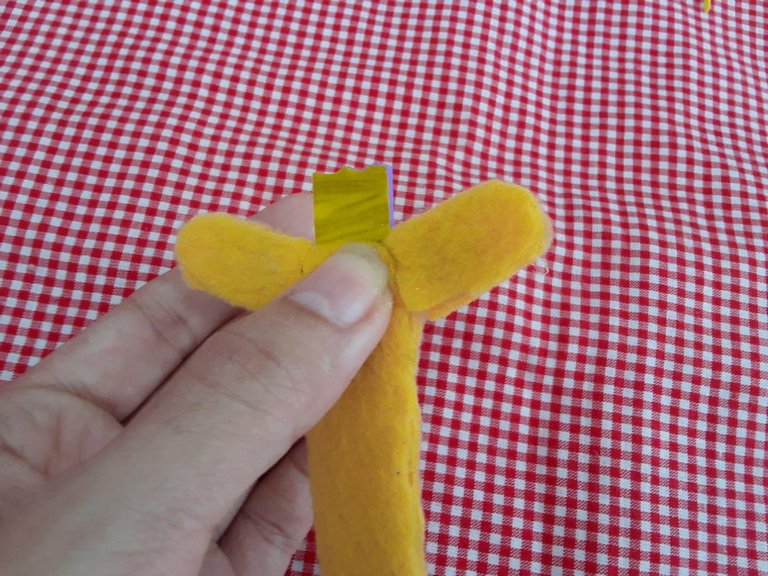
🔶 Así nos va quedando lo que sera el cuerpo del oso, para que tenga un toque realista, en la parte inferior recortamos tratando de darle forma de pequeños pies.
This way we get what will be the bear's body, so that it has a realistic touch, in the lower part we cut it out trying to give it the shape of little feet.
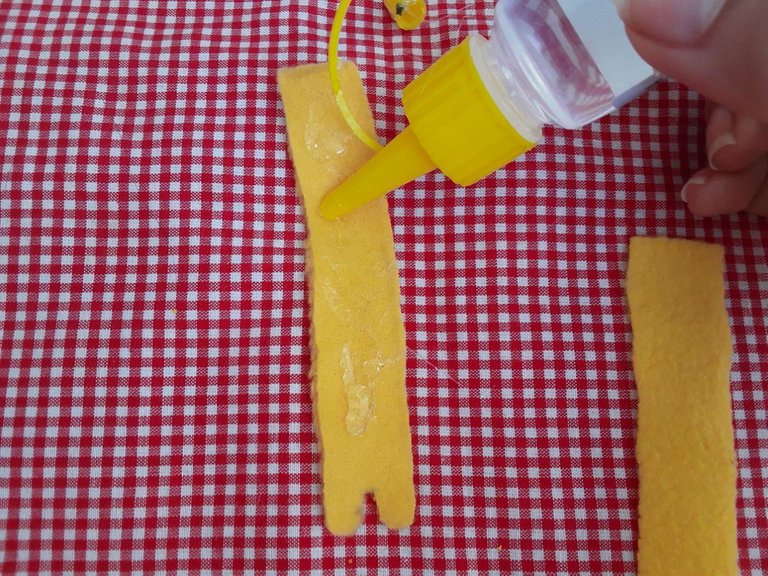
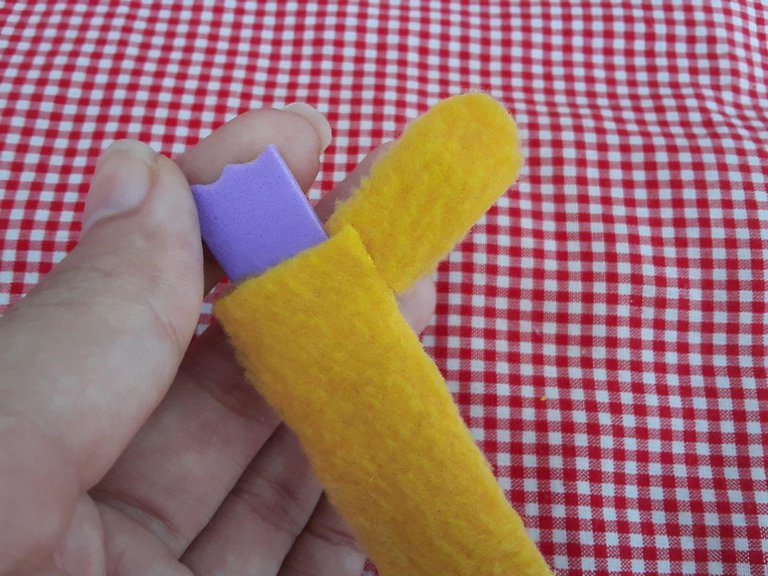
🔶 Ahora aplicaremos silicon en el fieltro, luego a la pieza de foami y otra vez al fieltro.
Now we will apply silicon to the felt, then to the foami piece and again to the felt.
🔶 Nos va quedando tal como se muestra en la primera imagen, luego repetimos el paso anterior con las demás piezas.
We are left as shown in the first image, then we repeat the previous step with the other pieces.
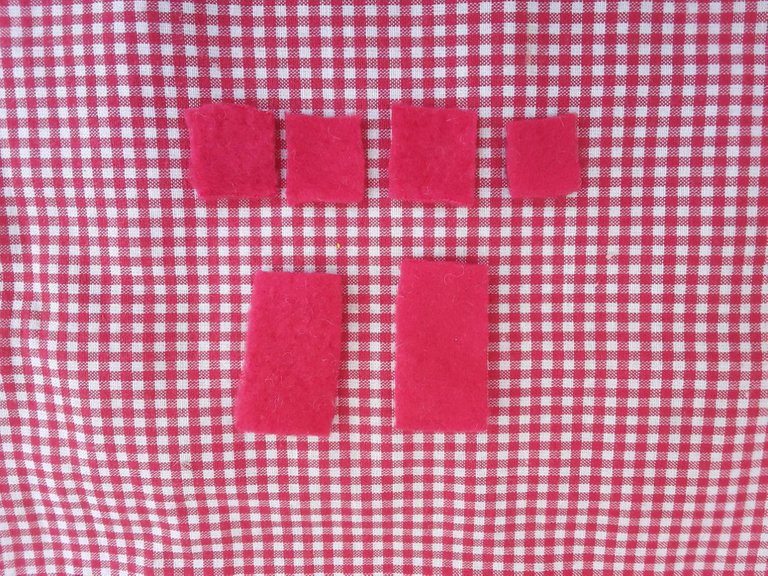
🔶 Vamos a realizar la característica camisa de nuestro oso, para ello colocamos el molde sobre el fieltro y dibujamos el contorno, para obtener la pieza frontal, trasera y mangas.
We are going to make the characteristic shirt of our bear, for this we put the mould on the felt and draw the contour, to obtain the front, back and sleeves.
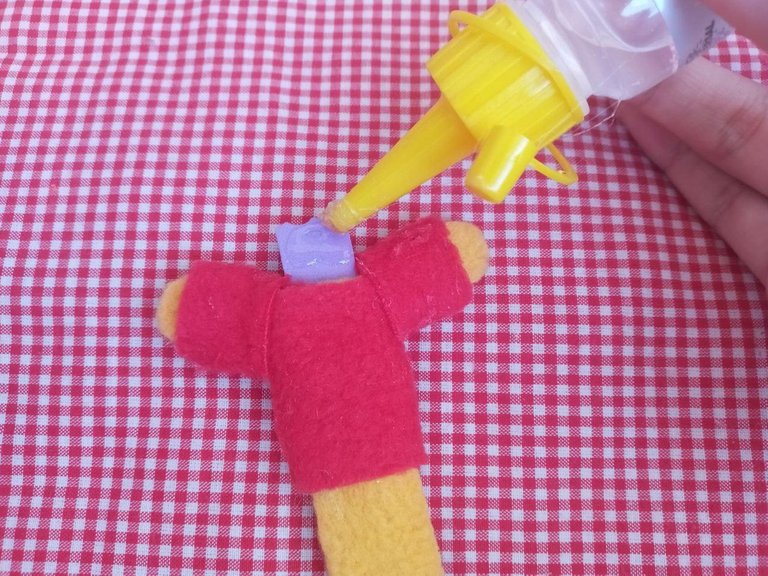
🔶 Ya lista y pegada la camisa continuamos recortando las piezas faltantes. Para la cabeza repetimos los pasos anteriores, en el foami y en el fieltro, siempre guiándonos por nuestro molde.
Now that the shirt is ready and glued, we continue to cut out the missing pieces. For the head we repeat the previous steps, in the foami and in the felt, always guiding us by our mold.


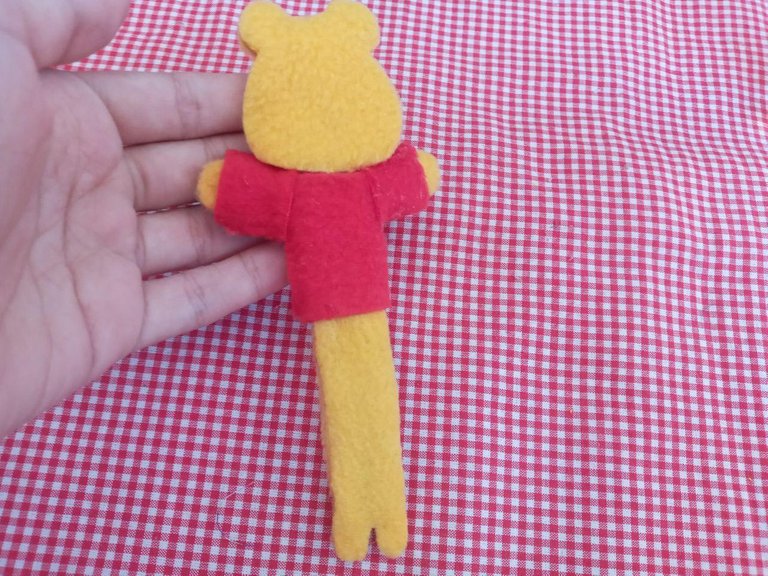
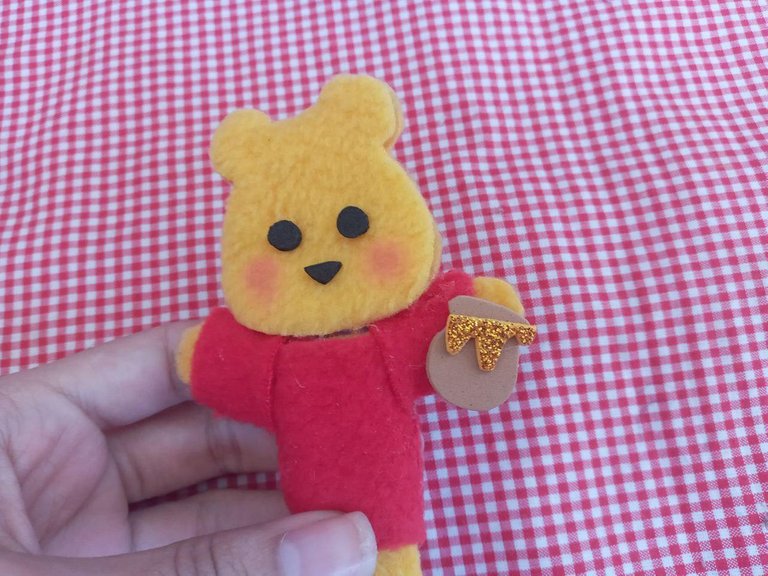
🔶 Una vez recortado las piezas de la cabeza procedemos luego a pegarlas a la base donde tenemos el cuerpo armado de nuestro osito. Aquí en este paso podemos decir que ya tiene bastante parecido a Winnie pooh 😉.
Once the pieces of the head have been cut out, we then proceed to glue them to the base where we have our teddy bear's body. Here in this step we can say that it already has enough similarity to Winnie pooh 😉.
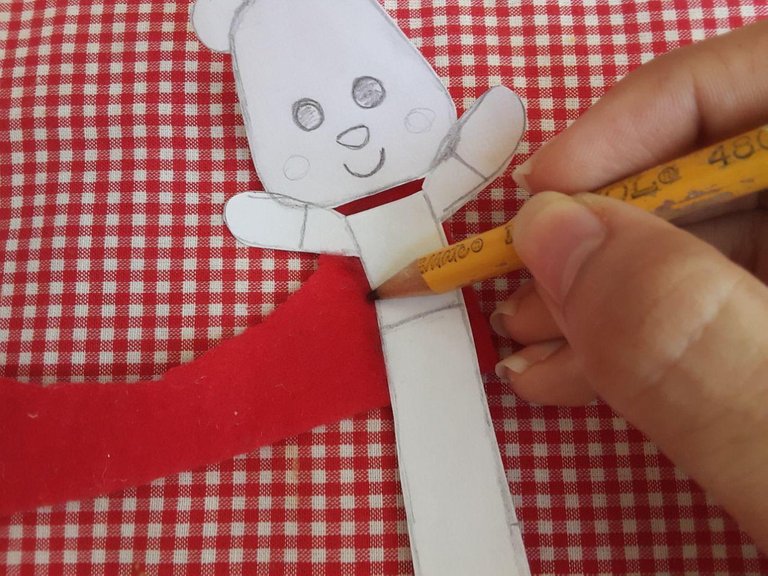
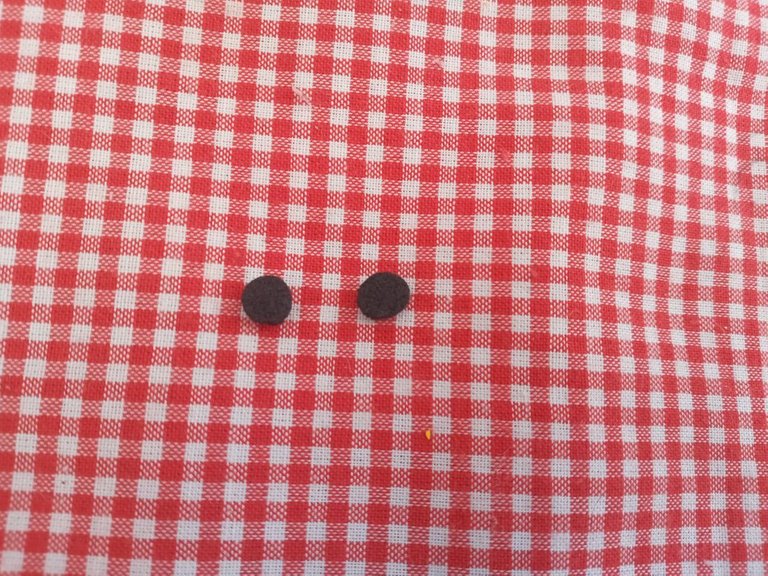
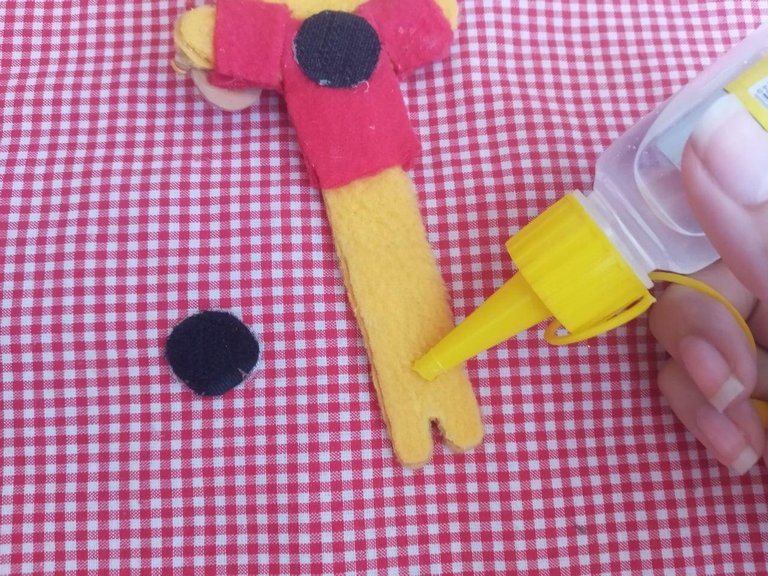
🔶 En este punto de la manualidad comenzaremos agregarle detalles a nuestro oso, con la ayuda del perforador realizaremos los ojos y la nariz con el foami negro.
At this point in the manual we will begin to add details to our bear, with the help of the perforator we will make the eyes and nose with the black foami.
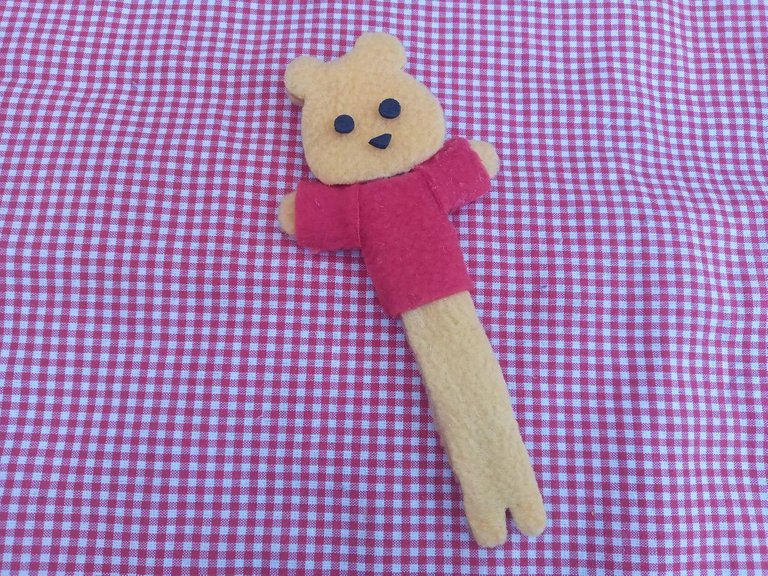
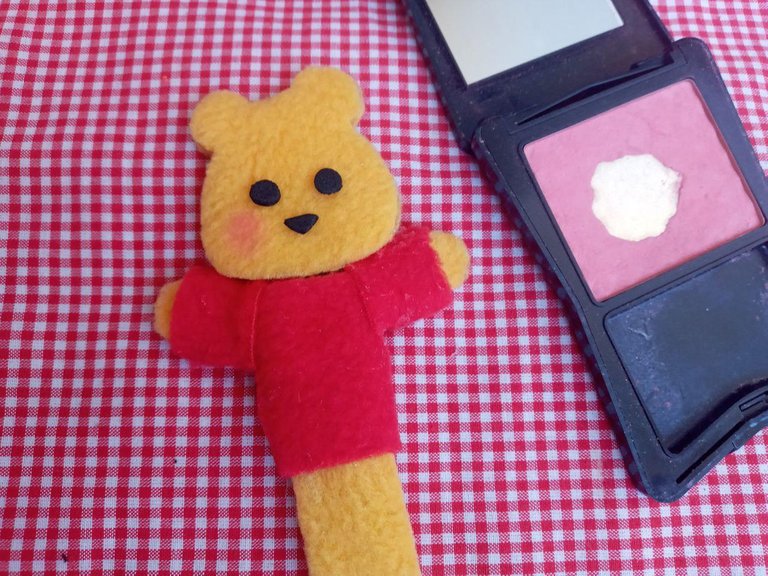
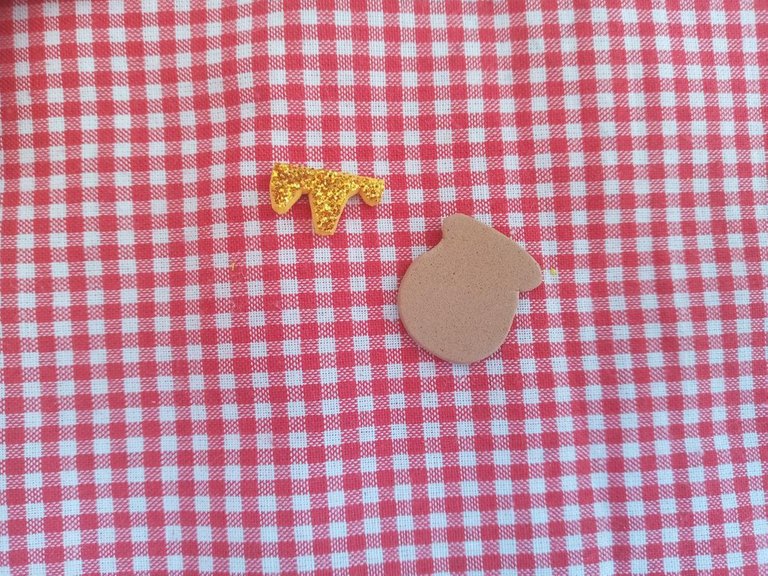
🔶 Luego de sacar nuestras piezas de los ojos y nariz, aplicamos un poco de silicon y lo colocamos en el lugar que corresponde esperamos unos segundos hasta que seque. Así continuamos agregando detalles con maquillaje rosa para las mejillas, esto lo podemos aplicar con la ayuda de los dedos o un hisopo. También recortamos su delicioso tarro de miel, con foami marrón y dorado metalizado, tal como les muestro en la imagen.
After removing our pieces from the eyes and nose, we apply some silicone and place it in the right place, waiting a few seconds for it to dry. This way we continue adding details with pink makeup for the cheeks, this can be applied with the help of the fingers or a swab. We also cut out your delicious honey jar, with brown and golden metallic foami, as I show you in the picture.
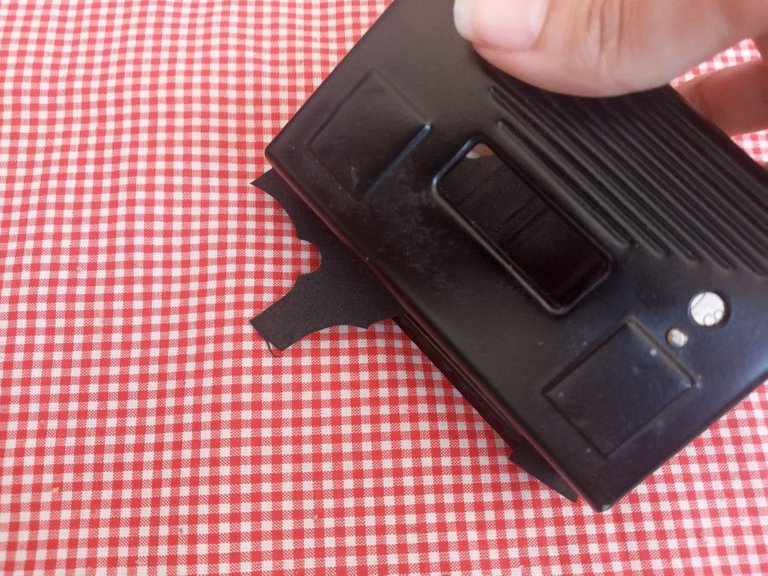
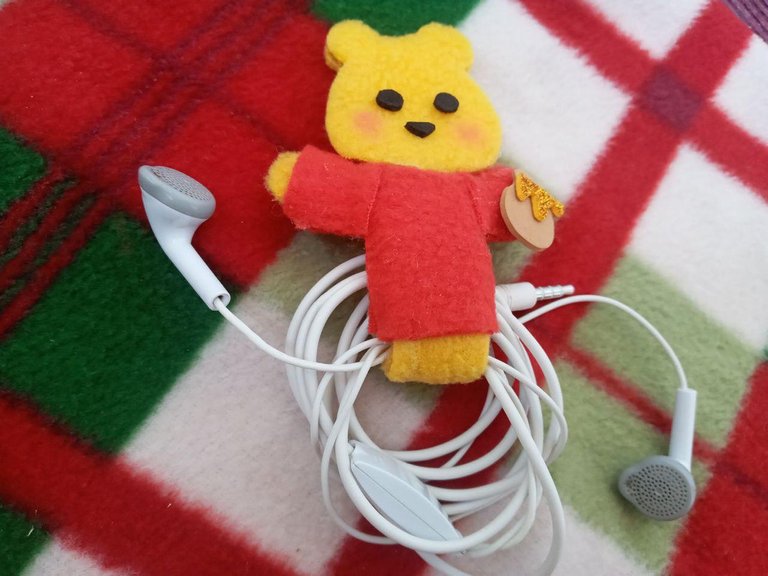
🔶 Finalmente colocamos el broche por la parte trasera de nuestro oso, tal como lo indico en la primera fotografía, esperamos unos minutos hasta que seque y estemos seguros que este bien pegado, aquí les muestro como ha quedado.❤️
Finally we put the pin on the back of our bear, as I indicated in the first picture, we wait a few minutes until it dries and we are sure that it is well attached, here I show you how it is. ❤
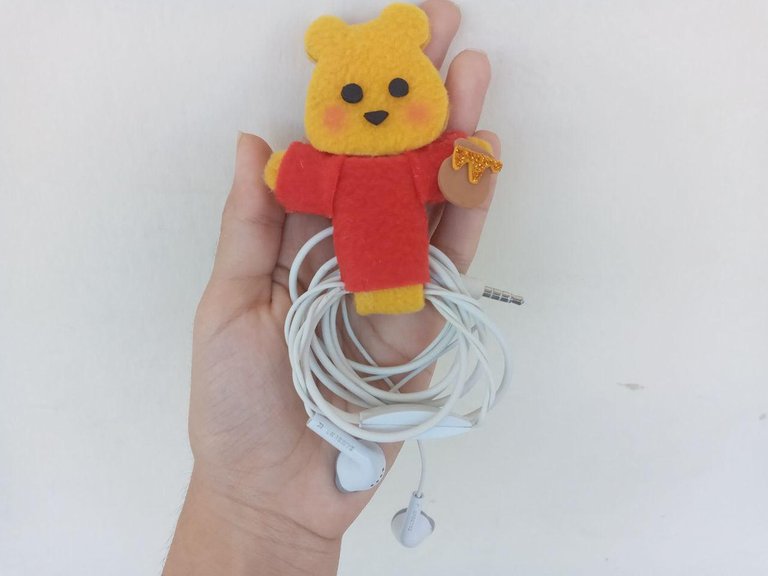
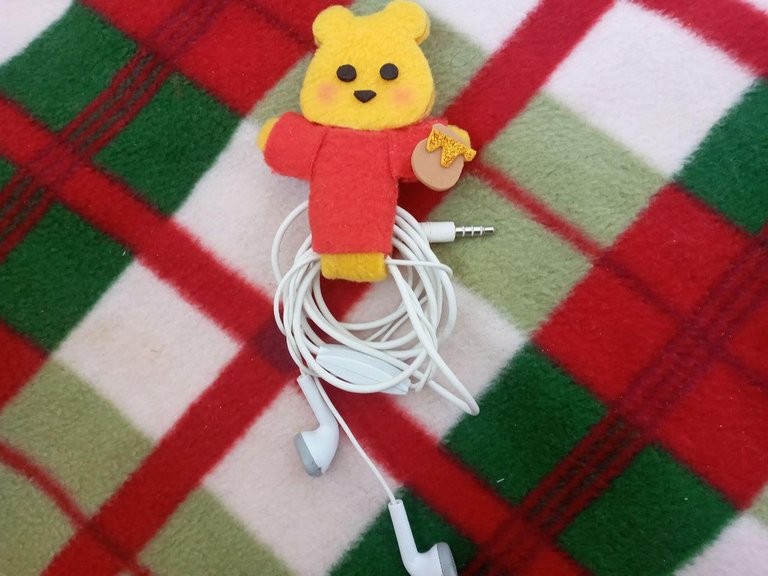
✅¡LISTO! hemos terminado el porta audífonos de nuestro simpático y adorable amigo Winnie Pooh, les aseguro que se divertirán y lo mas importante es que ya no tendrán problemas para buscar sus auriculares con esta gran y creativa idea.
READY! we have finished the headphone holder of our nice and adorable friend Winnie Pooh, I assure you that you will have fun and the most important thing is that you will no longer have problems finding your headphones with this great and creative idea.
Anímate a crear seguro te divertirás🎨😄Dare to create for sure you will have fun.
“La creatividad es la inteligencia divirtiéndose” - Albert Einstein
"Creativity is intelligence having fun" - Albert Einstein
Imágenes propiedad del autor| Images property of the author
Traductor|Translator
Deepl
Un gran abrazo a todos mis seguidores y a los usuarios que siempre apoyan mis publicaciones con un voto positivo e incluso con sus apreciados comentarios.♥️
A big hug to all my followers and to the users who always support my publications with a positive vote and even with their appreciated comments.♥️
Nos vemos en el siguiente post.
See you in the next post.

quedó fino!, imagínate la cantidad de cosas quete puedes inventar con eso. saludos