
English
In this opportunity we will continue the 3D modeling series by presenting the creation of a mixer, or what is the same, a controller used to mix music. I have chosen this type of objects by the number of details that they present and that even if they appear to be simple they require great work to be modeled.
Español
En esta oportunidad continuaremos la serie de modelado 3d presentando la creación de una mesa de mezclas, o lo que es lo mismo, un controlador utilizado para mezclar música. He escogido este tipo de objetos por el número de detalles que presentan y que pese a que aparentan ser sencillos requieren de gran trabajo al ser modelados.
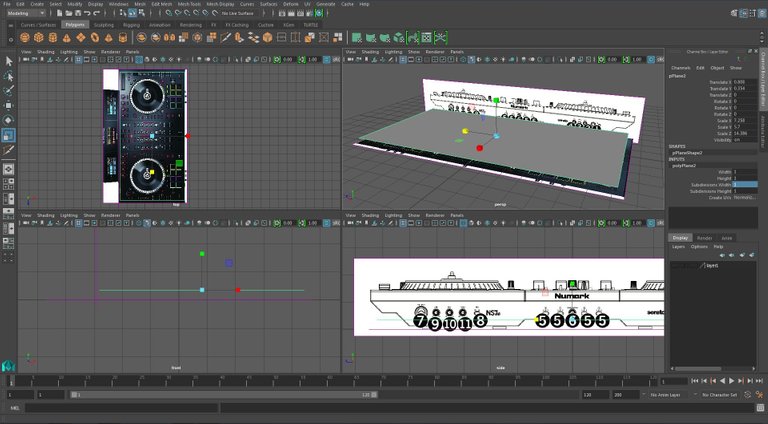
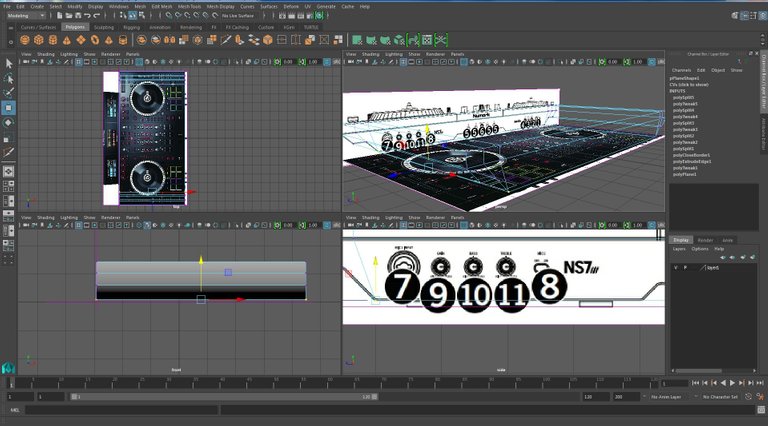
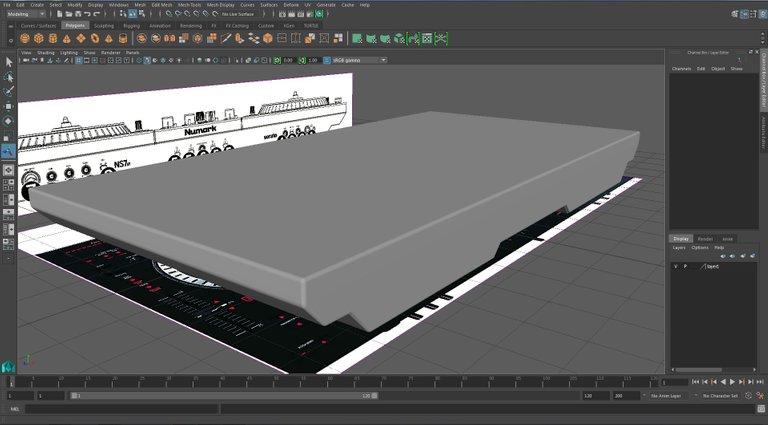
As always, it is strongly recommended that the modeling has the BluePrints or the reference images that will serve to create the object with its correct proportions or, at least, more approximate. In the present case I have achieved a top image without much or no angular perspective so it is perfect and a frontal image that I have taken from the user manual.
Como siempre, es recomendable encarecidamente que al modelar cuenten con los blueprints o las imágenes de referencia que les servirán para crear el objeto con sus proporciones correctas o, al menos, más aproximadas. En el presente caso he conseguido una vista superior sin mucha o ninguna perspectiva angular por lo que resulta perfecta y una frontal que he tomado del manual de usuario.
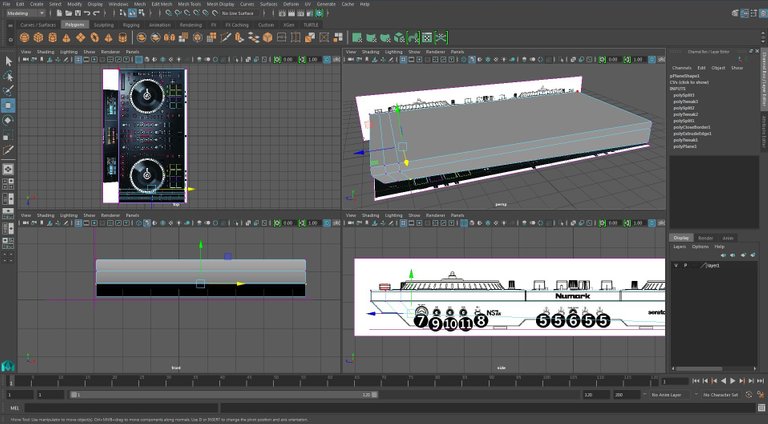
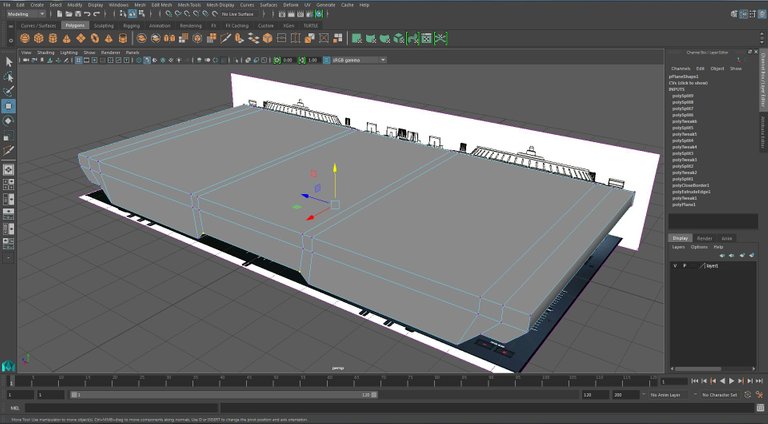
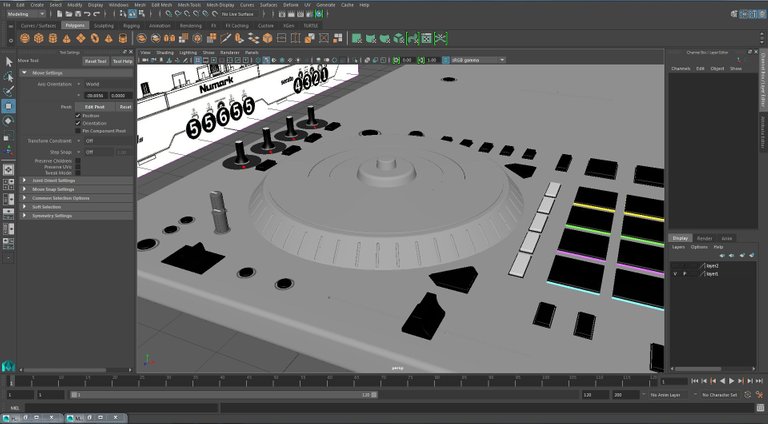
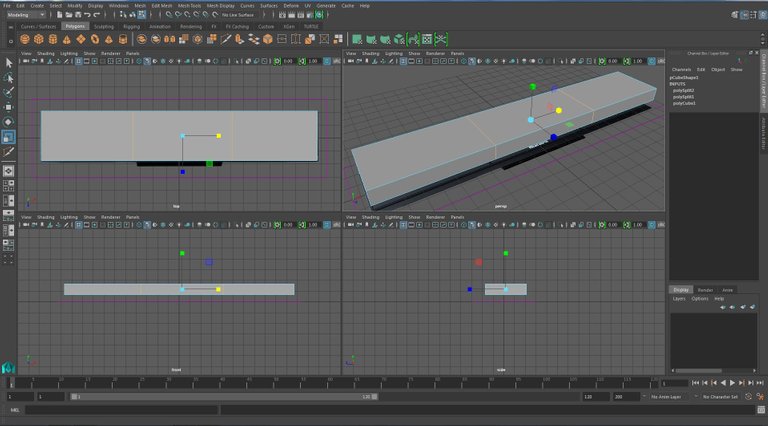
Already having our images in the program we begin the modeling. We will start from a plane to which we will shape to make the console.
Ya teniendo nuestras imágenes en el programa comenzamos el modelado. Partiremos de un plano al cual iremos dándole forma para hacer la consola.
And here we already have a first view of the console.
Y aquí ya tenemos una primera vista de la consola.
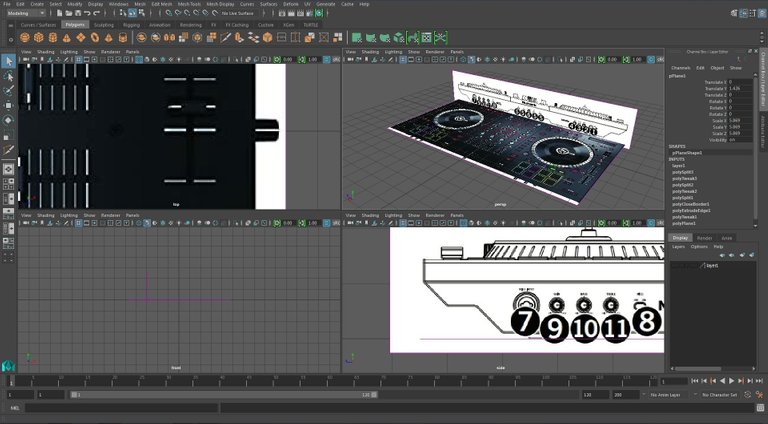
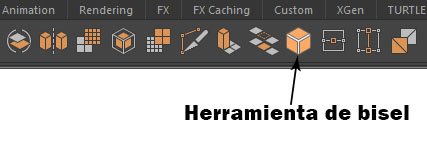
Now we will apply a very interesting function in the 3d model with the Bevel tool and its purpose is to smooth the too rough or sharp edges of the edges. To do this we will select all the edges that we want to smooth.
Ahora aplicaremos una función bastante interesante en el modelo 3d con la herramienta Bisel y tiene como finalidad suavizar los bordes demasiado bruscos o afilados de las orillas. Para ello seleccionaremos todos los bordes que deseamos suavizar
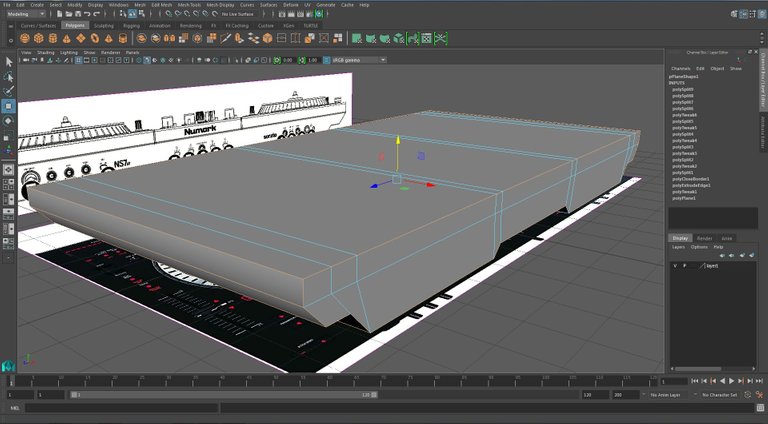
And here we have our console already perfectly smoothed
Y aquí tenemos nuestra consola ya perfectamente suavizada .
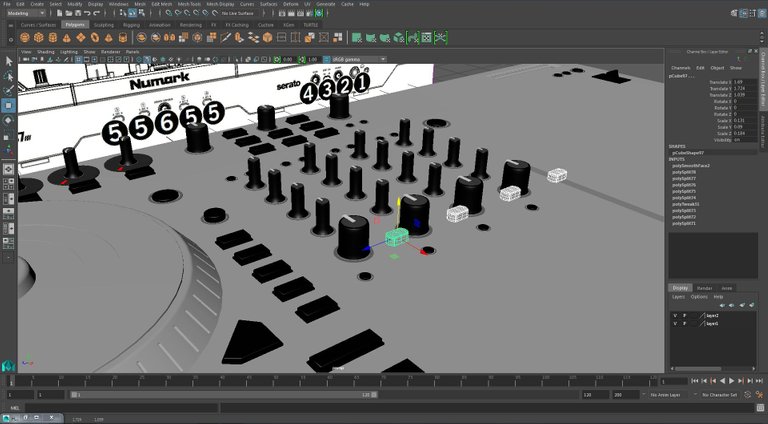
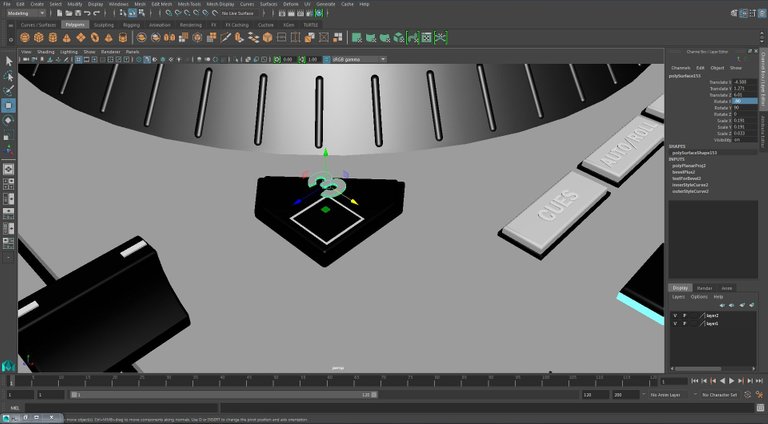
Now we will continue with the modeling of the controls and other manipulators
Ahora proseguiremos con el modelado de los controles y demás manipuladores
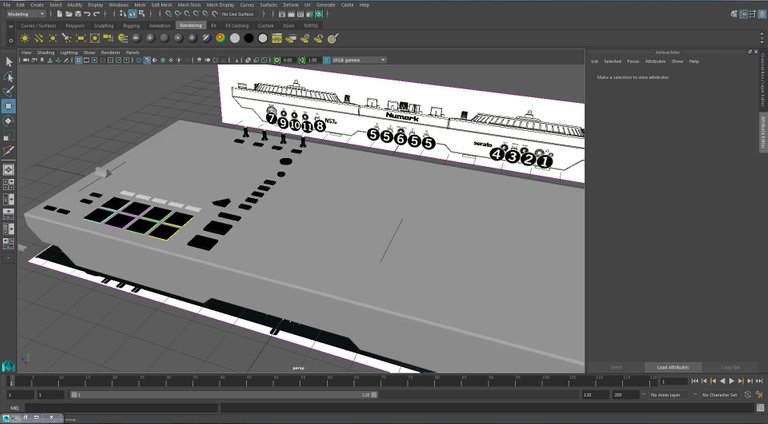
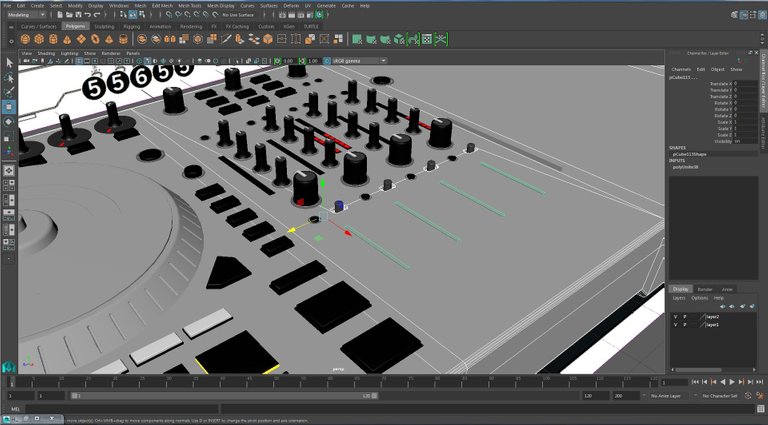
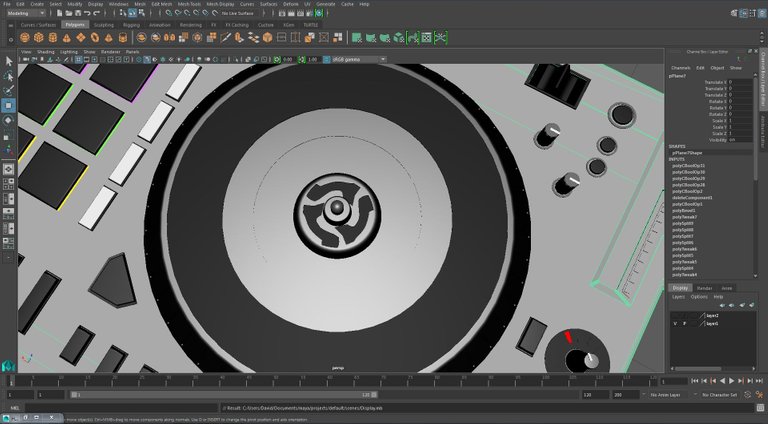
On the fly we start with the plate
Sobre la marcha comenzamos con el plato
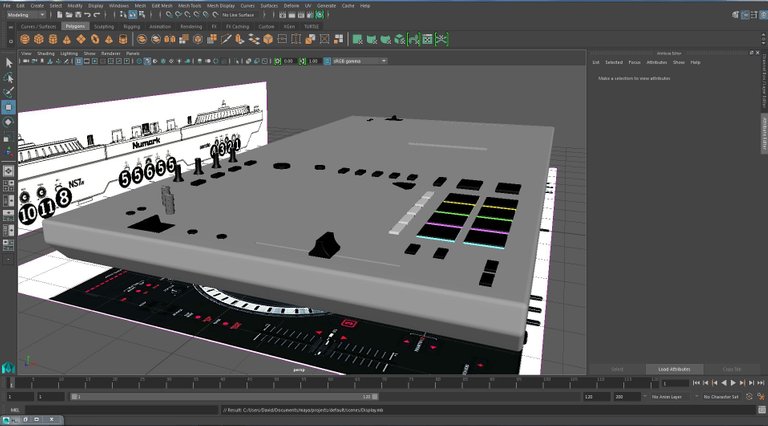
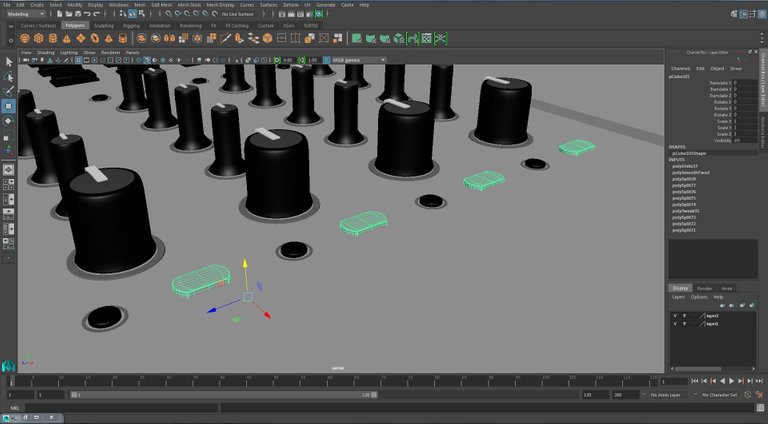
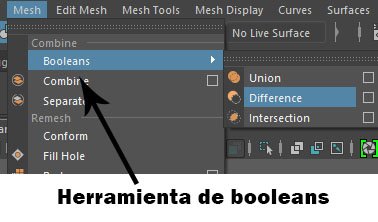
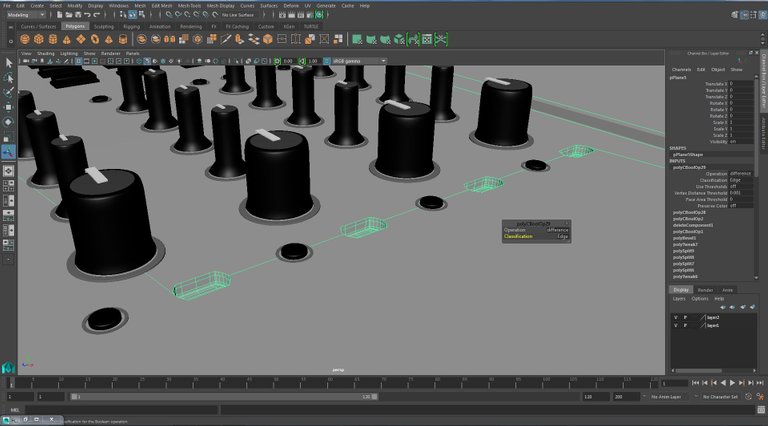
Now we will put into practice a function that can solve a headache when we start in 3d modeling: opening holes in the object. For this we will use the Booleans function. To execute it we will need to create an object with the shape that the hole already created will have, as can be seen we require a rectangular and at the same time oval shape. We will duplicate it to create several holes at the same time.
Ahora pondremos en práctica una función que puede resolver un quebradero de cabeza cuando nos iniciamos en el modelado 3d: abrir huecos en el objeto. Para ello utilizaremos la función de Booleans. Para ejecutarla necesitaremos crear un objeto con la forma que tendrá el hueco ya creado, como puede verse requerimos de una forma rectangular y al mismo tiempo ovalada. La duplicaremos para crear varios huecos a la vez.
We will place our shapes in the place and at the depth that we want our cavities and we will go to our boolean function.
Colocaremos nuestras formas en el lugar y a la profundidad que deseamos nuestras cavidades y vamos a nuestra función de boleano.
And here we will have our holes.
Y aquí ya tendremos nuestros huecos.
We continue with the work
Proseguimos con el trabajo
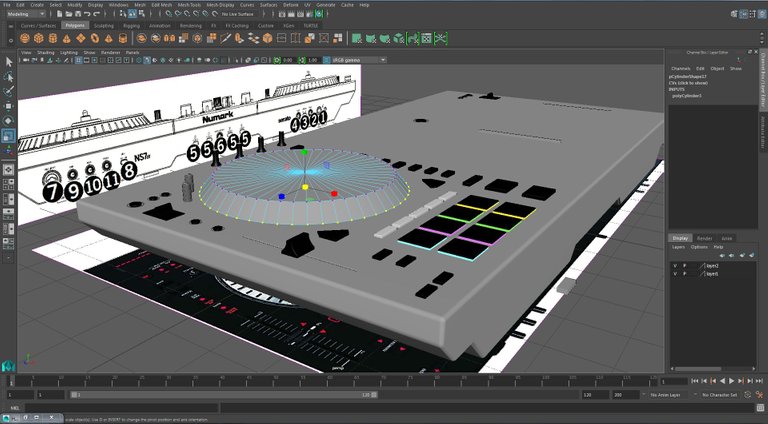
And we come to the moment of making an ornament that is in the center of the dishes. For this I have built a part of the ornament from a rectangle, I duplicated it two more times and combined them to make a single object
Y llegamos a un adorno que se encuentra en centro de los platos. Para ello he construido una parte del adorno a partir de un rectángulo, la dupliqué dos veces más y los conbiné para hacer un solo objeto.
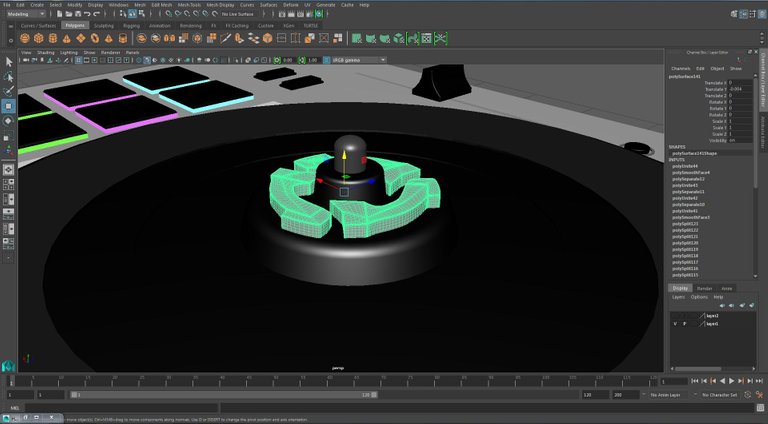
And applying the same boolean function we have this result.
Y aplicando la misma función de boolean tenemos este resultado

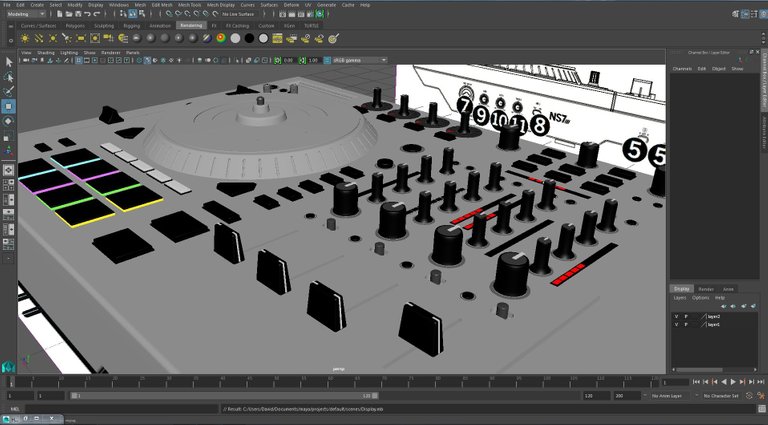
We are applying materials on the fly to define each part of the mixer.
Vamos aplicando materiales sobre la marcha para ir definiendo cada parte del mezclador
I decided not to go directly to texturing so most of the letters we are going to do using polygons. Of course, we must point out that the more polygons we use, the more memory our scene will consume.
Decidí no ir directamente a la texturización por lo que la mayoría de las letras las vamos a hacer mediante polígonos. Eso sí, debemos señalar que mientras más polígonos usemos mas memoria consumirá nuestra escena.
Now we will go to the LCD console. For this I have also made a reference image which will help a lot.
Ahora pasaremos a la consola de los LCD. Para ello también me he hecho de una imagen de referencia lo que ayudará bastante.

And for the LCD we will take some images of the information presented by each viewer.
Y para los LCD tomaremos unas imágenes de la información presentada por cada visor
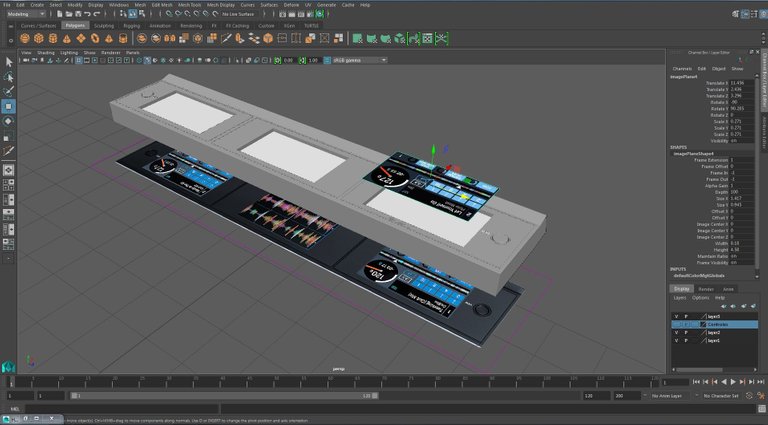
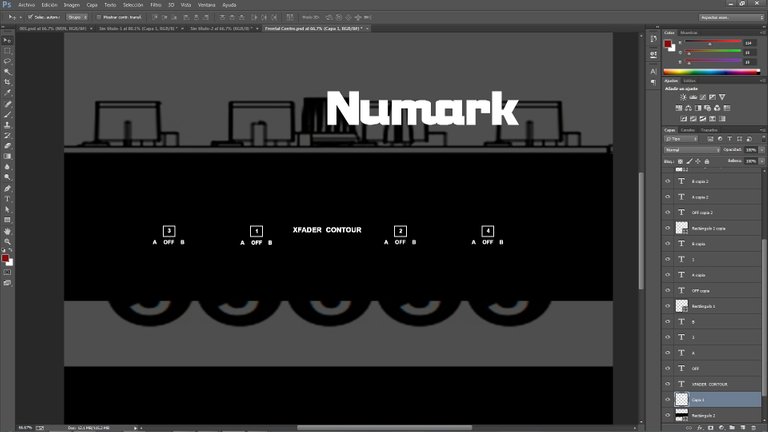
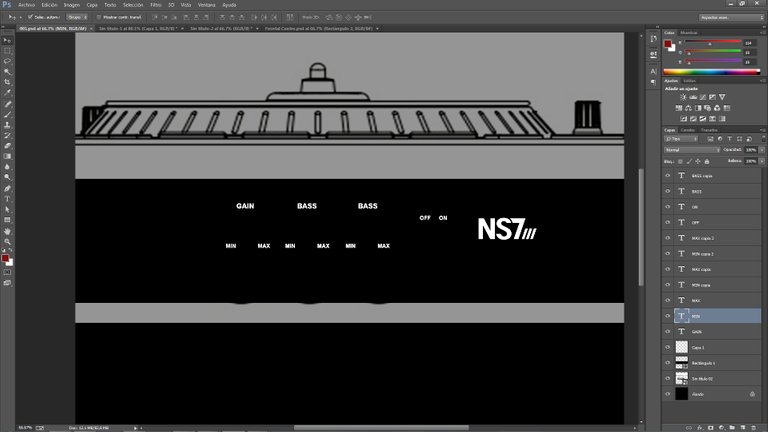
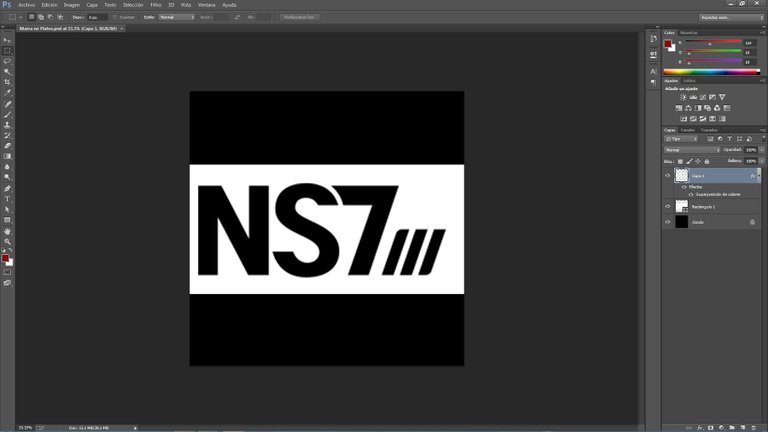
Now we will go to Photoshop to work with textures on the front of our main console and the LCD console.
Ahora si iremos a Photoshop para trabajar con texturas en el frontal de nuestra consola principal y la consola de LCDs
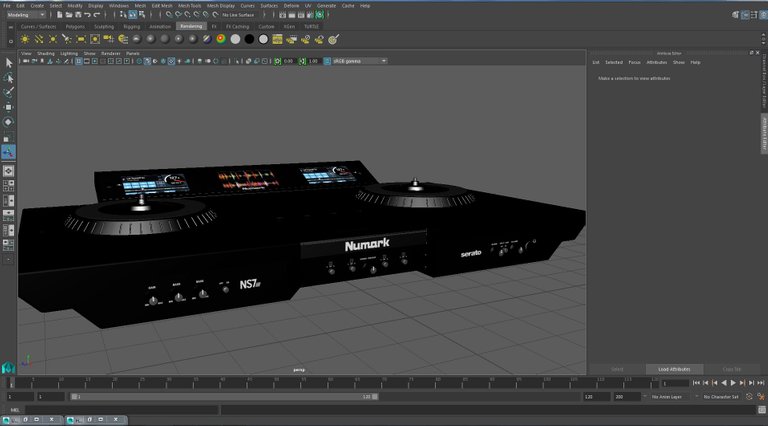
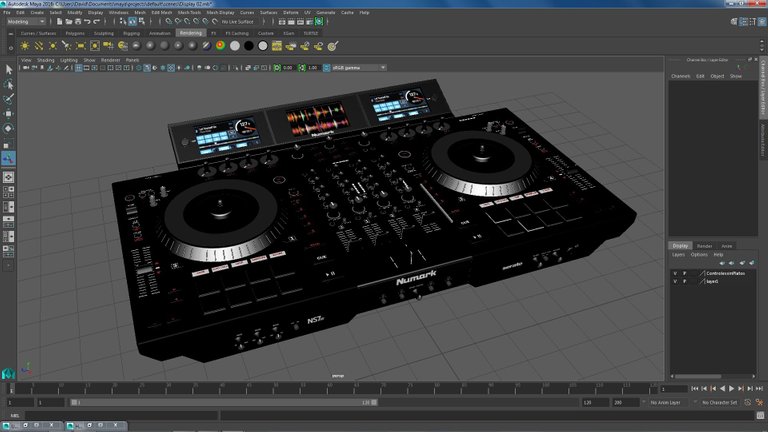
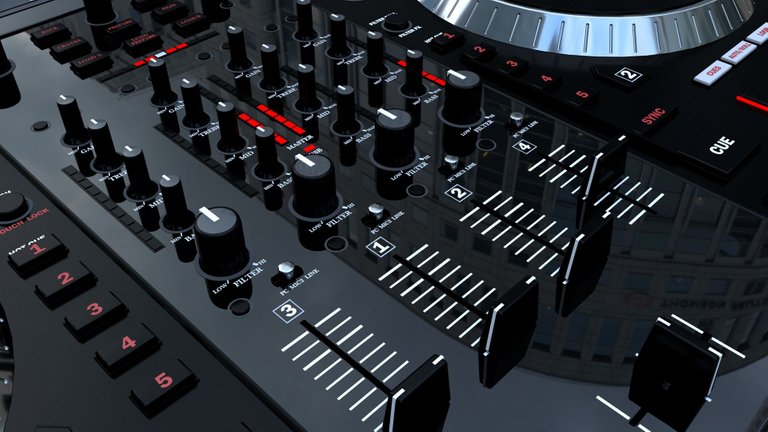
And here we have our mixer almost ready.
Y aquí ya tenemos nuestro mezclador casi listo.
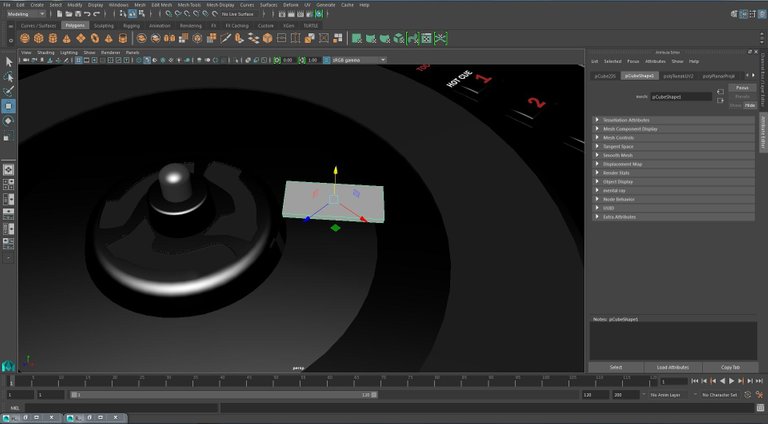
To finish we will prepare and place the name of the model that goes on each plate.
Para finalizar elaboraremos y colocaremos el nombre del modelo que va en cada plato
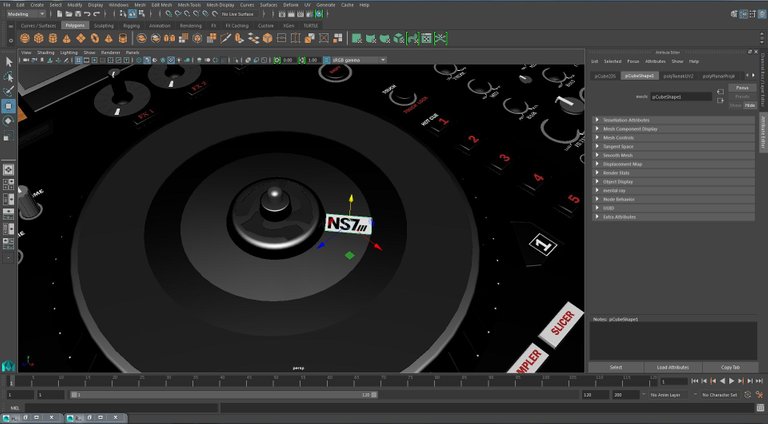
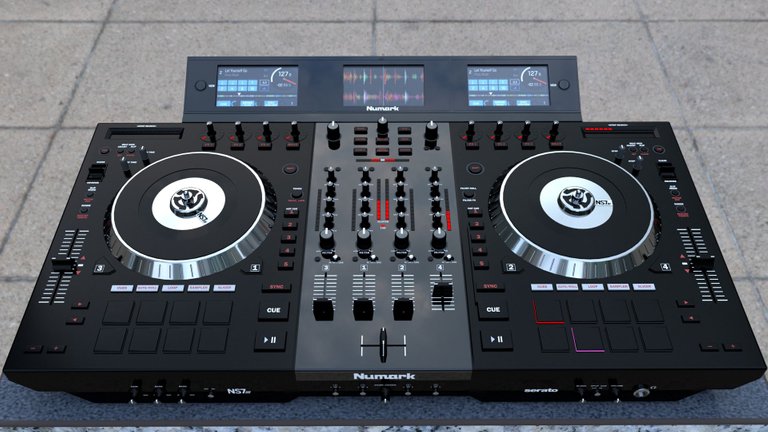
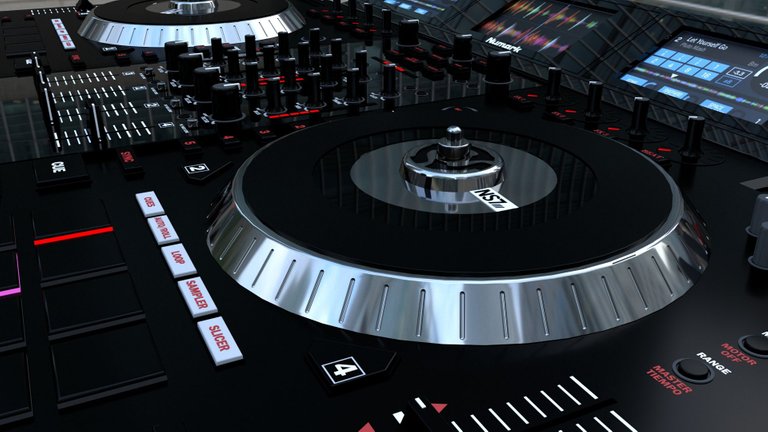
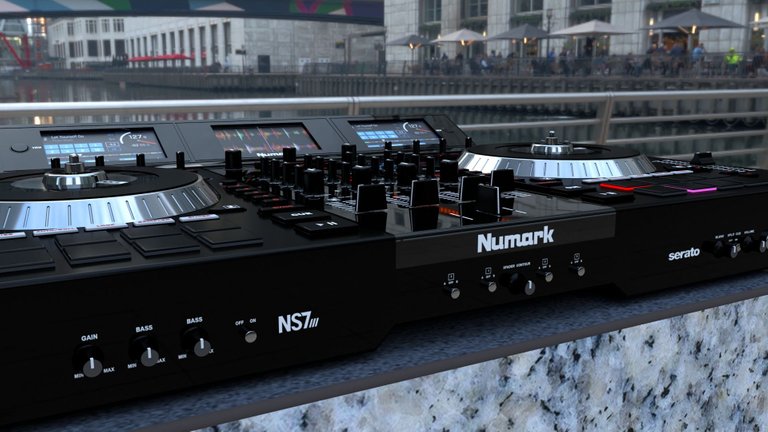
And with this last touch we have finished our model. And that's how it looks in the renders, using, as we explained in the first post of the series, an HDRI image.
Y con este último toque ya podemos dar por terminado nuestro modelo. Y así se ve en los renders, utilizando, como explicábamos en el primer post de la serie, una imagen HDRI.
Si has seguido el post hasta aquí es algo que te agradezco mucho. En el próximo post continuaremos develando más técnicas sobre el modelado 3d.
Si has seguido el post hasta aquí es algo que te agradezco mucho. En el próximo post continuaremos develando más técnicas sobre el modelado 3d.

Estas recibiendo un voto por parte del proyecto "Sound Music" (@music1sound) y este post fue seleccionado para el reporte de curación diaria. Contáctenos para saber más del proyecto a nuestro servidor de Discord. Si desea delegar HP al proyecto: Delegue 5 HP - Delegue 10 HP - Delegue 20 HP - Delegue 30 HP - Delegue 50 HP - Delegue 100 HP.