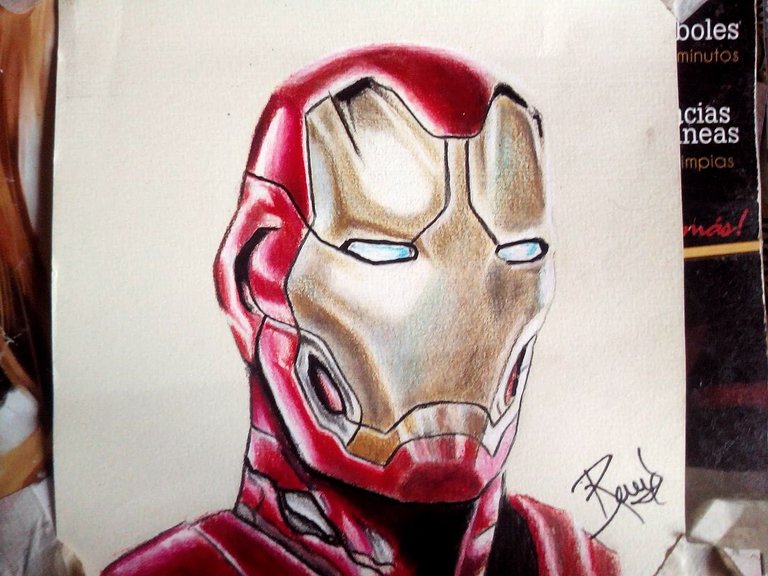
Hello friends, I hope you are very well, I was doing a movie marathon of the first two phases of the UCM and I was watching the Age of Ultron, I liked this movie a lot because it was the first time that the Avengers were decimated by strategies of Ultron. Also apart from that I liked the design of Tony Stark's armor and the best of all is that Ult'ron had a lot of resemblance to this armor, especially the helmet, that's why I decided to draw it. This drawing is done on light pastel canson cardstock and Prismacolor Premier colored pencils. Hope you like.
Hola amigos, espero que se encuentren muy bien, estuve haciendo un maratón de películas de las dos primeras fases del UCM y estava viendo la Era de Ultrón, esta película me gustó mucho porque era la primera vez que los Vengadores se vieron diezmados por las estrategias de Ultrón. También a parte de eso me gustó el diseño de la armadura de Tony Stark y lo mejor de todo es que Ultrón tenía mucho parecido con esta armadura, especialmente el casco, por eso decidí dibujarlo. Este dibujo esta hecho sobre cartulina canson de color pastel claro y con lápices de color Prismacolor Premier. Espero que les guste.

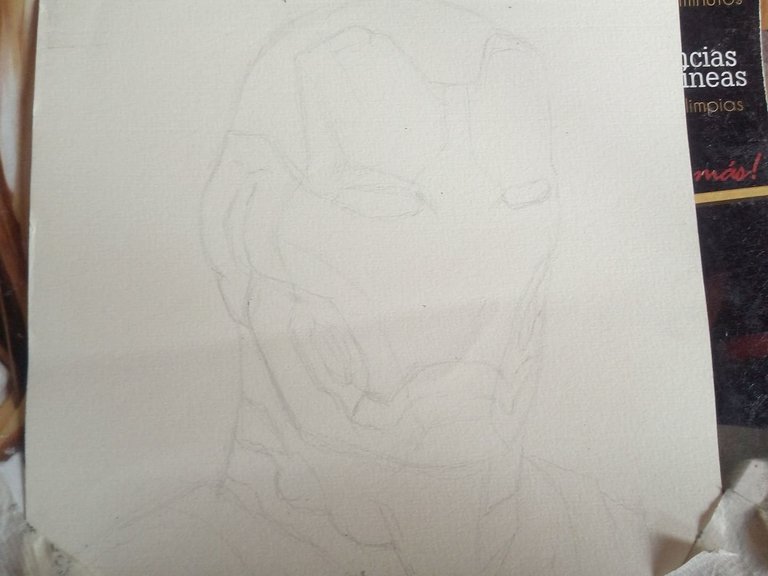

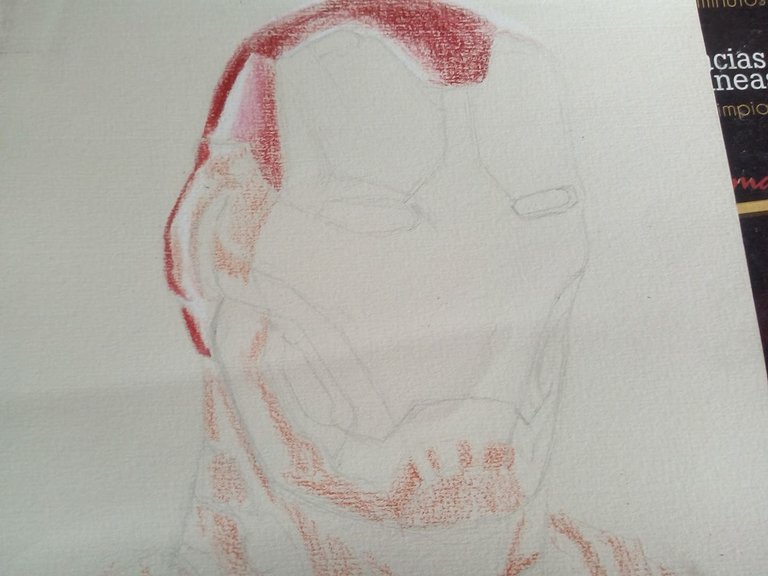
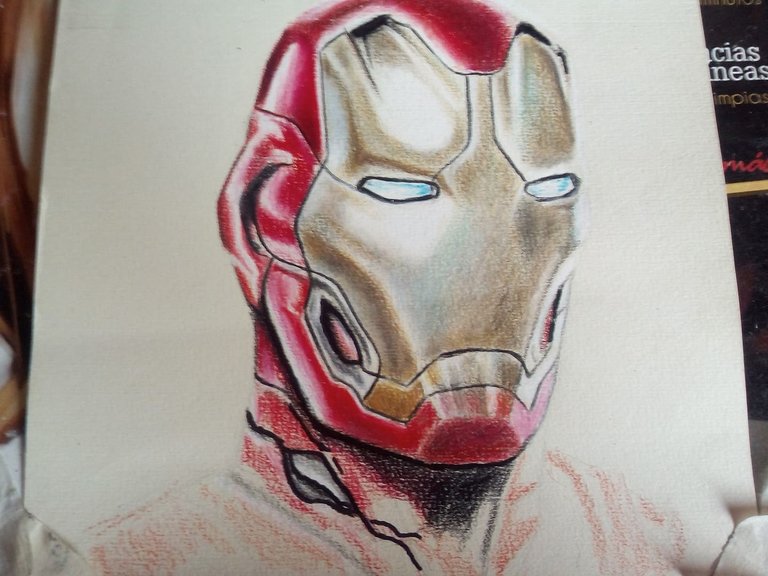
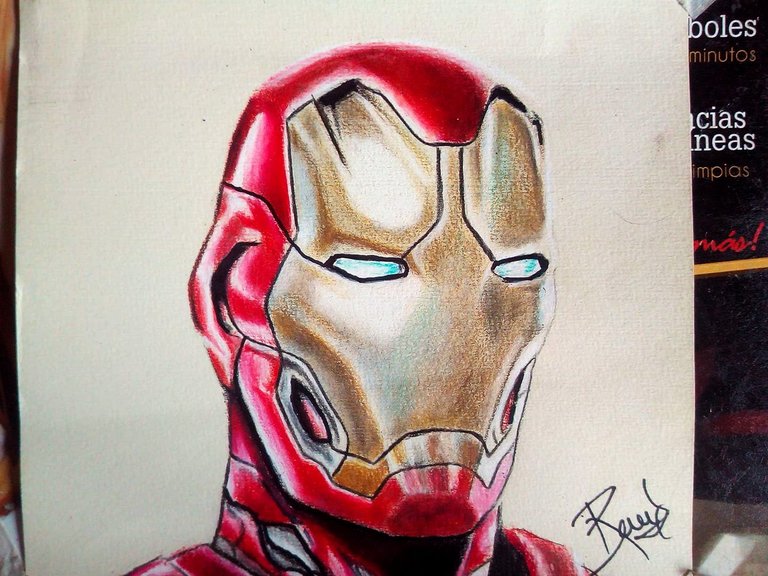
The first step, as always, is to draw a simple sketch with a 4H pencil, unlike other drawings, since the cardboard is lighter, I do not use white here. We make the sketch and then we paint the part of the helmet that goes red, we use a scarlet red that has a little orange tone, this will be the base color. Later we will put white color in the parts that are more illuminated of the hull, thus we will highlight the reflections of light. Next we begin to mix some shades of darker red to give volume to the color of the helmet.
El primer paso como siempre es dibujar un boceto sencillo con lápiz 4H, al contrario de otros dibujos al ser la cartulina más clara aqui no utilizo el color blanco. Hacemos el boceto y luego vamos pintando la parte del casco que va de color rojo, utilizamos un rojo escarlata que tiene un poco de tono naranja, este será el color base. Despues pondremos color blanco en las partes que estan mas iluminadas del casco, así resaltaremos los reflejos de luz. Seguidamente comenzamos a mezclar unos tonos de rojo más oscuro para darle volumen al color del casco.

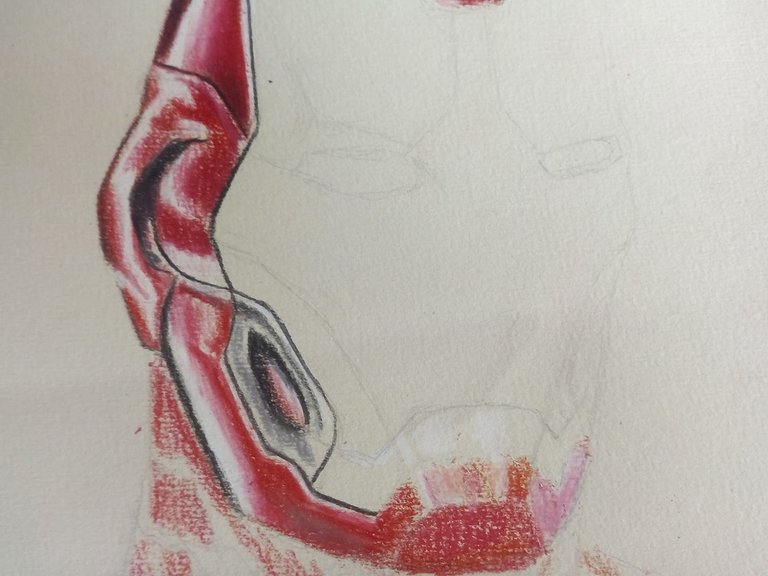
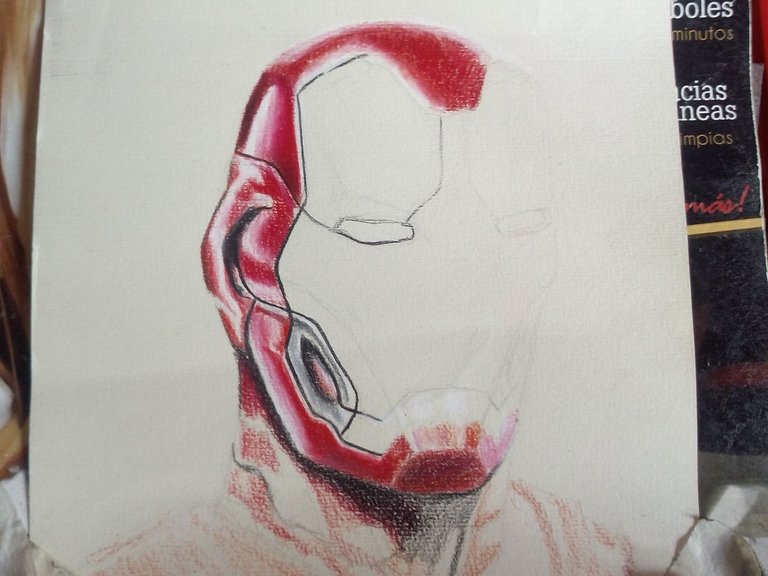
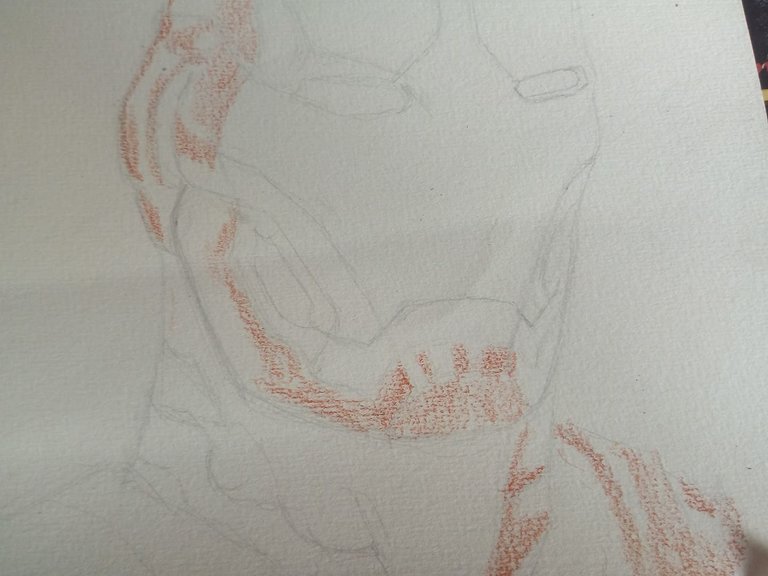
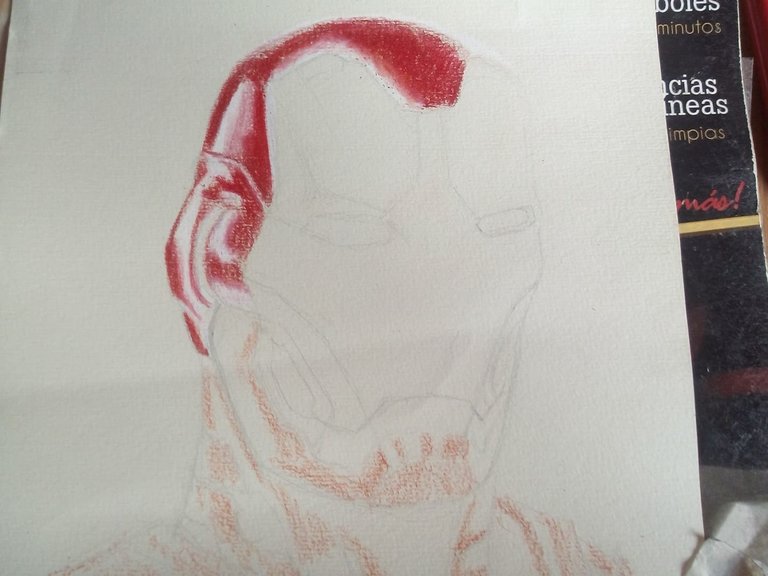
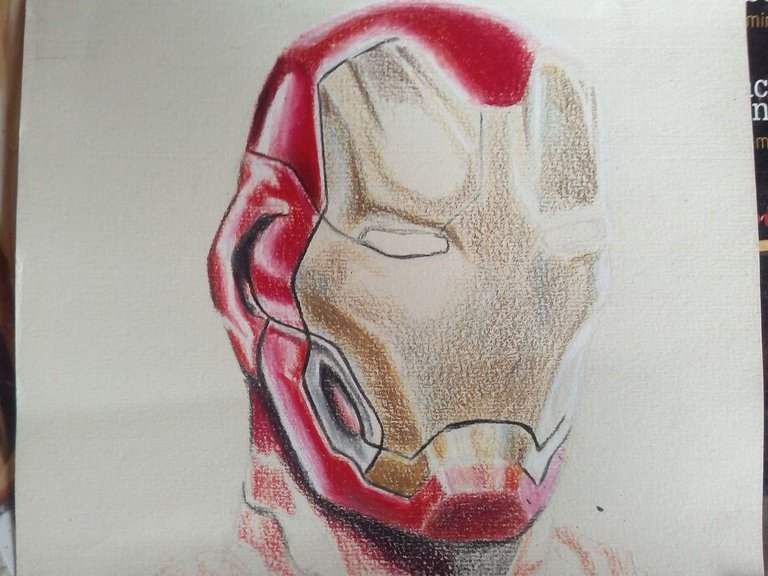
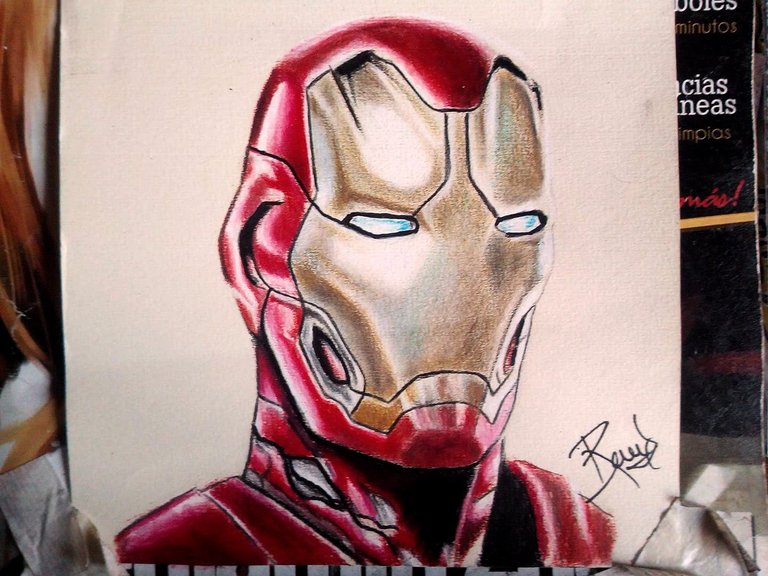
Then we begin to draw the lines that have the part that covers the face, that also includes the eyes. So we are also drawing the rest of the neck and chest. Using the same range of previous red colors.
Despues comenzamos a dibujar las lineas que tiene la parte que cubre el rostro, eso incluye también los ojos. Así tambien vamos dibujando el resto del cuello y el pecho. Utilizando la misma gama de colores rojos anteriores.
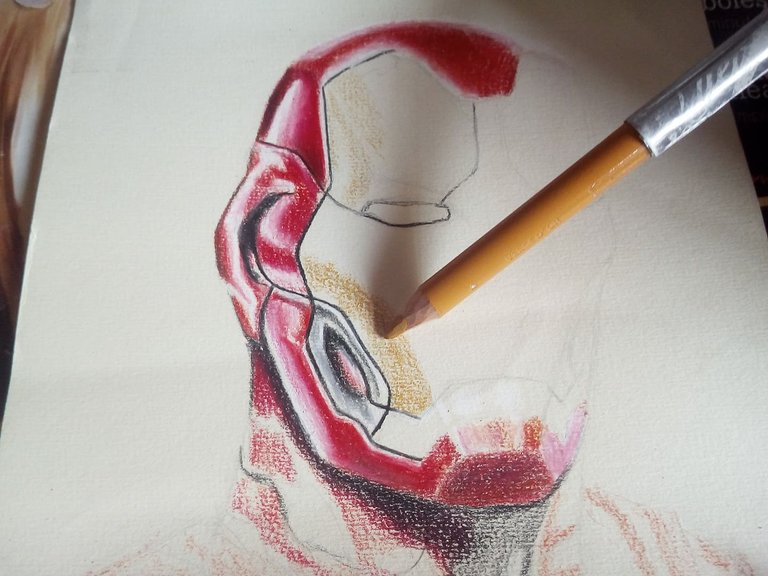
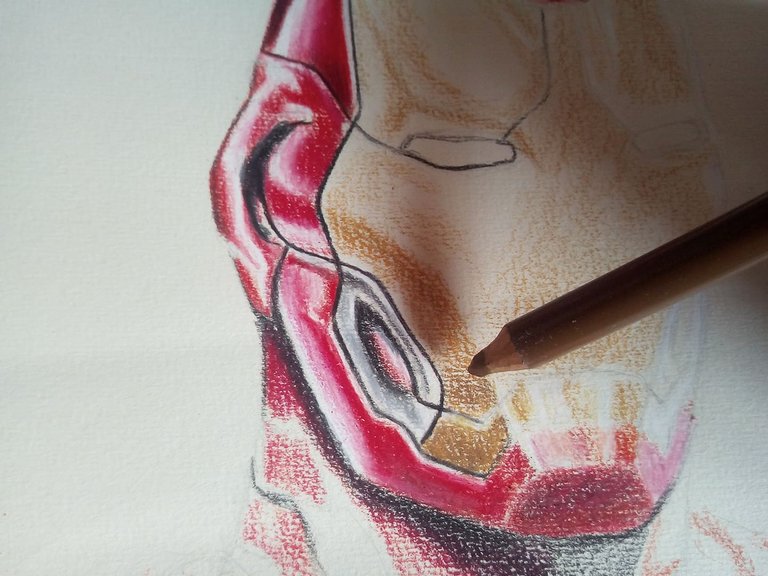
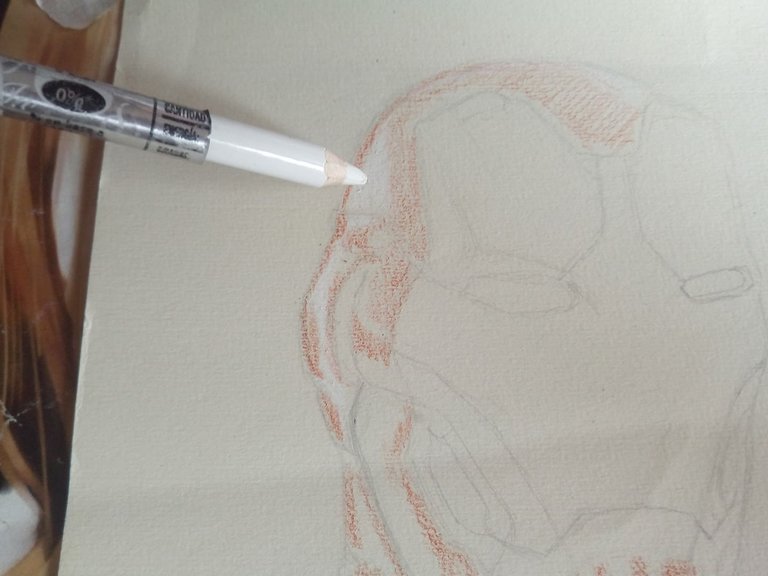
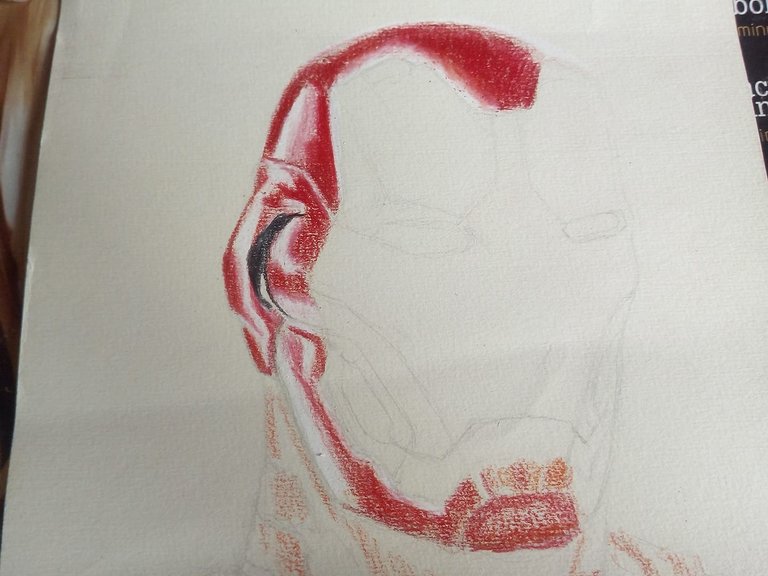
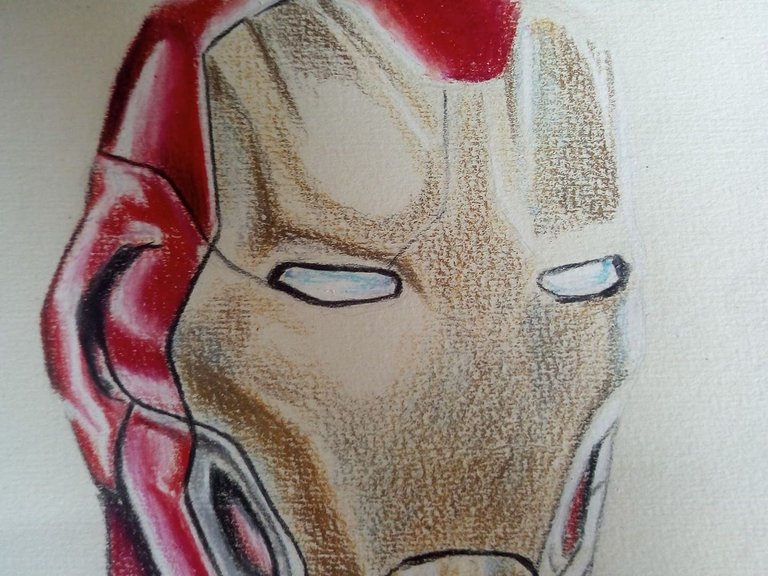
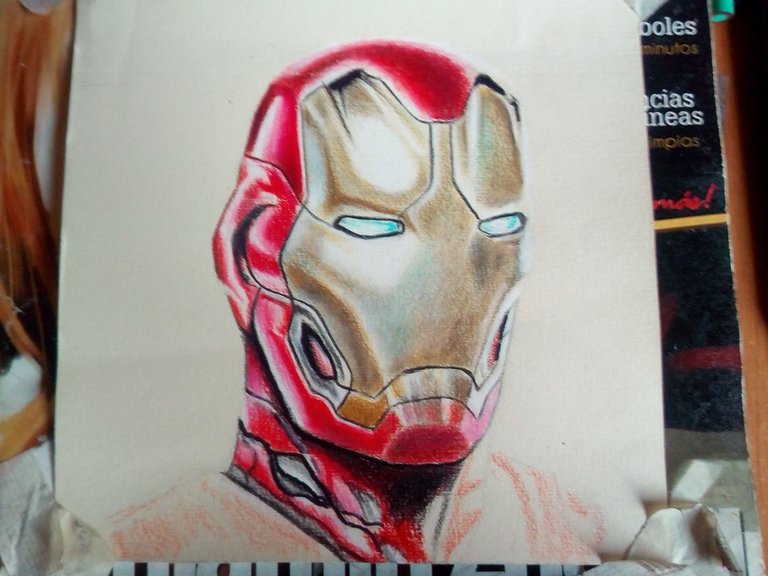
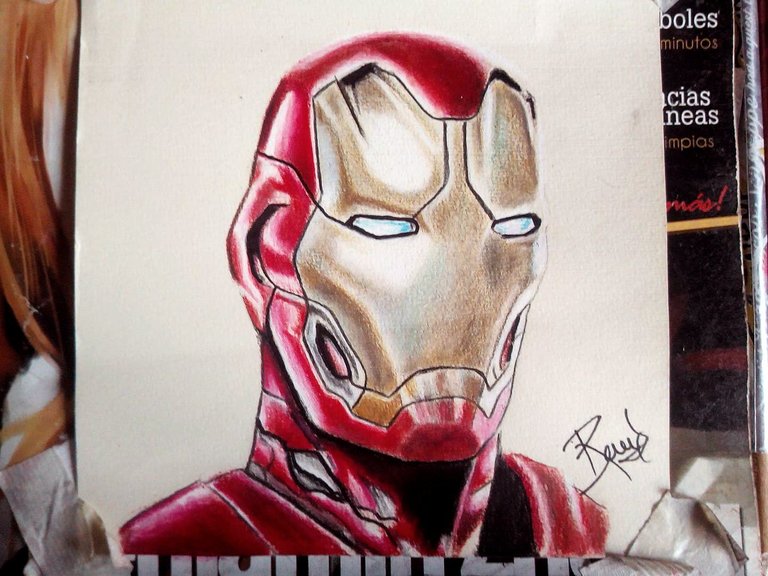
Now the next step is to paint the protector, the first color that we will use will be ocher yellow, we make soft strokes and leave some parts unpainted where we will later put white. The second color that we will use will be mustard brown, this color is a mixture between mustard green and light brown. Then we will use light brown directly for the darker parts. And to make the reflection effect of the metal we will paint some parts of light blue and turquoise.
Ahora el siguente paso es pintar el protector, el primer color que utilizaremos será el amarillo ocre, hacemos trazos suaves y dejamos algunas partes sin pintar donde luego pondremos color blanco. El segundo color que utilizaremos será cafe mostaza, este color es una mezcla entre verde mostaza y café claro. Despues utilizaremos café claro directamente para las partes más oscuras. Y para hacer el efecto de reflejo del metal pintaremos algunas partes de color azul claro y turquesa.
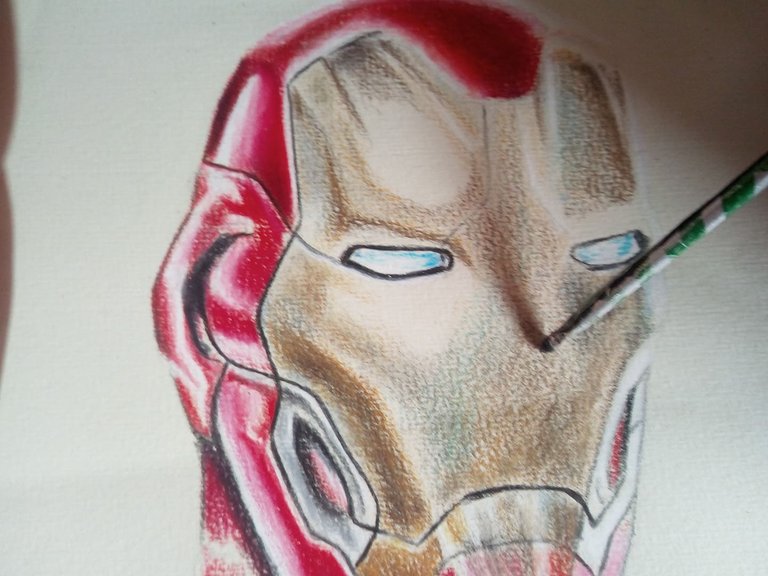
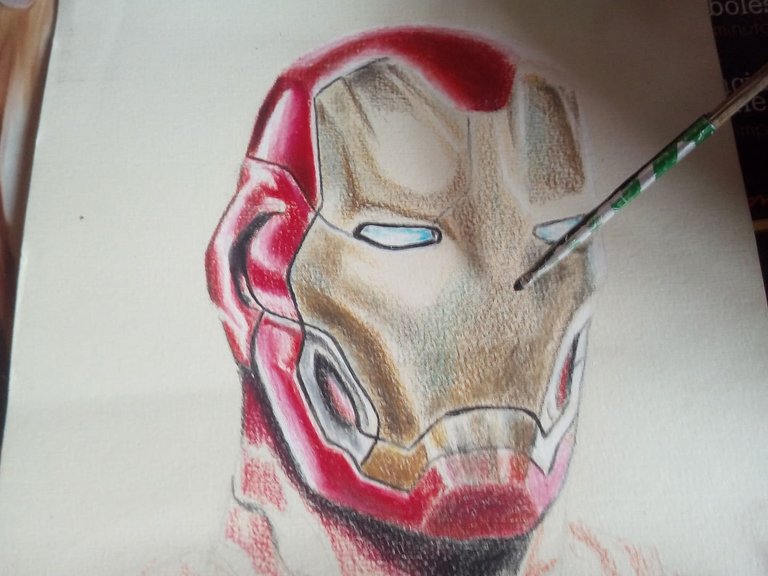
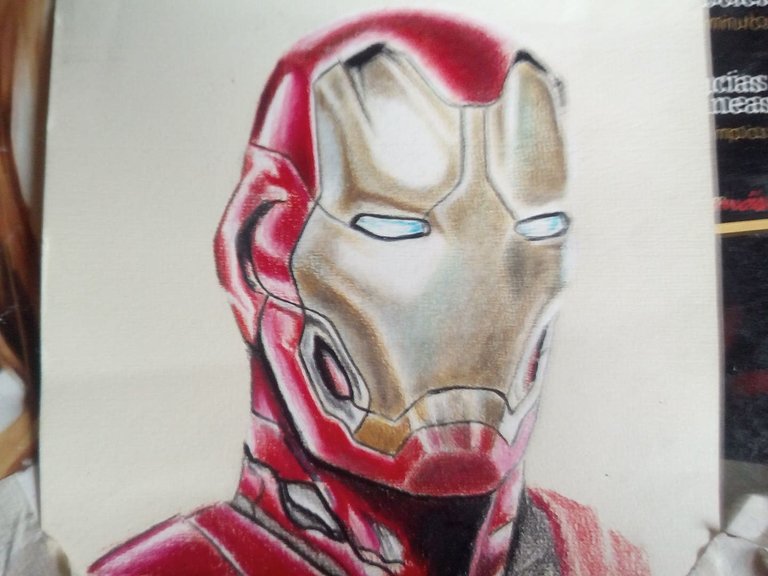
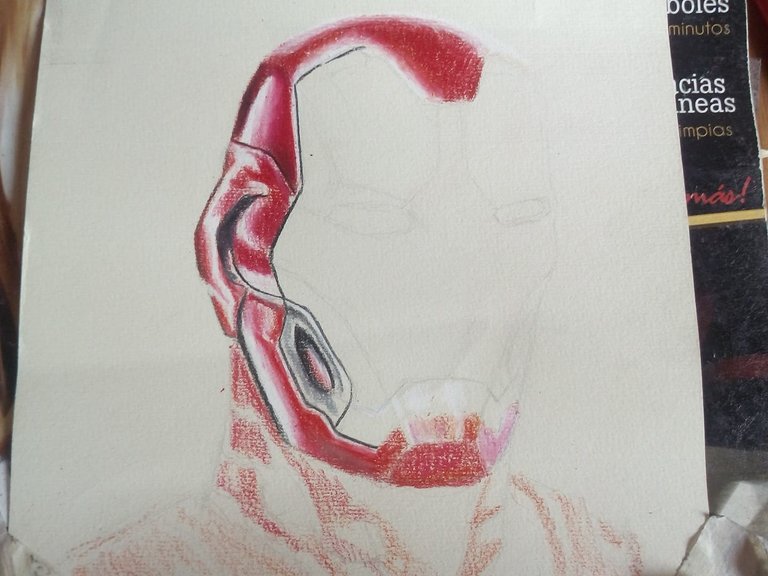
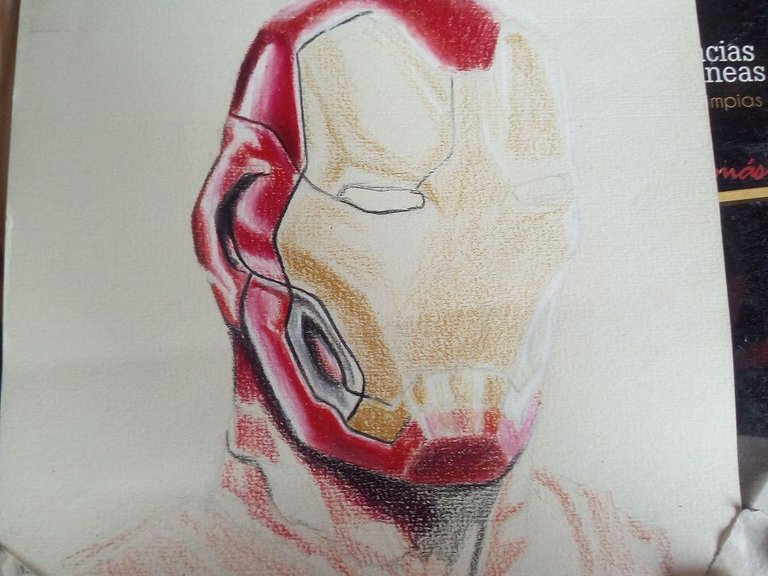
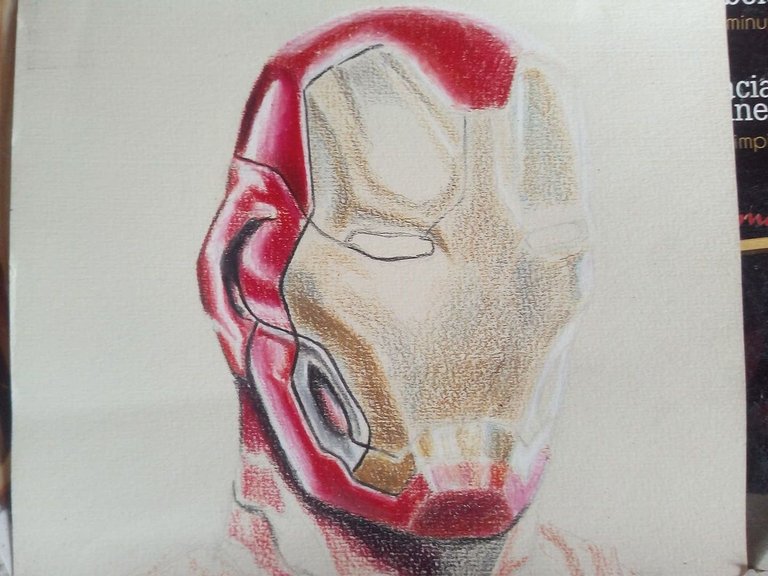
After painting the entire part of the face with a brush we are going to blur to mix all the colors well. After this with the white color we are going to paint the lighter areas to reflect the light on the metal. Next we finish painting the neck area and part of the shoulders of the armor using the same colors and the same technique that we used when starting the drawing. In this way we can finish the drawing.
Luego de pintar toda la aprte del rostro con un pincel vamos a difuminar para mezclar bien todos los colores. Despues de esto con el color blanco vamos a pintar las zonas más claras para hacer el reflejo de la luz en el metal. Seguidamente terminamos de pintar la zona del cuello y parte de los hombros de la armadura utilizando los mismos colores y la misma técnica que utilizamos al comenzar el dibujo. De esta manera podemos finalizar el dibujo.
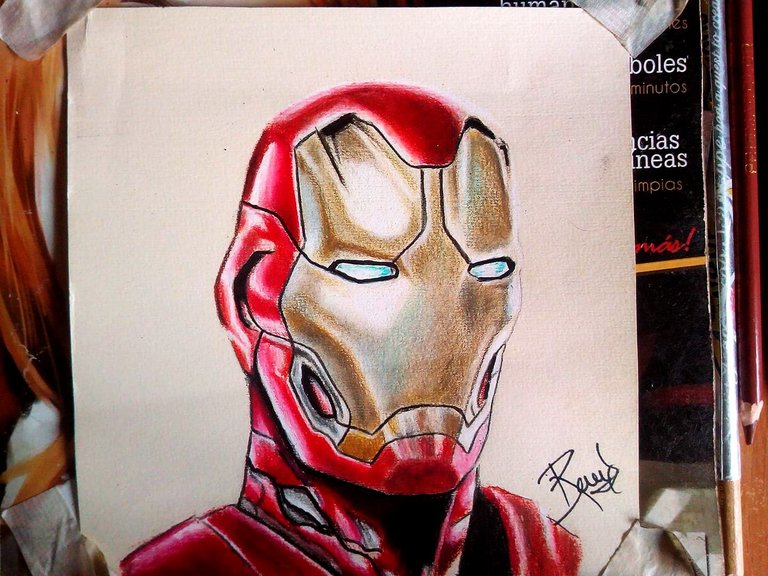
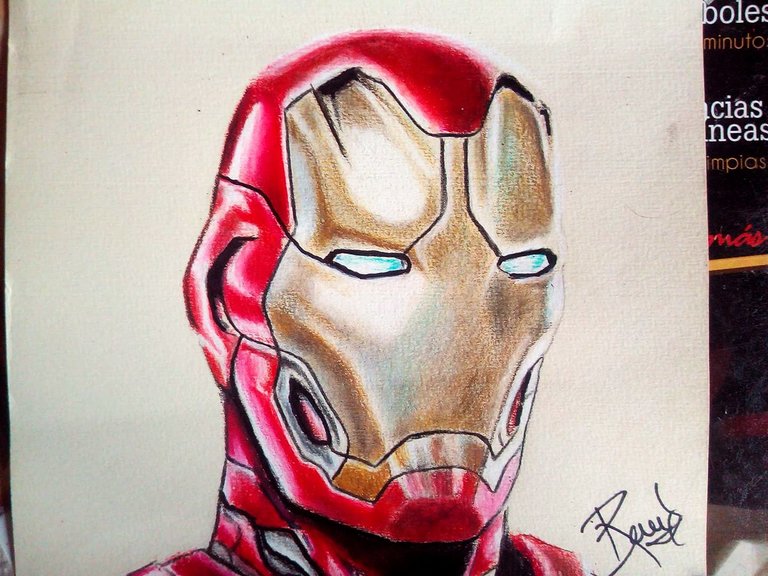

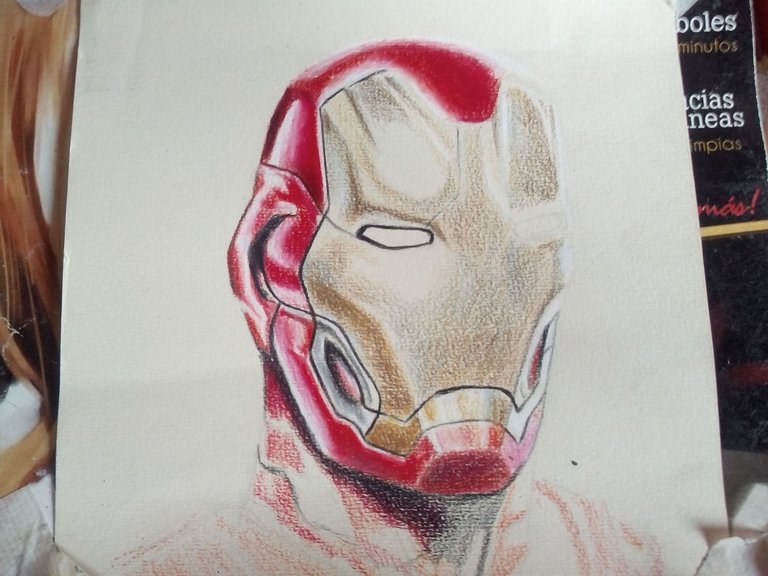
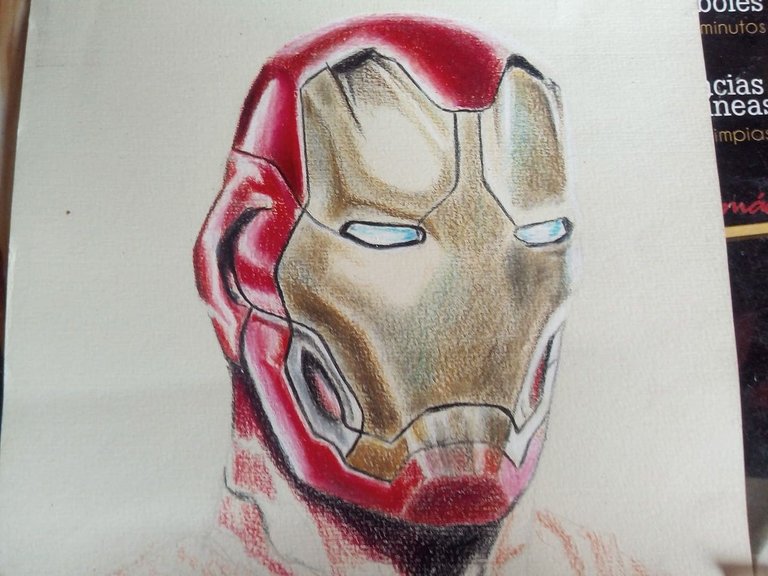
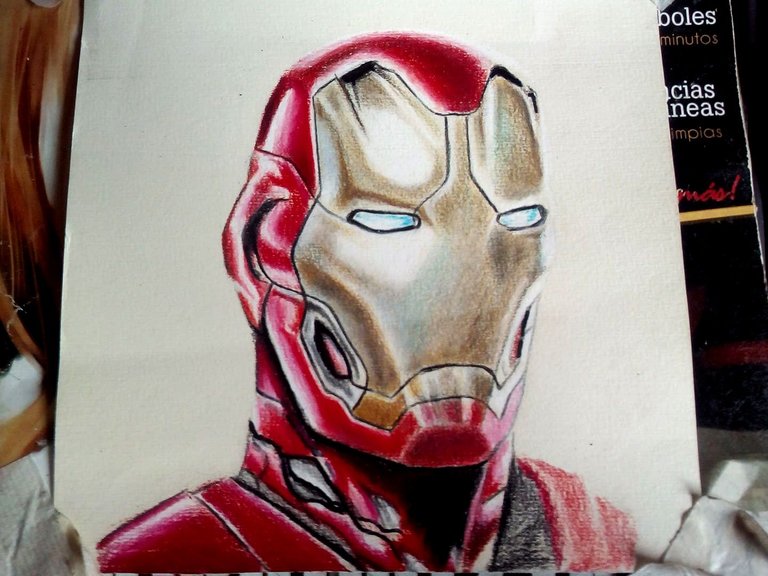
This is how our drawing of Iron Man has been, after finishing with the last details. As these colors are very creamy, unlike others, they allow you to make more layers of paint and if we add the surface of the paper to that, we will obtain a better finish. I usually mix these colors with mineral oil that allows the colors to be diluted with each other and gives the tones more shine. I hope you liked it, do not forget to comment what you think, and if you are Iron Man fans, what is your favorite armor? I like the Mark II, the VL and the Mark L. Goodbye see you soon, peace and health to all.
Así ha quedado nuestro dibujo de Iron Man, despues de finalizar con los últimos detalles. Como estos colores son muy cremosos al contrario de otros te permiten hacer más capas de pintura y si a eso le sumamos la superficie del papel obtendremos un mejor acabado. Estos colores lo suelo mezclar con aceite mineral que permite diluirse los colores unos con otro y le dá más brillo a los tonos. Espero que les haya gustado, no olviden comentar que les ha parecido, y si son fanáticos de Iron Man, cual es su armadura favorita? a mi me gusta la Mark II, la VL y la Mark L. Me despido hasta pronto, paz y salud para todos.
Como siempre un muy buen trabajo, ha sido genial, mucho ánimo y buena suerte, amigo.
Gracias hermano, siempre un gusto leer sus comentarios. Saludos!
The rewards earned on this comment will go directly to the person sharing the post on Twitter as long as they are registered with @poshtoken. Sign up at https://hiveposh.com.
hola fixie que buen talento para dibujar!! excelente trabajo
gracias hermano! Saludos!
You are a beast!!! What a spectacular drawing! I was fascinated by the neat way you did the shadows for the helmet and the overall color management. Congratulations. Keep sharing your art!
Thank you very much, my main interest was to be able to generate that reflection effect on the metal. Greetings.
Excelente dibujo! me gusto mucho el detallado ✨
Saludos hermano, muy agradecido por pasarte por mi publicación, es un honor que te haya gustado.
Ha quedado bellísimo, buenos detalles, felicitaciones que gran talento !
Muchas gracias por tomarte el tiempo de revisarlo al detalle y que te haya gustado. Saludos.
Congratulations @fixie! You have completed the following achievement on the Hive blockchain and have been rewarded with new badge(s):
Your next payout target is 7000 HP.
The unit is Hive Power equivalent because your rewards can be split into HP and HBD
You can view your badges on your board and compare yourself to others in the Ranking
If you no longer want to receive notifications, reply to this comment with the word
STOPTo support your work, I also upvoted your post!
Check out the last post from @hivebuzz:
Support the HiveBuzz project. Vote for our proposal!
Buen trabajo !!!
Gracias, saludos!
Que buen dibujo, quisiera aprender mas con ustedes.
cual quier cosa que necesites no dudes en preguntar