Hello fellow artists
How's your day?
I hope you all doing great.
As for me, I practice learning the Loomis method.
I am into sketch portraits, but I'm not good at the proportion of the face, because I only draw free hand.
So, I decided to learn the techniques to improve my drawing.
I am a self-taught artist, I just know how to draw by discovering it myself.
I don't have a proper education in drawing, but my college degree is somewhat related to arts.
So, now let me share with you my process of creating the face applying the Loomis Method.
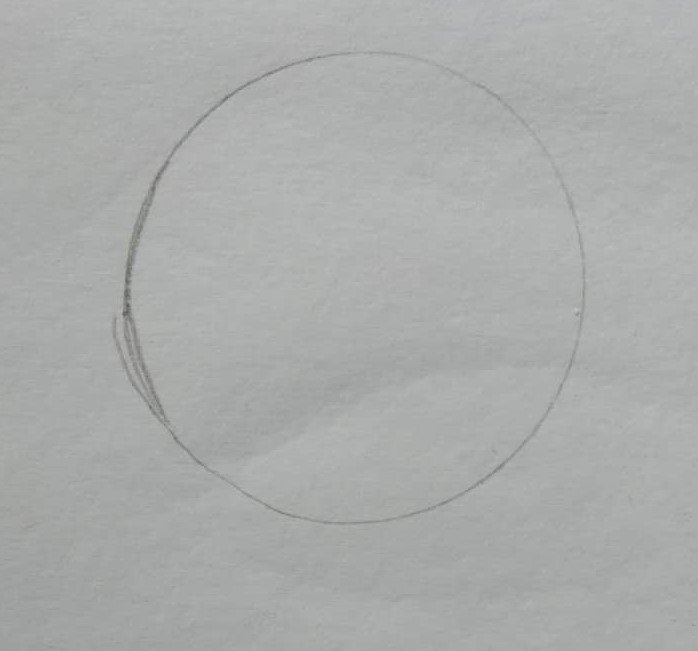
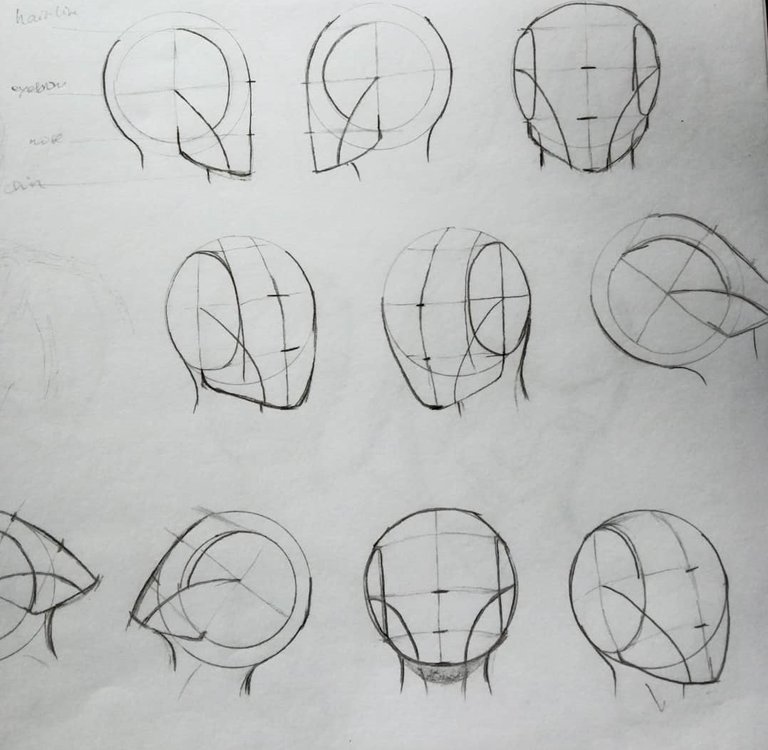
The first thing to do is draw a circle.
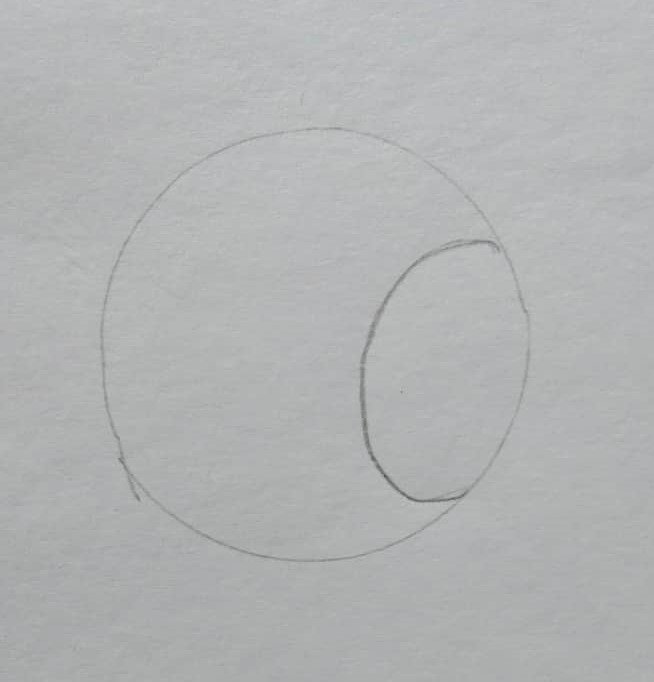
And then draw another small circle inside the circle that you first draw. This small circle is where the area of the ear was. By placing the small circle, you determine where your facing is facing. So this one is facing on the left side.
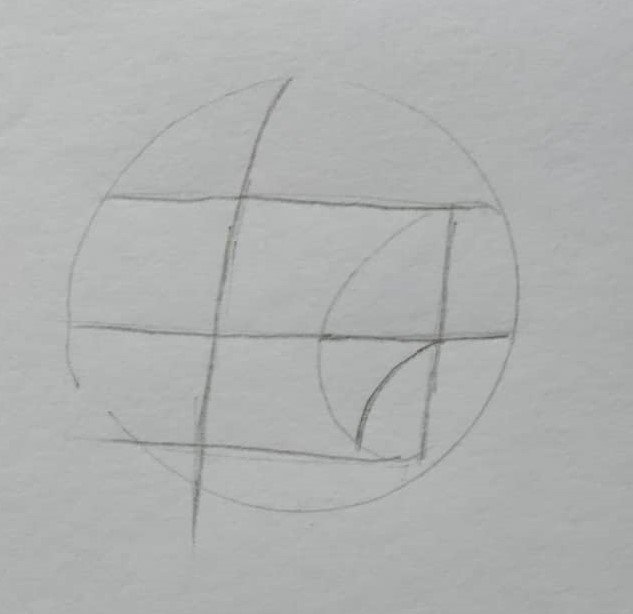
Find the middle of the circle and draw a line, and then draw another two lines in the upper and bottom of the small circle. And then find the middle of the circle vertically, as well as in the small circle.
And here, the structure is visible now.
Extend the line in the center, same measure. And then from the circle
a line connecting to the middle line.
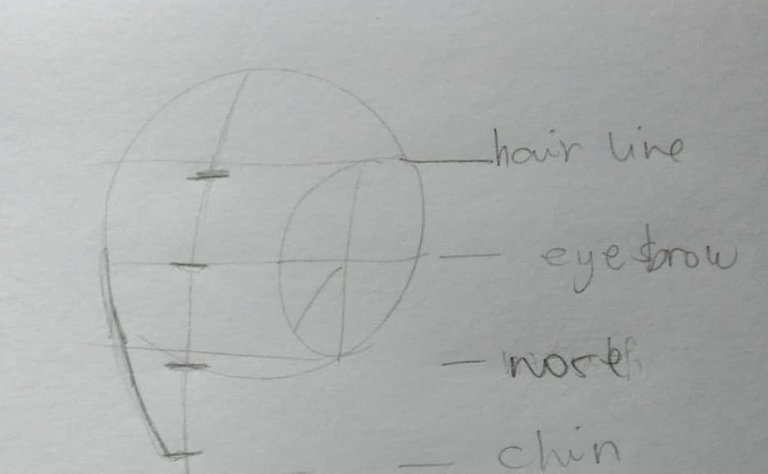
As you can see, we can now identify the location of the hairline, eyebrow, nose, and chin.
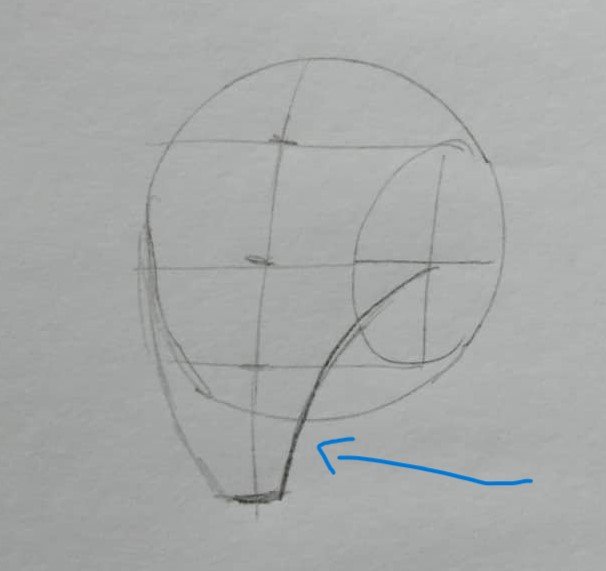
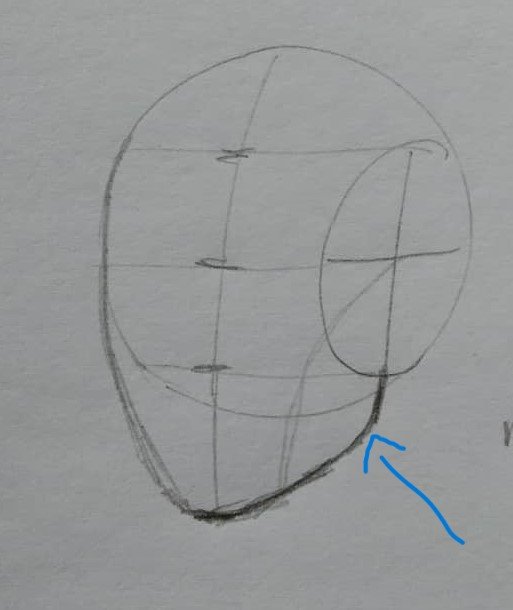
And then, draw a curve line connecting to the chin, and then connect the vertical line in the small circle to the chin.
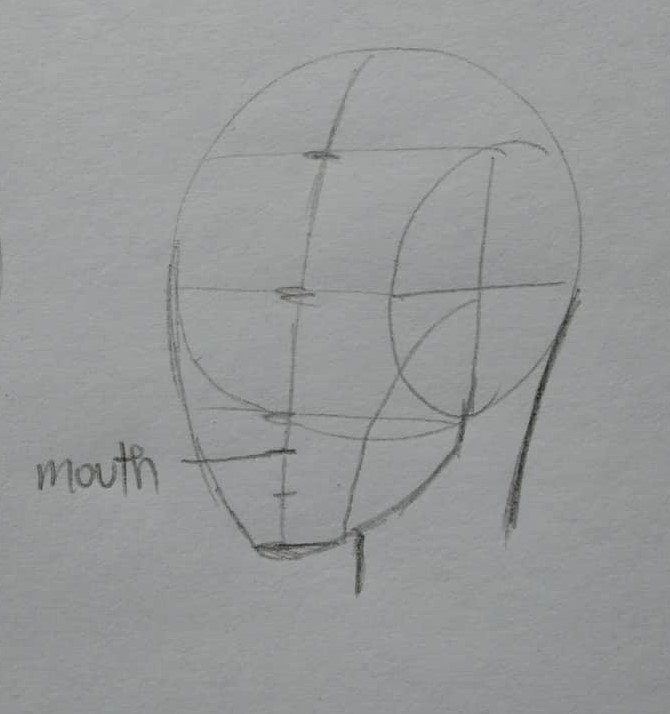
And then draw the neck. From the chin to the nose divide it into three, so you have now the mouth.
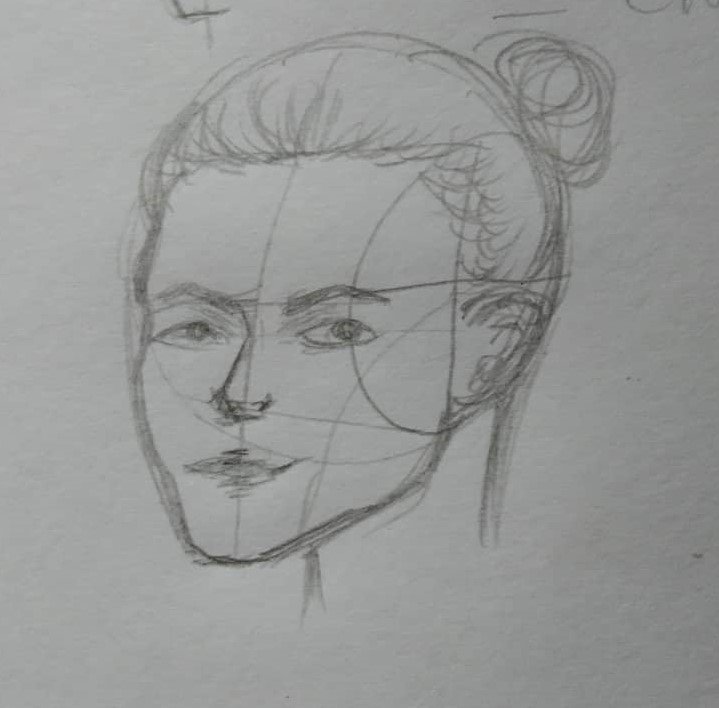
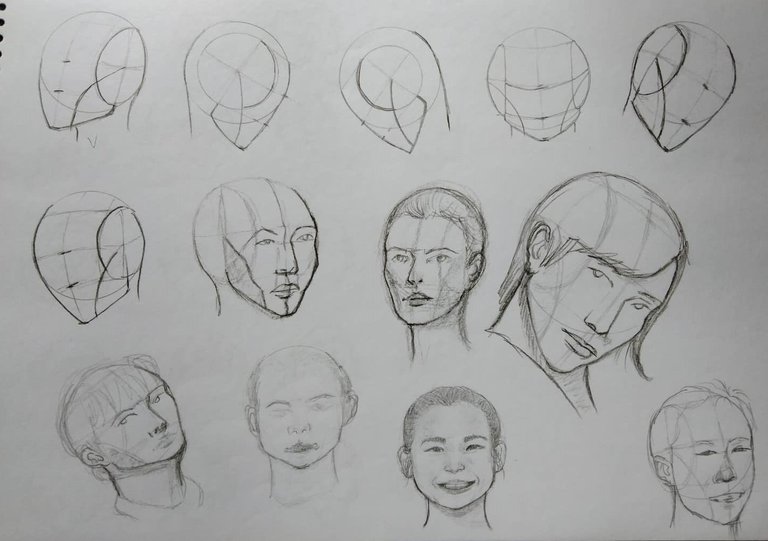
And then, start drawing the face.
Below are some of the different positions of the head.
I hope you like it. It is my first time doing a tutorial.
I know I am not that good at this.
I am still learning and I can say that I improve a little.
Enjoy your day everyone.
Anaon diay na hihi😁
Nice one dae👏
🥰thank you te
Congratulations @iamhasmin! You have completed the following achievement on the Hive blockchain and have been rewarded with new badge(s):
Your next target is to reach 600 upvotes.
You can view your badges on your board and compare yourself to others in the Ranking
If you no longer want to receive notifications, reply to this comment with the word
STOPCheck out the last post from @hivebuzz:
Support the HiveBuzz project. Vote for our proposal!
Wow, your post is inspiring me to draw again. These are cool tips. Though I'm not really an artist myself but I find drawing (and painting) relaxing and therapeutic hehe
😍 thank you, my friend.
your right, it is truly relaxing
Wow the science behind the art, I am not an artist so admired people who could draw hehe, especially portraits. Keep it up and more things to learn for sure.
^_^ thank you.
I'm a self-taught artist too. I never had any formal training in drawing (aside from the technical drawing I had in engineering).
This is most helpful. Thanks for sharing this.
Woah, thank you, I just discover this method recently. And it was really helpful