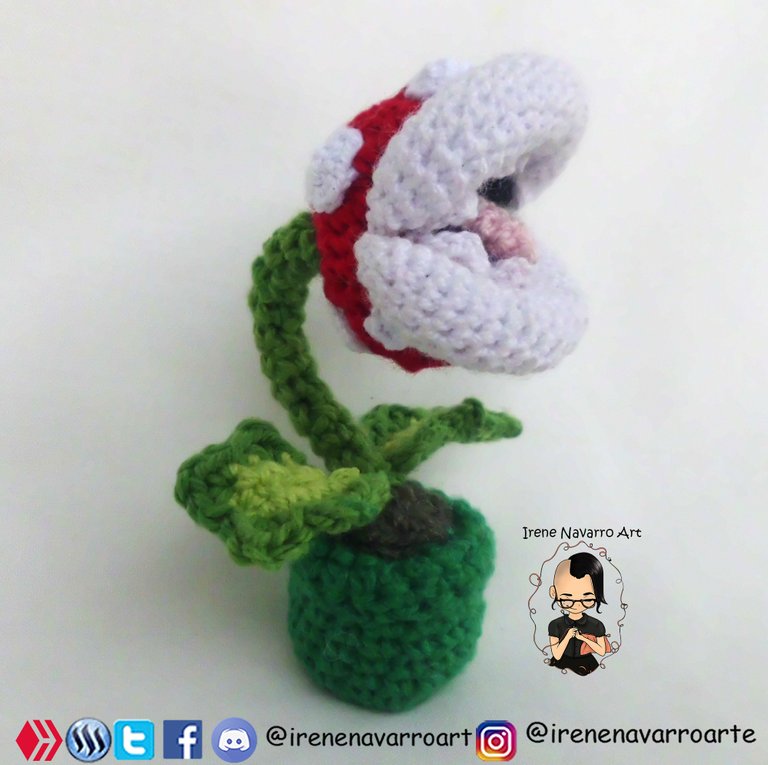
¡Saludos! en esta ocasión les comparto un amigurumi con la forma de la plasta piraña o planta carnívora del videojuego de Mario Bros.
Regards! This time I share an amigurumi in the shape of the piranha or carnivorous plant from the Mario Bros video game.
Muchos recordarán con algo de resentimiento la planta que tanto los hacía perder el juego de Mario Bros, ellas son Las Plantas Piraña seres que viven en el mundo de Mario, en el Reino Champiñón, en la Isla de Yoshi, y en otras regiones como el Reino Judía. La mayoría de estas plantas están conectadas a un tallo madre que se encuentra en las tuberías, es por ello que ellas entran y salen a la superficie por estas tuberías atacando a los jugadores de manera sorpresiva, aunque también en algunos mundos pueden vivir en macetas y en el suelo.
Many will remember with some resentment the plant that made them lose so much the Mario Bros game, they are The Piranha Plants beings that live in the world of Mario, in the Mushroom Kingdom, on the Island of Yoshi, and in other regions. Most of these plants are connected to a mother stem found in the pipes, that is why they enter and come out to the surface through these pipes, attacking the players in a surprising way, although also in some worlds they can live in pots and on the floor.
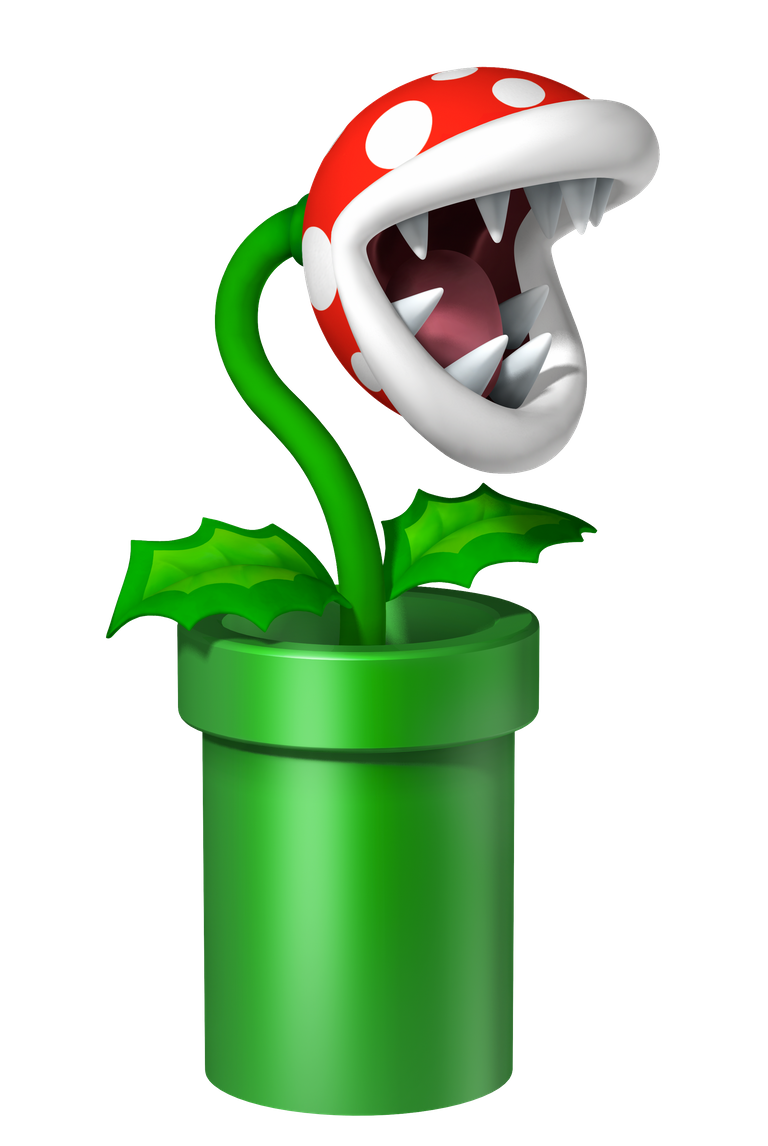
Imagen de referencia / Reference image
Proceso de elaboración /Process
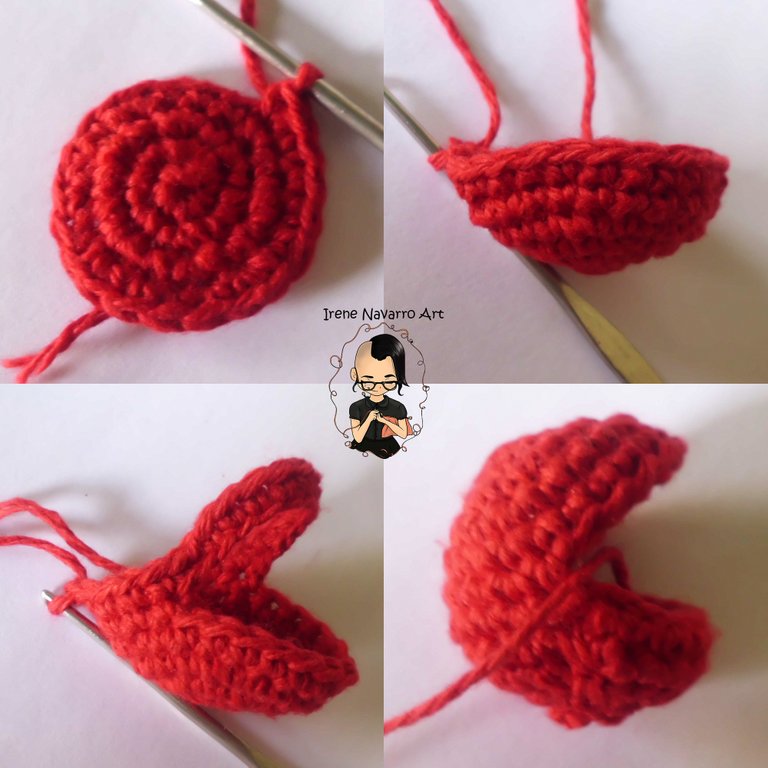
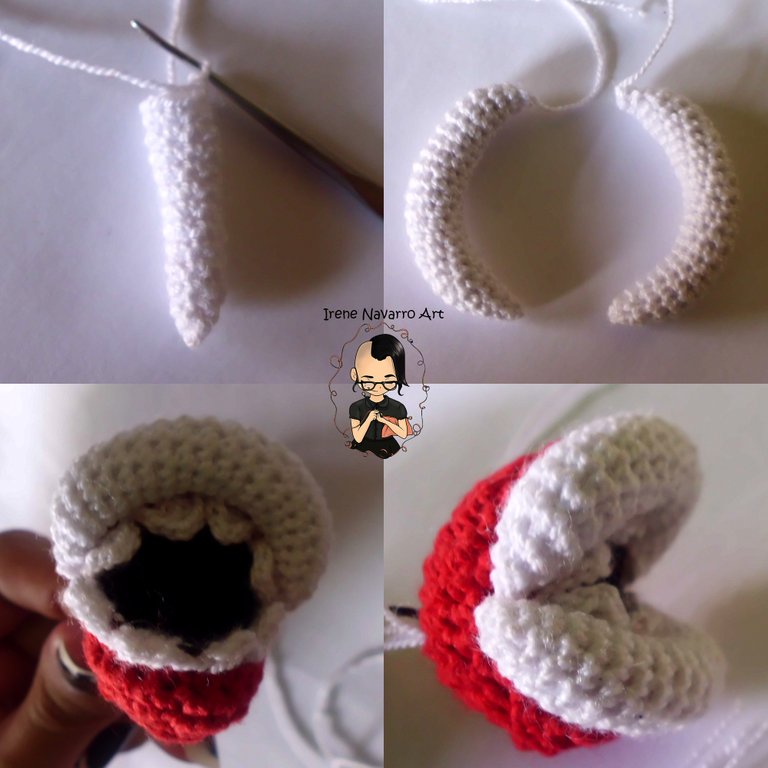
Los materiales que utilicé para este amigurumi fueron, pabilo rojo, negro, verde claro, verde medio, verde oscuro, gris, e hilo para crochet blanco y rosado, relleno de fibra sintética antialérgica, ganchillo Nº 4 y Nº 3 y una aguja de ojo grande. Comencé a tejer la cabeza de la flor con pabilo rojo y ganchillo Nº 3, haciendo una forma esférica dejando una abertura a la mitad para crear el espacio para la boca.
The materials I used for this amigurumi were, yarn red, black, light green, medium green, dark green, gray, and white and pink crochet thread, antiallergic synthetic fiber filling, crochet No. 4 and No. 3 and an eye needle big. I started knitting the flower head with red yarn and crochet No. 3, making a spherical shape leaving an opening in the middle to create space for the mouth.
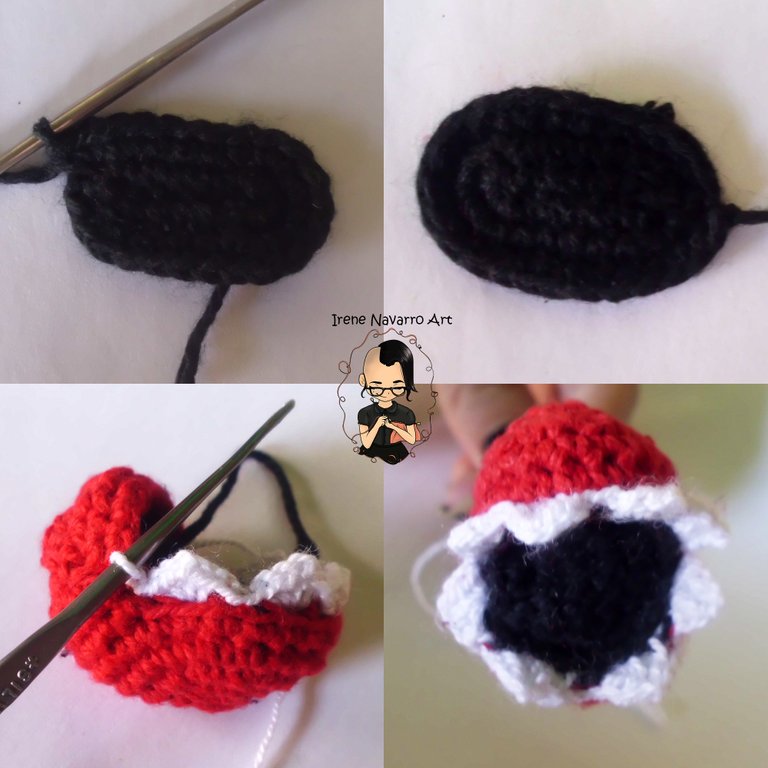
Tejí un ovalo con pabilo negro y ganchillo Nº 3, para formar el fondo de la boca, coloqué el ovalo negro dentro de la abertura de la boca uniendo las dos partes tejiendo con hilo blanco para crochet y ganchillo Nº 4, haciendo la formas puntiagudas de los dientes, antes de cerrar rellené con fibra e introduje un alambre.
I knitted an oval with black yarn and crochet No. 3, to form the bottom of the mouth, I placed the black oval inside the opening of the mouth joining the two parts knitting with white thread and crochet No. 4, making the pointed shapes of the teeth, Before closing I filled with fiber and inserted a wire.
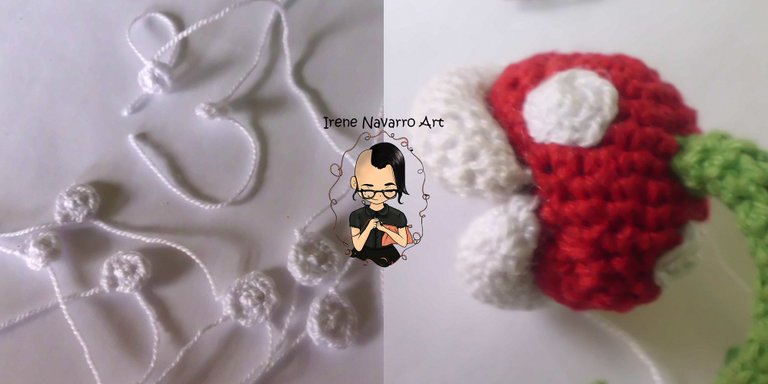
Para hacer los labios blancos de la flor, utilicé hilo blanco para crochet y aguja Nº 4, tejiendo una forma cilíndrica con disminuciones al inicio y al final, lo rellené con fibra, hice dos partes iguales y las cosí por todo el borde de la boca de la flor.
To make the flower's white lips, I used white thread and crochet No. 4, knitting a cylindrical shape with decreases at the beginning and at the end, I filled it with fiber, made two equal parts and sewed them around the edge of the mouth of the flower.
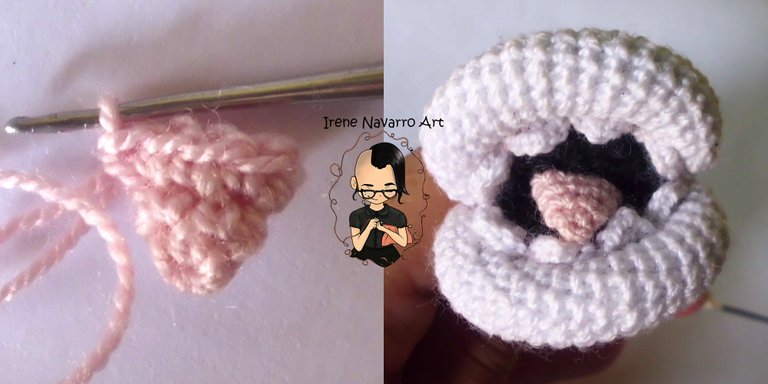
Con hilo rosado y ganchillo Nº 4, tejí una forma cónica, la cual cosí sin rellenar en el centro de la boca para crear la lengua.
With pink thread and No. 4 crochet, I knitted a conical shape, which I sewed without filling in the center of the mouth to create the tongue.
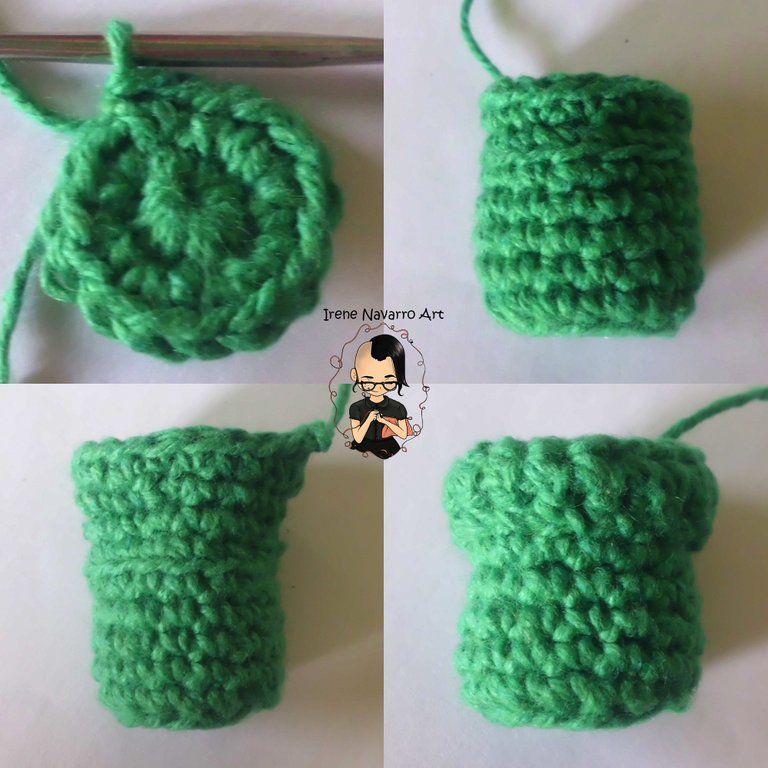
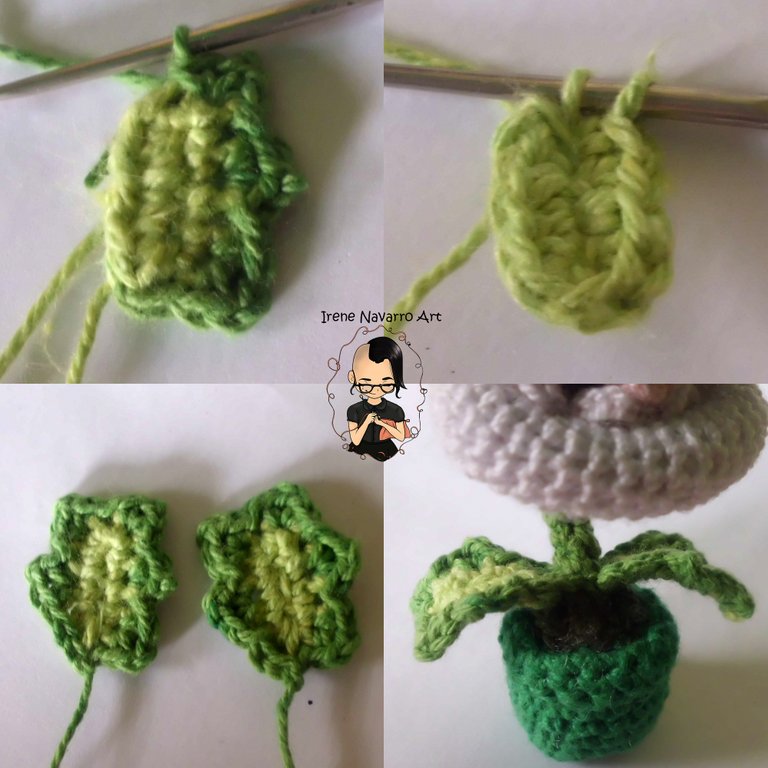
Para hacer la tubería, con pabilo verde oscuro y ganchillo Nº 3, tejí un círculo, continué el tejido de manera recta, al tener la altura adecuada hice unos aumentos y continué tejiendo de manera recta, doblé en borde y lo cosí para formar la orilla de la tubería.
To make the pipe, with a dark green yarn and crochet No. 3, I knitted a circle, continued knitting straight, having the proper height I made a few increases and continued knitting straight, folded on edge and sewn it to form the edge of the pipeline.
Para hacer el tallo comencé tejiendo un círculo con pabilo gris y ganchillo Nº 3, con pabilo verde medio levanté unos cuatro puntos de manera circular, tejí recto hasta llegar a la altura deseada para rodear el alambre que había introducido en la cabeza de la flor. Cosí el tallo a la cabeza, doblé el alambre creando una base para que la flor se mantuviera vertical, introduje el alambre a la tubería, rellené con fibra y cosí las orillas.
To make the stem I started knitting a circle with gray yarn and crochet No. 3, with medium green yarn I raised about four points in a circular way, knit straight until I reached the desired height to surround the wire that I had inserted into the flower head. I stitched the stem to the head, folded the wire creating a base for the flower to stay vertical, inserted the wire into the pipe, filled with fiber, and stitched the edges.
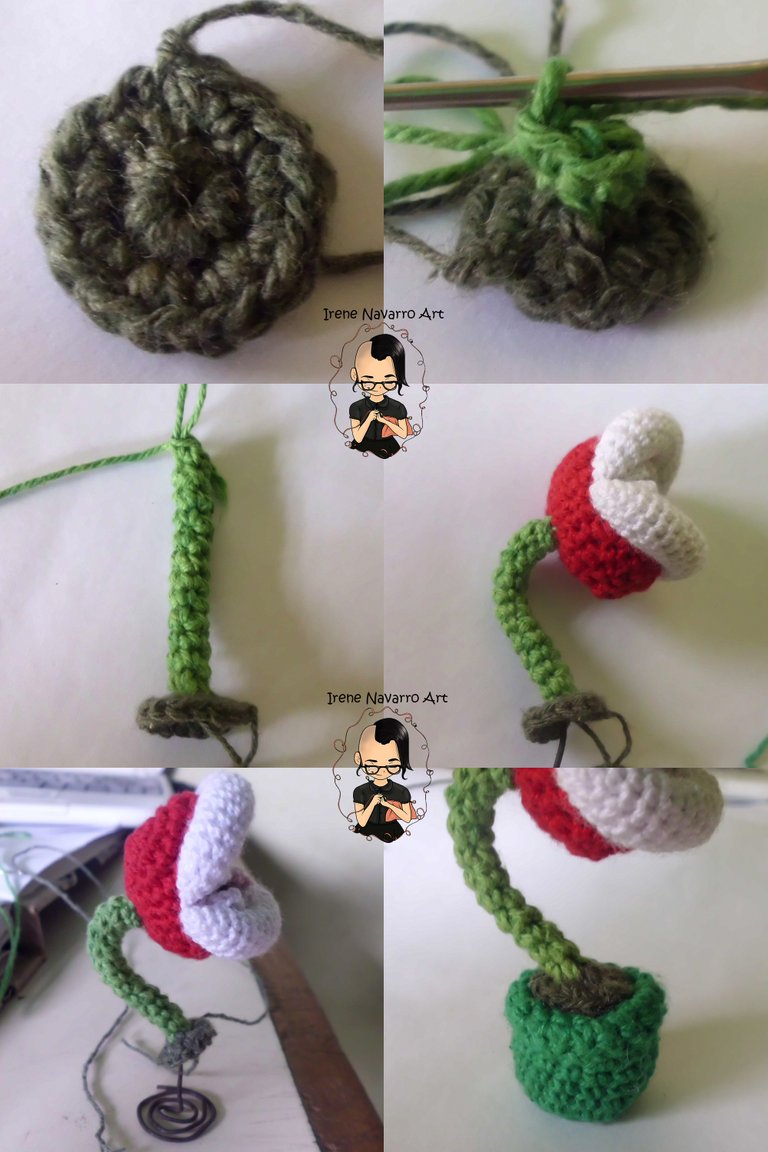
Para hacer las hojas comencé a tejer desde el centro con pabilo verde claro y ganchillo Nº 3, cambié a pabilo verde medio y tejí formas puntiagudas por los bordes de la hoja. Hice dos iguales y las cosí al tallo de la flor.
To make the leaves I started knitting from the center with light green yarn and crochet No. 3, changed to medium green yarn and knitted pointed shapes around the edges of the sheet. I made two of the same and sewed them to the stem of the flower.
Para finalizar, con hilo blanco y aguja Nº 4, tejí círculos de diferentes tamaños y los cosí a la cabeza.
To finish, with white thread and needle No. 4, I knitted circles of different sizes and sewed them to the head.
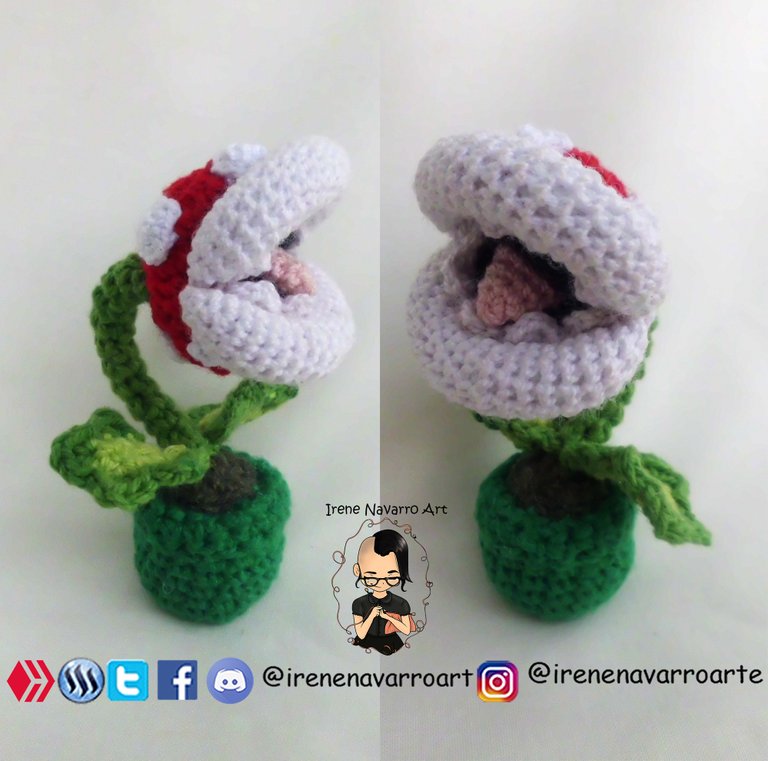
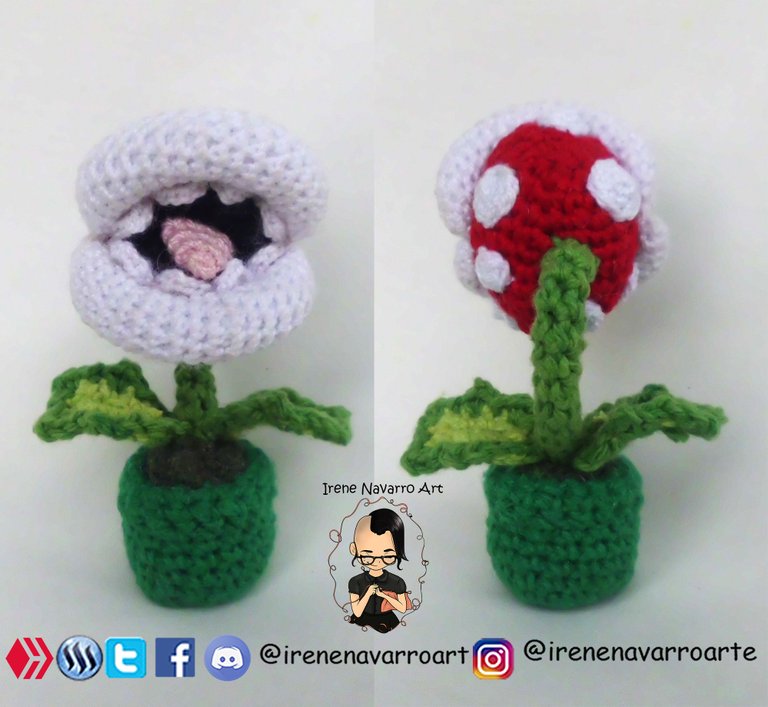
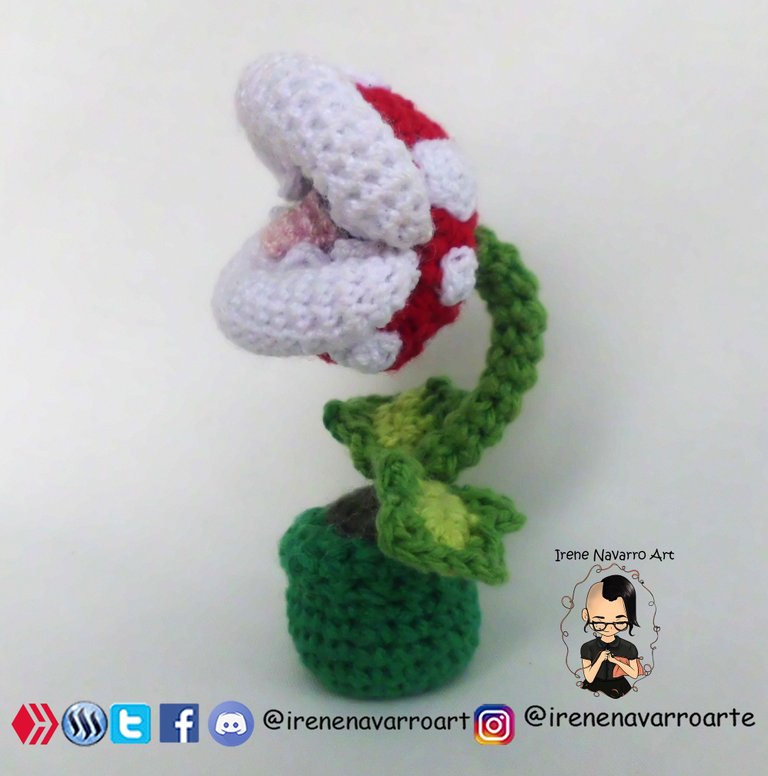
Resultado / Result
La flor mide 8 centímetros y puede usarse como pisa papel o adorno de escritorio.
The flower measures 8 centimeters and can be used as a paper clip or desktop ornament.
Imágenes tomadas con cámara Casio QV-R100 y editadas en Adobe Photoshop Cs6
Images taken with Casio QV-R100 camera and edited in Adobe Photoshop Cs6
Invítenme un Café/Support Me on Ko-Fi
Si te gusta mi contenido y quieres apoyarme a seguir dibujando, pintando, escribiendo y tejiendo puedes invitarme un Ko-fi en el enlace que les dejo aquí abajo, les recuerdo que es fácil, se usa Paypal y Tarjeta. ¡Muchas gracias a todos!
If you want to support my art you can also make donations for the value of a coffee (Ko-Fi) this uses Paypal, it is simple and with it I will be able to continue knitting and buying materials to create and share my publications

https://ko-fi.com/irenenavarroart

Espero les haya gustado. Les invito a leer mis próximas publicaciones y siempre estaré dispuesta a responder sus preguntas y comentarios, también pueden seguirme y contactarme en cualquiera de mis redes sociales. ¡Muchas gracias!
I hope you liked it. I invite you to read my next publications and I will always be willing to answer your questions and comments, you can also follow me and contact me on any of my social networks. Thank you!
#posh
Congratulations @irenenavarroart! You have completed the following achievement on the Hive blockchain and have been rewarded with new badge(s) :
You can view your badges on your board And compare to others on the Ranking
If you no longer want to receive notifications, reply to this comment with the word
STOPTo support your work, I also upvoted your post!
Do not miss the last post from @hivebuzz:
que arrechooo!.. cuanto tiempo te llevó?
Muchas gracias, lo hice en un día, no se cuantas horas, unas 5 creo :)
Muy interesante tu publicación yo también manejo algo de tejer. Saludos
Muchas gracias, saludos! :D