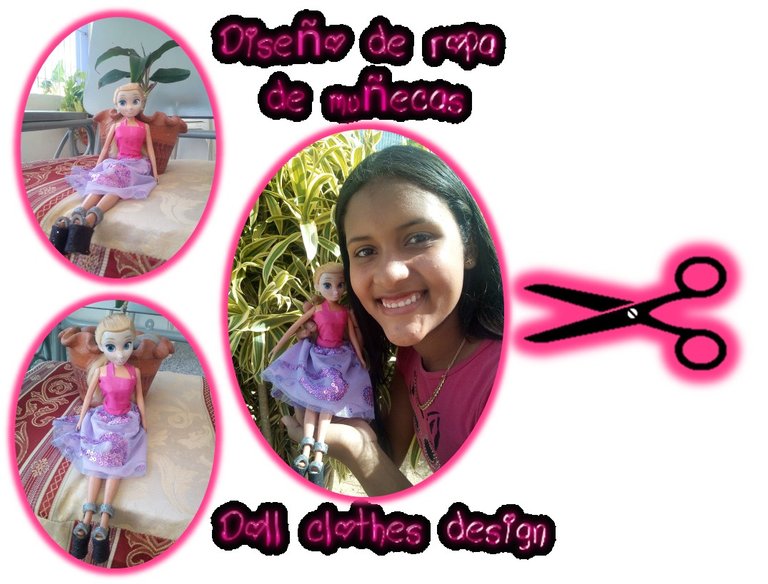

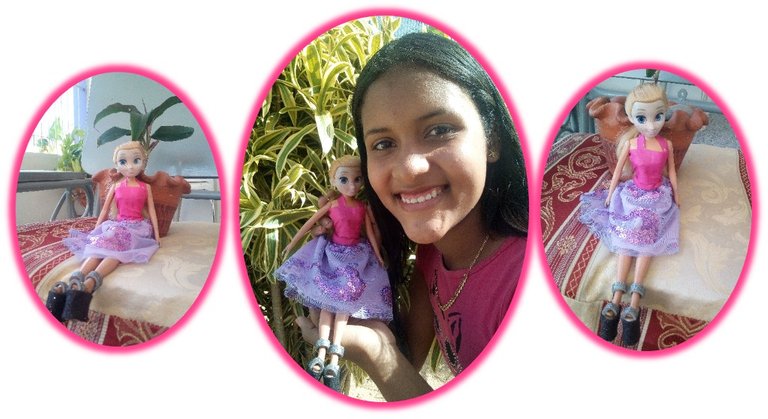
Hola a todos, hoy les traje otro atuendo que les va a fascinar, se define en dos piezas una camisa ceñida al cuerpo con una falda voluminosa y un par de zapatos de plataforma; Espero les guste mucho.
Hello everyone, today I brought you another outfit that will fascinate you, it is defined in two pieces
A body-hugging shirt with a voluminous skirt and a pair of platform shoes; I hope you like it a lot.
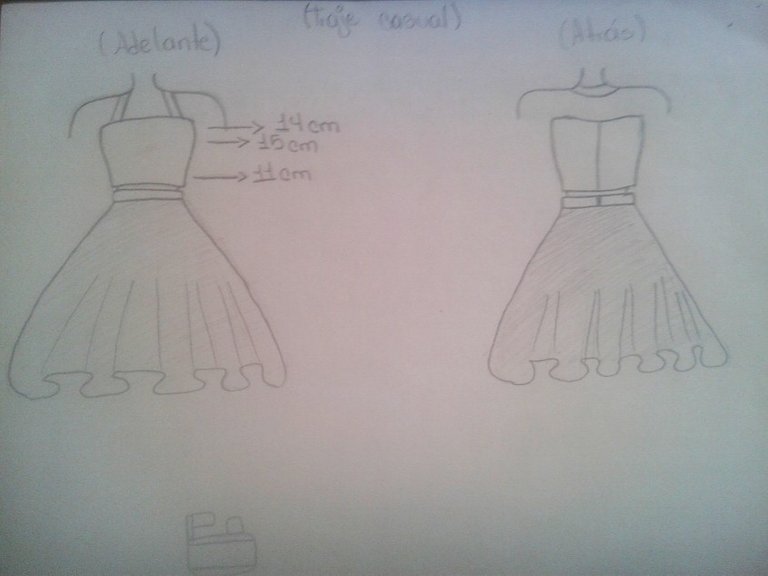
Diseño de un traje casual con zapatos de plataforma para muñeca. / Design of a casual outfit with platform shoes for doll.
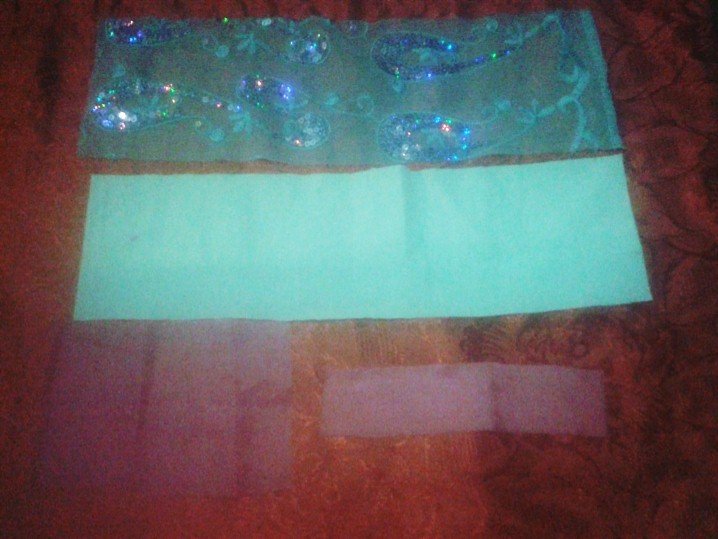
Materiales para confeccionar la falda y la camisa. / Materials to make the skirt and the shirt.
- Retasos de tela de el color que quieras (en este caso yo utilice tres colores distintos).
Fabric patches of the color you want (in this case i use three different colors).
- Hilo y aguja.
Thread and needle.
- Tijeras.
Scissors.
- Silicon.
Silicon.
- Lápiz.
Pencil.
- La modelo.
The model.
- Cierre mágico.
Magic closure.
- Cinta métrica o regla.
Tape measure or ruler.

PASO A PASO / STEP BY STEP:
Lo primero que hay que hacer es un boceto del traje donde plasmaremos las medidas, en este caso estas son las medidas:
Encima del busto: 14cm; En el busto: 15cm; Debajo de la ultima costilla y por encima del ombligo: 11cm.
The first thing to do is a sketch of the suit where we will capture the measurements, in this case these are the measurements:
Above the bust: 14cm; On the bust: 15cm; Below the last rib and above the navel: 11cm.
Para iniciar la confección, con la cinta métrica vamos a marcar en la tela de maya (42 cm de largo y 13 cm de ancho) y en una tela más oscura 42 cm de largo y 11 cm de ancho) para hacer la falda, luego en otra tela vamos a marcar para hacer el cinturón (4 cm de ancho y 20 cm de largo). Procedemos a marcar en la misma tela del cinturón (17 cm de largo y 10 cm de ancho) para la camisa y en esa misma tela otro de (2 cm de ancho y 14 cm de largo).
To start making, with the tape measure we are going to mark on the Mayan fabric (42 cm long and 13 cm wide) and on a darker fabric 42 cm long and 11 cm wide) to make the skirt, then on another fabric we will mark to make the belt (4 cm wide and 20 cm long). We proceed to mark on the same fabric of the belt (17 cm long and 10 cm wide) for the shirt and on that same fabric another one (2 cm wide and 14 cm long).
Luego ponemos la tela oscura sobre la de maya y la cosemos para poder hacer la falda, después La cosemos alrevez para que al voltearla quede con la costura por dentro. Culminado ese paso procedemos a coser La tela del cinturón doblándola a la mitad y cosiéndola solo de los lados alreves para que al voltearla quede con la costura por dentro, al voltearla cósela y pégala la falda detrás del cinturón coloca cierre mágico.
Then we put the dark fabric on top of the Mayan one and sew it to make the skirt, then we sew it around so that when we turn it over it is left with the seam inside. At the end of this step we proceed to sew the fabric of the belt folding it in half and sewing it only from the back sides so that when turning it is with the seam inside, when turning it sew it and glue it the skirt behind the belt places a magic closure.
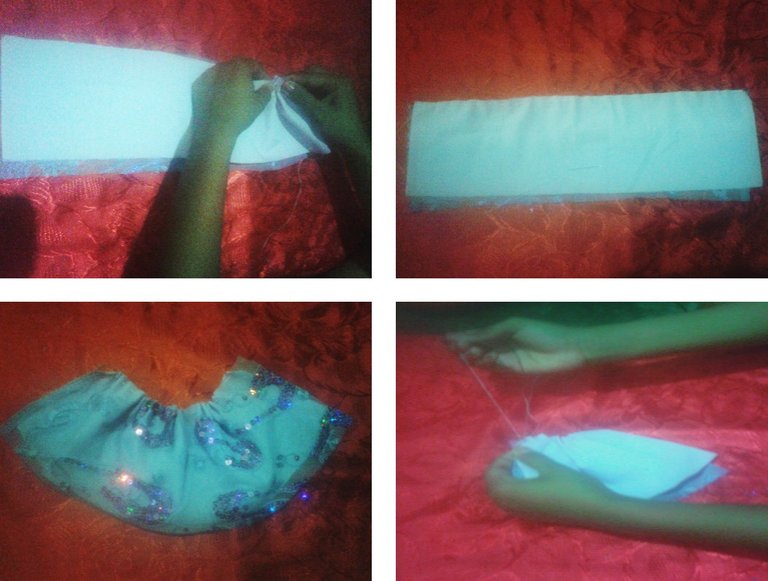
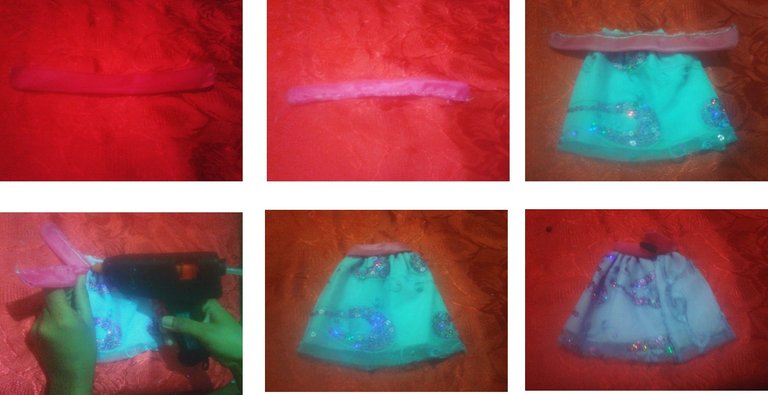
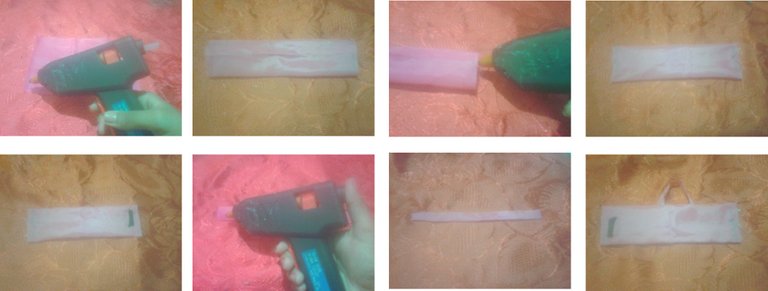
Con la tela de la camisa la doblamos a la mitad y con silicón pegamos los lados y el de abajo, y coloca cierre mágico con la tela de la cinta dóblala a la mitad y pégala a la camisa que quede así.
With the fabric of the shirt we fold it in half and with silicone we glue the sides and the bottom, and place a magic closure with the fabric of the ribbon fold it in half and glue it to the shirt that remains.
Zapatos de plataforma para muñeca / Platform shoes for doll:
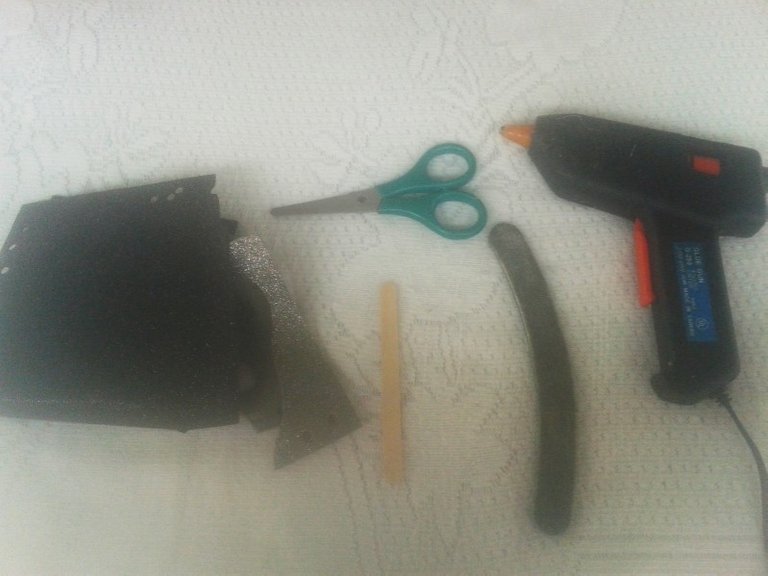
Materiales para confeccionar las plataformas. / Materials to make the platforms.:
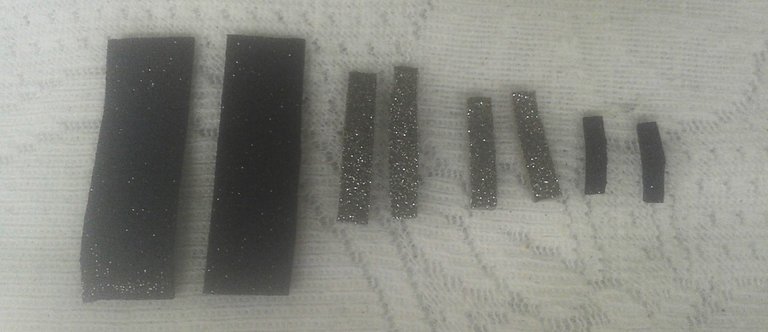
- Foami negro y plateado.
Black and silver foami.
- Tijeras.
Scissors.
- Silicon.
Silicon.
- Lima de uña.
Nail file
- Paleta de helado.
Popsicle.
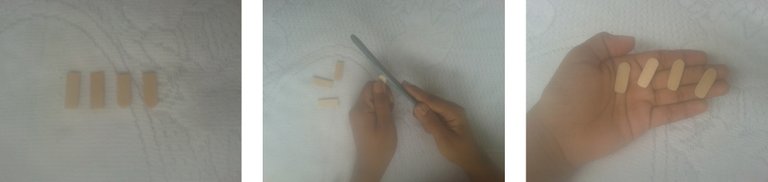
Empezaremos con medir en la paleta (2.5 cm de largo 4 veces) y con la ayuda de un adulto las vamos a picar, con la lima las vamos a limar para que queden redondeadas esto es para las suelas y plantillas.
We will start with measuring on the palette (2.5 cm long 4 times) and with the help of an adult we will chop them, with the file we will file them so that they are rounded this is for the soles and insoles.
En el foami negro vamos a medir 1 par de (6.7 cm de largo y 2 cm de ancho) 1 par de (1.7 cm de largo y 0.5 cm de ancho) En el foami plateado vamos a medir 1 par (0.6 cm de ancho y 3.3 cm de largo) y 1 par de (0.6 cm de acho y 4 cm de largo).
In the black foami we are going to measure 1 pair of (6.7 cm long and 2 cm wide) 1 pair of (1.7 cm long and 0.5 cm wide) In the silver foami we are going to measure 1 pair (0.6 cm wide and 3.3 cm long) and 1 pair of (0.6 cm wide and 4 cm long).
Continuamos pegando los pedazos de foami más grandes en la punta, pegamos una suela de paleta en la parte de abajo .
We continue to glue the largest pieces of foami on the tip, we glue a paddle sole on the bottom.

Con las tiras de foami plateado más pequeñas vamos a quitarle un poquito de foami en las puntas y las pegamos en la parte de arriba de la plataforma.
With the smaller silver foami strips we are going to remove a bit of foami at the tips and stick them on the top of the platform.
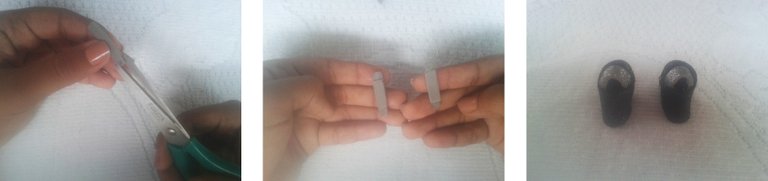
Luego con las tiras más pequeñas de foami negro le quitamos también una puntica pero esta vez de un solo lado y la pegamos en la parte de atrás, Continuamos pegando las últimas dos plantillas, con las tiras de foami que nos queda la vamos a pegar en la punta de la tira de foami negro que esta atrás y así quedan nuestras plataformas.
Then with the smaller strips of black foami we also remove a point but this time on one side and paste it on the back, We continue to glue the last two templates, with the remaining foami strips we are going to stick it on the tip of the black foami strip that is behind and so our platforms are.
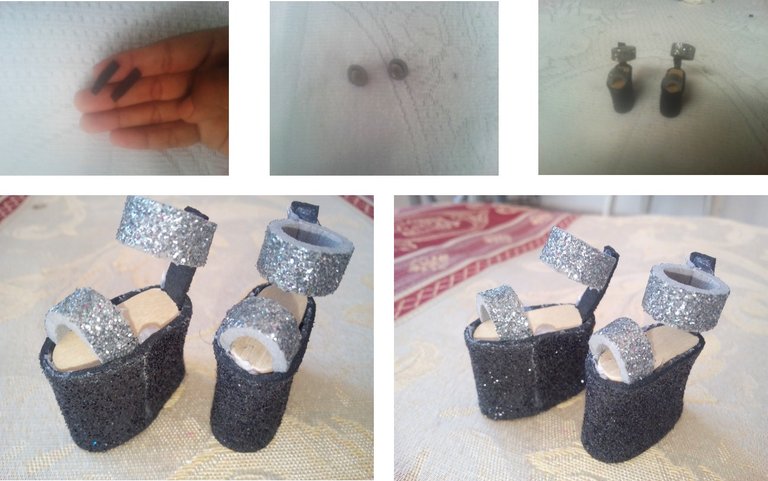
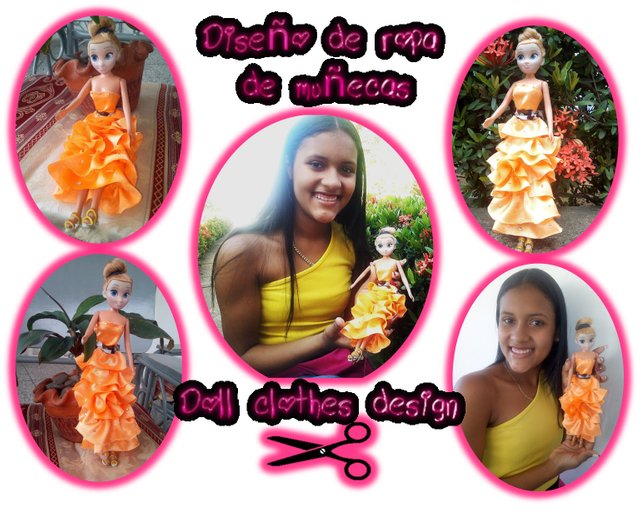
AQUÍ EL RESULTADO DEL TRABAJO / HERE THE RESULT OF THE WORK:
Clip en la imagen para ver mis otros trabajos./ Clip on the image to see my other works.:
✏️❤️❤️ Muchas gracias a todos por pasar por mi blog y apoyarme, Dios los bendiga. / Thank you all so much for stopping by my blog and supporting me, God bless you❤️❤️✏️
A great tutorial about making clothes for a doll!
Please remember to use the needleworkmonday tag only on Mondays - on other days please use #needlework :)
Thank you for your kind comment and guidance, I will take it into account.