![]()
Hola qué tal a todos? soy nuevo por aquí, estuve buscando una comunidad donde pueda mostrar mis diseños y algunos tutoriales donde ustedes puedan aprender, y bueno he dado con esta gran comunidad. Mi nombre es Oscar, soy diseñador y desarrollador de videojuegos.
Hello how are you all? I'm new here, I've been looking for a community where you can show my designs and some tutorials where you can learn. and well I have found this great community. My name is Oscar, I'm a video game designer and developer.
En esta oportunidad les traigo un tutorial para aprender a convertir una imagen o logo en pixel art, algo que está muy de moda actualmente. Existen muchas maneras de obtener resultados bien sea usando una aplicacion automatizada o alguna otra herramienta, pero aquí aprenderas a crear desde cero un arte en pixels usando Adobe Illustrator. Yo estoy usando la version 2021, pero esto tambien aplica a las versiones anteriores.
This time I bring you a tutorial to learn how to convert an image or logo into pixel art, something that is currently very fashionable. There are many ways to get results whether using an automated application or some other tool, but here you will learn how to create pixel art from scratch using Adobe Illustrator. I am using version 2021, but this also applies to previous versions.
Como ejemplo, usaremos el logo de Hive.Blog para que aprendan con algo simple y facil de hacer. Esto requiere paciencia así que antes de comenzar es mejor que prepares tu taza de cafe, tus audifonos con buena musica y a diseñar...
As an example, we will use the Hive.Blog logo so that you can learn something simple and easy to do. This requires patience so before starting it is better that you prepare your cup of coffee, your headphones with good music and design...
Tutorial
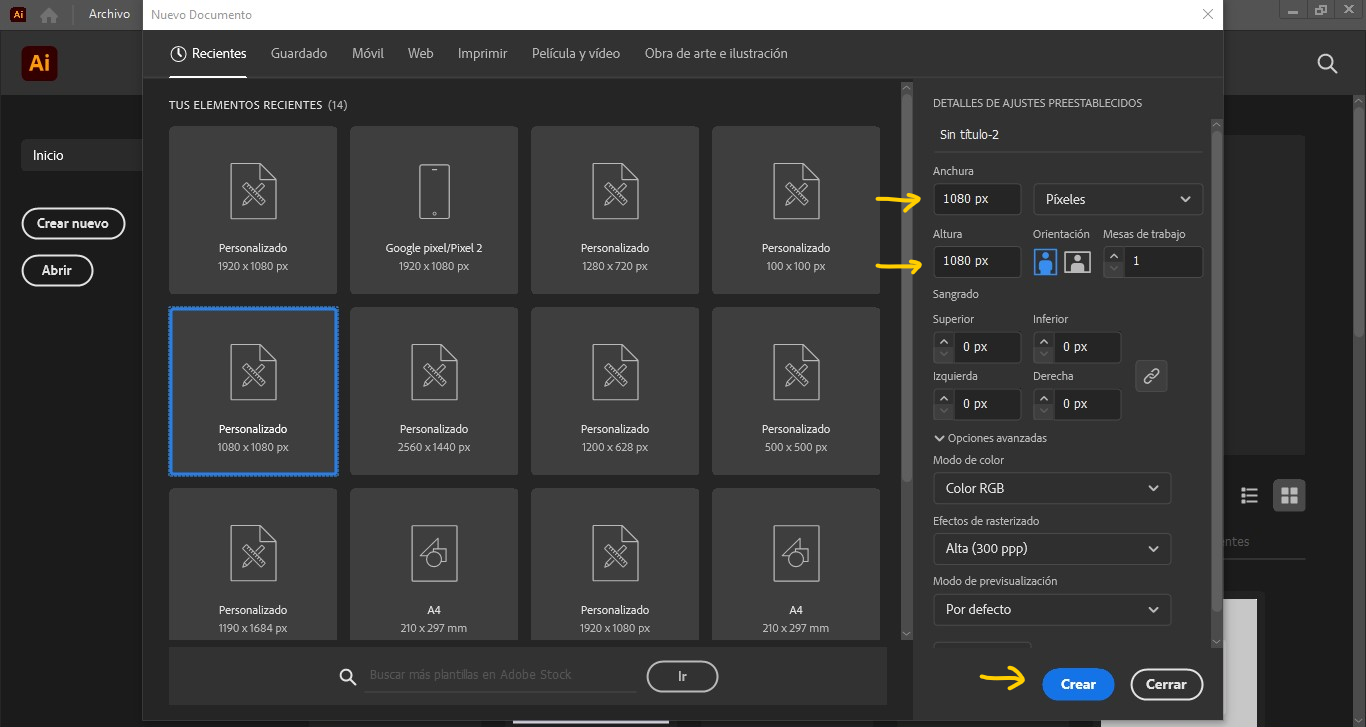
Paso 1: Abrimos AI y creamos un nuevo documento con 1080px de alto y 1080px de ancho.
Step 1: We open AI and create a new document with 1080px height and 1080px width.
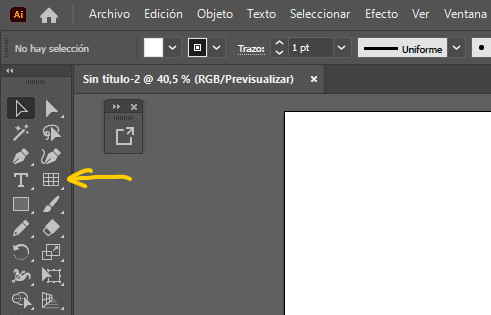
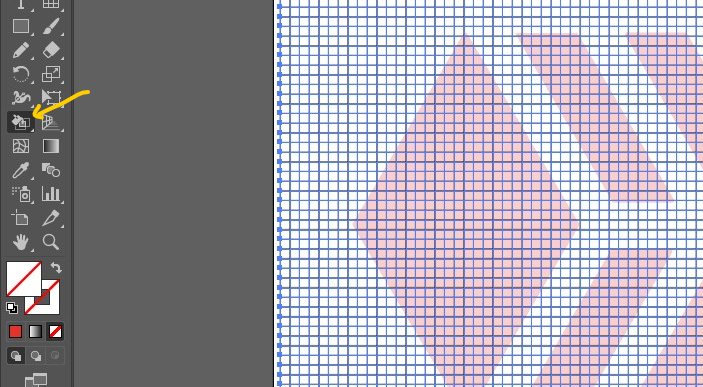
Paso 2: Seleccionamos la herramienta cuadricula rectangular. Si en cambio vez la herramienta de linea haz clic por dos segundos para mostrar las demás herramientas luego selecciona la cuadricula rectangular.
Step 2: We select the rectangular grid tool. If instead you see the line tool click for two seconds to show the other tools then select the rectangular grid.
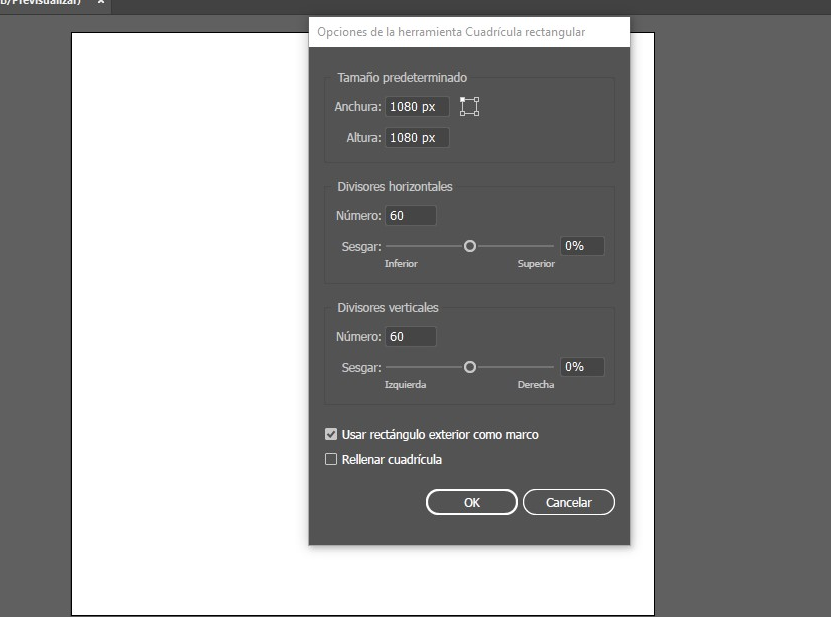
Paso 3: Una vez seleccionada, haga doble clic sobre la cuadricula rectangular para abrir el menu de propiedas de la herramienta. Estableceremos las divisiones horizontales y verticales en 60.
Step 3: Once selected, double click on the rectangular grid to open the tool properties menu. We will set the horizontal and vertical divisions to 60.
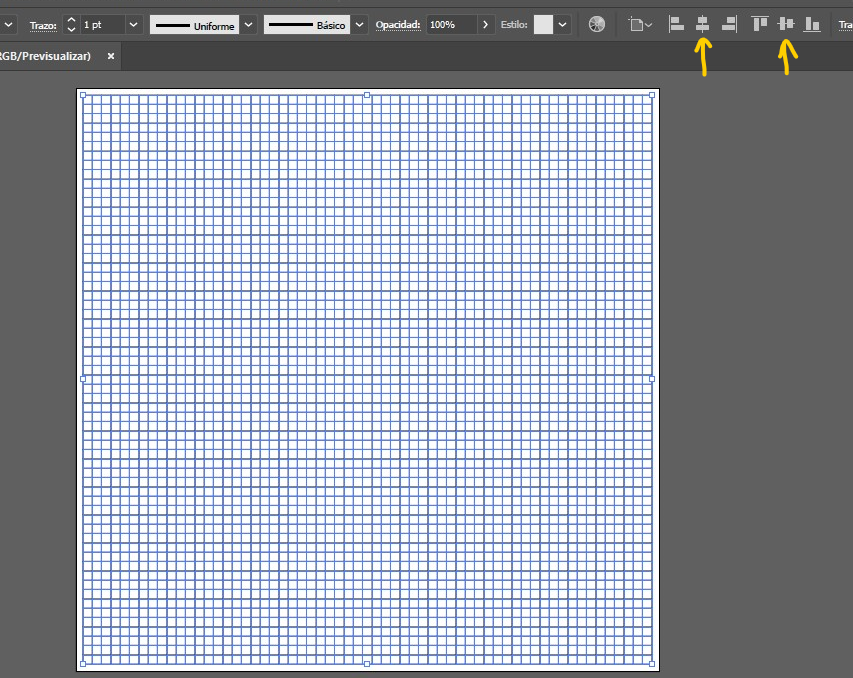
Paso 4: Ahora, nos ubicamos en la esquina superior izquierda de la hoja y con la tecla SHIFT presionada hacemos clic y arrastramos hasta la esquina inferior derecha. Con la cuadricula seleccionada hacemos clic en los botones indicados en la imagen para alinear al centro de la hoja.
Step 4: Now, we are located in the upper left corner of the sheet and with the SHIFT key pressed we click and drag to the lower right corner. With the grid selected, we click on the buttons indicated in the image to align it to the center of the sheet.
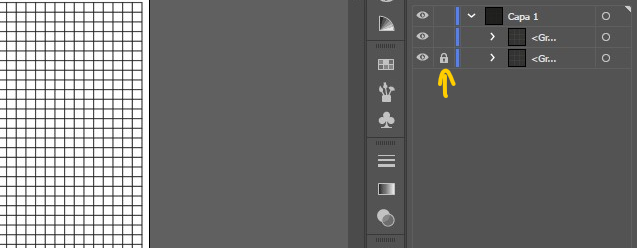
Paso 5: Duplicamos la cuadricula y la ubicamos justo encima de la primera cuadricula. En el menu de capas bloqueamos la que está por detras.
Step 5: We duplicate the grid and place it just above the first grid. In the layers menu we block the one behind.
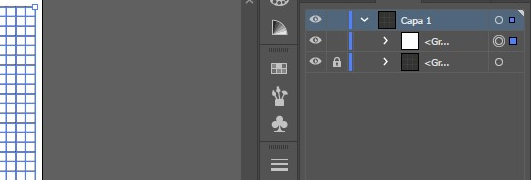
Paso 6: Seleccionamos la cuadricula superior y en el menu de propiedades le removemos el trazo negro.
Step 6: We select the upper grid and in the properties menu we remove the black stroke.
Paso 7: Importamos el logo de Hive al documento y lo arrastramos al final de las capas para que esté por debajo de las cuadriculas.
Step 7: We import the Hive logo into the document and drag it to the bottom of the layers so that it is below the grids.
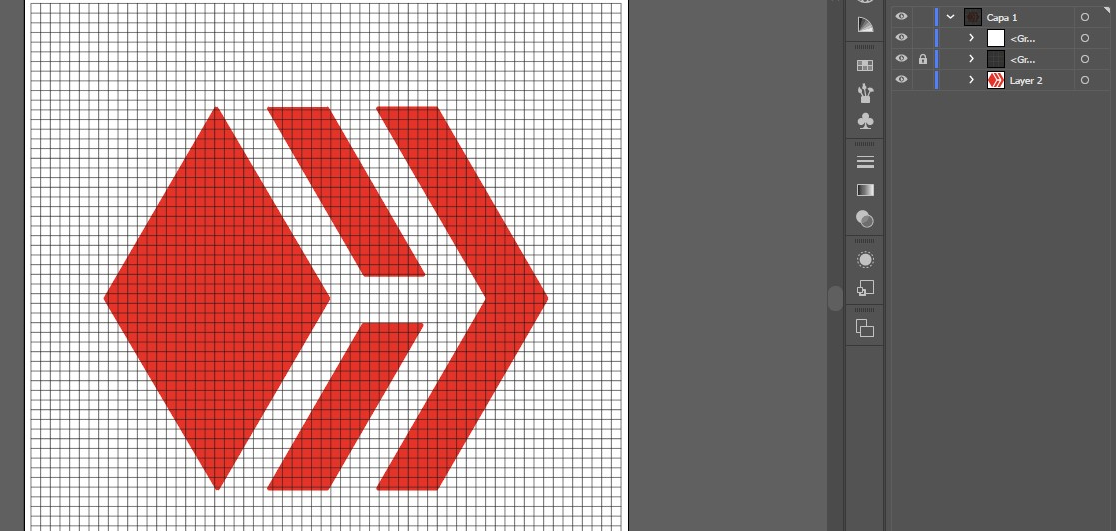
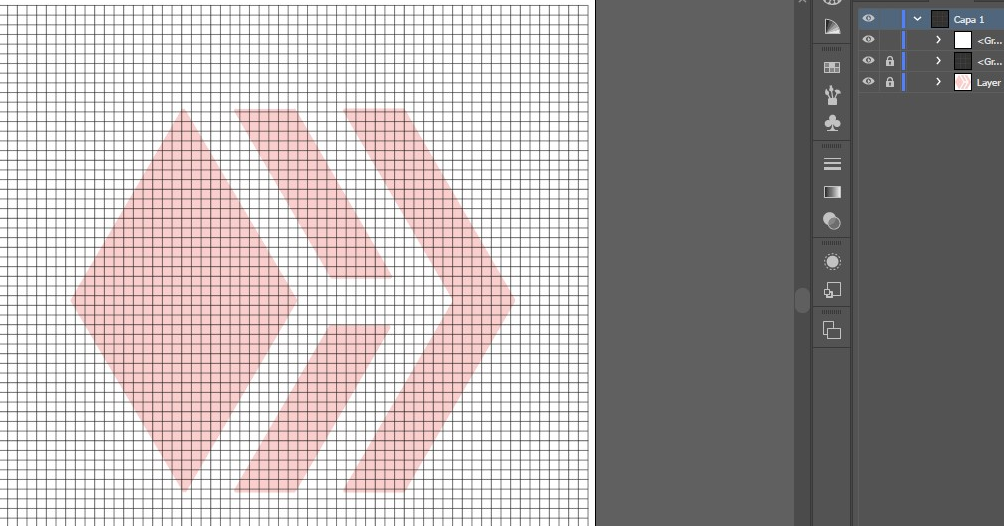
Paso 8: Bajamos la opacidad hasta que a penas se pueda ver el logo y la bloqueamos en el menu de capas.
Step 8: We lower the opacity until you can barely see the logo and lock it in the layers menu.
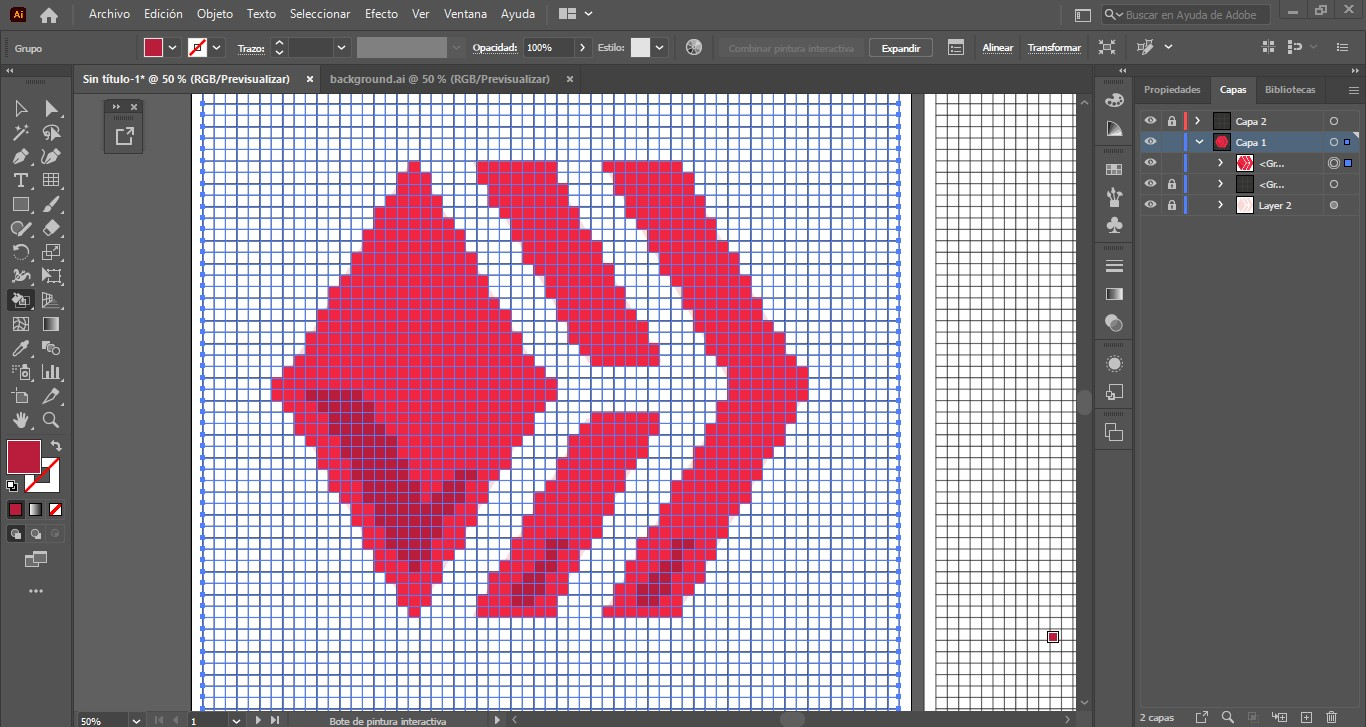
Paso 9: Ahora, con la cuadricula seleccionada, seleccionamos el bote de pintura interactivo del menu de herramienta. Escogemos el color en el mismo menú y ahora comienza lo divertido.
Step 9: Now, with the grid selected, we select the interactive paint bucket from the tool menu. We choose the color in the same menu and now the fun begins.
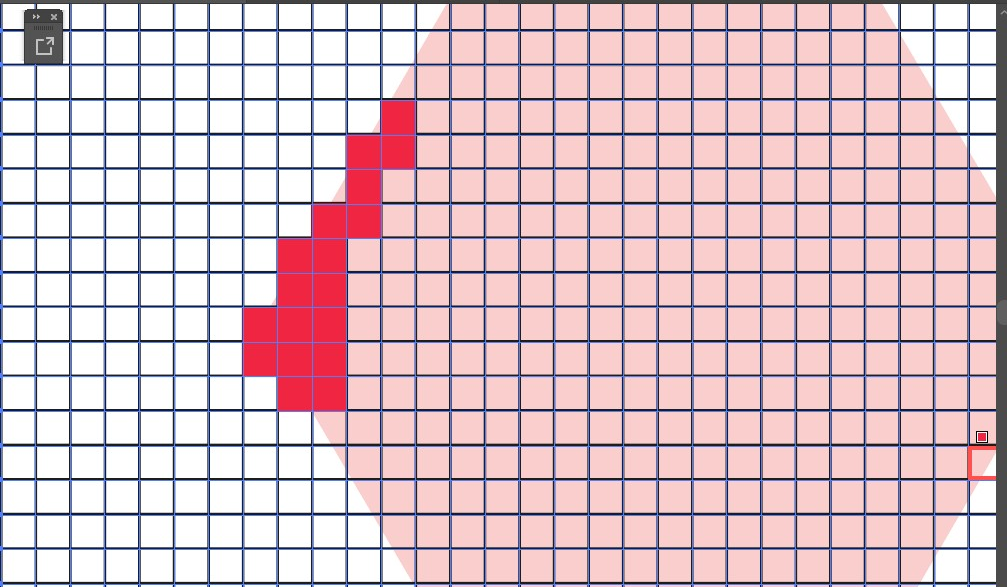
Paso 10: Hacemos Zoom con la tecla CTRL y la rueda del mouse hacia adelante para ver mejor el trabajo. Hacemos clic en cada cuadro que queramos pintar. Solo debes cubrir la imagen que está por debajo, imagina que estás calqueando un dibujo pero en vez de usar un lapiz usas un bote de pintura cuadrada. hehe
Step 10: We Zoom with the CTRL key and the mouse wheel forward to see the work better. We click on each frame that we want to paint. You only have to cover the image that is below, imagine that you are tracing a drawing but instead of using a pencil you use a square pot of paint. hehe
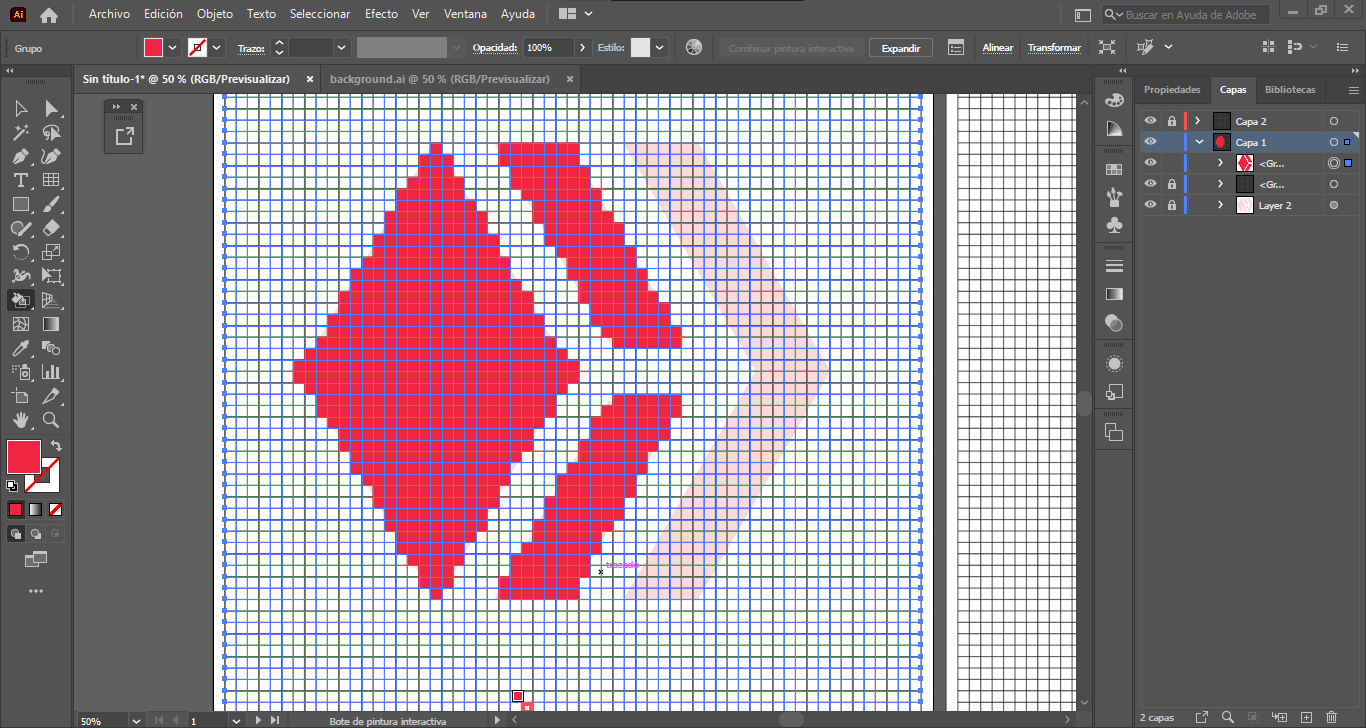
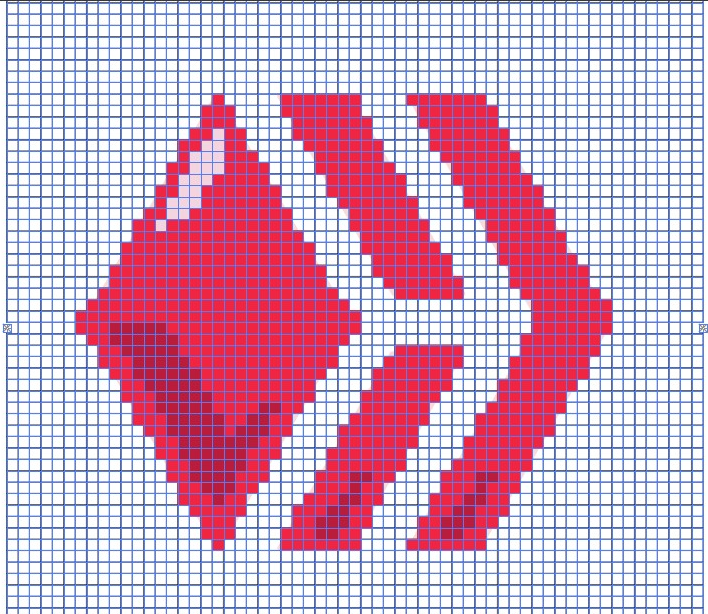
Paso 11: Ya hemos cubierto todo el logo de Hive, pero le hace falta algo más para que se vea más llamativo. Asi que pongamonos creativos. He pintado algunas zonas para mostrar una especie de sombra en la parte inferior y brillo en la parte superior.
Step 11: We've already covered the entire Hive logo, but it needs a little more to make it look more eye-catching. So let's get creative. I have painted some areas to show a kind of shadow at the bottom and brightness at the top.

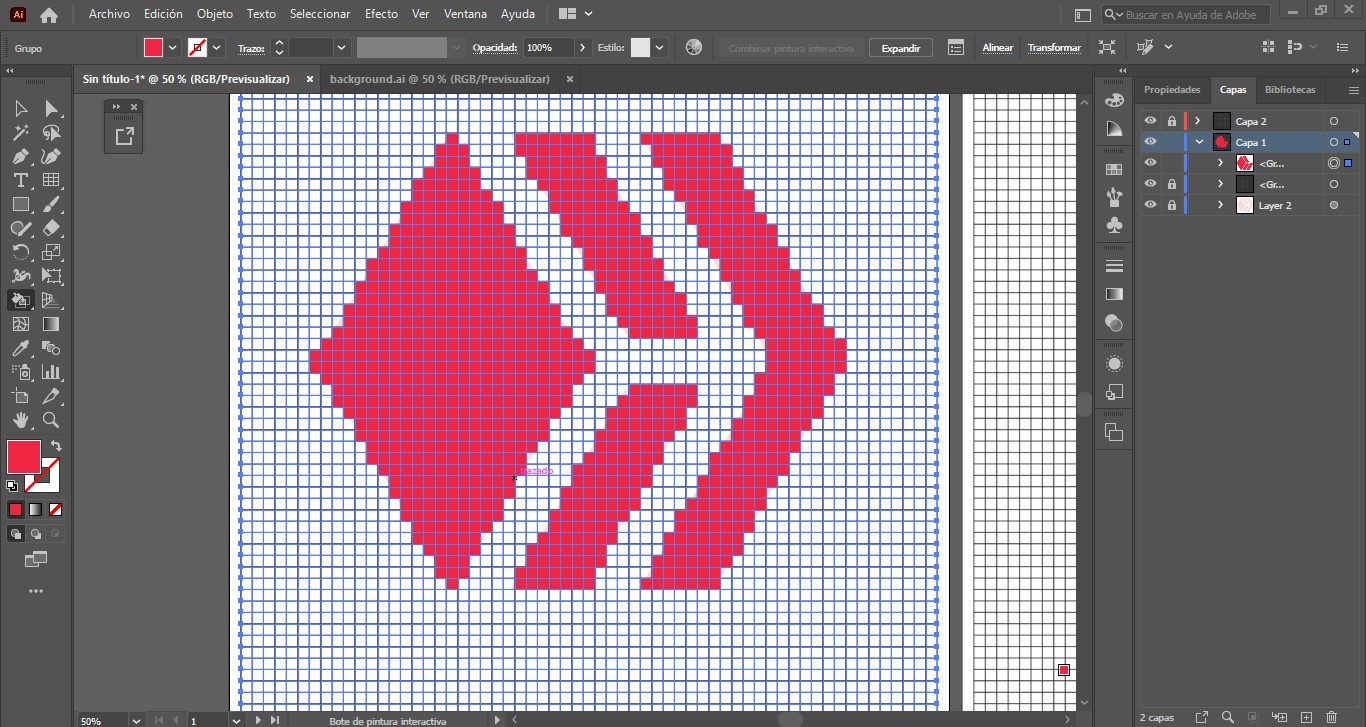
Paso 12: Ahora nuestro logo se ve mejor y con un toque original. Y si tal vez le agragemos una sombra por detras del logo? Para ello duplicamos la cuadricula pintada y le cambiamos el color a un tono más oscuro y la ubicamos por debajo de la capa.
Step 12: Now our logo looks better and with an original touch. What if maybe we add a shadow behind the logo? For them we duplicate the painted grid and change the color to a darker tone and place it below the layer.
Eso es, ahora tenemos un logo en pixeles muy bonito para ser usado en cualquier arte. Esta es una de las manera de como hacer un arte en pixel y la verdad es la que mas uso. Tambien existen otros software para crear este tipo de arte.
That's it, now we have a very nice pixel logo to be used in any art. This is one of the ways to make pixel art and the truth is the one I use the most. There are also other software to create this type of art.
Ahora cuéntame qué te ha parecido el resultado? conoces otra forma de hacer Pixel Art? quisiera saber tus opiniones. Gracias por leer y espero hayan aprendido algo nuevo.
Now tell me what you think of the result? Do you know another way to do Pixel Art? I would like to know your opinions. Thanks for reading and I hope you learned something new.
Kind regards!
Oscar
The rewards earned on this comment will go directly to the person sharing the post on Twitter as long as they are registered with @poshtoken. Sign up at https://hiveposh.com.
Congratulations @oscarcc89! You have completed the following achievement on the Hive blockchain and have been rewarded with new badge(s):
Your next target is to reach 450 posts.
You can view your badges on your board and compare yourself to others in the Ranking
If you no longer want to receive notifications, reply to this comment with the word
STOPTo support your work, I also upvoted your post!
Check out the last post from @hivebuzz:
Support the HiveBuzz project. Vote for our proposal!