.jpeg)

Español
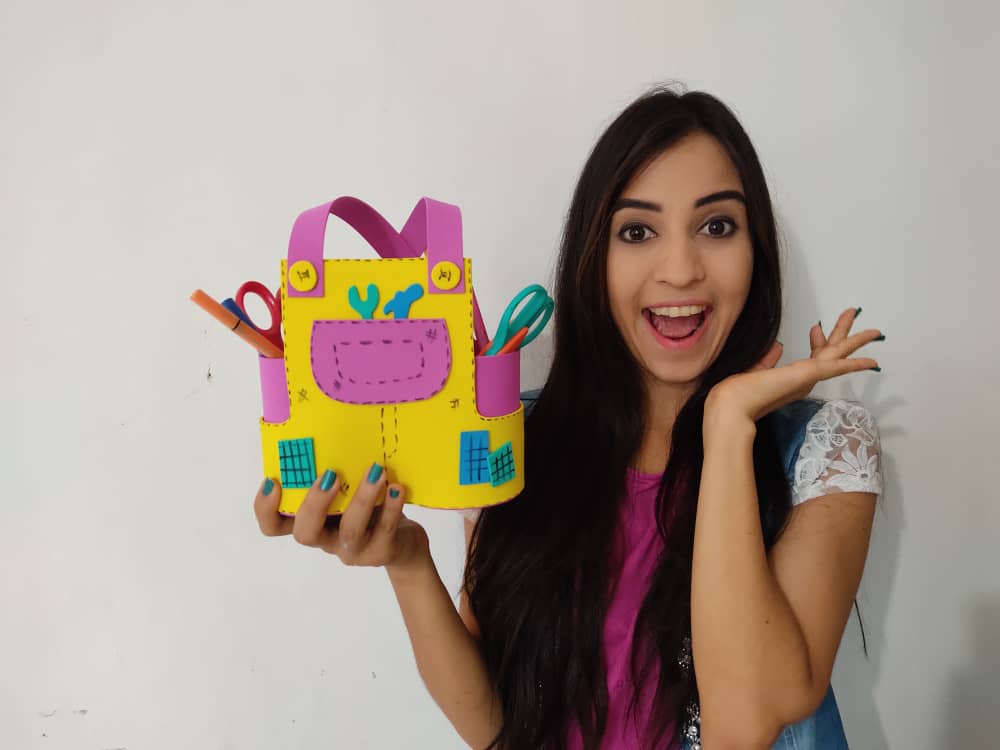
Holaquerida familia de HIVE 💙 Hoy les traigo un nuevo e increíble paso a paso donde aprenderemos a realizar un precioso organizador en forma de overol, ideal para mantener en orden nuestros, utensilios y herramientas de trabajo favoritas, y a su vez, darle una hermosa vista a nuestra mesa de trabajo, oficina, habitación, etc. Pues, para nadie es un secreto que el pilar fundamental de la vida en las personas es la educación, y no solo la del colegio, sino también la educación del hogar, dónde nace la importancia de ordenar y también enseñar a los más pequeños este gran hábito. Recuerden que el orden siempre aportará una imagen saludable en la decoración de nuestro entorno. Así que, los invito a disfrutar de este divertido momento, ideal y perfecto para el desarrollo de la creatividad tanto de niños como adultos. Además es una idea perfecta para pasar un rato agradable con nuestros pequeños en casa e incentivarlos, ya que, pueden ir, de a poco, desarrollando su ingenio y acercándose un poco más al trabajo artístico.
English
Hello dear HIVE familly 💛 Today I bring you an incredible new step by step where we will learn how to make a beautiful organizer in overalls, ideal for keeping our favorite utensils and work tools in order, and in turn, giving a beautiful view to our work table, office, room, etc. Well, it is no secret to anyone that the fundamental pillar of life in people in education, and not only that of school, but also home education, where the importance of ordering and also teaching the little ones this great habit. Remember that order will always provide a healthy image in the decoration of our environment. So, I invite you to enjoy this fun moment, ideal, and perfect for the development of creativity for both children and adults. It is also a perfect idea to spend a pleasant time with our little ones at home and encourage them, since they can go, little by little, developing their ingenuity and getting a little closer to artistic work.
¿Qué están esperando?
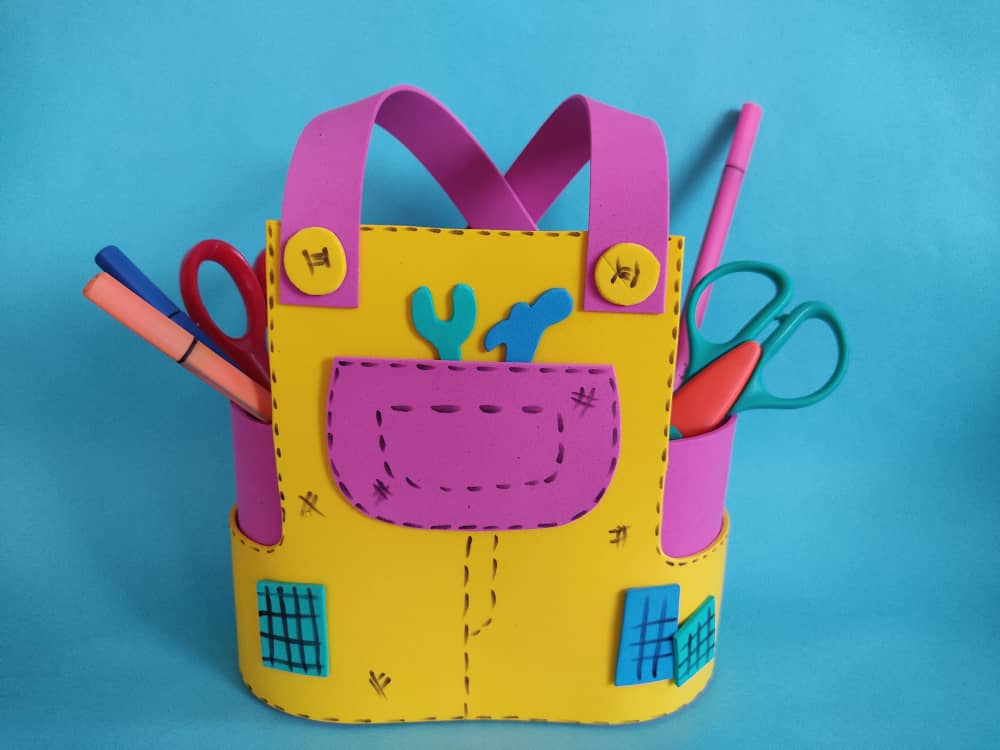
Gracias a esta técnico podemos fabricar nuestros propios organizadores utilizando materiales reciclables y foami o goma eva, que es un material económico y fácil de conseguir. Este lindo organizador nos ayudara a tener nuestras cosas en orden, además será una decoración perfecta para nuestra mesa de trabajo. Antes de comenzar no olvidemos lavarnos nuestras manos.
What are they waiting for?
Thanks to this technician we can manufacture our own organizers using recyclable materials and foamy or eva foam, which is an economic material and easy to get. This cute organizer will help us to have our things in order, it will also be a perfect decoration for our work table. Before we start, let's not forget to wash our hands.
[Materiales | Materials]
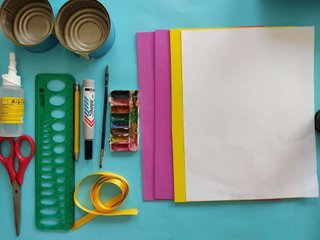
Para hacer este hermoso organizador necesitaremos:
- Moldes.
- Foami o goma eva.
- Hojas de papel.
- Latas desechables.
- Lápiz.
- Tijera.
- Marcador de punta fina.
- Pegamento o silicón frio.
To make this beautiful organizer we will need:
- Molds.
- Foamy or EVA foam.
- Sheets of paper.
- Disposable cans.
- Pencil.
- Scissors.
- Fine tip marker
- Glue or cold silicone.
Procedimiento (paso a paso)
Process (step by step)

Primero, dividimos el foami en dos partes iguales en forma horizontal. El tamaño del foami a utilizar será el necesario para cubrir o forrar dos latas pequeñas desechables.
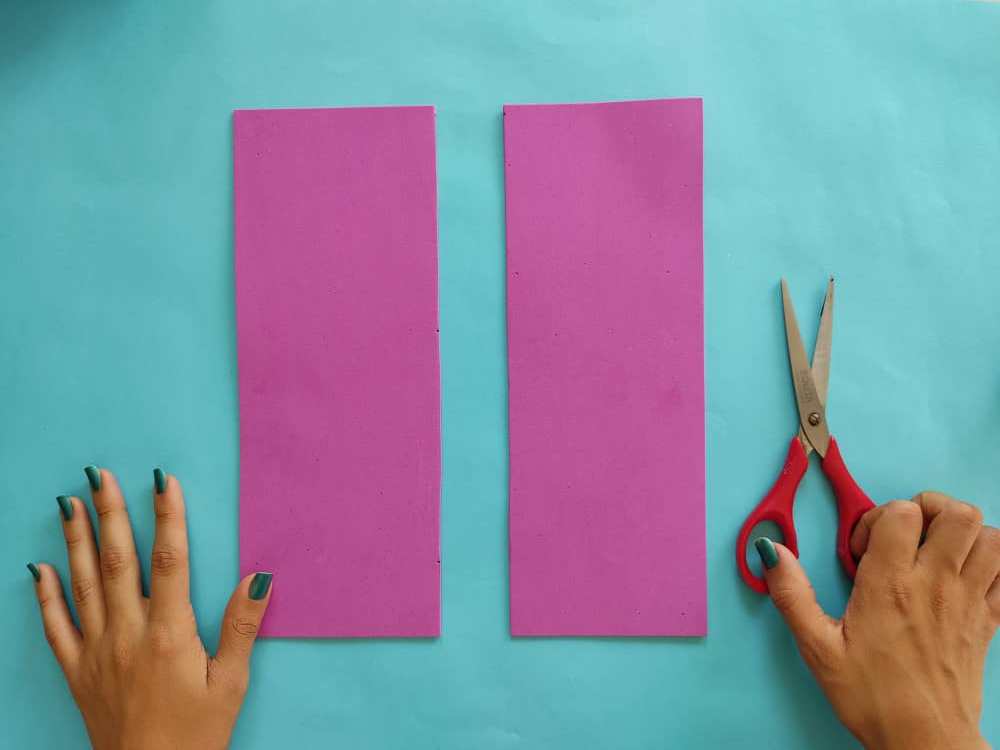
First, we divide the foamy into two equal parts horizontally. The size of the foamy to be used will be that necessary to cover or line two small disposable cans.
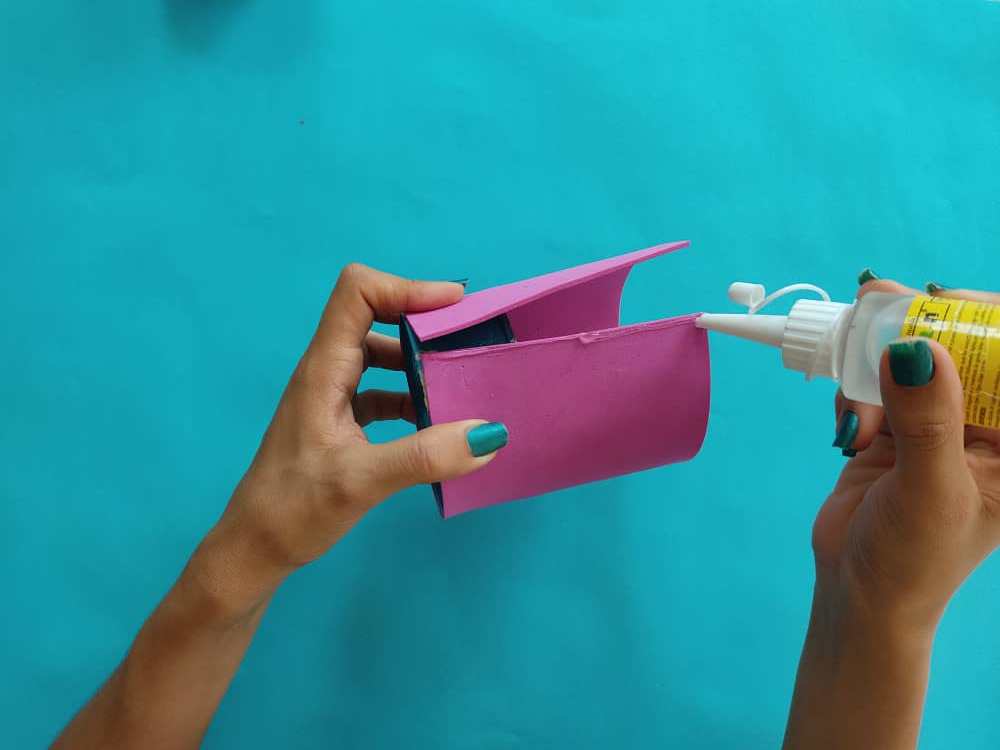
Seguidamente cubrimos las latas con abundante pegamento o silicón. Debemos asegurarnos que queden el foami quede bien pegado a la latada. Y unimos o pegamos las dos latas forradas, y hacemos presión para asegurarnos que queden bien pegadas.
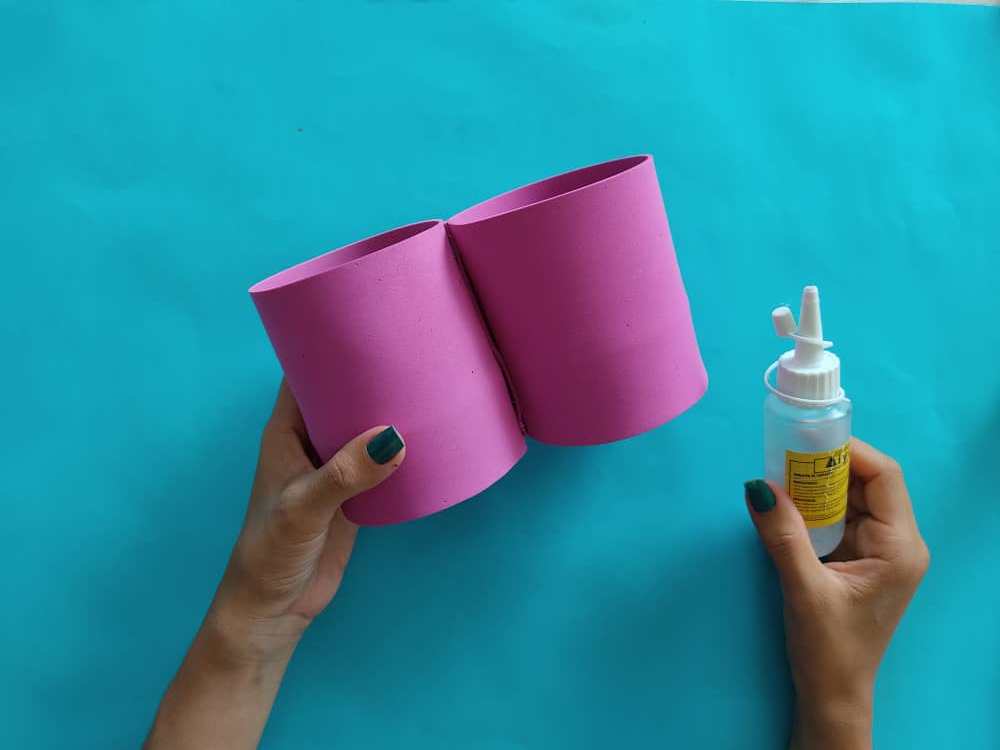
Then we cover the cans with plenty of glue or silicone. We must make sure that the foamy remains well glued to the can. And we join or glue the two lined cans, and we apply pressure to make sure they are well glued together.
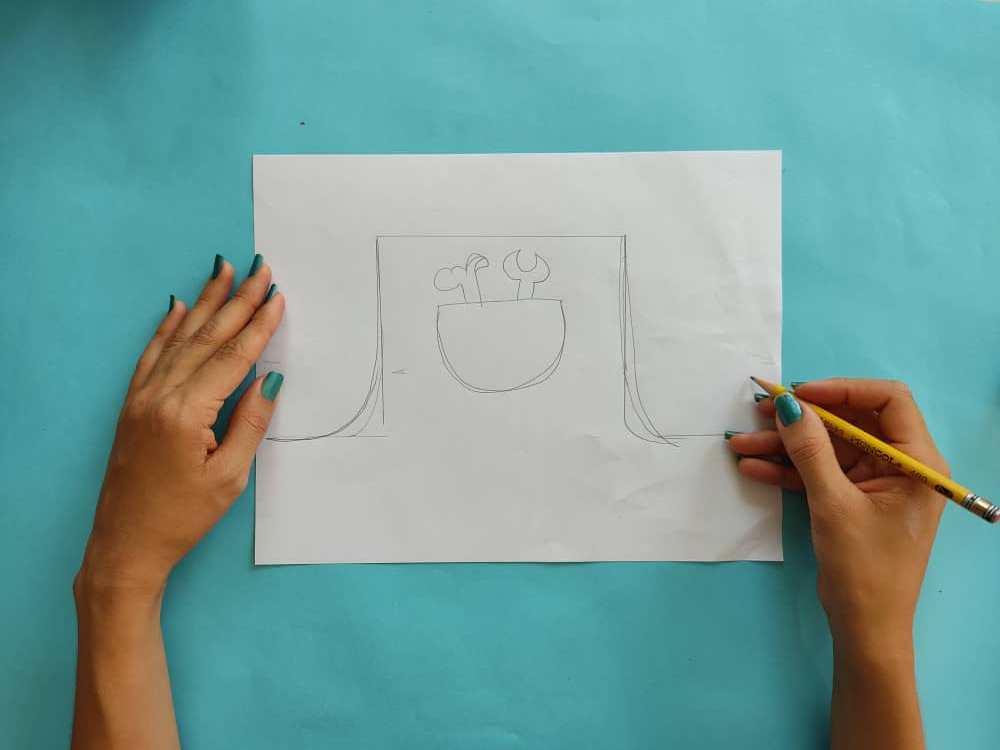
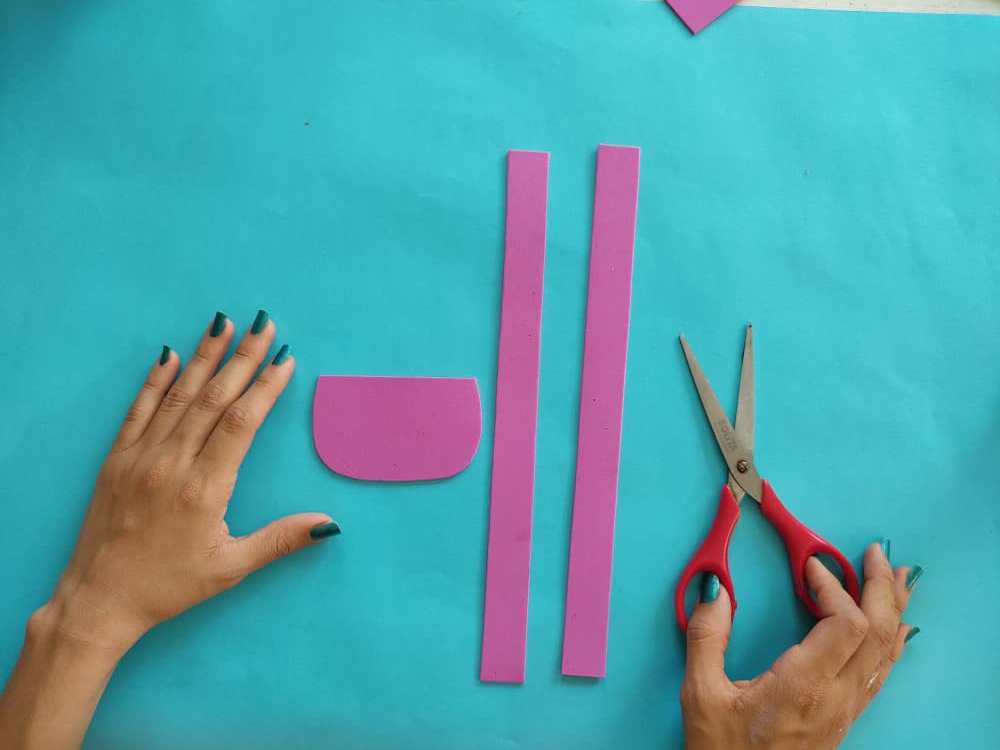
Ahora, dejamos volar nuestra imaginación y diseñamos una especie de overol, y recortamos para obtener el molde.
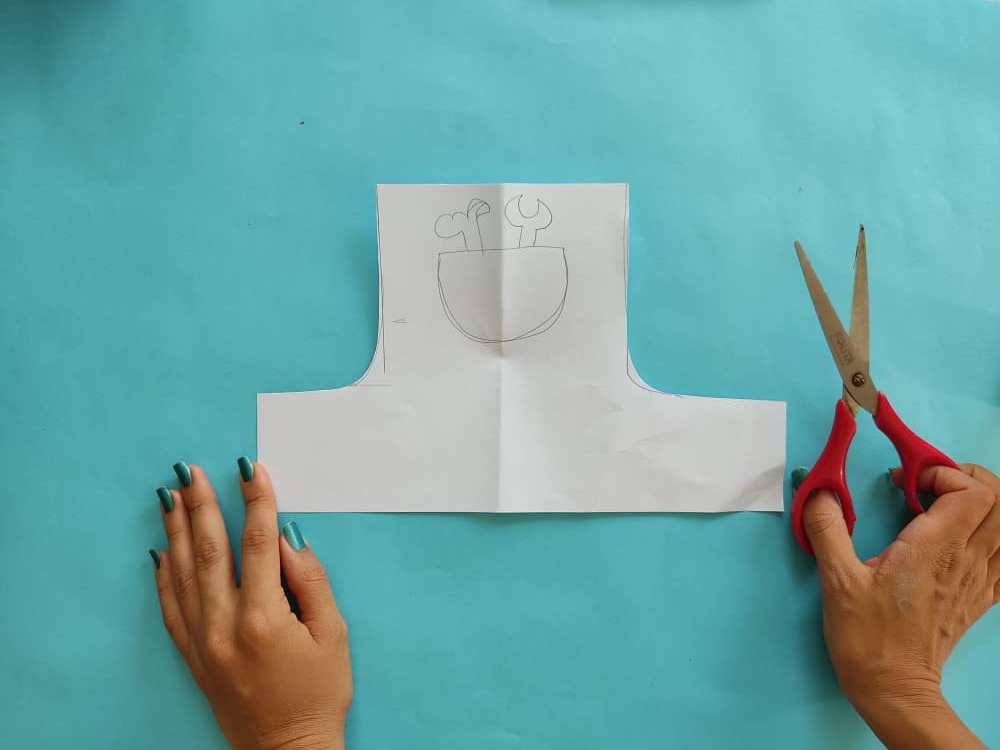
Now, we let our imagination run wild and design a kind of overalls and cut to get the mold.
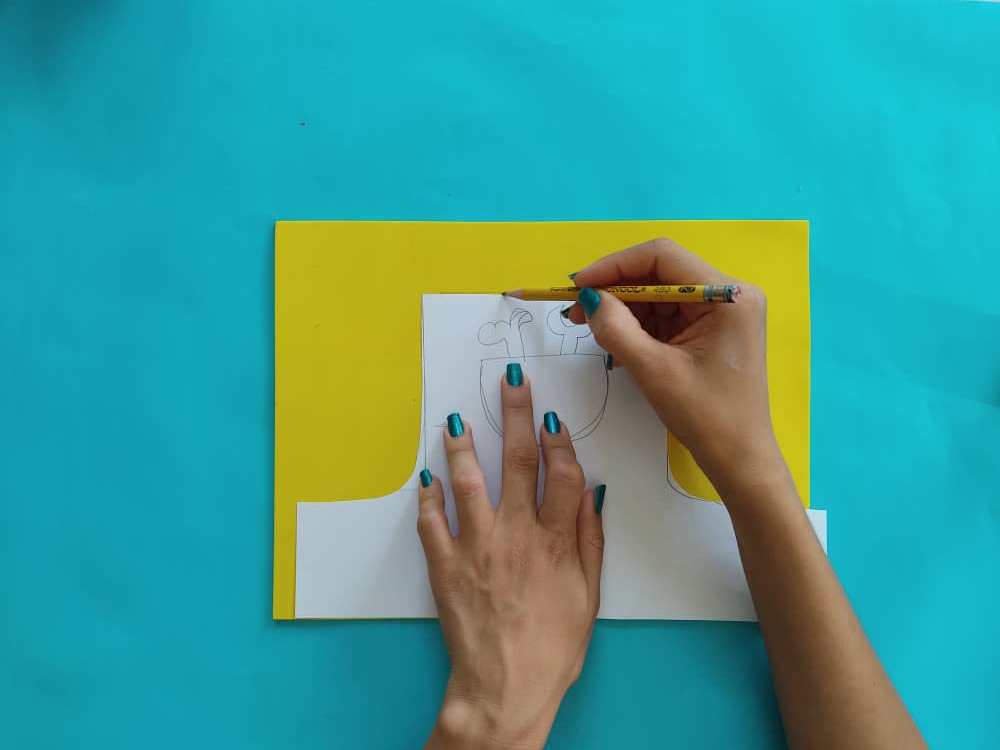
Una vez obtenido el molde, transferimos al foamy, y recortamos cuidadosamente, ya que será la decoración de este hermoso trabajo.
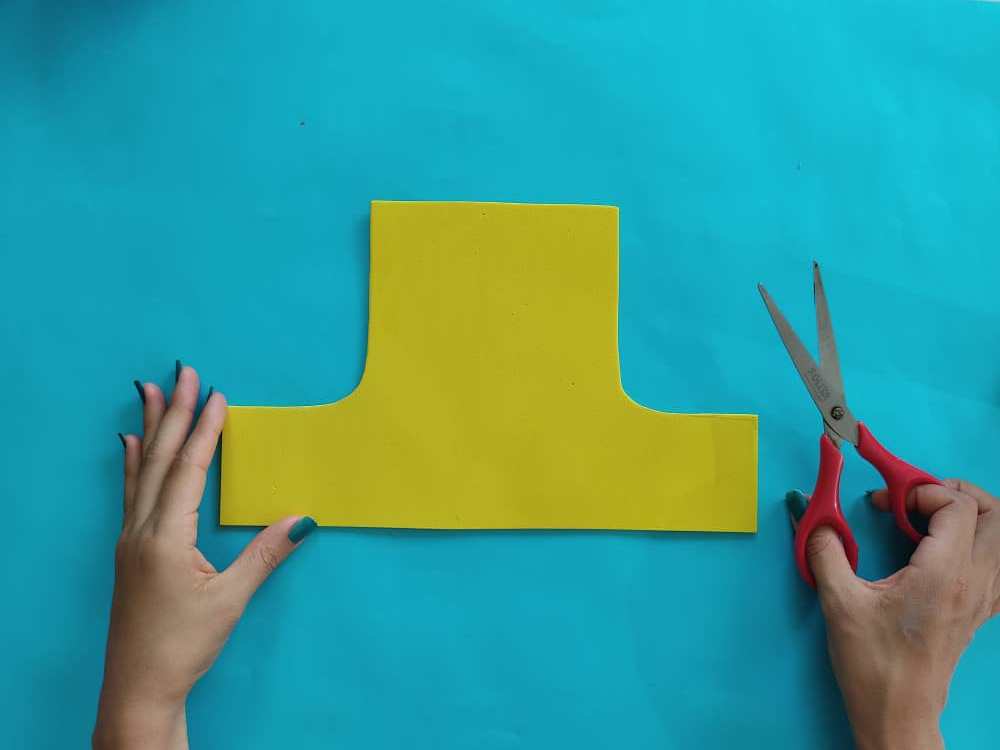
Once the mold is obtained, we transfer to the foamy, and carefully trim, as it will be the decoration of this beautiful work.
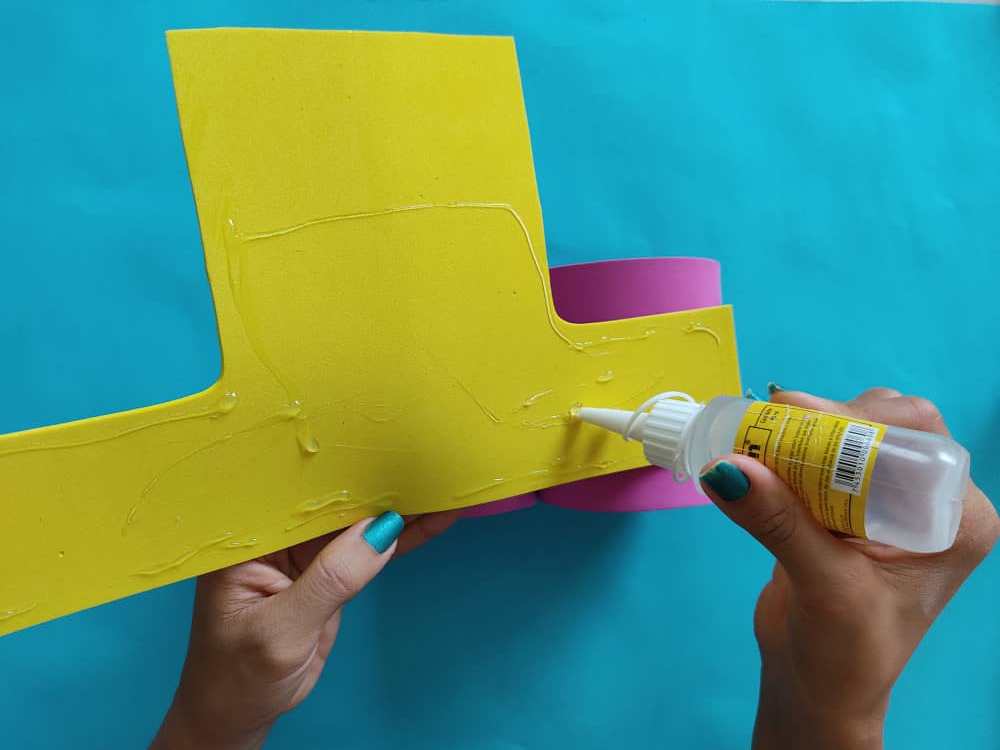
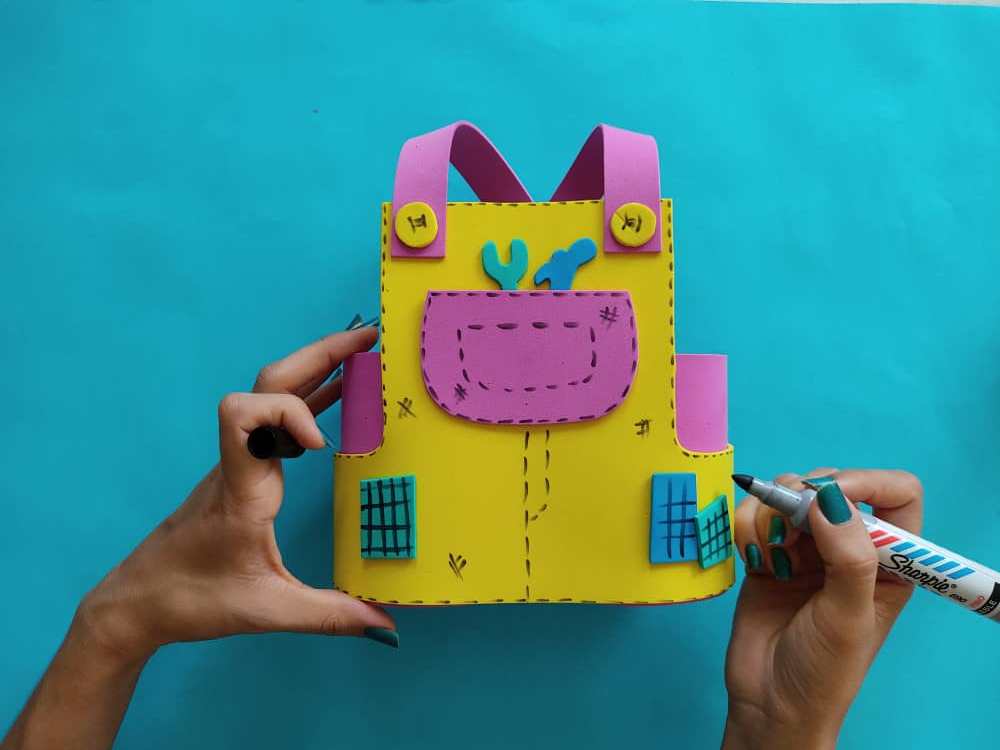
Luego, fabricamos los hermosos detalles de nuestro overol en foami, como el bolsillo, los tirantes y herramientas, botones y otros que queramos agregar. Seguidamente, definimos el overol y sus detalles con la ayuda de un marcador de punta fina.
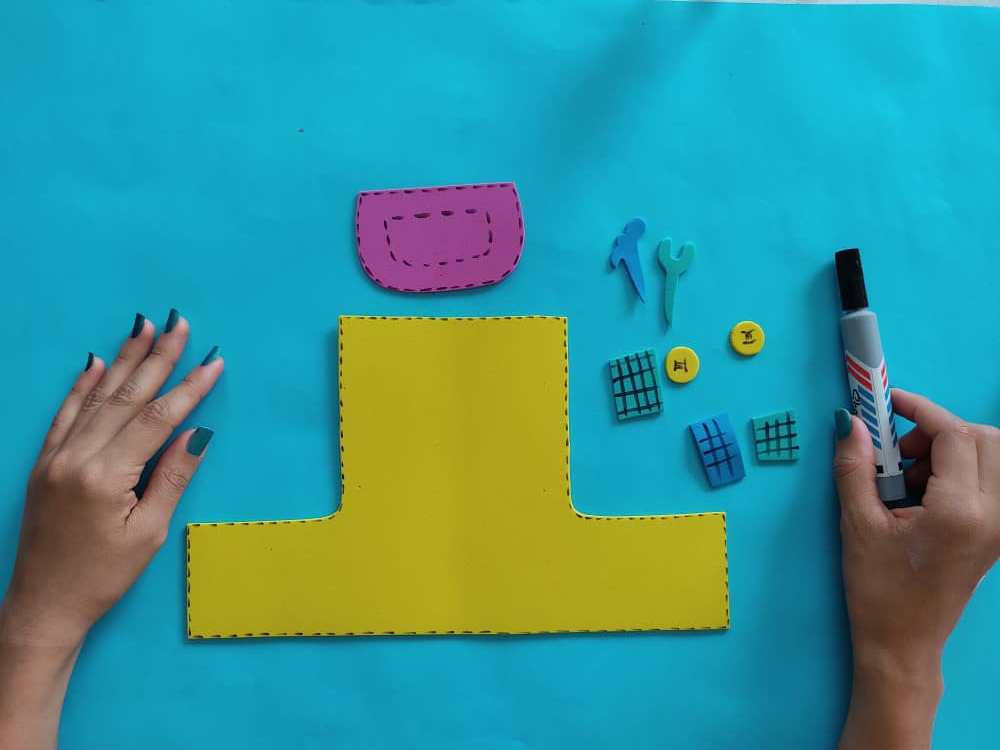
Then, we make the beautiful details of our overalls in foamy, such as the pocket, the suspenders and tools, buttons, and others that we want to add. Next, we define the overalls and their details with the help of a fine point marker.
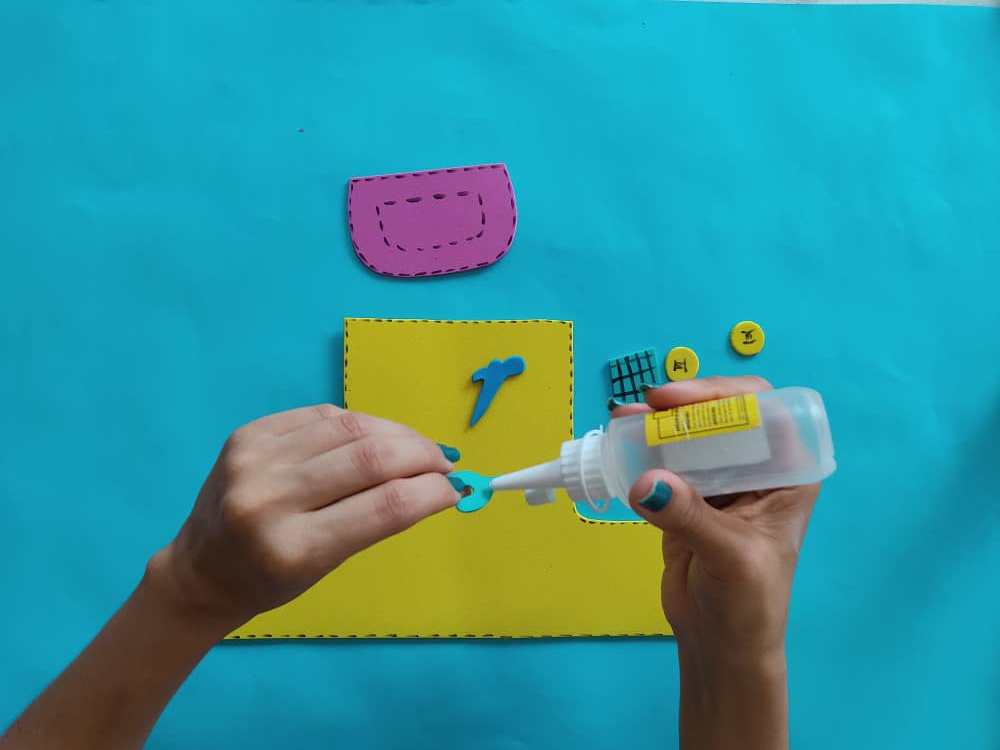
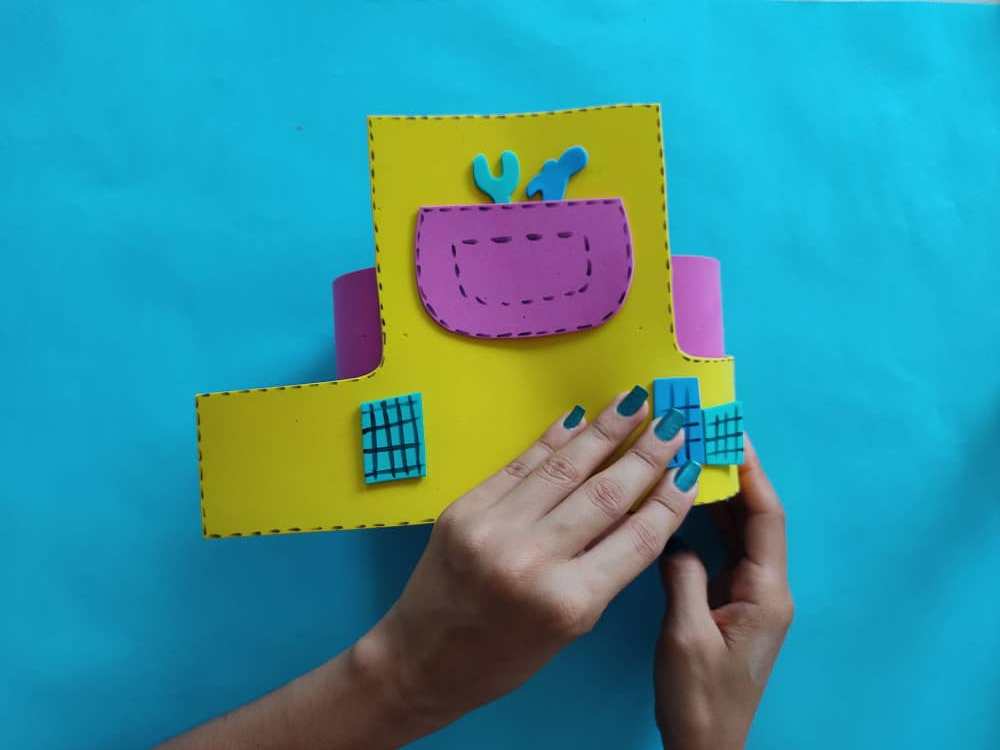
Ahora, armamos nuestro overol pegando cada figura, asegurándonos de que cada pieza que bien ubicada y bien pegada.
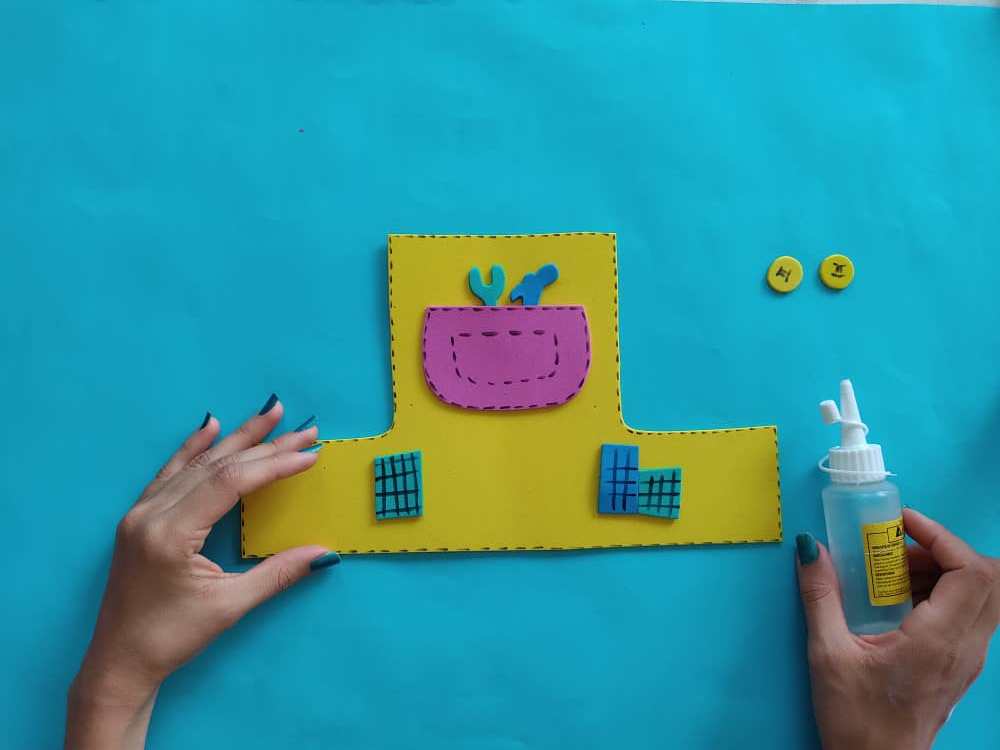
Now, we assemble our overalls by gluing each figure, making sure that each piece is well located and well glued.
Seguidamente, pegamos el overol sobre los cilindros o latas forradas que obtuvimos en los primeros pasos. Recuerden hacer presión por unos segundos en los extremos de la parte inferior para que el overol quede bien pegado.
Next, we glue the overalls on the cylinders or lined cans that we obtained in the first steps. Remember to press for a few seconds at the ends of the bottom so that the overalls are well attached.
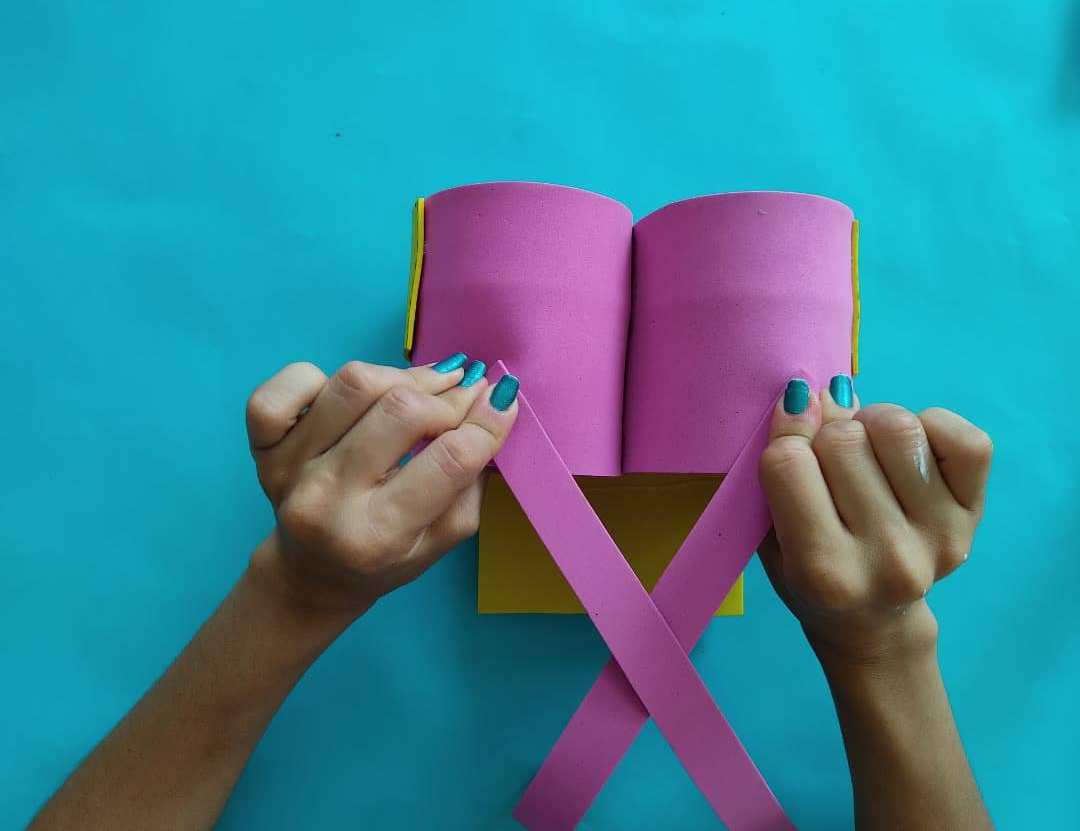
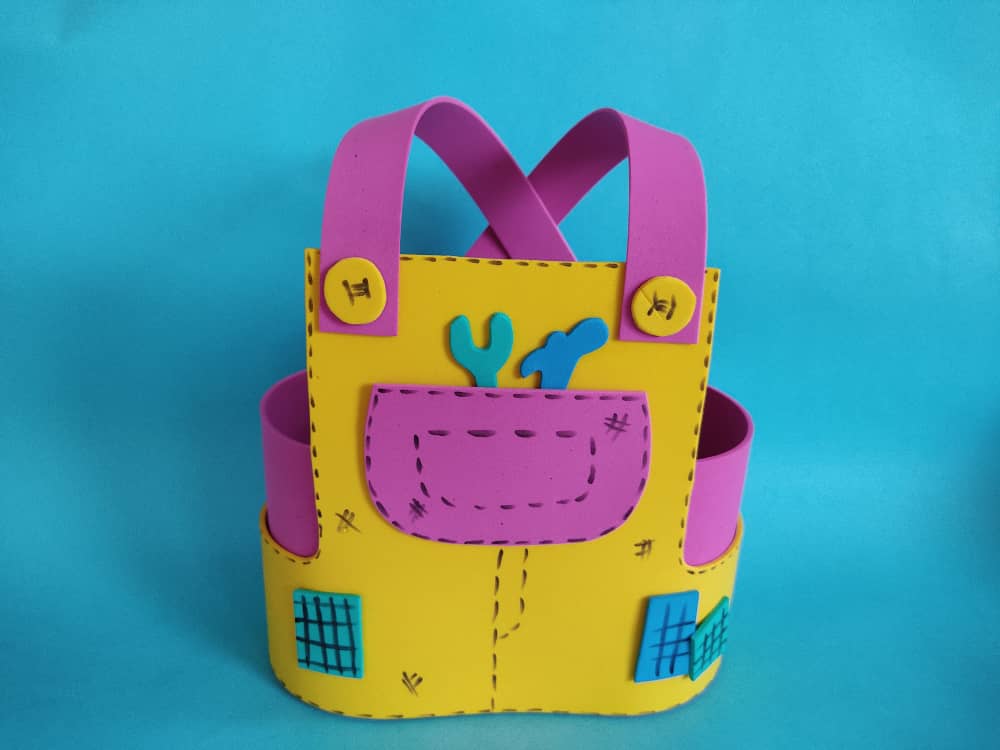
Luego, pegamos los un extremo de los tirantes en la parte trasera de los cilindros y el otro extremo en la parte frontal del overol, podemos hacerlo en forma de equis o cruzados como en este caso, o simplemente dejamos los tirantes derechos.
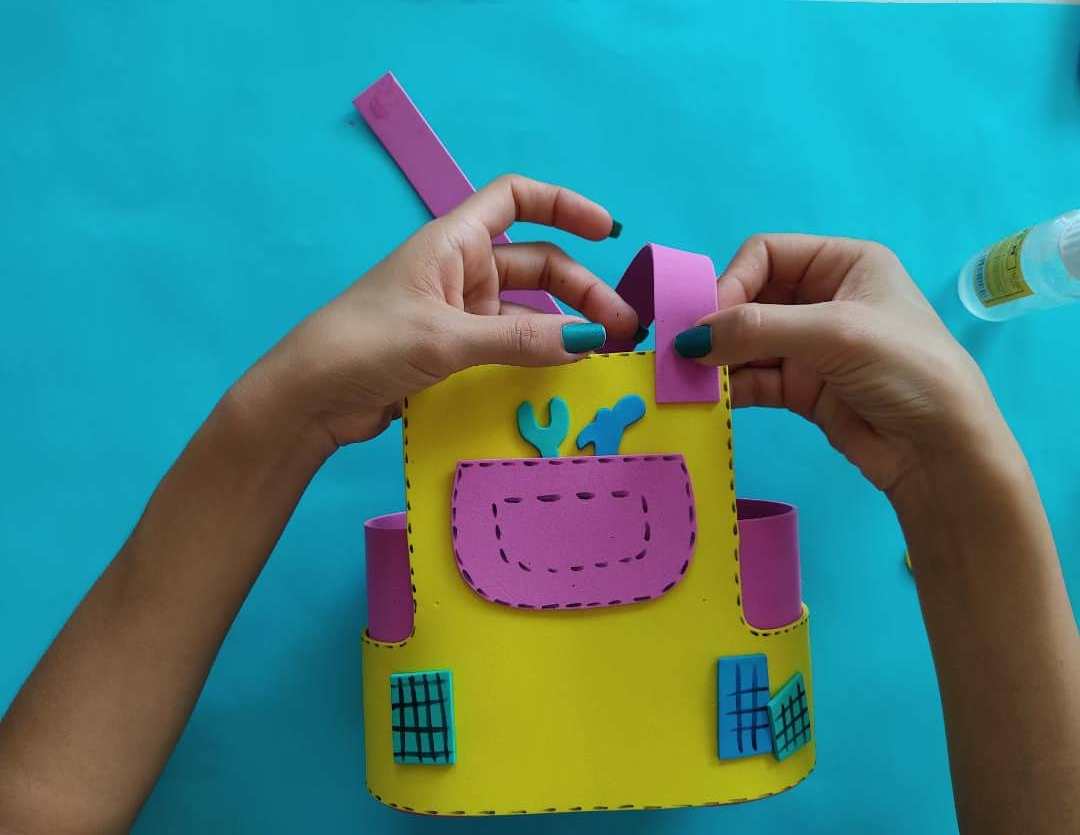
Then, we glue the one end of the straps on the back of the cylinders and the other end on the front of the overalls, we can do it in the form of cross or X as in this case, or we just leave the straps straight.
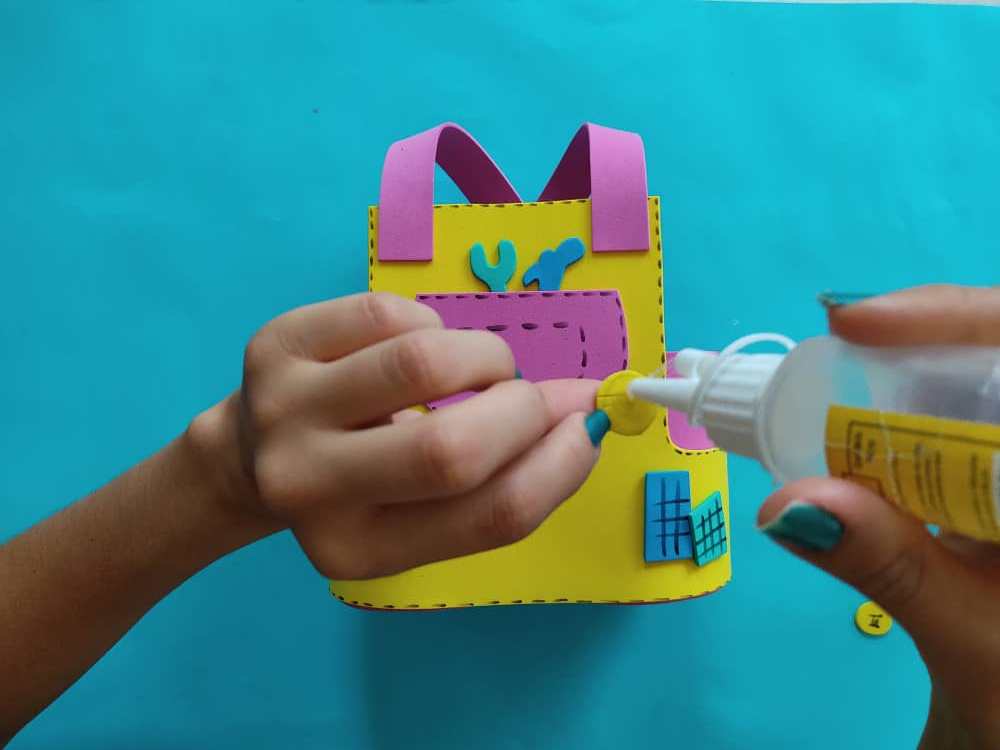
Finalmente, pegamos los votos a los tirantes y hacemos unos últimos retoques con el marcador para que nuestro organizador luzca más hermoso aun.
Finally, we glue the votes to the braces and make a few final touches with the marker to make our organizer look even more beautiful.
Gracias por acompañarme y espero que lo hayan disfrutado. ❤️
Thanks for joining and I hope you enjoyed it.❤️
.jpeg)
.jpeg)
.jpeg)
.jpeg)
Clic para ver trabajos anteriores | Click to see previous works


My twt #posh
That's a very interesting, creative and functional bag. Excellent work, Sara! 🤗
Thanks friend. How glad you liked it.
Siempre espectacular amiga!
Gracias amigo mio jeje! Me alegra que te guste lo que hago.!
Sin duda eres un artista, gracias por compartir!
GRacias por tu comentario y por tu visita.. :D Saludos!!
Congratulations, your post has been upvoted by @dsc-r2cornell, which is the curating account for @R2cornell's Discord Community.
Enhorabuena, su "post" ha sido "up-voted" por @dsc-r2cornell, que es la "cuenta curating" de la Comunidad de la Discordia de @R2cornell.
Very much dear @blessed-girl :D XOX
wow muy practico y económico
fuera desorden
excelente trabajo amiga @saracampero
Gracias querida, me alegra que te guste mi hulmide trabajo. Saludos!! Gracias por venir y comentar!
Hola @saracampero.
Llevaba días sin visitar tus Articulos pero sigues haciendo un maravilloso trabajo con tus manualidades. Este overol es realmente creativo. Un abrazo.😉
Very very nice! Well done 👏👏👏
Eres un mar lindo de ideas creativas. Saludos
This post earned a total payout of 27.420$ and 13.710$ worth of author reward that was liquified using @likwid.
Learn more.