Hello to all the HIVE BLOG community
He estado pensando en que mostrarles primero, pues tengo varias ideas que creo les podrían servir y agradar a mucho y, me encantaría compartirlas. Para el día de hoy quiero enseñarte hacer Toppers para la decoración de tu pastel de cumpleaños, o sencillamente para algún arreglo.
I've been thinking about what to show you first because I have several ideas that I think you could use and like a lot, and I would love to share them. Today I want to show you how to make Toppers for decorating your birthday cake, or simply for some arrangement.

Una manualidad que está en tendencia, es muy fácil de hacer y sobre todo muy bonita. Créeme que en tus decoraciones esto aportará un toque muy especial, y más aún si lo personalizas como lo hice yo en esta oportunidad.
A craft that is in trend, it is very easy to make and above all very pretty. Believe me that in your decorations this will bring a very special touch, and even more if you customize it as I did this time.
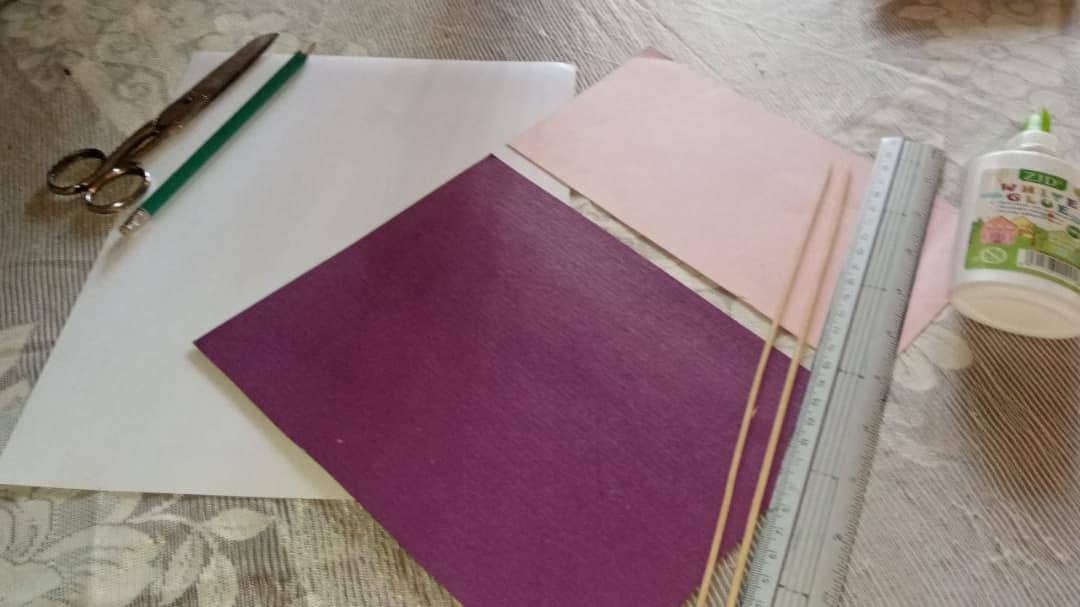
- Los materiales que vas a necesitar son los siguientes: -
- Los materiales que vas a necesitar son los siguientes: -The materials you will need are the following: 1.-Cartulina blanca, rosada y morada (Los colores los puedes cambiar a tu gusto)
2.- Pega blanca liquida, en barra o silicon.
3- Palillos de altura.
4.- Lápiz
5.- Tijera
6.- Marcadores del color de tu preferencia.
7.- Regla
1.-White, pink and purple card stock (You can change the colors to your liking).
2.-White liquid glue, glue stick or silicone.
3.-Sticks of height.
4.-Pencil
5.-Scissors
6.-Markers in the color of your choice.
7.-Ruler
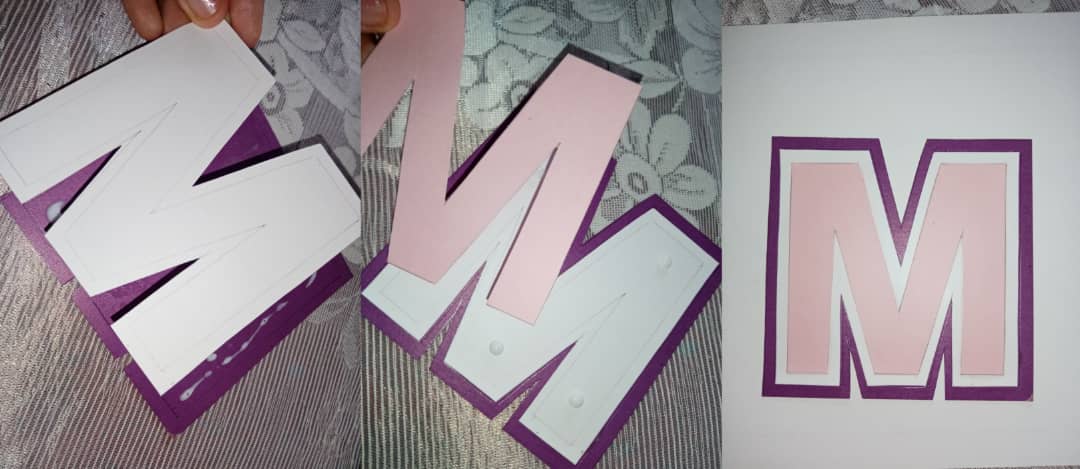
Lo primero que hay que hacer es marcar la inicial del nombre que queremos hacer, yo realice la M por mi nombre, pero esto fácilmente lo puedes cambiar por el tuyo o el de la persona a quien deseas regalárselo. Antes de hacer esto yo me asegure de que color seria la base de mi letra. Porque este procedimiento lo repetiremos 2 veces más. Hasta conseguir 3 piezas de la letra M solo que una más grande que la otra para que se puedan ver los 3 colores. Cuando ya están marcadas las podemos recortar.
The first thing to do is to mark the initial of the name we want to make, I made the M for my name but you can easily change it to yours or the person you want to give it to. Before doing this I made sure what color would be the base of my letter. Because we will repeat this procedure 2 more times. Until we get 3 pieces of the letter M only one bigger than the other so you can see the 3 colors. When they are already marked we can cut them out.

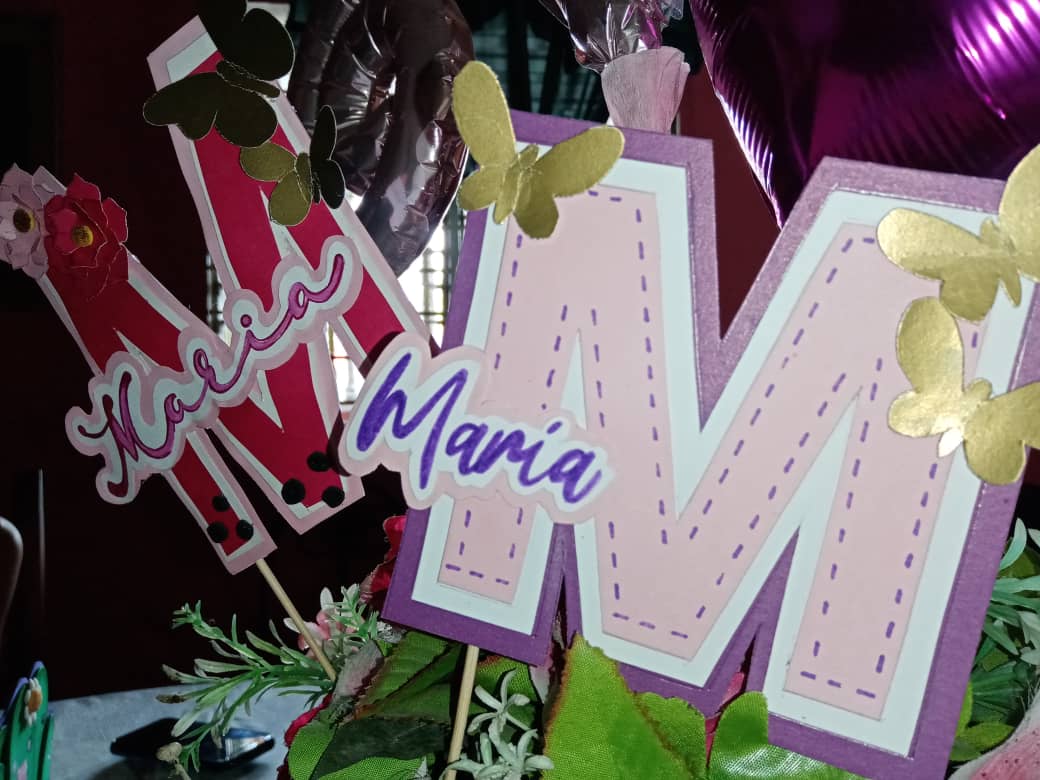
Como ya hemos marcado y cortado, lo que procede es pegar las letras. Una encima de la otra para obtener el resultado que muestro en la imagen. La M más grande es la morada y la más pequeña es la rosada, en medio de estas esta una M en blanco.
As we have already marked and cut, the next step is to glue the letters. One on top of the other to get the result shown in the image. The biggest M is the purple one and the smallest is the pink one, in the middle of these is a white M.
En este momento, tu eliges que otros elementos quieres añadirle a tu letra. Puedes pegar stickers, pegatinas, o lo que sea. Yo en cambio hice sobre una cartulina blanca mi nombre, la marque con un marcador color morado para que combinara, recorte y puse sobre otra cartulina rosada, para luego pasar a pegar encima de la letra M. Como te muestro en la foto.
At this point you choose what other elements you want to add to your letter. You can stick stickers, stickers, or whatever. I made my name on a white cardboard, marked it with a purple marker to match, cut it out and put it on another pink cardboard, and then paste it on top of the letter M. As I show you in the picture.
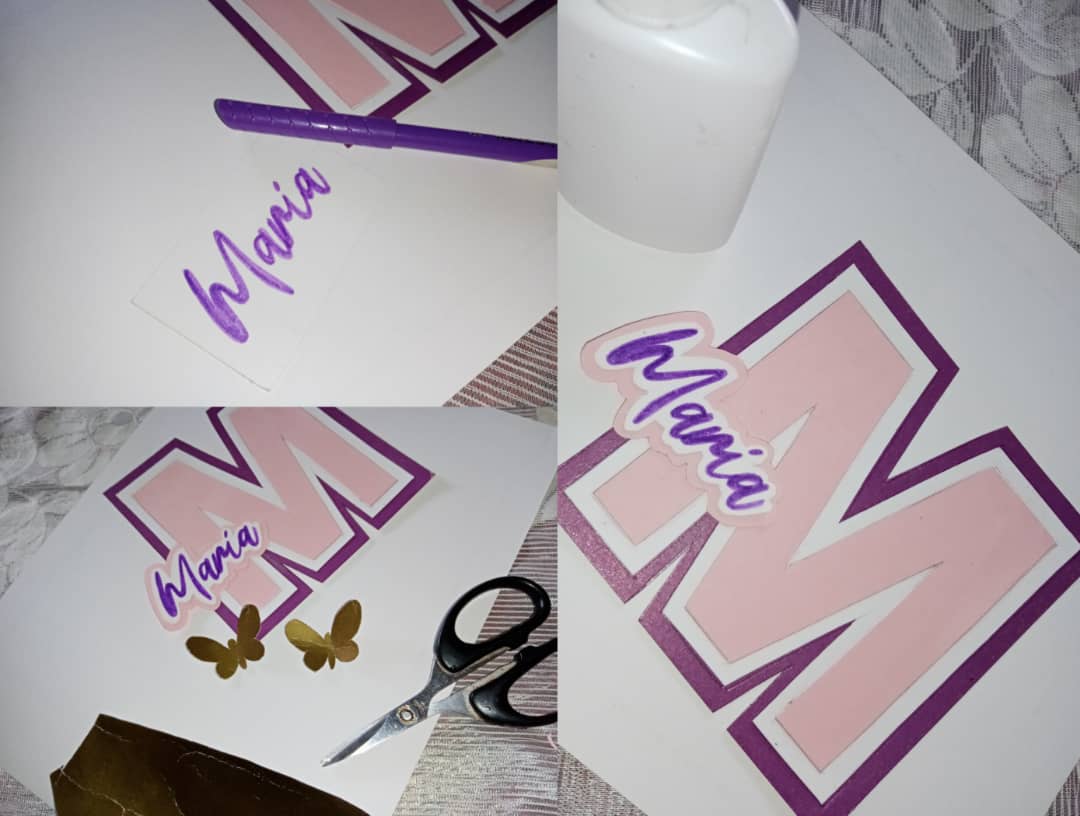
Agregue unas mariposas que hice sobre cartulina dorada. Y para darle otro toque con el mismo marcador morado con el que hice mi nombre. Marque pequeñas líneas con ayuda de mi regla para darle un efecto por todo el borde de la M más pequeña.
I added some butterflies that I made on gold cardboard. And to give it another touch with the same purple marker with which I made my name. Mark small lines with the help of my ruler to give it an effect all around the edge of the smallest M.
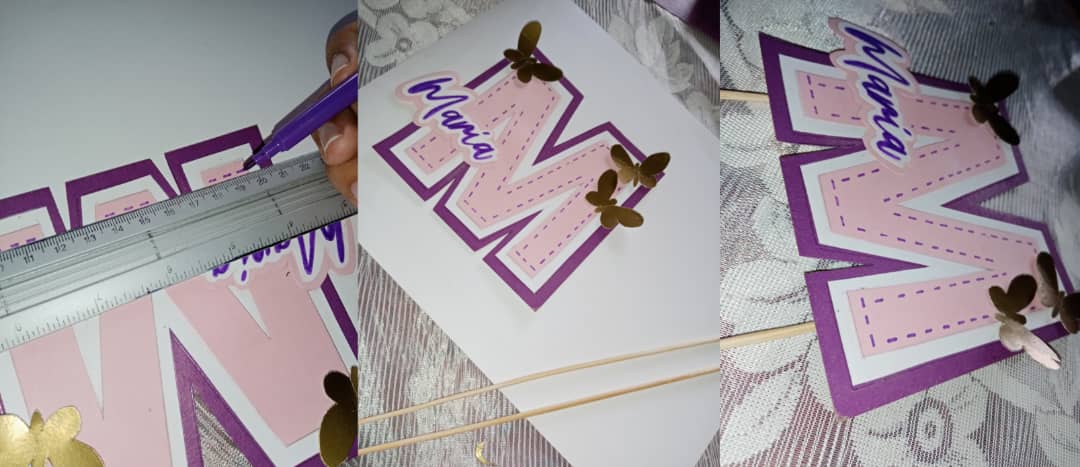
Lo que queda es pegar detrás los palillos de altura. Pará que este se pueda encajar fácilmente en el pastel o donde lo quieras colocar.
What's left is to glue the height sticks on the back. So that it can easily fit into the cake or wherever you want to place it.
Asegúrate de pegar muy bien todas las piezas y los palillos de altura para que este quede bien fijado y no se caiga. Y listo! Podrás agregar este toque personalizado a tus pasteles, arreglos, regalos.
Make sure to glue all the pieces and the height sticks very well so that it is well fixed and does not fall off. And that's it! You will be able to add this personalized touch to your cakes, arrangements, gifts.
Espero que te haya gustado tanto como a mi este proceso y resultado. Luego te iré mostrando nuevas ideas para estos fabulosos Toppers que están muy a la moda. Cuéntame en los comentarios si tu ya has realizado alguno de ellos, o si los has utilizado?. Atrévete a realizar este tipo de manualidades y muestra tu resultado.
I hope you liked this process and result as much as I did. Then I will show you new ideas for these fabulous Toppers that are very fashionable. Let me know in the comments if you have already made any of them, or if you have used them? Dare to make this kind of crafts and show your result.
Texto traducido en DeeLp/Text translated in DeeLp
Primera imagen realizada en Postermywall/First image made in Postermywall
Imágenes capturadas con ti teléfono Honor8A/Images captured with your Honor8A phone