Today, I am going to consume the Api Rest that I already created in a past post, which you can see by clicking Here .
It is a very basic Api of video games the Backend of our api is PHP and that we are going to consume this time with React.
React, is an open source Javascript library designed to create user interfaces with the aim of facilitating the development of SPA that is applications on a single page, created by Facebook.
I am going to divide the post into several chapters so to speak, this first post is about listing only all the video games that we have so far, in other posts I will upload the typical CRUD (Create, List (this post) ,
Update and Delete) with the advance of the days.
Well, we have our api that we can see in the following link: https://tupaginaonline.net/api/games/v1 which returns a Json with our information that we want
list in our SPA. Note Before continuing with the post I clarify that I am not an expert in React, so let's move on. Requirements to get started: We open the folder and proceed to see that there is inside the folder. Ok, we have several files and folders. Let's go to our visual studio code editor, if I told you before to use the one you want, but use visual since it has an integrated terminal. so let's go.
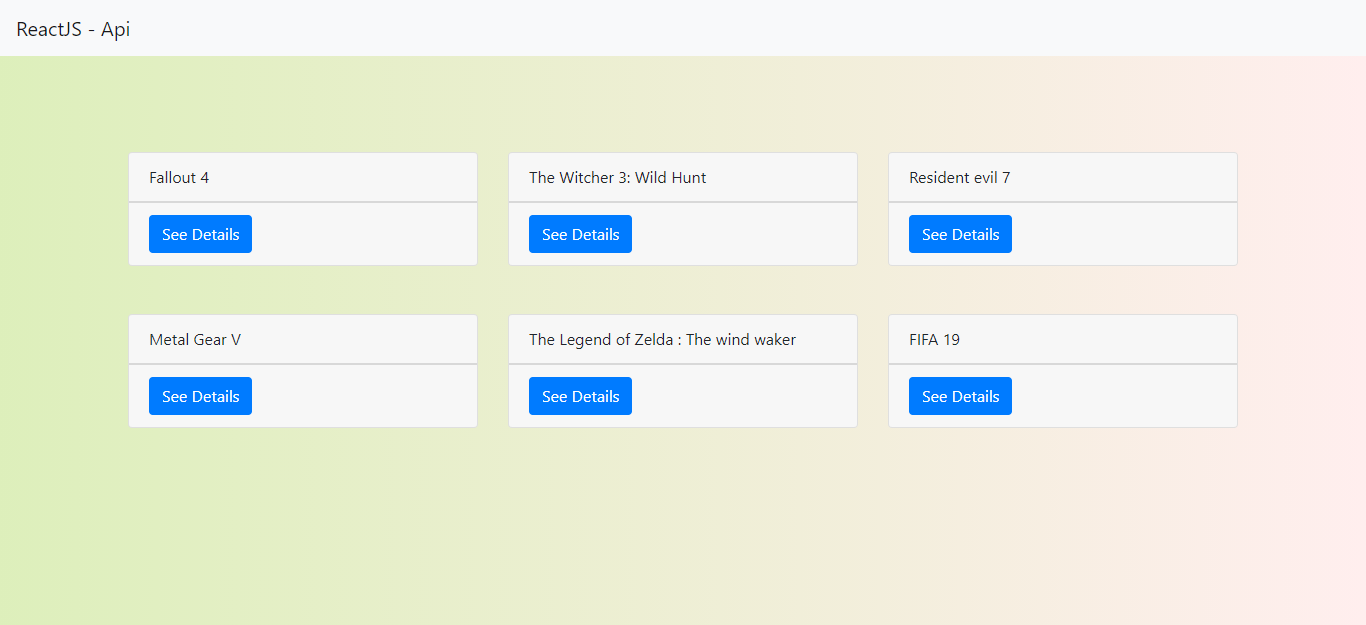
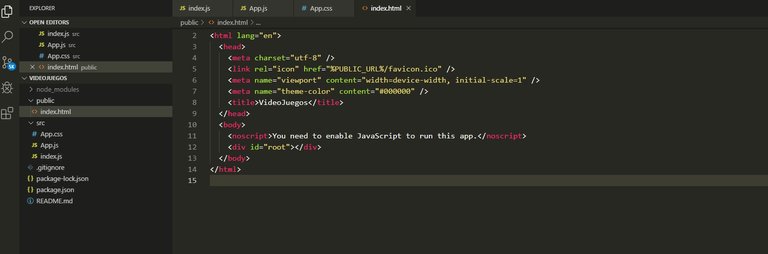
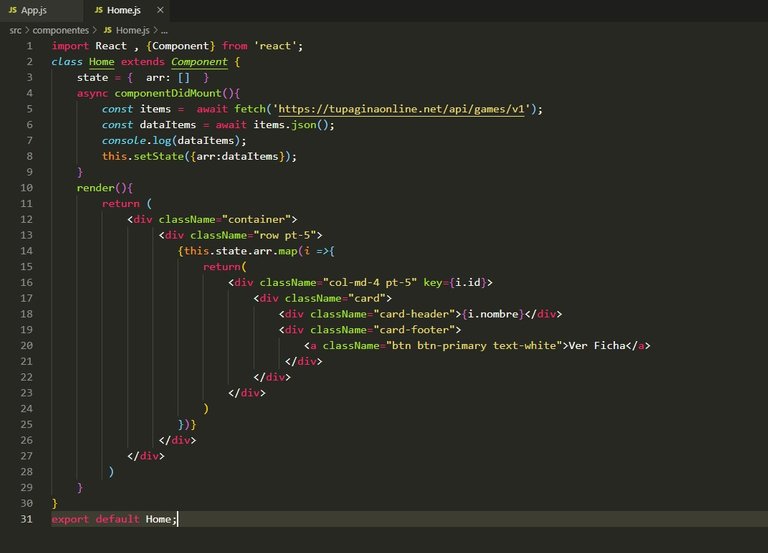
We are going to delete some files that do not interest us: 1) Open the Public / folder and we will delete several lines there: Leave alone the index.html Edit the index.html and leave it this way: Now inside the src / folder leave the following files: App.css , App.js y index.js Edit the index.js and leave it as follows: Edit the App.js and leave it as follows for now: Leave App.css blank for now, and with this done we will have our first Hello World in React !! We are going to add styles to our App. We are going to use the Bootstrap css framework . to do so we are going to copy the cdn that bootstrap provides us on your website bootstrap Now we open the index.html inside Public / and place the bootstrap cdn below the title tag Now for the good news, to really start elbowing, & nbsp; inside src / we will create a new folder called components But before that you have to install a module called react-router-dom & nbsp; Let's go to our integrated terminal, to open it within Visual studio code press the following keys, Control + Shit + P and write terminal integrated Ready with the terminal open we write the following: and we press Enter. We navigate to components / and create a new file called & nbsp; Home.js and we open it to write the following code: componentes/Home.js Now we navigate to src / App.js and open it to write the following code: Src/App.js We proceed to write in our console and the browser should open with our App running, a simple Hello World !! With this we make sure that our router works. Let's go to components / Home.js and we will connect to our rest api with the following code: If everything went well we will see this through the browser console: Great, we are already obtaining the data in our App, what follows will be to go through that arrangement with the following code: If everything has gone well and I hope so, we will see the following: What follows will be to activate this See File button for this we will write the following code componentes/Home.js We create a new file within components called Tab.js with the following code we are almost ready, but it takes a navigation to make the thing look better not ? We will create a new file within components called Navigation.js and we will write the following code: and we modify the App.js And now we see how our App has been Finally we have to upload our code to production, on your hosting of course. For this we must write the following in the console: upload the content of the generated folder called build to your hosting.
cd desktop
npx create-react-app my-app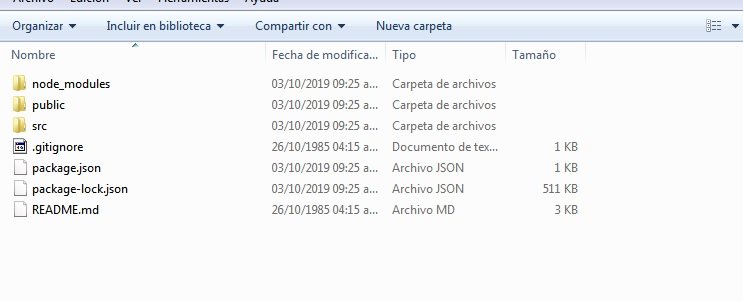
import React from ´react´;
import ReactDOM from ´react-dom´;
import App from ´./App´;
ReactDOM.render(<app>, document.getElementById(´root´));</app>
import React from ´react´;
import ´./App.css´;
function App() {
  return (
    <div classname="App">
      <header classname="App-header">
        <h1>Hello World!!  </h1>
      </header>
    </div>
  );
}
export default App;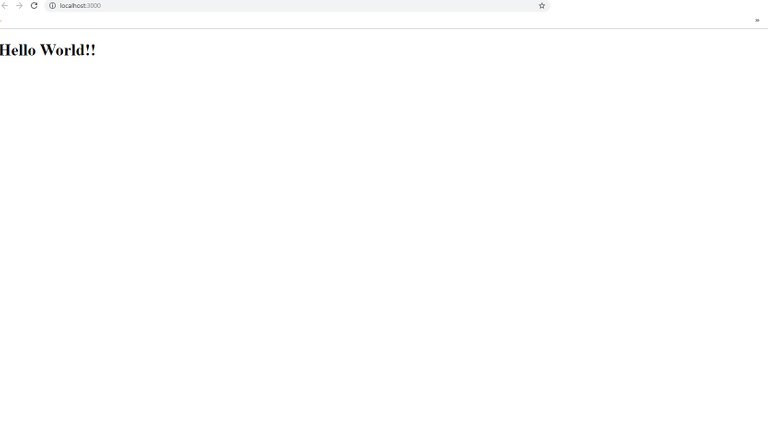
< Link rel="stylesheet" href="https://stackpath.bootstrapcdn.com/bootstrap/4.3.1/css/bootstrap.min.css"
    integrity="sha384-ggOyR0iXCbMQv3Xipma34MD+dH/1fQ784/j6cY/iJTQUOhcWr7x9JvoRxT2MZw1T" crossorigin="anonymous" >
<pre class="gatsby-code"><code class="gatsby-code"><b class="token function">npm </b>i react-router-dom
import React , {Component} from ´react´;
class Home extends Component {
    render(){
        return (
            <div><h1>Hola Mundo!!</h1></div>
         )
    }
}
export default Home;
import React from ´react´;
import ´./App.css´;
import Home from ´./componentes/Home´;
import { Route, BrowserRouter } from ´react-router-dom´;
function App() {
  return (
   <div classname="App">
        <browserrouter>
              <route exact="" path="´/´" component="{Home}">
        </route></browserrouter>
     </div>
  );
}
export default App;npm start


body {background: #FFEEEE; /* fallback for old browsers */ background: -webkit-linear-gradient(to right, #DDEFBB, #FFEEEE); /* Chrome 10-25, Safari 5.1-6 */ background: linear-gradient(to right, #DDEFBB, #FFEEEE); /* W3C, IE 10+/ Edge, Firefox
16+, Chrome 26+, Opera 12+, Safari 7+ */ }


npm run build
With this we have finished our first Post which is to List the data of a Rest Api through ReactJS
The link where you can see the live result is : https://react-videojuegos.tupaginaonline.net
If you want to have your website, click the button below
Congratulations @jfdesousa7! You have completed the following achievement on the Hive blockchain and have been rewarded with new badge(s) :
You can view your badges on your board and compare yourself to others in the Ranking
If you no longer want to receive notifications, reply to this comment with the word
STOP