Heeeyho Readers! Coming by with a small maintenance-related post.
Those living near the sea know the struggle — rust! Keeping things well-maintained is key to avoid such hellish oxidative pestilence. For that reason, I avoid going by the sea on my main bicycle and also clean/oil its parts often. For everything else (going to the gym, supermarket, communiting around, etc...) I use a cheap and quite beaten 26 inch bicycle, a.k.a the beach bike.
The idea revolves around a bicycle that won't hurt if rust ate it away. Don't get me wrong though: I won't literally let rust destroy the bicycle, but won't spend a lot of money/time (just enough to keep it running) on maintenance either. Until it doesn't. Then, I'm forced to service the rig and change parts here and there.
Rust-o-nado
The beach bicycle lives outside the house and is often used on rainy days. Add to that a few trips by the sea and we have the perfect recipe for rust-o-nado madness. Quite shameful for a mechanical engineer to have such a neglected machine, but... I'm sloooowly working towards having my own workshop at home (more about that later), which will change everything. Anyways.
The chain rusted badly and the freewheel screams for help. The gears are not working either. However, because I'm working on another bicycle project (that will appear on the blog soon), changing parts is out of question. I just need the bicycle spinning without creaking, which means cleaning the chain and greasing the freewheel. Ah! It's also the perfect situation for a little chemistry experiment too.
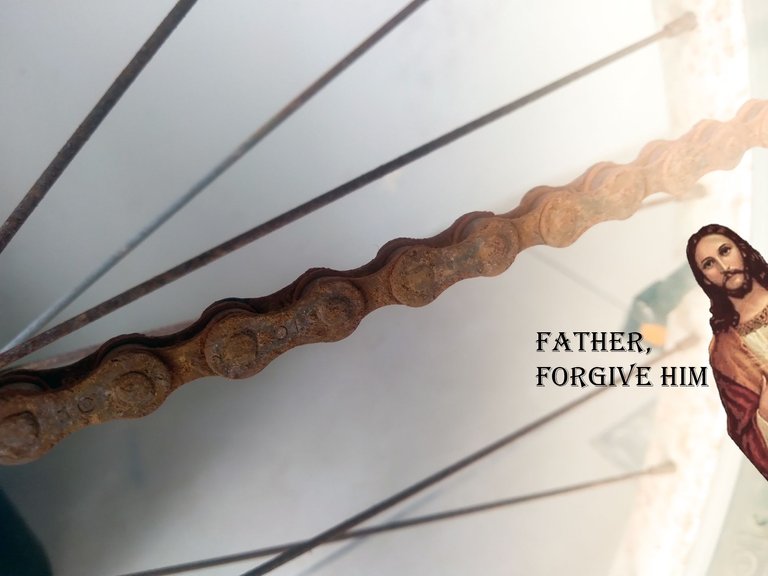
I've been searching the web about ways to remove rust with home stuff. There are tons of magical solutions out there, but vinegar and salt appears on every experiment. Electrolysis is great as well, but requires a battery that I don't have. Vinegar and salt then!
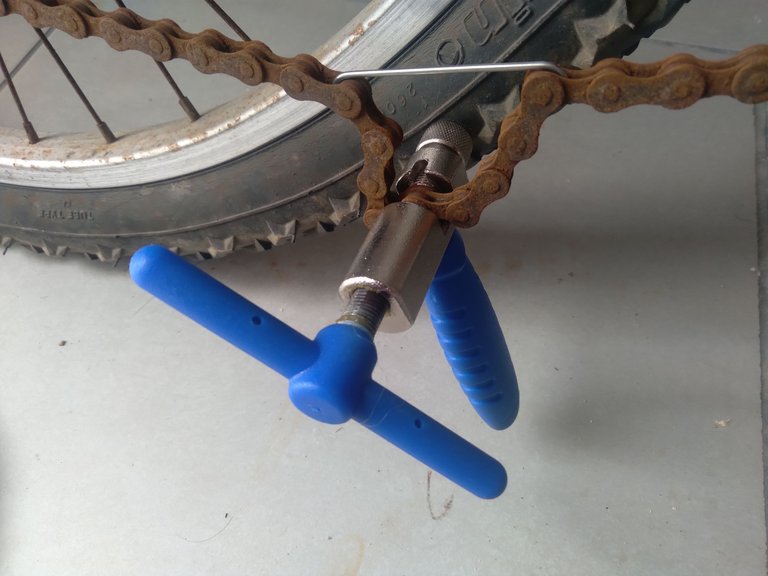
The chain breaker bought from China worked wonders to remove the chain. No effort at all to remove the pin. Then, I soaked the chain in vinegar and spread barbecue salt on top.
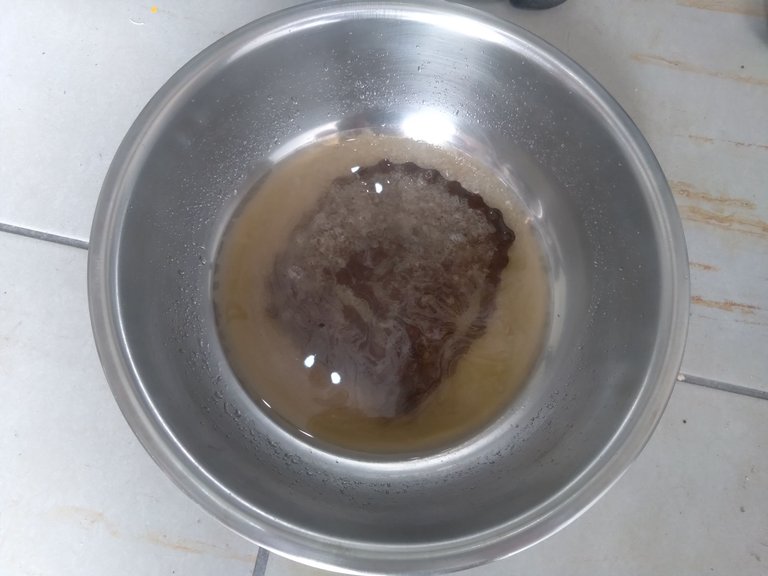
After 24 hours the result is a tad disappointing. Maybe a soft steel/brass brush would leave the surface in better shape. It's worth mentioning that the rust was quite severe though.
What you see below is after scrubbing the chain with kitchen de-greaser and a brush, letting it dry, and applying a thing coat of oil.

Installing a new chain is a lot easier, but I like a small experiment (while saving a few bucks). By the way, I heard we need to rinse very well the vinegar or the rust comes back quick. Not that the rust won't come back anyways — that's the issue in cheap non-coated steel chains.
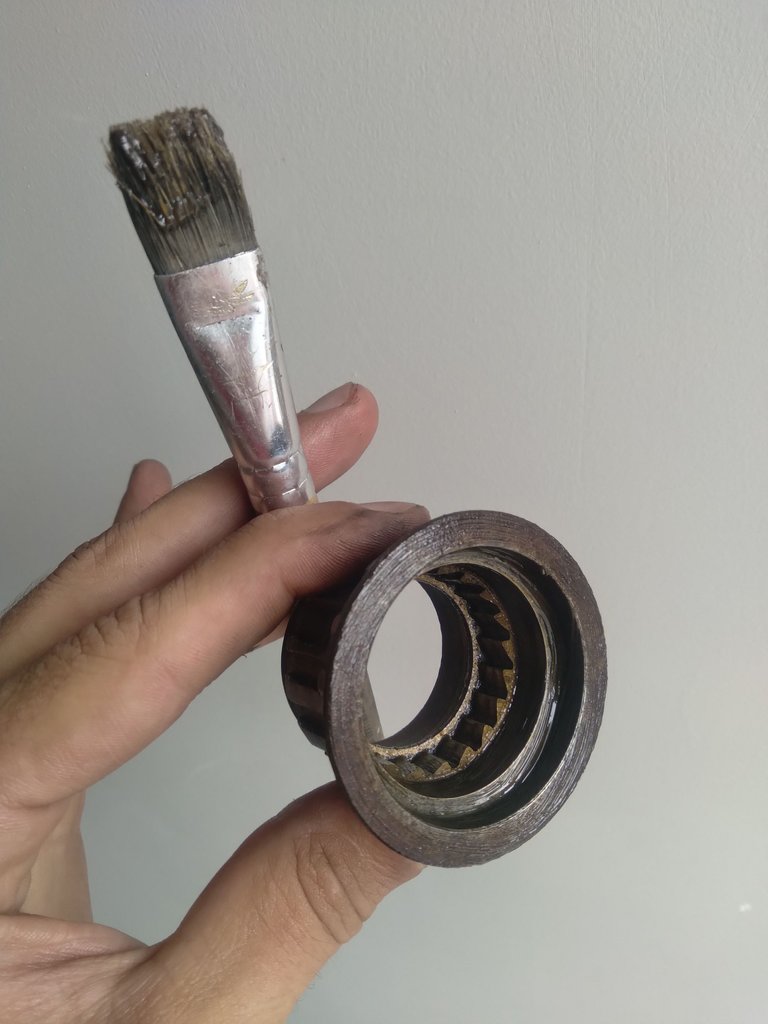
The freewheel
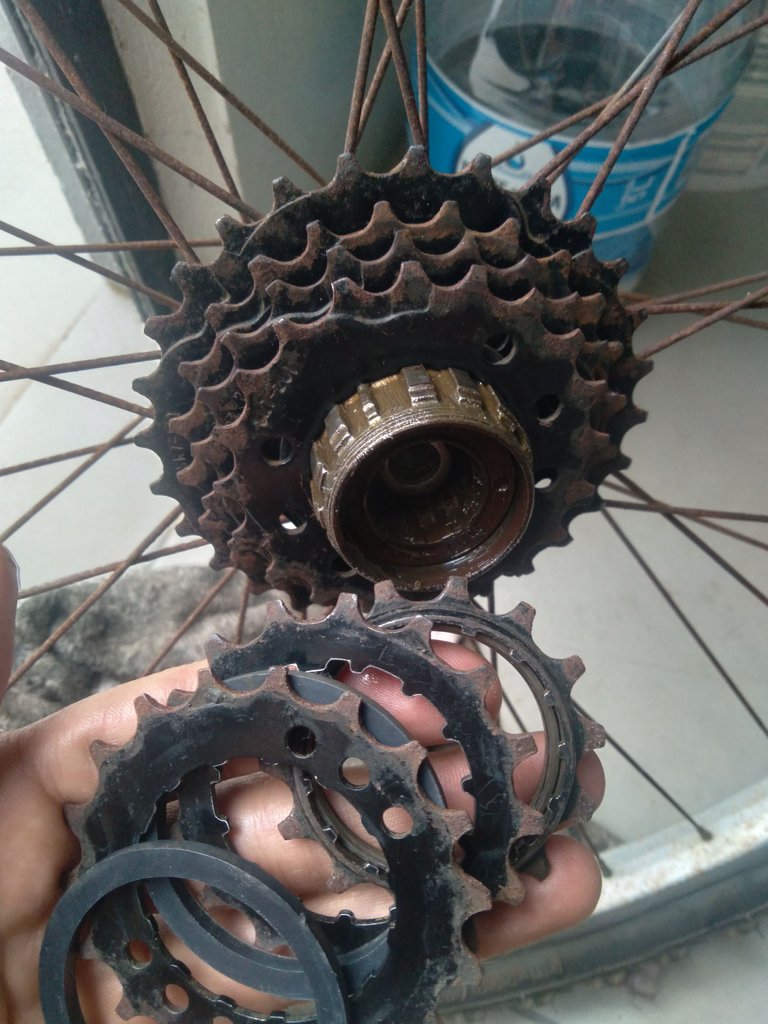
The freewheel was loose. I realized after removing the wheel that the sprockets were not tightened properly, explaining the weird noises when not pedaling. It's best to use the opportunity to disassemble the freewheel and hub axle to re-grease everything.
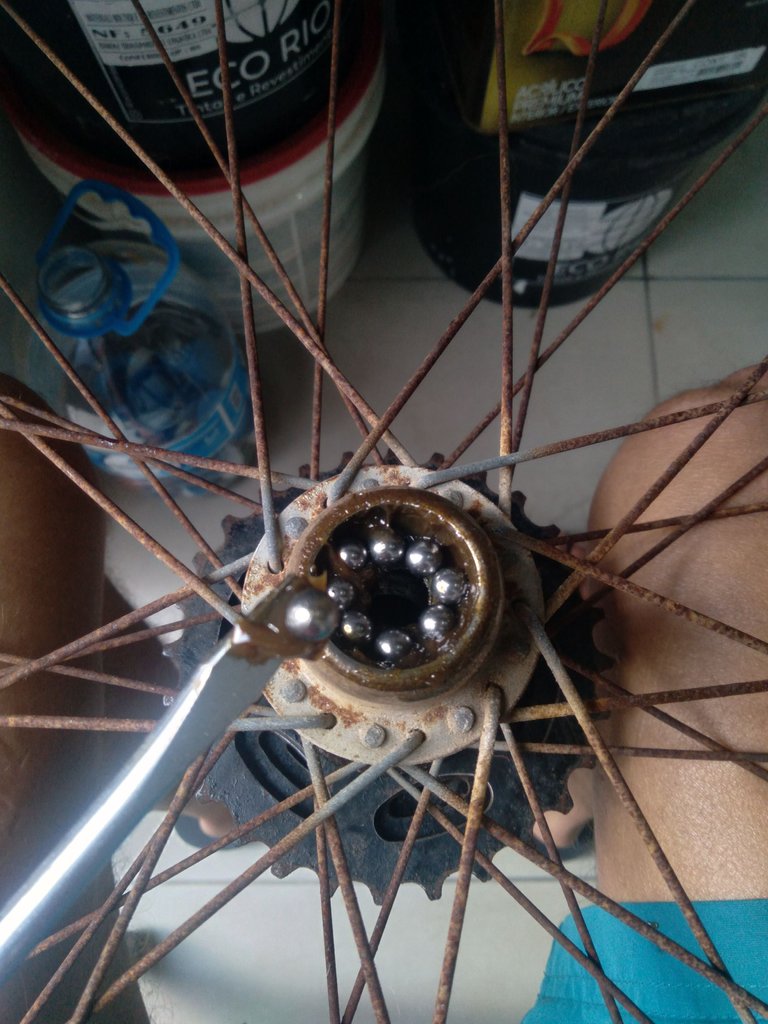
Madonna mia! Grease was non-existent, thus, after pulling the freewheel body out, the ball bearings fell on the ground — my mistake, I should've put a cloth underneath to catch them. Lesson learned. Thank God none disappeared into oblivion.

Wish I had a bench grinder equipped with wire brush to properly clean the sprockets. A good bench grinder is about 175 Hive near me; it's on the list of soon-to-be bought tools. For now, I just brushed the sprockets with de-greaser.
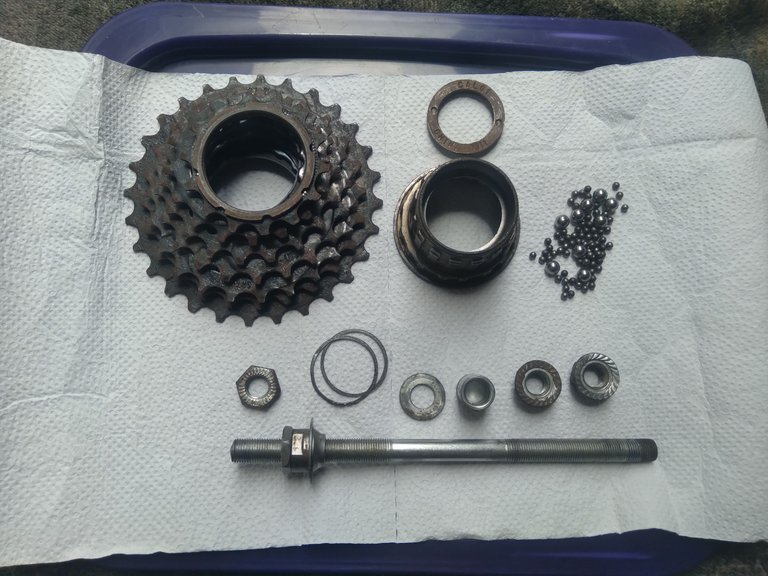
Lastly, a light film of grease on the freewheel body to protect from future rust. On higher end bicycles we don't use this much grease, nor do we use cheap general purpose grease, buuuuuuuuuut... we are talking about the beach bicycle here.
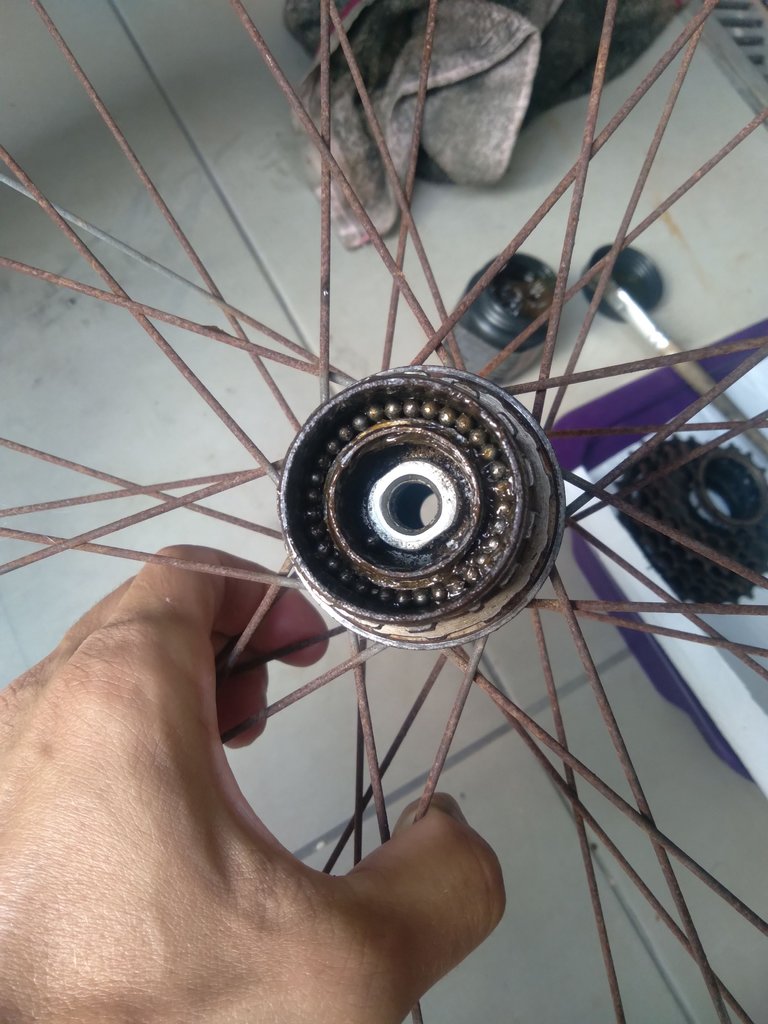
The real pain in the behind is placing the dozens of ball bearings (72 at the freewheel body to be more precise) back into the cups. Be patient! The trick is to use a bit of grease to hold the balls on a screwdriver. One by one they go into place.
As you are probably wondering, that is one hell of a lazy maintenance. What can I do when I need the bicycle running asap at zero cost? Things will change for the better soon when I'm done buying the tools for the workshop. It's costing a lot of Hive, though it's gonna be epic and will generate tons of great content.
I hope you've enjoyed this post. Until next time.
Peace.
If you enjoyed this post consider leaving your upvote for a hot coffee.
Find me on Twitter: https://twitter.com/mrprofessor_
~Love ya all,
Disclaimer: The author of this post is a convict broke backpacker, who has travelled more than 10.000 km hitchhiking and more than 5.000 km cycling. Following him may cause severe problems of wanderlust and inquietud. You've been warned.

Man that before and after on that chain is mind blowing! Will keep that in mind for future rust buckets 😅👍
XDD But if you look up close it's not that great. I believe that a second bath on clean vinegar followed by scrubbing with a wire brush it would be awesome. After 24 hrs the vinegar turned brown as hell
Oxidation can be a problem indeed. I also live near the sea, but even worse are cold winters. Over here they sprinkle salt on the streets when it freezes to prevent slippery conditions.
This is really bad for your bike. I always spray off my bicycle with a hose after every ride so the salt comes off. After that I dry it a bit with an old cloth before Input my bike back in the garage.
Thanks fornsharing your tips!
Upvoted by the Cycling Community
Share your rides, bicycle, maintenance, news or any other cycling related content!
If you would like to support the Cycling Community you can click one of the amounts below to delegate some Hive Power
25 HP - 50 HP - 100 HP - 250 HP - 500 HP
Salt is evil! I can only imagine how car parts behave over the years. Next on my list is an ai compressor to quickly dry the bicycle after eashing it.
Congratulations @mrprofessor! You have completed the following achievement on the Hive blockchain And have been rewarded with New badge(s)
Your next target is to reach 95000 upvotes.
You can view your badges on your board and compare yourself to others in the Ranking
If you no longer want to receive notifications, reply to this comment with the word
STOPCheck out our last posts:
Holy shit, 90.000. Had each been worth 1usd id be rich xD