- Cover image -
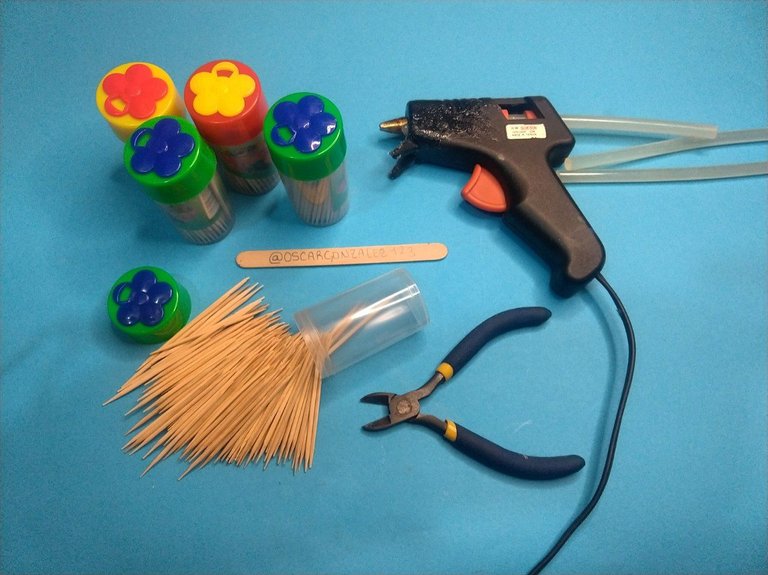
There are many ways to make a model, some more expensive than others and some with better results than others. Although, I have to admit that I have fallen in love with this method, how fun it is to make them and the low cost of manufacturing.
Not to mention the few tools I'm going to be using, a small pliers to cut the toothpicks and a glue gun with their respective sticks.
This is going to be quite repetitive to tell the truth, so I'll be uploading the parts and saying what I'm going to do with them.
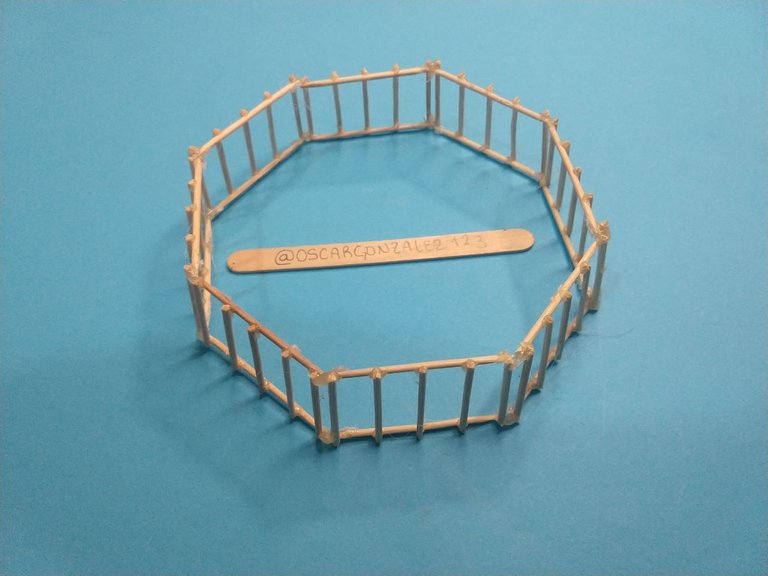
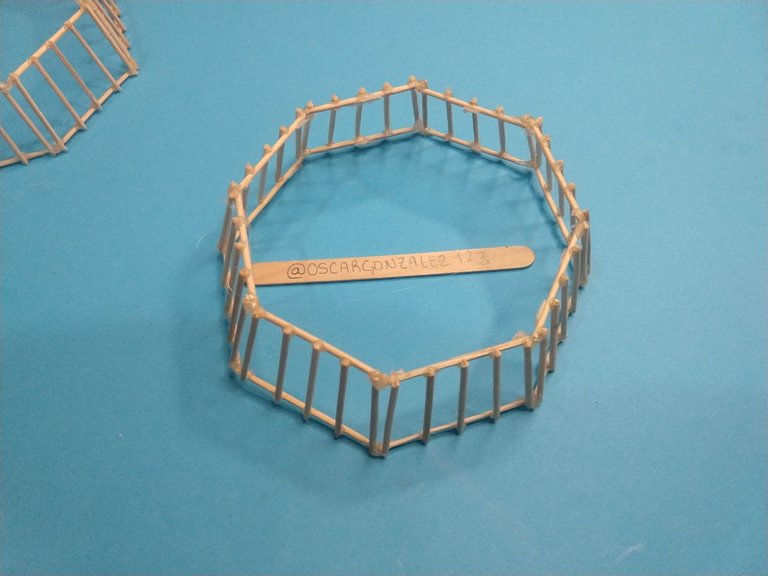
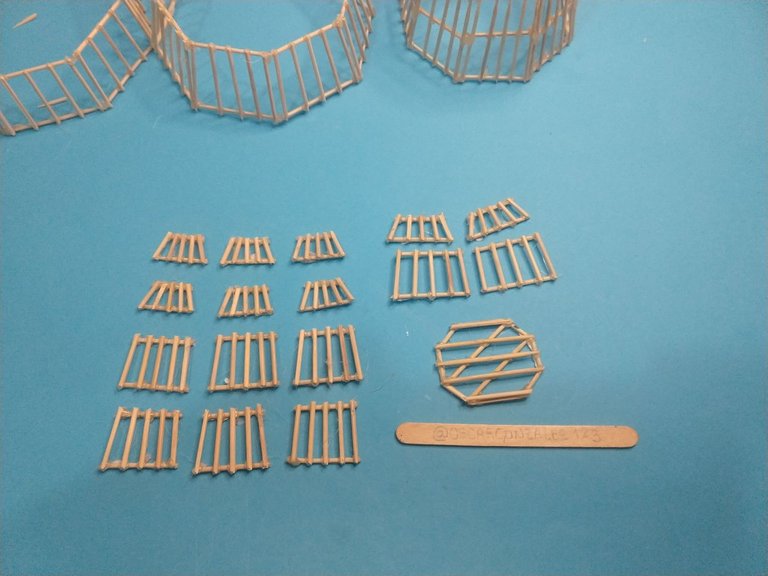
The first thing was to make 8 pieces of 4,5x5,5x3,5, with these we will make an octagon, it will be the base of our windmill
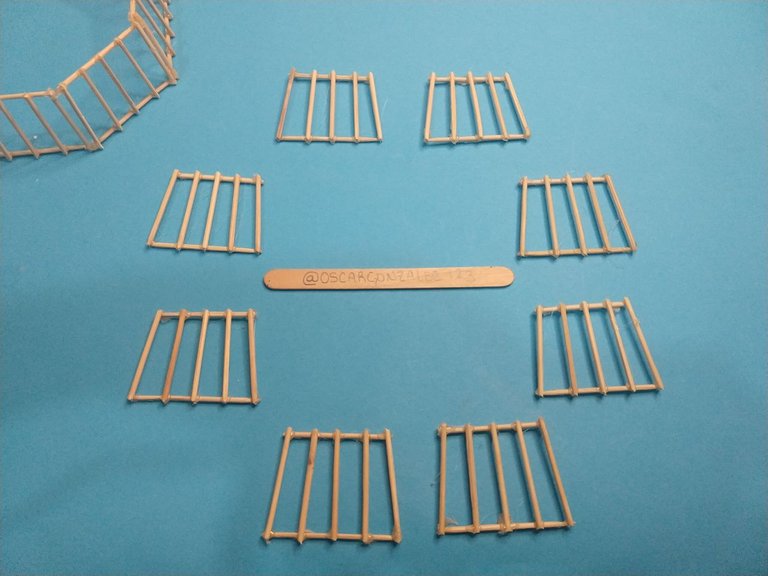
The second will be more of the same, 8 more pieces, although you are 4x5x4, with which we will also make an octagon.
This will be the second floor of our mill, we should not worry if it is not perfectly aligned with the previous octagon, since we will put some spacers at the end
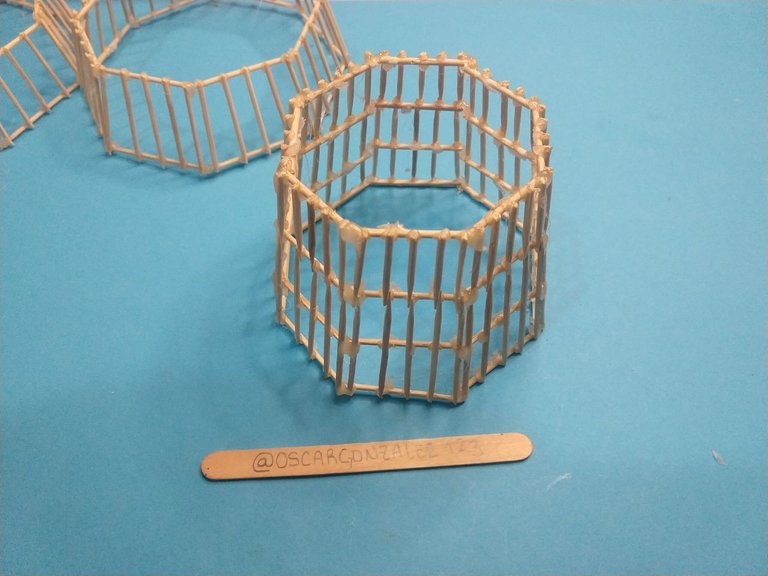
Third, we will make another octagon, although this time with longer pieces. More specifically from 2,5x4x8.
These will make up the upper part of our mill and this must be perfectly aligned with the previous one.
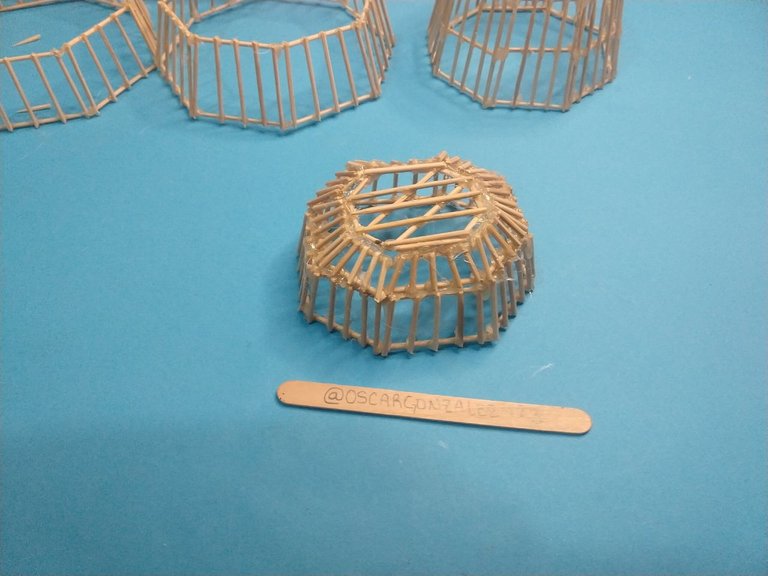
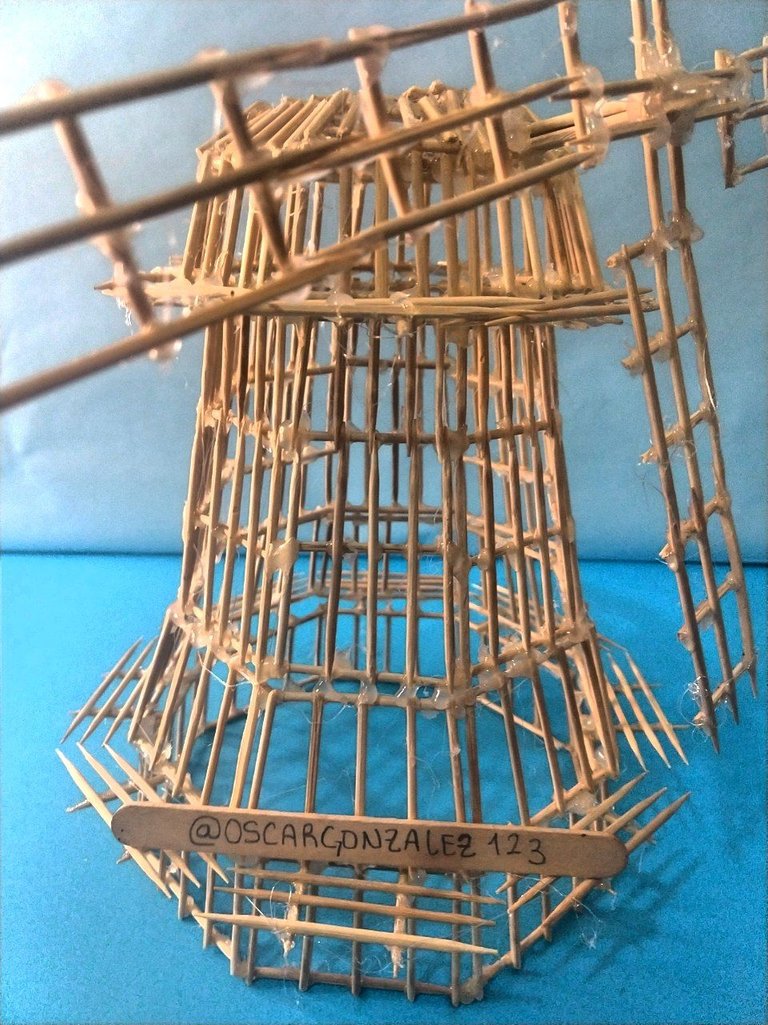
We arrive at the point of the dome, in this case it is also an octagon, but two of its sides are longer than the rest, so there would be 6 pieces of 2,5x3x2,5 Plus another 2 pieces of 3x4x2,5, which will make the final octagon
On top of that, we will make an octagon, also with two parts longer than the others and we will complete with small pieces, which I will not say measurements because as we assemble, these spaces can vary
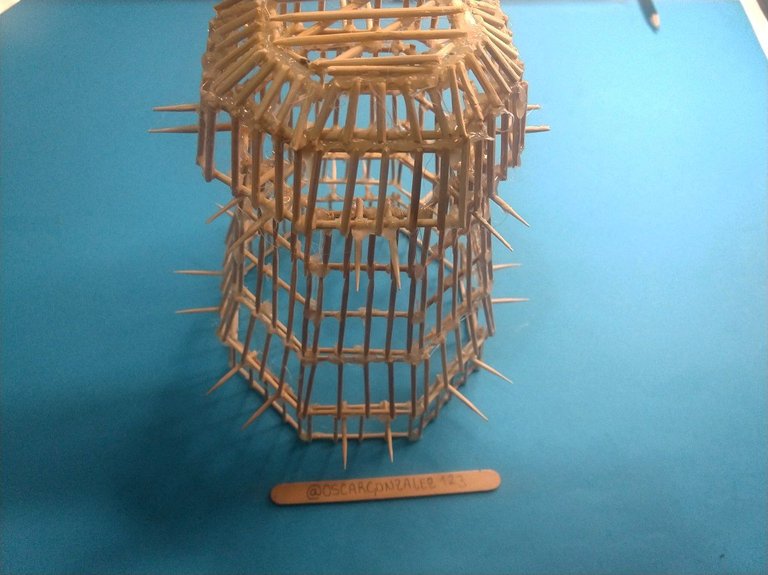
In the end we put everything together, in the order in which we built it. At the junction of the base with the first floor, we add some small projections, there we are going to place some crosswise shaped sticks as a floor. We will do the same in the union of the dome and the body of the structure
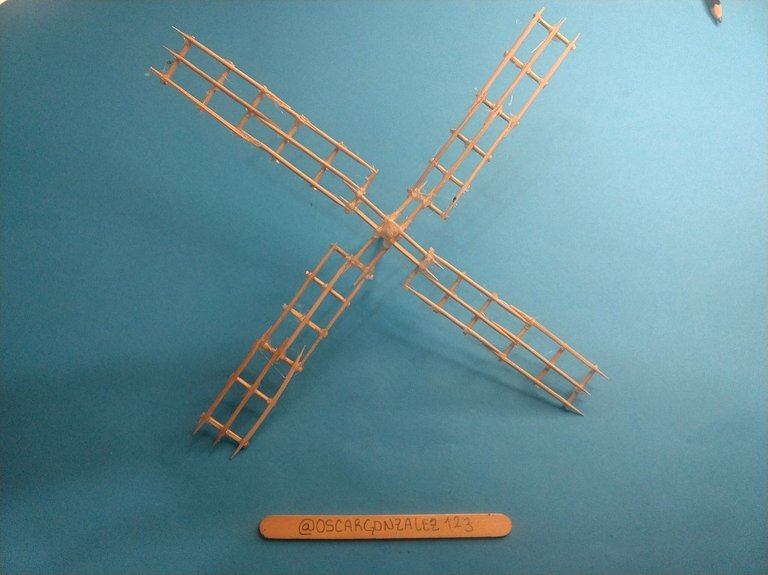
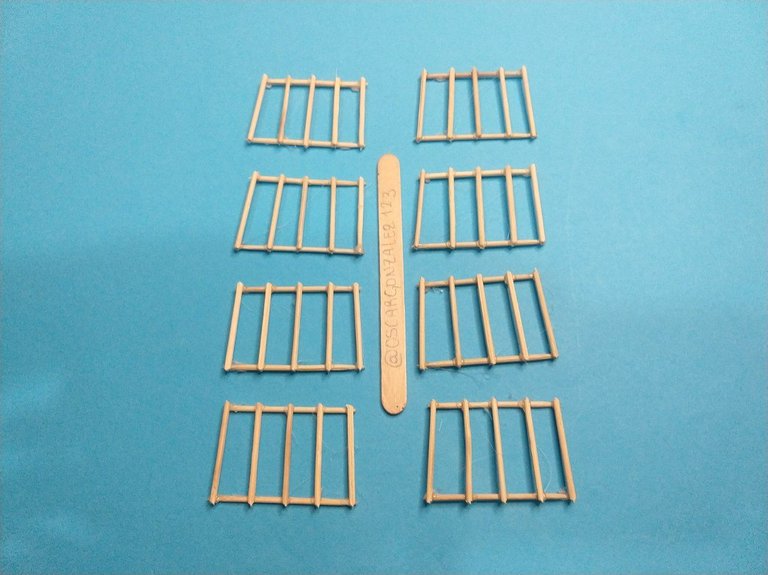
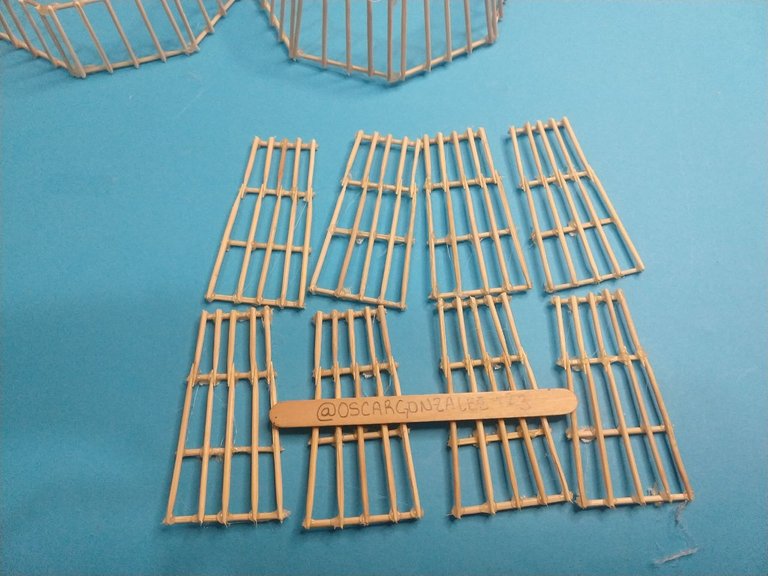
Last but not least, the blades of the windmill. I thought this would be the most difficult, but it was actually the easiest to do, I just made rectangles and then joined them together
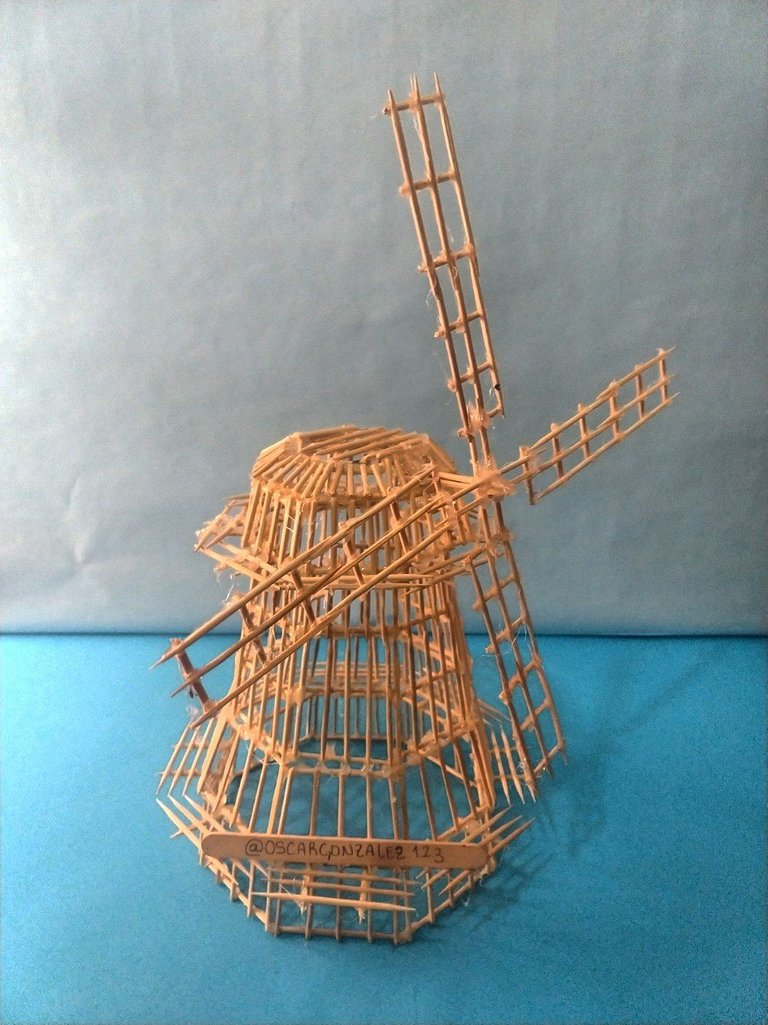
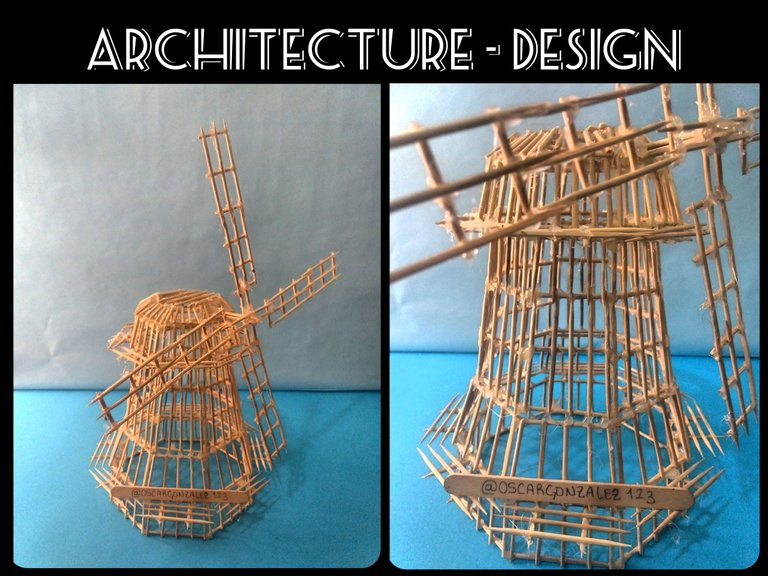
And so, after about 9 hours of work, I finished my first model made entirely with toothpicks.
I honestly loved doing it, although it's a lot of work, it's very repetitive and you can improve the technique each time, that is, you start by placing the corners first, for example, and then you evolve and realize that otherwise it's better... you go thinking how to improve throughout the process
One thing that I couldn't improve on is the use of silicone. On youtube they make it seem very easy, but believe me it is not, if you add a little it doesn't stick and if you add a lot it looks ugly.
Another thing is the temperature, if it's not that hot it doesn't stick either, but if it's too hot it takes too long to dry, anyway, it was super fun and it was worth every burn
Dear @oscargonzalez123. For this post and your future publications to be considered for nomination, please ensure that you have replied to all comments in your previous architecture posts. We also highly encourage you to interact actively with this community's admin team and other authors by upvoting, reblogging, and commenting on their content. Thank you for your kind consideration.
Good day, I was able to respond to the comments on my post, both the previous and the current one, and comment on how to vote for some works such as (A New Beginning) (The architecture of ancient Great Britain) (Kampung Naga, a village with local wisdom in Java Occidental) ( Design and Architecture of Maimoon Palace) (Sacred Architecture of Madrid: San Pedro el Viejo) @aplusd
Thank you dear @oscargonzalez123. We appreciate your community participation and hope you would continue being active in your future posts. 😀
😄So shall
I understand, thank you very much for your observation, I will be more aware of it from now on.
How nice, it is not every day that I get to see this kind of work. Thank you for sharing and have a nice day ahead.
It was really fun to do it, my goal is to make several, until forming a kind of mini city
That's great, be sure to share it with us.
👍🏻So shall.
Me parece un trabajo de gran dedicación ya que no es fácil mantener los palillos en su puesto y luego tener sumo cuidado para colocar la pega caliente y no quemarte en el proceso.
Excelente trabajo.
I find it to be a very dedicated job since it is not easy to keep the chopsticks in place and then take great care to place the hot glue and not burn yourself in the process.
Excellent work
Thanks for the support, the truth is that I did burn my hands a little because of the hot silicone, but it was worth it for being here sharing my work and effort.
👍
Your content has been voted as a part of Encouragement program. Keep up the good work!
Use Ecency daily to boost your growth on platform!
Support Ecency
Vote for new Proposal
Delegate HP and earn more
Congratulations @oscargonzalez123! You have completed the following achievement on the Hive blockchain and have been rewarded with new badge(s):
Your next target is to reach 200 upvotes.
You can view your badges on your board and compare yourself to others in the Ranking
If you no longer want to receive notifications, reply to this comment with the word
STOPCheck out the last post from @hivebuzz:
Support the HiveBuzz project. Vote for our proposal!