After another few months of Training non-stop i have finally reached a new level!

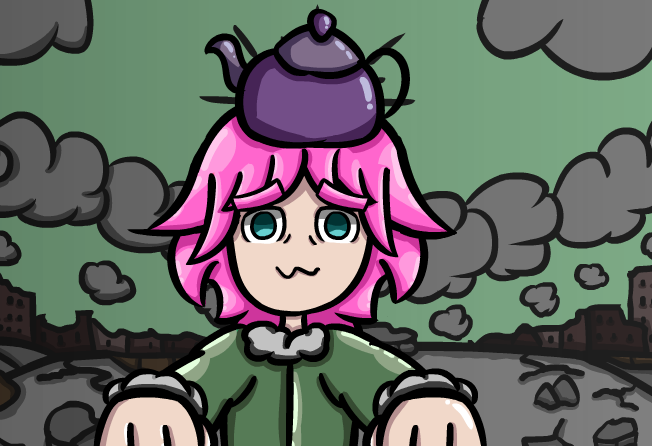
"Spring Harvest"
Glad to have some casual free time again
Burned out but i can feel that im so close
How much longer can i keep this up?
Hopefully my body can still hang in there.
.
.
.
Should i improve my Music, Voice and Video editing skills next?
.
.
.
2 skills
Illustration and Animation
Welp im already backed into a corner.
I'd rather die giving it everything i've got than wait for me to run out of money and survive on the streets.
Heck maybe my toe infection would get me 1st before any of those, the surgery is too expensive and the color of it is getting worse.
GRRRRRRRRRRRRRRRRRRRRRRRRRRRRRRRRRRRRRRRRRRRRRRRRRRRRRRRRRRRRRRRRRRRRRRRRRRRRRRRRRRRRRRRRRRRRRRRRRRRRRRRRRRRRRRRRRRRRRRRRRRRRRRRRRRRRRRRRRRRRRRRRRRRRRRRRRRRRRRRRRRRRRRRRRRRRRRRRRRRRRRRRRRRRRRRRRRRRRRRRRRRRRRRRRRRRRRRRRRR
TAKURI IS STRONG!!!!
TAKURI IS STRONG!!!!

@zeroooc
@demotry
@jijisaurart
FIGHT ME NOW! 1v1 midlane!
How to draw like an animator!
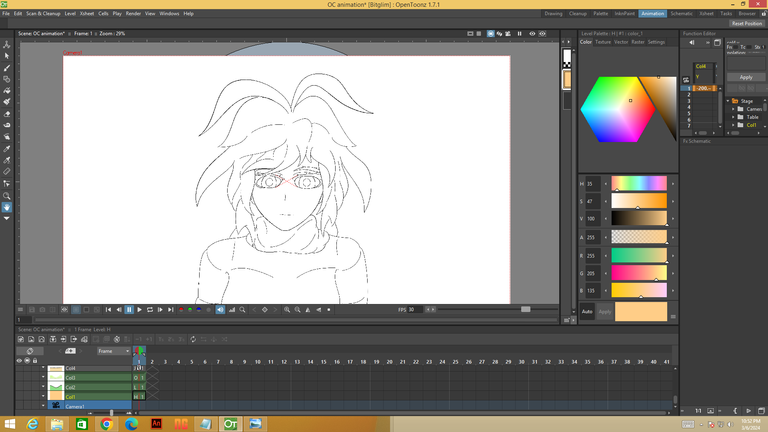
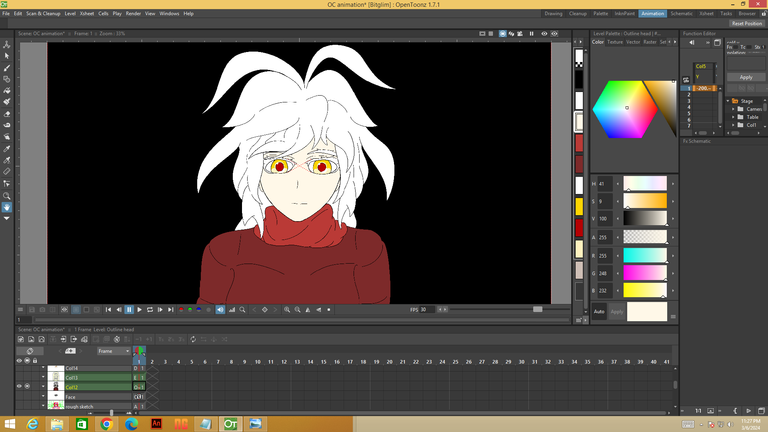
Clean outline
.
.
.
I wanted to wait and finish this animation first before making a post, but @japex1226 was learning compositing and VFX. A lot of the guides are scattered teaching you basic stuff, there are a couple videos that teach you genga style animation.
But we only want the VFX and Compositing part, replicating more recent anime and not those from early 2000s.
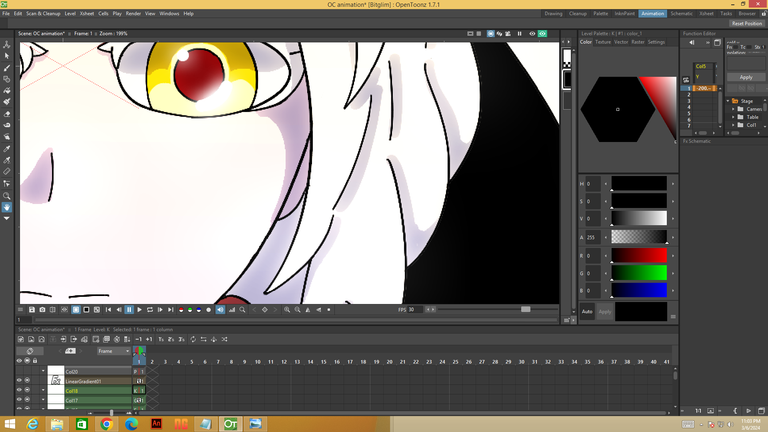
Close up of the face
The current method im using can be considered highlights.
When you select portions of the body, usually under light to have a faint glow that gives it a more vibrant look.

Askeladd from Vinland Saga
.
.
.
Close of up the face
The 2nd method usually employed in dimly lit areas or just darker places overall. This can be considered Rim lights or Shadow blur.
Your trying to highlight a portion of the body by making other areas darker
Thorrfinn from Vinland Saga
Some highlight methods are still being used such as the eyes or overhead light gradient. But in contrast to the first method, the shadows are the ones giving attention to the rest of the body even though its covering front and center.
The first thing you would notice is that shadows are blurry and sort of expanding, while the 1st method we see the light invading and causing bloom on dark areas.
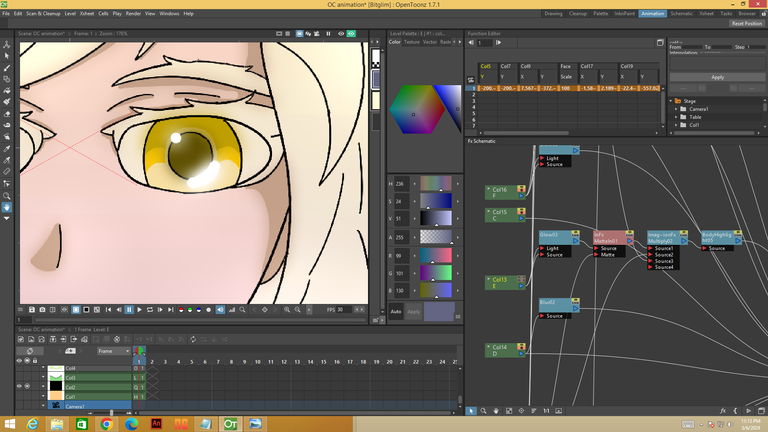
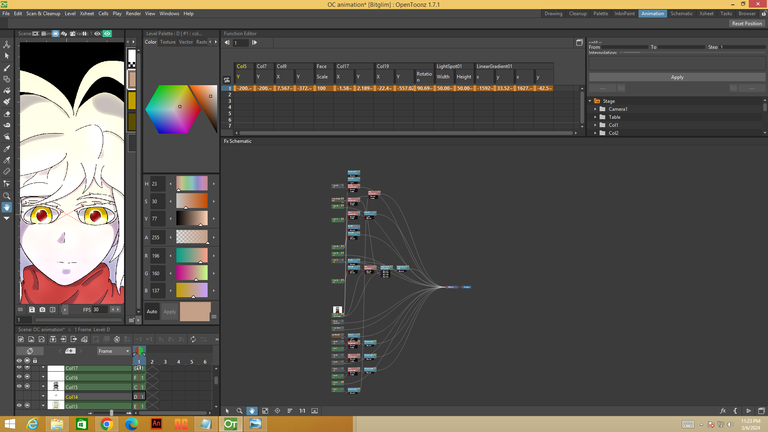
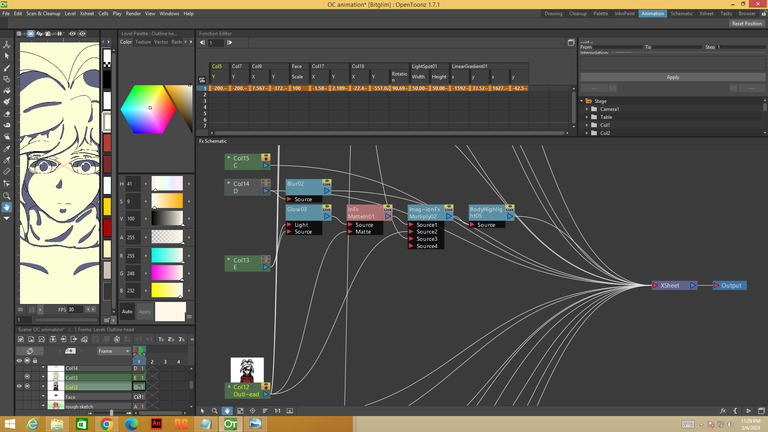
Methods i use to achieve these effects
"Torture"
Although the program im using is Opentoonz, a free, open-sourced and well respected standard within the japanese animation industry. Heck its even used by Studio Ghibli!!!
The way you achieve might differ, but the end result is the same.
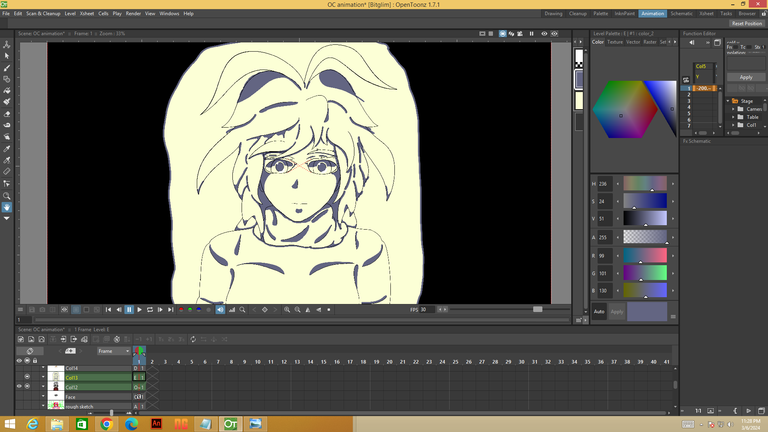
Base Colors
For the Base colors, its important to have simple flat colors and sharp edges. Please turn off all anti-alias or anything that smoothens the art.
We want it to be as Crispy as can be, so its easier for the VFX artist or Compositor to do his job. But in this case its YUUUUUUUUUUUUU
Matte Highlights and Shadows
This might turn off a lot of you rastor artist, but since were going to be relying on the computer for much of the bulk work. You would need to carefully organize each layer and treat it like a proper person.
You cannot just have over +50 unnamed layers and expect to get away with it.
All of your effects must have their own respective layer and you have to create a Matte layer that will use your Base layer as an reference to apply said effect within the alpha of the base layer.
SIMPLE
Step by step process
For now we just going to do one effect and that is the Body bloom/ Body Highlight or whatever jargon you wanna call it.
In simple terms, UWU body is glowing very cool.
Ignore the Spaghetti lines, we just going to focus on this part.
*Note, you may use whatever method to achieve said effect. Just make sure to follow the order to get a similar result
For this example we have
Example:
Base Layer (A)
Highlight and Shadows (B)
.
Step.1
Create a Glow Effect for the Highlight and Shadows.
= (B) + (G1)
Step.2
Add a Matte in Layer so that (B) could attach to (A)
*Some programs allow you to attach layers directly, but i suggest having a separate layer just in case you wanna change anything or apply another layer in between.
= (A) + (M1 Matte) + (B) + (G1) + (M2 Source)
Step.3
Apply a highlight Effect/Filter
It can be multiply, overlay, add, burn, dodge, whatever you feel like.
Put the Matte as the highest level and have a copy of the base layer attached to the highlight to act as a base.
*Note, please use contrasting colors for the Highlights and shadows. This will make the computer detect contrast and differentiate which areas are lighted to shaded easier.
In my case the areas under light are light yellow and the areas under shade are dark blue.
= (A) + (M1 Matte) + (H1 Source 2) + (B) + (G1) + (M2 Source) + (H2 Source 1)
(Optional Step.4)
Sometimes you would want to have nearby objects affecting the character you have. Such as a glowing lamp nearby or tree branch giving shade to the character as she passes by.
The simple solution is to just repeat the entire process with the variable and have another matte or peg attach the 2.
*Note, only do this if your a wizard. You could have 1 setting apply to the entire scene, basically everything! Only use this for short animations that only takes place in 1 area.
Another thing, if you don't want to have bloom spread everywhere and only want the character or specific parts to be highlighted. Just add the glow Effect at the end of the chain or have a separate matte out layer
Its basically the reverse of Matte in.

Tadaa, you could achieve something similar to this. Although after a few years, hopefully i could achieve mappa or wit studio level. Imma make my own anime!
Sources, Refferences and Links
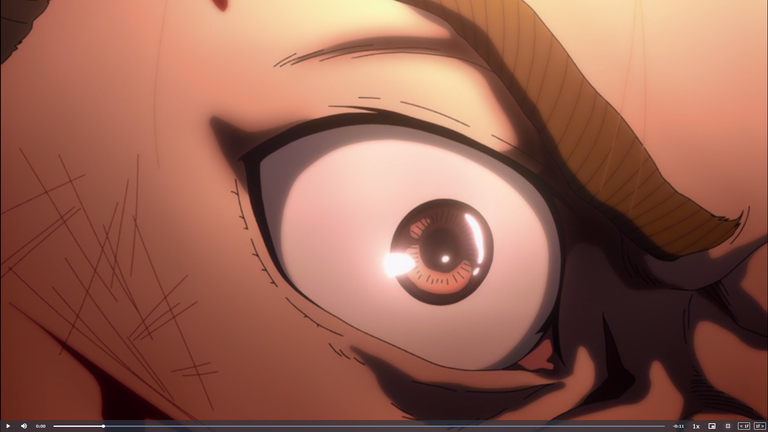
https://sakugabooru.com/post/show/162838
https://www.sakugabooru.com/post/show/217739
https://www.sakugabooru.com/post/show/221954
Taku Thoughts
Hallu, thanks for reading lots and lots. Reaching this part mean't you skimmed right through and got interested by the header.
Grrrrrrr
First of all, yeah there is a lot of setup required within just the 1st frame of a anime to get the ball rolling. But once it has started, like what i shown you in the example, you could just draw basic color character and Crude highlight layer then the program would take care of the rest.
Doing it this way allows for 1 person to animate all by himself and with a decent pace. No more 1 man 6-months of rice later Blam!
Its possible to do a short gif within 1-2 weeks and 1min animation within a month.
If you utilized more time saving methods such as the 2-frame loop that Dragon ball frequents or just having Mouth, eyes, and occasional hair movement. While the body is stiff as a rock. Then congrats go ahead and make your own anime now.
Im very burned out now. Im still applying to jobs and doing freelance work. The bitglim Art exhibit partnership is a huge boost to my Profile!!! Im feeling suuuuuuper that i'll get a full time job soon with salary and everything.
Heck the emails take several weeks to a month response time. Who knows i might already be employed within the next few weeks.
But ohh well.
Currently my savings have dwindled to non-existance. Im Currently living Commission to commission, @demotry and @hiddenblade came in clutch and provided around (1/4th) of the money that has kept me going so far.
Most importantly the Emotional support Everyone has given meeeee!
I couldn't have kept myself going like this without the backing of everyone from Hive.
Perhaps once i get my first salary check, i wanna hop into a voice call with each one of you to give my most sincere gratitude.
*Kewk as im writing this post i feel a bit teary for all the hardships i endured.
Im not sure how long exactly until i get a job. But if anyone of you needs a commission for whatever.
It can be something for your website, youtube or just a personal treat.
Im willing to do what it takes to keep my internet on.
There are level 1,2,3 (Easy, Normal, Hard)
($ Character + $ Background = Total )
(X2 if Animated into a Gif)
.
.
.
Simple Level 1
($25+$25) = $50 ($100 if Animated)
(2-3 days or less than 1 week if animated)
Chibi, cute and UwU
.
Anime Level 2
($50+$50) = $100 ($200 If Animated)
(5-7 days or 1-2 weeks if animated)
The Current Animation im working on is this level
.
Illustration Level 3
($100+$100) = $200 ($400 If Animated)
(1-2 weeks or less than a month if animated)
Please not this one, im burnt out. But if there is, then it will allow me to have enough money for a while.
My monthly living expense is around $150 or php 8,000
If you have enough money to spare, kindly contact me here or DM me in discord. Im having a lot of stress trying to secure my bills before the end of this month (March). I guess i understand the anxiety of living paycheck to paycheck. I wish to have a few months buffer at least so that I could have some room to breath.
Grrrrrr
Aight, thanks for Wathing.
-- Takuri
Awesommmmee!!!
Kewk i kinda feel very bad now for charging you that much. Especially since looking back now. My animation is much much better.
Grrrrr i shall make it up to yuuuuuu.
Also keep going at it on youtube, its a grind that will take a long time to build up.
Broooo crazy you're really great at this teach me sensei😌 So we can animate war huehuehuehue
Muahahhaha, imma go ahead and finish this one now so that i could flex the true power that i have gained.
Hmmmm perhaps we can grab fellow hivers such as Mobbs for music and JIJI for vocals and we can try creating a animated hive shorts. HUHUHHUHHUHUHU
Yon! Try mo na yung na send ko sa Discord parang ganun nga style din yung gawa mo eh. Inspired na inspired😁
Grrrrrrrrr
!LUV
!BEER
takuri, happyphoenix sent you LUV. 🙂 (1/10) tools | trade | connect | daily
Made with LUV by crrdlx.
Za booze has arrived
in spirit, you must be staff from mappa. MWUAHAHAHA.
Grrrrrrrrrrr, im now a bonified animator. Crunch time is breakfast
sheessh, thats crazy. Its so very hard to animate some pics, there's so many layers. But you're so amazing!!👏
UWUWUWUwuwuuw ty so much. WOOOOOOO fellow Hiveph member.
Zamn your post are great. Grrrrr you have a noice home.
Im now angry, grrrrrrrr
50 layers is crazy 😵 If I have a lot of time maybe I'll be hyper focus about this but sadly adult responsibilities are on the way. But one day I'll try and might blog about my experience.
Good Job explaining. I know it's a lot of effort!
!PIZZA
Grrrrrrrr, when we going to play play play!
Levelling up!
Keep at it <3
Grrrrrrrr
grabe ka na taku sensei! paturo mag animate!
When im free.
*NEver
$PIZZA slices delivered:
@jijisaurart(1/10) tipped @takuri
Congratulations @takuri! You have completed the following achievement on the Hive blockchain And have been rewarded with New badge(s)
Your next target is to reach 900 comments.
You can view your badges on your board and compare yourself to others in the Ranking
If you no longer want to receive notifications, reply to this comment with the word
STOPCheck out our last posts: