Happy start of the week to all my fellow members of this great family of Hive, let's start this week with lots of energy and great optimism, putting everything in the hands of God, so that he is the one who takes control and guide us on the best path.
We remain constant and perseverance, trying to do and give the best in every publication I do, this was one of my goals this year, take time to create content in large family of Hive, so I can also create accessories that can use my 2 women at home, I speak of my wife and my daughter, they really enjoy when I make an accessory, they are my great models and are the ones who use them.
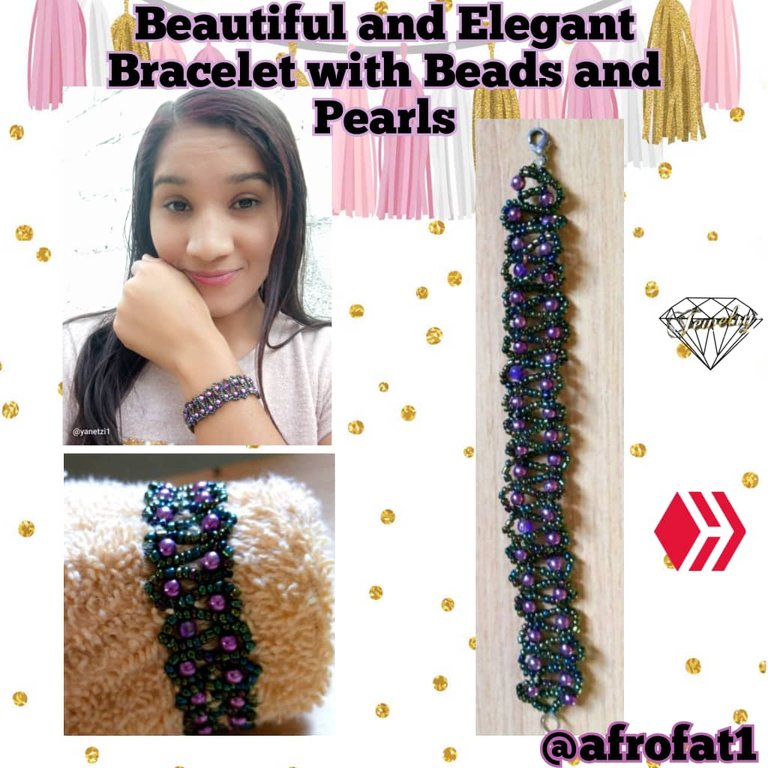
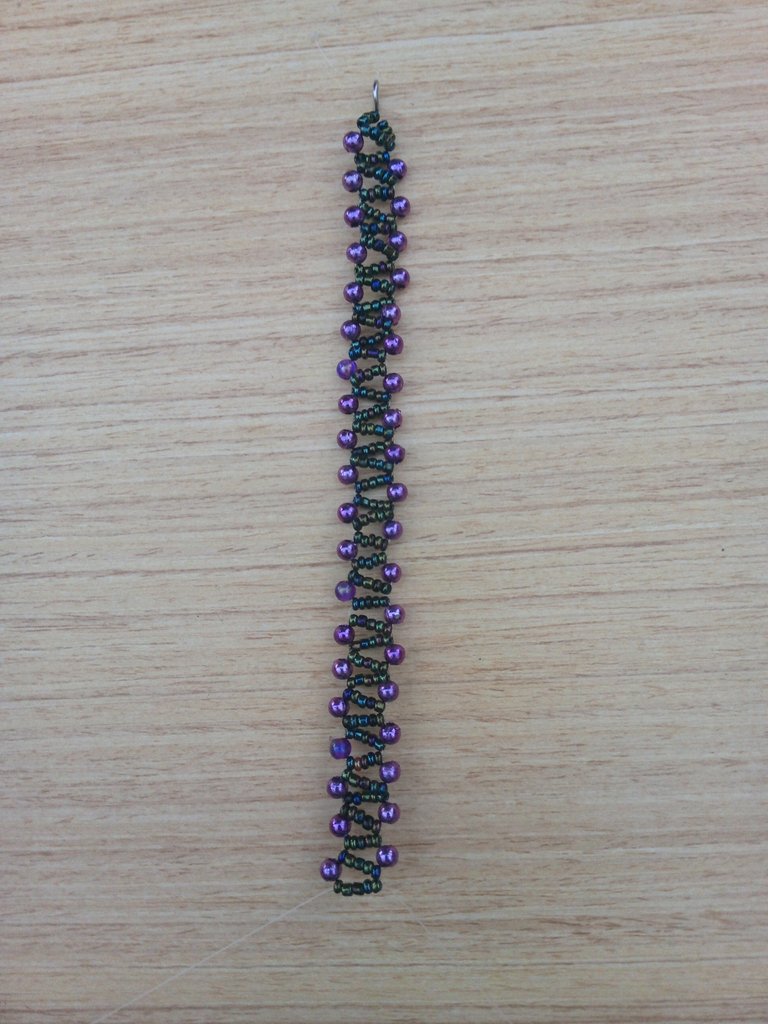
Well my dear colleagues today I want to talk about a beautiful and elegant bracelet, I really liked this design because as I said before is very elegant, today I want to show you the step by step and so learn a little how to make this type of accessories.
Materials Used
- Black Tornasol beads.
- Purple Pearls.
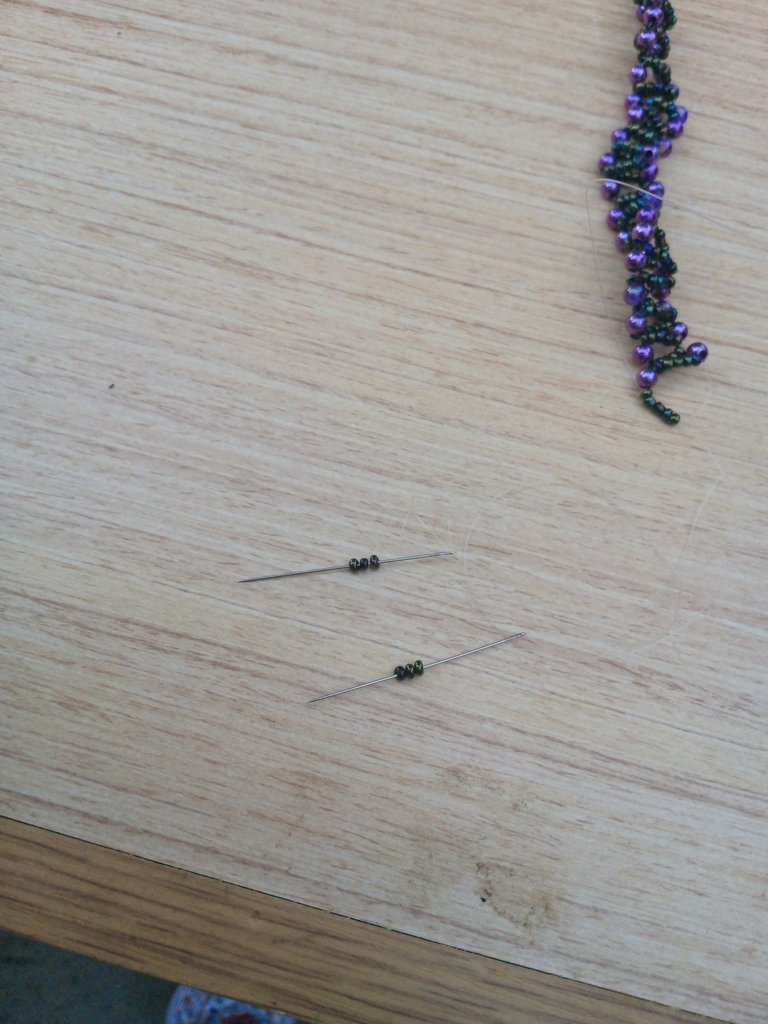
- Fishing line or Nylon 0.25.
- 2 needles for beads.
- 2 bead needles for beads.
- Scissors.
- Hook and latch.

Step by Step
1
The first thing to do will be to take 2 meters of fishing Nylon and we are going to thread each end through a needle.
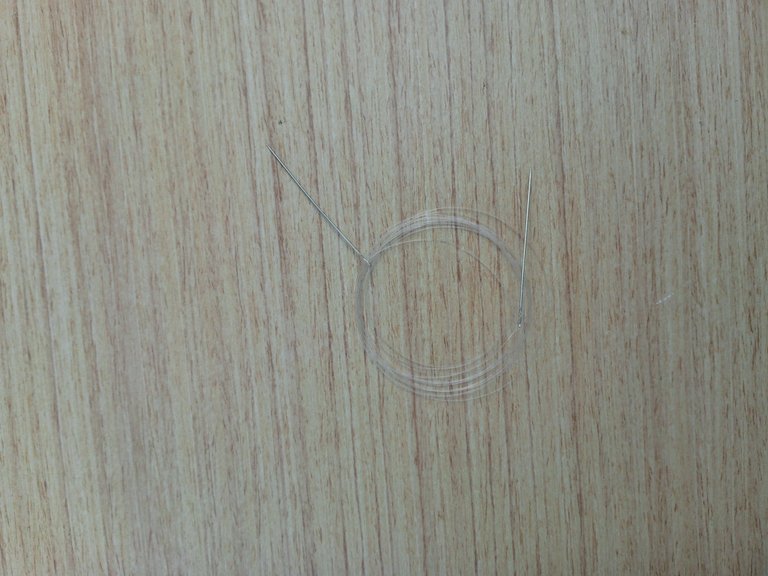
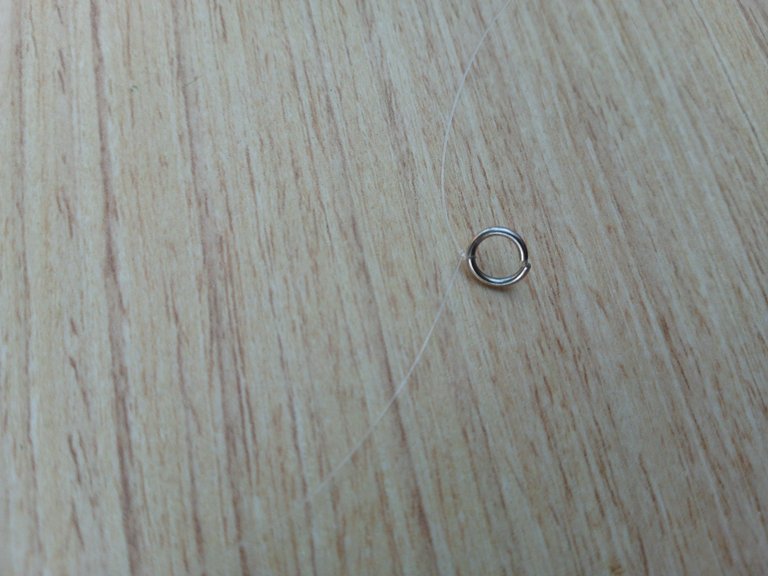
Then we will take the ring and we will tie several knots, taking into account that we will leave one end of the threads longer than the other.
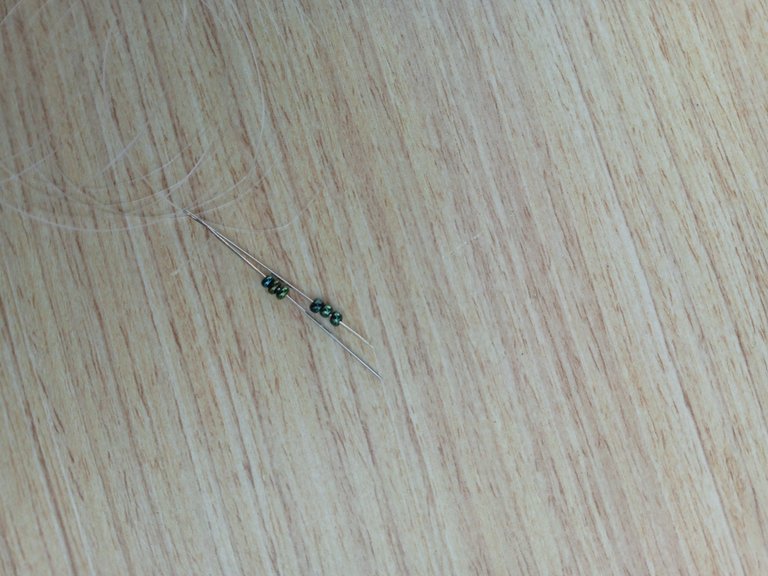
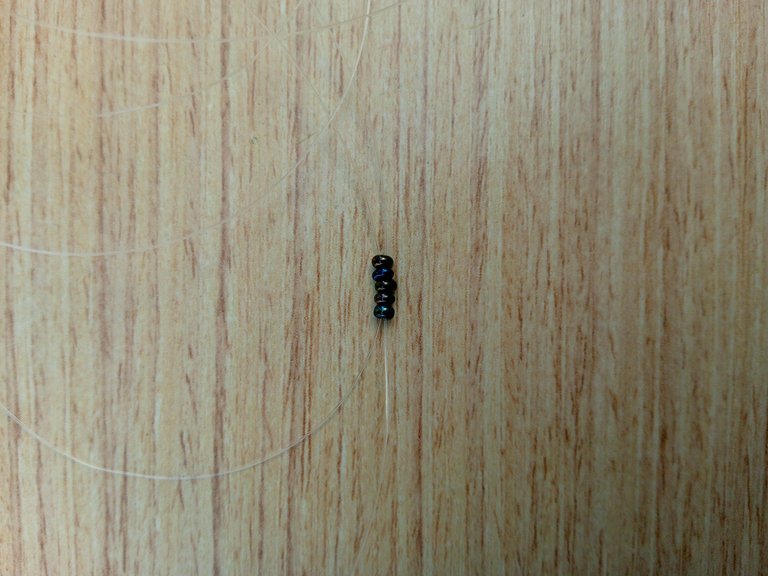
We are going to introduce 3 beads in each needle and we are going to take them to the end of the nylon.
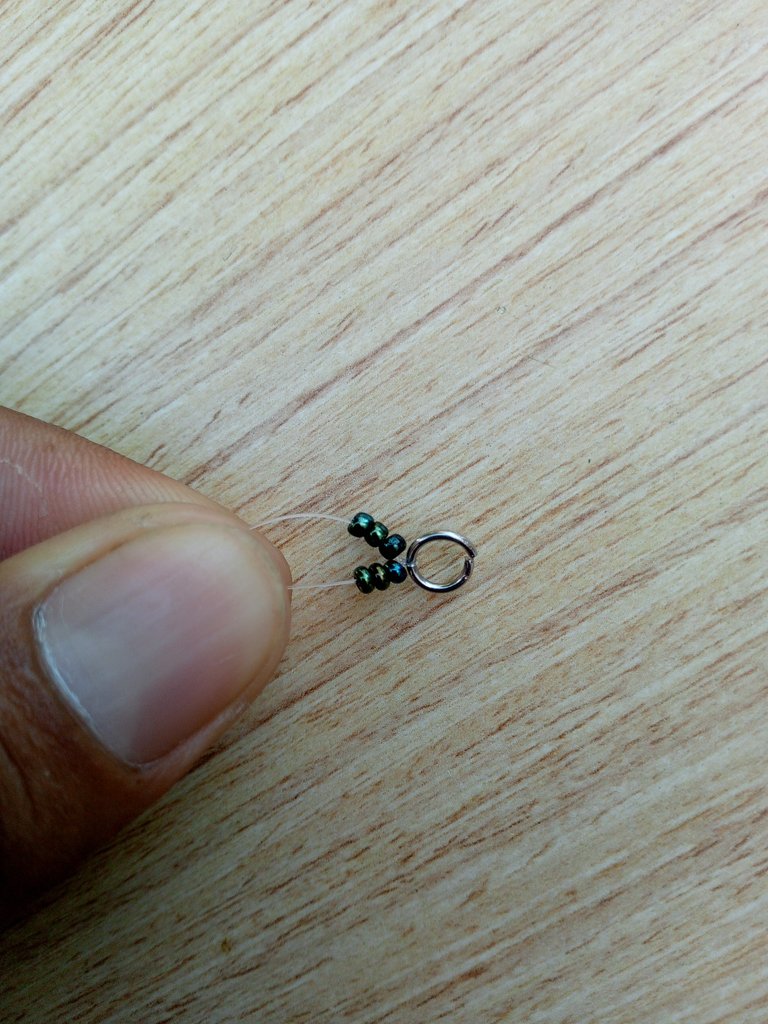
After this we are going to introduce a needle with the nylon by 5 beads, then we are going to introduce the other needle in the opposite of the other needle, that is to say, if we introduce the needle by the left and it comes out to the right, we are going to introduce the other needle by the right and it comes out to the left, we are going to take it to the end of the nylon.

2
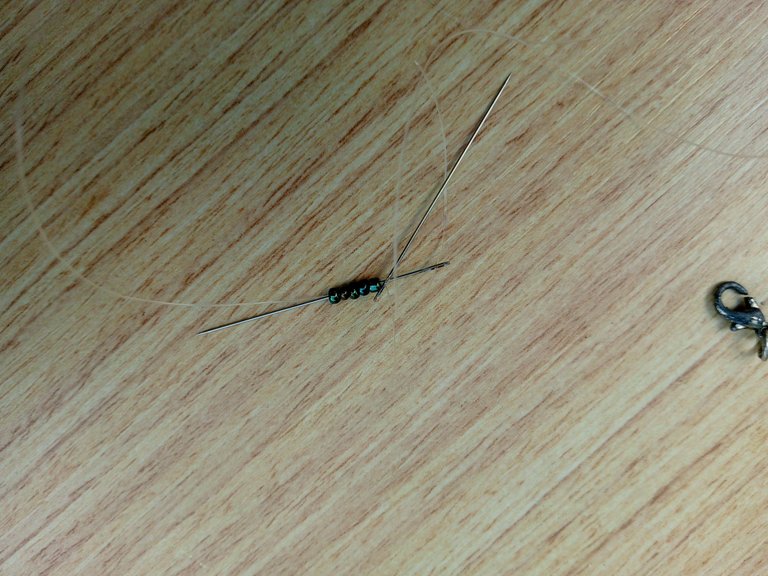
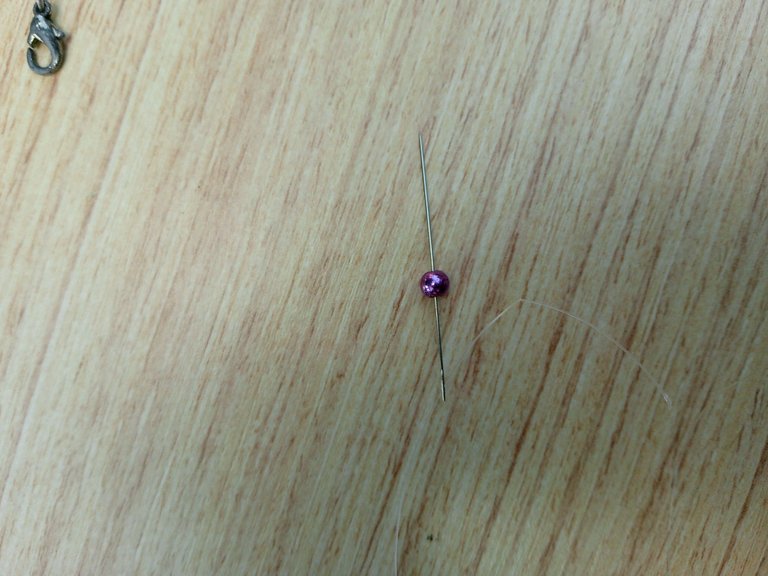
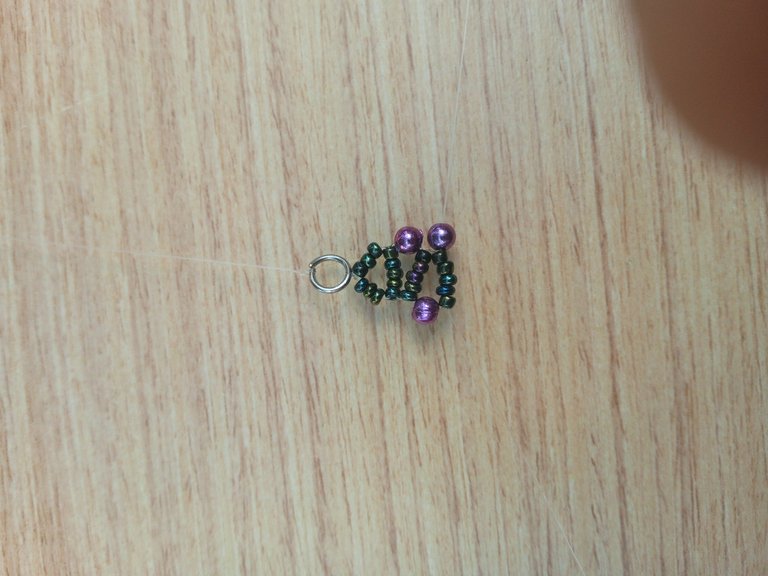
What we will do is to take a purple bead and insert the needle with the nylon and take it to the end.
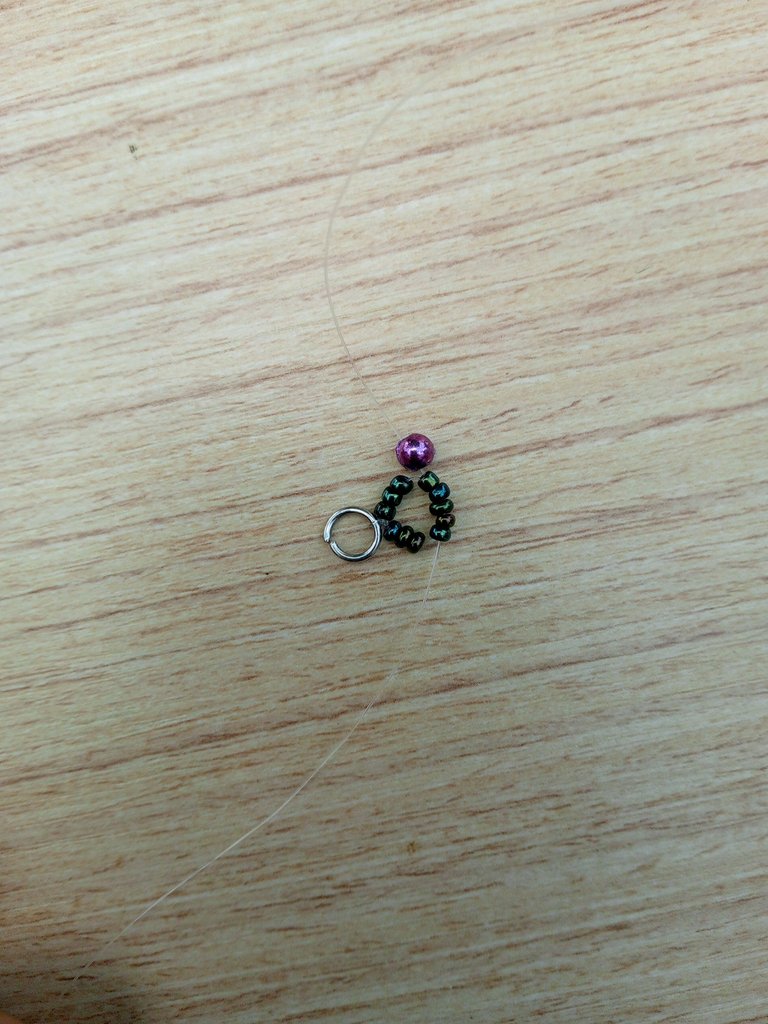
Now we will take 5 beads and we will introduce one of the needles in them, then with the help of the fingers of the hands, we will make a circle and we will introduce the other needle in the beads, we will pull them so that they will look like this.

We are going to introduce a purple bead and we are going to take into account how the beads are placed, one bead goes on top and another one on the bottom, this is the sequence.
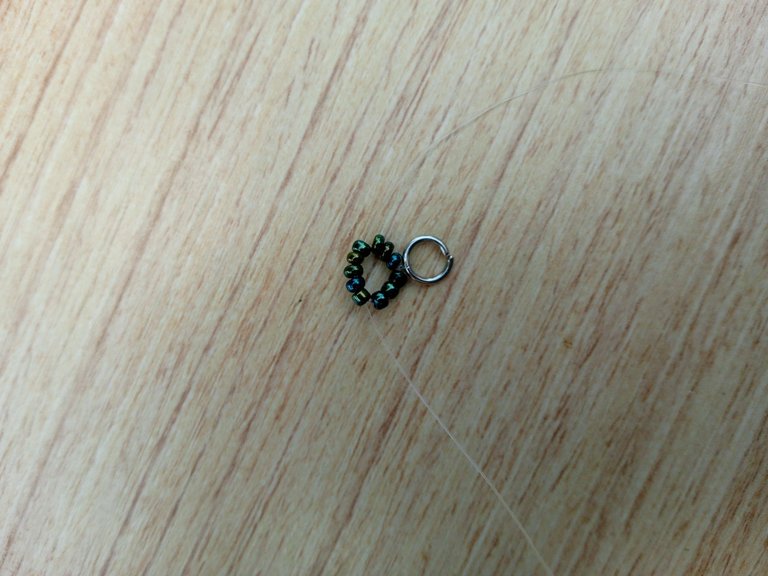
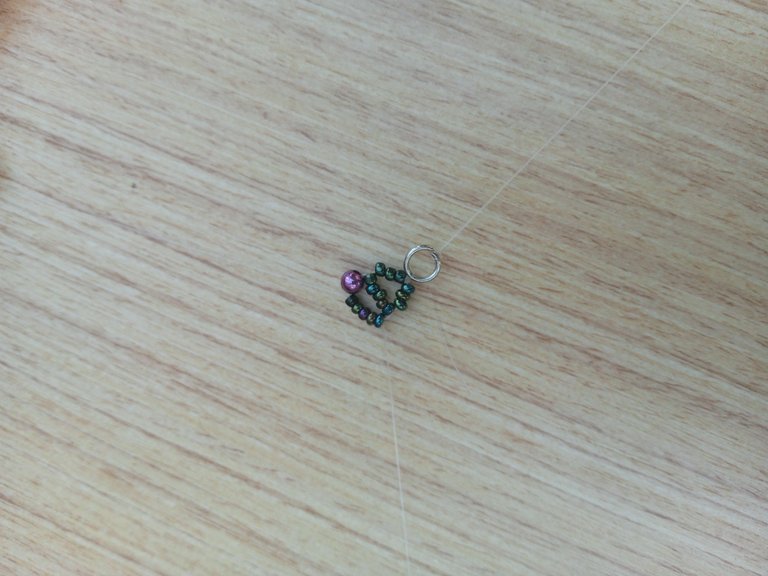
Again we place 5 beads and we will do the same procedure, with the help of the fingers, we will make a small circle and we introduce the other needle through the beads so that we get this result.
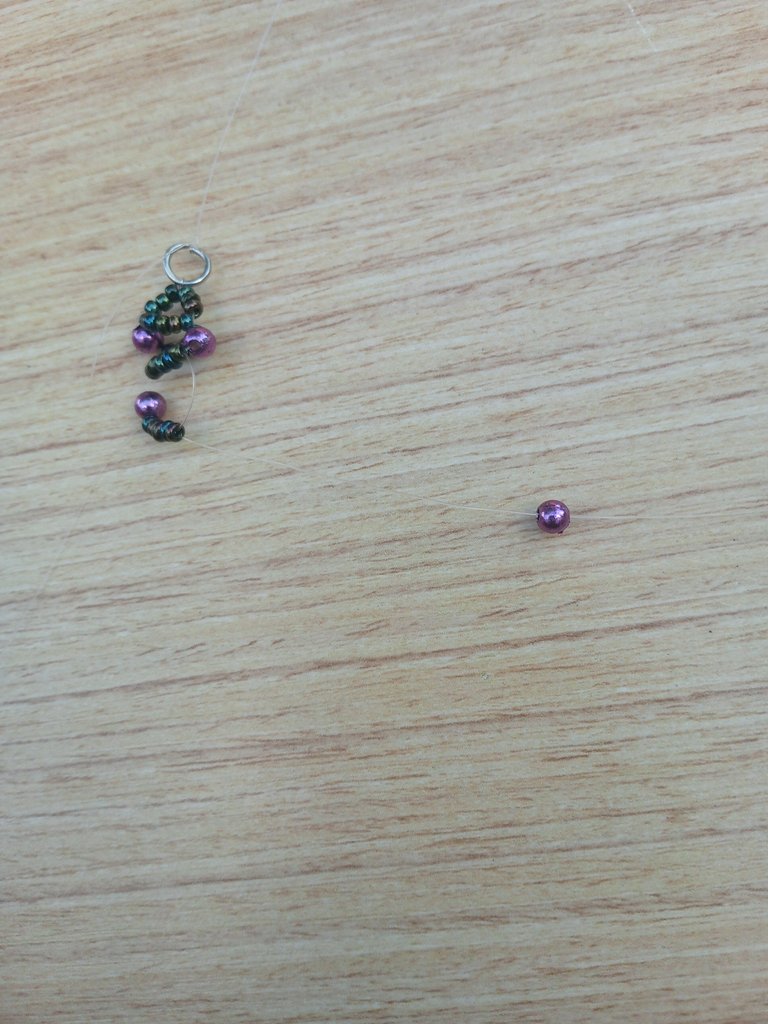
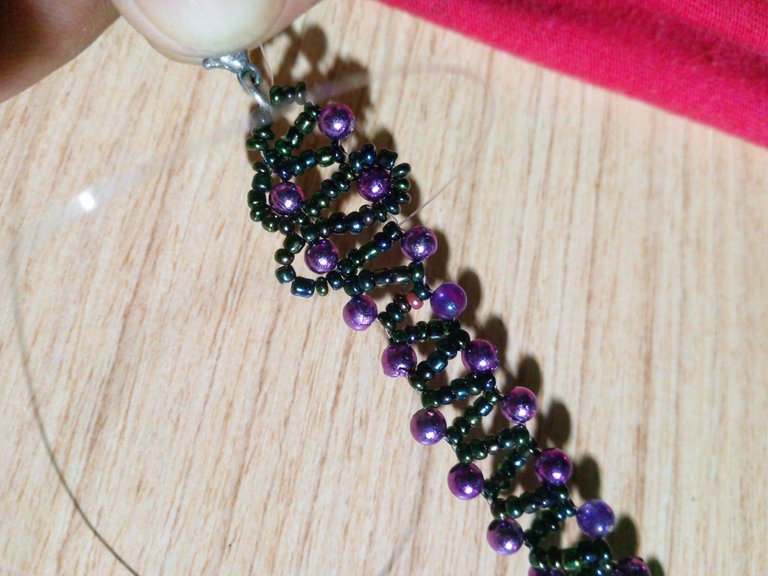
We will continue repeating the steps until we get the size or length we want, taking 5 beads by one end of the threads and then passing the other needle on the contrary, pulling them and then by one end of the nylon we place a bead, taking into account that one bead should go up and the other down or one to the left and the other to the right.
3
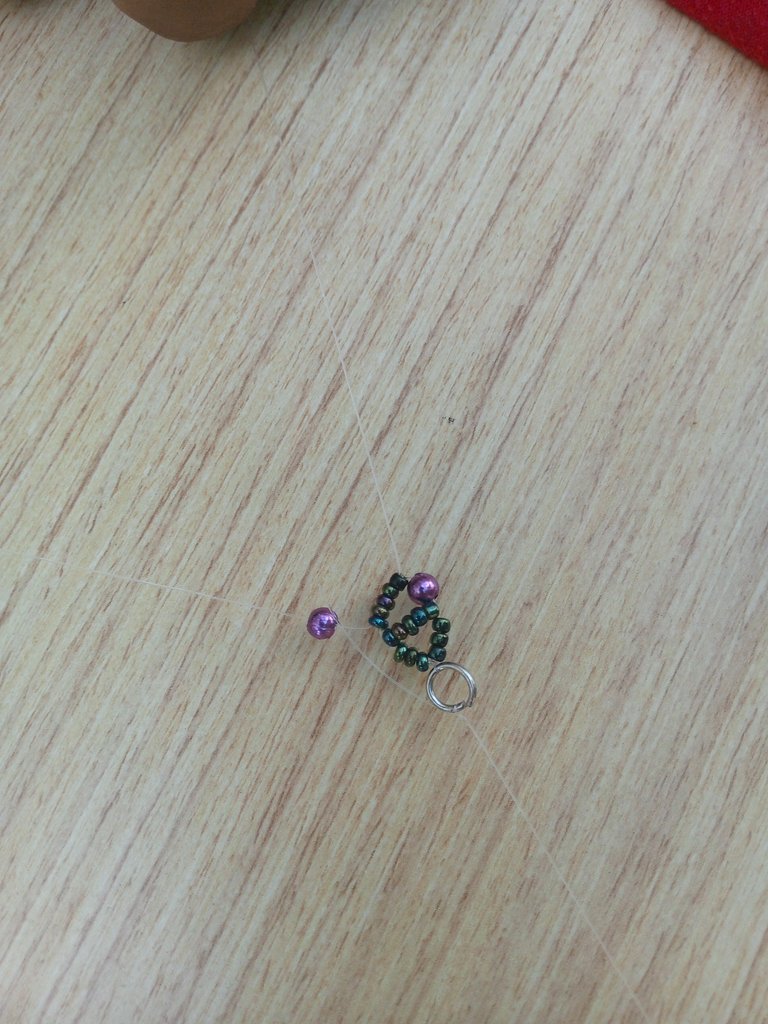
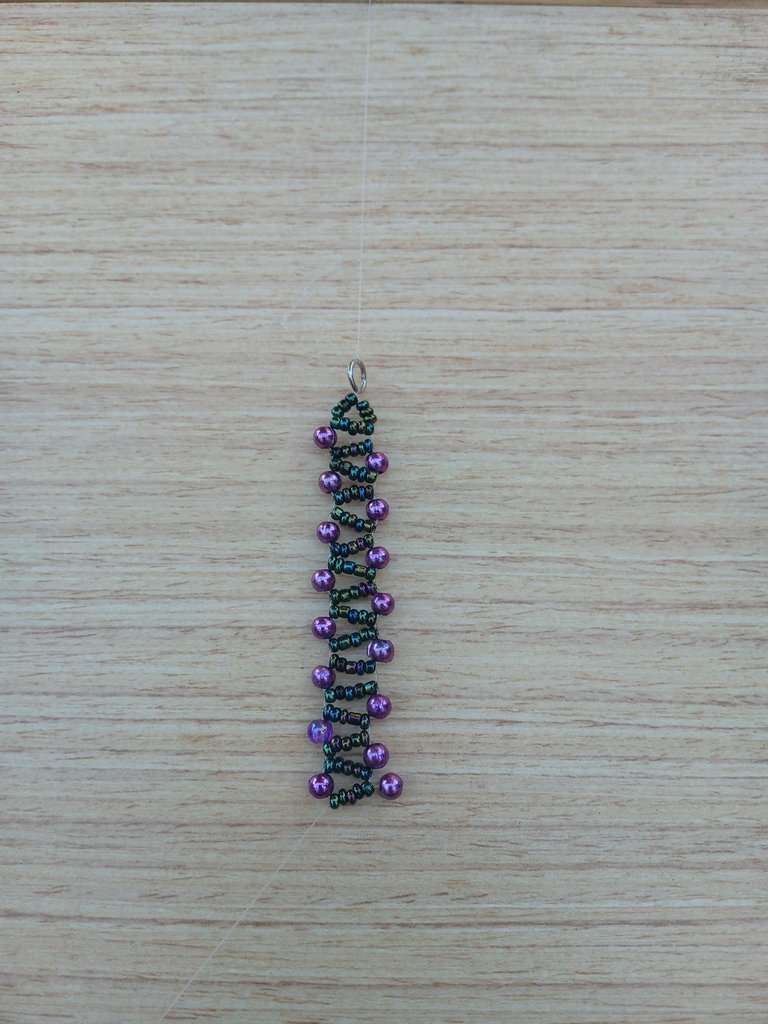
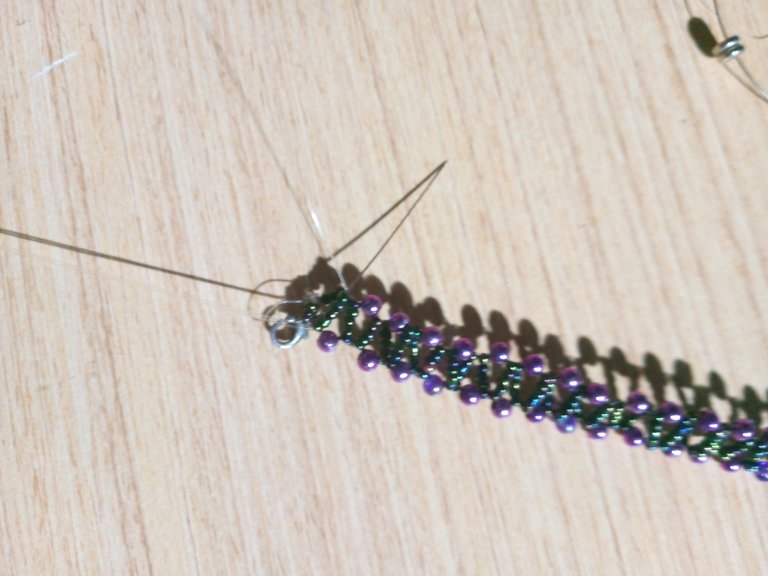
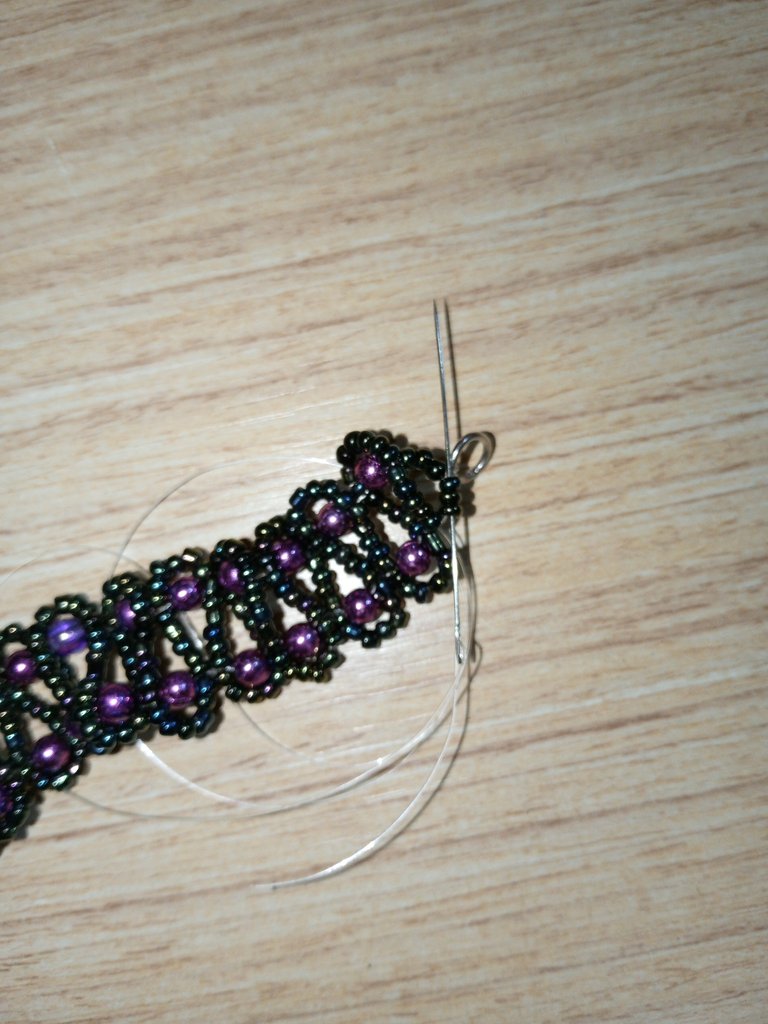
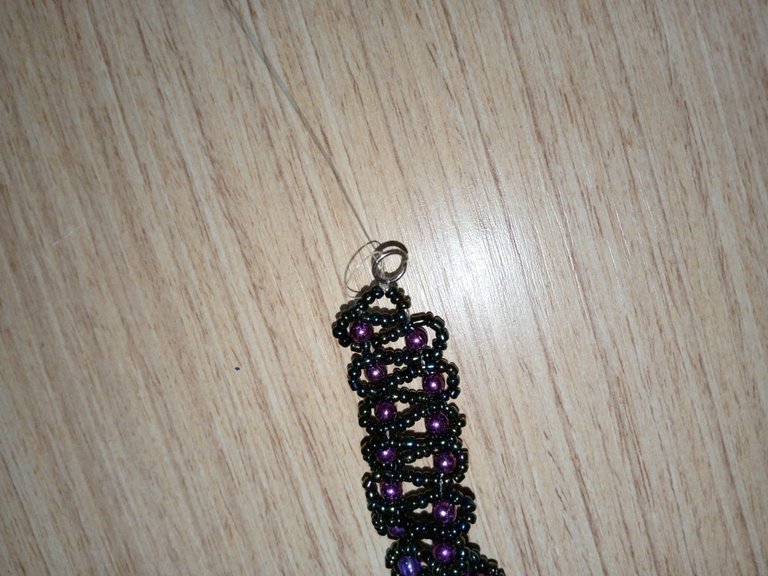
To seal our first part of this beautiful bracelet we will do the following, after having obtained the desired length we will introduce the last 5 beads we cross the nylons and then we will place 3 beads on each needle.
Then we are going to introduce the safety catch and we will make several knots to secure very well, we will have the result as it is seen with the safety catch.
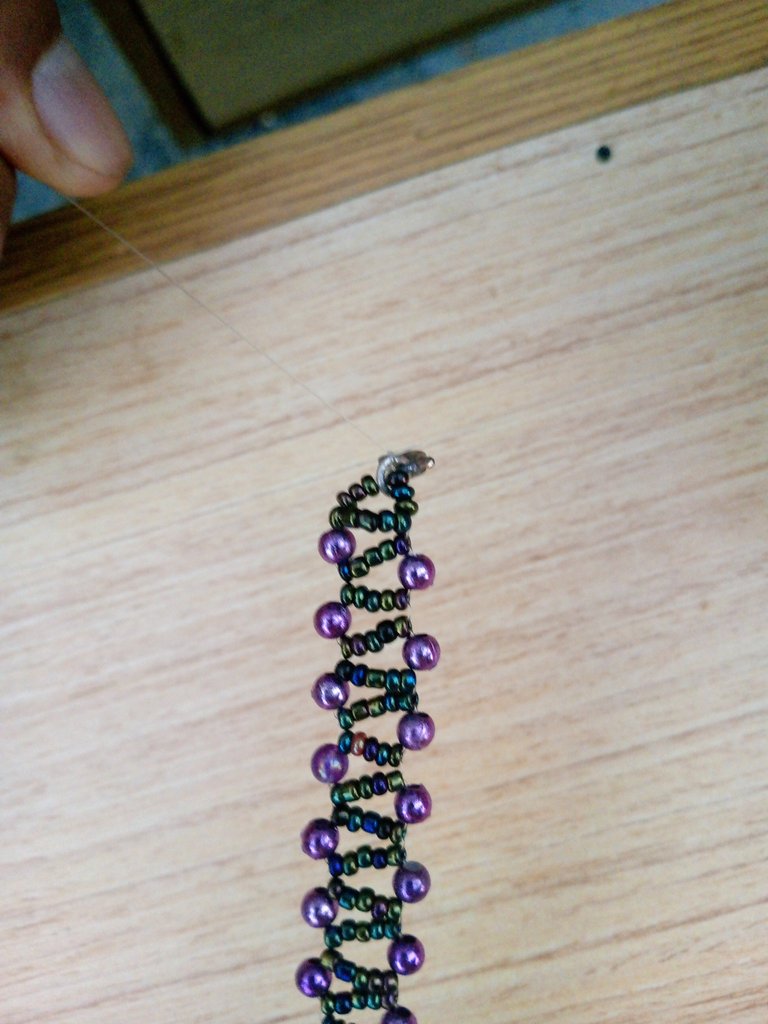
4
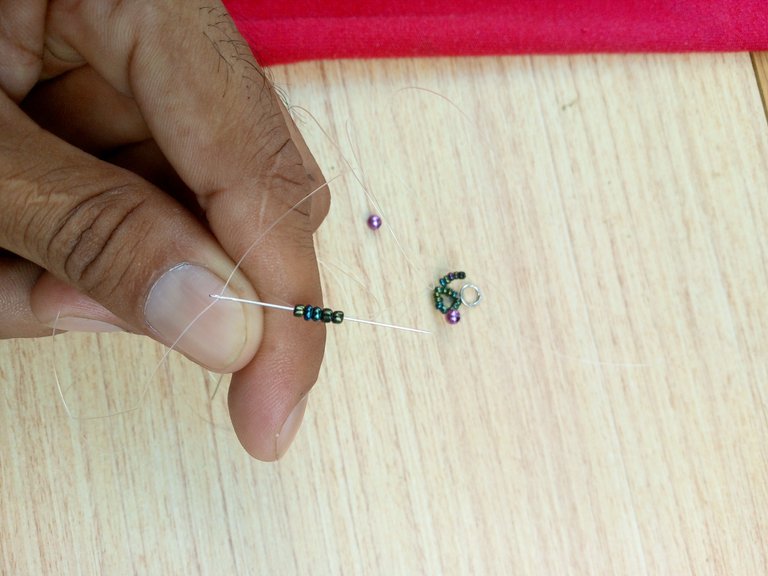
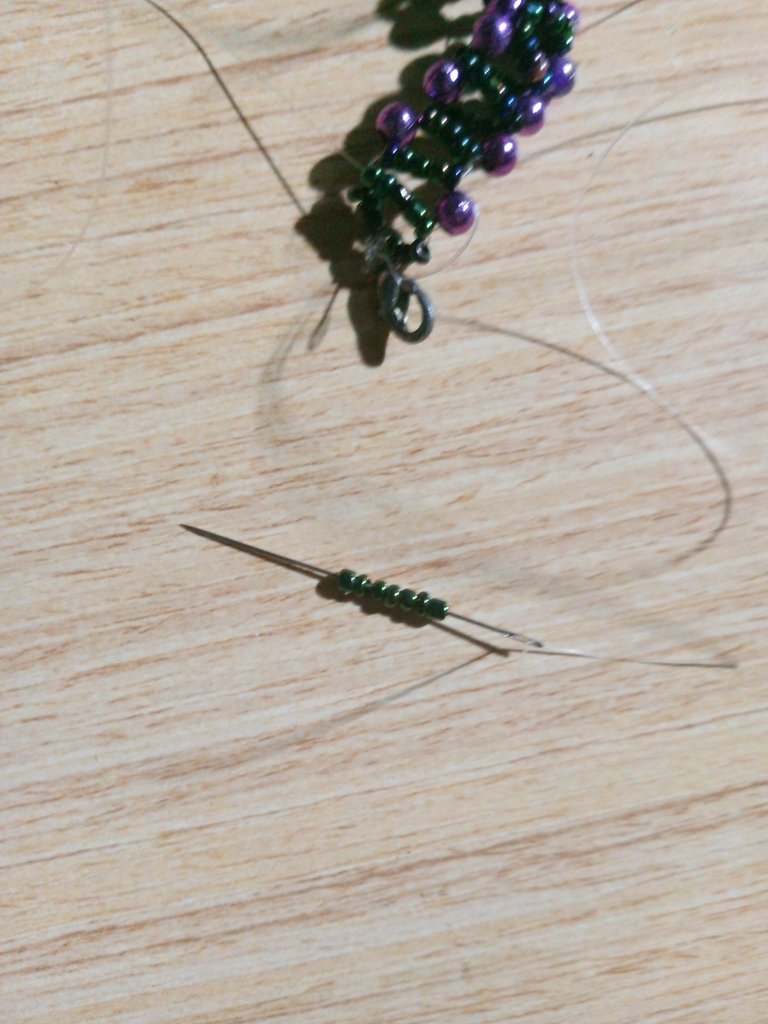
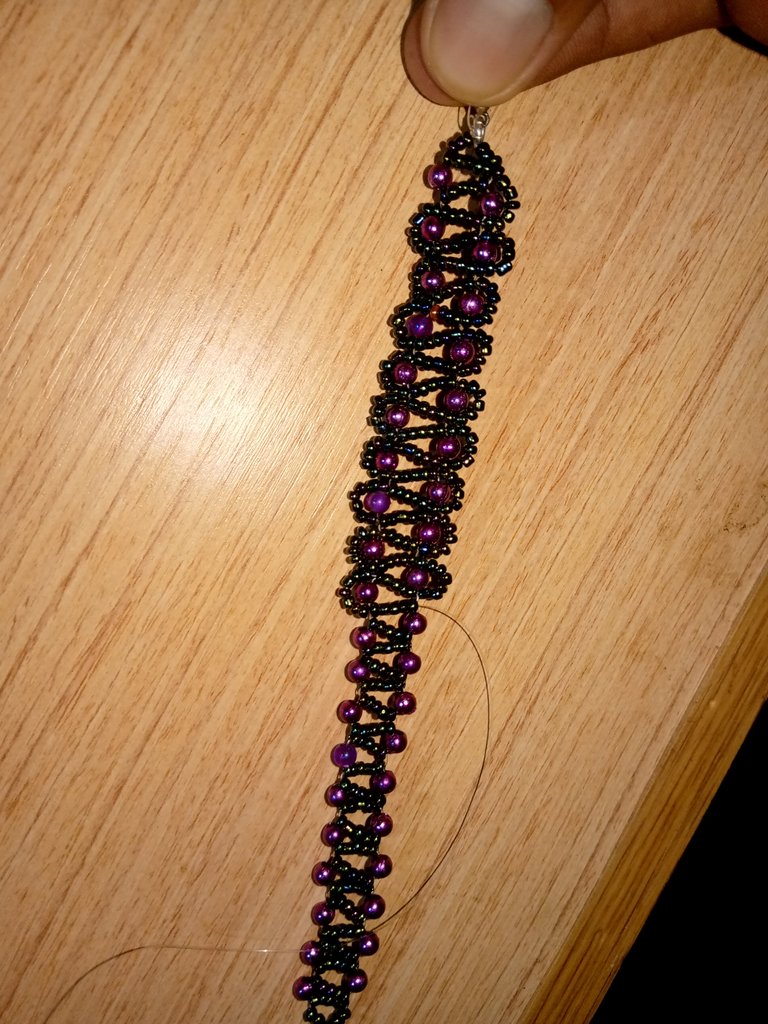
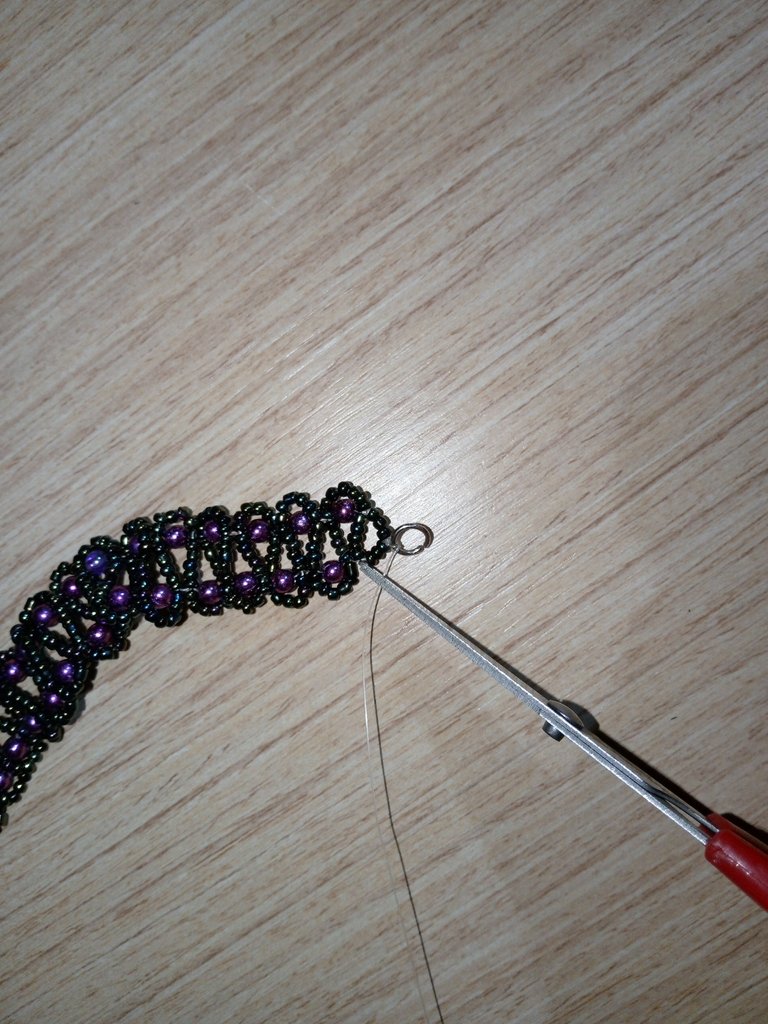
We continue with our elegant bracelet, now we are going to utizar a needle and the end of the longest nylon that we have left, the other end we will cut it with the help of the scissors, we introduce the needle by the 5 beads of the middle to be able to jump a pearl and to arrive to the part of above, to be able to cover the following one.
Then we will take 7 beads and pass over the pearl, introducing the needle through the 5 beads that are in the center, in this way our pearl will be surrounded.
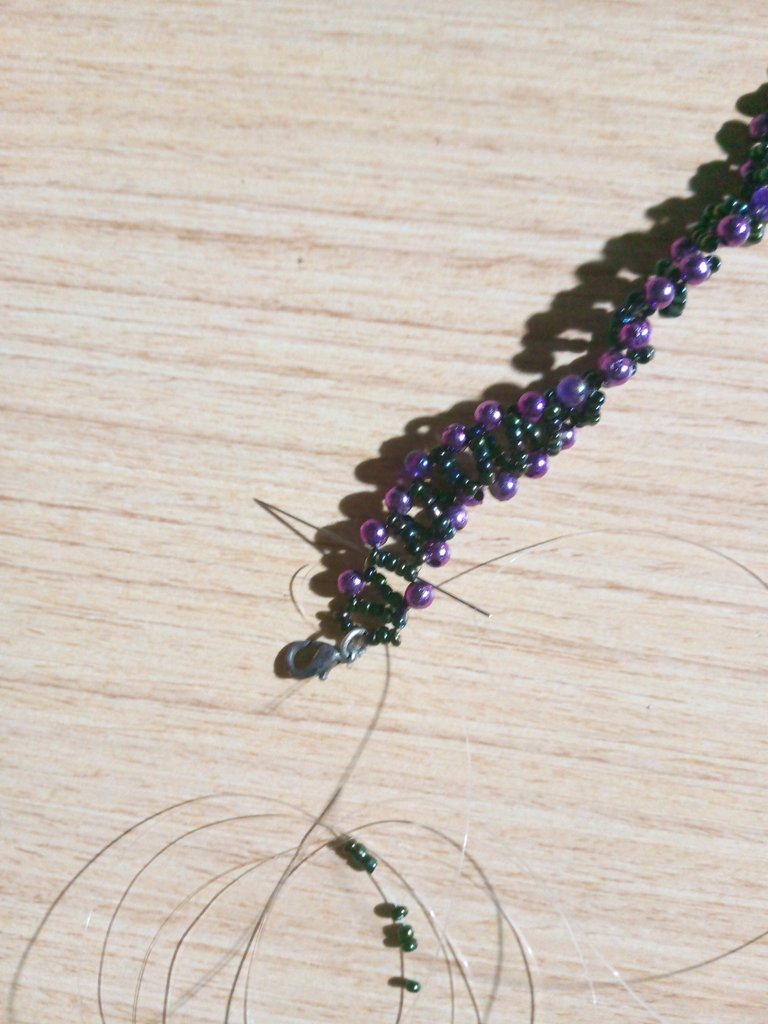

Next we introduce 7 beads and in the same way, we pass over our pearl and introduce the needle through the 5 beads in the center.
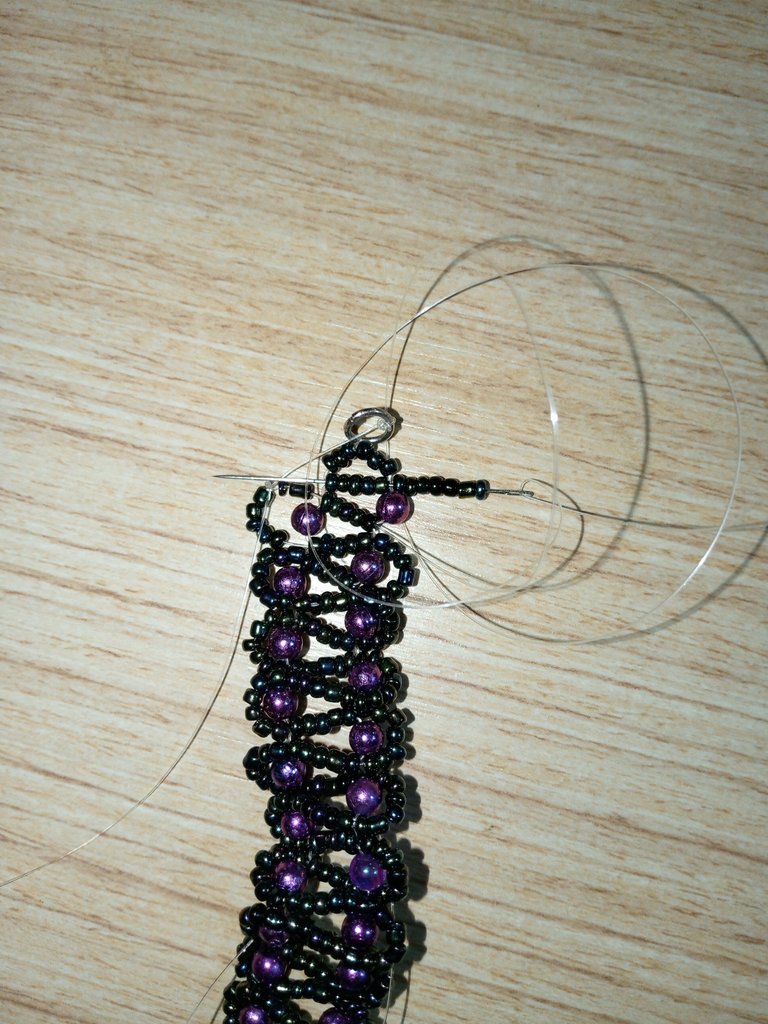
In the same way we will continue until we have covered all the pearls, after drinking them covered with the beads, with the remaining nylon we will reinforce the beads of the ring.
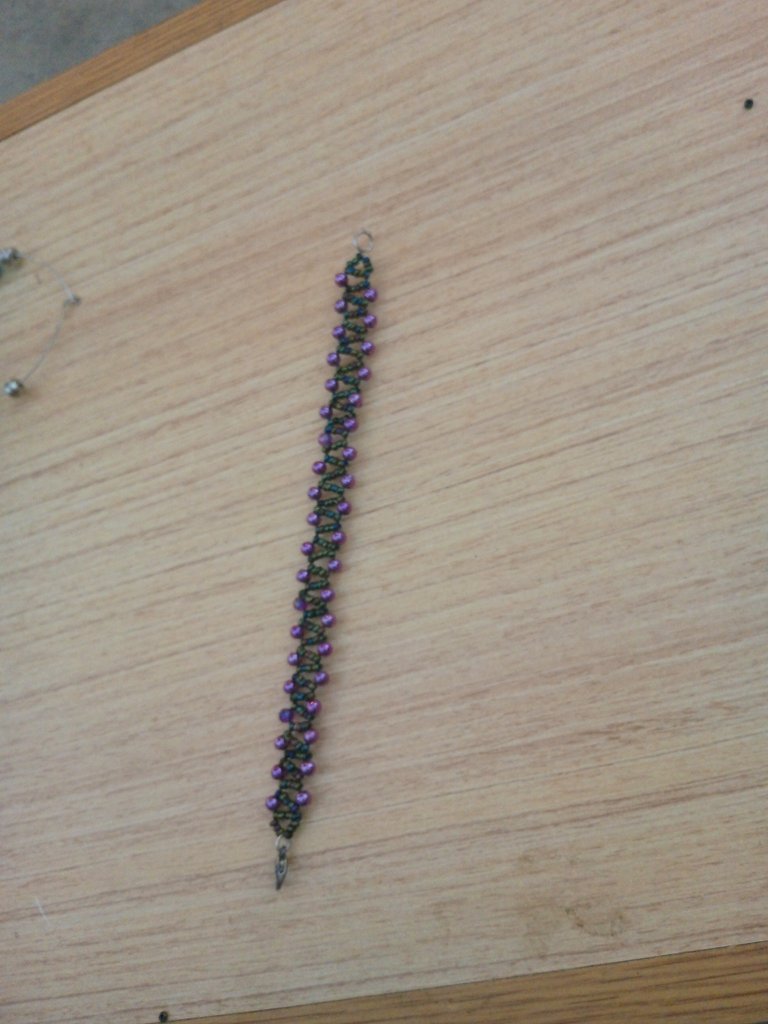
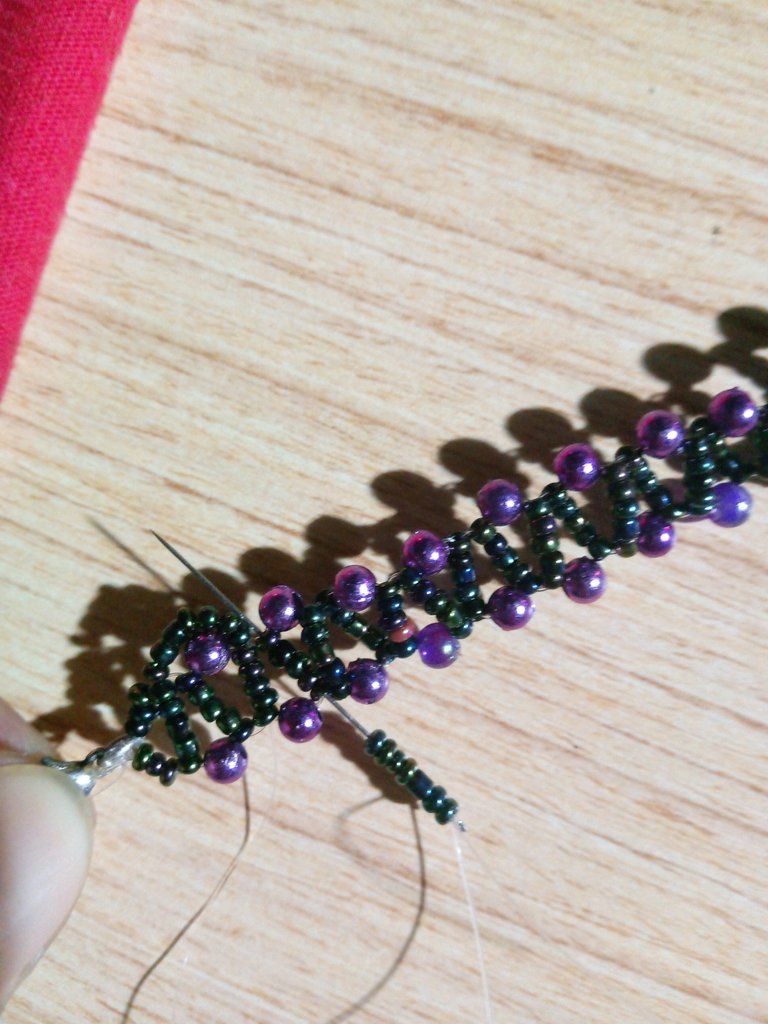
Finally to seal our bracelet we will make several simple knots, then we will cut with the scissors the excess nylon.
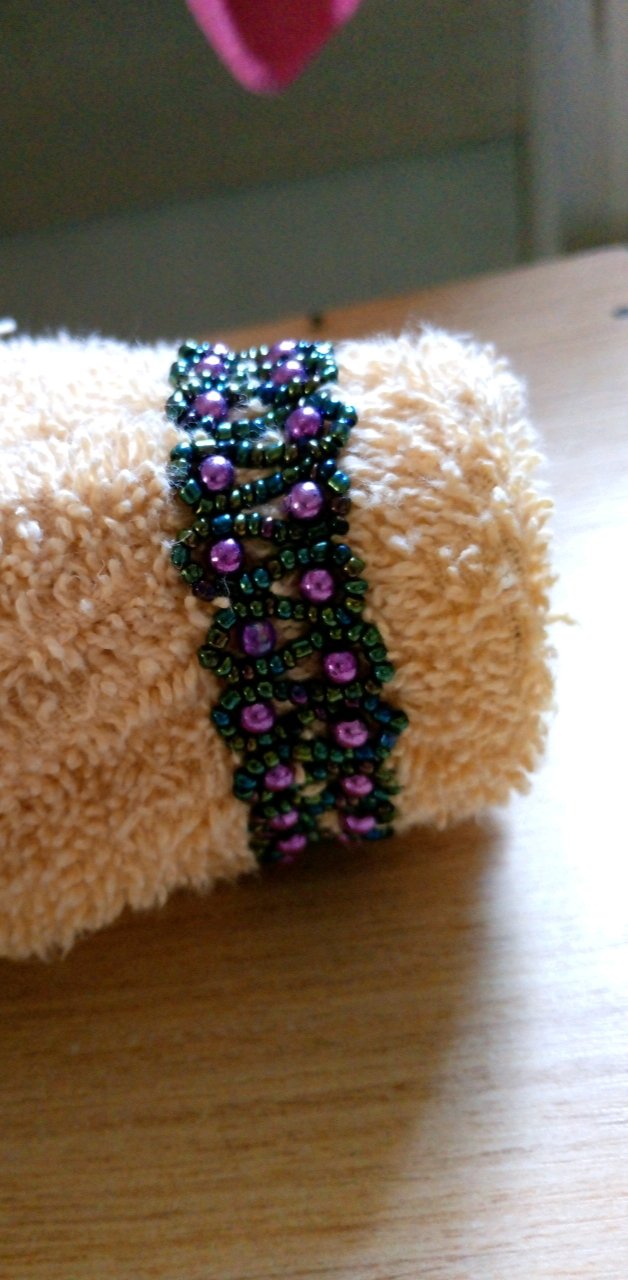
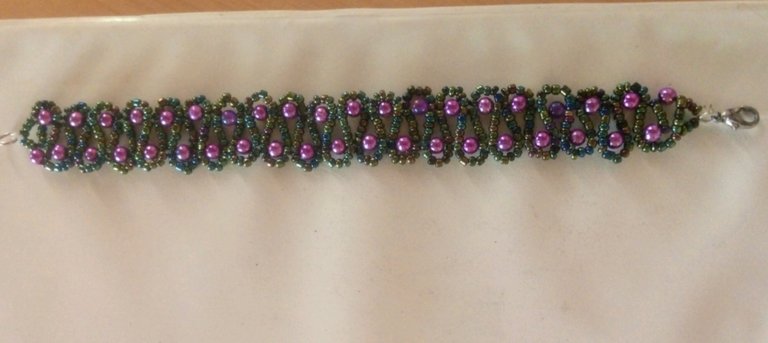
This would be the final result of our beautiful and elegant bracelet of beads and pearls.
Thankful to God for giving me the opportunity to be again with all of you sharing these creations, thanks to the beautiful and creative community of Jewelry for opening the doors for each of us to show our talent and creativity, I say goodbye wishing you a nice day and happy beginning of the week, Blessings.
The images are my property and were taken by my phone tecno spark Go 2023.
Translator Used:Deepl translator.
Images are edited using canva photo editor application.
Feliz inicio de semana para todos mis compañero de esta gran familia de Hive, vanos Iniciar esta semana con muchas energías y gran optimismo, poniendo todo en las manos de Dios, para que sea el que tome el control y nos guíe por el mejor camino.
Seguimos constante y en perseverancia, tratando de hacer y dar lo mejor en cada publicación que hago, esta fue unas de mis metas este año, tomar tiempo para crear contenido en gran familia de Hive, asi también poder crear accesorios que puedan utilizar mis 2 mujeres en casa , les hablo de mi esposa y mi hija, ellas disfrutan mucho cuando realizo algún accesorio, son ellas mis grandes modelos y son las que los utilizan.
Bueno mis queridos compañeros hoy quiero hablarles sobre un hermoso y elegante brazalete, me gusto mucho este diseño porque como les dije anteriormente es muy elegante, hoy quiero mostrarles el paso a paso y así aprendan un poco como realizar este tipo de accesorios.
Materiales Utilizados
- Mostacillas Negras Tornasol
- Perlas Moradas
- Hilo o Nylon de Pescar 0.25
- 2 Agujas para Mostacillas
- Tijeras
- Argolla Y Seguro
Paso a Paso
1
Lo primero que hacerlo sera tomar 2 metros de Nylon de pescar y vamos a introducir cada extremo por una aguja.
Luego tomaremos la argolla y le haremos varios nudos, tomando en cuenta que vamos a dejar un extremo de los hilos mas largo que el otro.
Vamos a introducir 3 mostacillas en cada aguja y las vamos a llevar al final del nylon,
Después de esto vamos a introducir una aguja con el nylon por 5 mostacillas, luego vamos a introducir la otra aguja al contrario de la otra aguja, es decir, si introducimos la aguja por la izquierda y sale a la derecha, vamos a introducir la otra por la derecha y que salga por la izquierda, la llevaremos al final del nylon.
2
Lo que haremos sera tomar una perla morada introducimos la aguja con el nylon y la llevaremos al final
Ahora tomaremos 5 mostacillas y vamos a introducir una de las agujas en ellas, luego con la ayuda de los dedos de la manos, haremos un círculo y introducimos la otra aguja en las mostacillas, tiraremos de ellas para que se vallan viendo de la siguiente manera
Vamos a introducir una perla morada y vamos a tener en cuenta como van colocadas las perlas, una perla va arriba y otra abajo, esa es la secuencia.
Nuevamente colocamos 5 mostacillas y haremos el mismo procedimiento, con la ayuda de los dedos, haremos un pequeño círculo y introducimos la otra aguja por las mostacillas para que nos quede este resultado.
Seguiremos repitiendo los pasos hasta lograr tener el tamaño o el largo que deseamos, tomando 5 mostacillas por un extremo de los hilos y luego pasando la otra aguja al contrario, tirando de ellas y luego por un extremo de los nylon colocamos una perla, tomando en cuenta que una perla debe ir a arriba y otra abajo o una a la izquierda y la otra derecha.
3
Para sellar nuestra primera parte de este hermoso brazalete haremos lo siguiente, después de haber obtenido el largo deseado vamos a introducir las últimas 5 mostacillas cruzamos los nylon y luego colocaremos 3 mostacillas en cada aguja.
Luego vamos a introducir en seguro y haremos varios nudos para asegurar muy bien, tendremos el resultado como se ve con el seguro.
4
Continuamos con nuestra elegante brazalete, ahora vamos a utizar una aguja y el extremo del nylon mas largo que nos quede, el otro extremo lo cortaremos con la ayuda de las tijeras, introducimos la aguja por las 5 mostacillas del medio para poder saltar una perla y llegar a la parte de arriba, para poder cubrir la siguiente.
Luego tomaremos 7 mostacillas pasar por encima de la perla, introduciendo la aguja por las 5 mostacillas que están en el centro, así quedara rodeado nuestra perla.
Seguidamente introducimos 7 mostacillas y de igual manera, pasamos por encima de nuestra perla e introducimos la aguja por las 5 mostacillas del centro.
De la misma manera seguiremos hasta tener cubierta todas las perlas, después de beberlas cubierto con las mostacillas, con el nylon sobrante reforzaremos las mostacillas de la argolla.
Por ultimo para sellar nuestro brazalete haremos varios nudos simples, luego cortaremos con las tijeras el nylon excedente.
Este seria el resultado final de nuestro hermoso y elegante brazalete de mostacillas y perlas
Agradecido con Dios por darme la oportunidad de estar nuevamente con todos ustedes compartiendo estas creaciones, gracias a la hermosa y creativa comunidad de Jewelry por abrirnos las puertas para que cada uno de nosotros demuestre su talento y creatividad, me despido deseándoles un bonito día y feliz inició de semana, Bendiciones
Las imágenes son de mi propiedad y fueron tomadas por mi teléfono tecno spark Go 2023.
Traductor Utilizado:Deepl traductor
Las imágenes son editadas mediante la aplicación editor de fotos canva
Congratulations @afrofat1! You have completed the following achievement on the Hive blockchain And have been rewarded with New badge(s)
Your next target is to reach 900 upvotes.
You can view your badges on your board and compare yourself to others in the Ranking
If you no longer want to receive notifications, reply to this comment with the word
STOPTo support your work, I also upvoted your post!
Check out our last posts:
Me encantó mucho mi Vida muchas gracias por compartir y por el regalo éxitos y bendiciones para ti que Dios te bendiga 😘
Amen amen, siempre a tu orden amor muchas gracias😍
Te quedó hermosa amigo .. saludos y bendiciones
Amen amiga bendiciones para ti🤗
Que hermoso te ha quedado este brazalete Me gusta! Siempre elaboras pulseras tan bonitas, de verdad admiro tu paciencia y la forma tan detallada en la que nos muestras el paso a paso. Muy bien!
Muchas gracias! Siempre con tu bonitas palabras de apoyo, bendiciones para ti🤗
Hermoso, elegante y muy delicado.
Me encanta, felicidades por este excelente trabajo.
Gracias por apreciar mi trabajo, bendiciones
linda pulsera amigo..
Es muy dulce que puedas crear este bello brazalete pensando en ellas, admiro tu gran gesto.
El brazalete quedó hermoso, trabajas muy bien este material, me fascinan los trabajos con mostacillas y me parecen que son muy laboriosos por lo que se requiere de una gran paciencia para obtener un resultado encantador. Te felicito porque lo haz hecho magnífico.
Cuando trabajo con mostacillas me tomo mi tiempo, se necesita estar tranquilo y concentrado para que quede un buen resultado, muchas gracias por apreciar mi trabajo. Exitos
Totalmente. Yo he intentado trabajar con mostacillas y termino agotada, con dolor en el cuello y no muy feliz porque no consigo el resultado que busco. El nylon muy delgado me agota muchísimo. No nos llevamos bien para nada. De hecho, tenía un rollo casi entero y lo deseche a la basura con cierto resentimiento. Perdón por ello. No se debe desperdiciar material.
Muy hermosa me encanta el modelo feliz dia.