
Saludos queridos compañeros de esta comunidad de hive, espero se encuentren bien, quiero agradecerle a Dios por darme la oportunidad de estar nuevamente compartiendo con todos ustedes, ya por motivos personales habia estado ausente.
Para cerrar el día de hoy, he decidido unirme al concurso realizado por la creativa comunidad de Jewelry, realizando una gargantilla de flores acompañados con unos llamativos arcos multicolor, ya que las flores forman parte esencial de lo que son las fiestas de carnavales, además también de los distintos colores que se puedan apreciar en estas dichas fiestas.
Bueno queridos compañeros, los invito me acompañen a realizar este bonito tutorial que con mucho cariño y dedicación he realizado para todos ustedes, a continuación les estaré presentando los materiales utilizados para la elaboración de esta hermosa y colorida gargantilla.
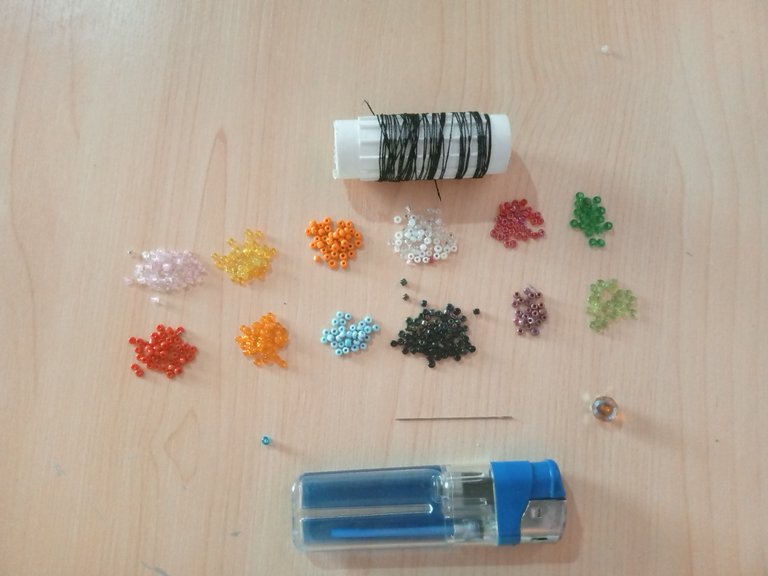
Materiales
Mostacillas de diferentes colores, Negras, Blancas, Rosadas, Azules, naranja claro, naranja oscuro, Amarillo, Verde Claro, Verde Oscuro, Rojas brillantes y Moradas claras
Hilo nylon o Hilo zapatero
Cristal de swarovski
Aguja mostacillera #12
Encendedor o Yesquero
A continuación les estare presentando el paso a paso utilizado para la elaboración de esta hermosa gargantilla carnavalesca.
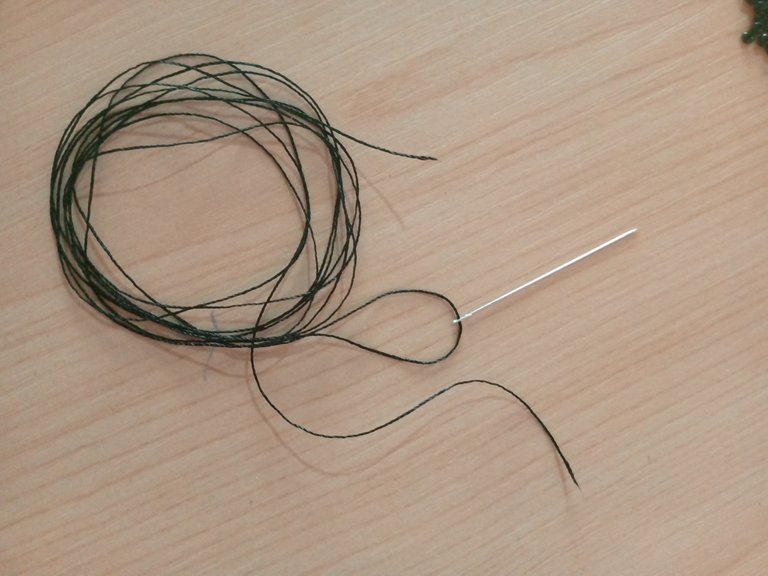
Paso 1
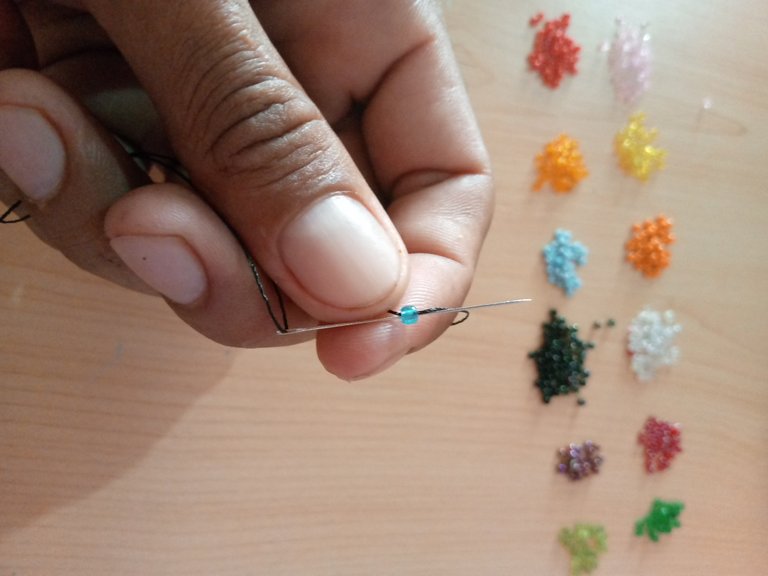
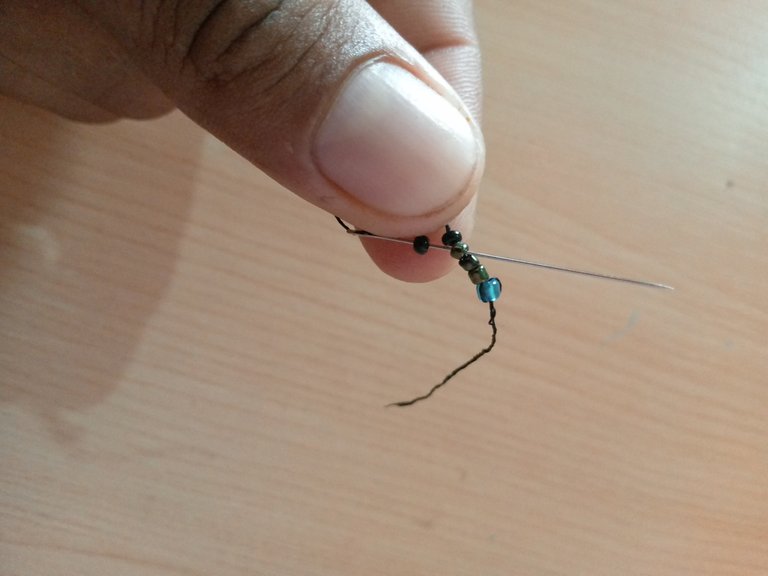
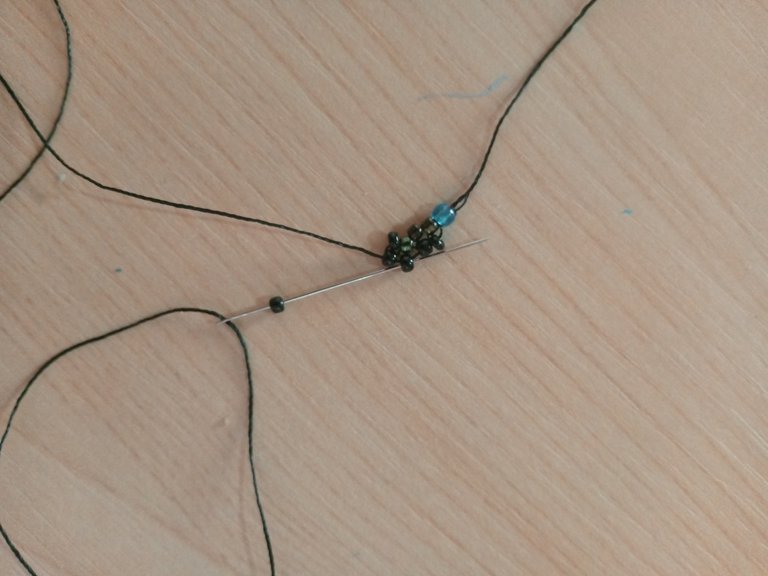
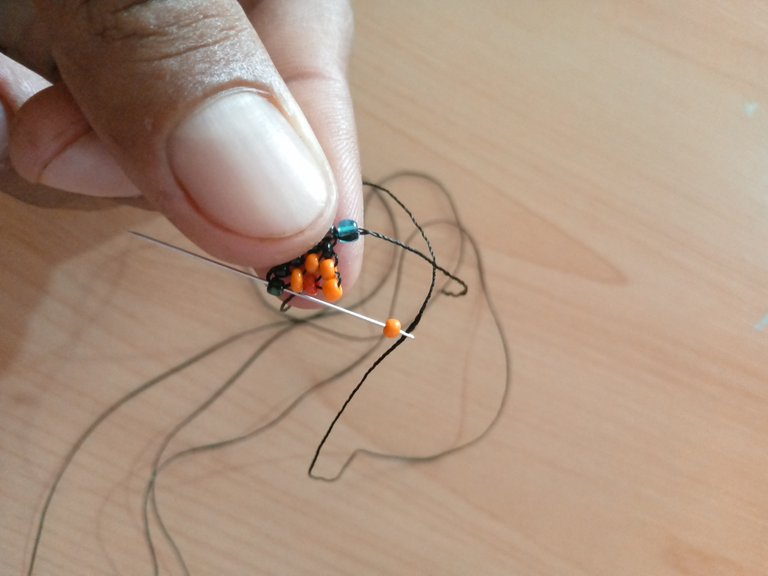
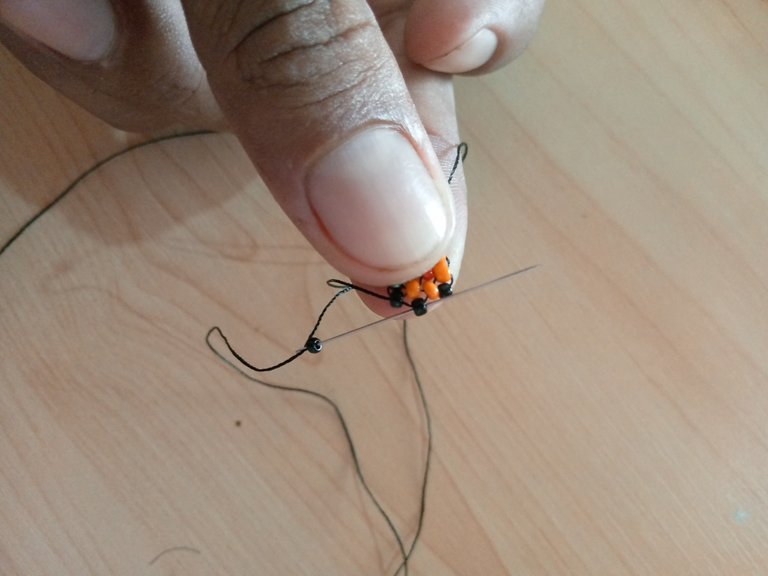
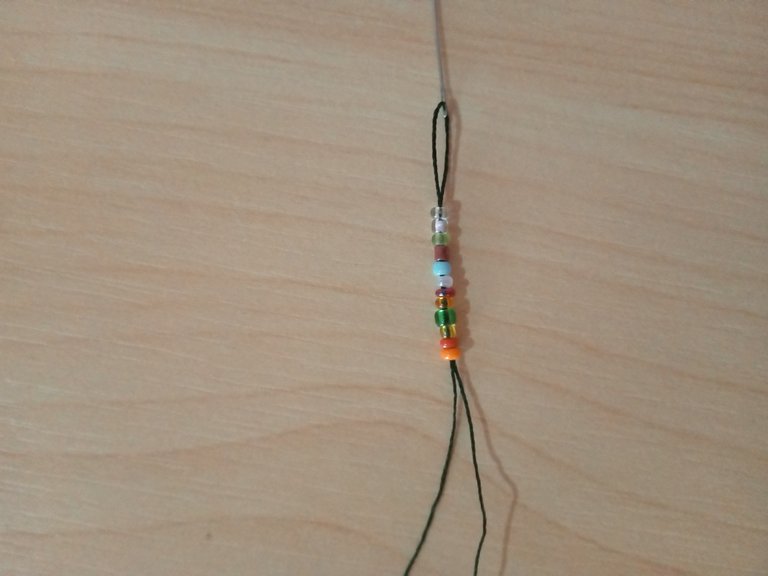
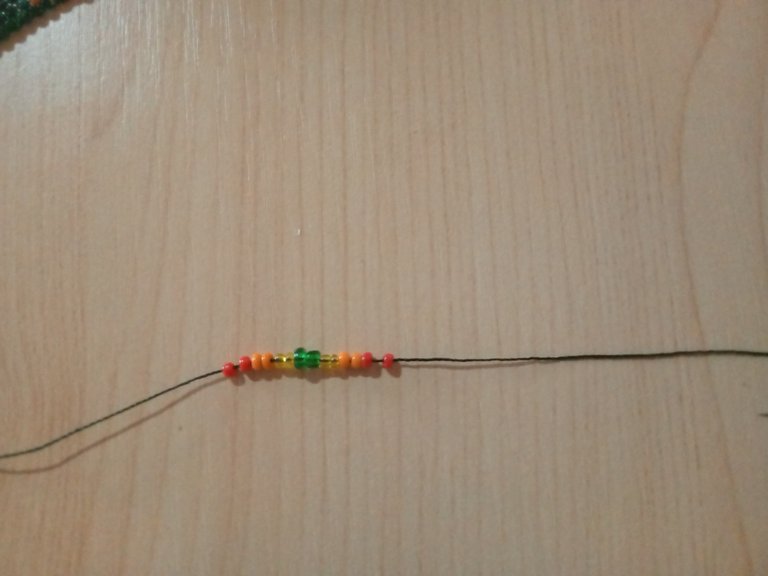
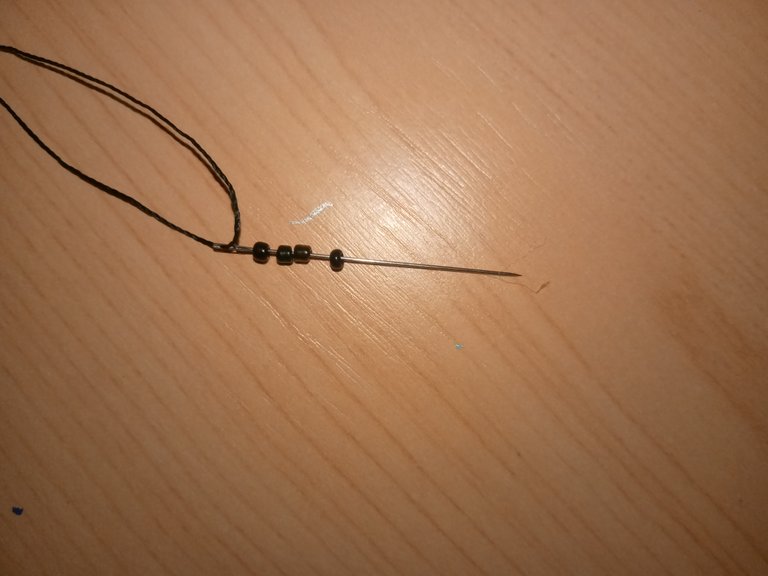
Para la elaboración de este bonito accesorio vamos a necesitar un aproximado de 3 metros de nylon, vamos a enhebrar nuestra aguja con el nylon y luego vamos a introducir una mostacilla de cualquier color esto nos servirá de soporte para comenzar a realizar nuestro trabajo.
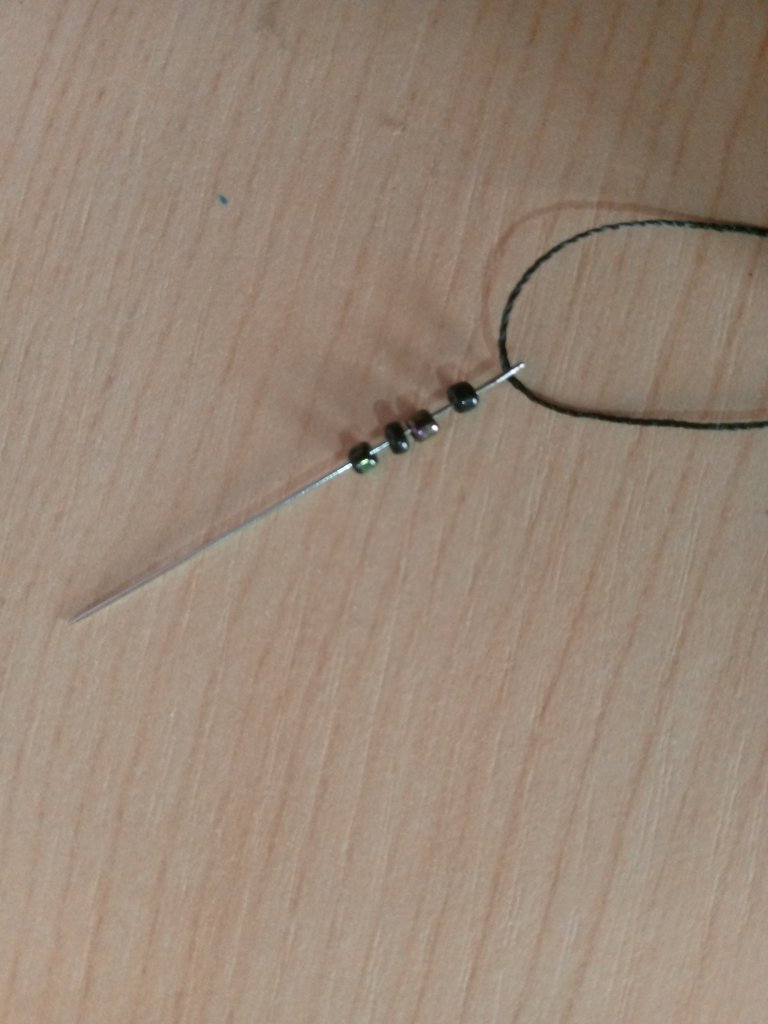
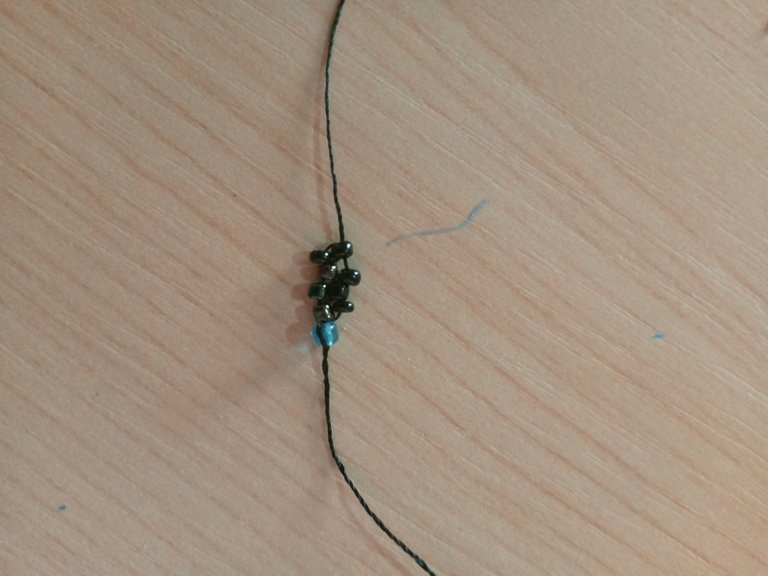
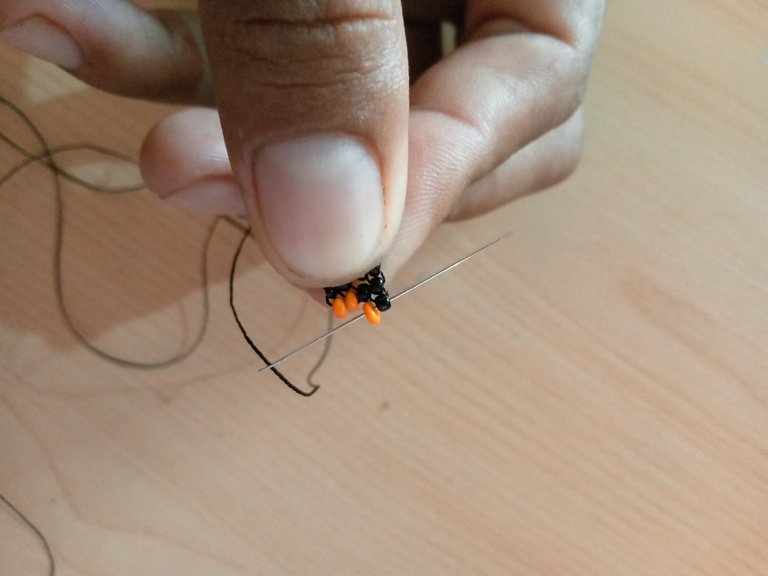
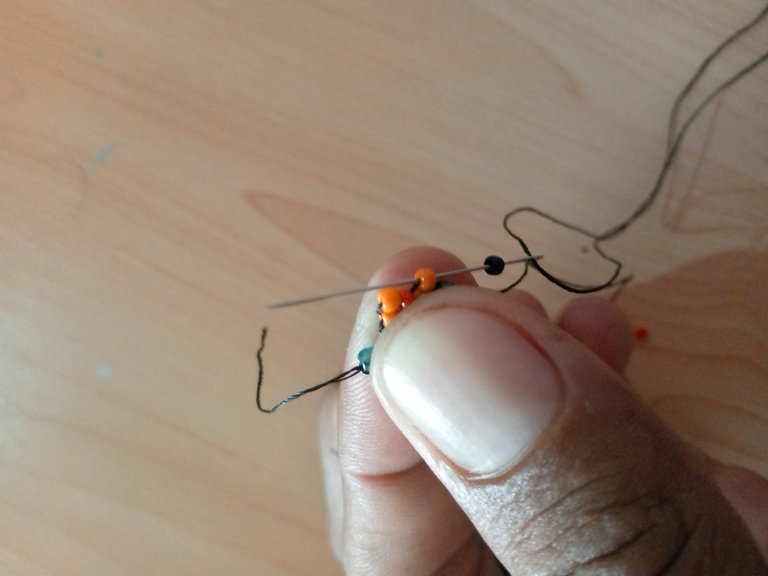
Luego vamos a introducir cuatro mostacillas de color negro la llevaremos al final del hilo, nuevamente vamos a introducir una mostacilla de color negro y vamos a introducir la aguja por la tercera mostacilla.
Nuevamente vamos a tomar una mostacilla negra, vamos a saltaremos una e introducimos en la siguiente mostacillas
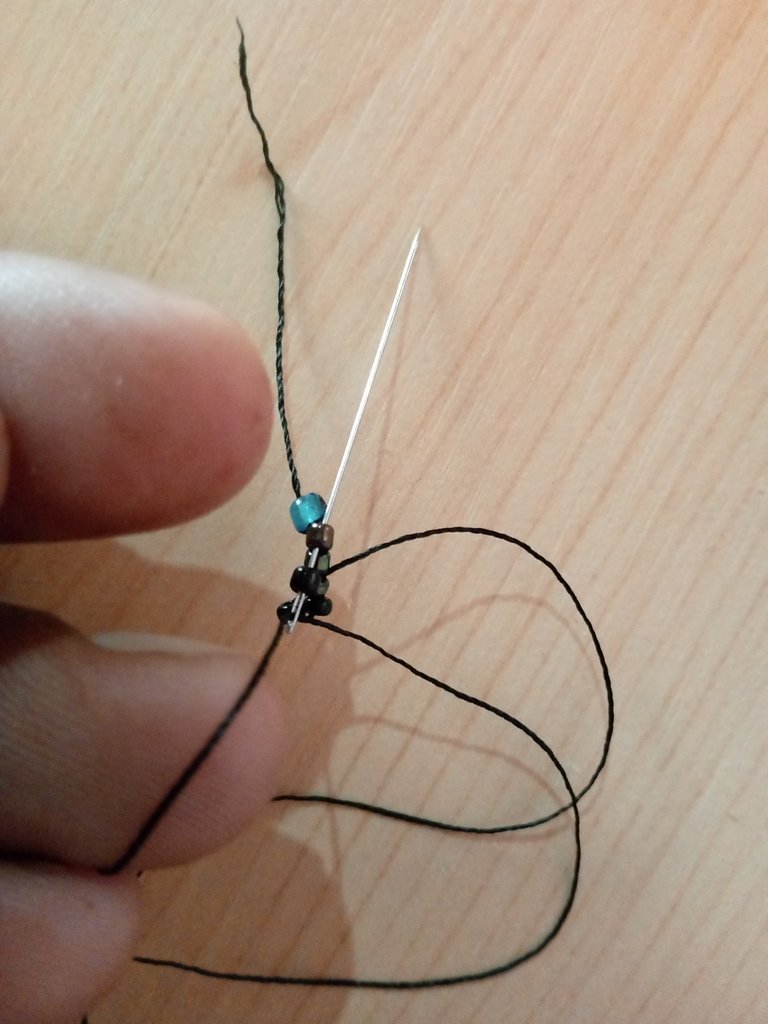
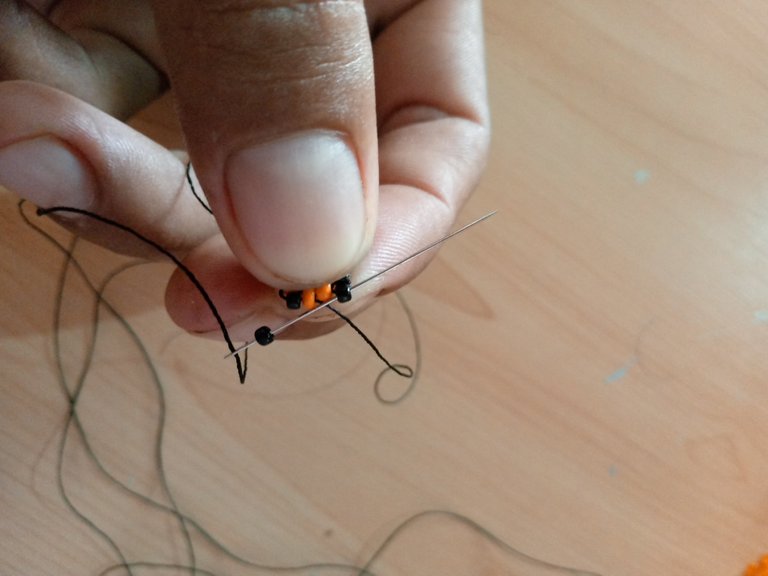
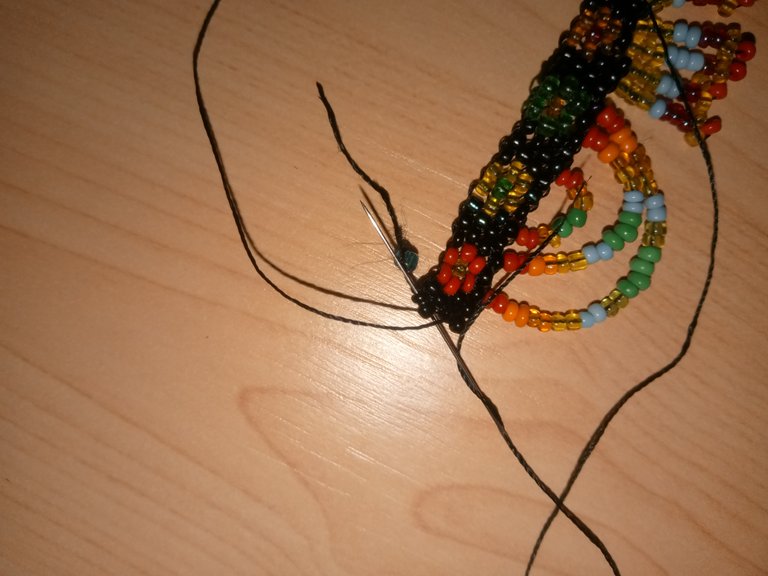
Tomaremos una mostacilla negra y con la ayuda de nuestra aguja vamos a devolvernos por el centro de la mostacilla que colocamos anteriormente, nuevamente tomaremos una mostacilla negra y vamos a introducir la aguja por la mostacilla que está en la parte de arriba y tiramos del hilo.
Paso 2
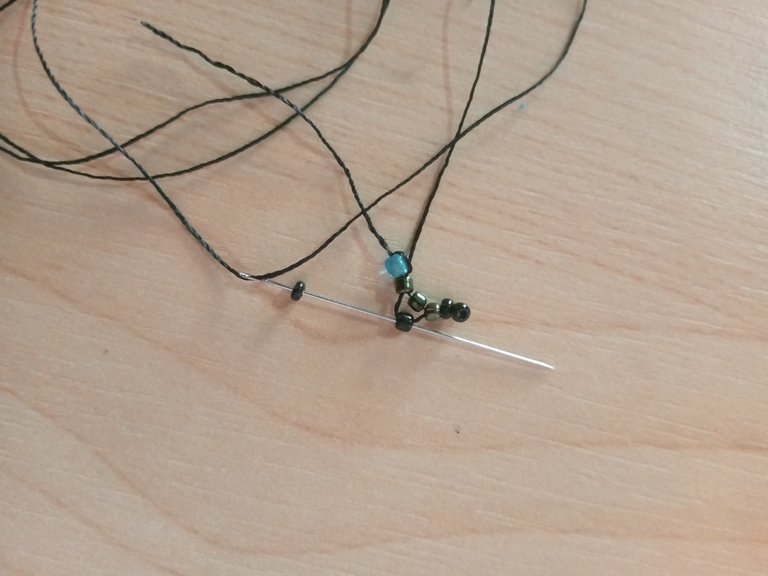
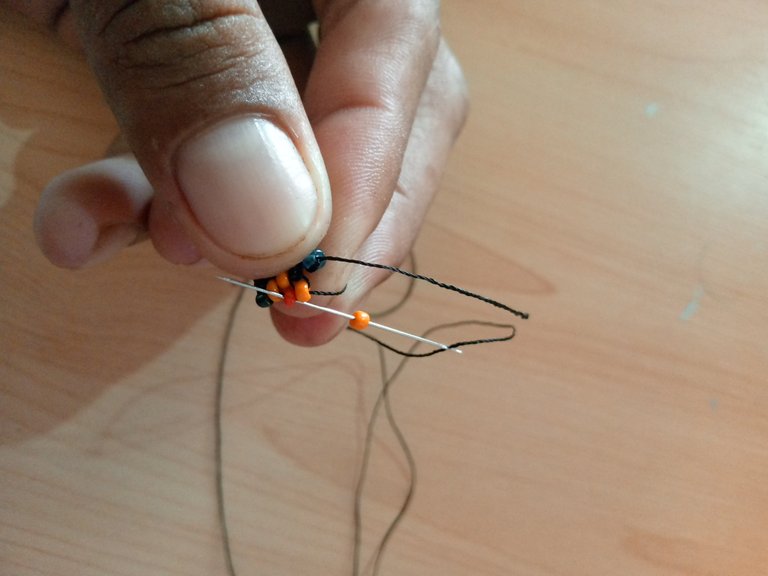
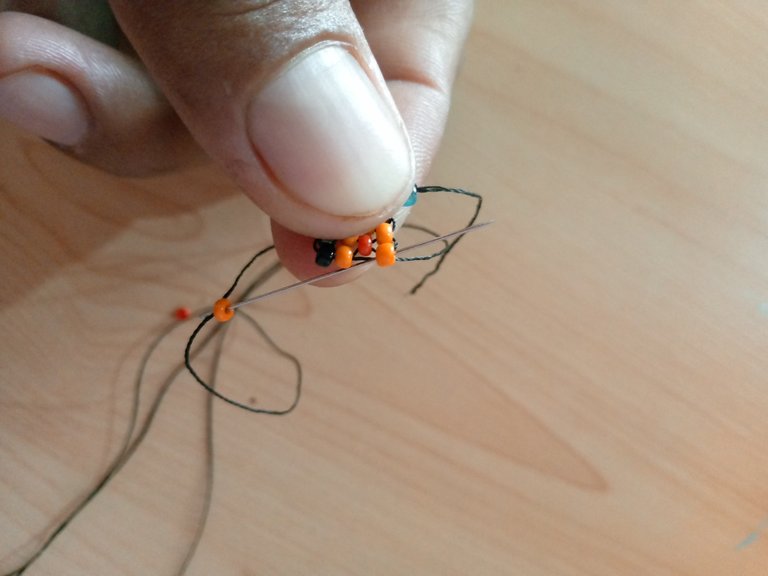
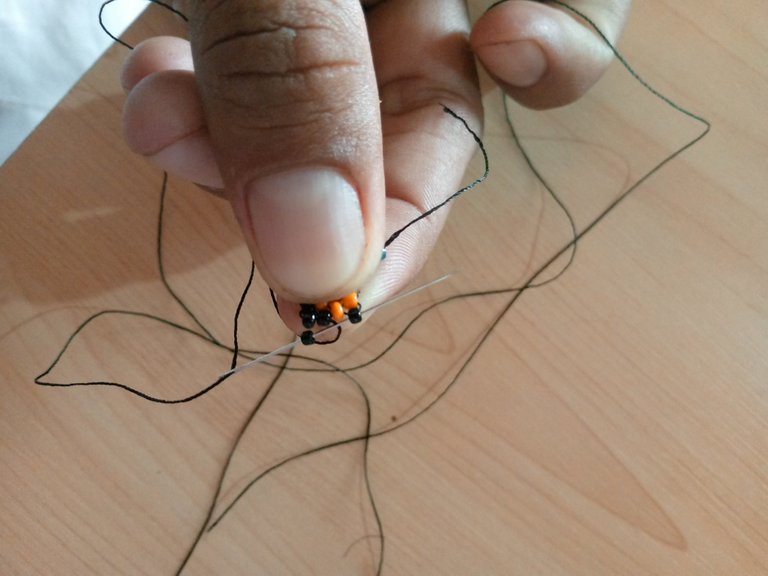
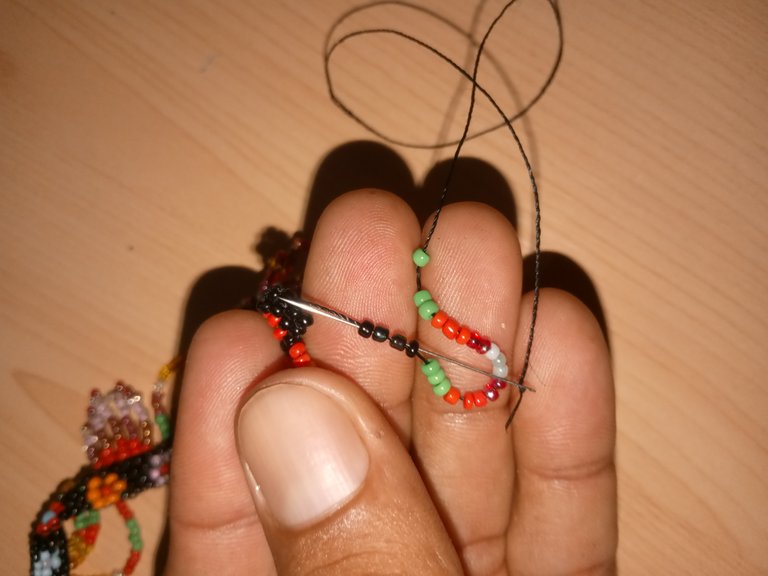
Tomaremos una mostacilla negra y vamos a introducirla por la segunda mostacilla de arriba hacia bajo y tieramos del hilo, luego vamos a tomar una mostacilla color naranja y vamos a introducir la aguja por la última mostacilla negra.
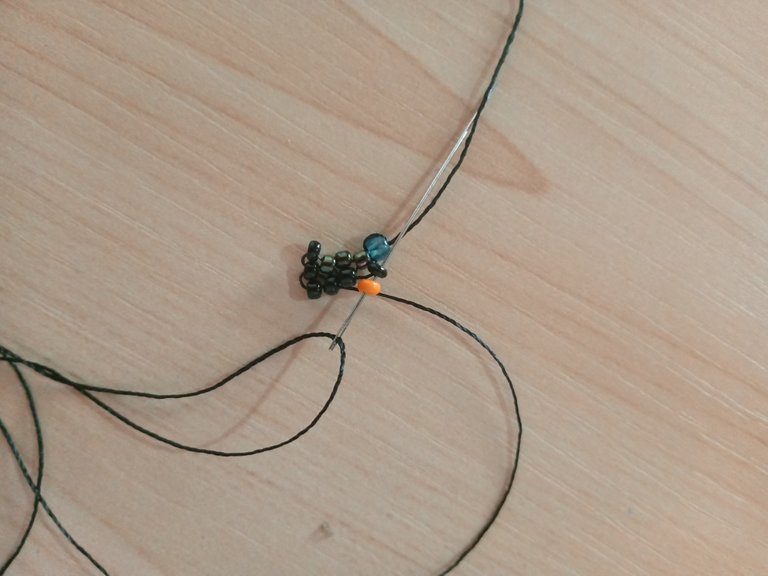
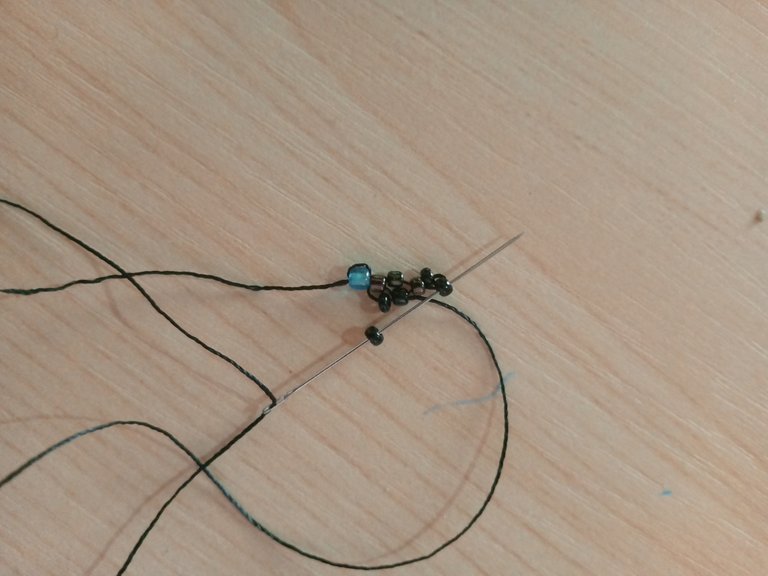
Nuevamente vamos a tomar una mostacilla naranja y de abajo hacia arriba pasamos nuestra aguja por la mostacilla naranja que introducimos anteriormente, seguidamente tomaremos otra mostacilla naranja y pasaremos nuestra aguja por la mostacilla negra que está en la parte de abajo.
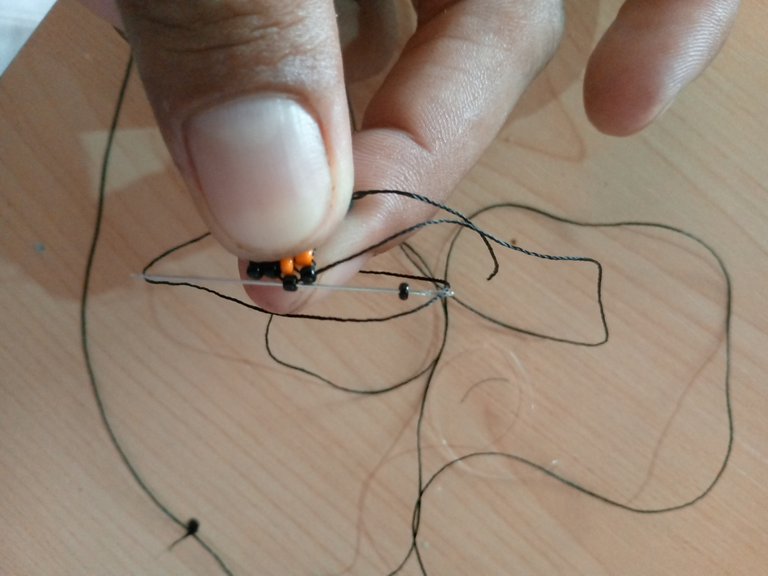
Tomaremos una mostacilla negra y nos devolvemos por la mostacilla naranja, vamos a tomar una mostacilla de las rojas brillantes y la vamos a introducir por la última mostacilla color naranja.
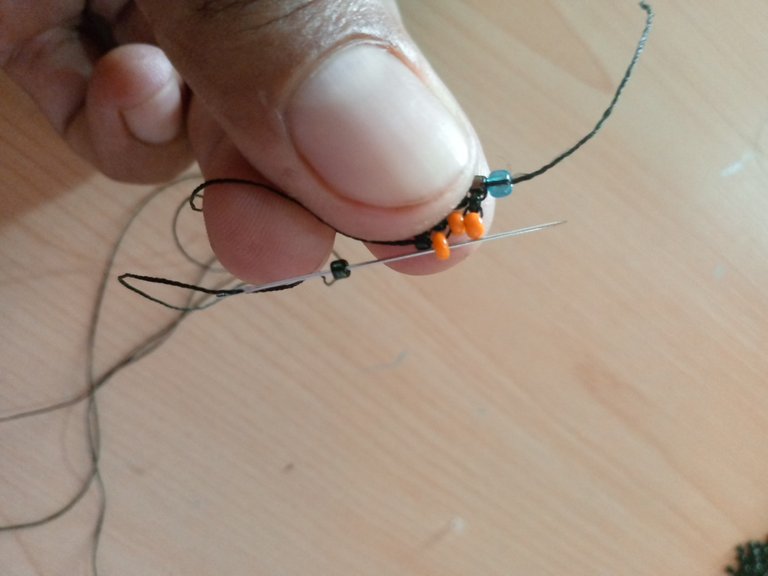
Vamos a tomar una mostacilla de color naranja y nos devolveremos con nuestro hilo e introducimos por la mostacilla de color rojo brillante y tiramos de ella para nuevamente tomar una mostacilla anaranjada y introducir nuestra aguja por la mostacilla negra.
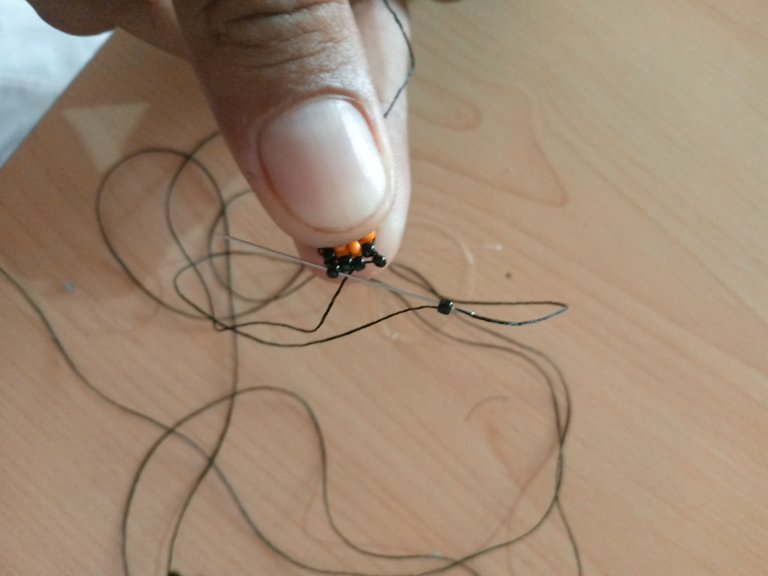
tomaremos una mostacilla negra y nos devolvemos por la mostacilla naranjada para luego tomar nuevamente una mostacilla anaranjada e introducir por la última mostacilla del mismo color.
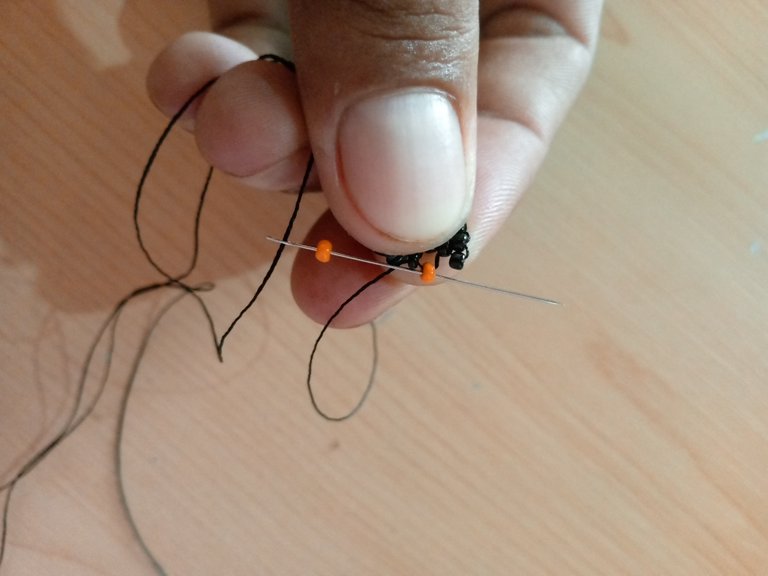
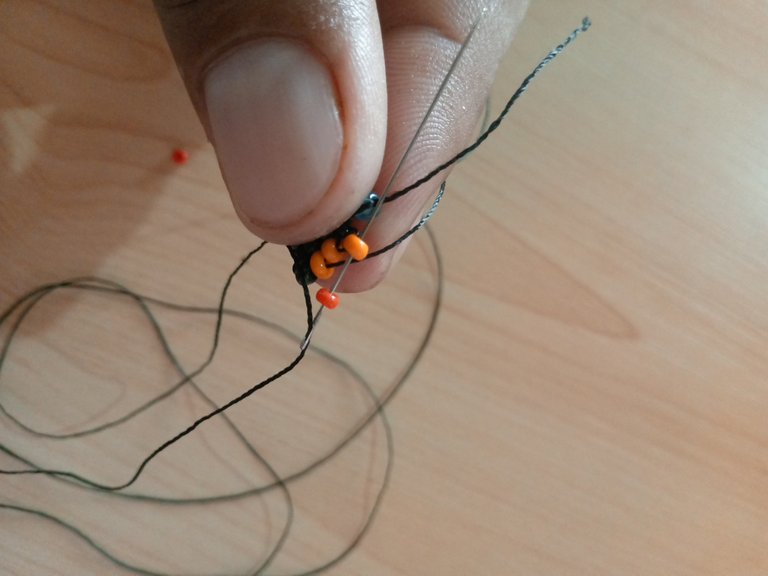
Introduciremos una mostacilla de color negro y saltamos una mostacilla anaranjada y introducimos en la siguiente, tomamos otra del mismo color y saltamos la anaranjada y introducimos en la siguiente negra.

Tomamos una mostacilla negra y nos devolvemos introduciendo nuestra aguja por la mostacilla del mismo color tiramos de ella para luego introducir otra mostacilla de color negro y esta la vamos a introducir por la última mostacilla del mismo color.
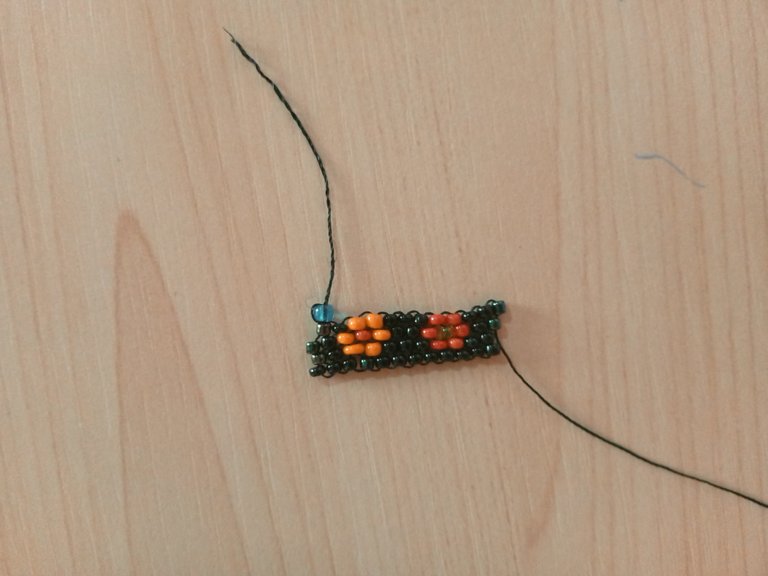
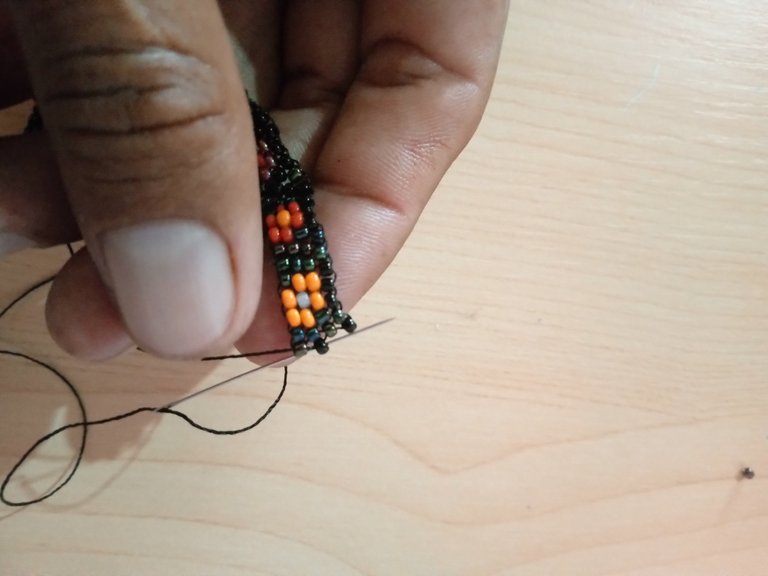
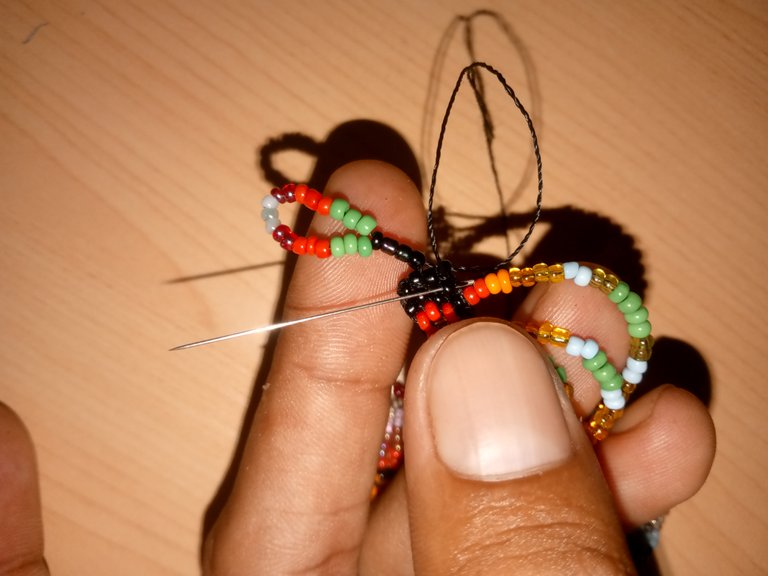
Vamos a repetir este procedimiento un par de veces, tomando una mostacilla negra y luego saltamos una e introducimos la aguja por la siguiente, esto hasta tener una separación entre cada flor de color.
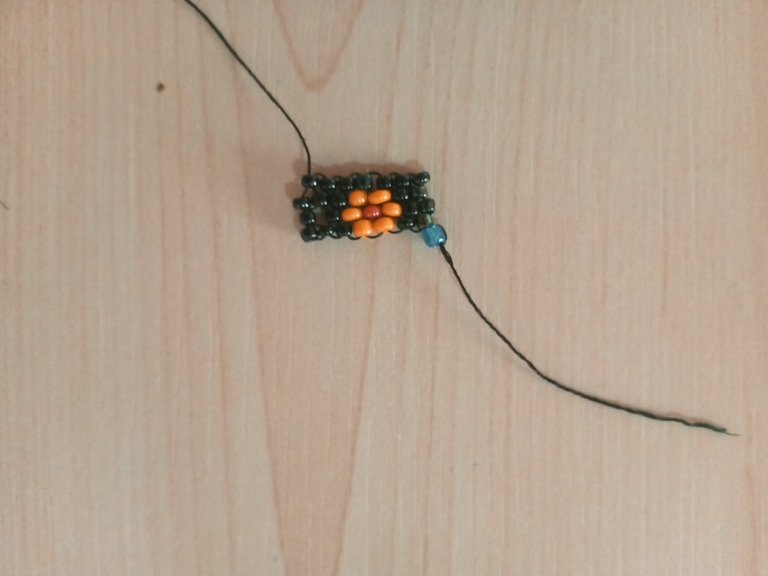
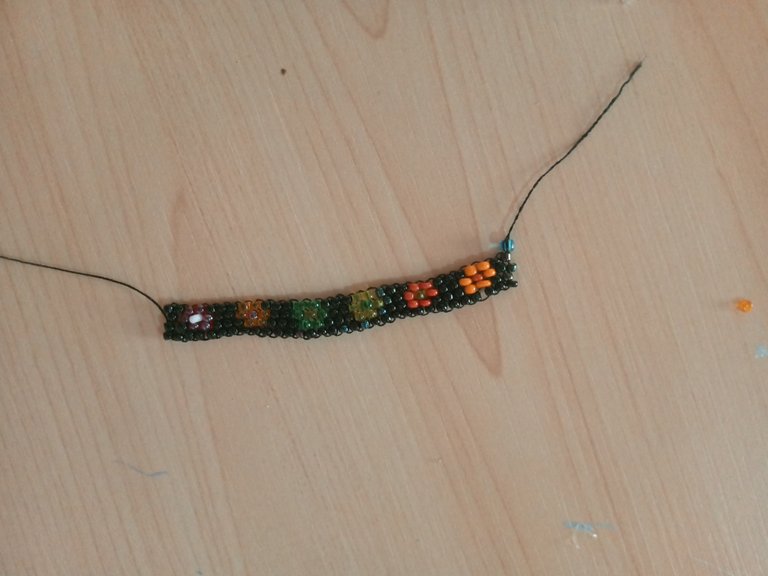
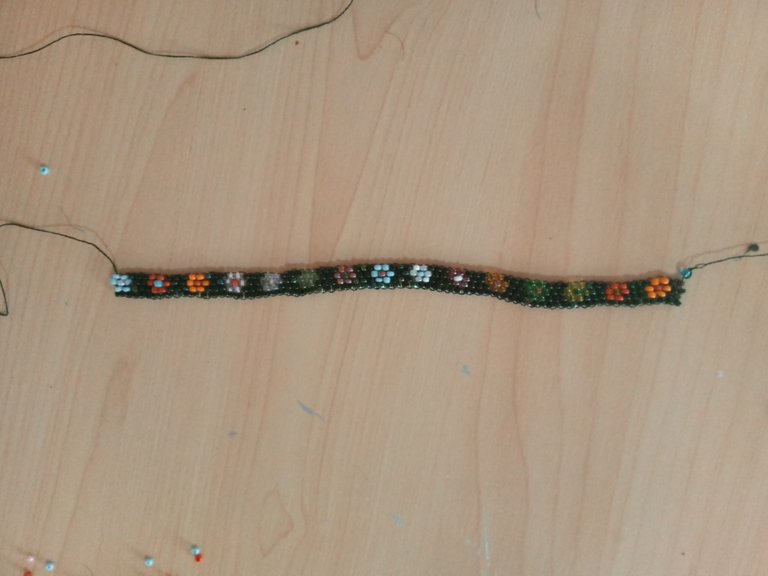
Asi quedaria lista nuestra hermosa flor naranja, de la misma manera vamos a ir haciendo el mismo paso por paso hasta lograr tener el largo o la cantidad de flores de colores que quieran, en mi caso yo realicé 22 flores de colores, las podemos combinar con los colores que mas nos gustan.
Paso 3
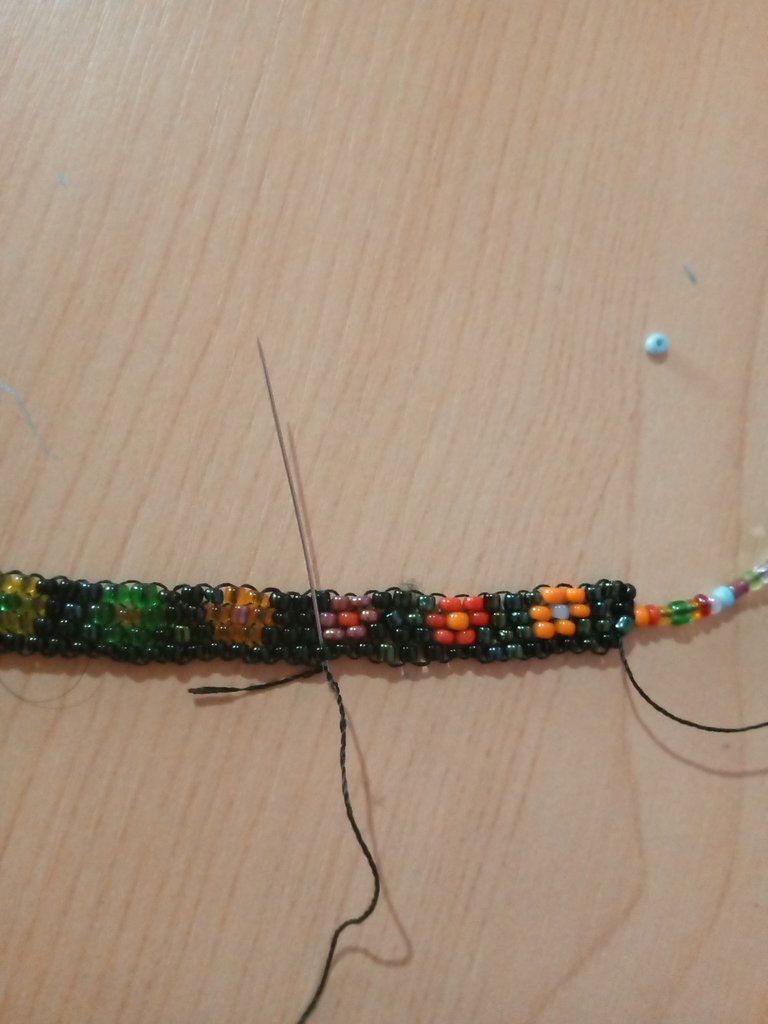
Al terminar las 22 flores coloridas y habiendo la separación vamos a introducir nuestra aguja por las mostacillas que sobresalen, esto para ir disminuyendo los espacios
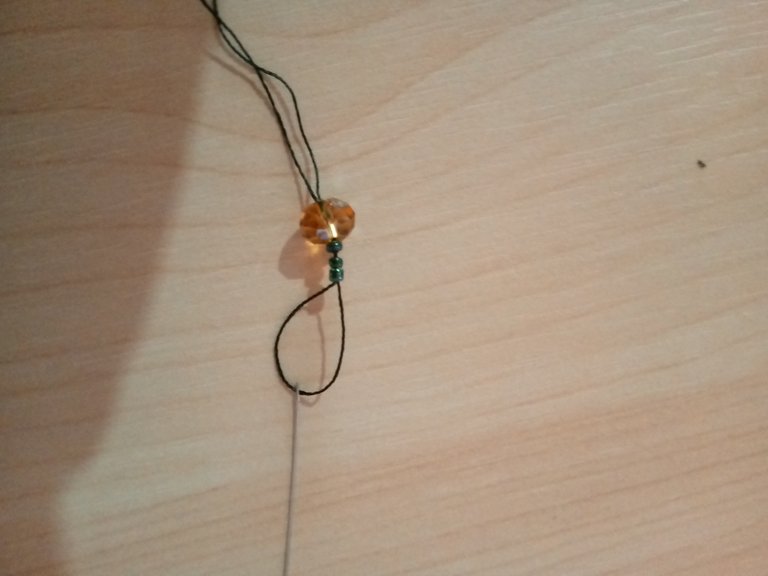
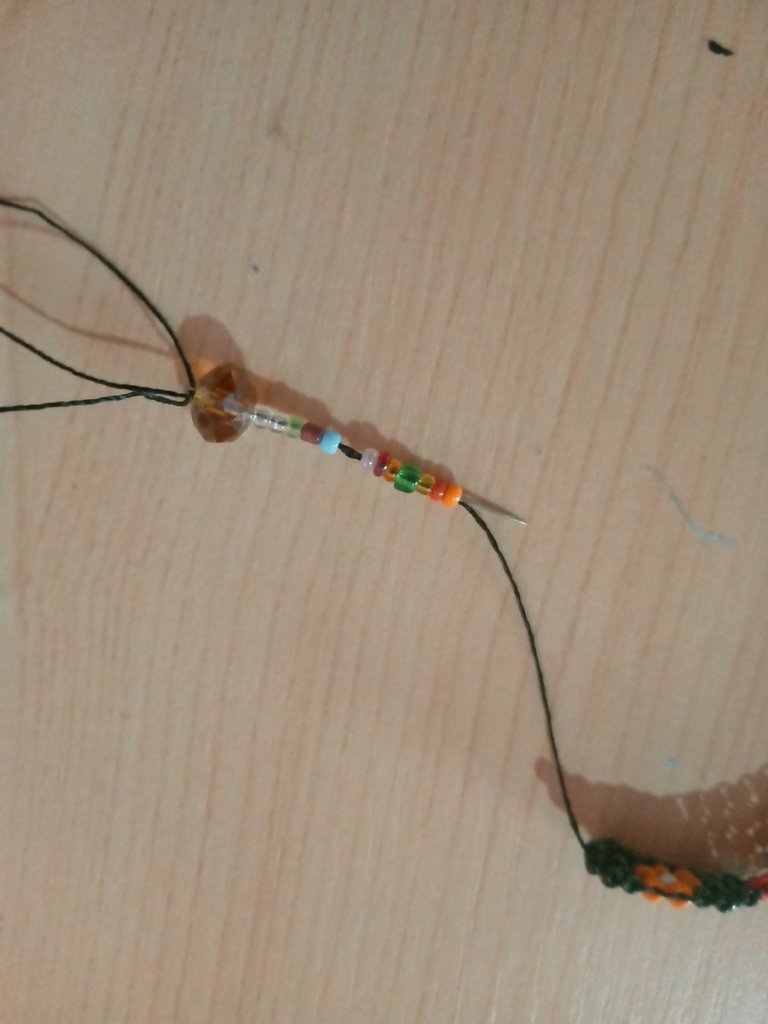
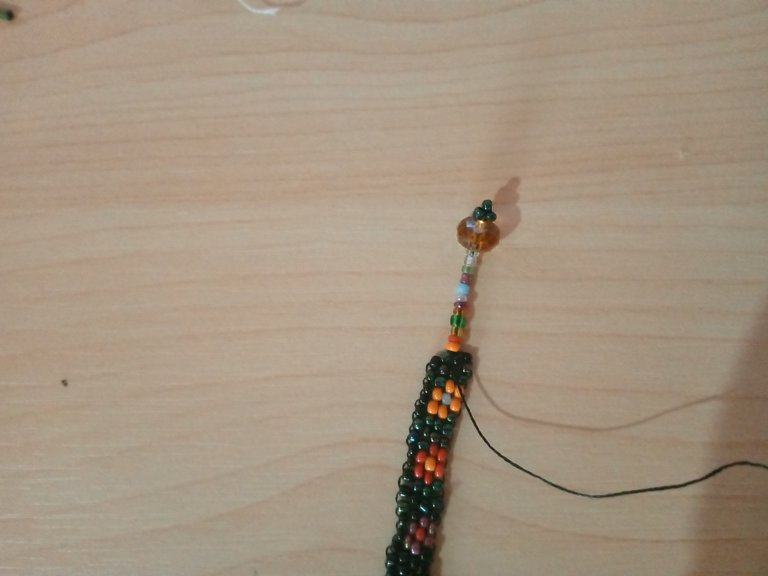
Luego vamos a introducir una mostacilla de cada color de las flores que realizamos, luago vamos a introducir la aguja por el cristal de swarovski, vamos a introducir 3 mostacillas verdes oscuras y nos devolvemos por todas las mostacillas que introducimos, este sera el broche de nuestra colorida gargantilla.

Paso 4
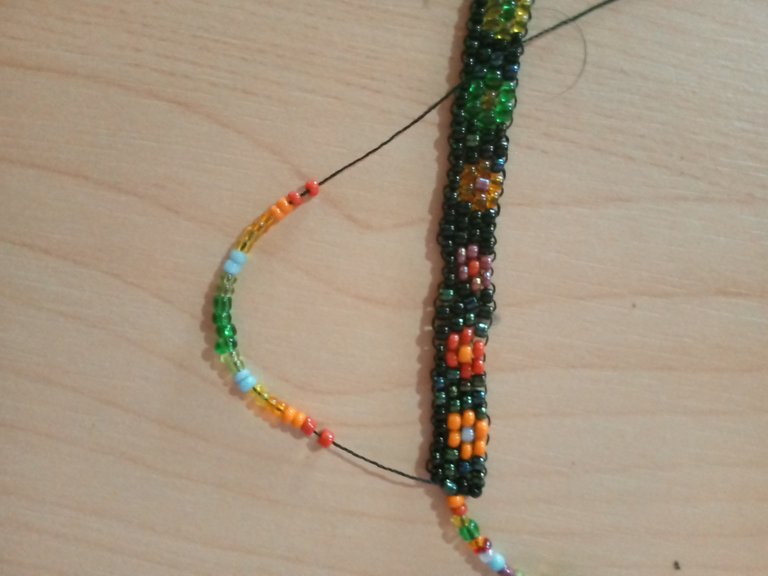
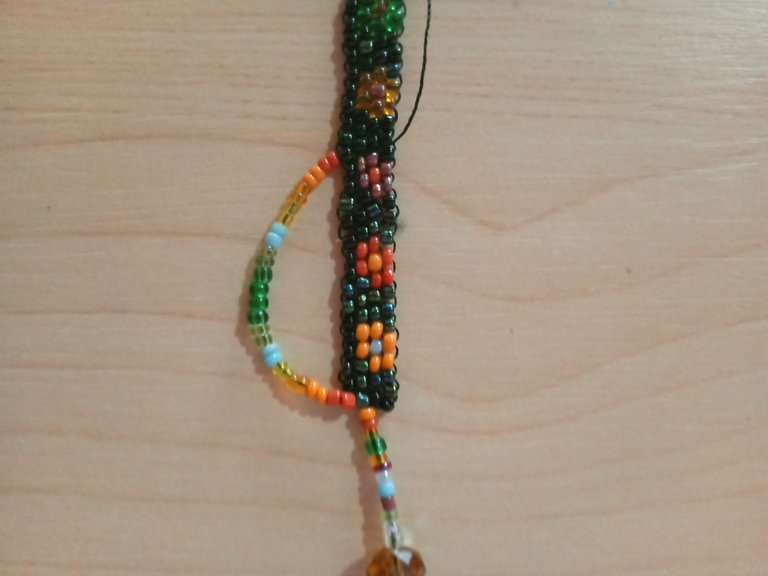
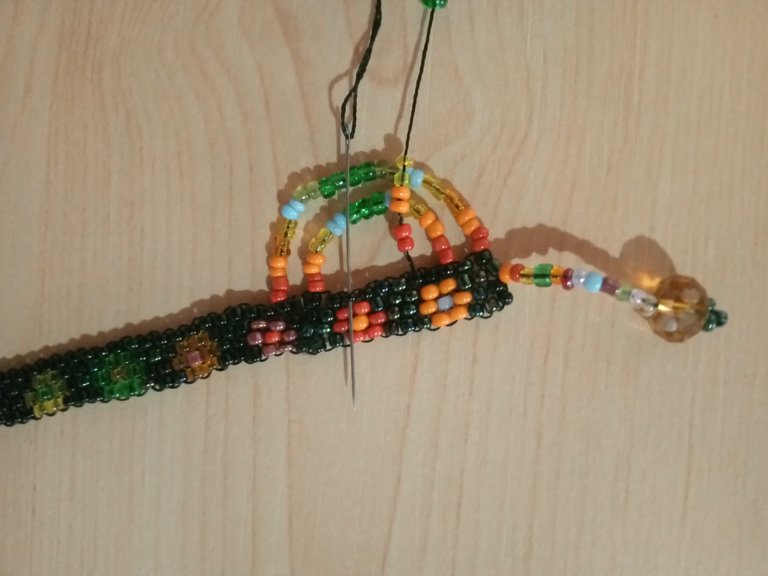
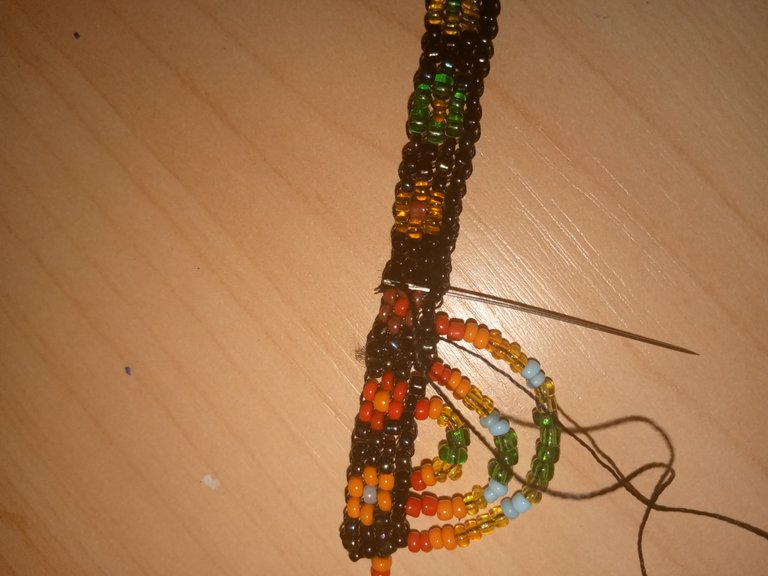
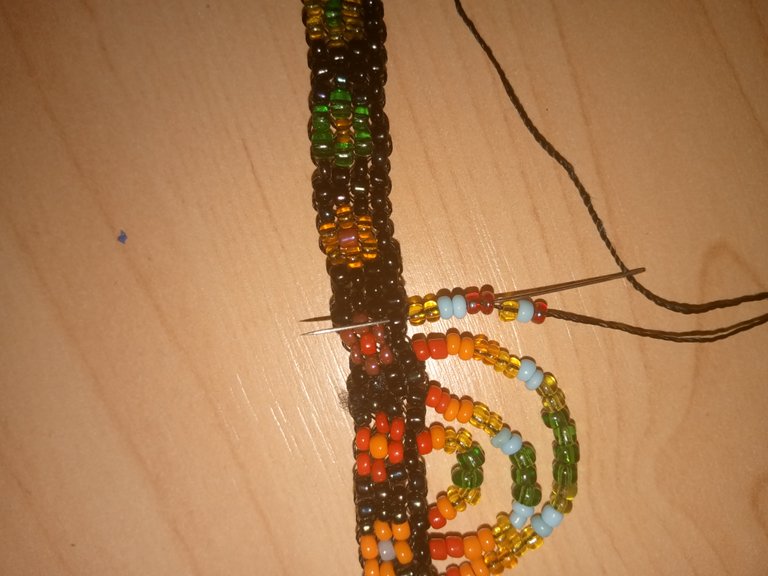
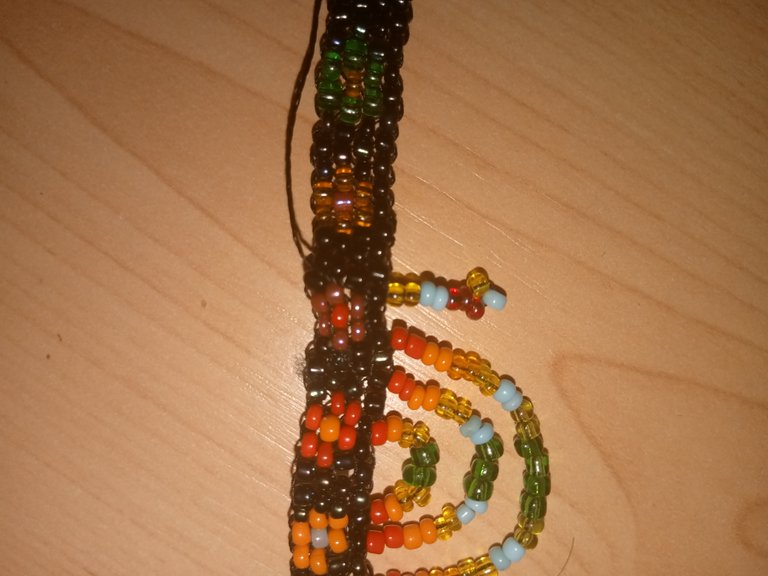
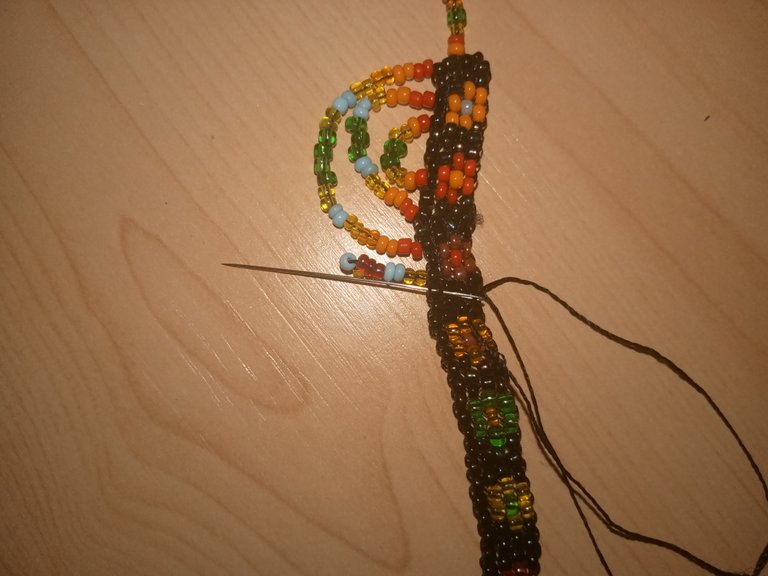
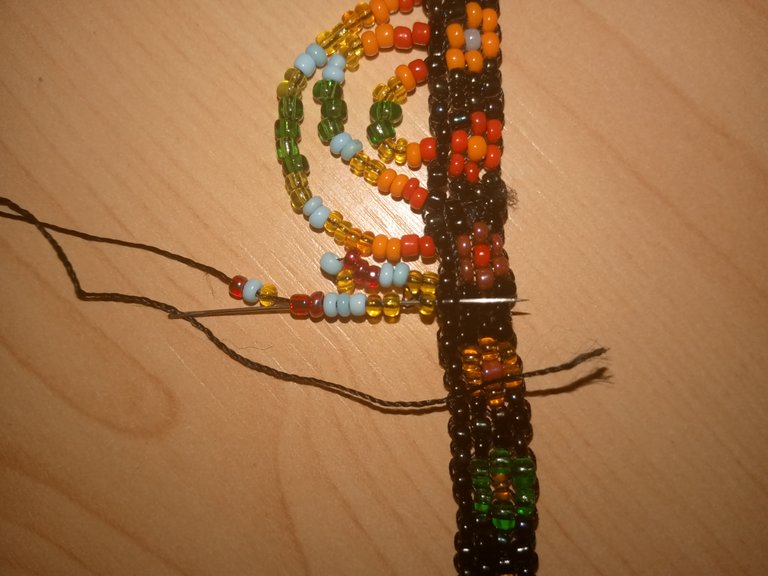
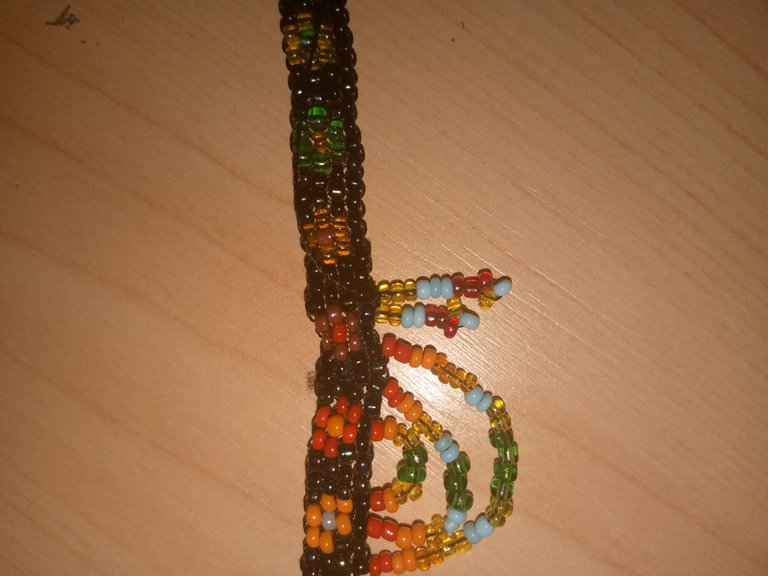
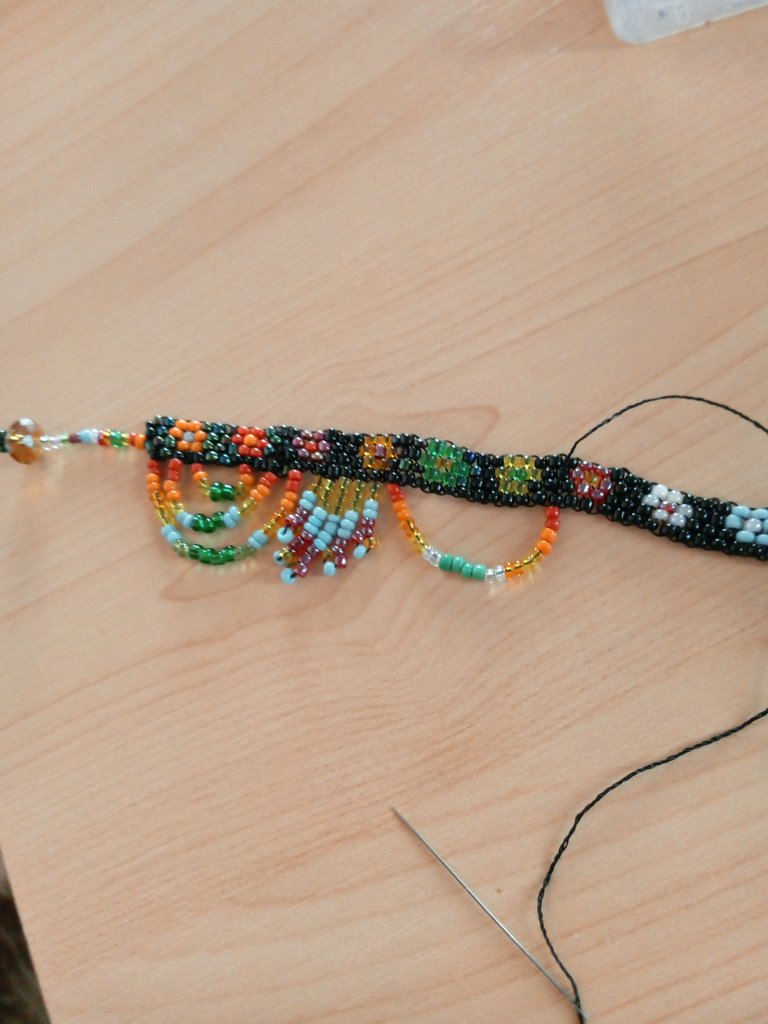
Para este paso nos posicionaremos en la parte de abajo en la mostacilla negra, vamos a realizar un arco de muchos colores, introduciremos un total de 28 mostacillas, y vamos a ligar los colores como mejor nos parezca, luego contaremos 13 mostacillas negras para luego introducir nuestra aguja de abajo hacia arriba.
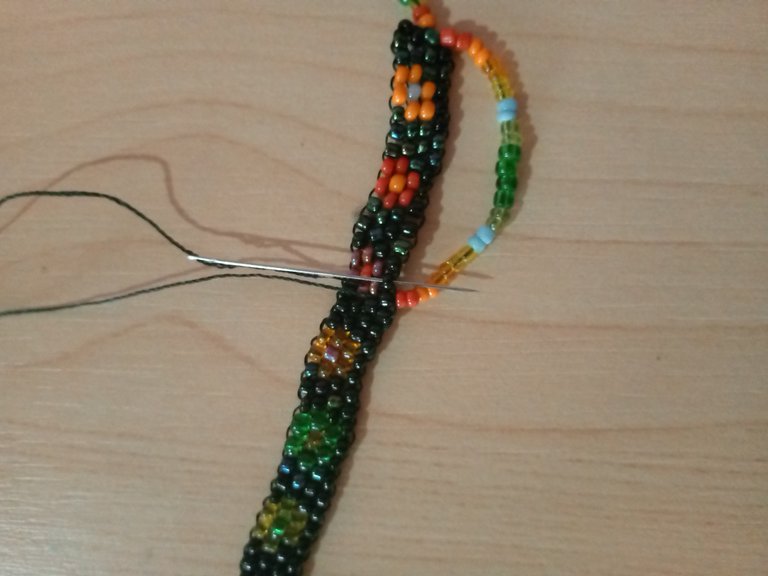
Vamos a posicionar nuestro aguja hacia dentro dejando una mostacilla por el medio, luego tomaremos 19 mostacillas y las conbinaremos con las que introducimos anteriormente para que se vean coordinado los colores de nuestro hermoso arco y introducimos nuestra dejando una mostacilla por el medio.
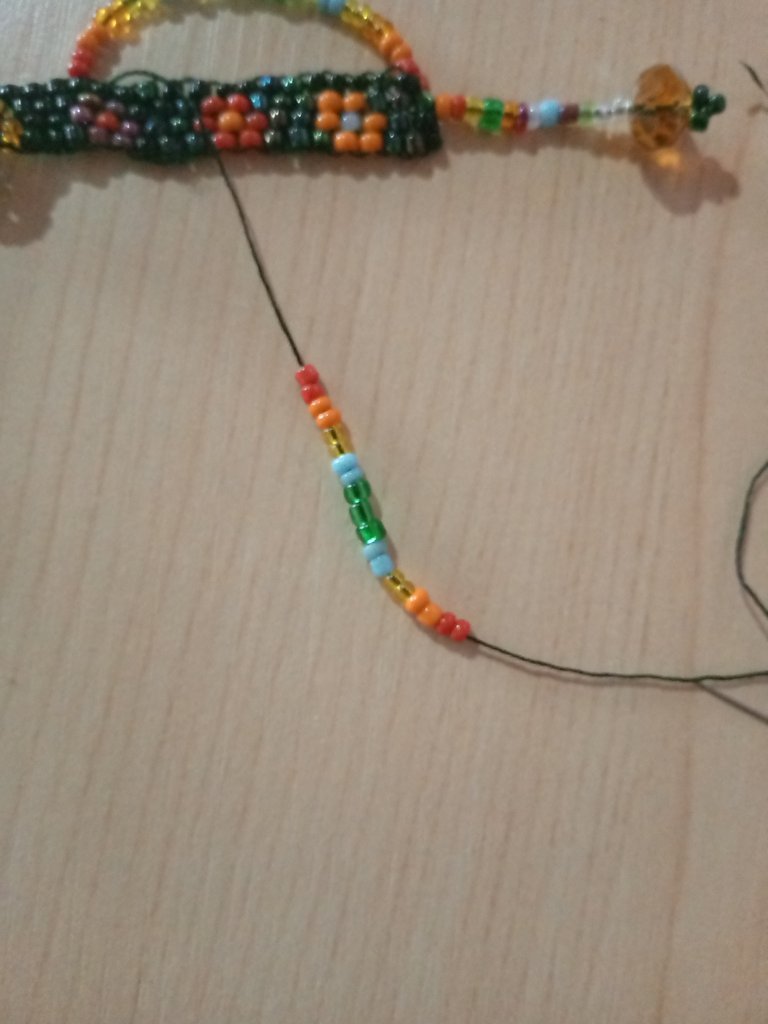
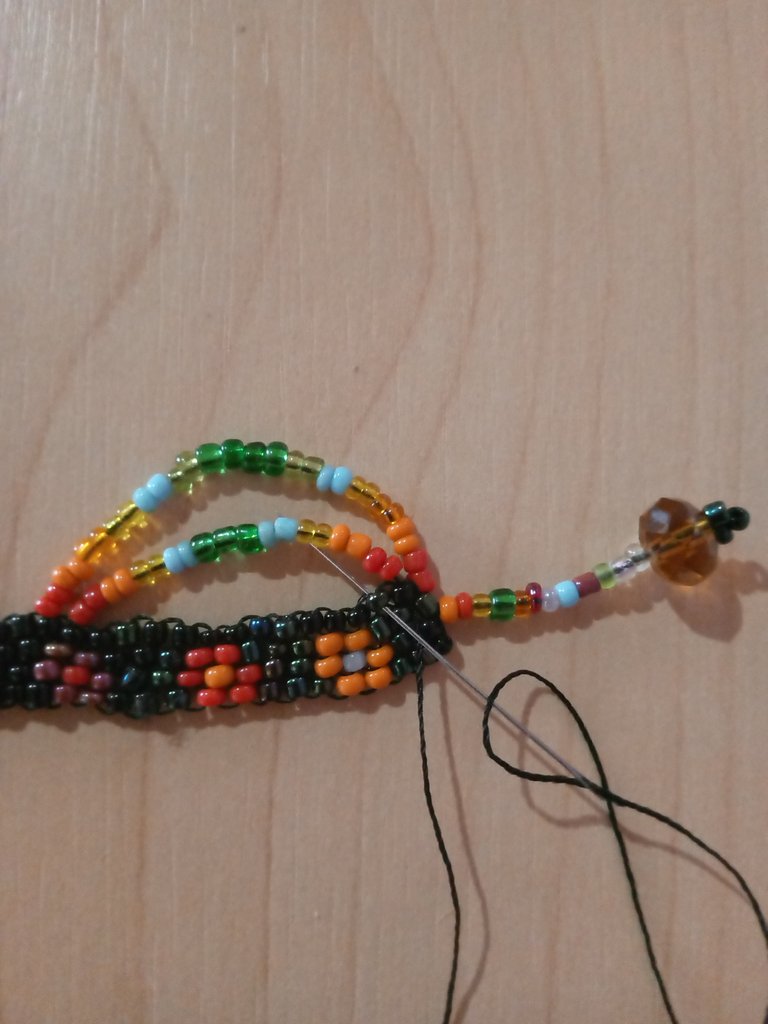
Nuevamente vamos a dejar una mostacilla por el medio y vamos a posicionar la aguja para introducir 14 mostacillas de colores, igualmente vamos a introducir la aguja con dejando una mostacilla por el medio.
Paso 5
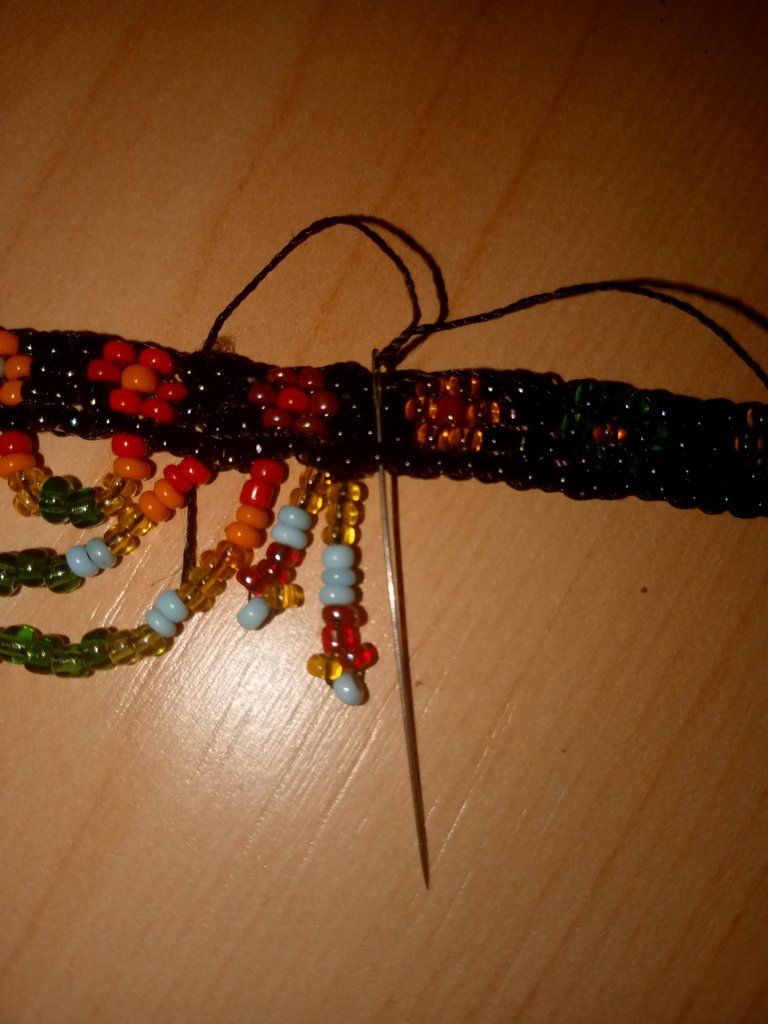
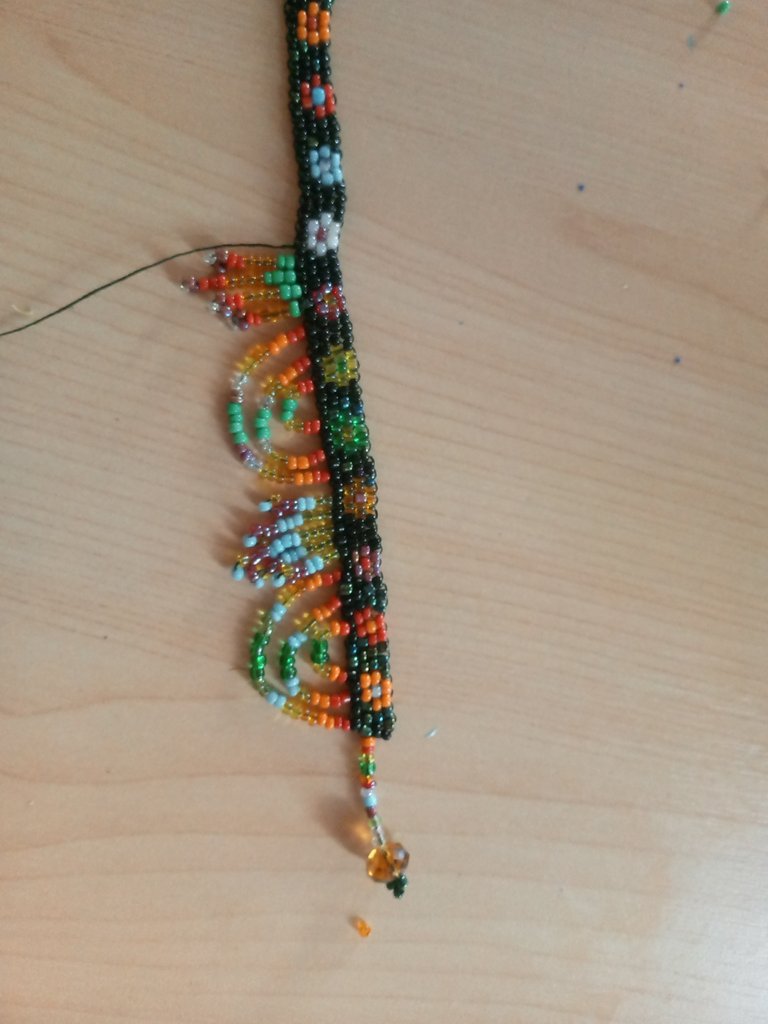
Ahora le colocaremos unos flequillos a nuestro hermosa gargantilla, vamos a posicionar nuestra aguja introduciendo por cada mostacilla hasta llegar al siguiente lado,
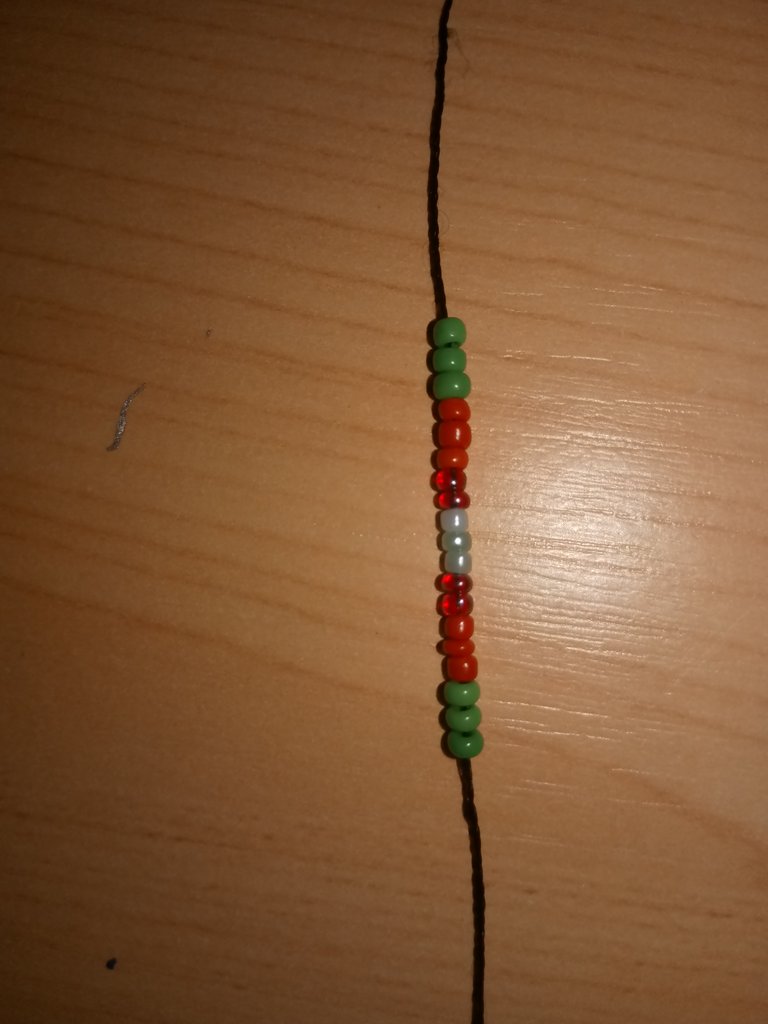
Vamos a introducir nueve mostacillas estas del color del gusto de cada quien en mi caso yo coloqué los colores de la bandera de mi hermoso país amarillo azul y rojo, 2 amarillas, 2 azules, 2 rojas y liego 1 amarilla 1 azul y una roja.
Vamos a a dejar pasar las últimas tres mostacillas y introducimos por las siguientes, pasaremos la aguja por donde sale nuestra aguja.
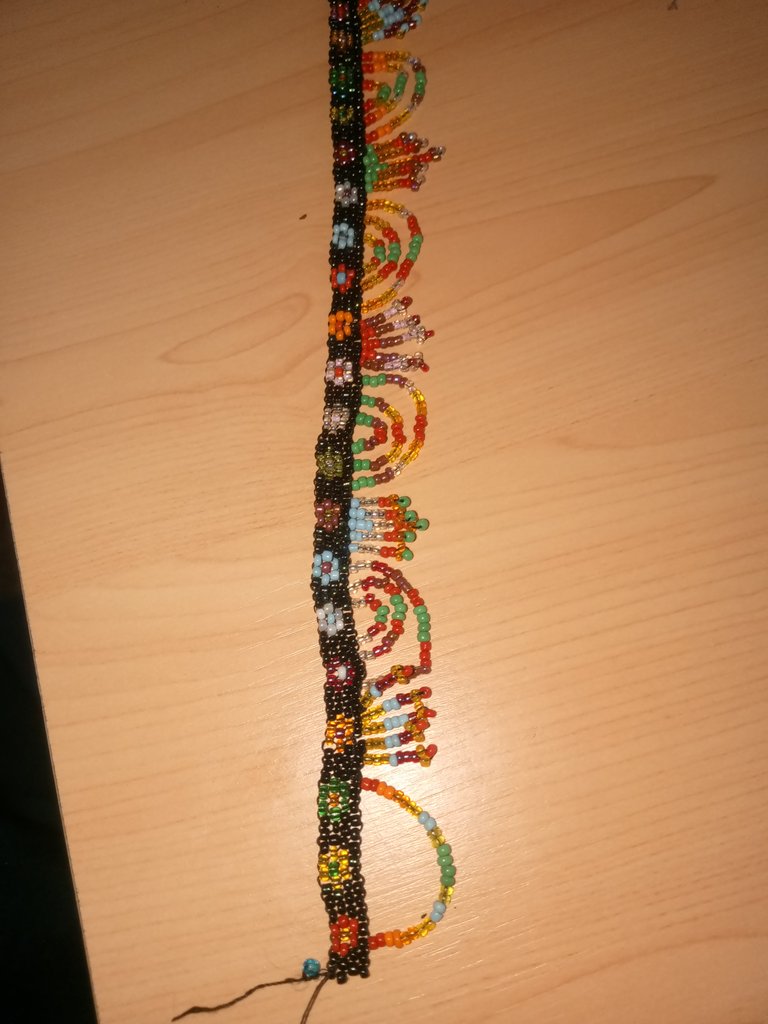
Luego colocamos la aguja por la mostacilla siguiente, esta vez vamos a introducir 11 mostacillas lo que queremos es que vaya aumentando cada línea de mostacillas, las ordenamos según el color que queramos, hacemos el mismo procedimiento saltamos las últimas tres e introducimos completamente por la mostacilla negra.
Nuevamente vamos a posicionar nuestra aguja hacia abajo en la siguiente mostacilla y vamos a tomar esta vez 12 mostacillas igual manera las ordenamos como queramos y saltamos las últimas tres e introducimos nuestra aguja completamente hasta la mostacilla negra.
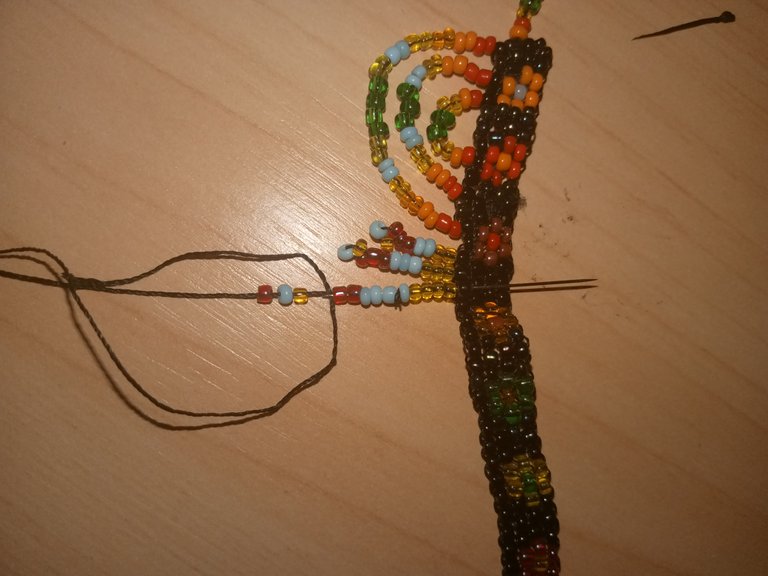
Ahora vamos a ir disminuyendo como el anterior introduciendo 11 mostacillas después 9, realizaremos el mismo procedimiento dejando pasar las últimas tres introduciendo completamente la aguja.
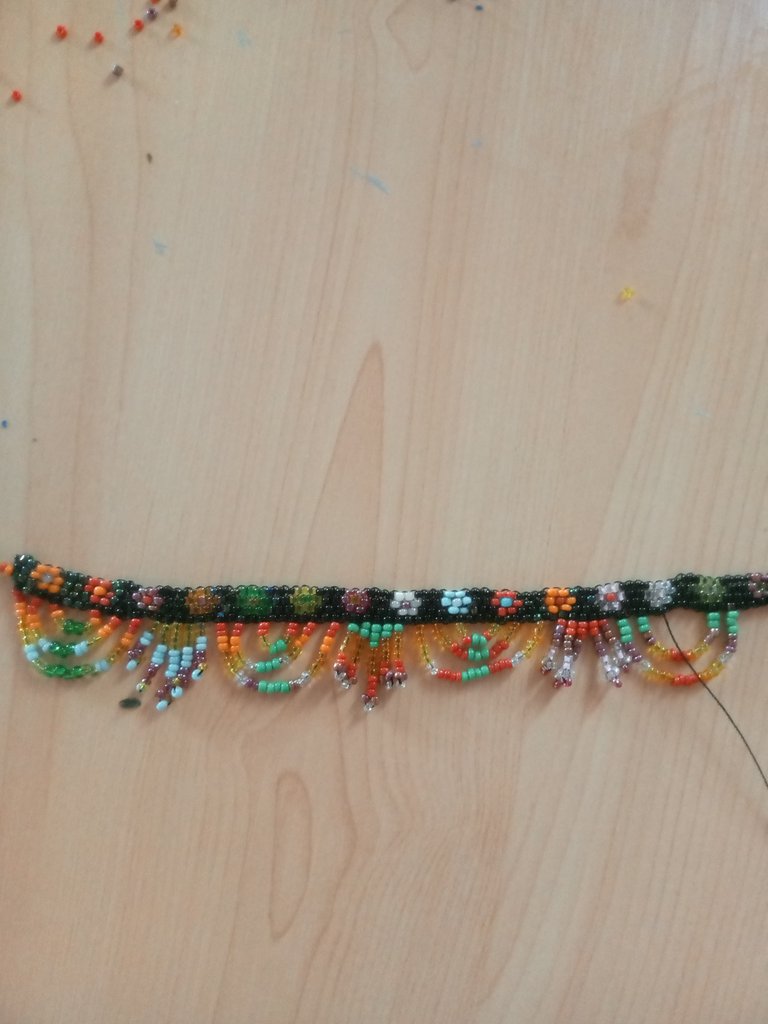
Ahora vamos a repetir el procedimiento hasta forrar nuestras flores con arcos y flequillos de colores.
Paso 6
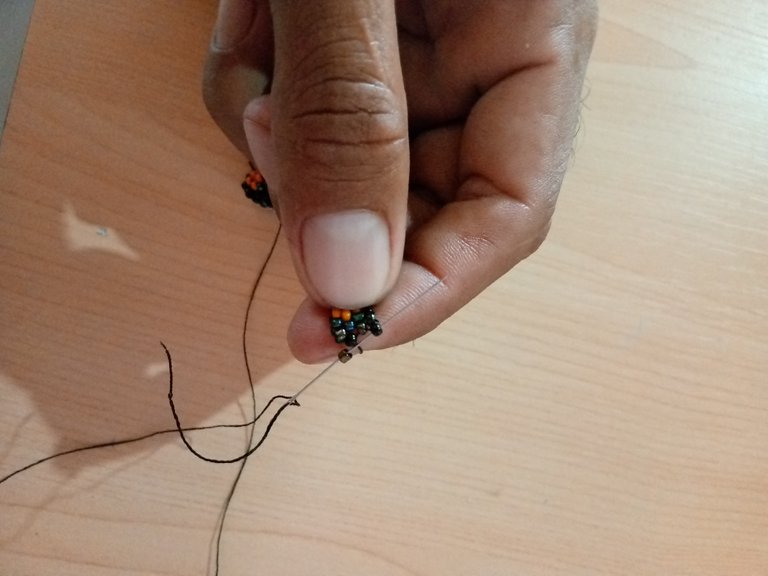
Para este ultimo paso vamos a ir reduciendo los espacios inteoduciendo la aguja por las mostacillas negras, luego retiraremos el soporte que colocamos iniciando, hacemos varios nudos y con la ayuda del encendedor sellamos.
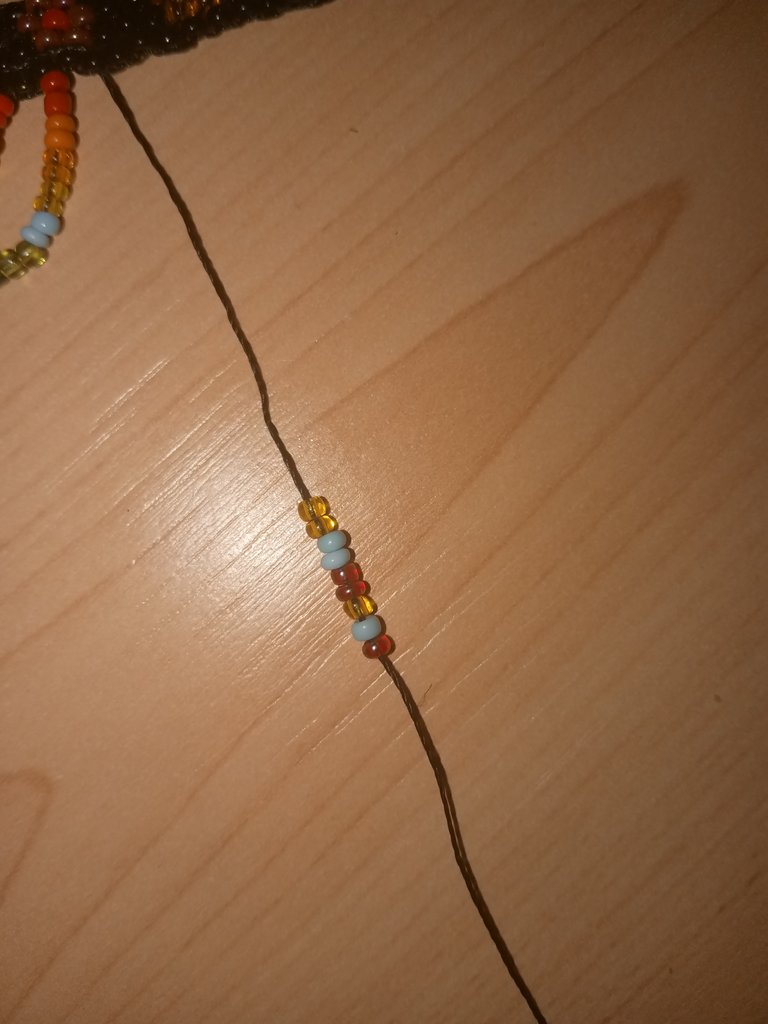
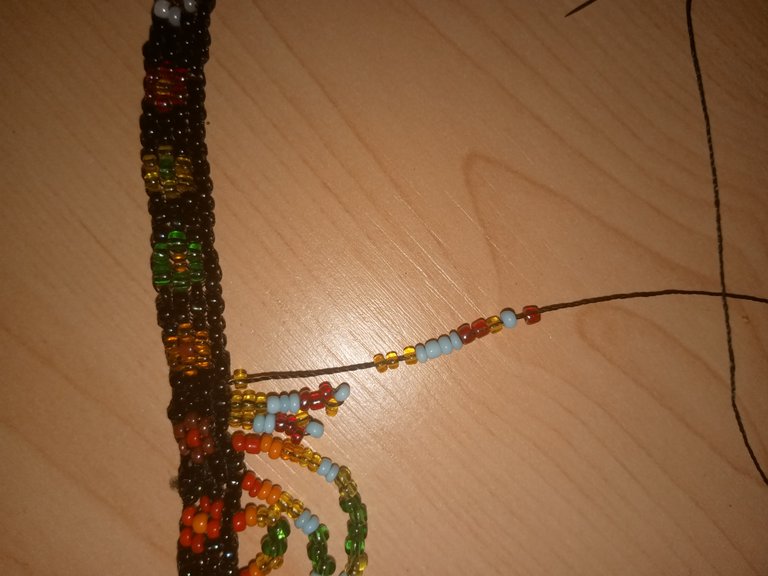
Despues de haber llevado el nylon al centro de las mostacillas, vamos a introducir 4 mostacillas negras, luego 19 mostacillas de diferentes colores, los colores que mas les gusten, vamos a introducir nuestra aguja por las 4 mostacillas negras y tiramos de ellas,
Luego escondemos nuestro hilo por las mostacillas y haciendo varios nudos y con la ayuda del encendedor sellamos nuestro hermosa gargantilla para lucir en estos carnavales.

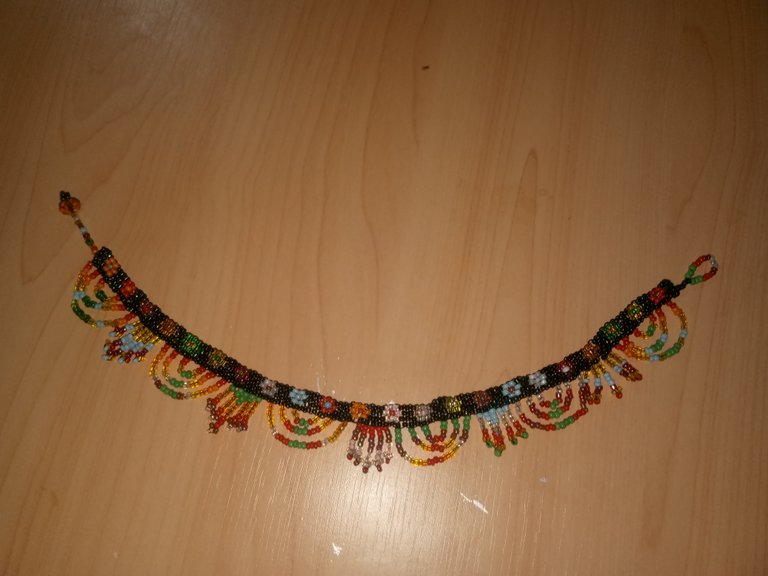
De esta manera estaria listo nuestro hermoso brazalete para lucir en estas fiestas carnavaleras
Me hubiese gustado participar con mas tiempo, pero vomo les habia comentado por motivos personales estuve ausente, gracias a Dios pude hacer mi participación en este bonito concurs, muchas gracias a mi cuñada dayana por ser mi modelo y lucir esta hermosa gargantilla que con mucha dedicación realice para compartir con todos ustedes
Hubiese gustado invitar a mi esposa @yanetzi1 a mi cuñada @joheisy y mi compañera @bayondalways1 a este bonito concurso, para que demostraran su talento.
Espero sea de su agrado este tutorial, bendiciones para todos.
Las fotografías fueron tomadas por mi teléfono tecno spark Go 2023.
Traductor Utilizado:Deepl traductor
Las imágenes son editadas mediante la aplicación canva
Greetings dear fellow members of this hive community, I hope you are well, I want to thank God for giving me the opportunity to be again sharing with all of you, for personal reasons I had been absent.
To close today, I decided to join the contest held by the creative community of Jewelry, making a choker of flowers accompanied with a striking multicolored bows, as the flowers are an essential part of what are the carnival festivities, as well as the different colors that can be seen in these parties.
Well dear colleagues, I invite you to join me to make this beautiful tutorial that with love and dedication I have made for all of you, then I will be presenting the materials used for the development of this beautiful and colorful choker.
Materials
Black, white, pink, blue, light orange, dark orange, yellow, light green, dark green, dark green, bright red and light purple.
Nylon thread or shoemaker's thread
Swarovski crystal
#12 mustard needle
Lighter or Tinder
Next I will be presenting the step by step used for the elaboration of this beautiful carnival choker.
Step 1
For the elaboration of this beautiful accessory we are going to need an approximate of 3 meters of nylon, we are going to thread our needle with the nylon and then we are going to introduce a bead of any color this will serve us as a support to begin to carry out our work.
Then we are going to introduce four beads of black color we will take it to the end of the thread, again we are going to introduce a bead of black color and we are going to introduce the needle by the third bead.
Again we are going to take a black bead, we are going to skip one and insert it in the next bead.
We will take a black bead and with the help of our needle we will go back through the center of the bead that we placed previously, again we will take a black bead and we will introduce the needle through the bead that is at the top and pull the thread.
Step 2 .
We will take a black bead and insert it through the second bead from top to bottom and pull the thread, then we will take an orange bead and insert the needle through the last black bead.
Again we are going to take an orange bead and from the bottom up we pass our needle through the orange bead that we introduced previously, then we will take another orange bead and pass our needle through the black bead that is at the bottom.
We will take a black bead and go back through the orange bead, we will take a bright red bead and put it through the last orange bead.
We are going to take an orange bead and go back with our yarn and insert it through the bright red bead and pull it through and again take an orange bead and insert our needle through the black bead.
we will take a black bead and go back through the orange bead and then take again an orange bead and introduce our needle through the last bead of the same color.
We will introduce a black bead and skip an orange bead and introduce it in the next one, take another one of the same color and skip the orange one and introduce it in the next black one.
We take a black bead and we go back introducing our needle through the bead of the same color we pull it to introduce another black bead and this one we are going to introduce it through the last bead of the same color.
We are going to repeat this procedure a couple of times, taking a black bead and then skip one and introduce the needle through the next one, this until we have a separation between each colored flower.
This way our beautiful orange flower will be ready, in the same way we are going to do the same step by step until we have the length or the amount of colored flowers you want, in my case I made 22 colored flowers, we can combine them with the colors that we like.
Step 3
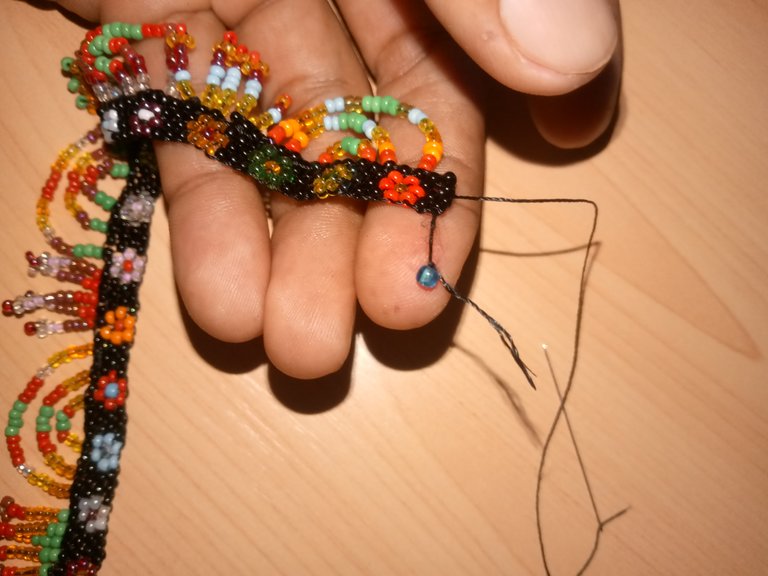
After finishing the 22 colorful flowers and having the separation we will introduce our needle through the beads that protrude, this to decrease the spaces.
Then we are going to introduce a bead of each color of the flowers that we made, then we are going to introduce the needle through the swarovski crystal, we are going to introduce 3 dark green beads and we return through all the beads that we introduced, this will be the clasp of our colorful choker.
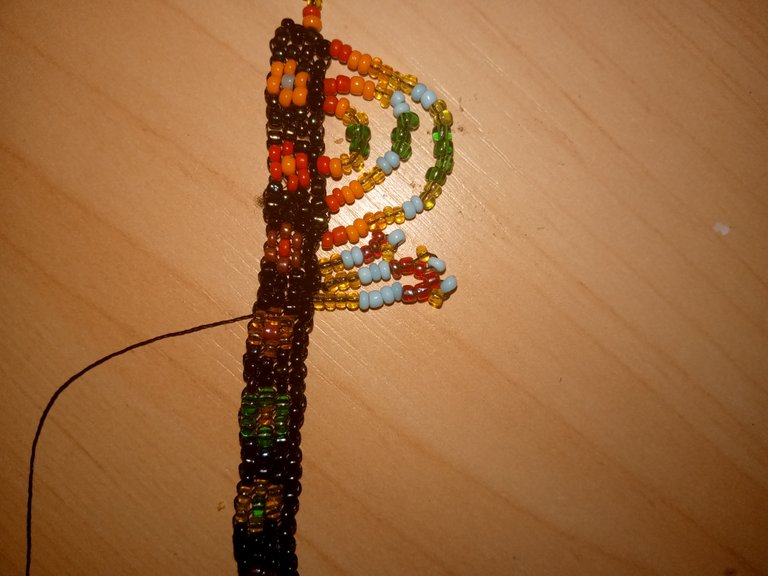
Step 4
For this step we will position ourselves at the bottom on the black bead, we will make an arc of many colors, we will introduce a total of 28 beads, and we will link the colors as we see fit, then we will count 13 black beads to then introduce our needle from the bottom up.
We are going to position our needle inwards leaving a bead in the middle, then we will take 19 beads and combine them with the ones we introduced previously so that the colors of our beautiful bow are coordinated and we introduce our needle leaving a bead in the middle.
Again we are going to leave a bead in the middle and we are going to position the needle to introduce 14 colored beads, we are also going to introduce the needle leaving a bead in the middle.
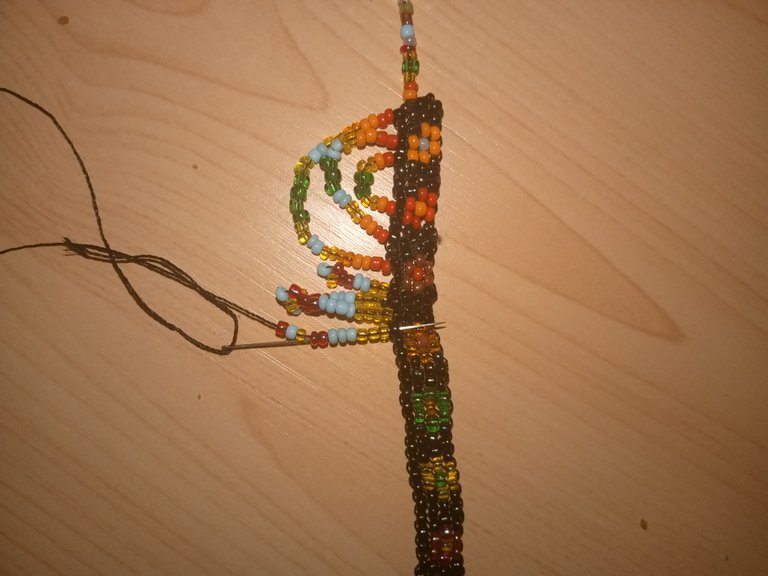
Step 5
Now we will attach some bangs to our beautiful choker, we are going to position our needle by inserting through each mustard until we reach the next side,
We are going to introduce nine beads these of the color of the taste of each one in my case I placed the colors of the flag of my beautiful country yellow blue and red, 2 yellow, 2 blue, 2 red and then 1 yellow, 1 blue and 1 red.
We are going to let the last three beads pass and we introduce them through the following ones, we will pass the needle through where our needle comes out.
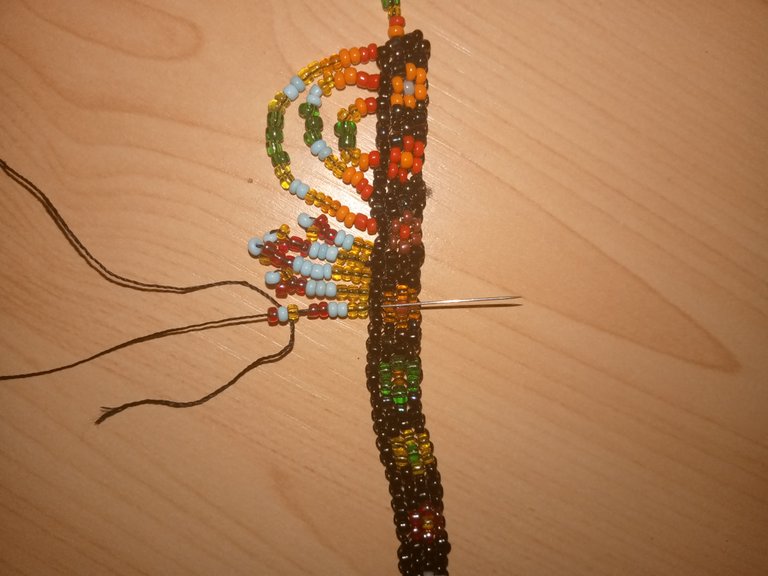
Then we place the needle through the next bead, this time we are going to introduce 11 beads, what we want is to increase each line of beads, we order them according to the color we want, we do the same procedure, skip the last three beads and introduce them completely through the black bead.
Again we are going to position our needle down on the next bead and we are going to take this time 12 beads in the same way we order them as we want and we skip the last three and introduce our needle completely through the black bead.
Now we are going to decrease like the previous one introducing 11 beads, then 9, we will do the same procedure letting the last three beads pass completely introducing the needle.
Now we are going to repeat the procedure until we have covered our flowers with bows and colored bangs.
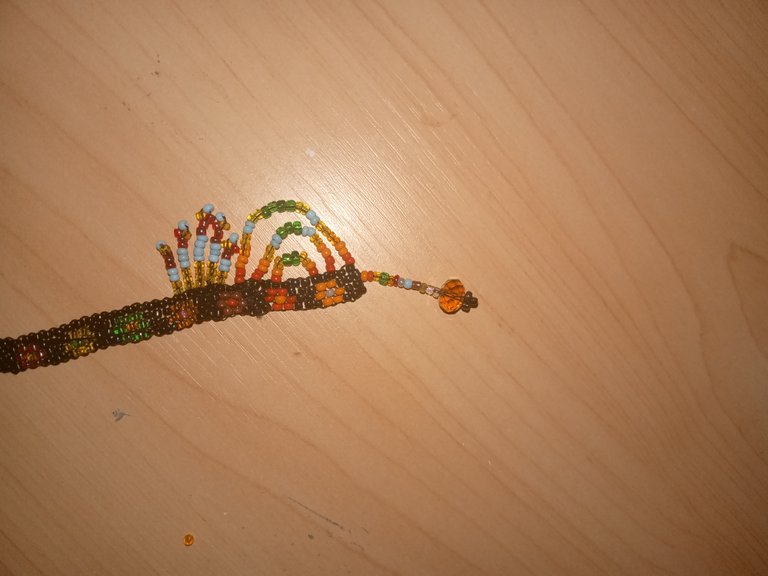
Step 6
For this last step we are going to go reducing the spaces inteoduciendo the needle by the black beads, then we will remove the support that we placed starting, we make several knots and with the help of the lighter we seal.
After having taken the nylon to the center of the beads, we are going to introduce 4 black beads, then 19 beads of different colors, the colors that you like, we are going to introduce our needle through the 4 black beads and pull them,
Then we hide our thread through the beads and making several knots and with the help of the lighter we seal our beautiful choker to wear in these carnivals.
This way our beautiful bracelet would be ready to show off in these carnival festivities
I would have liked to participate with more time, but as I had told you for personal reasons I was absent, thank God I could make my participation in this beautiful contest, thank you very much to my sister-in-law Dayana for being my model and wear this beautiful choker that I made with great dedication to share with all of you.
I would have liked to invite my wife @yanetzi1, my sister in law @joheisy and my partner @bayondalways1 to this beautiful contest, so they could show their talent.
I hope you like this tutorial, blessings to all.
The pictures were taken by my tecno spark Go 2023 phone.
Translator Used:Deepl translator
Images are edited using canva application.
Que hermosa creación! Realizar este trabajo en mostacilla es muy laborioso. Te felicito
Muchas gracias! Si amiga lleva trabajo, pero con dedicación todo es posible, bendiciones
Te ha quedado muy hermosa.. gracias por la mención 💪🏻💕🤗🤗🤗🤗, tus creaciones son únicas amigo, suerte en el concurso 🎉🤗
Muchas gracias amiga, bendiciones para ti.
Una hermosa gargantilla, sin duda es un trabajo minucioso y colorido, las flores y los detalles llaman mucho la atención.
Mucho éxito en el concurso 🎊 🎉
Muchas gracias, bendiciones.
Excelente trabajo amigo me encanto..
Congratulations @afrofat1! You have completed the following achievement on the Hive blockchain And have been rewarded with New badge(s)
Your next target is to reach 1250 upvotes.
You can view your badges on your board and compare yourself to others in the Ranking
If you no longer want to receive notifications, reply to this comment with the word
STOPCheck out our last posts: