
| Boys want to accessorize too. Mouse tail bracelet. | Los chicos también quieren accesorios. Pulsera con cola de ratón. |
|---|---|
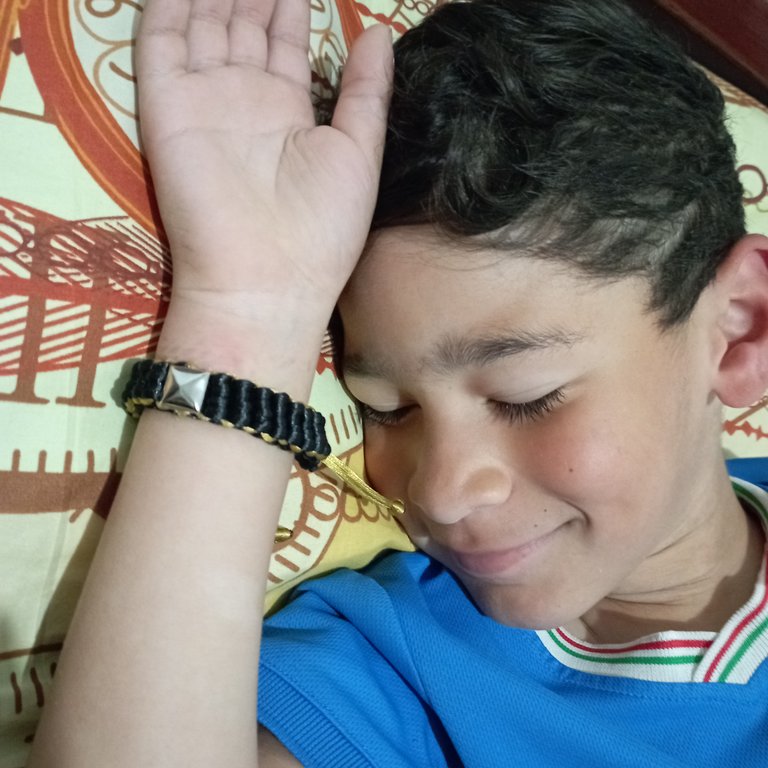
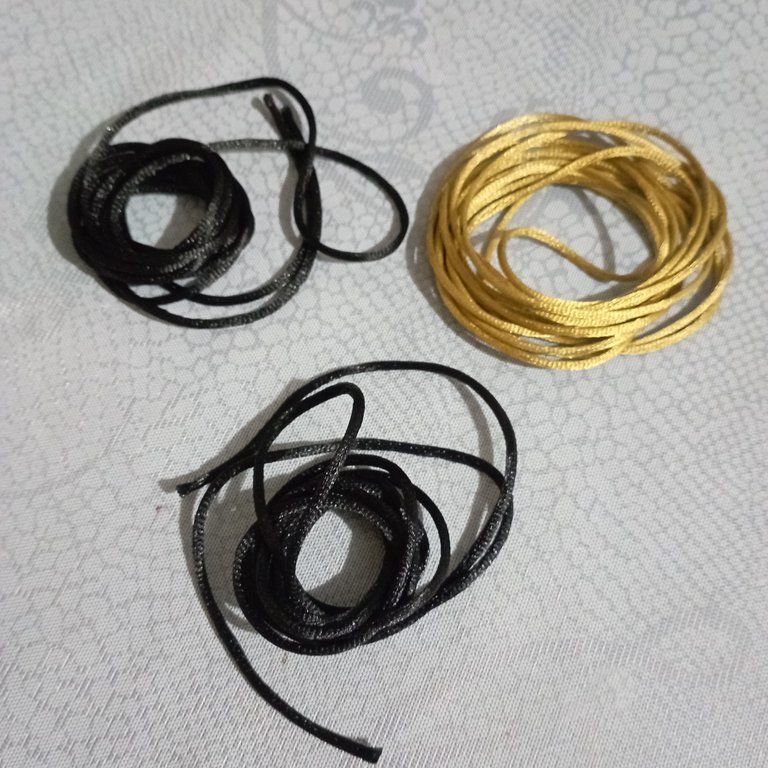
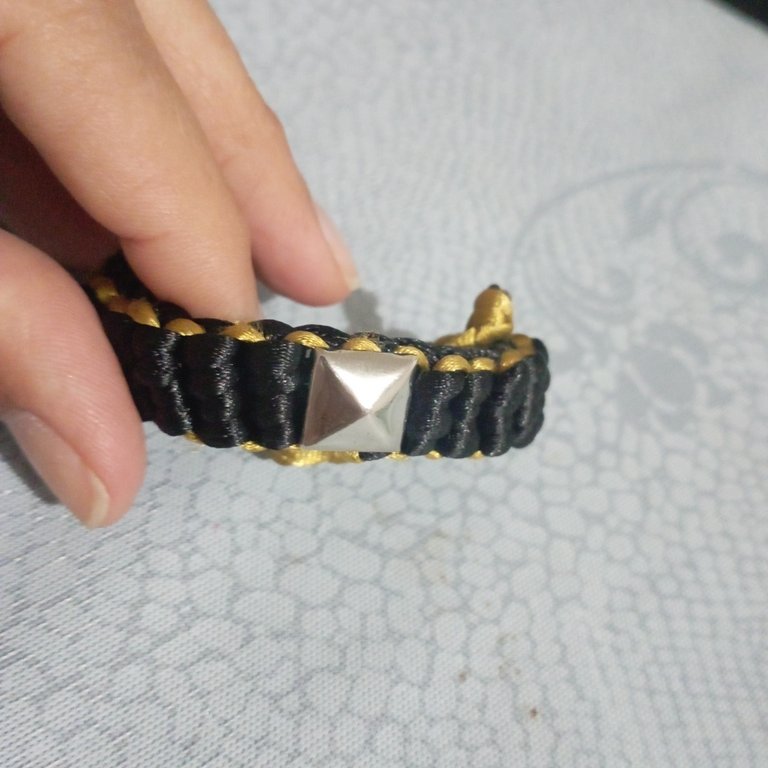
My son Carlos started protesting because I have been accessorizing his sister and I never make anything for him. His protest has no other purpose than to get my attention and for me to also spend time with him taking pictures and making him a part of the content I create for #jewelry. I am very touched that he wants to be part of what I do, and he is very right in demanding attention, I admit that I have involved myself more to the baby than to him, that's why I made him a bracelet with gold and black mouse tail and I put a silver colored square stud that gave him the special touch because. I share with you the list of materials: | Mi hijo Carlos empezó a protestar porque le he estado haciendo accesorios a su hermana y nunca le hago nada a él. Su protesta no tiene otro fin que el de llamar mi atención y que pase tiempo también con él tomando fotos y haciéndolo participe del contenido que creo para #jewelry. Me conmueve mucho que quiera ser parte de lo hago, y tiene mucha razón en reclamar atención, admito que me he involucrado más a la nena que a él, es por ello que le hice una pulsera con cola de ratón dorado y negro y le puse una tacha cuadrada de color plata que que le dió el toque especial porque. Les comparto la lista de materiales: |
2 meters of gold mouse tail.
2 meters of black mouse tail.
1 square silver-colored square block.
Lighter.
Instant glue.
Scissors.
2 metros de cola de ratón dorada.
2 metros de cola de ratón negro.
1 tacha de cuadrada color plata.
Encendedor.
Pegamento instantáneo.
Tijeras.
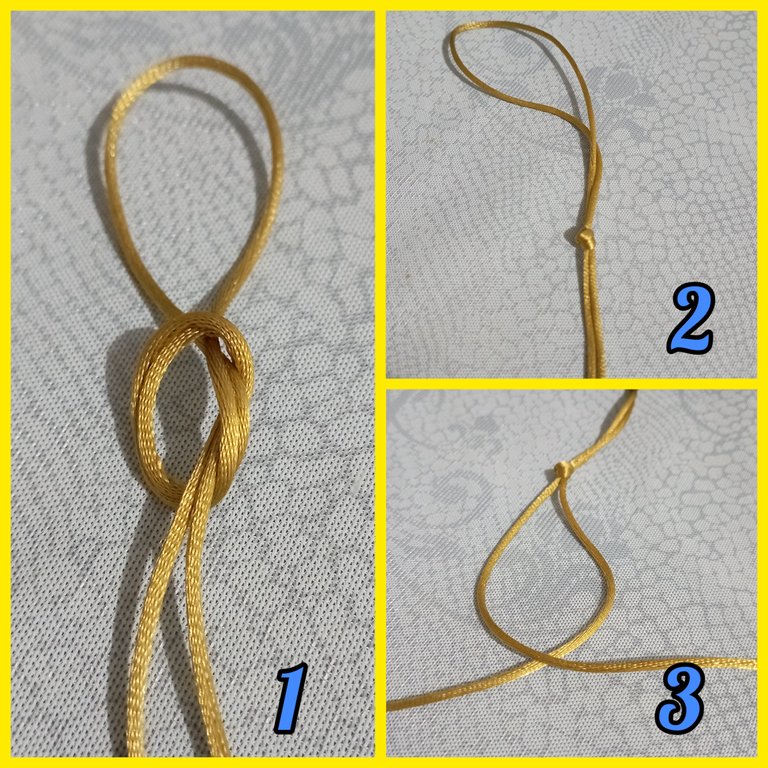
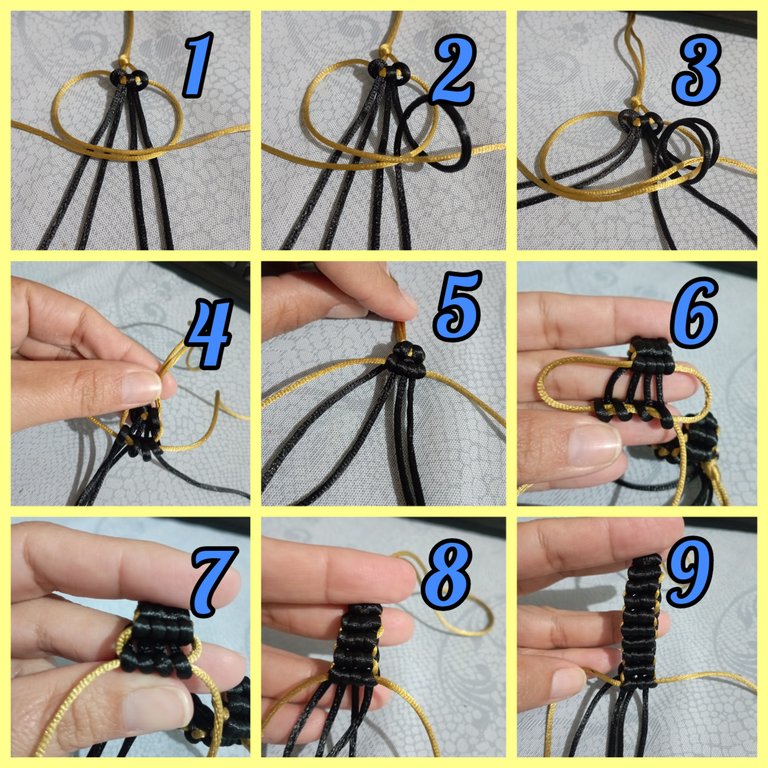
Take the gold-colored cord and fold it in half. We make a knot in the fold approximately 10 centimeters from the tip. If we wish we cut it or we can leave it to cut it at the end. The part that remains open we pass it from one side to the other making an X as shown in image number 3 of the photo. | Tomamos el cordón color dorado y lo doblamos a la mitad. Hacemos un nudo en el doblez aproximadamente a 10 centímetros de la punta. Si deseamos lo cortamos o lo podemos dejar para cortarlo al final. La parte que queda abierta la pasamos de un lado al otro haciendo una X como se muestra en la imagen número 3 de la foto. |

We cut the black cord in half to have two strands of one meter each. We fold one of the cords in half forming an inverted U, we position it behind the X that we have made with the golden cord and then we bring it forward and pass the two ends between the semi-circle that is formed giving origin to a knot. We take the second cord and do the same with the difference that we pass the ends or tips in front of the new half circle as shown in figure 5. At this point we will have two external and two internal threads, with a toothpick we lift the internal threads and bring them forward and tighten to form the first link. | El cordón negro lo hemos cortado a la mitad para tener dos hilos de un metro cada uno. Doblamos uno de los cordones a la mitad formando una U invertida, lo posicionamos detrás de la X que hemos realizado con el cordón dorado y luego lo llevamos hacia adelante y pasamos las dos puntas entre semi círculo que se forma dando origen a un nudo. Tomamos el segundo cordón hacemos lo mismo con la diferencia de que pasamos los extremos o puntas por delante del nuevo semi círculo como se muestra en la figura 5. En este punto tendremos dos hilos externos y dos internos, con un palillo levantamos los hilos internos y los traemos hacia adelante y apretamos para formar el primer eslabón. |
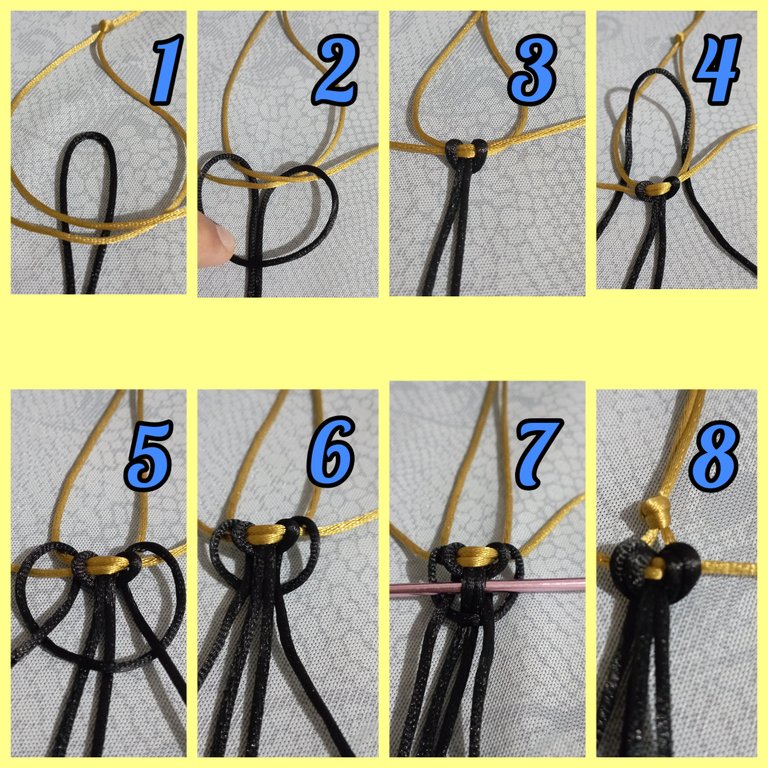
Now we move forward with the next links, making a new X in front of the black cords. We only cross over the golden cords. We take a cord working from right to left and pass it between the next black dining room, making a turn over the golden cord as shown in figure 2 of the photo. Repeat with the next black cord wrapping it around the golden cord and so on until we reach the fourth cord. We pull the golden ends and tighten while pulling the black cords. We keep repeating as long as we have black threads, and we notice how the bracelet takes shape. | Ahora avanzamos con los eslabones siguientes, haciendo una nueva X delante de los cordones negros. Solo cruzamos sobre si mismos los cordones dorados. Tomamos un cordón trabajando de derecha a izquierda y lo pasamos entre en siguiente comedor negro dando una vuelta sobre el cordón dorado como lo nuestra la figura 2 de la foto. Repetimos con el siguiente cordón negro enrollando alrededor dorado y así hasta llegar hasta el cuarto cordón. Tiramos de los extremos dorados y apretamos al tiempo que vamos tirando de los cordones negro. Seguimos repitiendo mientras tengamos hilos negros, y vamos notando cómo toma forma la pulsera. |
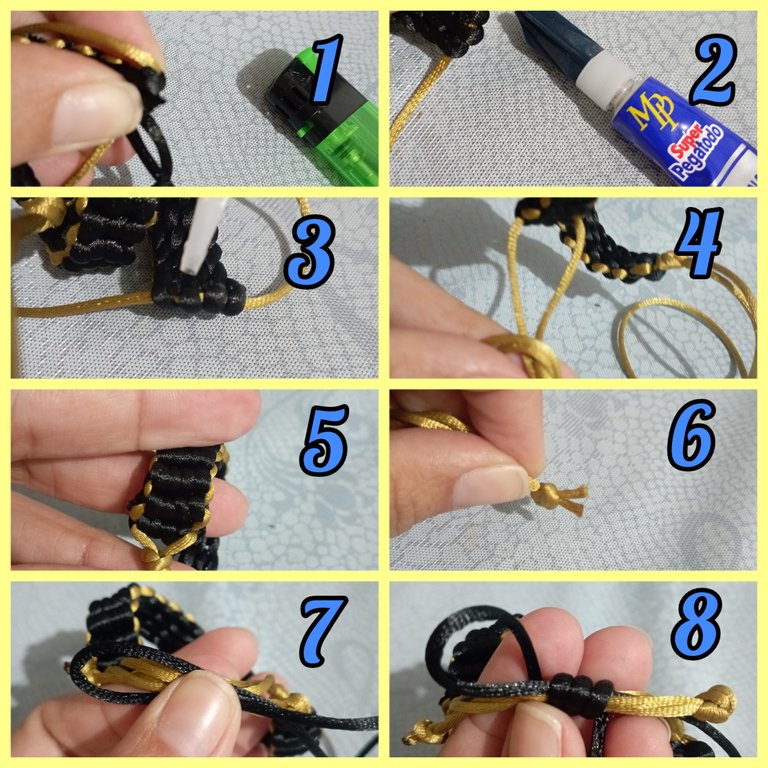
When we have reached the end we cut the leftovers one at a time and with the lighter we seal them. I applied a dot of instant glue to make sure it doesn't come loose. To finish and make a closing knot, we made a slip knot with a piece of black cord, we placed the ends of the bracelet one on top of the other and with the black cord we formed a loop over the golden threads as shown in figure 7 and then we made three or four turns around with the black cord and passed the end through the loop we formed. | Cuando hemos llegado al final cortamos los sobrantes uno a la vez y con el encendedor los sellamos. Apliqué un punto de pegamento instantáneo para asegurarme de que no se suelte. Para terminar y hacer un nudo de cierre, realizamos un nudo corredizo con un trozo de cordón negro, colocamos los extremos de la pulsera uno sobre otro y con el cordón negro formamos una lazada sobre los hilos dorados como se muestra en la figura 7 y luego damos tres o cuatro vueltas alrededor con el cordón negro y pasamos la punta por la lazada que hemos formado. |
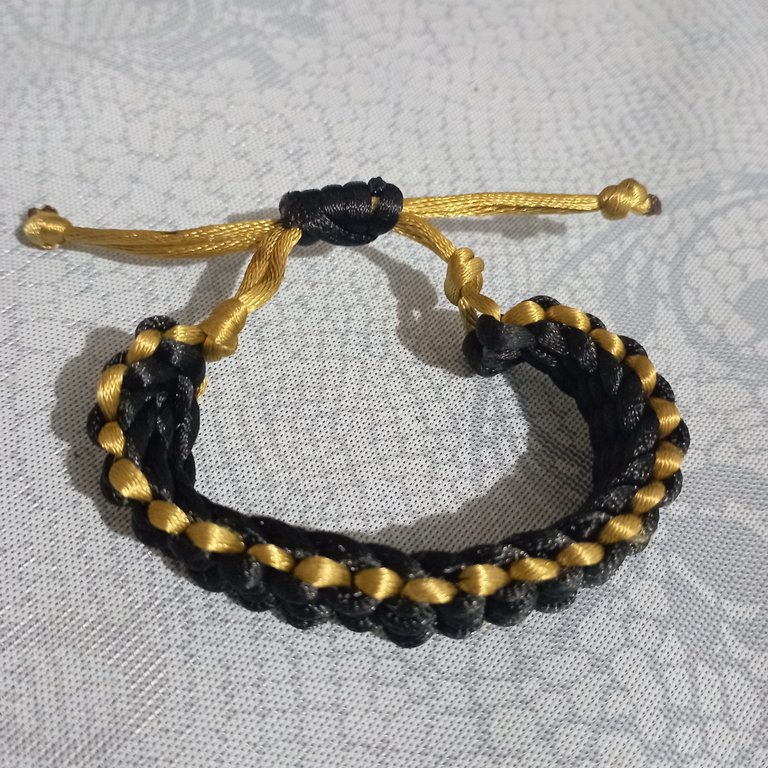
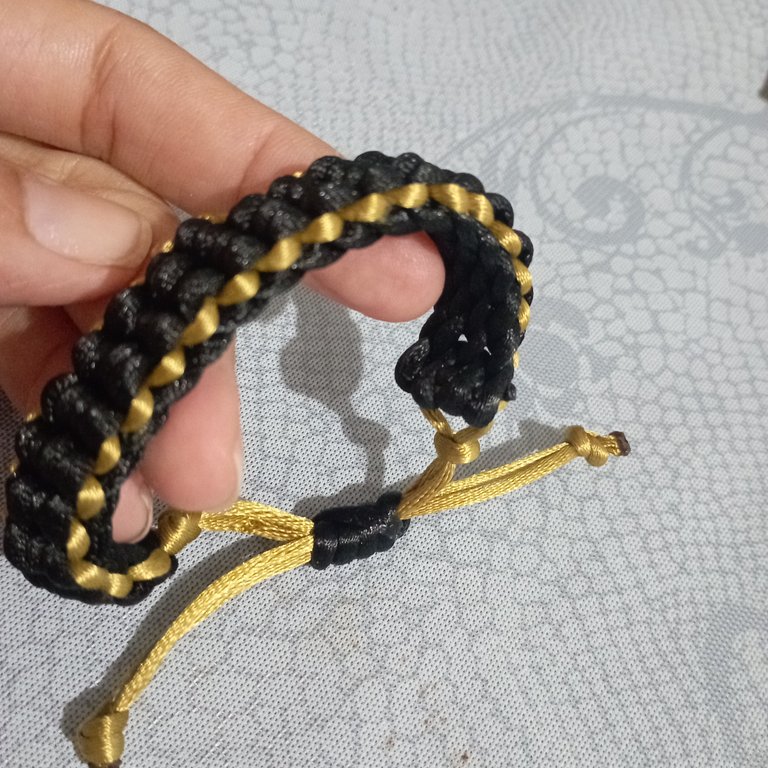
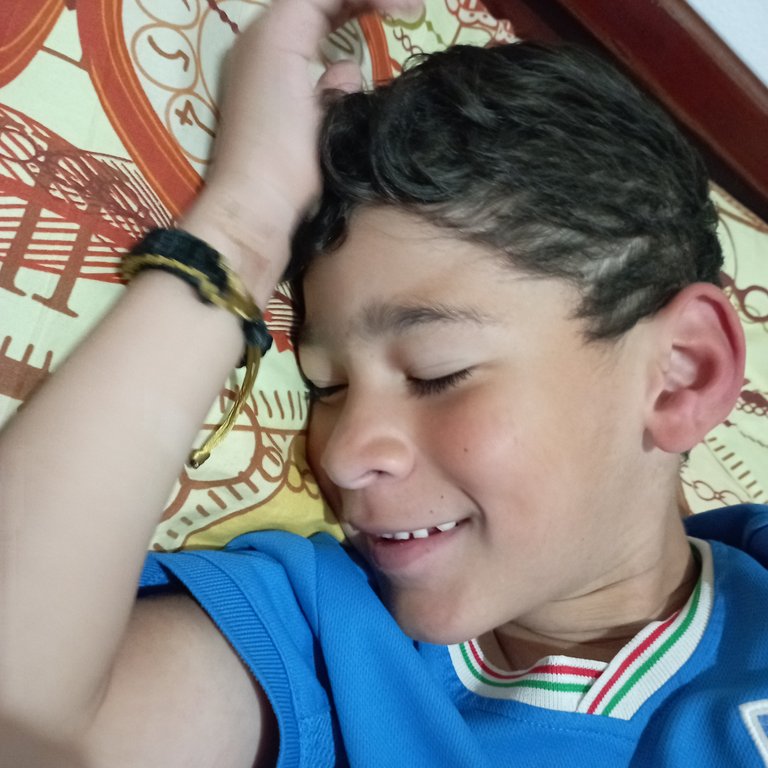
This weaving is very easy to do, plus it is very relaxing to work on. The part of a little more difficulty is the beginning because the weave has no structure until we advance to the third knot, then everything happens by itself. When I had the bracelet ready I put it on my son and waited for him to wake up, when he discovered the bracelet on his wrist he was happy and gave me that smile that has always made me sigh. I share the photos with you. There is a picture that is not very clear and it is just when he wakes up and sees the bracelet, I apologize because it is not so clear but I wanted to share it because I loved this moment and it is not a pose, it is an authentic reaction so it can't be done again. I hope you like it. Bye Bye. | Este entramado es muy fácil de realizar, además de que es muy relajante trabajar en ello. La parte de un poco más de dificultad es el principio ya que no el tejido no tiene estructura hasta que avanzamos hasta el tercer nudo, después todo se da por si solo. Cuando tuve la pulsera lista se la puse a mi hijo y esperé a que se despertara, cuando descubrió la pulsera en su muñeca se puso feliz y me dio esa sonrisa que me hace suspirar desde siempre. Les comparto las fotos. Hay una foto que no está muy nítida y es justo cuando se despierta y ve la pulsera, pido disculpas porque no se ve tan clara aún así la quise compartir porque amé este momento y no es una pose, es una reacción auténtica por lo que no se puede hacer de nuevo. Espero les guste. Chao Chao. |

Imágenes editadas en: itshot
Fotos tomadas con Redmi 10
Images edited in: itshot
Photos taken with Redmi 10
Muy linda la pulsera que le realizaste a tu príncipe, se ve que quedó feliz con ella. Me encantó ese tejido. Gracias por compartir tu bonito trabajo @artsugar 🥰🌹😘❤️
Gracias amiga..si está súper contento..que cosas que con pequeños detalles podemos crear un momento especial con nuestros hijos.
Gracias por tu comentario.
Abrazos
Claro que si los.chicos también les gustan los accesorios 😉, a tu hijo le queda muy bien está pulsera que has realizado, ese entramado se ve difícil pero has logrado explicarlo muy bien 👍 para que se vea fácil, excelente trabajo.
Jajajajaja...uyyy si. Se ve difícil pero es muy sencillo. Que bueno que se haya entendido la explicación. Tenía dudas y un poco de preocupación por que no se entendiera.
Gracias por dejarme tan amable comentario y valorar este aporte para la comunidad.
Exitos y bendiciones
Do not lay the blame on the boy complaining because he loves you and what you do. I love the way you made him profound to be shown in the jewelry as he suggested.
Yesss...actually what he wanted was a little attention, that's why I wanted to give him a little present made with my hands to let him know that I also think of him and that I enjoy the time we are together and making this for him.
Thank you for your comment. 😊