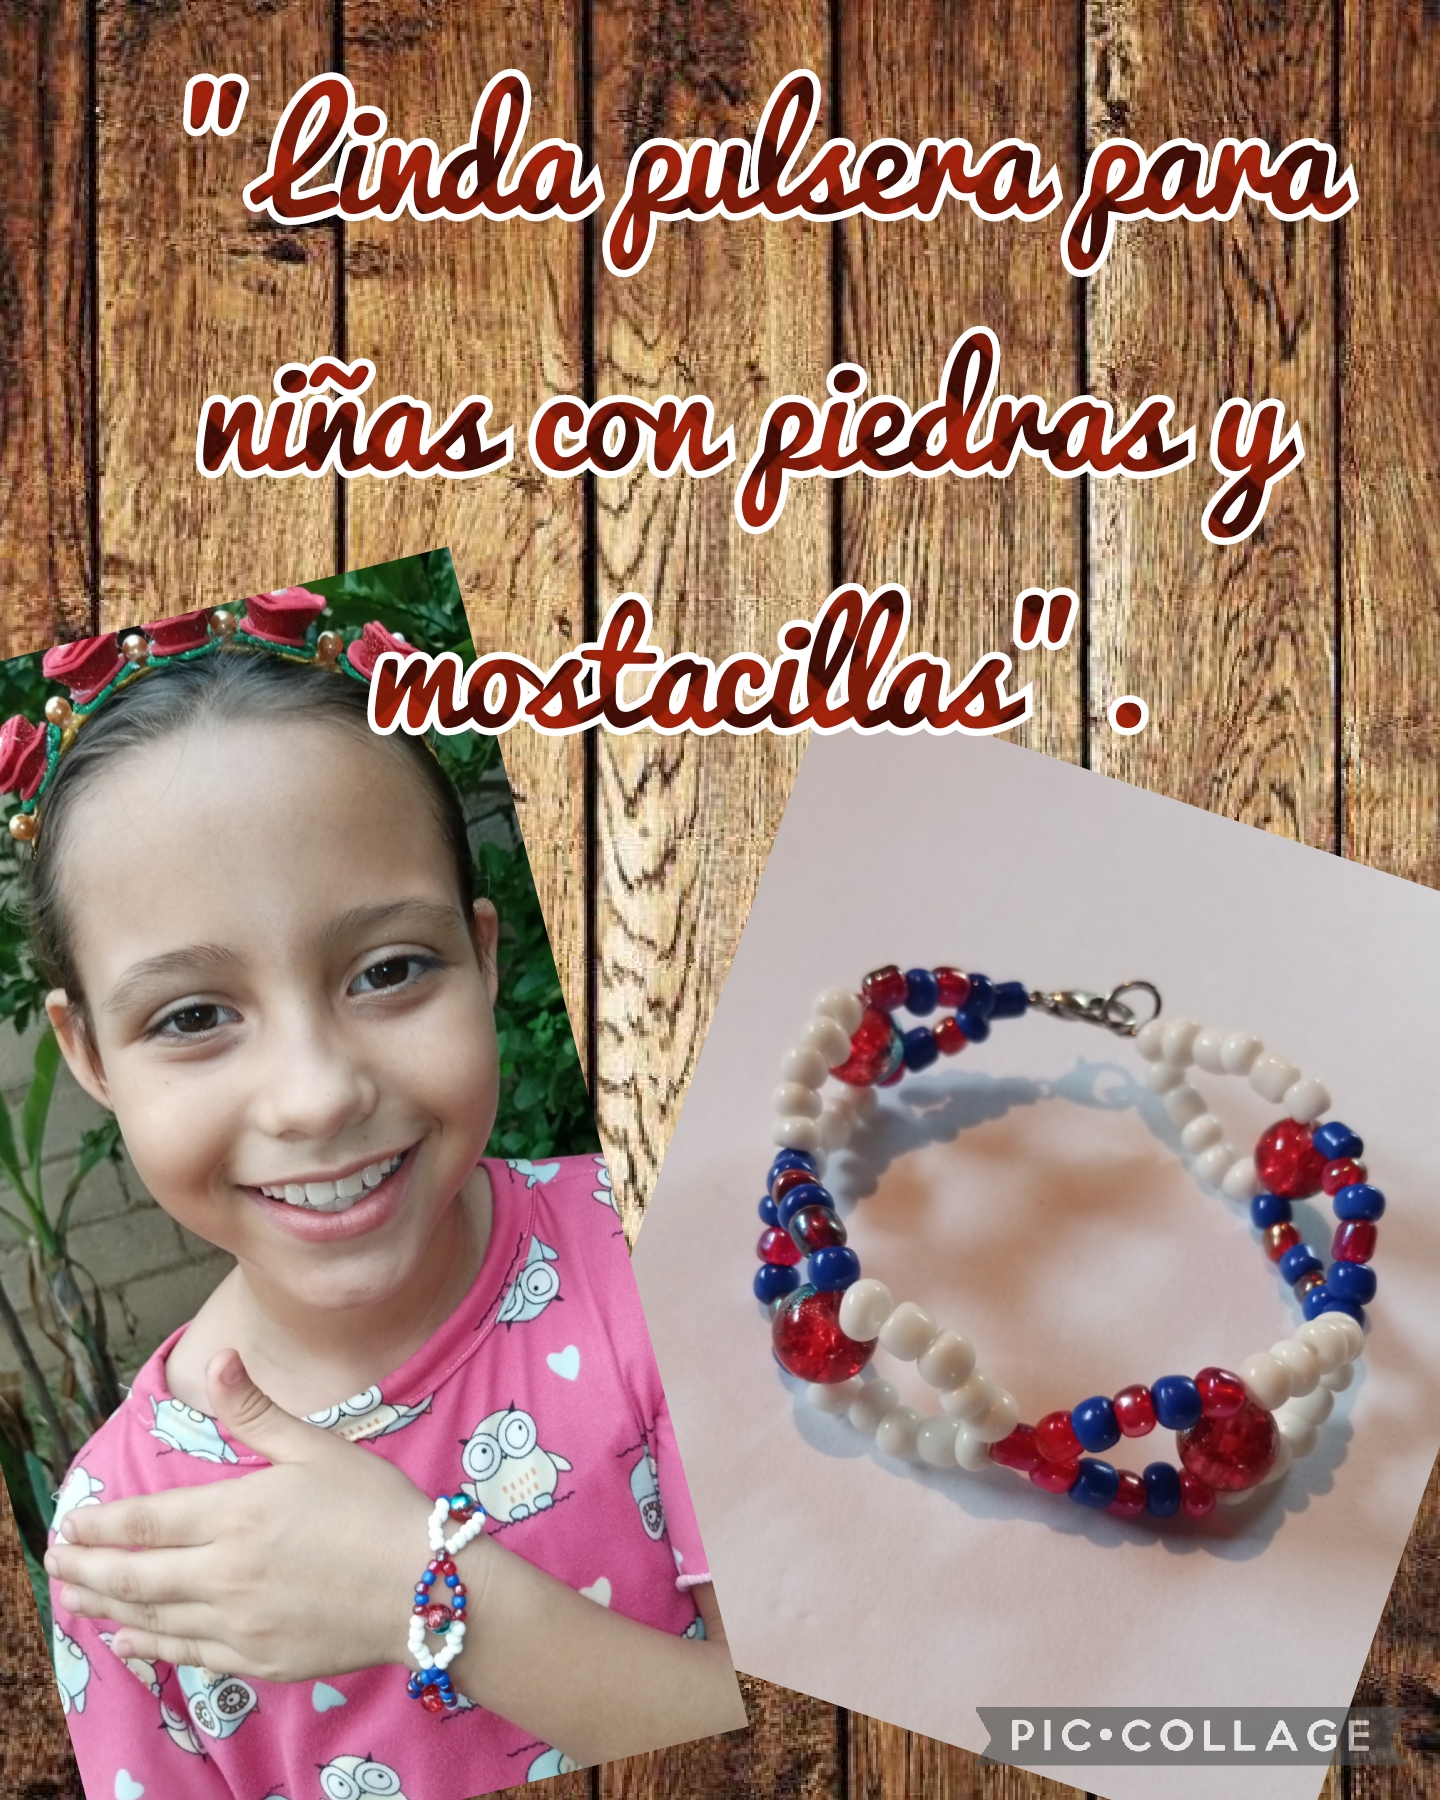
Muy buenas noches, para todas mis amigas creativas, de esta maravillosa comunidad Jewelry, espero se encuentren muy bien, nuevamente les doy la bienvenida a mi blog, hoy les quiero mostrar el paso a paso, de como vamos a realizar una linda pulsera, para niñas utilizando los materiales mostacillas y piedras para bisutería, esta pulsera es ideal para las niñas ya que amos a utilizar clores muy lindos.
Amigas les cuento que me gusto mucho este modelo, para las niñas, y a mi hija que le gusta mucho la bisutería le va a
encantar, esta pulsera es muy fácil y sencilla de realizar, ustedes viendo el paso a paso la podrán realizar, ahora sin mas que decir, vamos a comenzar con el paso a paso, seguro se van a divertir tanto como yo.
Good evening, to all my creative friends, from this wonderful Jewelry community, I hope you are doing well, I welcome you back to my blog, today I want to show you step by step how we are going to make a nice bracelet, to girls using the materials beads and stones for jewelry, this bracelet is ideal for girls since we love to use very cute colors.
Friends, I will tell you that I really liked this model, for girls, and my daughter, who likes jewelry a lot, will love it.
love it, this bracelet is very easy and simple to make, you can do it step by step, now without further ado, we are going to start with the step by step, you will surely have as much fun as I did.
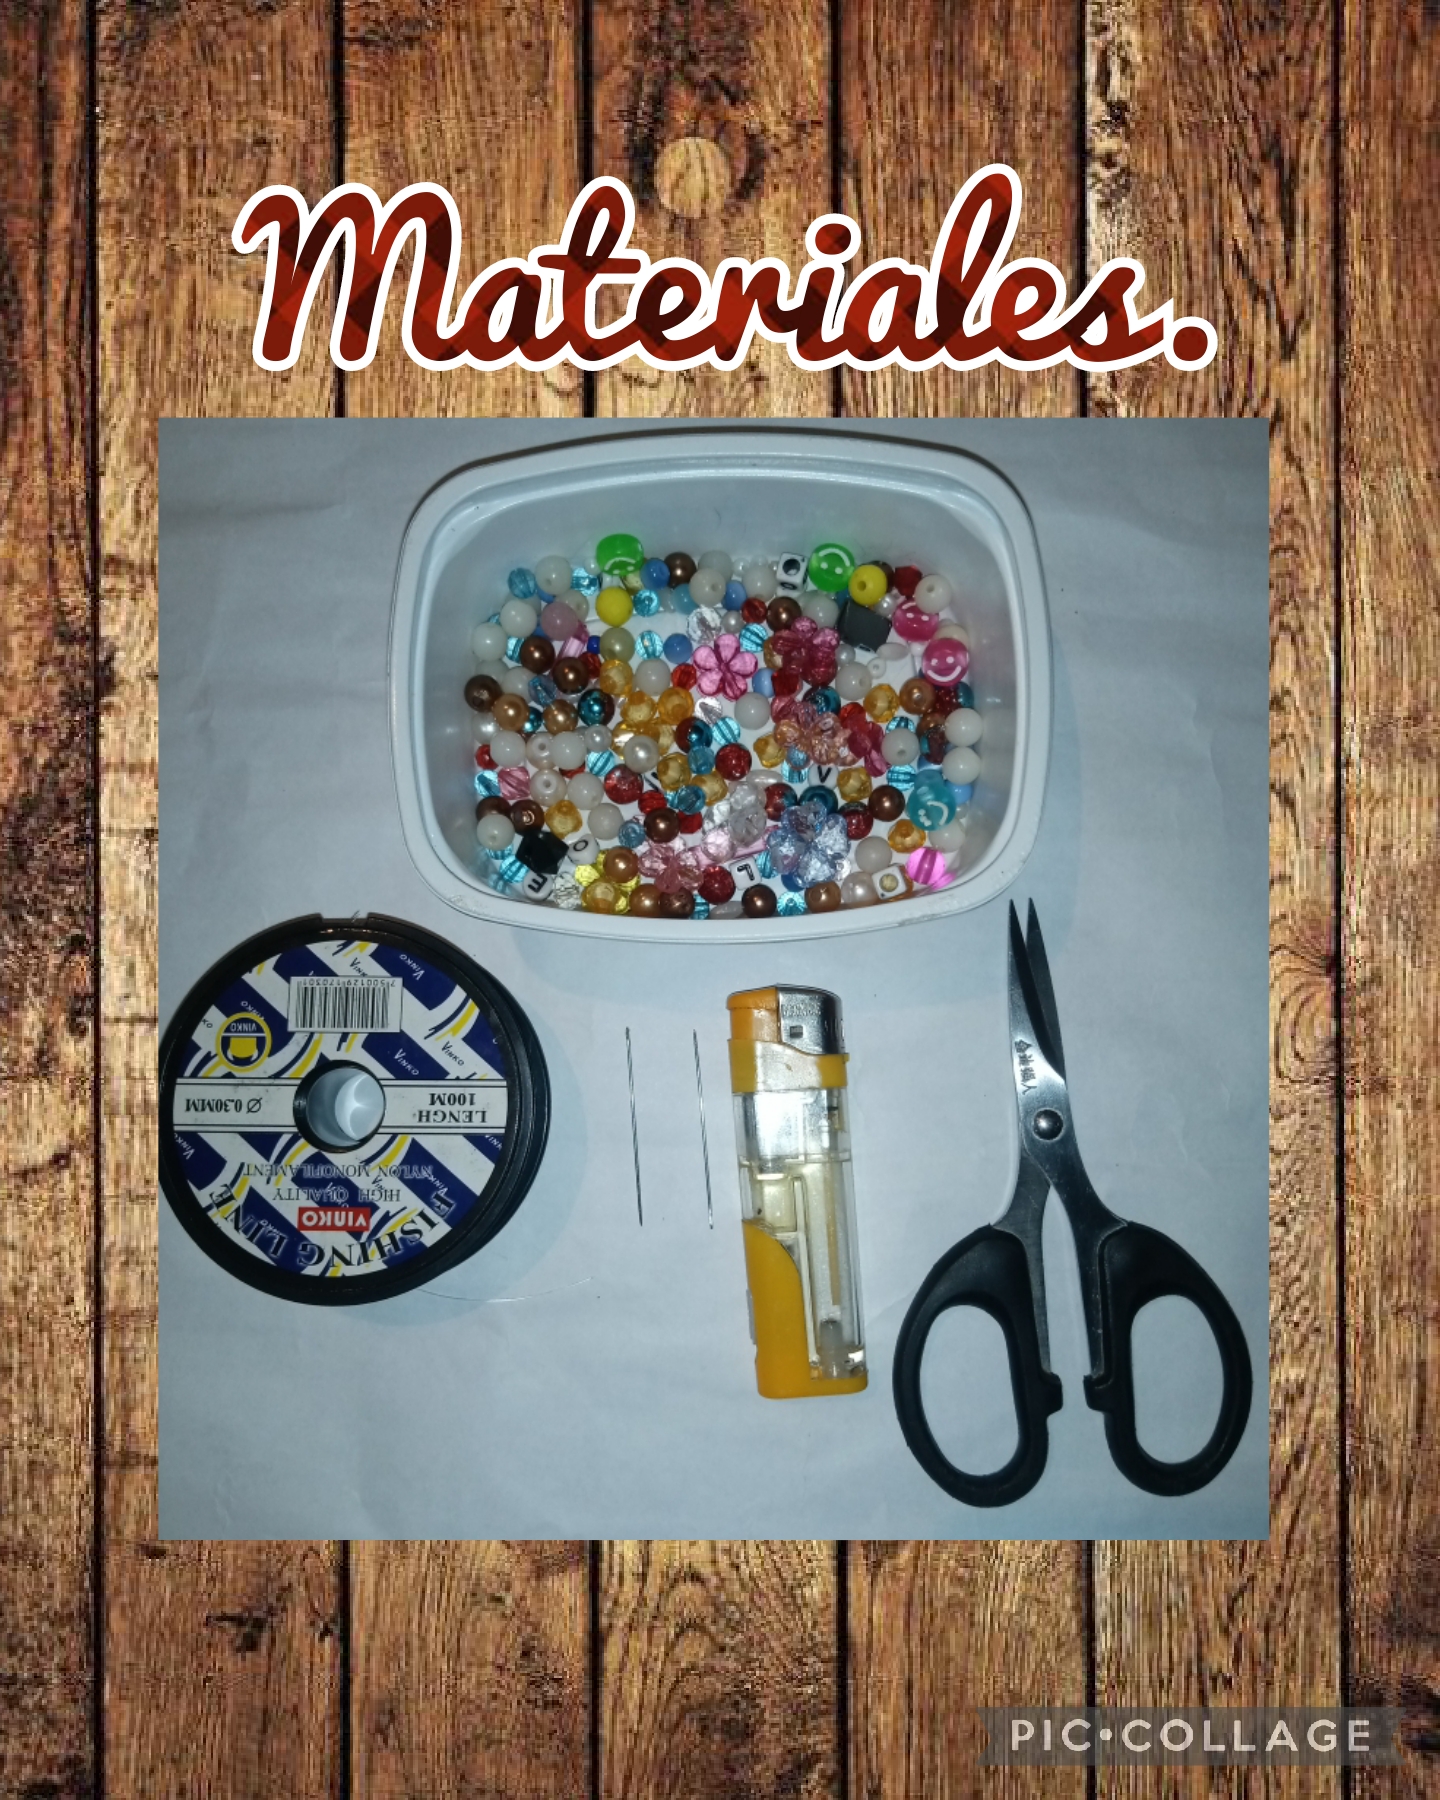
Para realizar esta linda pulsera, para niñas vamos a necesitar los siguientes materiales y herramientas:
*Hilo transparente de nailon.
*2 agujas para coser.
*Mostacillas color azul, roja y blanca.
*Piedras para bisuteria.
*1 tijera.
*1 regla métrica
*1 encendedor..
To make this cute bracelet for girls we will need the following materials and tools:
*Transparent nylon thread.
*2 sewing needles.
*Blue, red and white beads.
*Stones for jewelry.
*1 scissors.
*1 metric ruler
*1 lighter.
Let's start with the step by step of this fun tutorial
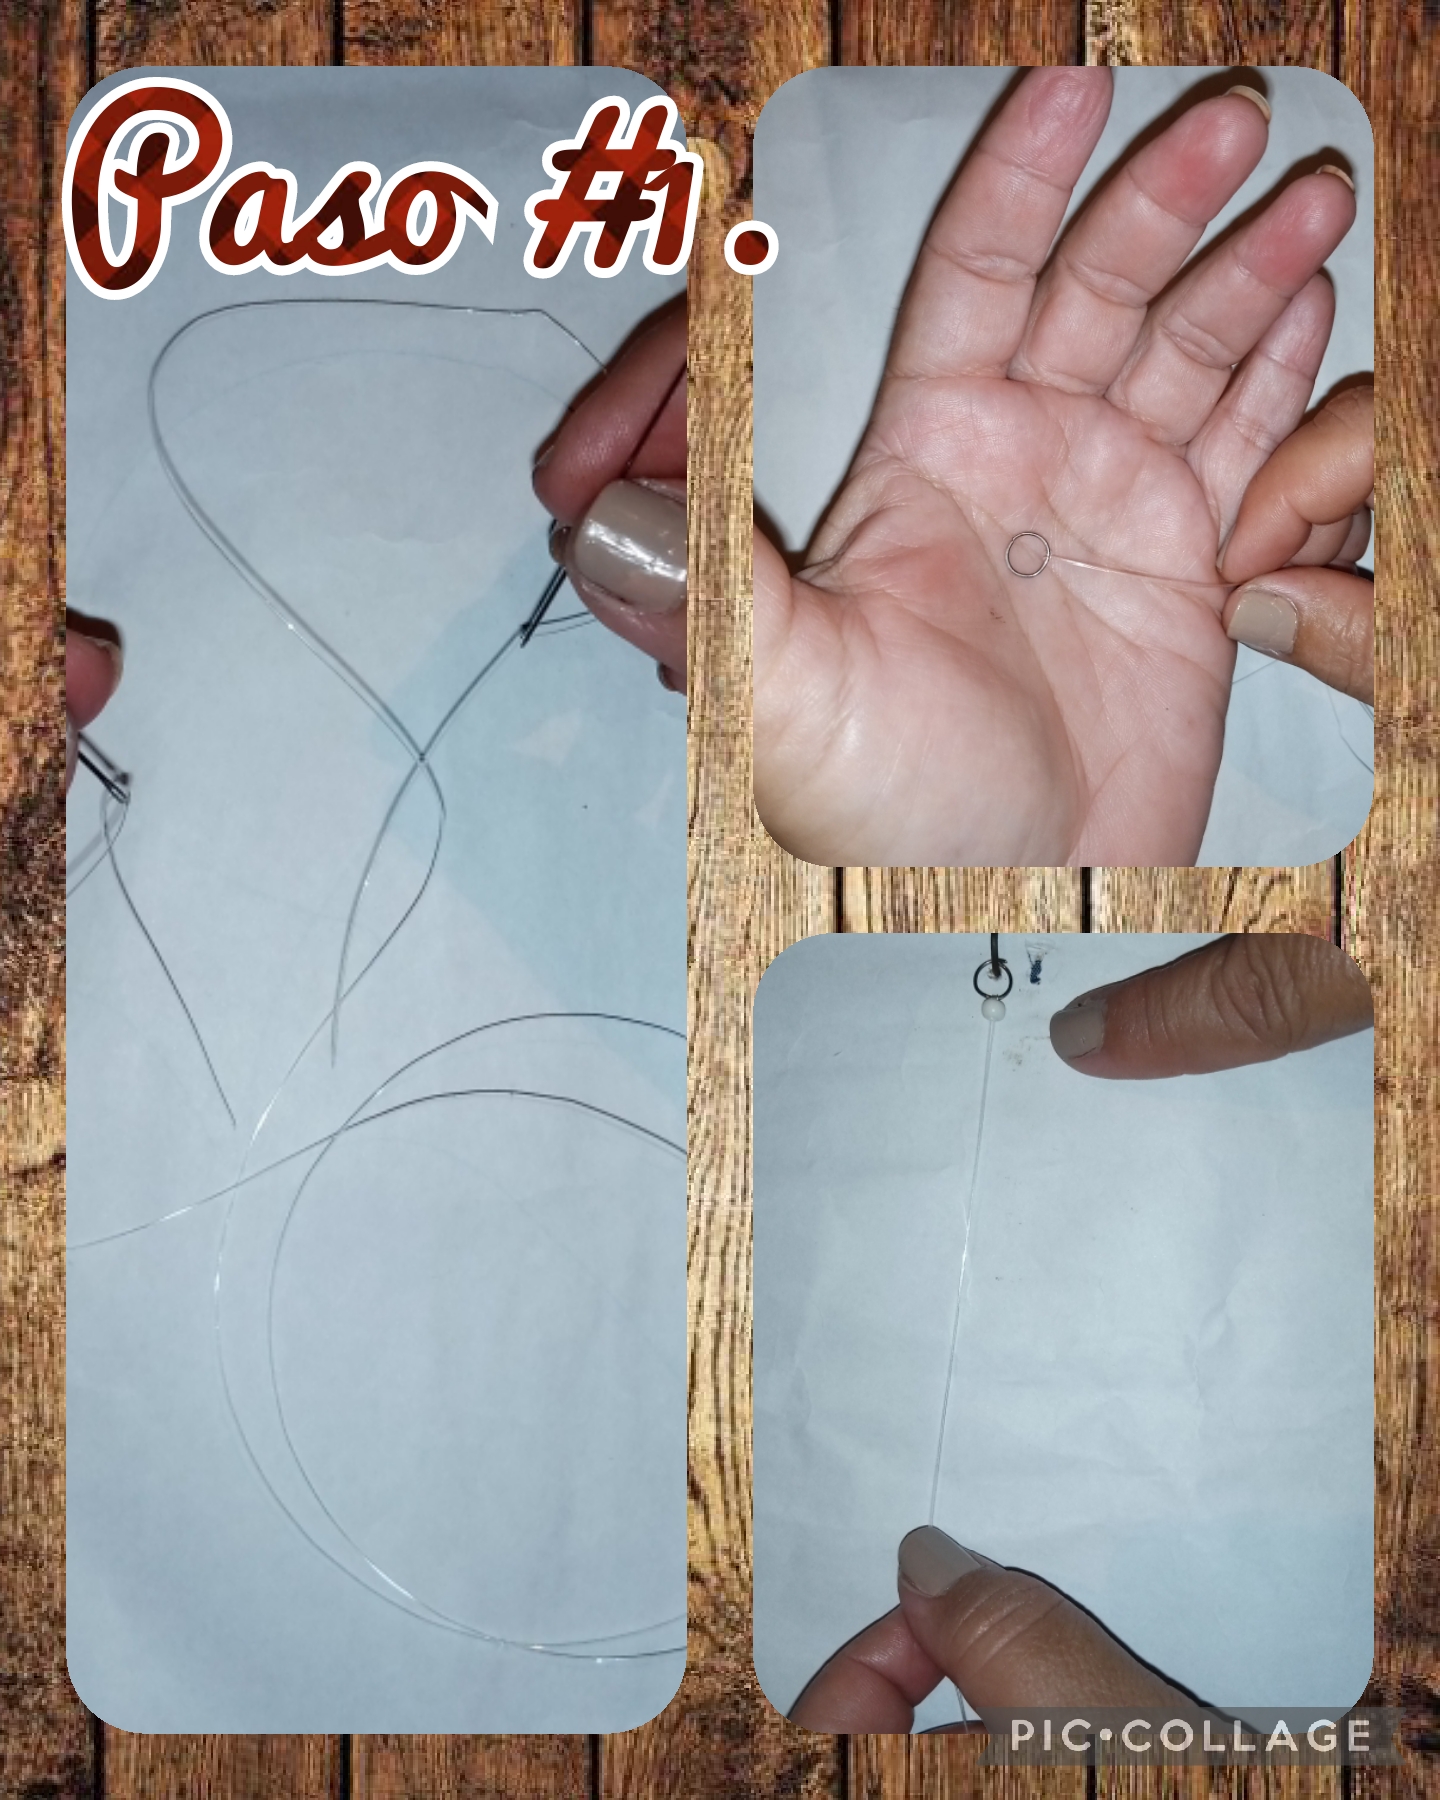
Step #1. We are going to start with the step by step to make a beautiful bracelet, for girls, and we are going to do it as follows, the first thing we are going to do is, we take a metric ruler and the nylon thread, and we are going to take the measure of 70 centimeters we are going to fold it into 2 equal parts, then we take the 2 sewing needles and insert them into each end of the nylon thread, then we insert the metal ring and bring it to the center, see the images.
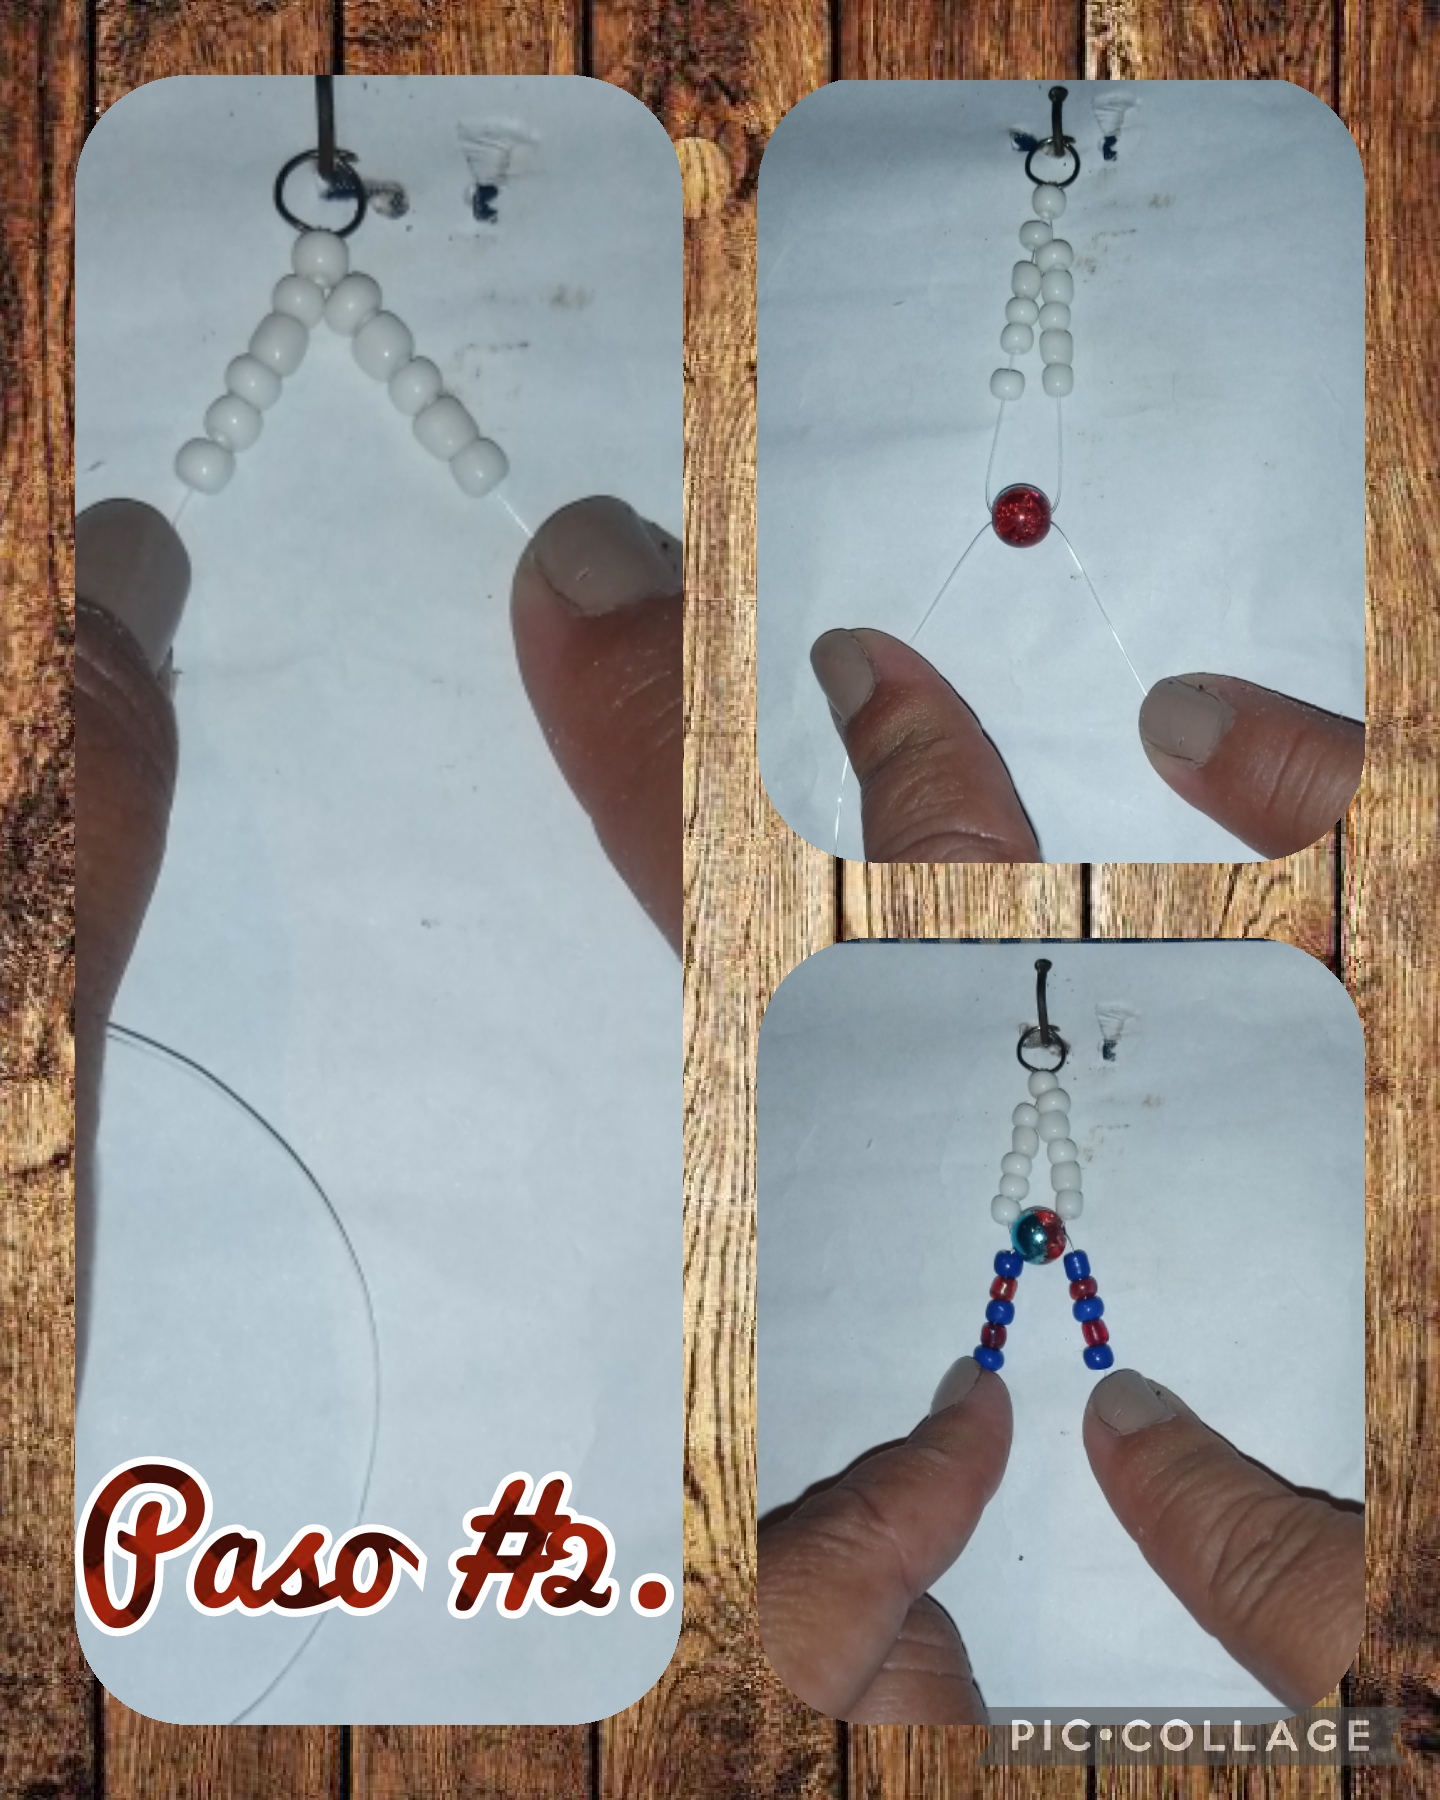
Step #2. In this step we are going to start to form the bracelet, first we are going to insert a bead in the two threads, and we take it to the part where the metal ring is, then we begin to insert 5 white beads at each end. , then we insert 1 multicolored stone, in the two threads, and we take them where the white beads are, we reinsert the beads at the ends in this case there are 5 at each end but of 2 blue and red colors, see the images.
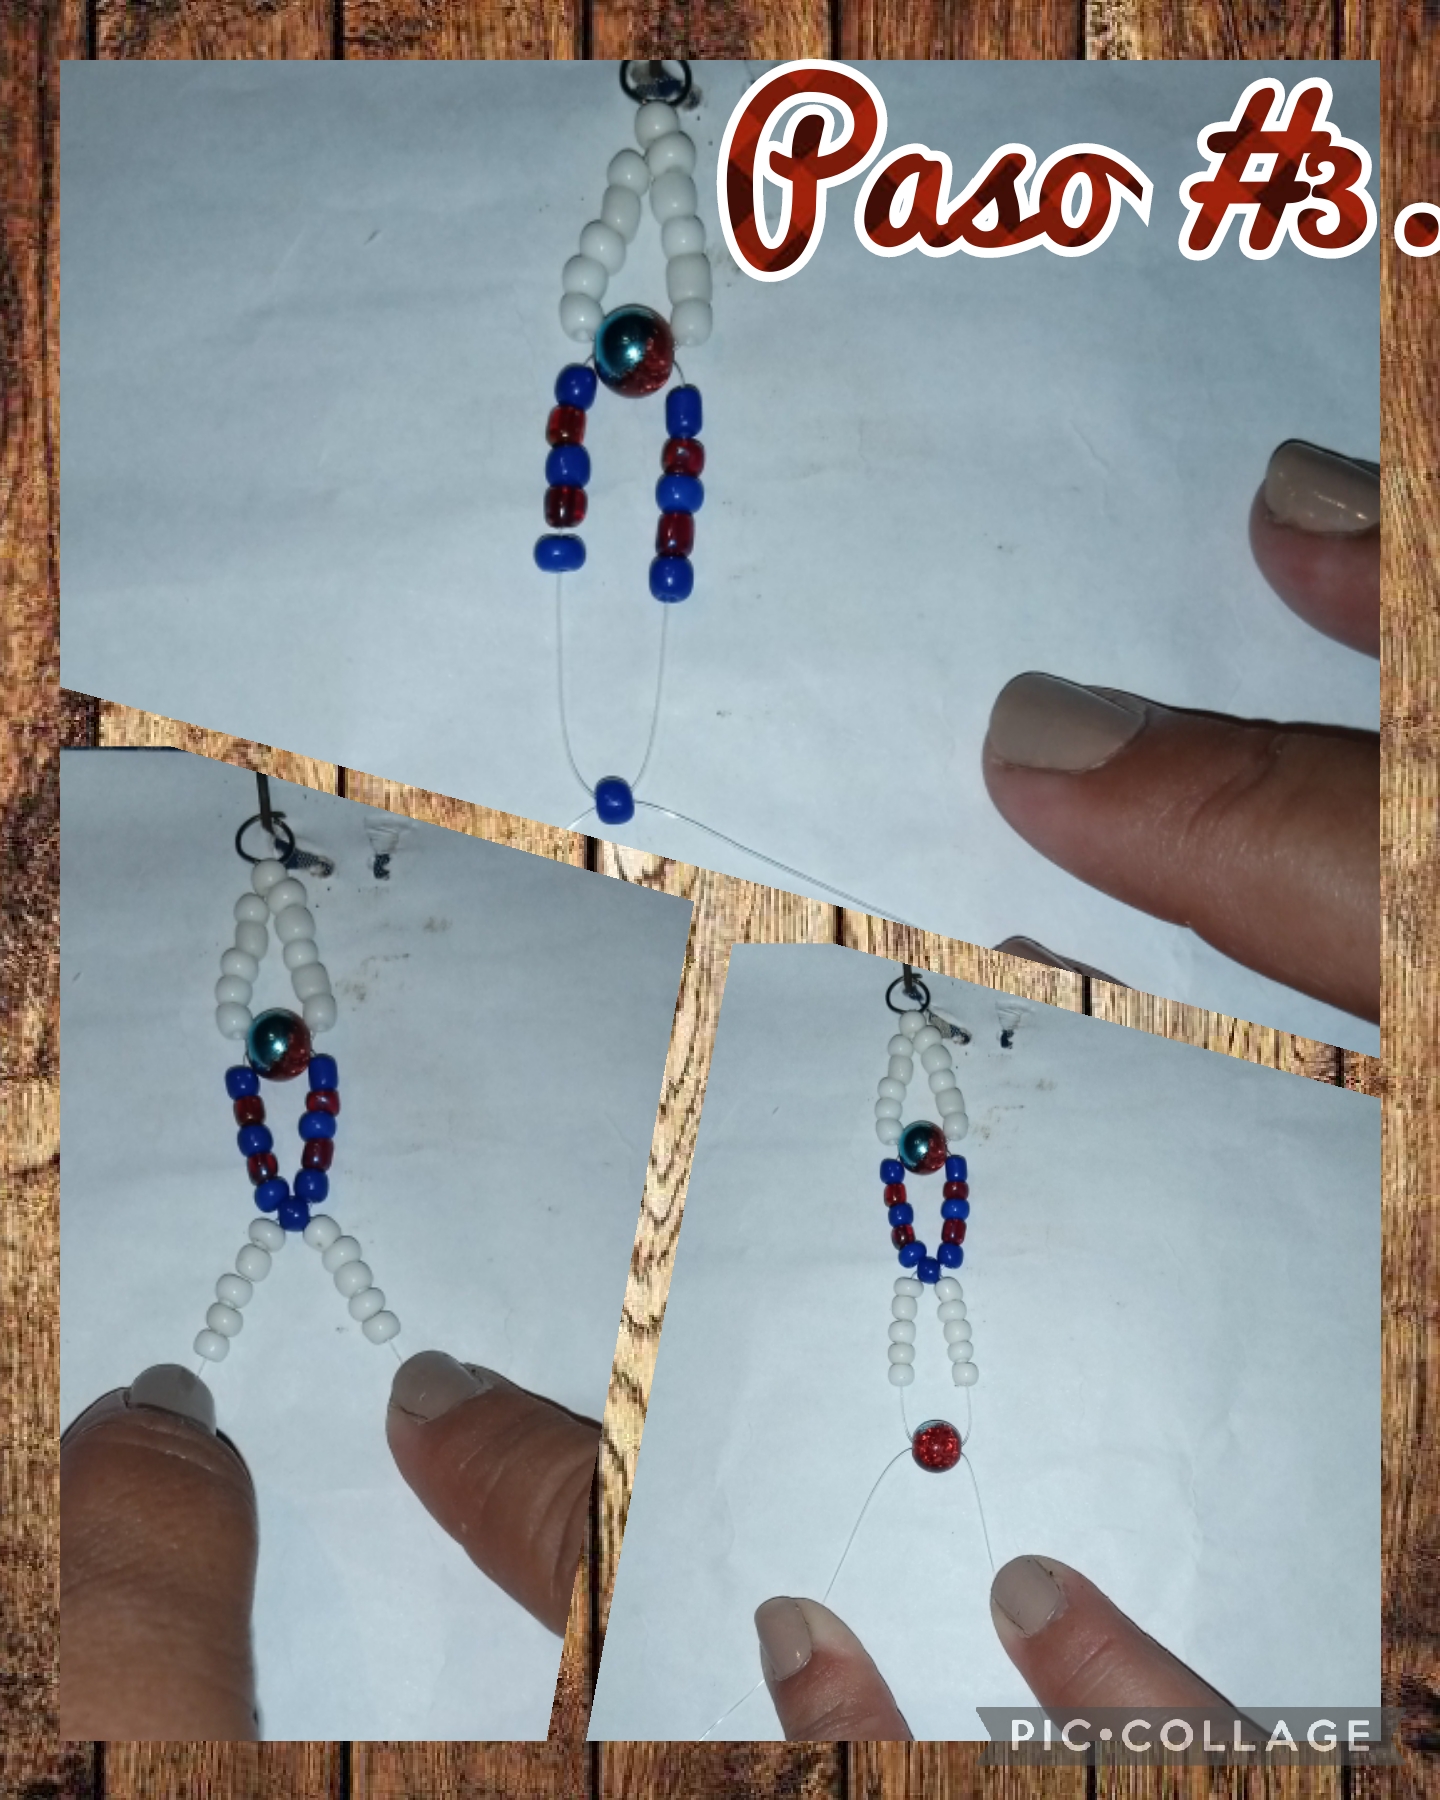
Step #3. In this step we reinsert a blue colored bead, in the 2 threads, and we pull it up, we are going to insert another 5 white colored beads, in each end, and finally we reinsert 1 red and blue multicolored stone, see the images.
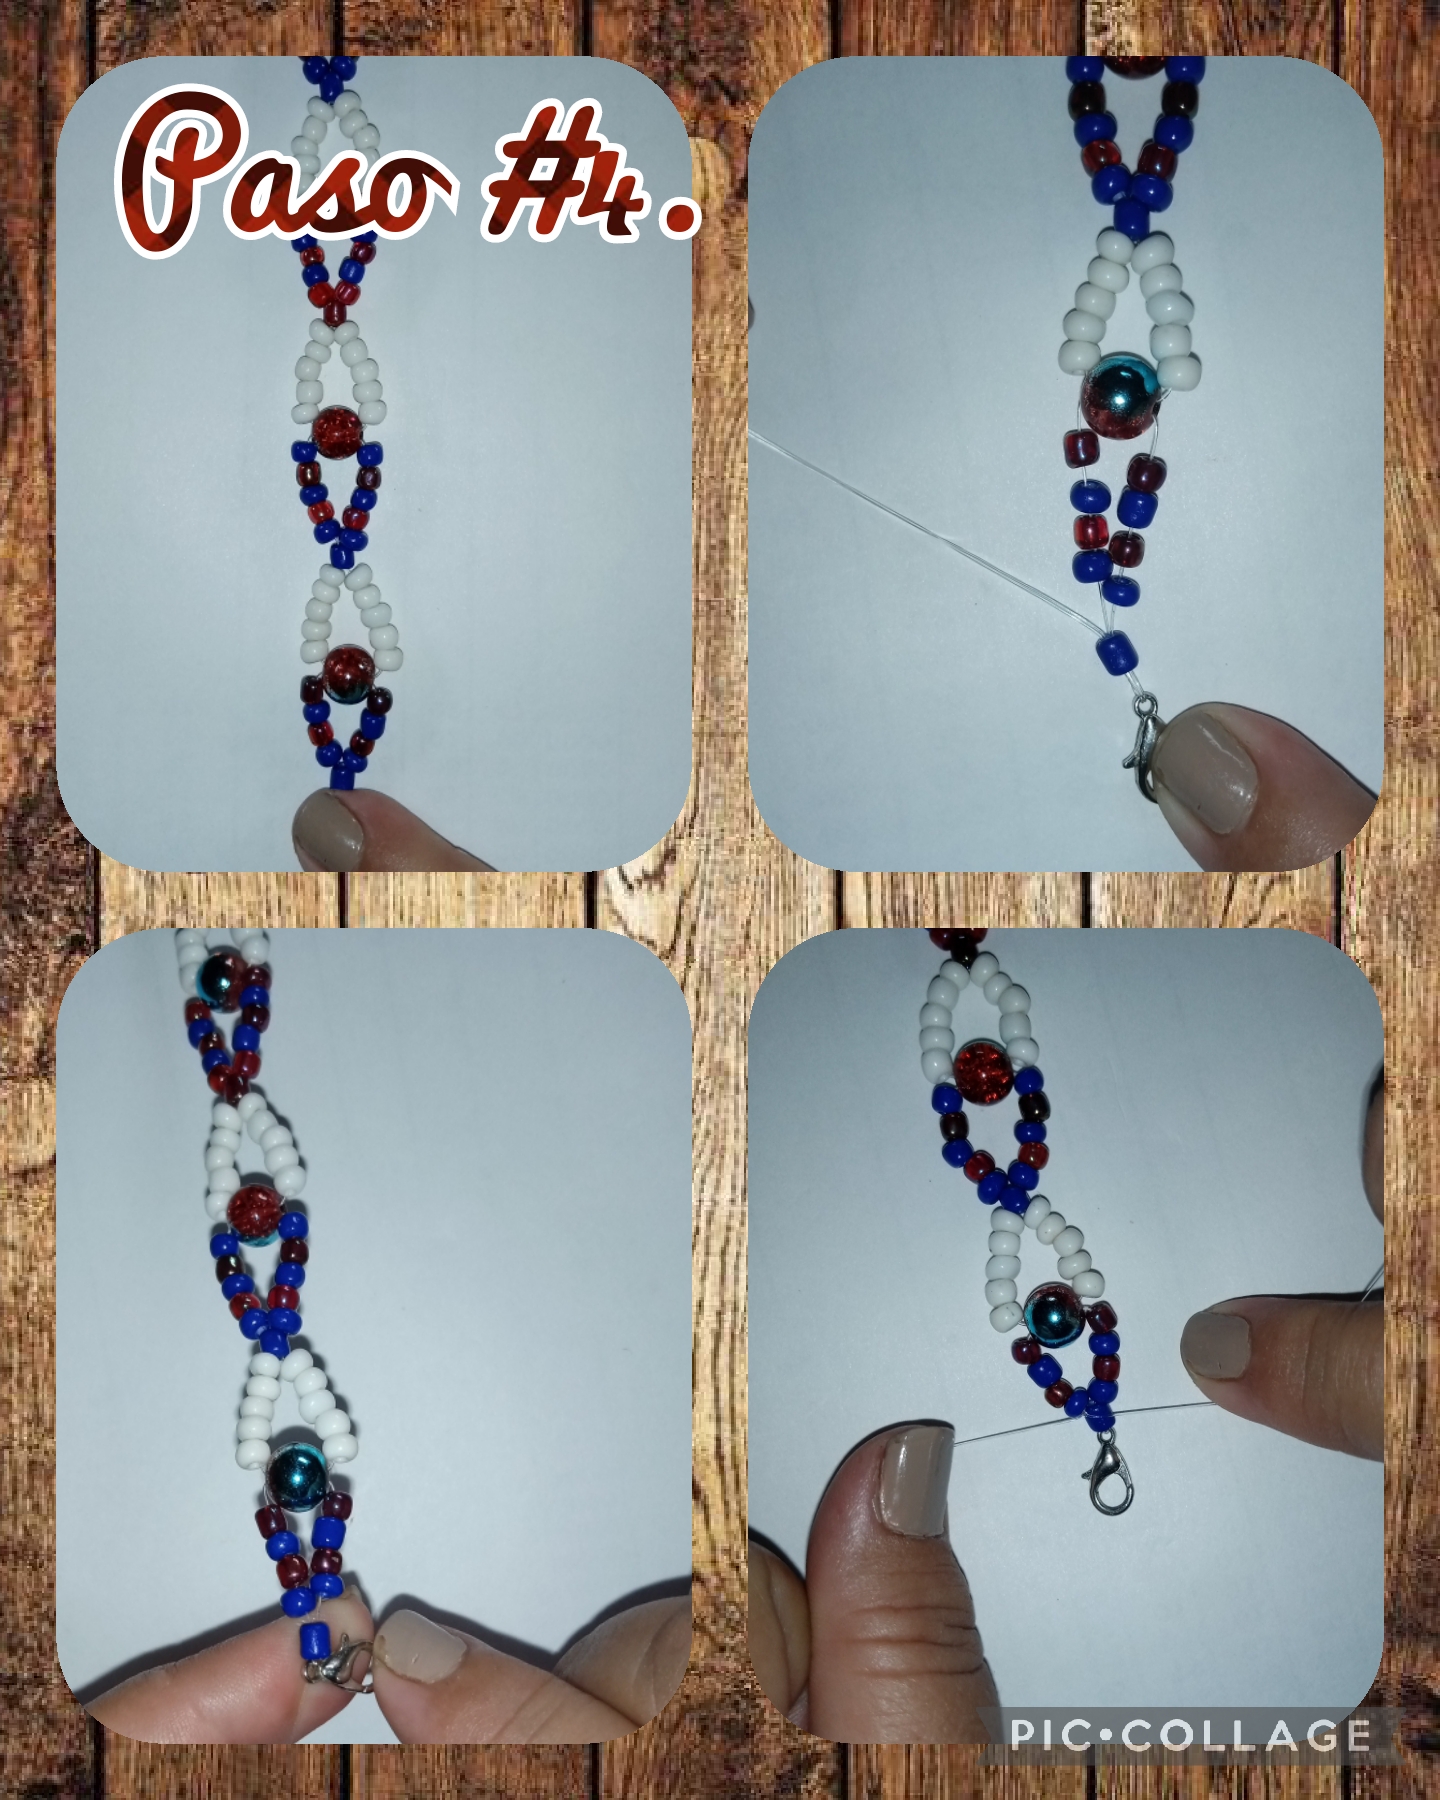
Step #4. Now in this step I show you how the bracelet has turned out, now what we are going to do is introduce the crochet, to open and close, with the needle and the thread we sew the bracelet, inserting the needle into the beads, to finish making 3 knots so that it doesn't come loose and stays tight, and we ended up burning the ends with the lighter, so that it seals well and doesn't come loose, see the images.
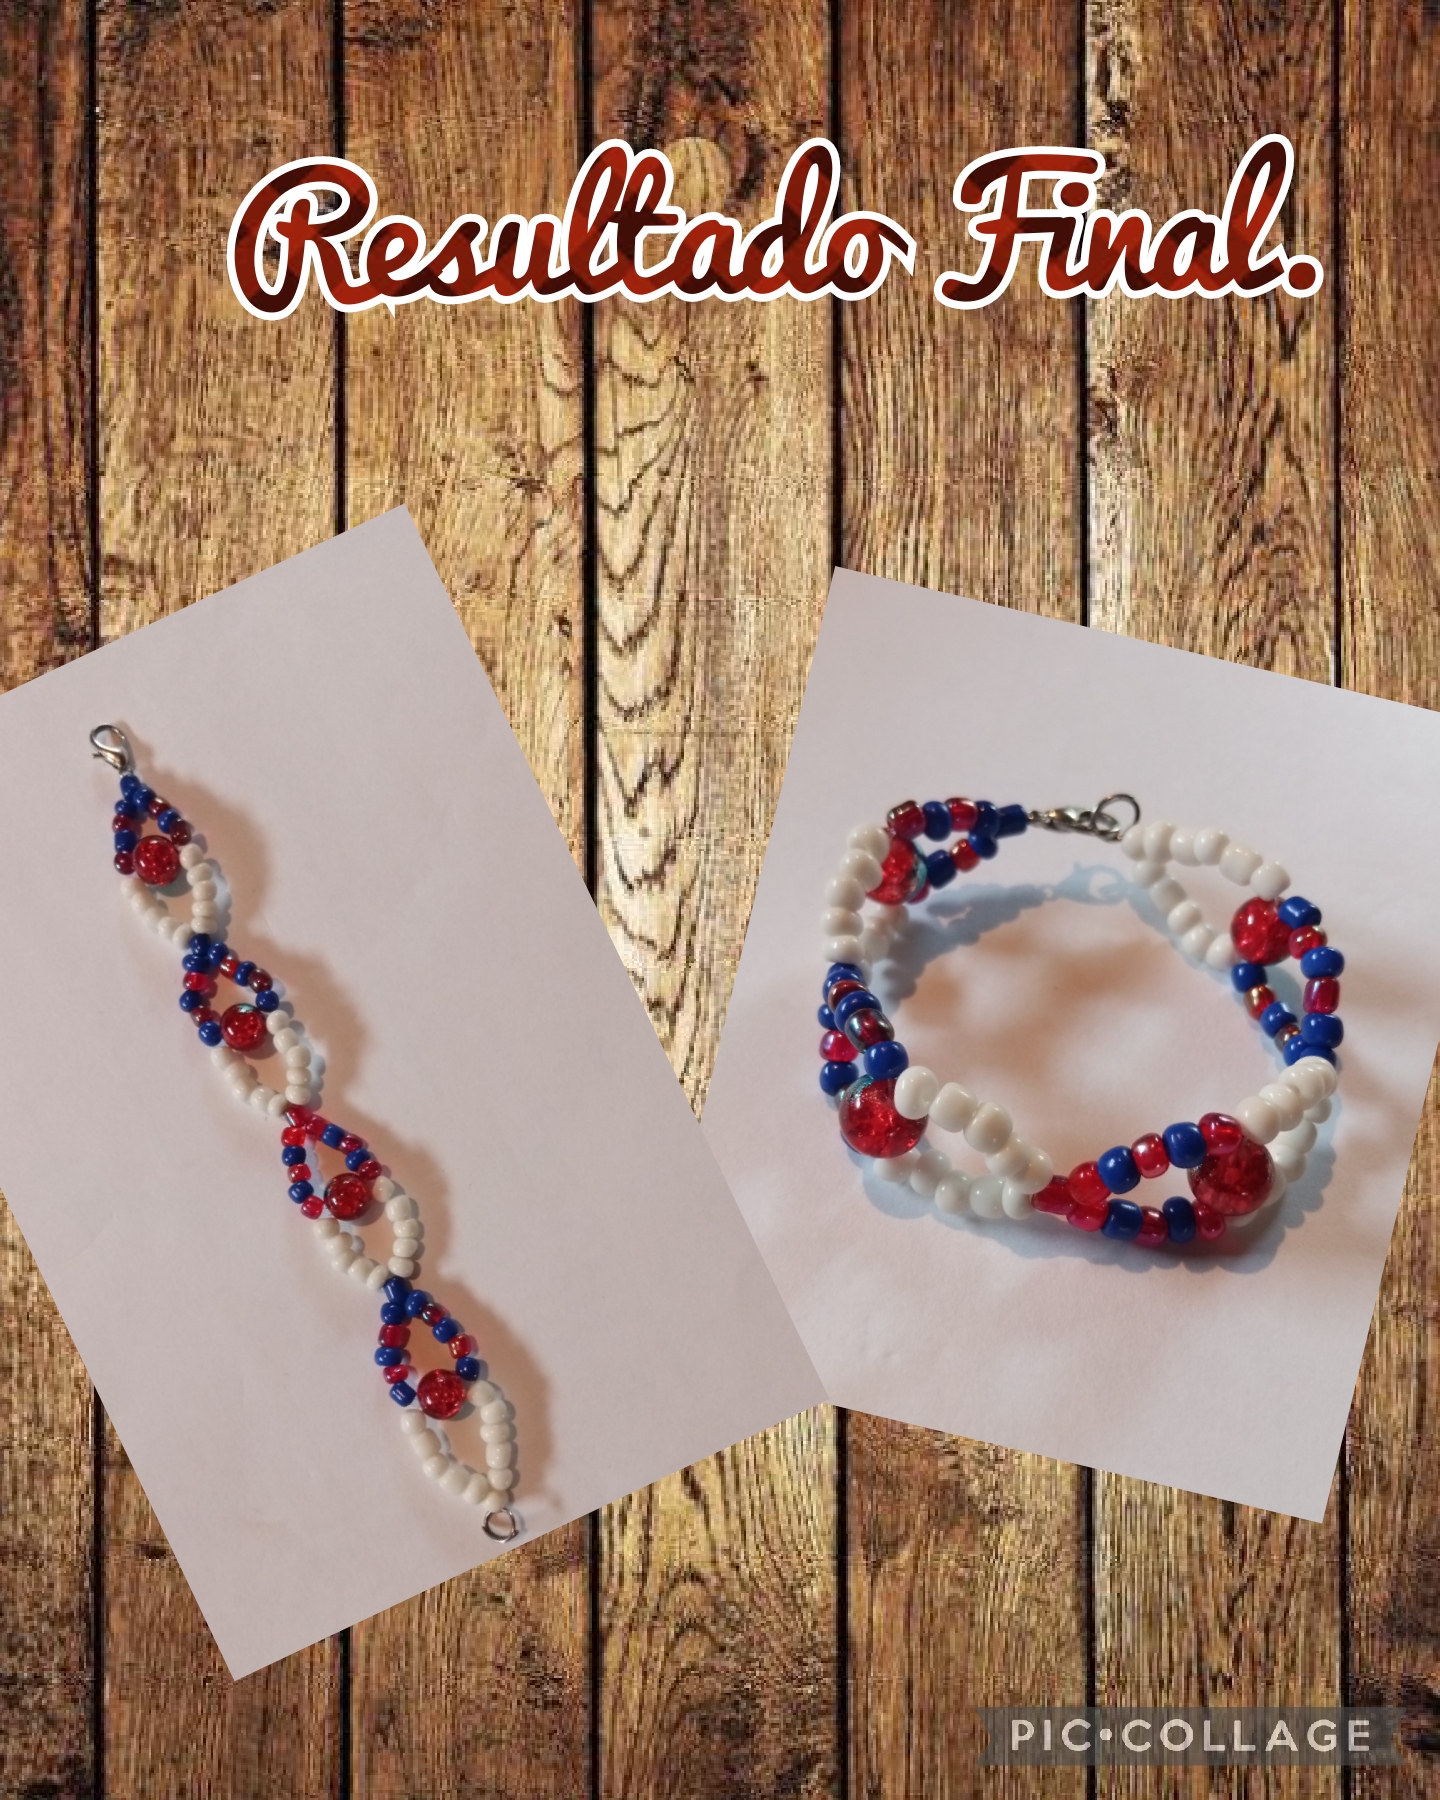
Once all the steps have been completed, this is the FINAL RESULT, a beautiful bracelet for girls made with beads and stones for jewelry, thanks for visiting my blog and reading until the end, see you soon with another idea, God bless you all you.
Las fotos fueron capturadas con mi teléfono TECNO SPARK 6 GO, editadas con la aplicación Pic collage y traducido el contenido con el traductor Google Esp-Ing.
The photos were captured with my TECNO SPARK 6 GO phone, edited with the Pic collage application and the content translated with the Google Esp-Ing translator.
Hola @cruzjimenez01, le ha quedado muy bonito y delicado. Felicidades, suerte cariño.
Hola, gracias saludo y bendiciones...
Se ve que le encantó, y con mucha razón. Su cara de felicidad lo dice todo.
Quedó preciosa.
Hola, si le encantó mucho su pulsera, gracias. Saludos....