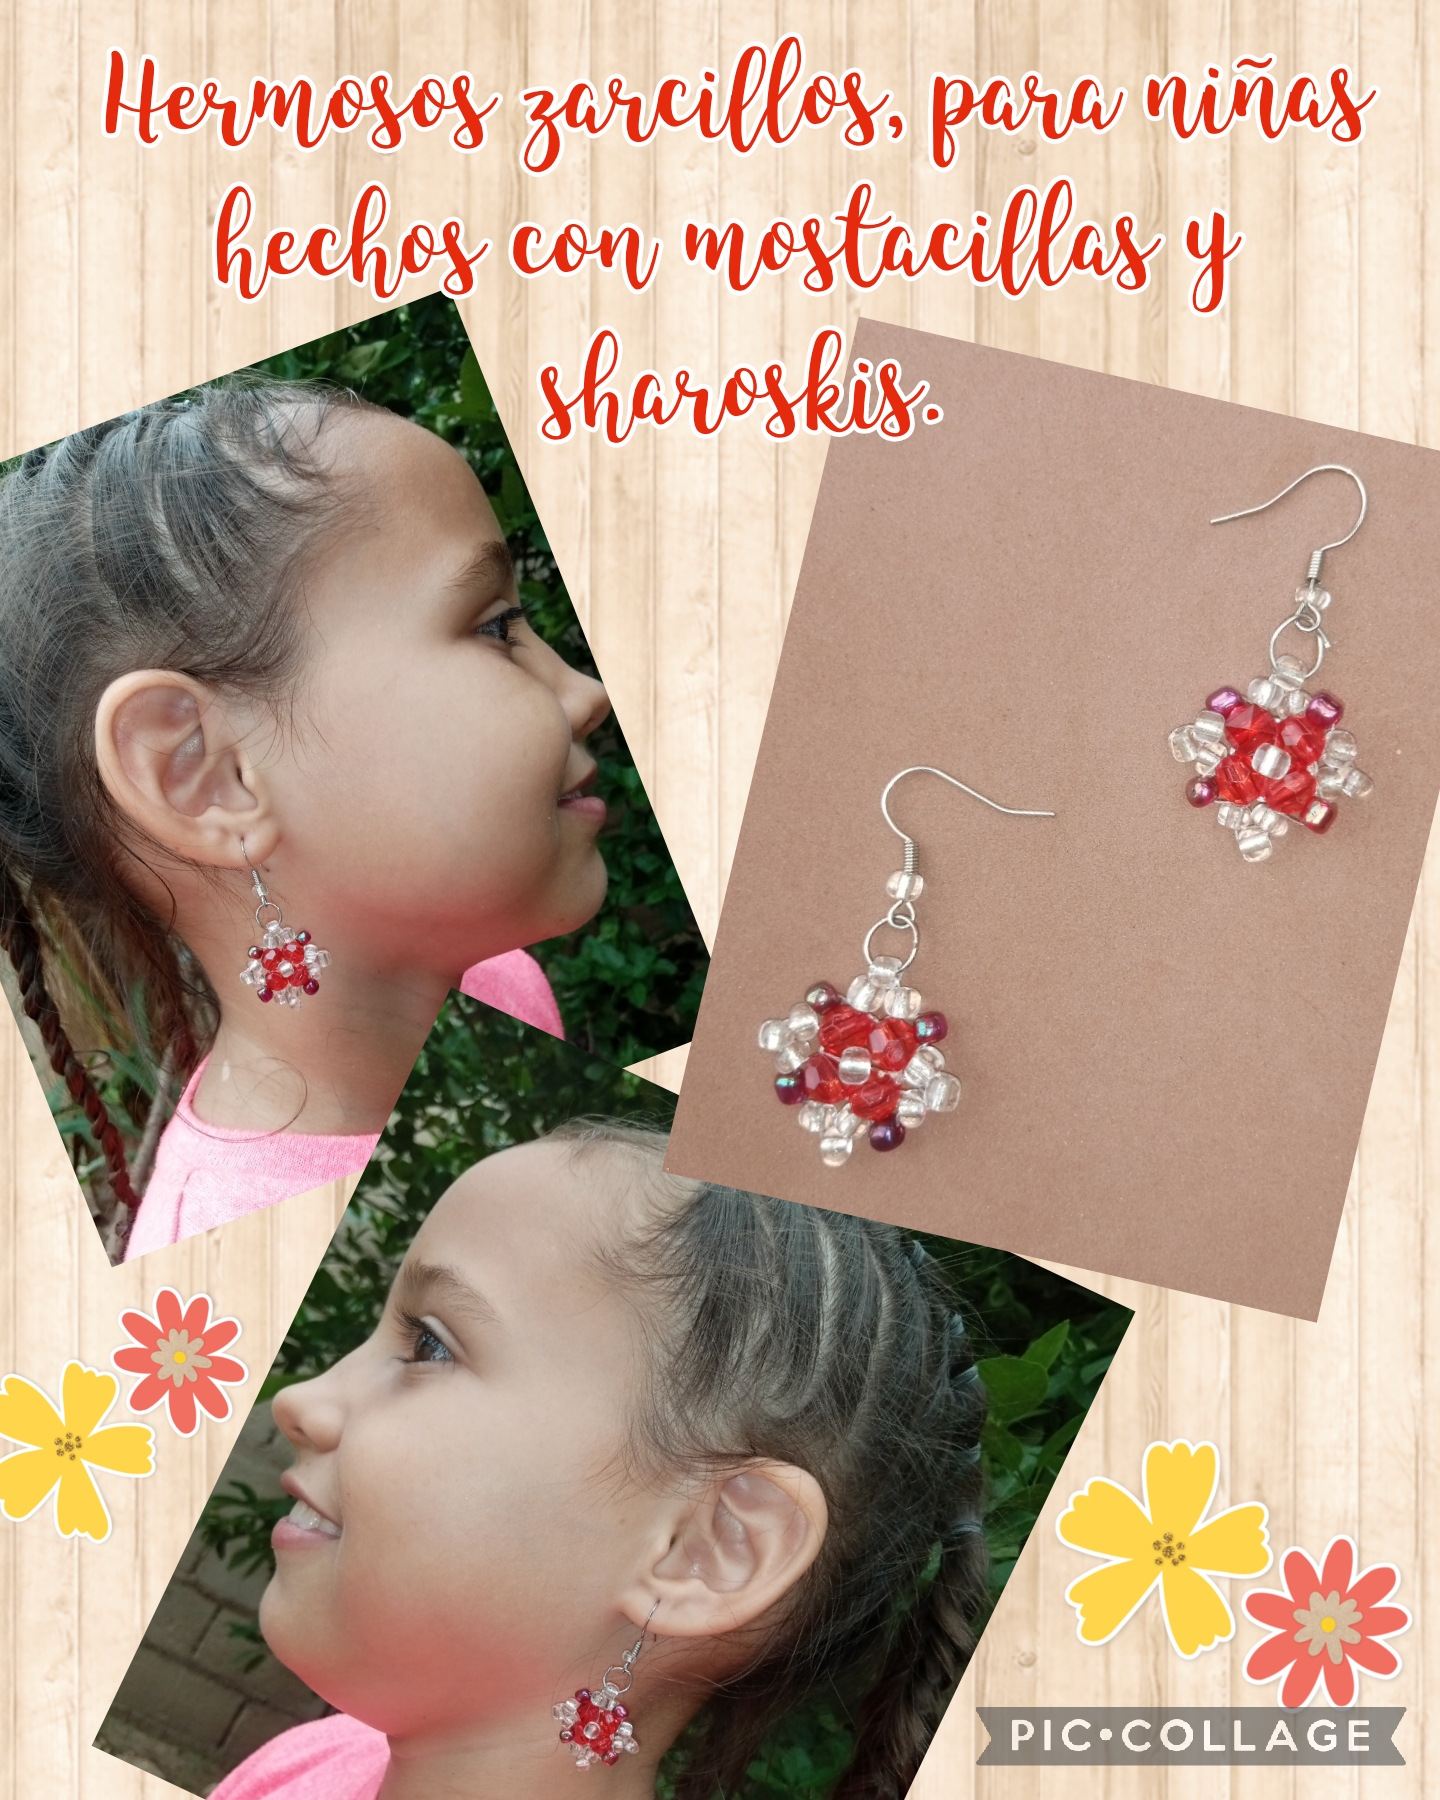
Muy buenas noches, amigas creativas de esta hermosa comunidad Jewelry, les envio un gran saludo virtual, deseandoles que estén muy bien, y Dios los bendiga a todos, hoy nuevamente les doy la bienvenida a mi blog, porque hoy les traigo un divertido y muy sencillo tutorial, se trata de realizar unos hermosos zarcillos, para las niñas, con mostacillas y swarovski estos zarcillos son ideal para las princesas de la casa, y yo los realice para mi hija, como siempre se los he dicho, a ella le gusta mucho la bisutería jejejeje, y todo lo que realizo es para ella, ahora sin mas que decir manos a la obra y vamos a comenzar con los pasos.
Good evening, creative friends of this beautiful Jewelry community, I send you a big virtual greeting, wishing you all the best, and God bless you all, today I welcome you back to my blog, because today I bring you a fun and very simple tutorial, it is about making beautiful earrings, for girls, with beads and swarovski these earrings are ideal for the princesses of the house, and I make them for my daughter, as I have always told her, she likes them a lot the jewelery hehehehe, and everything I do is for her, now without further ado, let's get to work and let's start with the steps.
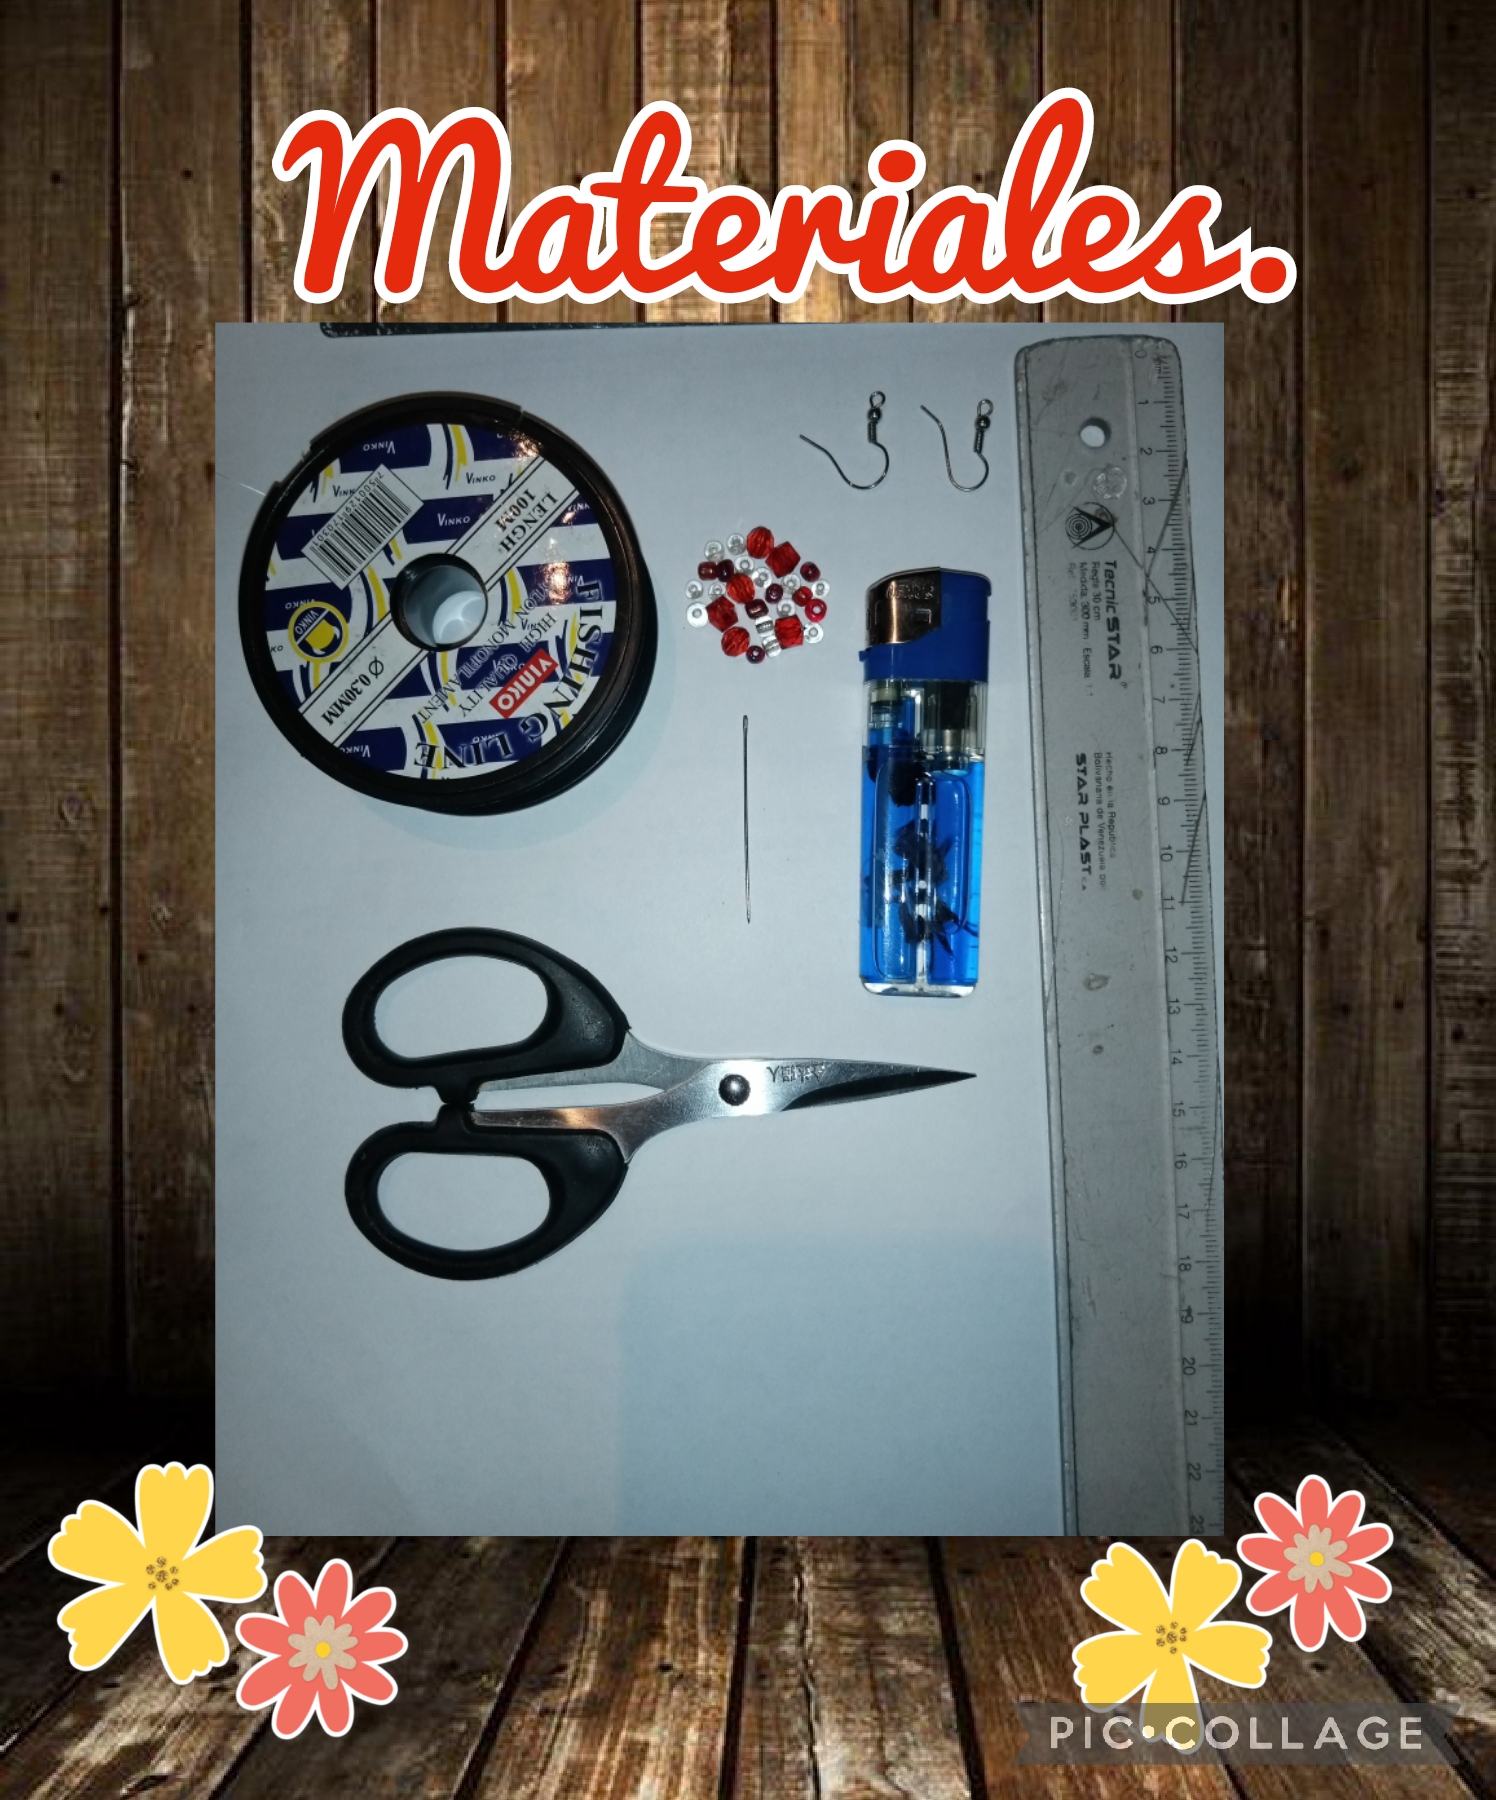
*Vamos a necesitar los siguientes materiales y herramientas, para realizar unos hermosos zarcillos.
*Hilo de nailon transparente.
*Piedras de swarovski color roja y mostacillas colores transparente y roja.
*Anzuelos de metal para bisutería.
*1 regla métrica.
*1 aguja.
*1 tijera.
*1 yesquero.
*We are going to need the following materials and tools to make some beautiful tendrils.
*Transparent nylon thread.
*Red swarovski stones and transparent and red colored beads.
*Metal hooks for jewelry.
*1 metric ruler.
*1 needle.
*1 scissors.
*1 tinderbox.
We begin with the step by step of this fun tutorial, to make some beautiful tendrils.
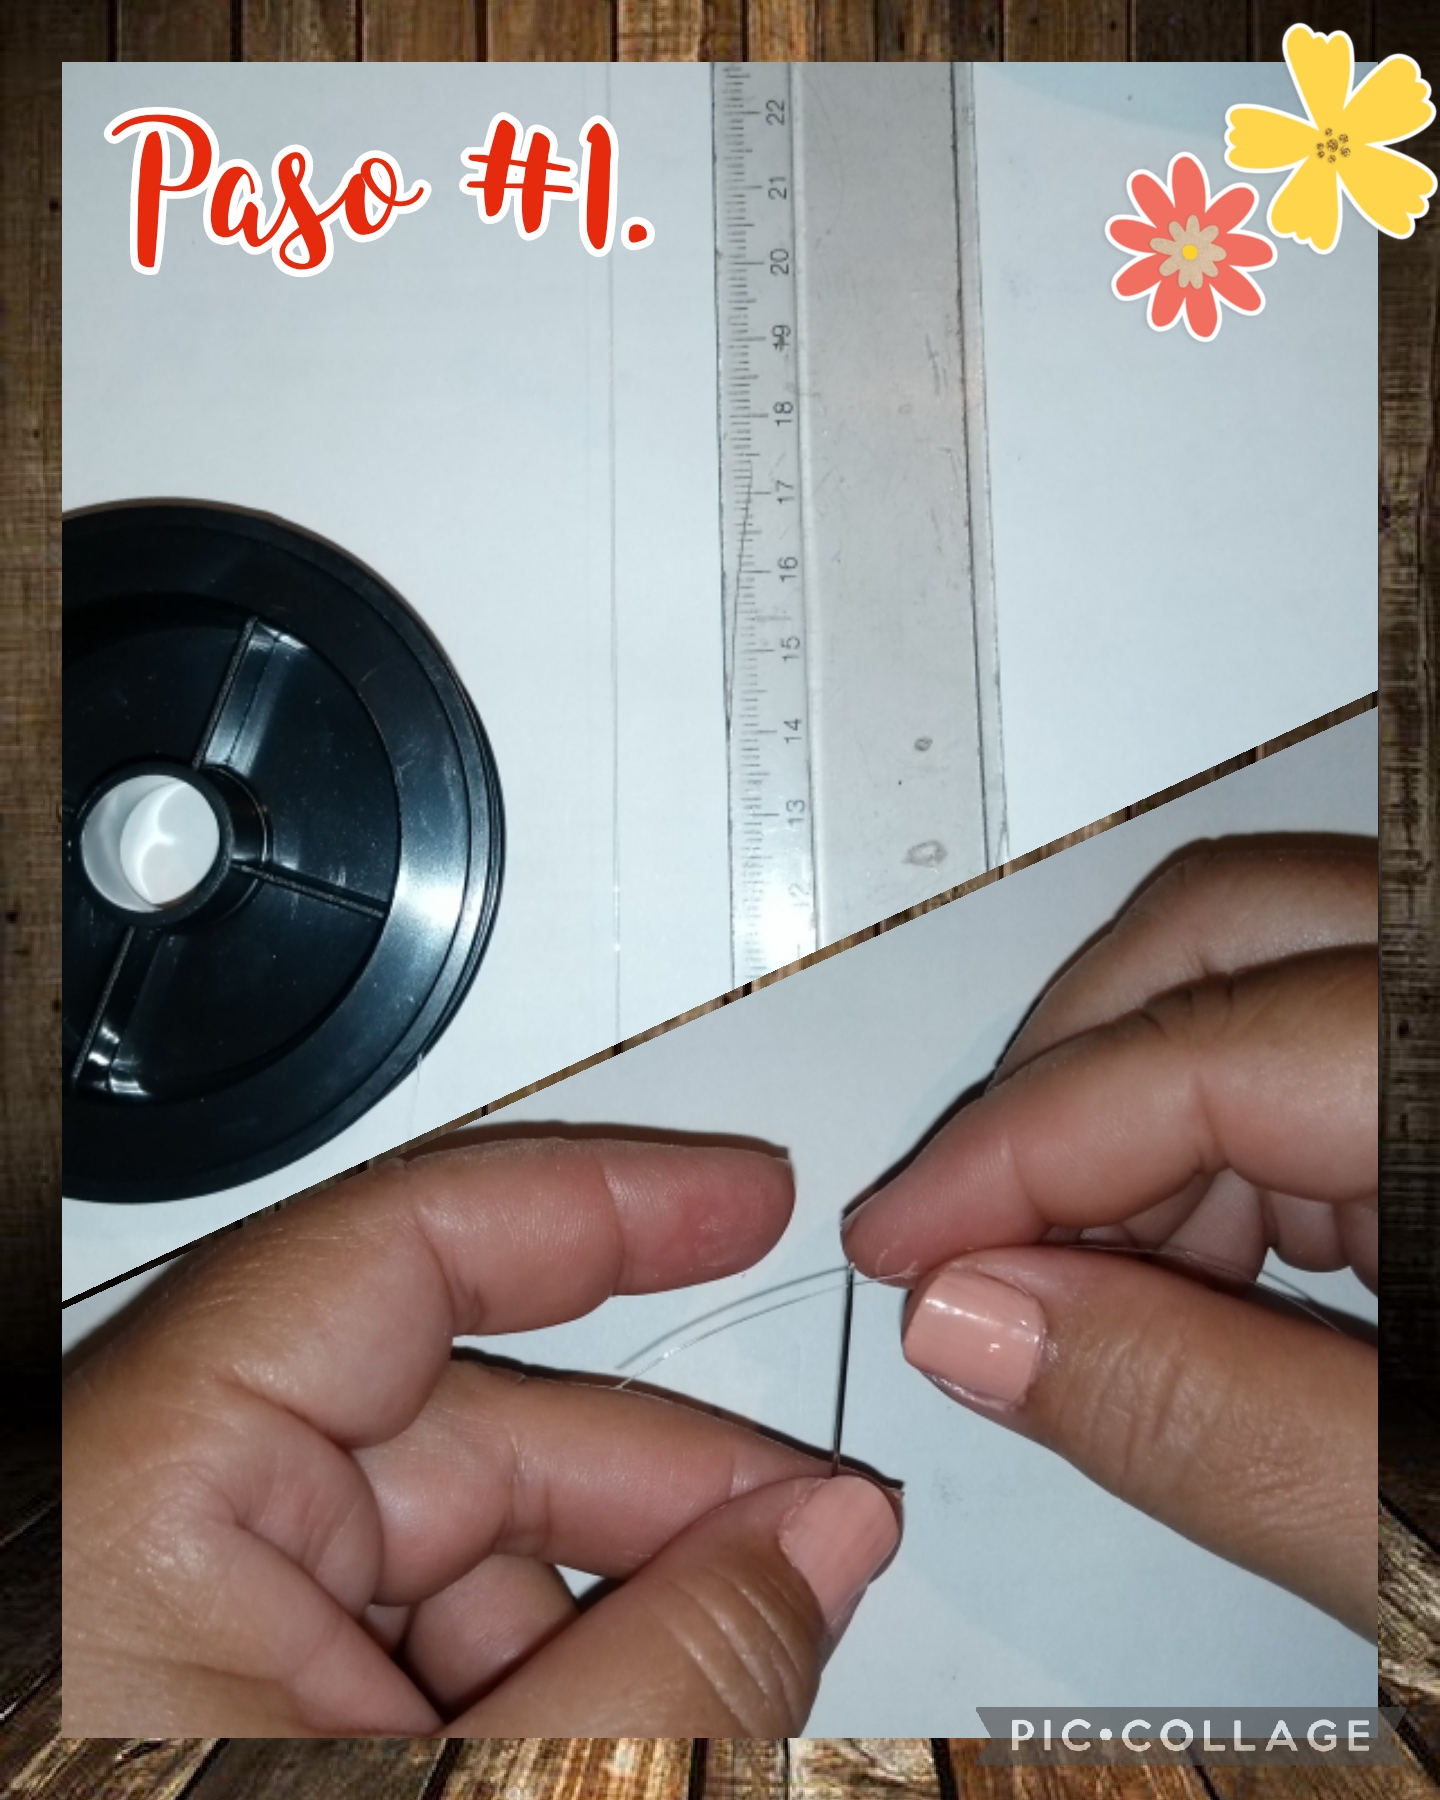
Step #1. We start to make some beautiful tendrils and we are going to do it as follows, the first thing we are going to do is, we take the transparent nylon thread and 1 metric ruler and we are going to take the measurements of 55 centimeters, from this measurement we are going to cut 2 measures, because there are 2 tendrils, then we take 1 needle and insert the thread into the needle, see the images.
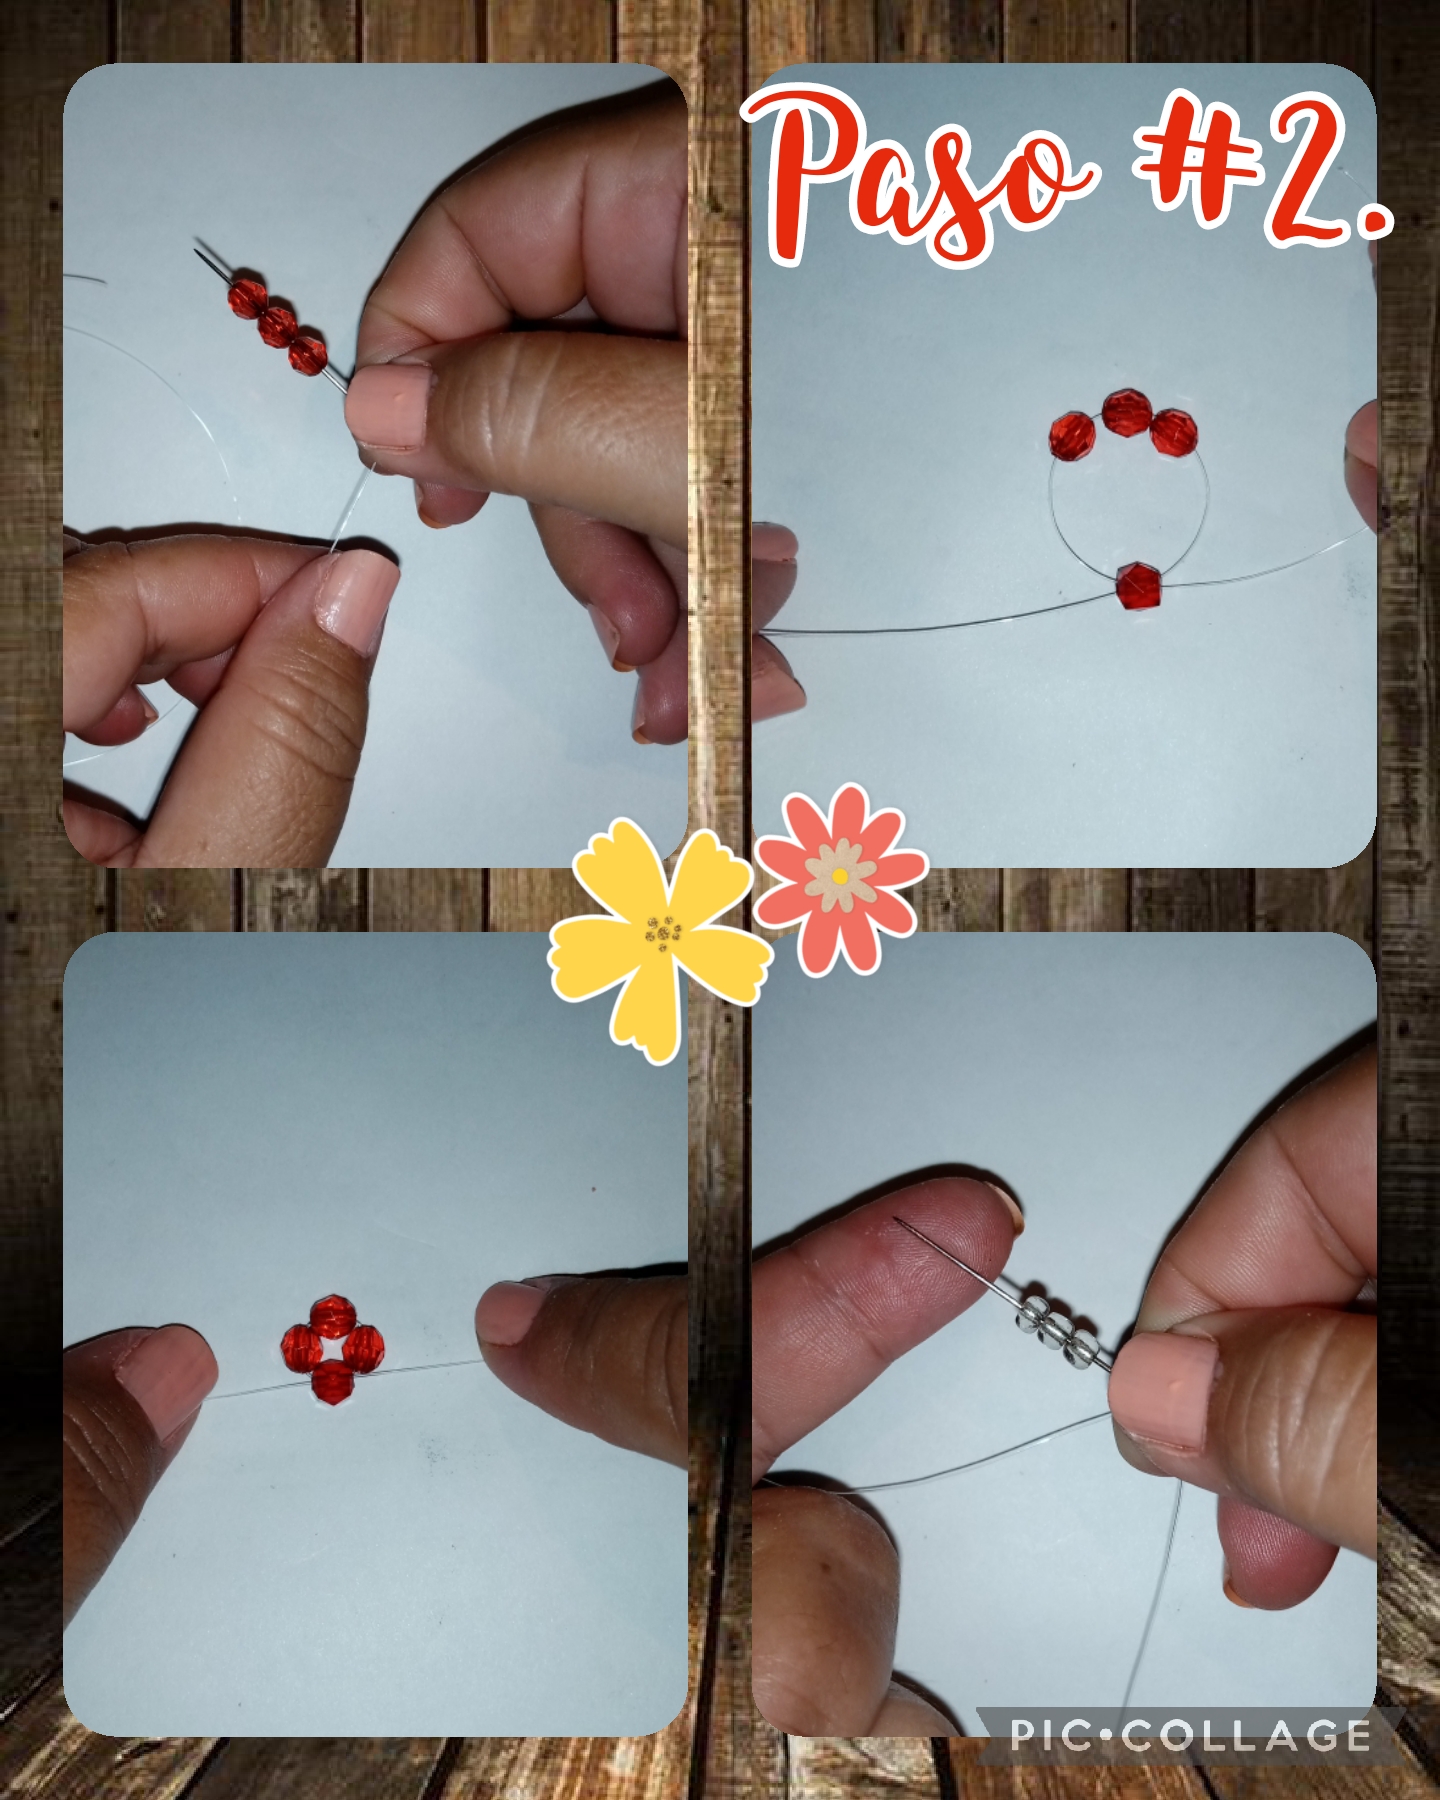
Step #2. Now in this step we are going to begin to form the tendrils, and we are going to do it as follows, we take the needle with the thread already inserted, and we are going to first insert 3 swarovski stones, then we reinsert another swarovski stone crossing the threads from right to left and from left to right, then we tighten and then we return, to insert 3 transparent beads, see the images.
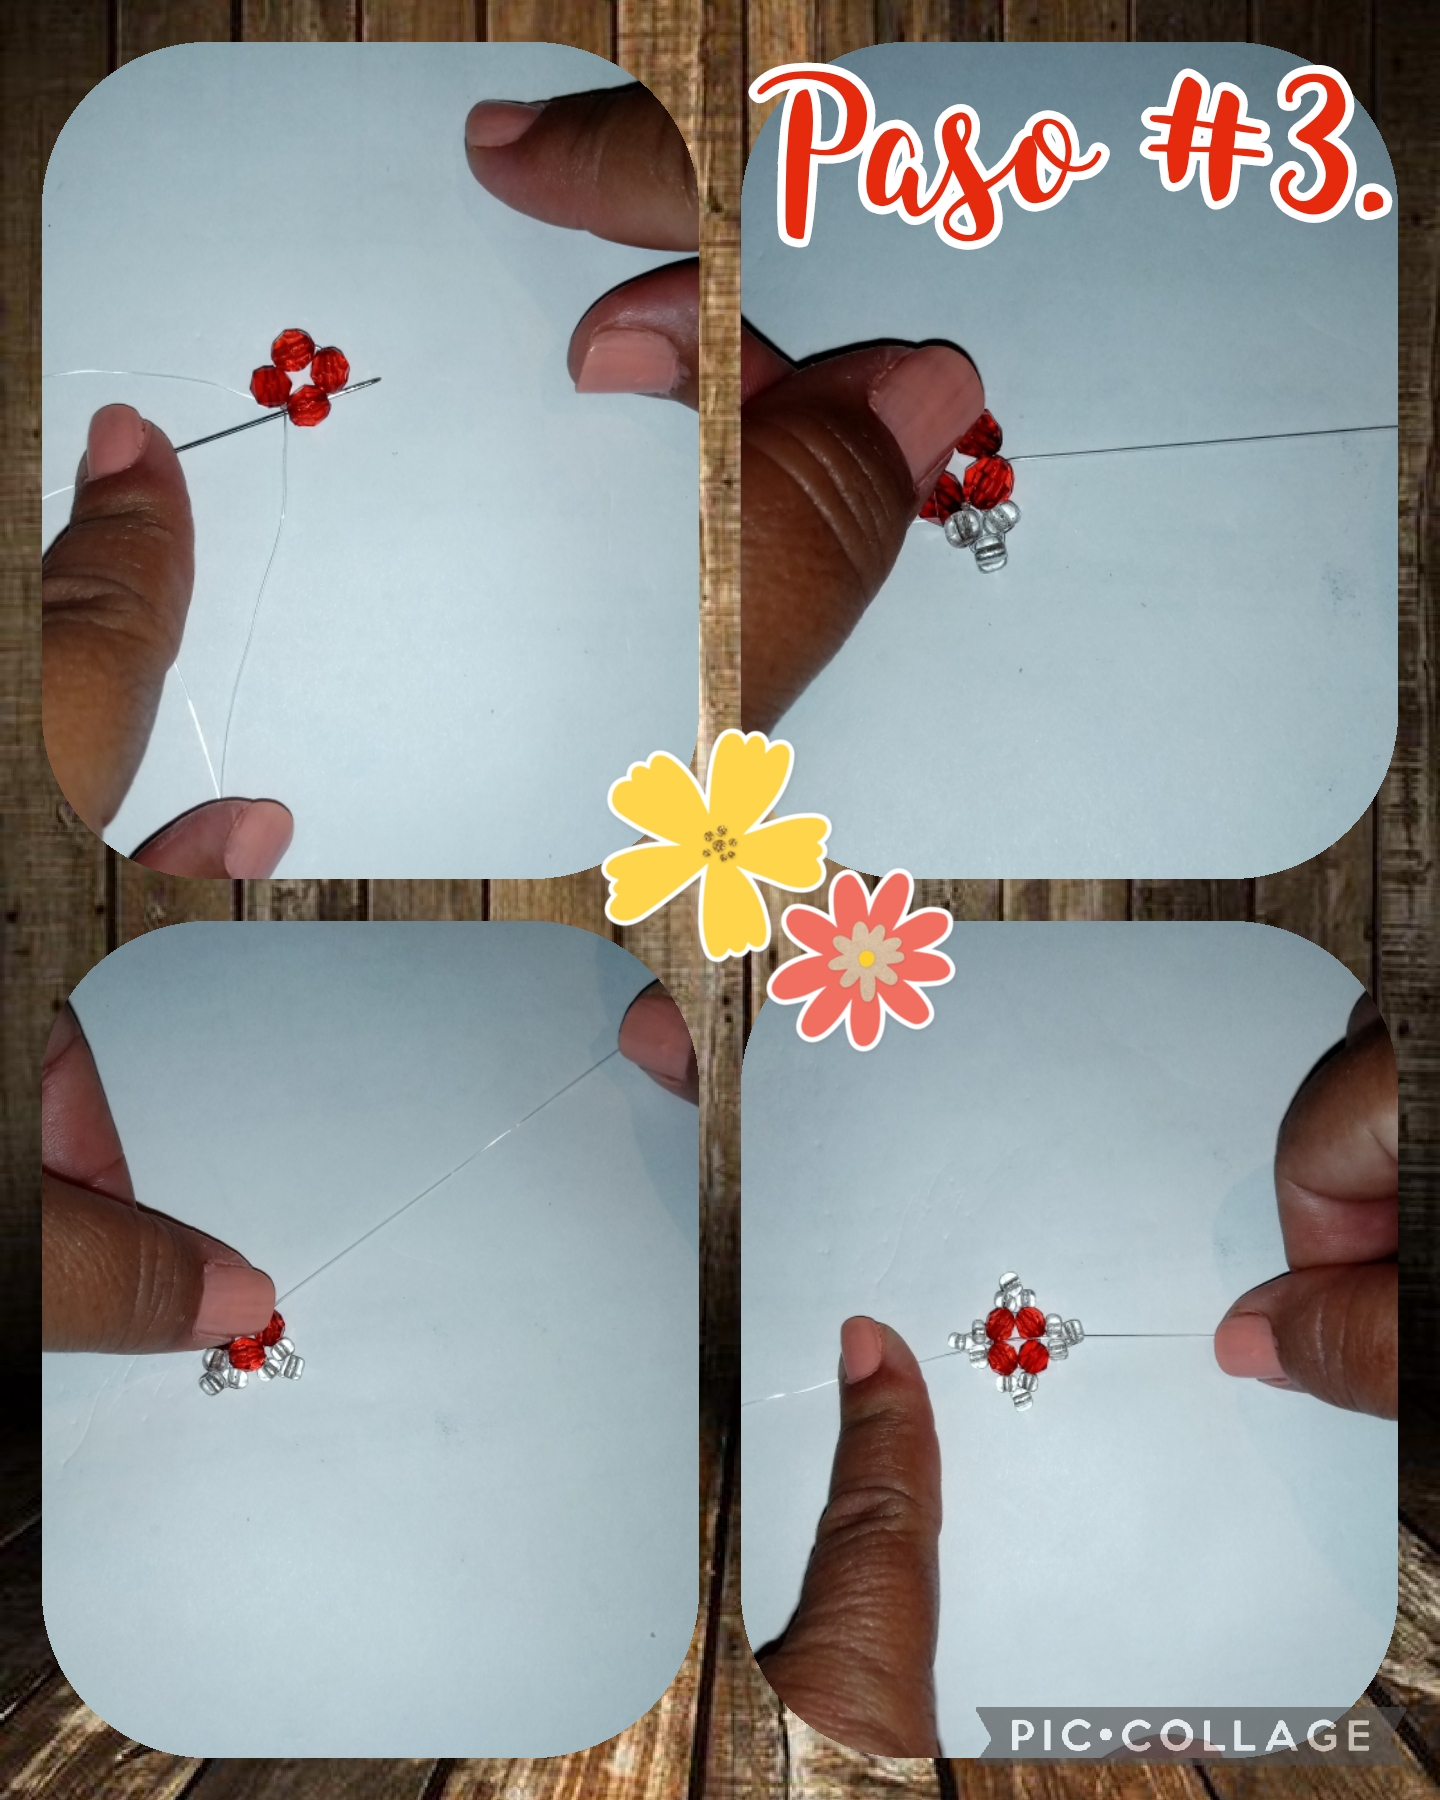
Step #3. In the previous step we already inserted the 3 transparent beads, then we inserted the needle into one of the Swarovski stones, we pressed and then we pulled the thread until joining the beads with the Swarovski stones and we pulled again to continue forming the tendrils, see the images.
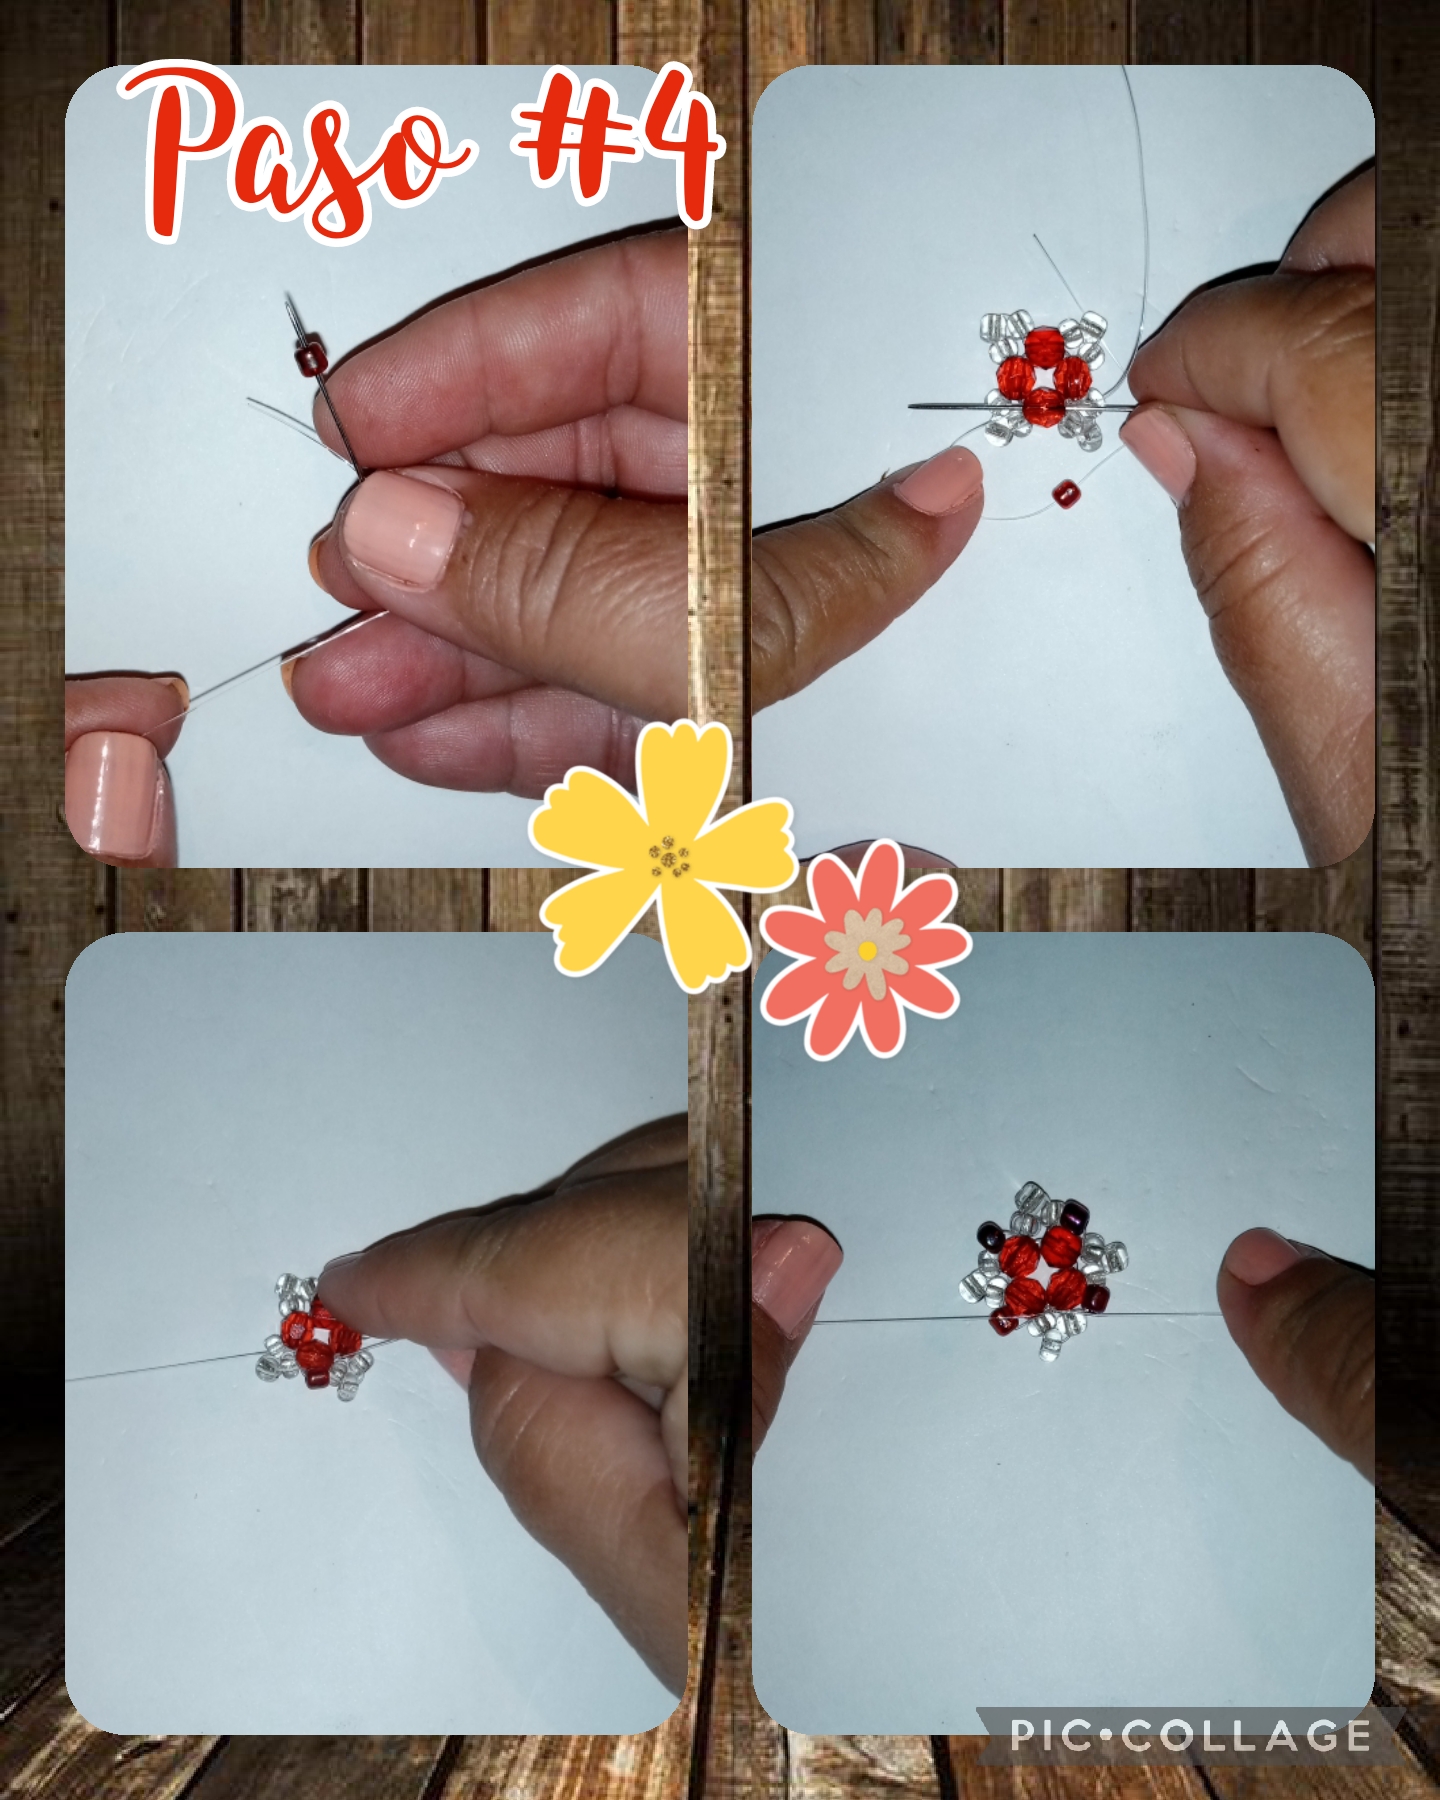
Step #4. Now we are going to insert the first red bead, and then we insert the needle into the transparent beads, and pull to join the red bead, so we are going to insert them until we finish inserting all 4 beads, and once all are inserted, we pull the thread of nylon to tighten it well so that they do not come loose, see the images.
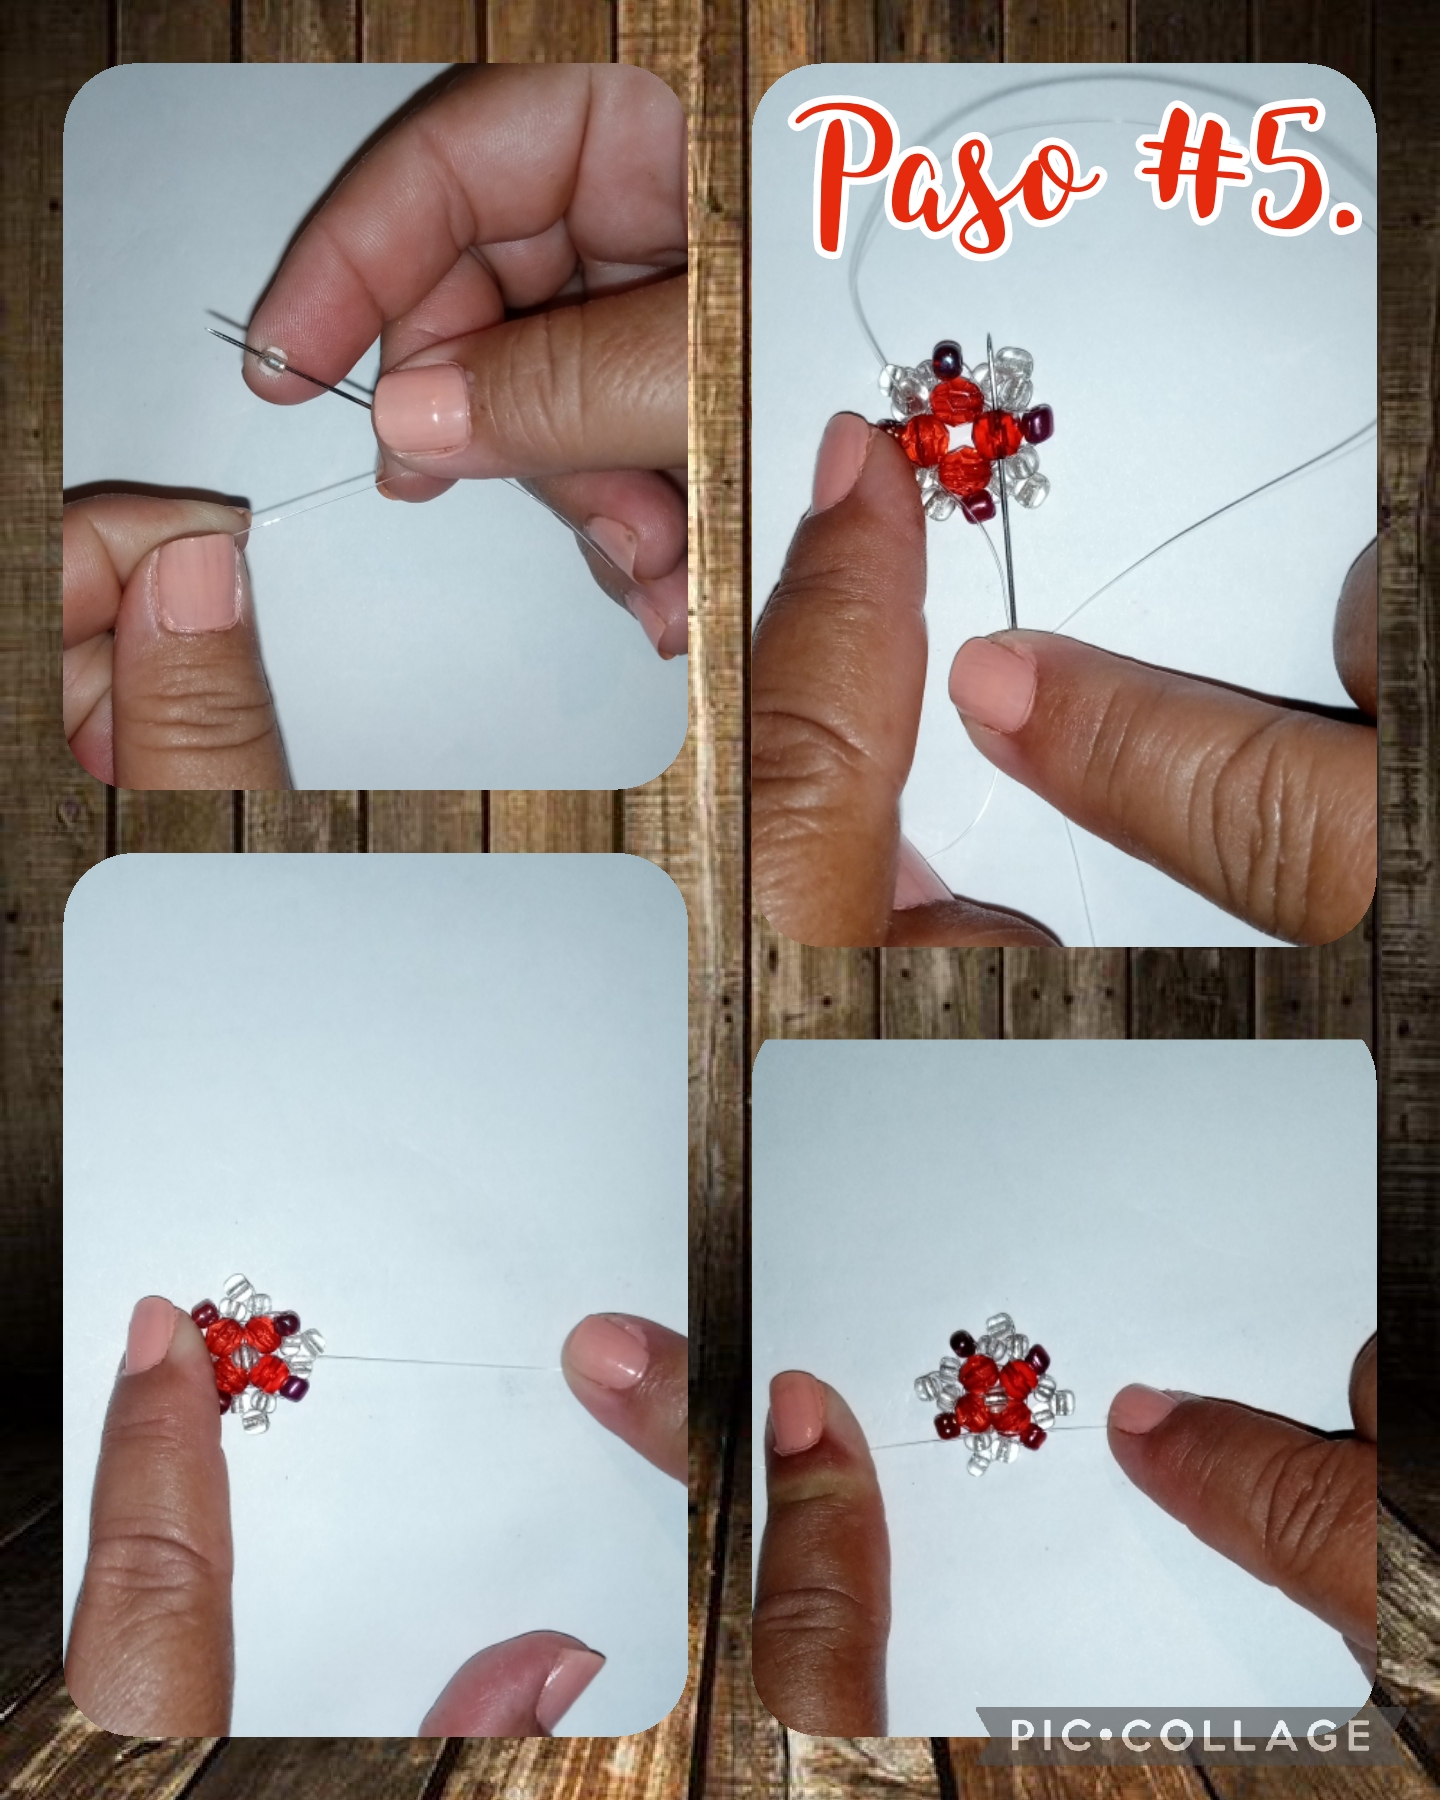
Step #5. Already in this step we are going to take the needle with the nylon thread, and we are going to sew the entire piece, passing the nylon thread through all the stones, to ensure that it is well tightened, and the 2 tendrils already made cannot be released , see pictures.
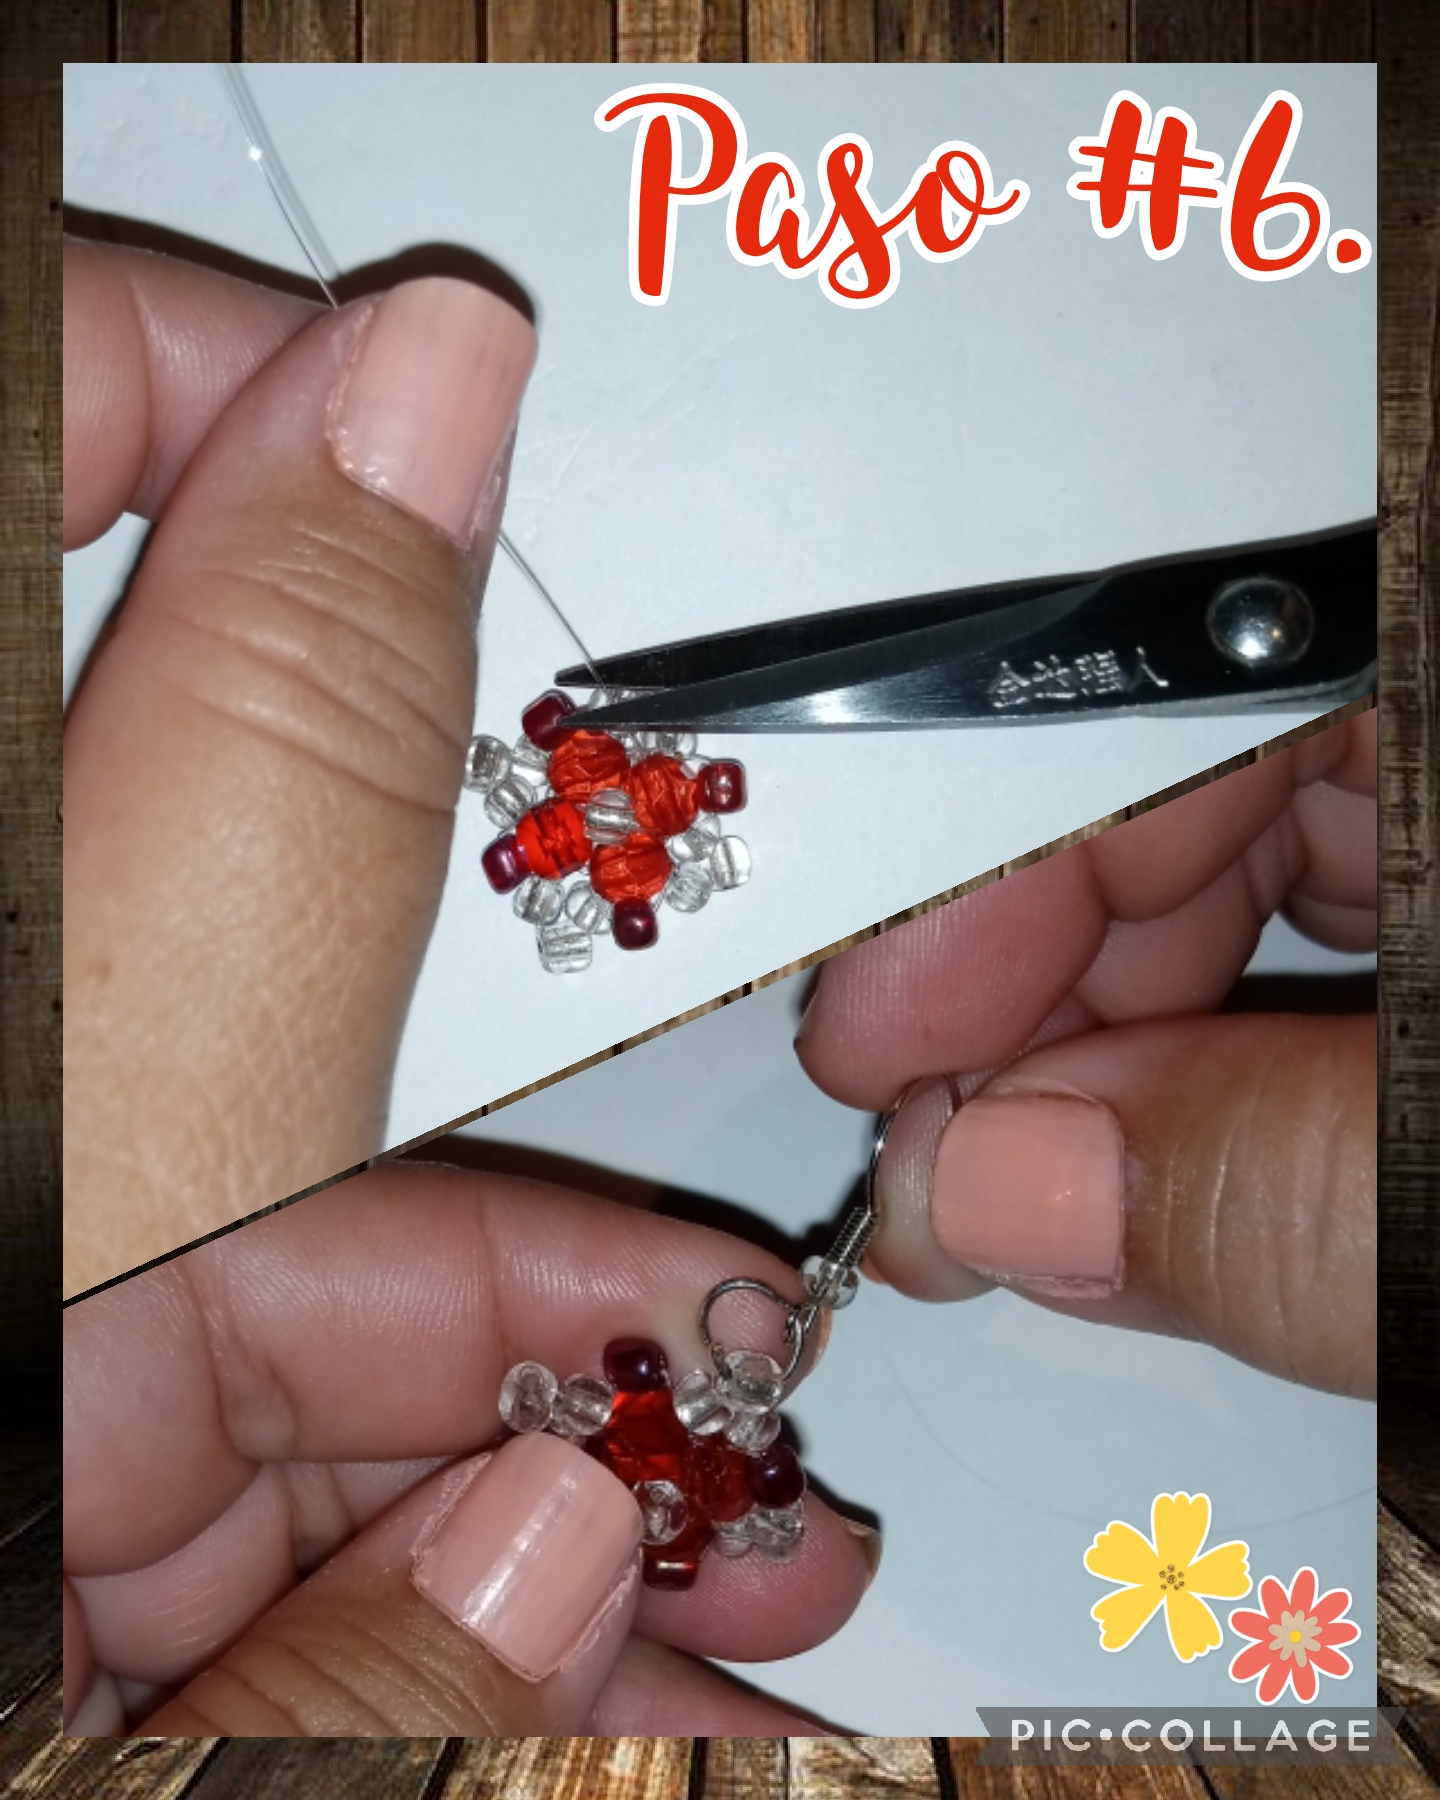
Step #6 I have already made the 2 tendrils now with the help of scissors, we are going to cut the excesses and with the tinderbox to burn the ends and seal them to finish we are going to place the metal hook, for jewelry, in each tendril, see pictures.

All the steps have been completed, this is the final result, some beautiful tendrils, for the princesses of the house, I thank you for visiting my blog and reading until the end, have a good night and God bless you all .
Las fotos fueron capturadas con mi teléfono TECNO SPARK 6GO, editadas con la aplicación PIC-COLLAGE y el contenido es traducido con el traductor de GOOGLE-ESP-ING.
The photos were captured with my TECNO SPARK 6GO cell phone, edited with the PIC-COLLAGE application and the content is translated with the GOOGLE-ESP-ING translator.
Lindos zarcillos quedan muy hermoso el tejido que realizaste, y el color muy lindo
Hola, si están muy lindos muchas gracias saludos.
Han quedado bellos, me encanta la forma y los colores que usaste 👍
Your earring making process is very nice and it looks great as well. Well done.