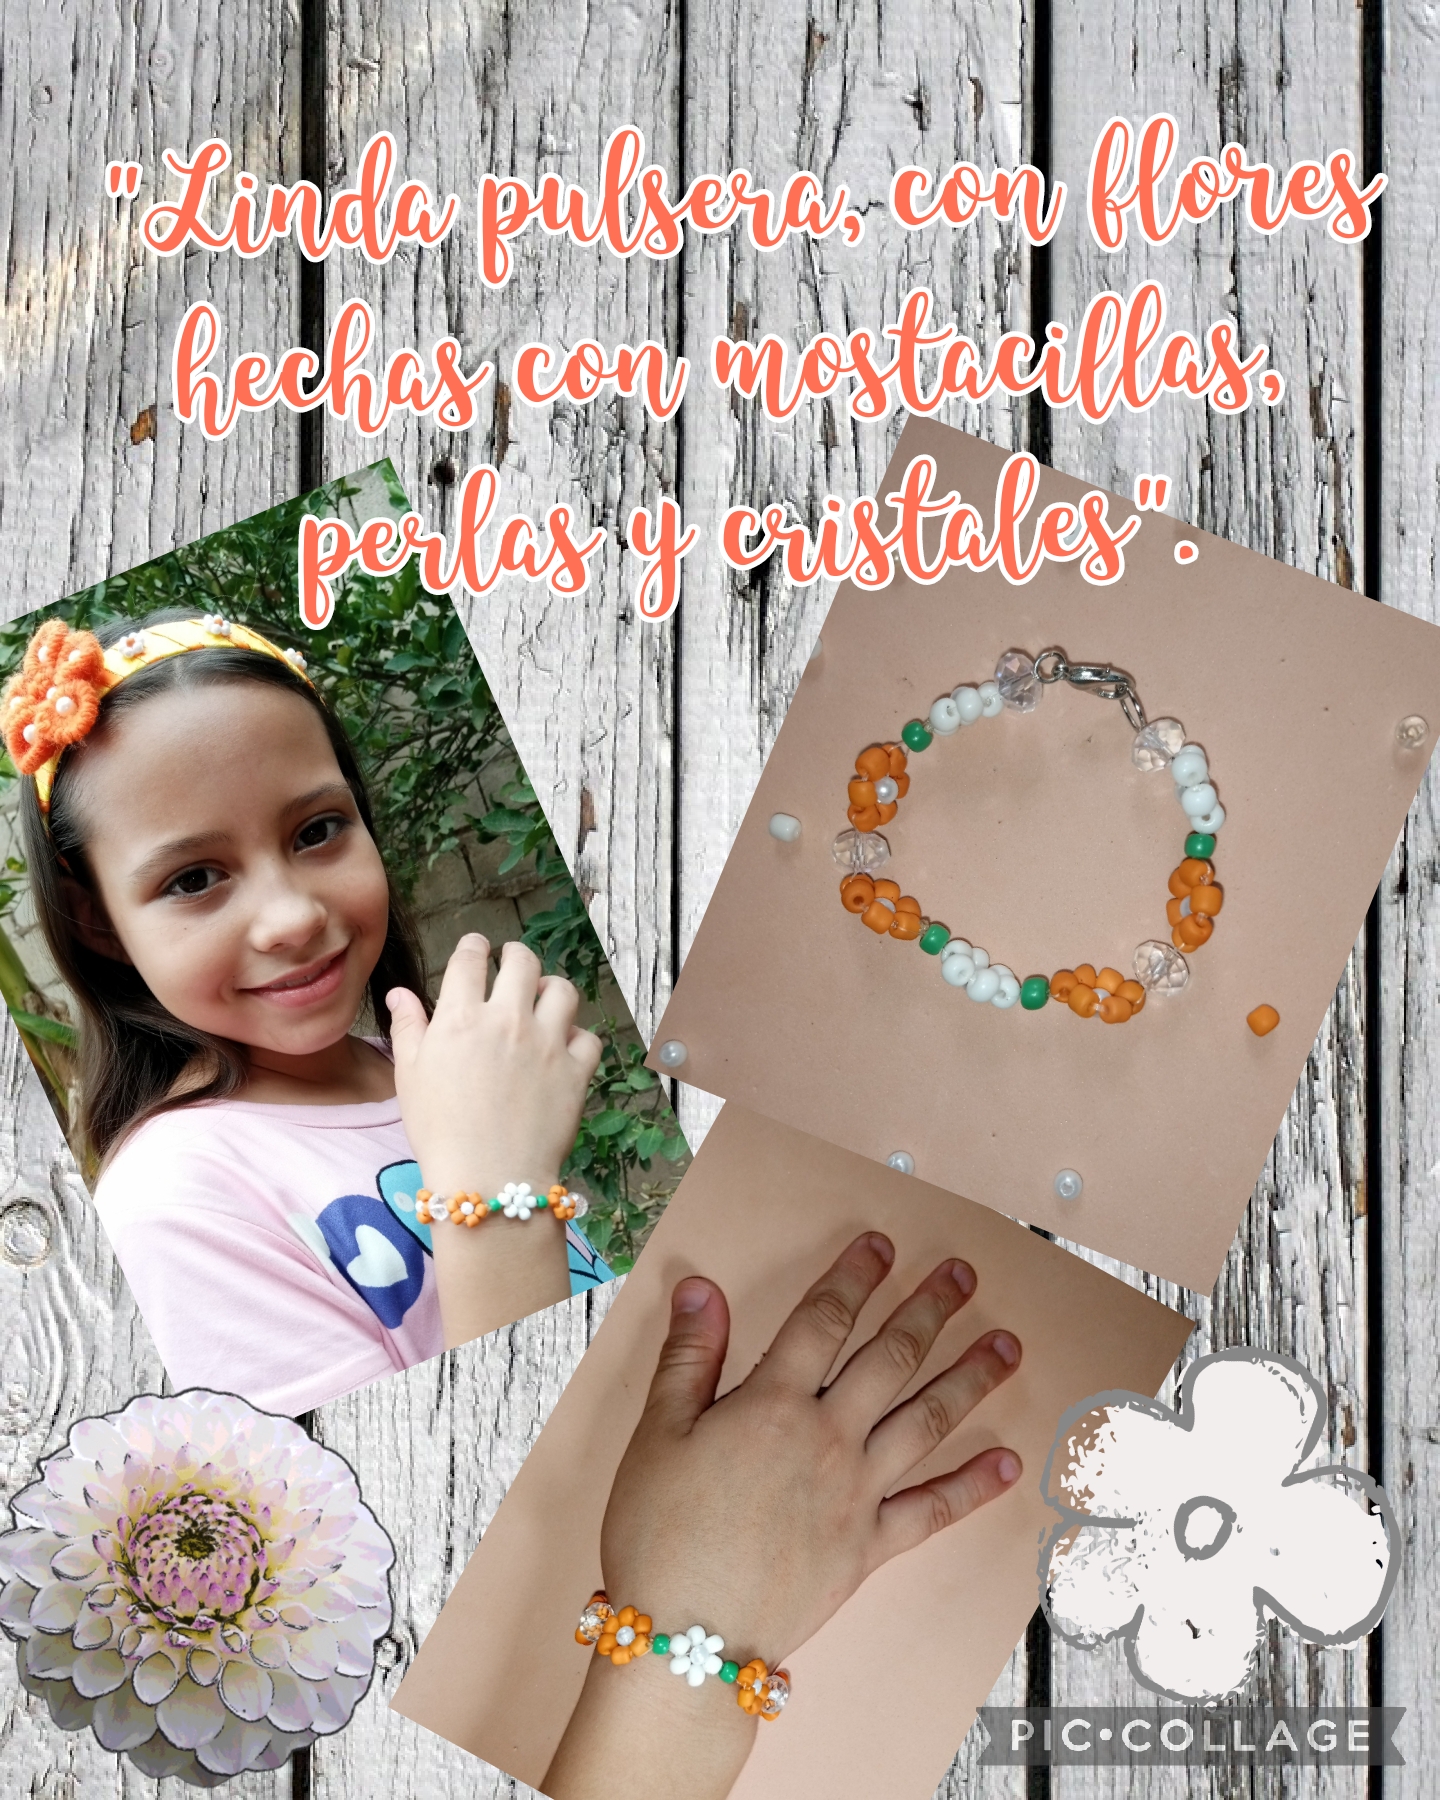
Hola, mi gente bella de esta hermosa comunidad Jewelry, espero que hayan pasado un feliz fin de semana, les doy la bienvenida nuevamente a mi blog, para compartir con ustedes el paso a paso de este tutorial, para que puedan realizar esta bonita pulsera, los materiales que utilizaremos son mostacillas, perlas y cristales, es muy fácil y sencilla de realizar, estoy muy segura que viendo el tutorial la podrán realizar, vamos a comenzar con el paso a paso, espero les guste.
Hello my beautiful people of this beautiful Jewelry community, I hope you have had a happy weekend, I welcome you back to my blog, to share with you the step by step of this tutorial, so that you can make this beautiful bracelet, The materials that we will use are beads, pearls and crystals, it is very easy and simple to do, I am very sure that by watching the tutorial you will be able to do it, we are going to start with the step by step, I hope you like it.
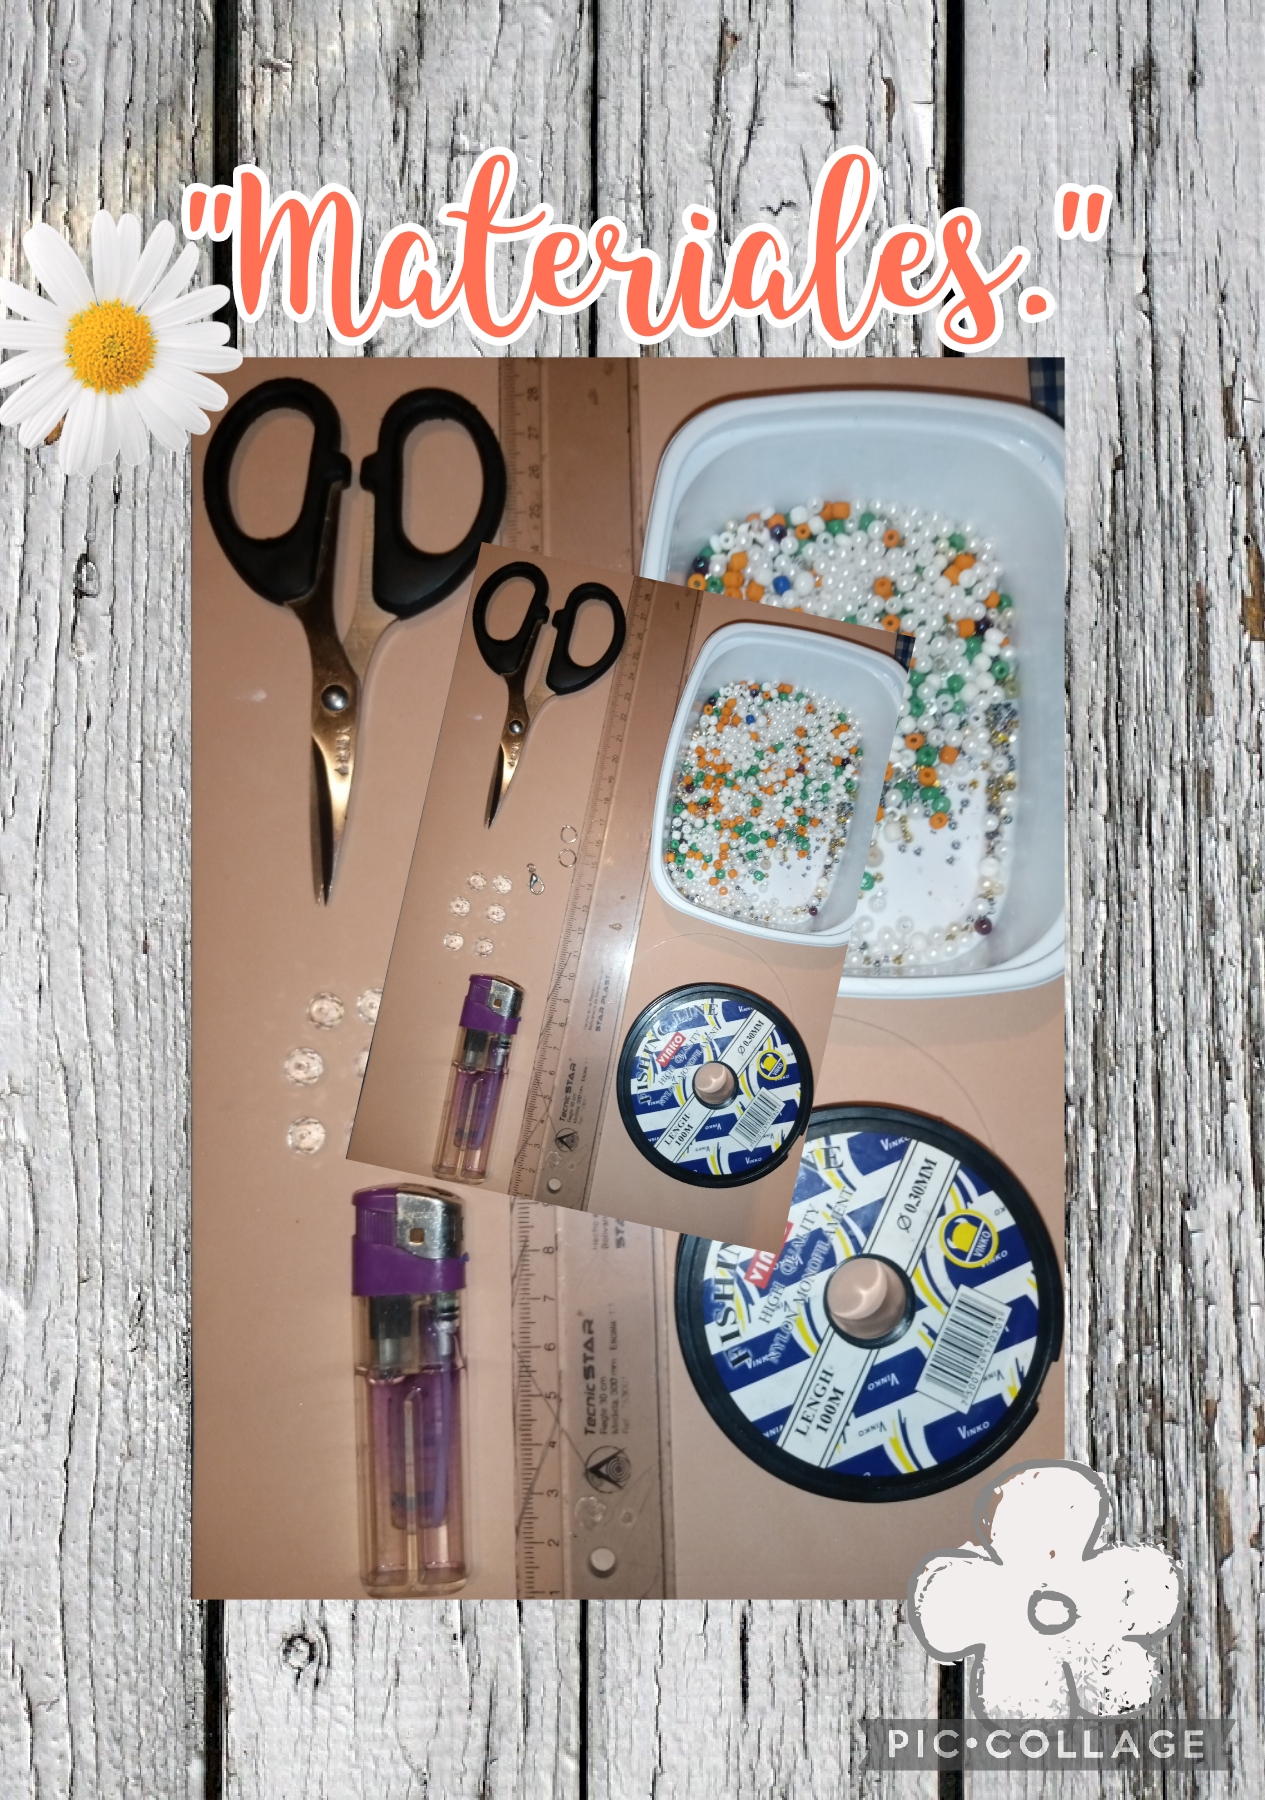
Para realizar esta linda pulsera, vamos a necesitar los siguientes materiales y herramientas que verán a continuación;
*Hilo de nailon, para bisutería
*Mostacillas.
*Perlas.
*Cristales.
*2 argollas de metal y un gancho para abrir y cerra.
*1 tijera.
*1 regla métrica.
*1 yesquero.
*1 tabla de madera, con un gancho de presión.
To make this beautiful bracelet, we are going to need the following materials and tools that you will see below;
*Nylon thread, for jewelry
*Beads.
*Pearls.
*Crystals.
*2 metal rings and a hook to open and close.
*1 scissors.
*1 metric ruler.
*1 tinderbox.
*1 wooden board, with a snap hook.
Let's start with the step by step of this fun tutorial.
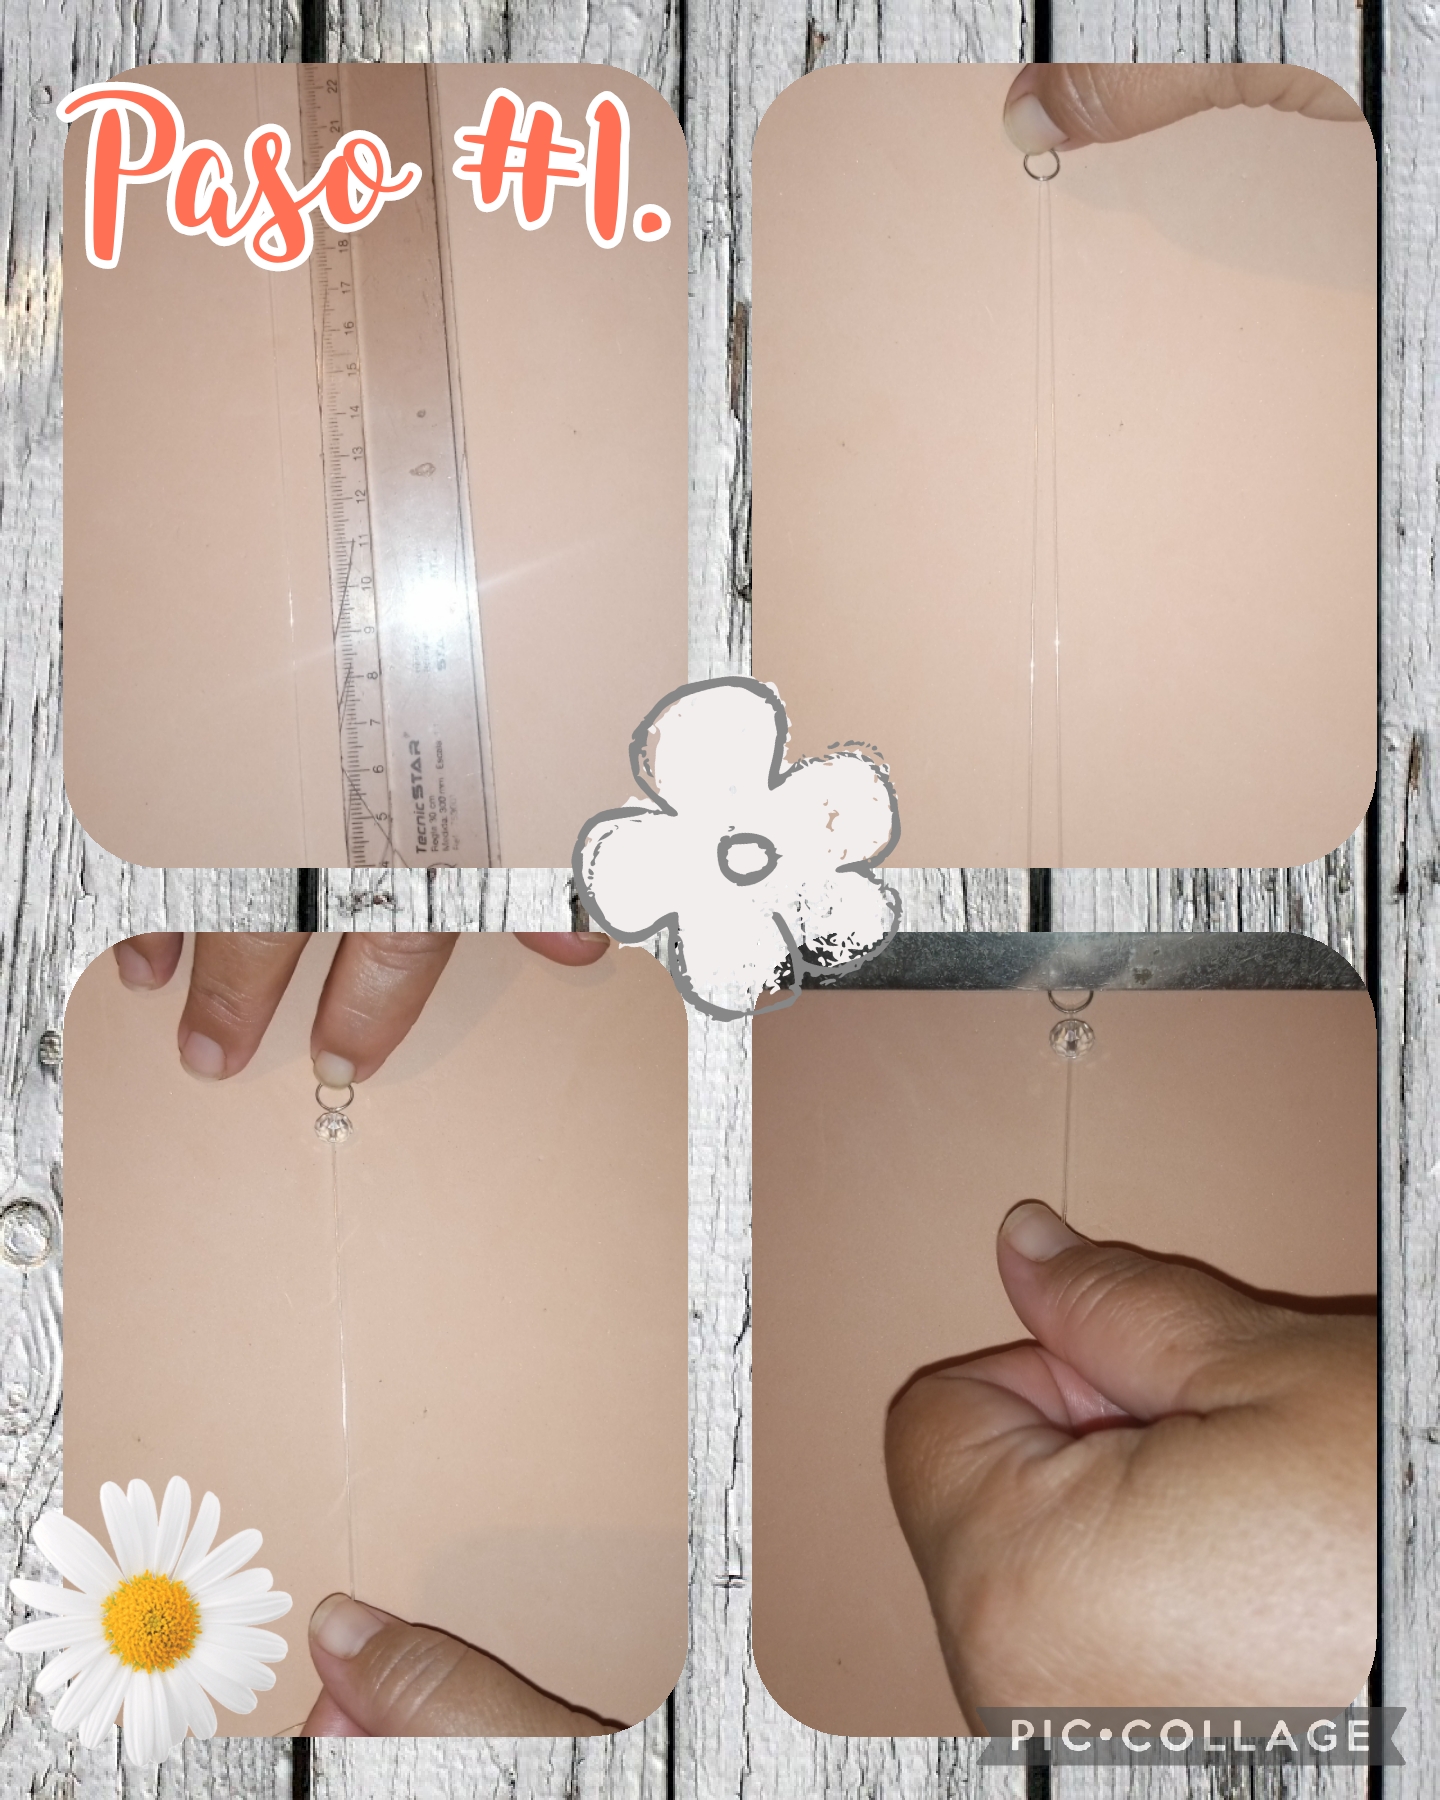
Step #1. We are going to make a nice bracelet, and we are going to start as follows, we take the nylon thread and a metric ruler and we are going to measure 80 centimeters, then we are going to fold it in half to insert a metal ring and then a knot, then we take the wooden board, which has the pressure hook and there we press the metal ring, and then we take the 2 threads and insert it into a crystal, to start the procedure, see the images.
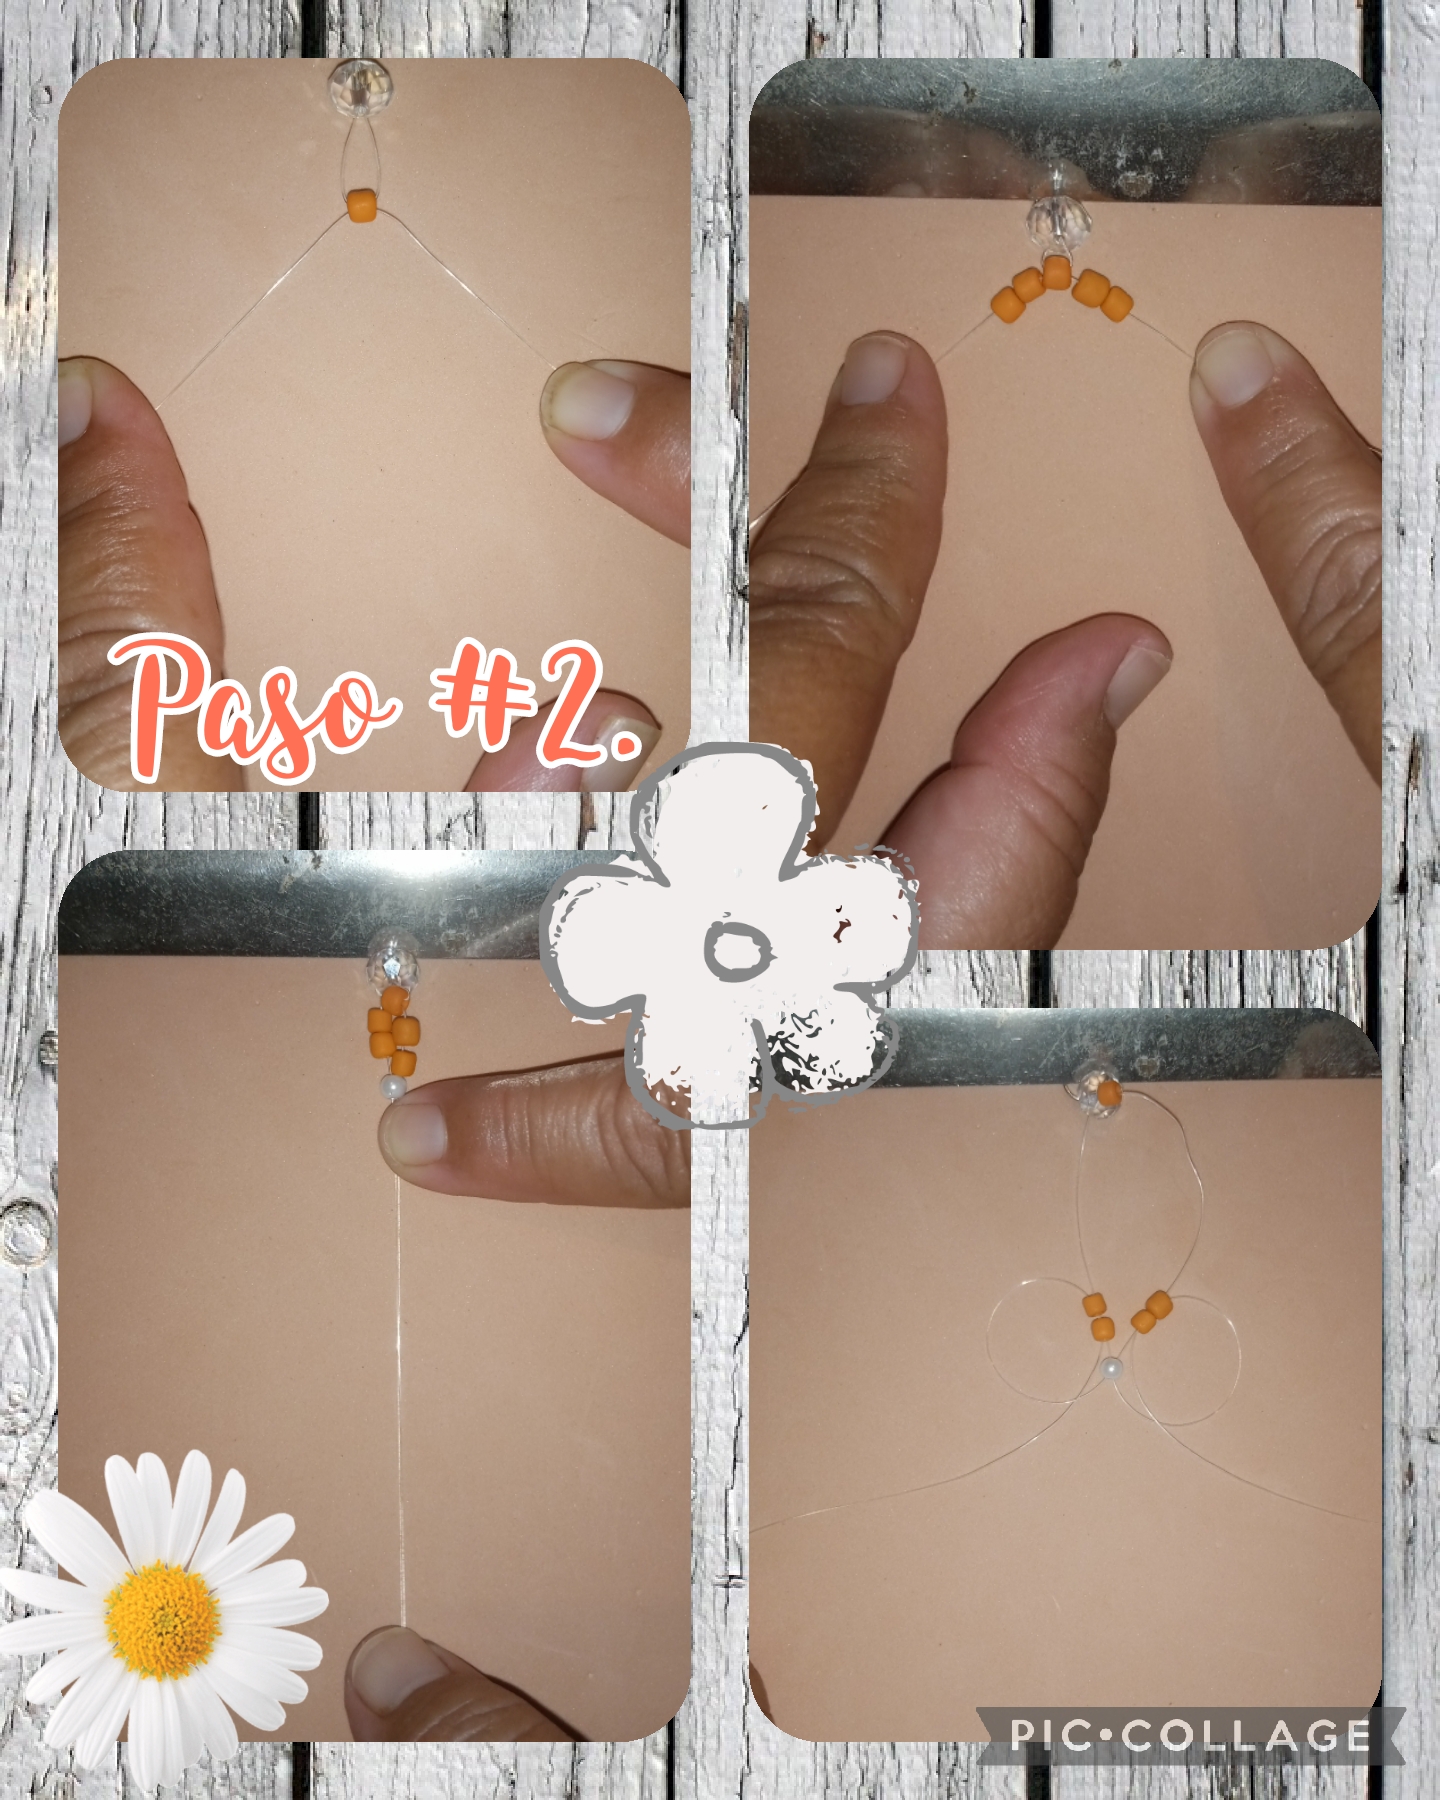
Step #2. In this step we are going to insert a bead, orange with crossed threads, then we take 4 beads and insert 2 on each side, we also insert 1 pearl, for the 2 threads, and so that the pearl is in the center. , we are going to insert each thread behind the 2 beads and we bring it forward and press, we are going to do it in the 2 threads, see the images.
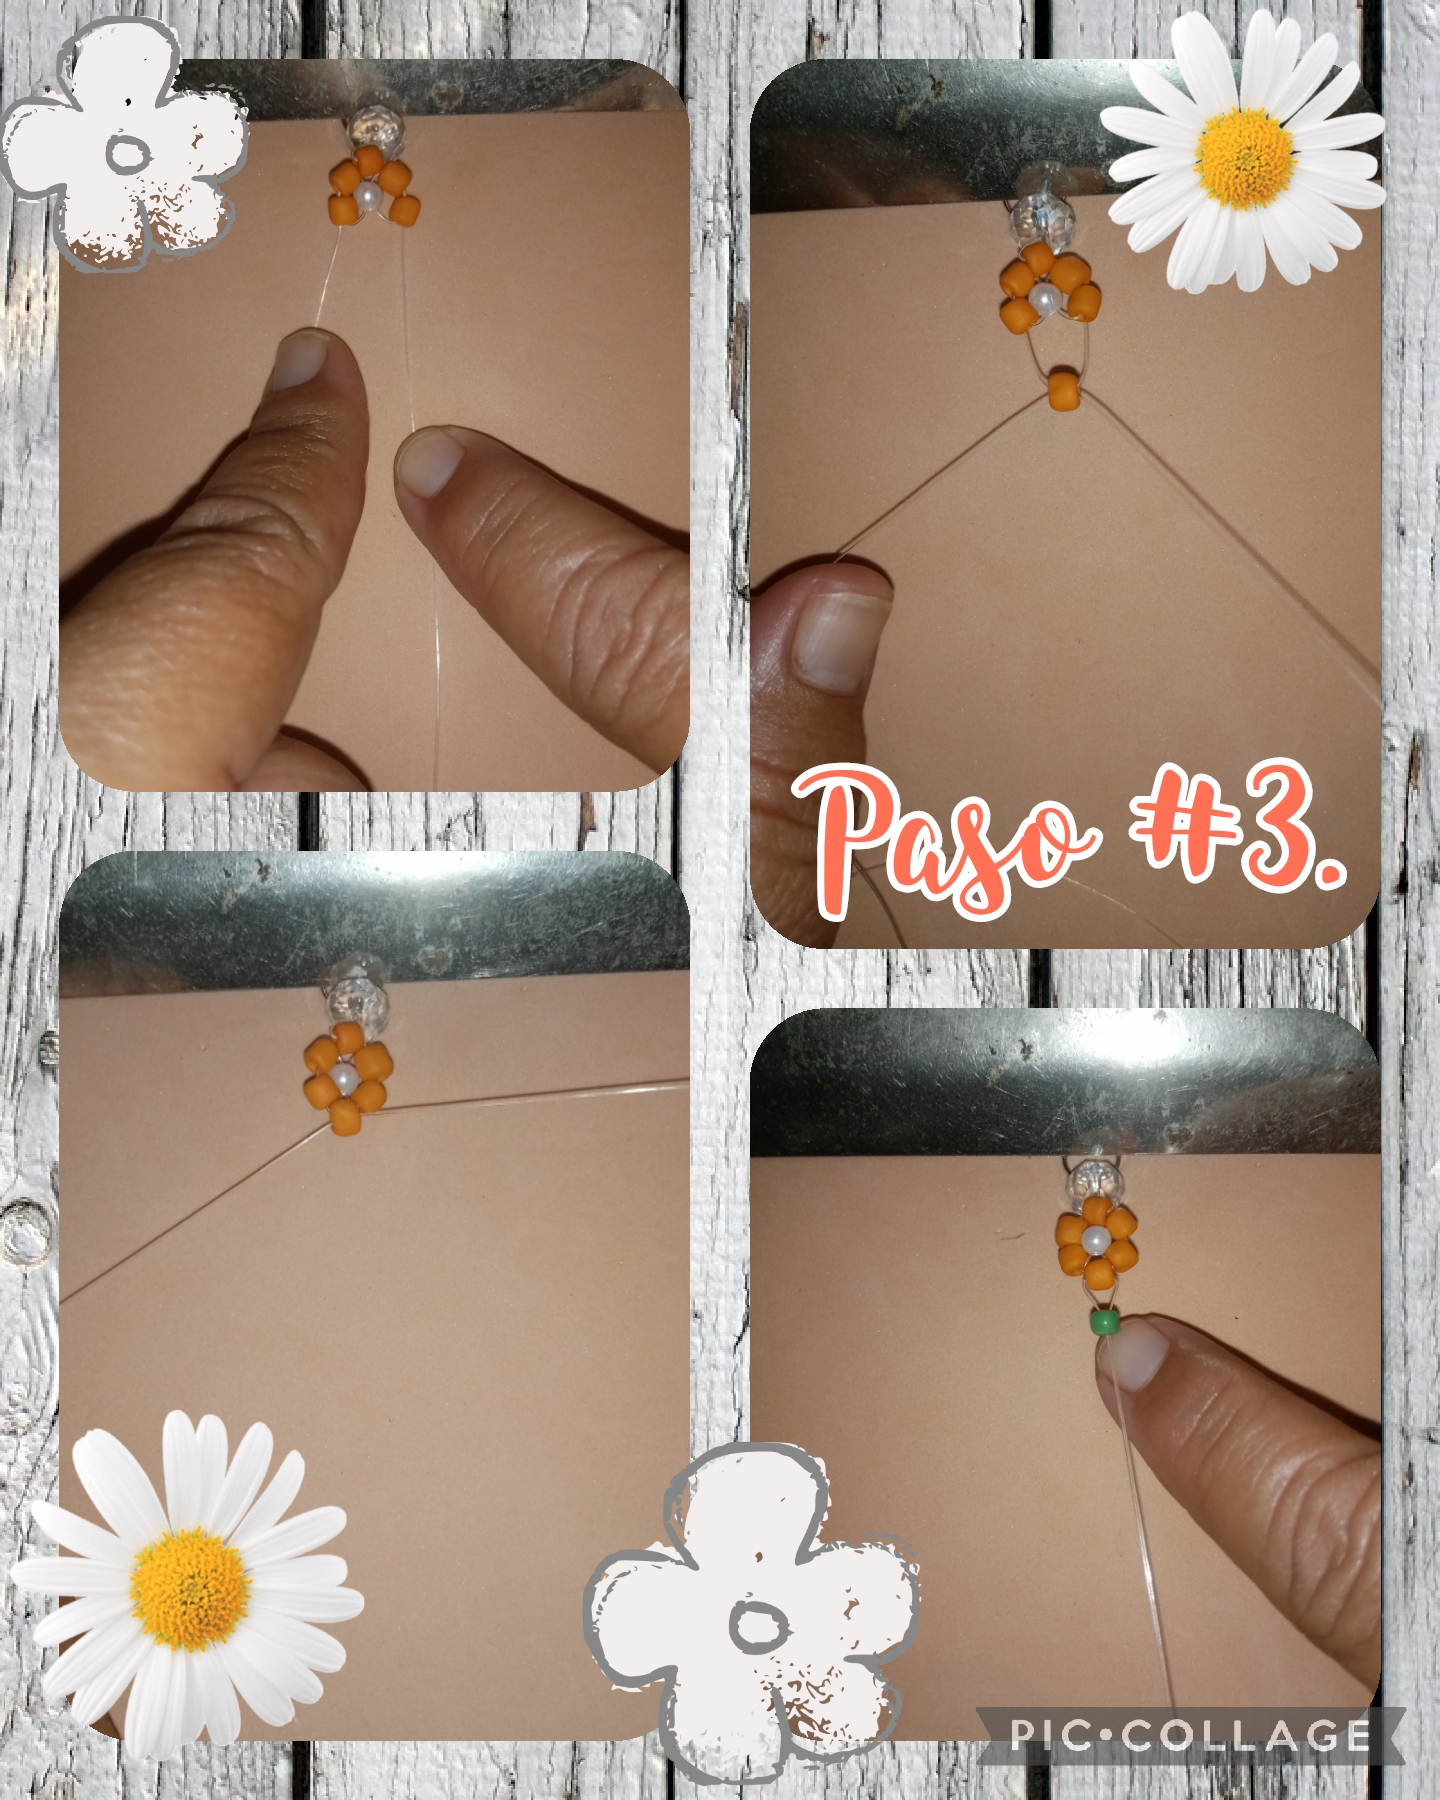
Step #3. As you can see, the pearl was inserted in the center, to begin to form the flower, now we take another bead, orange in color and we are going to insert it with the threads, we cross and tighten again, and to finish forming the flower we are going to put a green bead in the 2 threads, and we take it to where the flower is, which would look like a leaf, see the images.
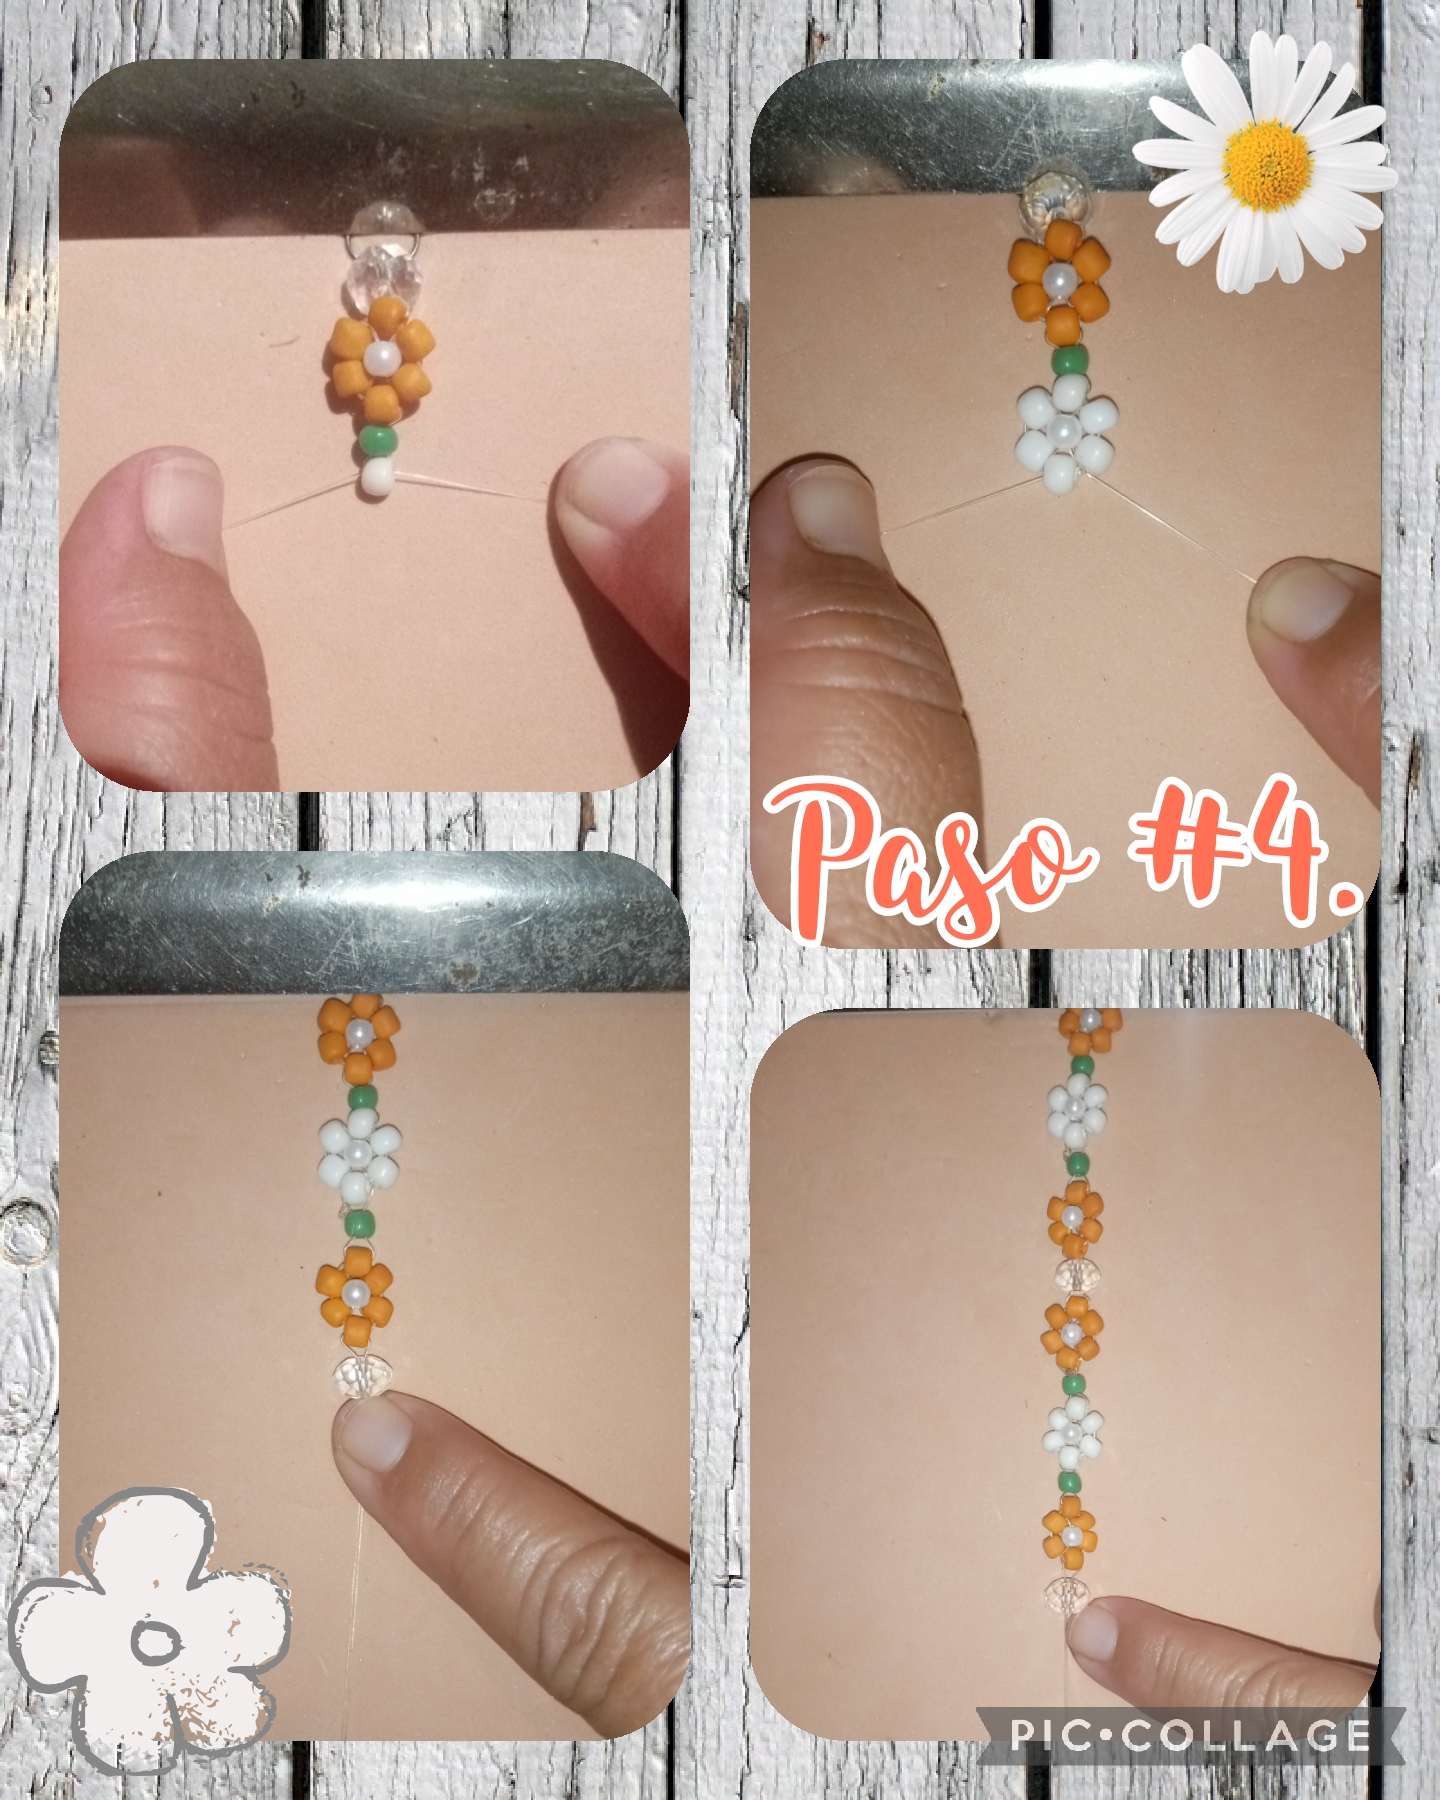
Step #4. In this step we are going to form another flower, but we are going to make it with white beads and a pearl in the center, we are going to do it with the same procedure, with which we made the orange flower, we will continue inserting the beads, green color we return to make another orange flower and thus we insert a crystal, and so on, until we reach the desired size, see the images.
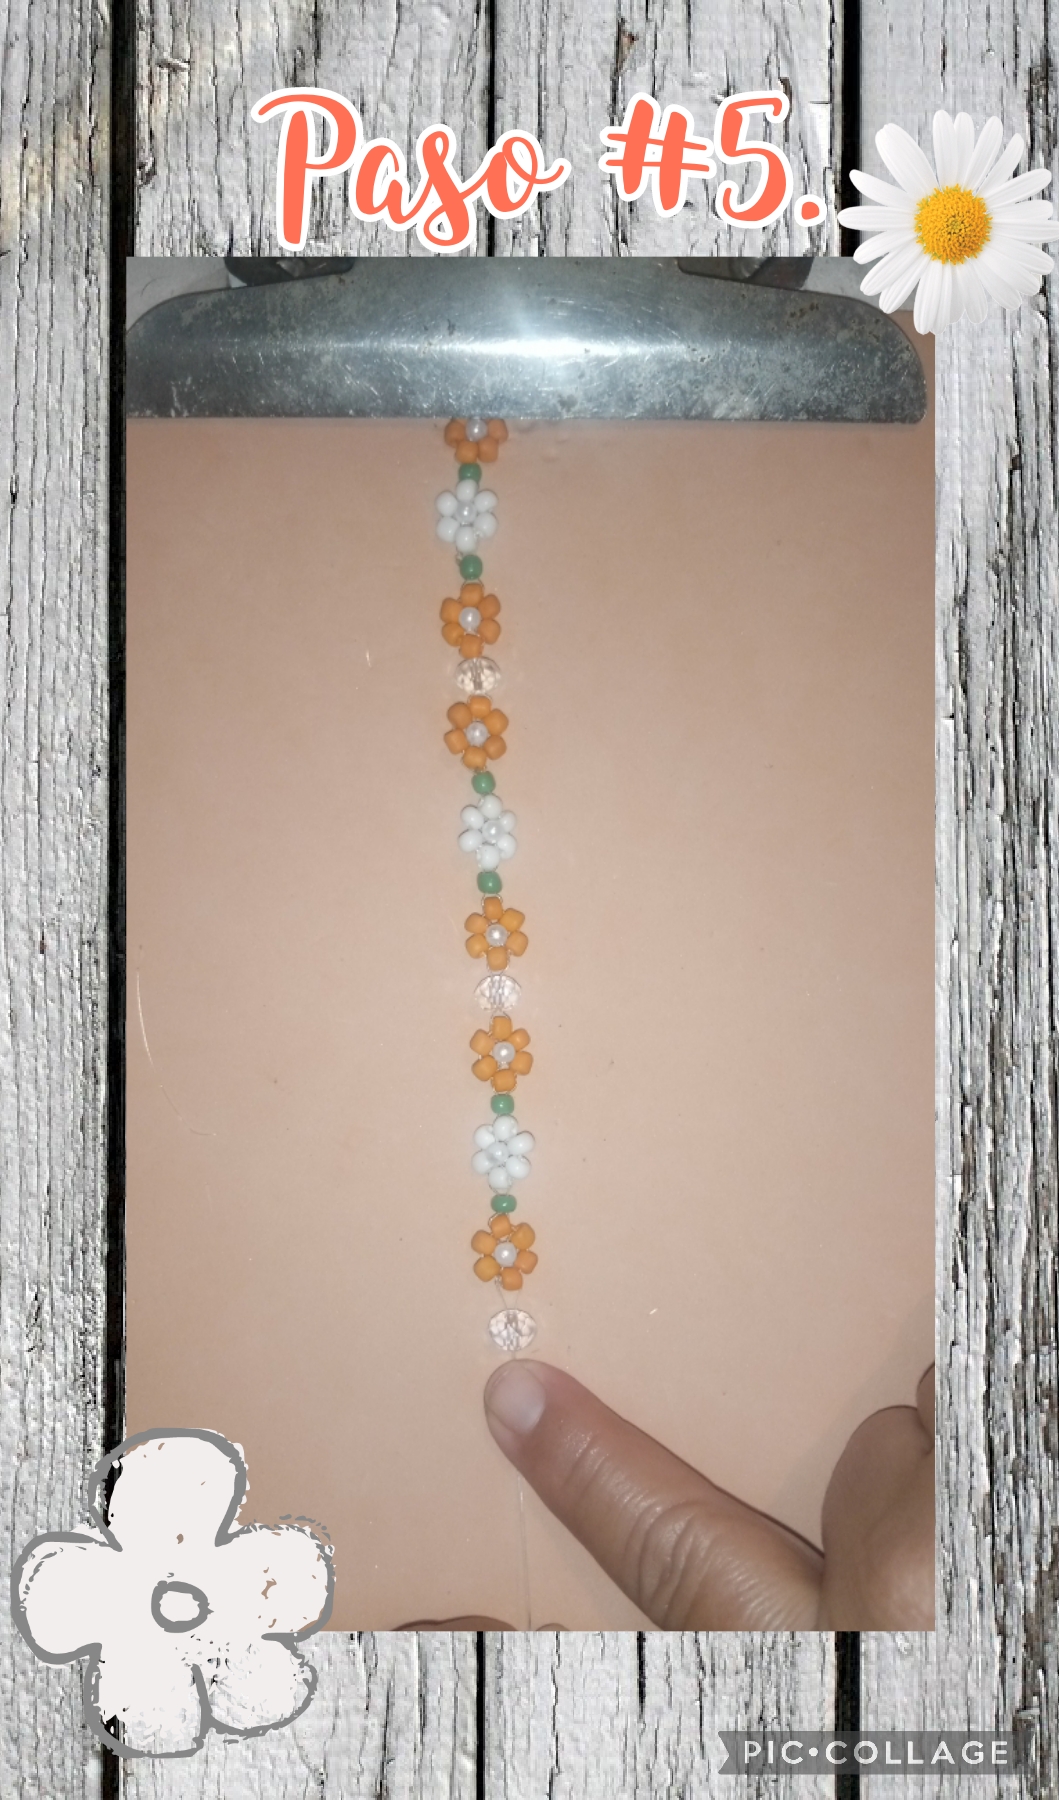
Step #5. In this step we show you the bracelet, almost finished, look at the image.
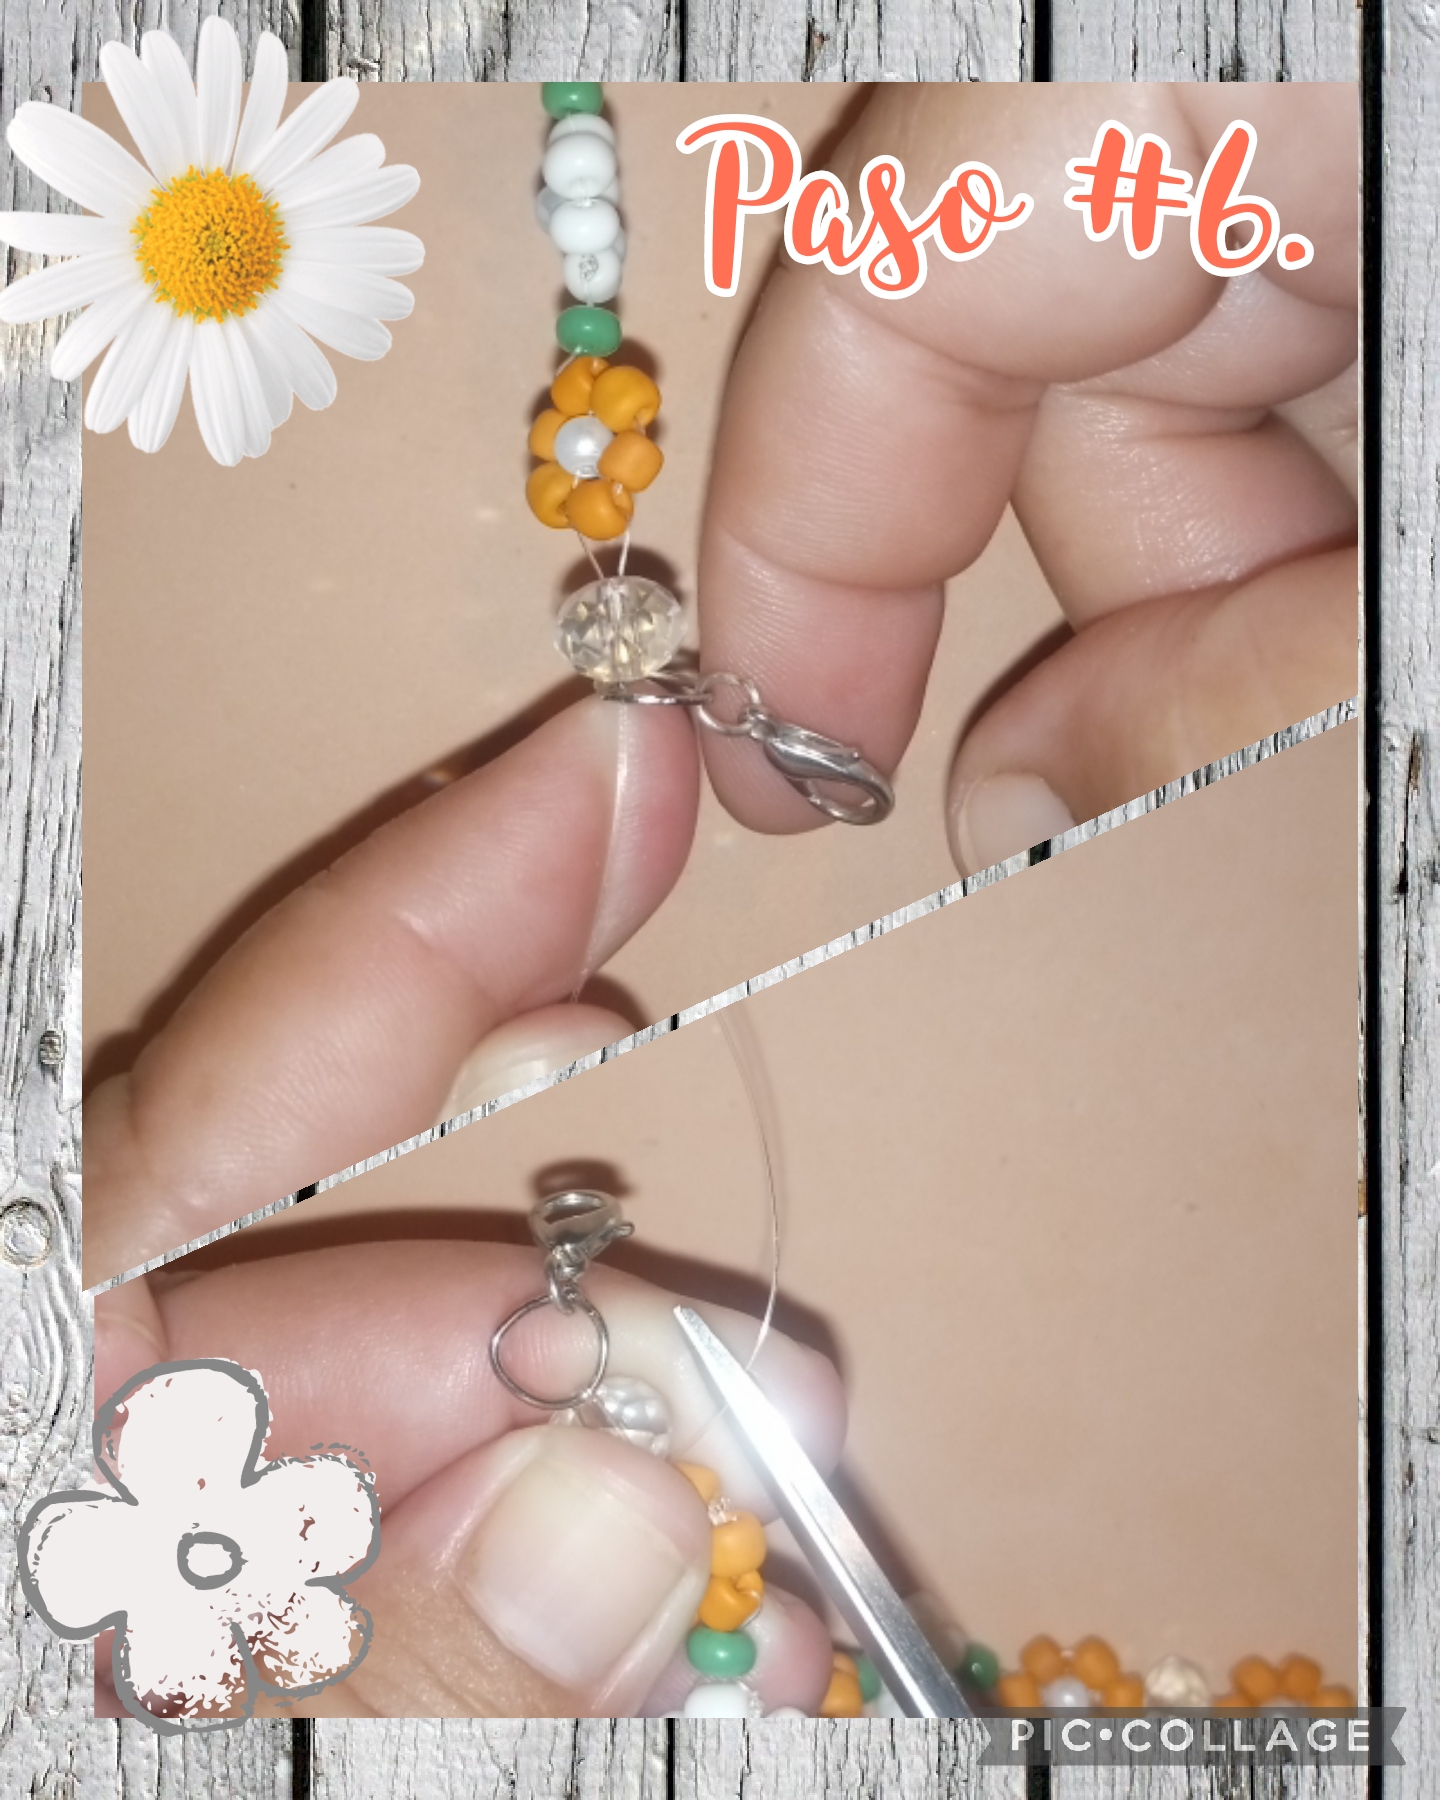
Step #6. In this step we are going to take the open and close hook and insert it into the final part of the bracelet, then we make 2 knots so that it is tight and does not come loose, and with the scissors we cut the excess and with the tinderbox we burn the ends to finish sealing, see the images.
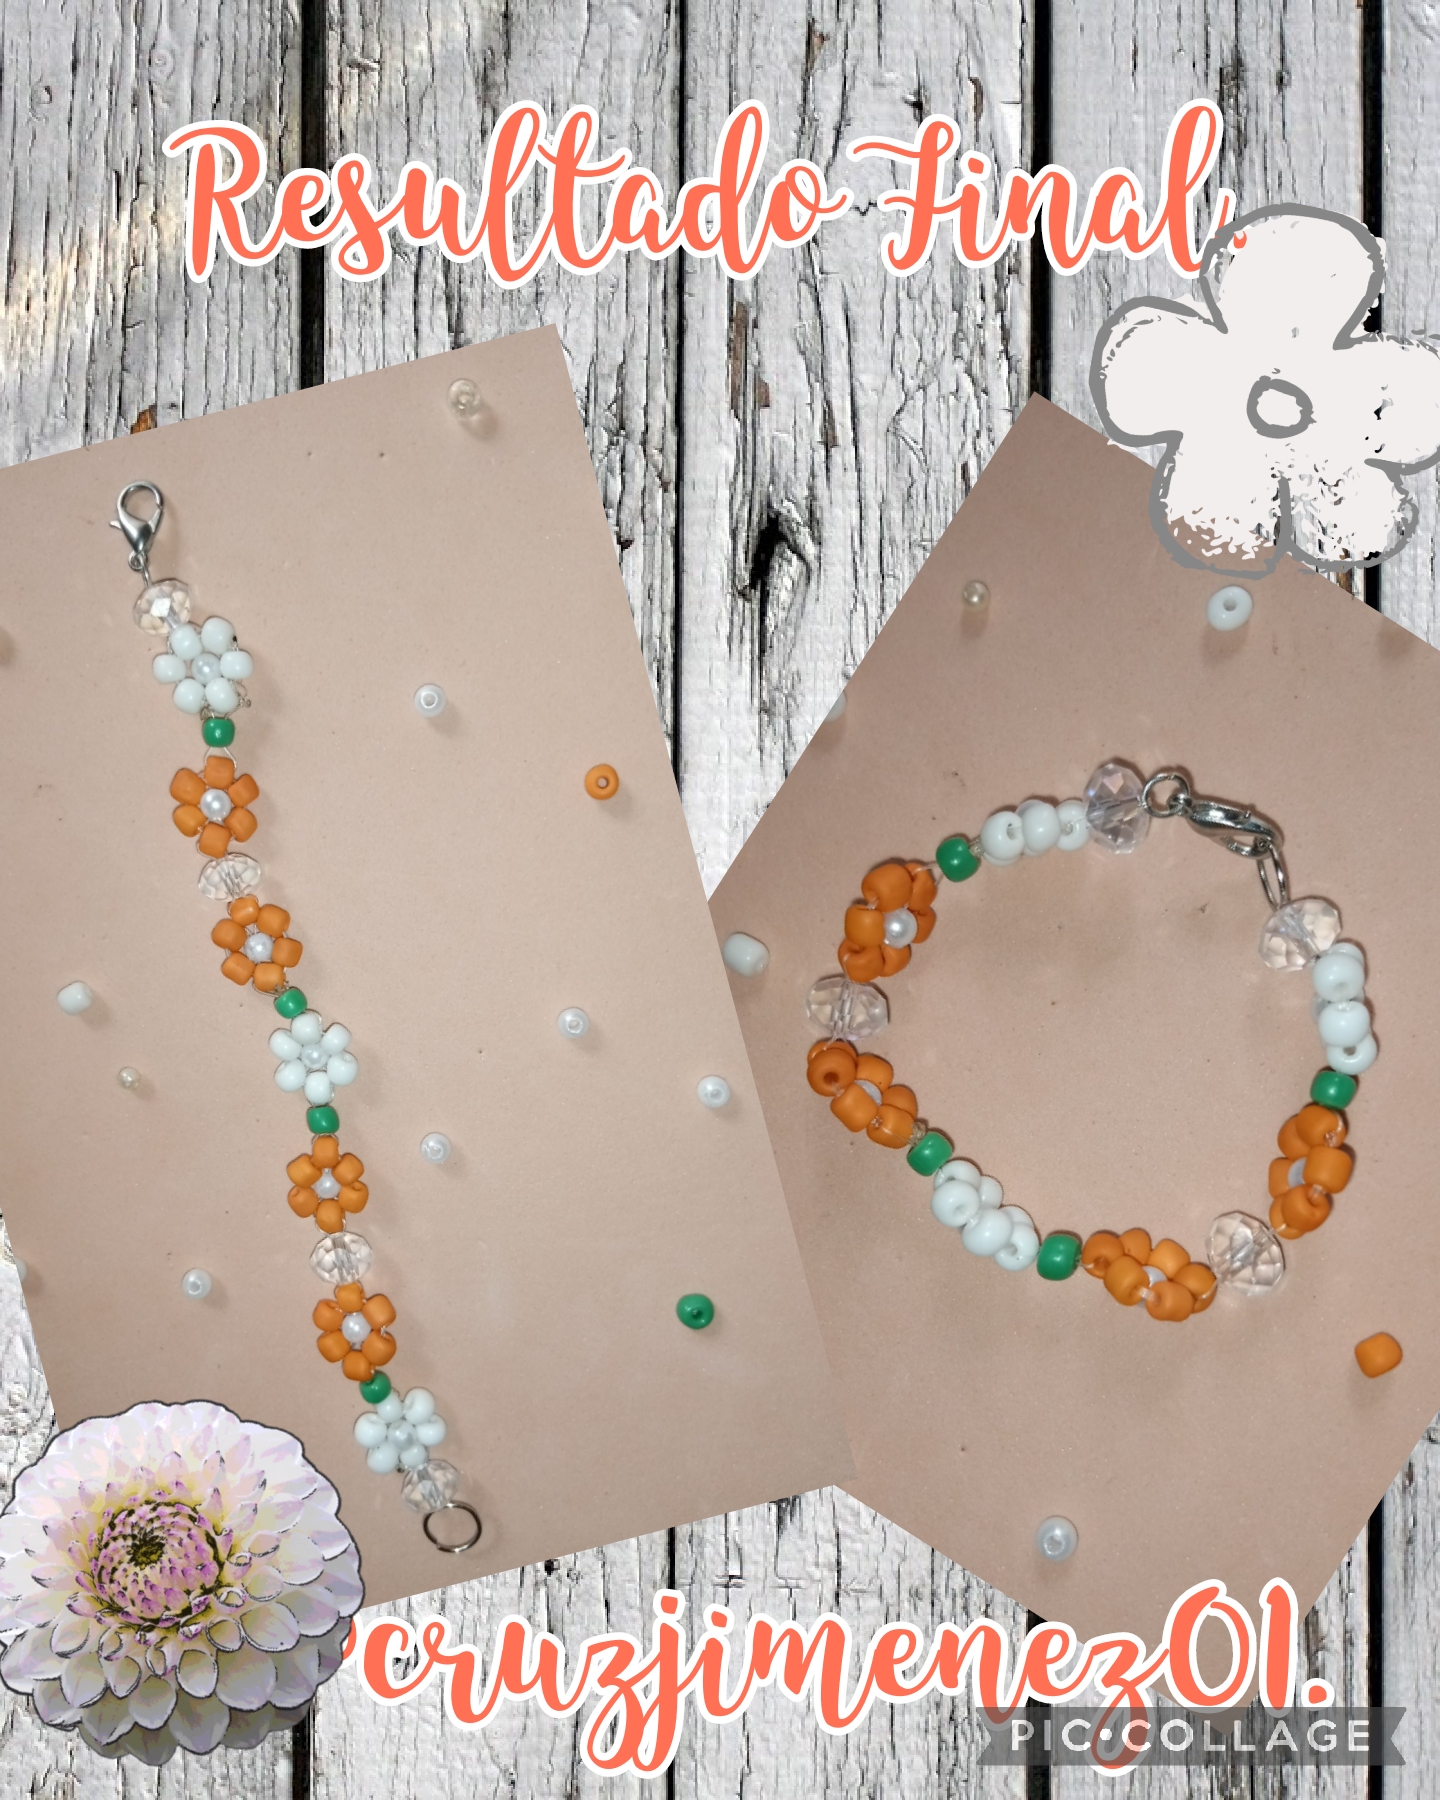
We have reached the end of all the steps, and the final result is a beautiful bracelet, with flowers made with beads, pearls and crystals, this bracelet is ideal for the princesses of the house. Thank you for visiting my blog and watching until the end, see you very soon, God bless you and have a good night.
Las fotos fueron capturadas con mi Teléfono Android TECNO SPARK 6GO y editadas con la aplicación PIC-COLLAGE y traducido el contenido por el traductor de Google Esp-Ing.
The photos were captured with my TECNO SPARK 6GO Android Phone and edited with the PIC-COLLAGE application and the content translated by the Google Esp-Ing translator.
Me gustó mucho tu publicación @cruzjimenez01, felicidades y mucha suerte cariño.
Congratulations @cruzjimenez01! You have completed the following achievement on the Hive blockchain And have been rewarded with New badge(s)
Your next target is to reach 25000 upvotes.
You can view your badges on your board and compare yourself to others in the Ranking
If you no longer want to receive notifications, reply to this comment with the word
STOPCheck out our last posts:
Support the HiveBuzz project. Vote for our proposal!
Muy bella, una selección de colores muy bellos, Gracias por este paso a paso @cruzjimenez01
The rewards earned on this comment will go directly to the people sharing the post on Twitter as long as they are registered with @poshtoken. Sign up at https://hiveposh.com.
Qué hermosa forma de consentir a las princesas de la casa.
Estas creaciones se nota que le gustan a la niña, porque la modela y se le ve muy feliz además la luce muy bien
Felicitaciones