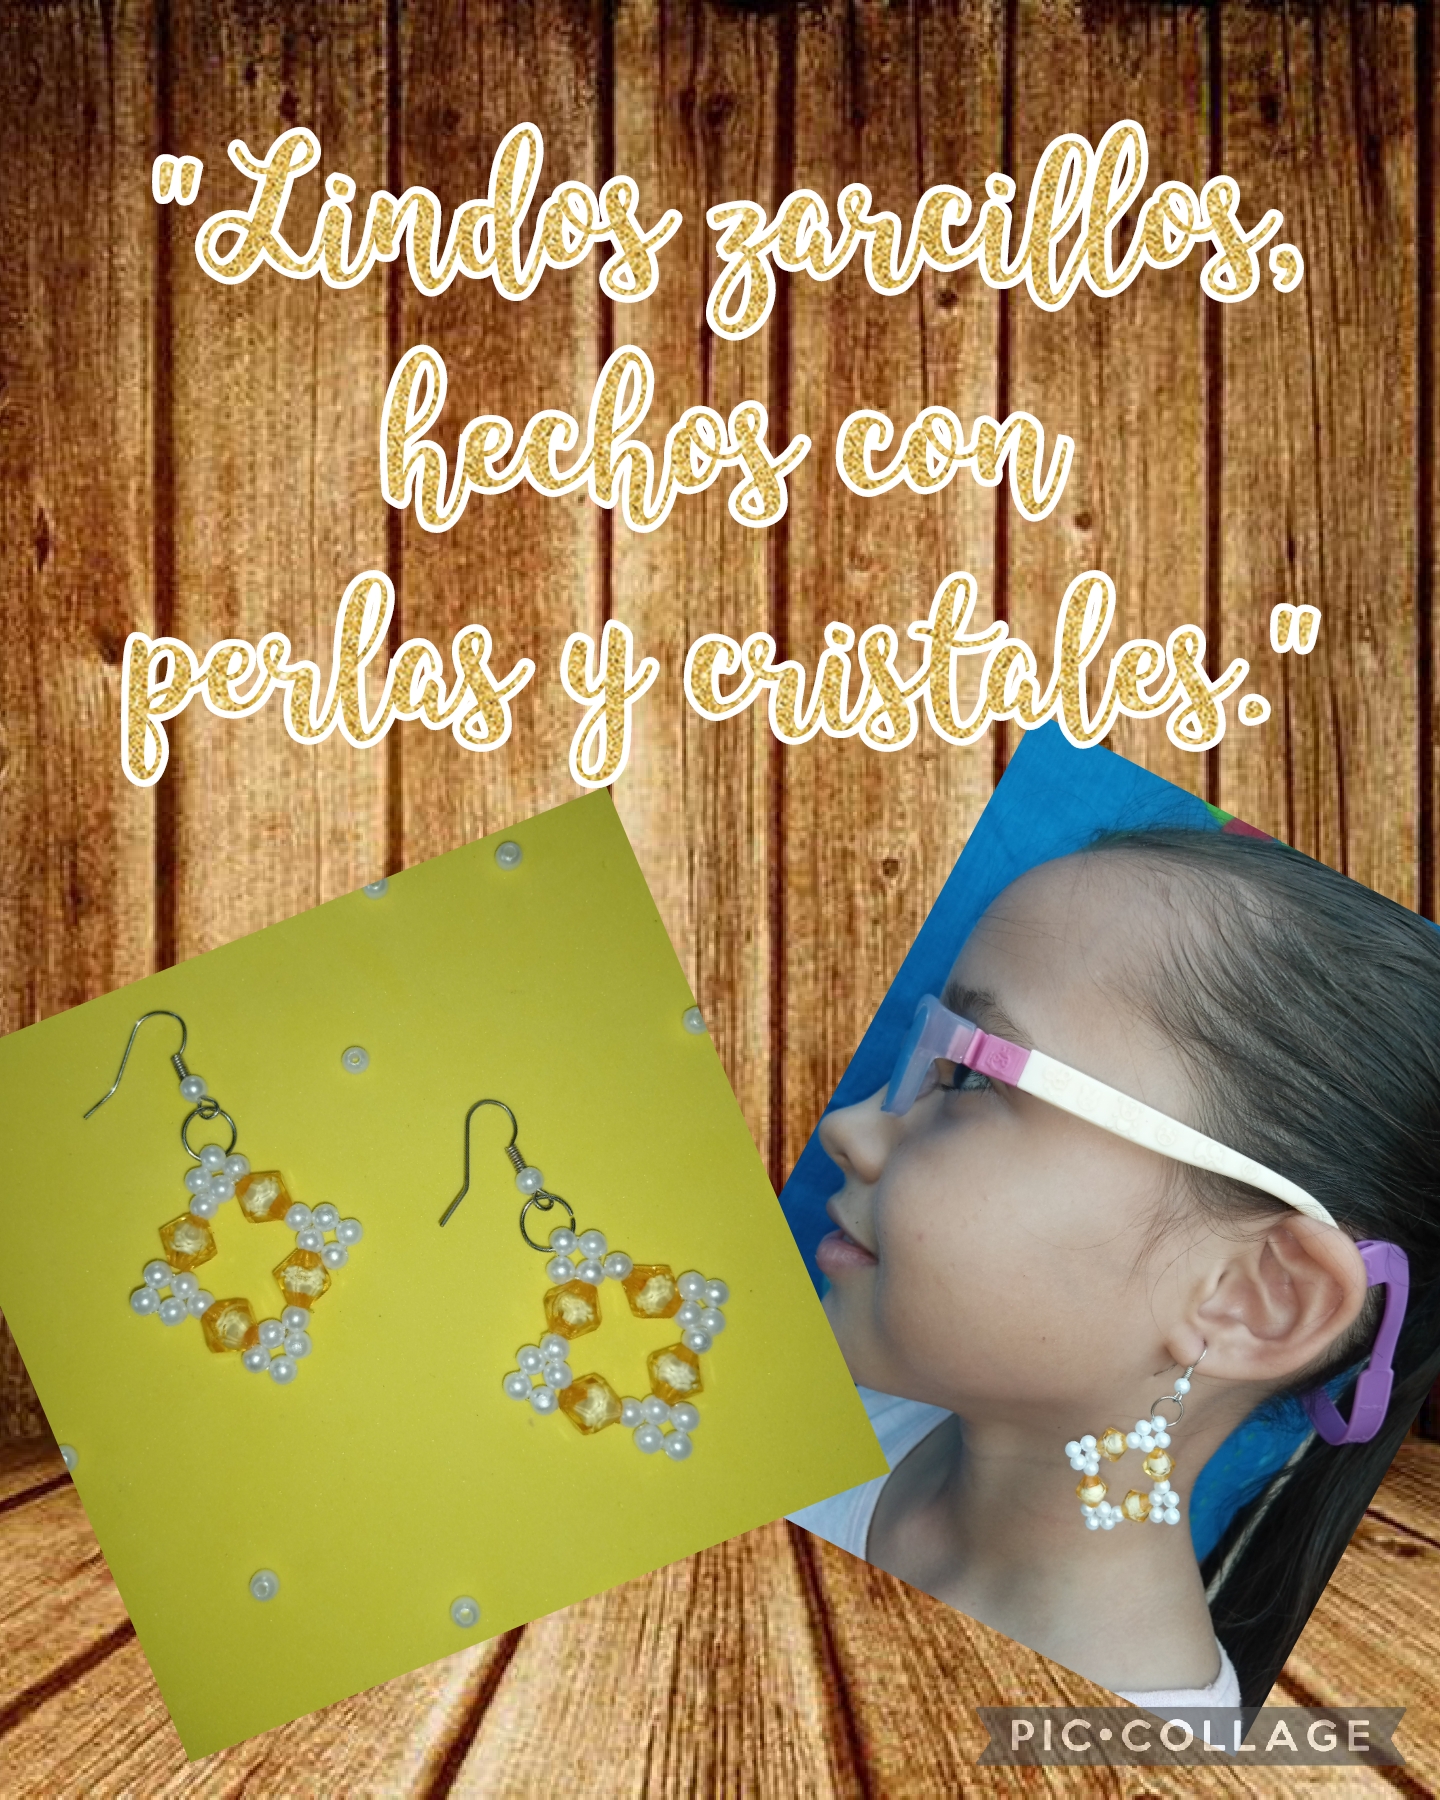
Hola!!!!! Bienvenidos a mi blog, amigos creativos de esta hermosa comunidad Jewelry, antes de todos les envio un saludo virtual, deseandoles que hayan pasado un feliz día, llenos de mucha alegría, deseandoles a Dios que los bendiga a todos.. Hoy les traigo un nuevo tutorial, se trata de hacer unos lindos zarcillos, con perlas y cristales, son muy fácil y sencillos de hacer, ustedes también los pueden hacer, viendo el tutorial, están muy lindos para regalárselos a las persona mas queridas, en fechas y momentos especiales, ahora sin mas que decir, comencemos con el paso a paso de este divertido y fácil tutorial..
Hello!!!!! Welcome to my blog, creative friends of this beautiful Jewelry community, before all of you I send you a virtual greeting, wishing you a happy day, full of joy, wishing that God bless you all... Today I bring you a new tutorial, it is about to make beautiful earrings, with pearls and crystals, they are very easy and simple to do, you can also do them, watching the tutorial, they are very beautiful to give them to the most loved person, on special dates and moments, now without further ado let's start with the step by step of this fun and easy tutorial..
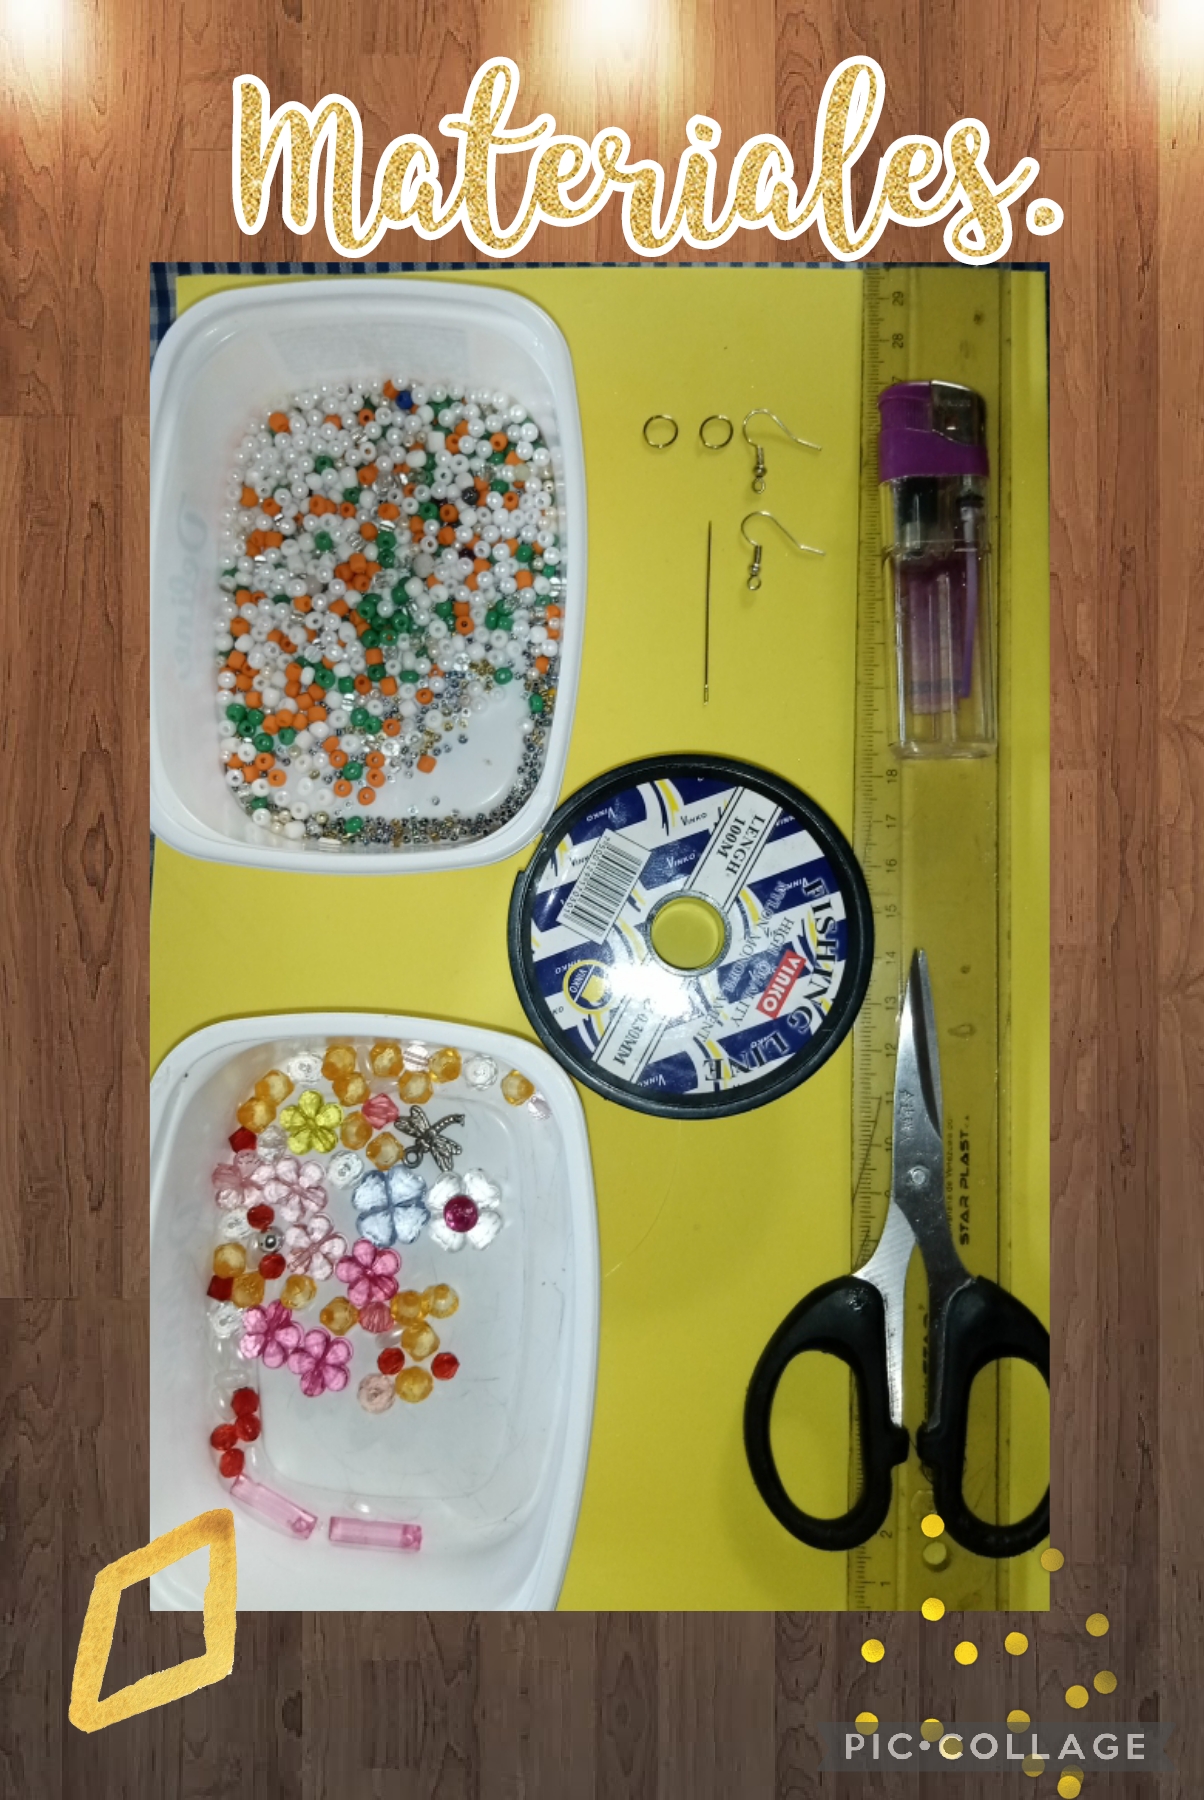
Para hacer estos lindos zarcillos, vamos a utilizar los siguientes materiales y herramientas:
*Hilo de nailon.
*Perlas.
*Cristales.
*2 anzuelos para bisutería.
*2 argollas de metal.
*1 aguja para coser.
*1 regla métrica.
*1 yesquero.
To make these cute tendrils, we are going to use the following materials and tools:
*Nylon thread.
*Pearls.
*Crystals.
*2 hooks for jewelry.
*2 metal rings.
*1 sewing needle.
*1 metric ruler.
*1 tinderbox.
Let's get started, with this fun step by step.
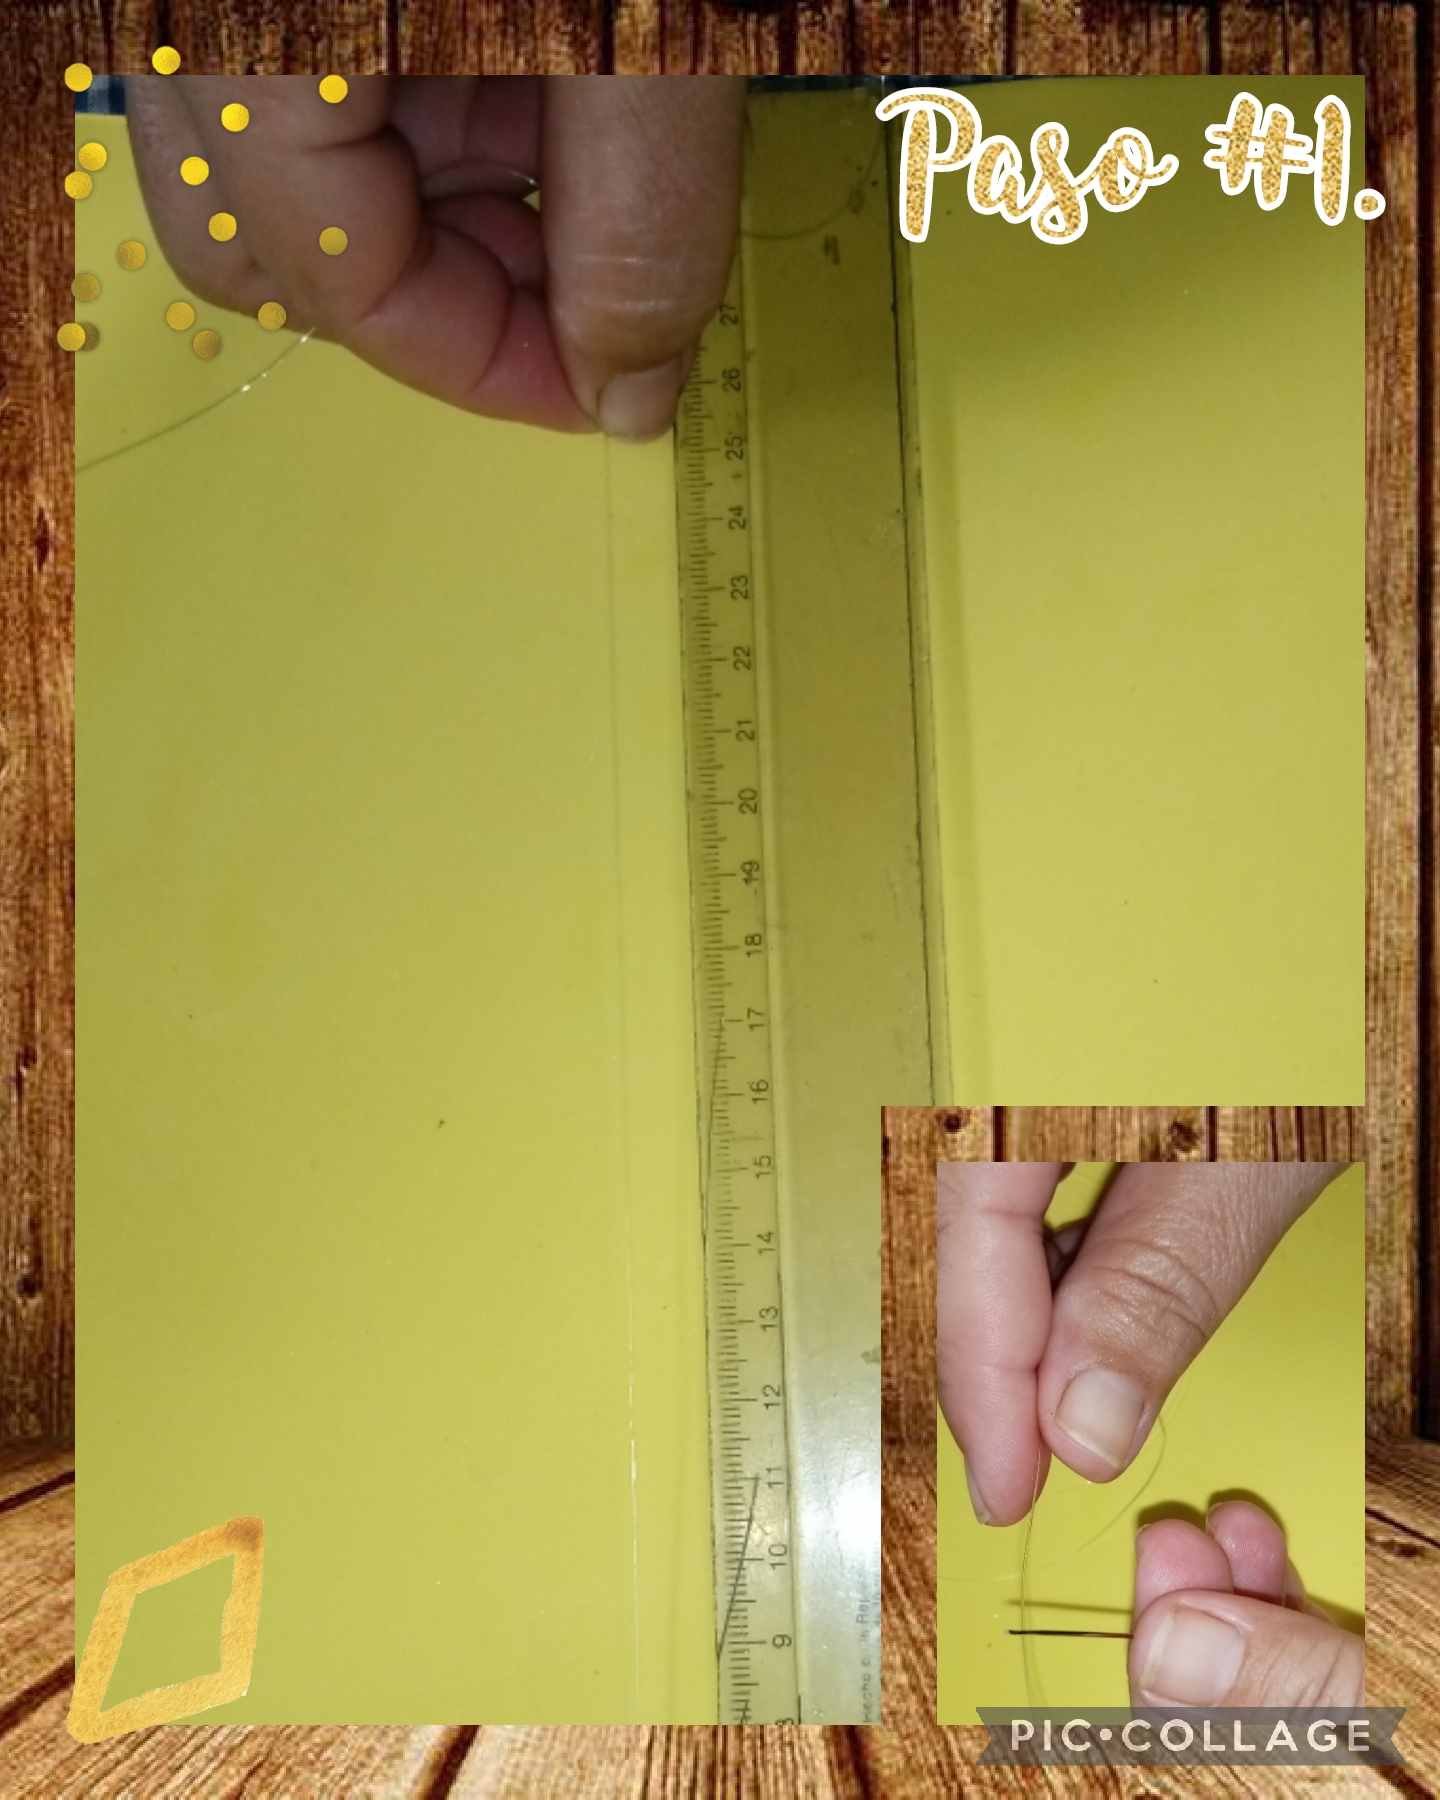
Step #1. To start making some beautiful tendrils, we are going to start with this step by step and we are going to do it as follows, the first thing we are going to do is, we take the nylon thread and a metric ruler, to take the measure of 35 centimeters, but we are going to cut 2 nylon threads with the same measurement because they are 2 tendrils, then we take the sewing needle and insert the nylon thread into the needle, see the images.

Step #2. In this step, we are going to take 2 pearls and 1 crystal, to start but there are a total of 4 crystals and 8 pearls, then we join all the pearls and crystals, make 2 knots and tighten, so that it cannot come loose, see the images .
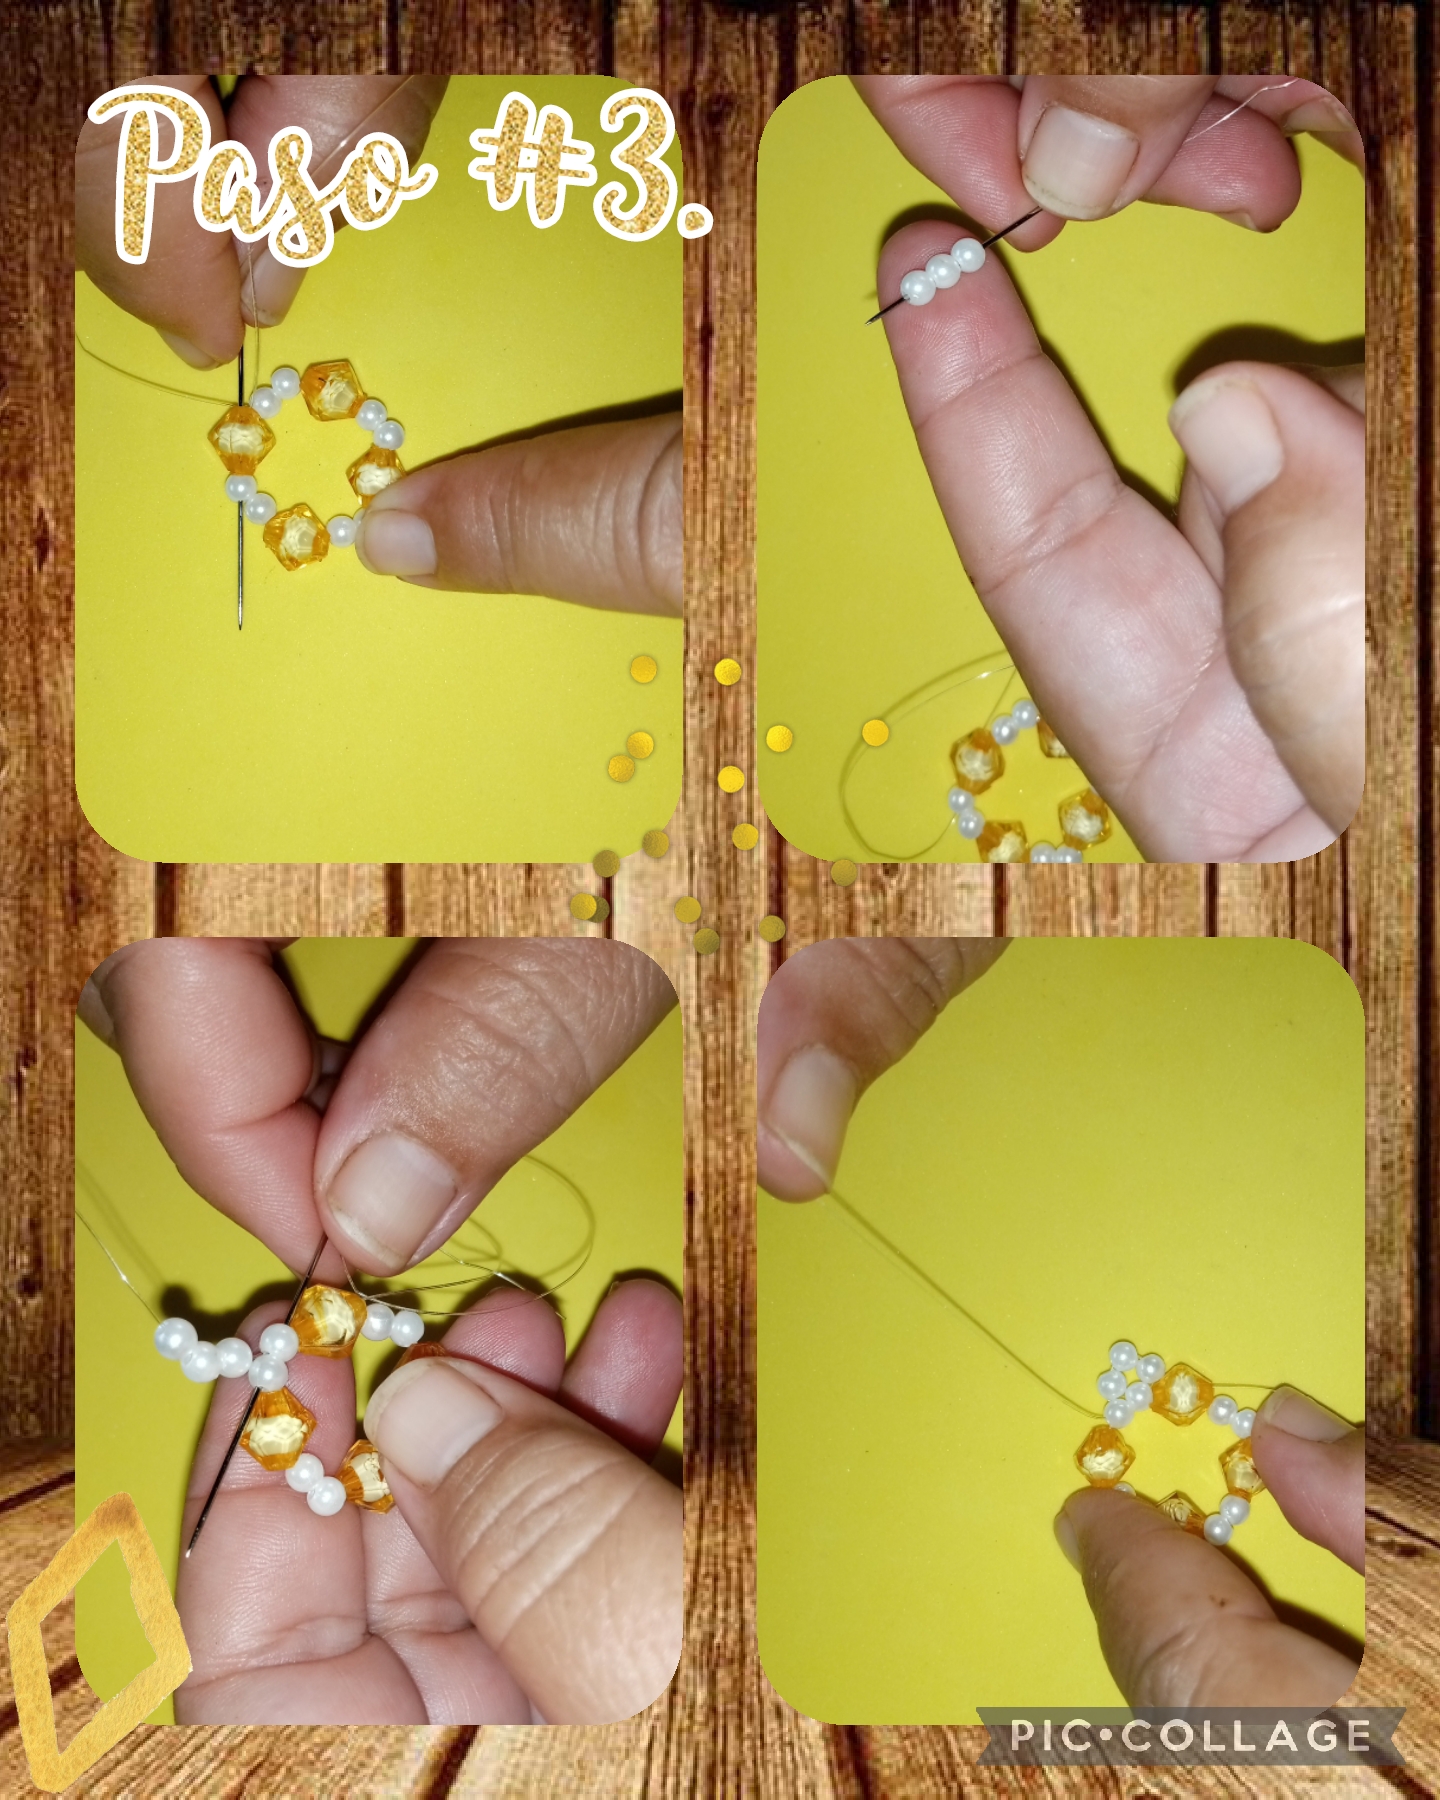
Step #3. Next we are going to sew the whole piece, inserting the nylon thread through the glass, orange color and a pearl, we remove, and we insert 3 more pearls, see the images.
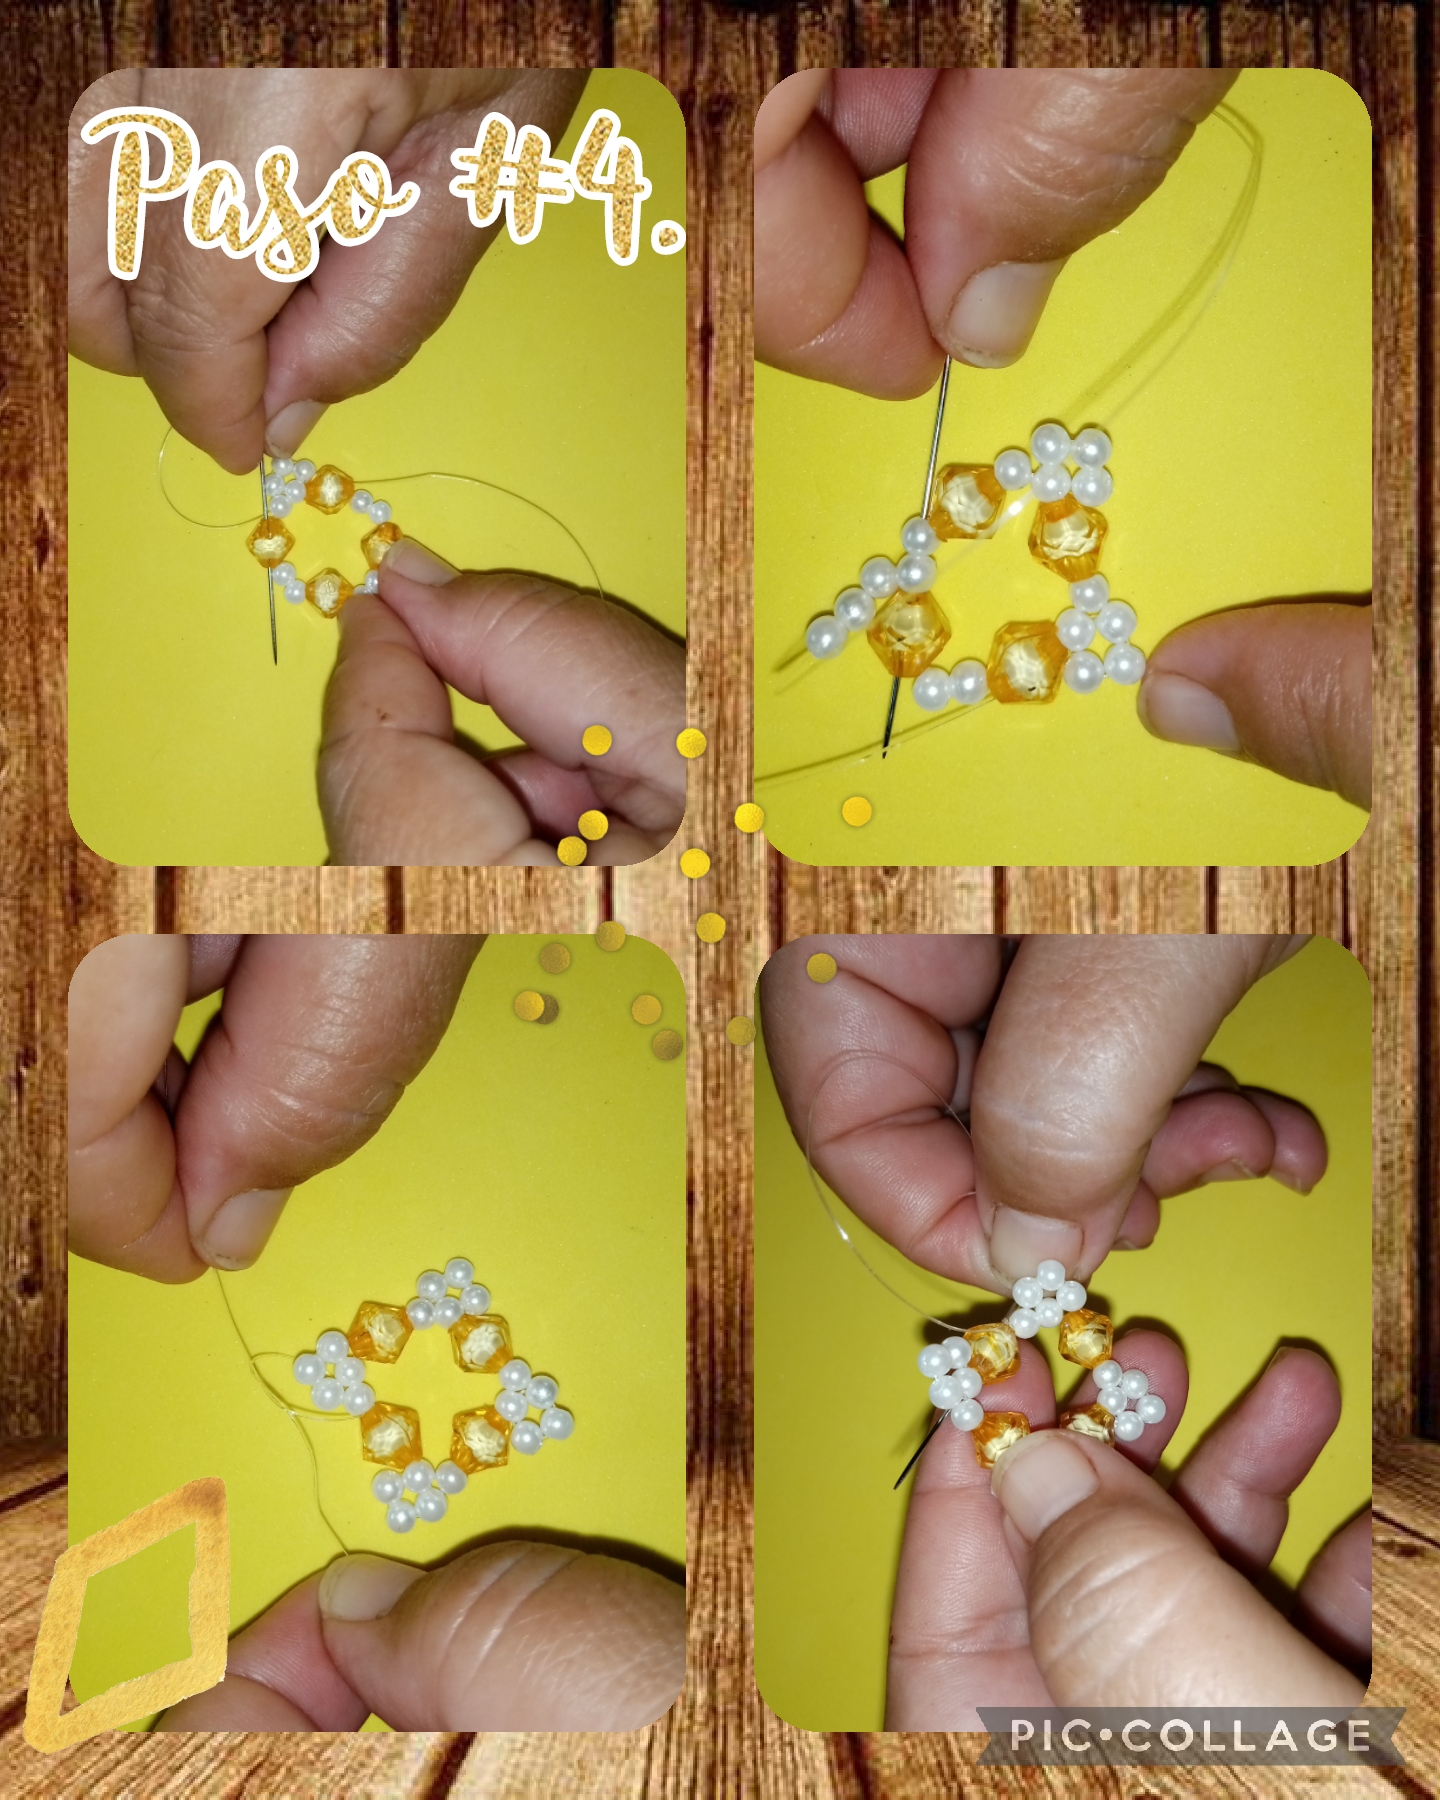
Step #4. In this step we are going to continue forming the tendrils, now we are going to insert 2 more pearls, and join them with the first 3 pearls that we had inserted first, we sew the piece again, passing the nylon thread through the pearls and crystals, see See the images to see how the piece looks.
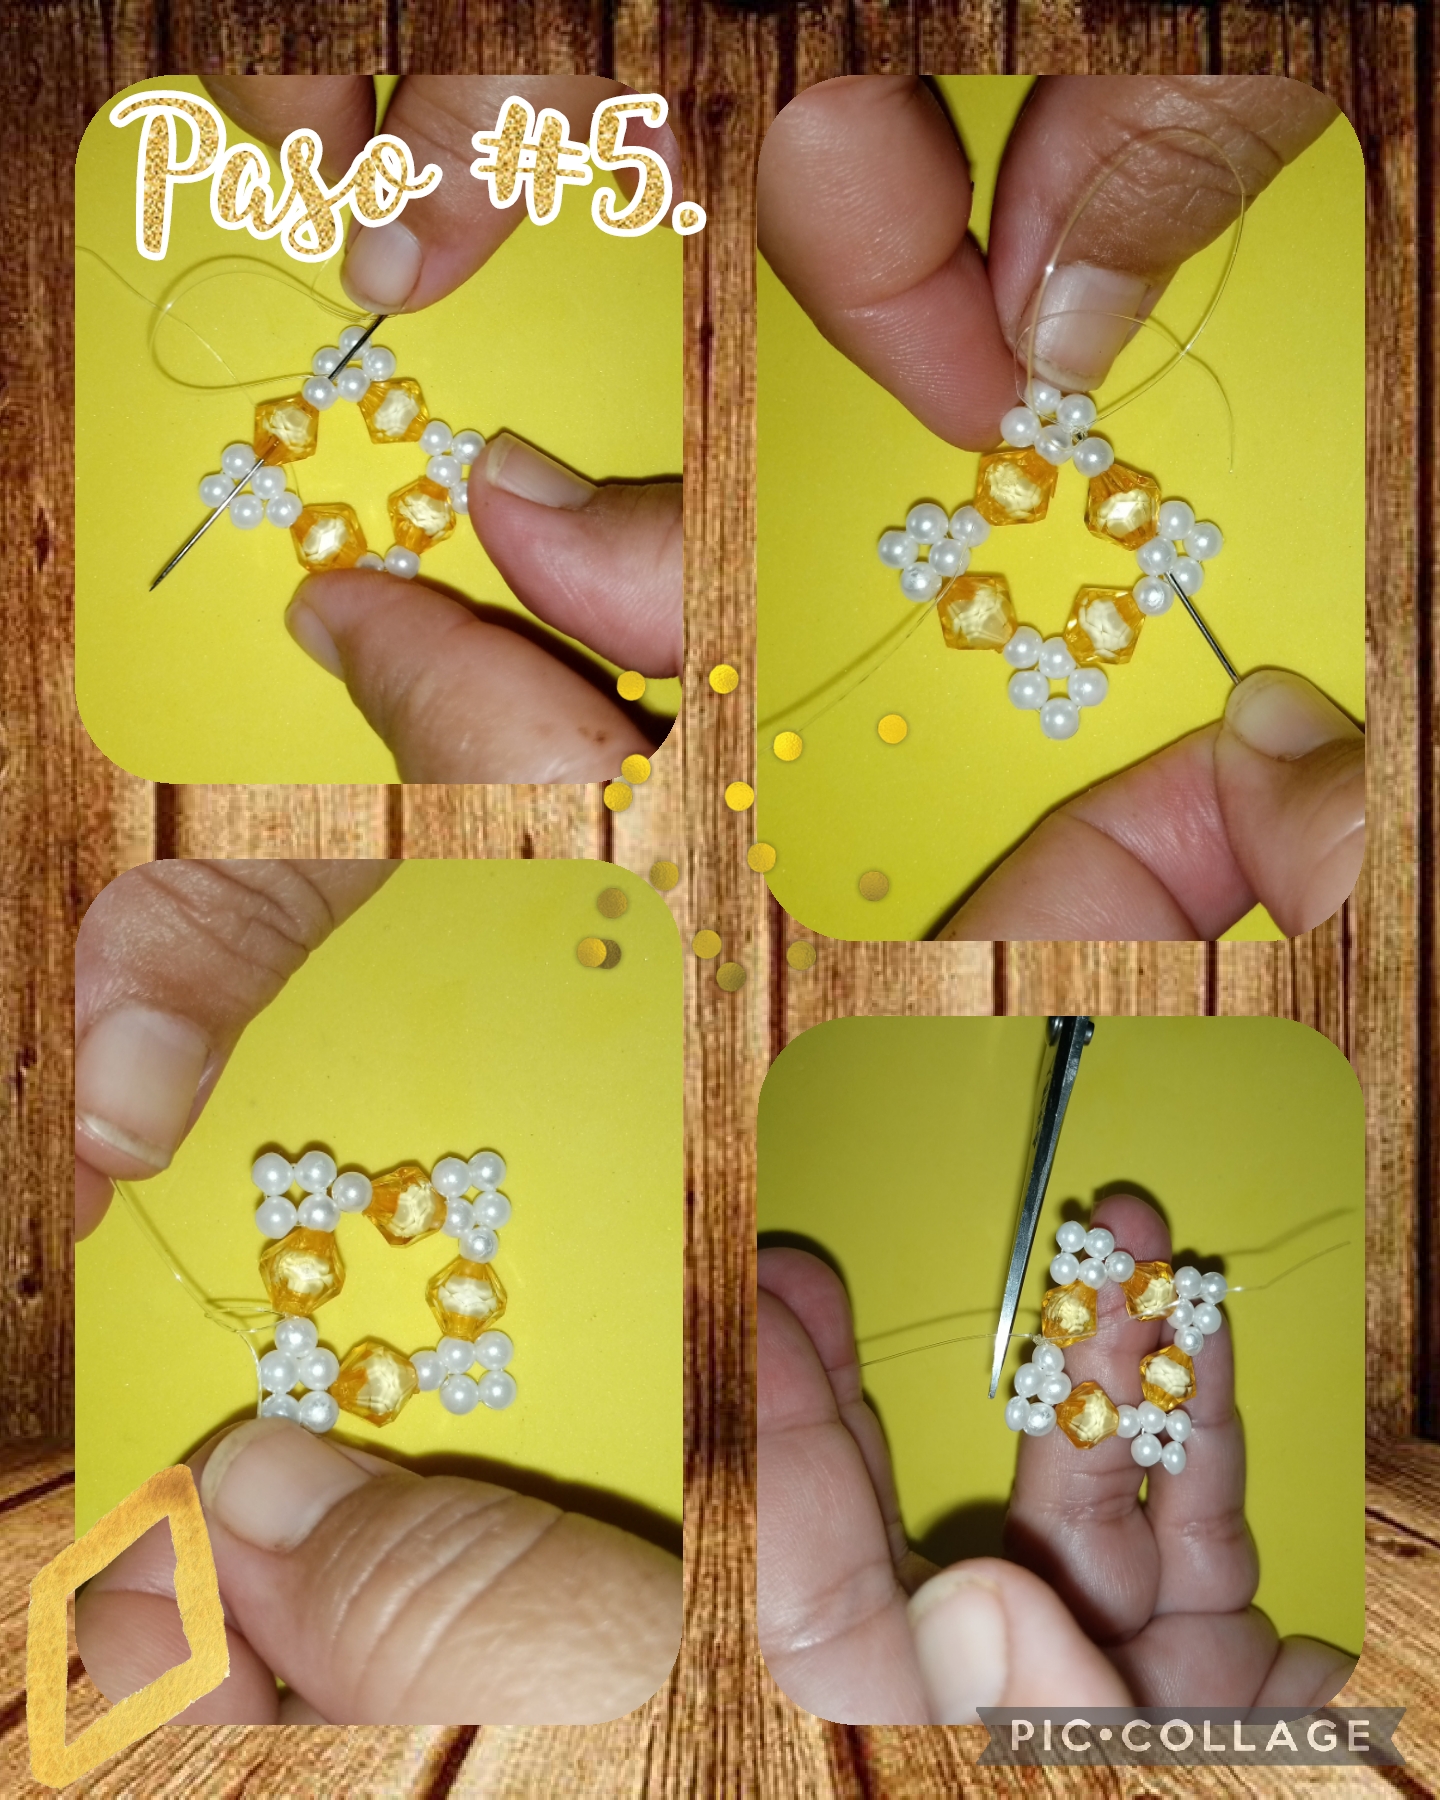
Step #5. In this step we continue forming the piece, inserting pearls, to form the corners to shape the piece, inserting pearls and sewing the piece, passing the nylon thread through all the pearls and crystals, so that it is tight and cannot come loose. . . Once we have finished forming the piece that would be the tendrils, we make 2 knots and cut the excess with scissors and with the tinderbox we burn the ends to seal, see the images.
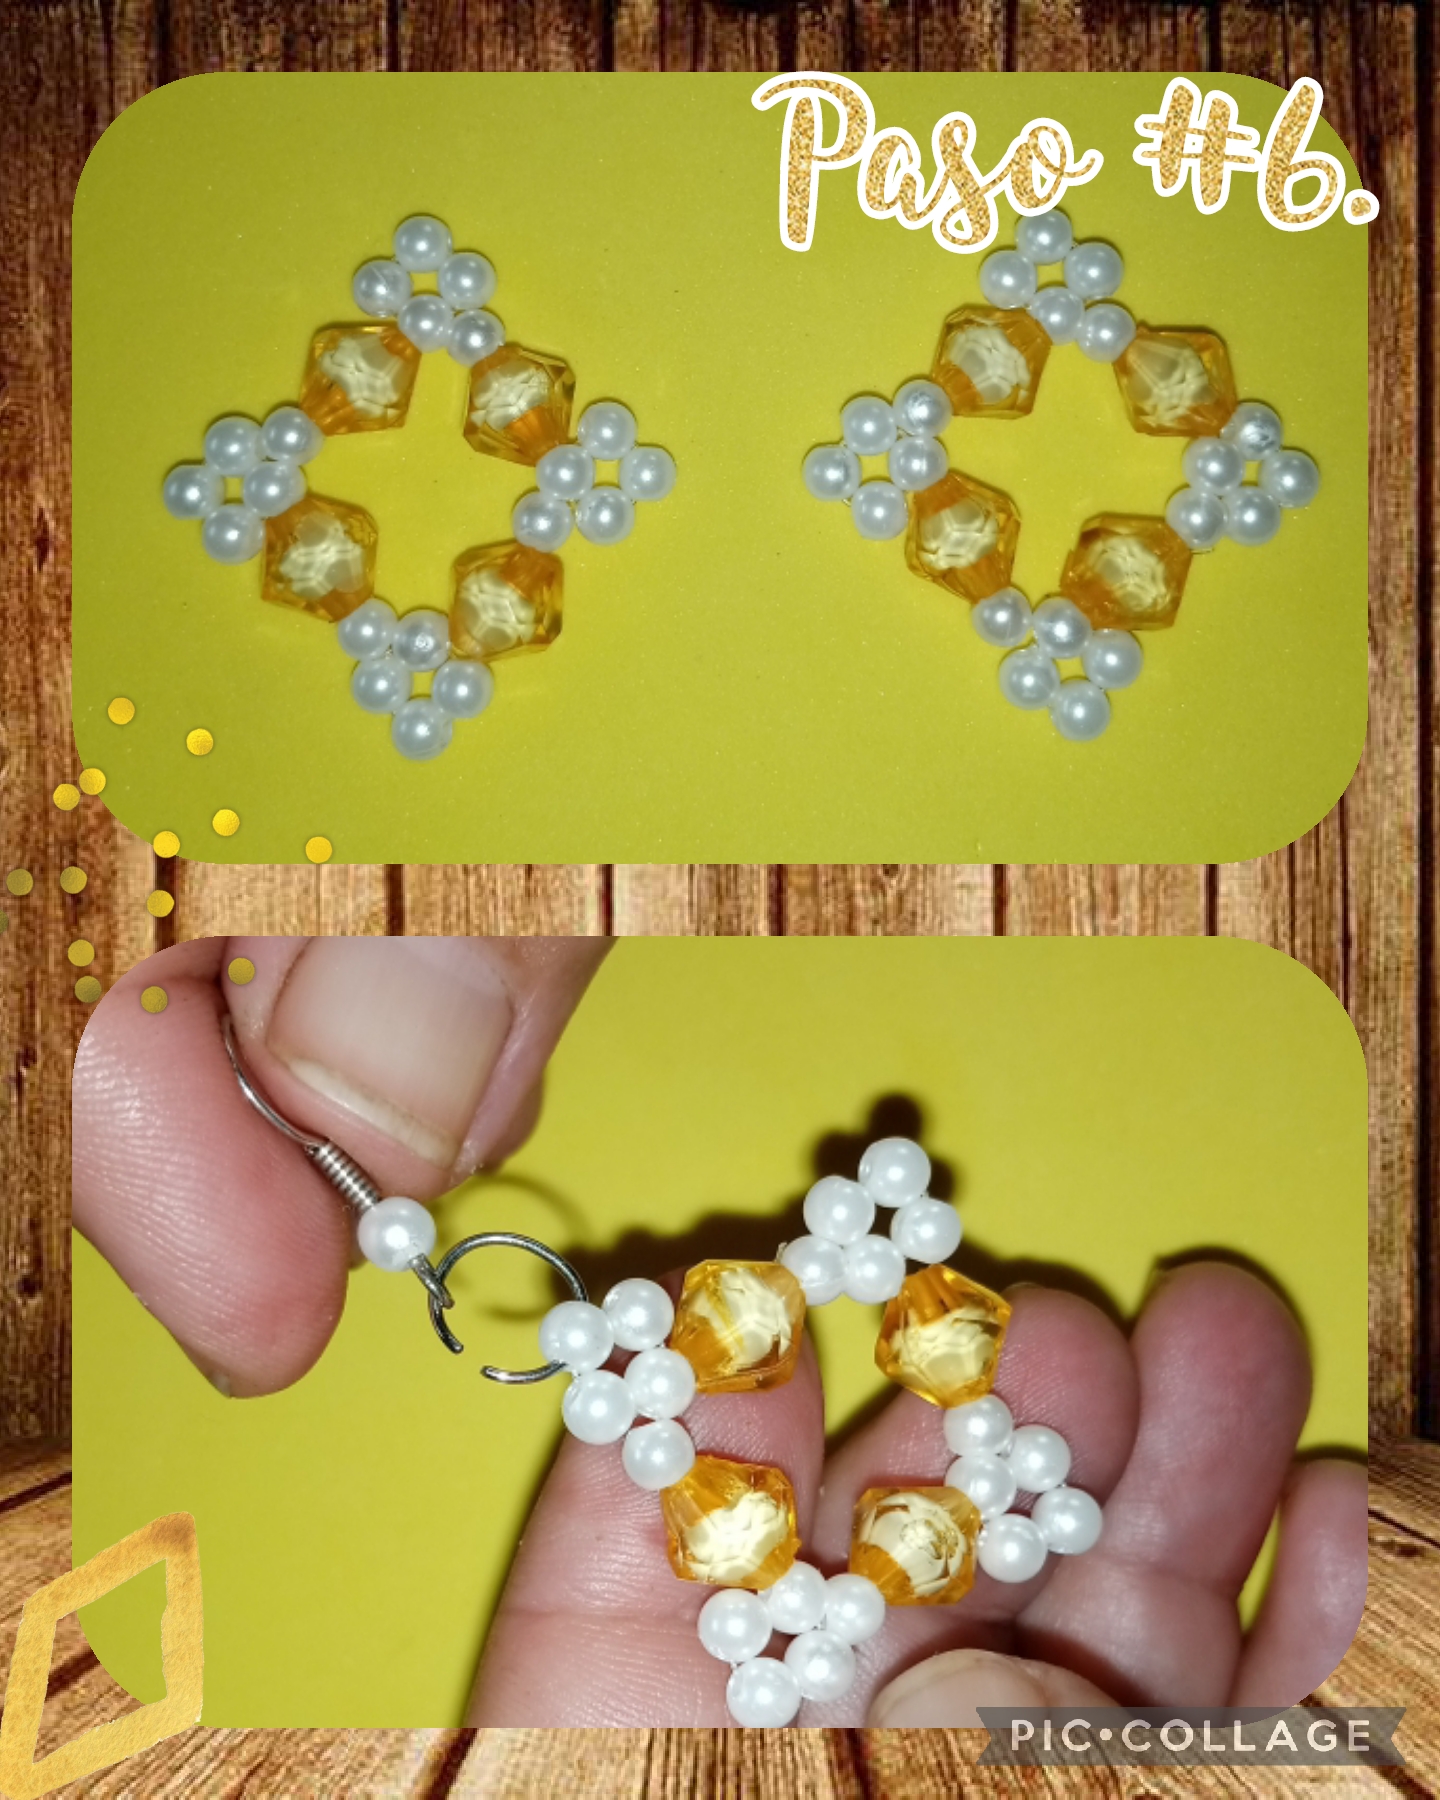
Step #6. In this step, as you will see, the tendrils are already formed, and now to finish completing them we are going to insert the metal ring and the metal hook into one of the pearls, for jewelry and thus be able to finish the tendrils, see the images.
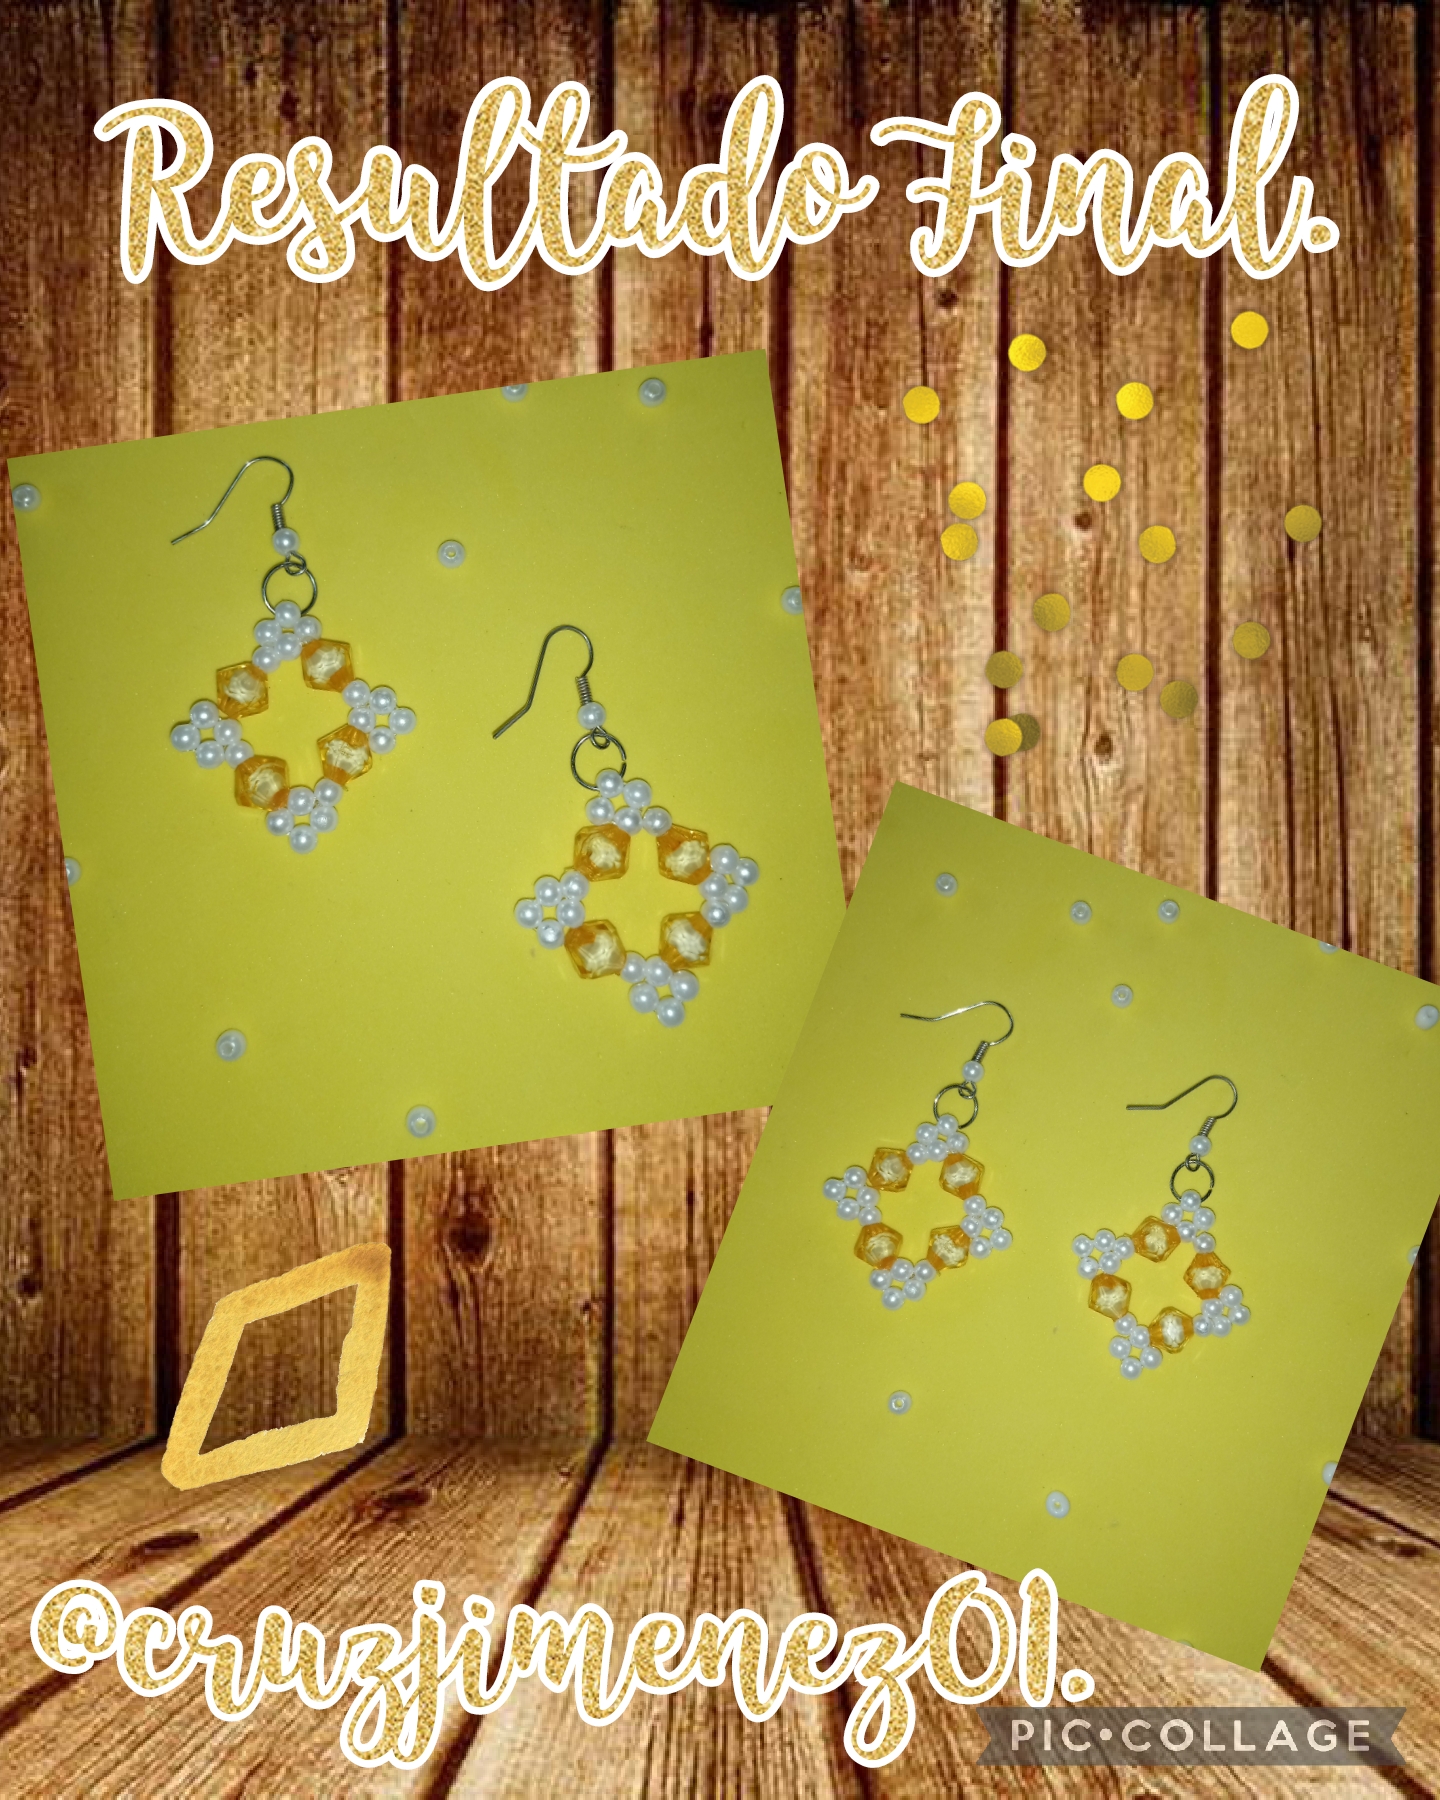
Once all the steps are finished, this is the final result, some beautiful earrings made with pearls and crystals, thanks for visiting my blog and watching until the end, all the tutorial, see you very soon with another creative idea, come Good evening, may God bless you all and have a very good evening.
Las fotos fueron capturadas con mi teléfono androide, TECNO-SPARK 6GO y editadas con la aplicación PIC-COLLAGE y el contenido fue traducido con Google Esp-Ing.
The photos were captured with my android phone, TECNO-SPARK 6GO and edited with the PIC-COLLAGE application and the content was translated with Google Esp-Ing.
The rewards earned on this comment will go directly to the people( @dayadam ) sharing the post on Twitter as long as they are registered with @poshtoken. Sign up at https://hiveposh.com.
https://leofinance.io/threads/@dayadam/re-leothreads-2zgheuxt5
The rewards earned on this comment will go directly to the people ( dayadam ) sharing the post on LeoThreads,LikeTu,dBuzz.