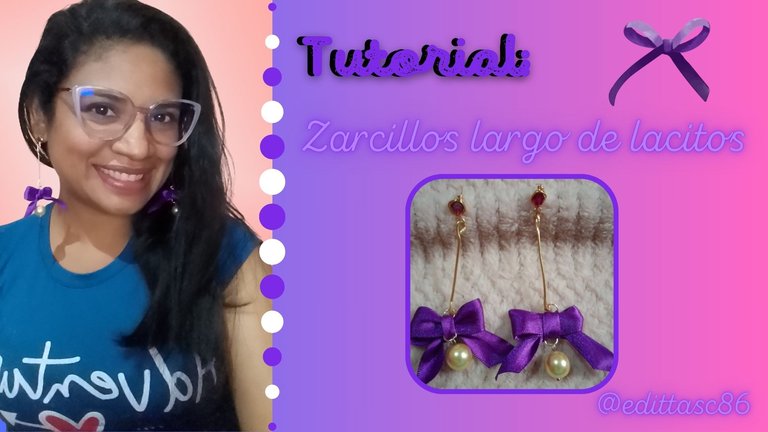
Hola, a todos, cómo les va? Espero que esten muy bien, pasando un agradable momentos, el estilo coquette viene para quedarse, lazos, detalles, Zarcillos, collares pulseras, vestidos totalmente en tendencia.
Esta tendencia viene acompañada por los colores en tonos rosa, blanco, beige, ese tipo de tonalidades, sin embargo, los lazos como tal se extendido a otros colores, porque la imagen que caracteriza esta tendencia son los lazos, así que un lazo de cualquier color identifica esta moda.
Y siguiendo esta ola de esta tendencia, les muestro estos zarcillos en este estilo...
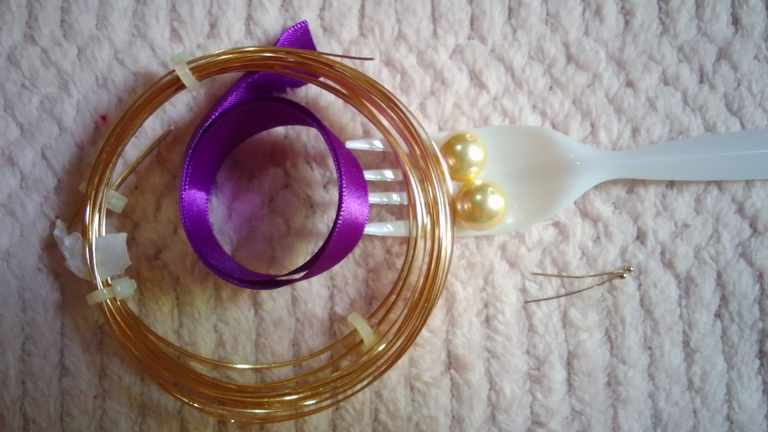
Los materiales que utilice son los siguientes:
🎀 Cinta raso morada.
🎀 Alambre calibre 18 y 20.
🎀 Cristales (2)
🎀 Tenedor de plástico, yesquero
🎀 Perlas de Nácar de 25 mm (2)
🎀 Base de zarcillo
Hello everyone, how are you doing? I hope you are very well, having a nice time, the coquette style is here to stay, bows, details, earrings, necklaces, bracelets, dresses totally in trend.
This trend is accompanied by the colors in shades of pink, white, beige, that kind of shades, however, the bows as such are extended to other colors, because the image that characterizes this trend are the bows, so a bow of any color identifies this fashion.
And following this wave of this trend, I show you these earrings in this style....
The materials I used are as follows:
🎀 Purple satin ribbon.
🎀 18 and 20 gauge wire.
🎀 Crystals (2).
🎀 Plastic fork, tinder.
🎀 25 mm mother-of-pearl beads (2).
🎀 Earring base.
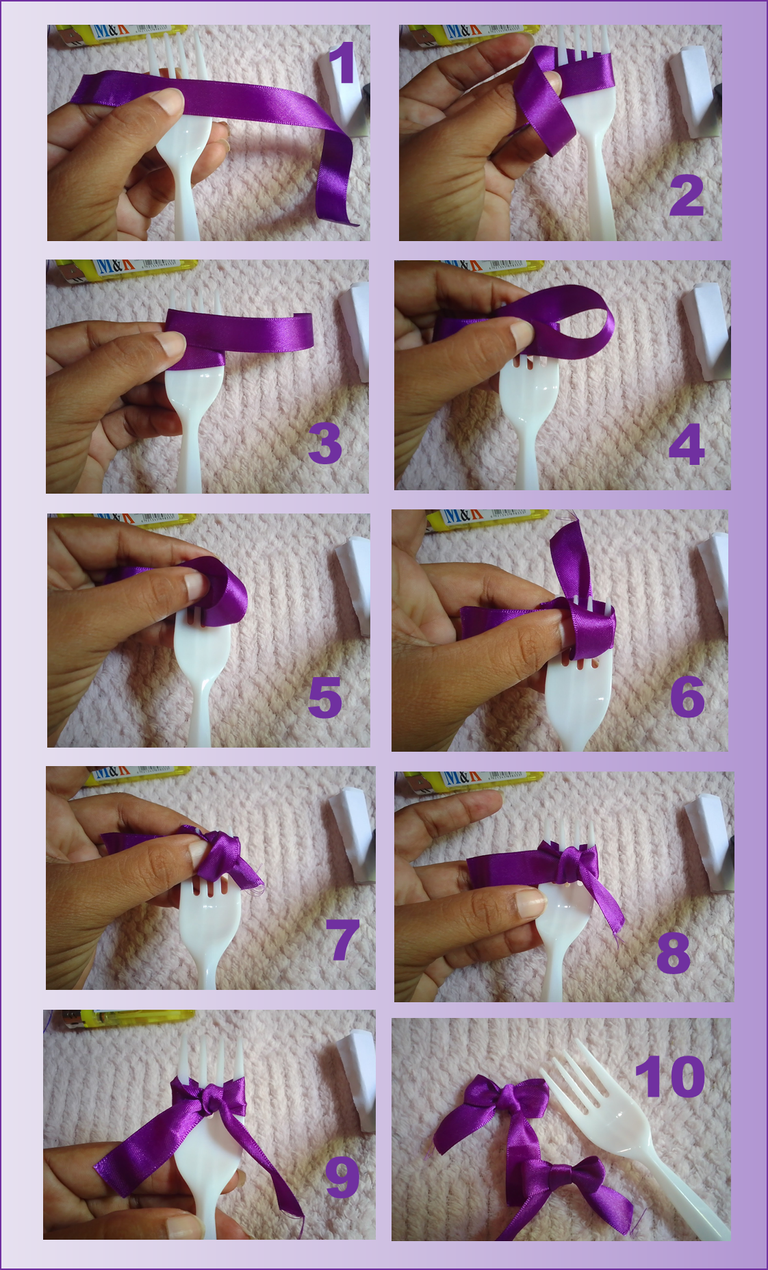
Y los realice así:
1- los lacitos 🎀, utilice 20 cm de cinta para cada lacito, los ubique delante del tenedor, el pedazo del lado derecho lo pase detrás, ese mismo le hago un arquito y la punta lo voy a llevar hacia atrás por el espacio del medio deñ tenedor, ese mismo pedazo, lo devuelvo por la parte de arriba del tenedor y lo meto por el arquito que deje al inicio y halo para amarrar y hacer el nudo, y de esa manera obtengo el lazo.. Vaya sude y me enrede escribiendo jaja.. pero les aseguro es mucho mas fácil de hacerlo que escribirlo, Se que con las imágenes sera mas fácil de comprender 😅
And I made them like this:
1- the ribbons 🎀, use 20 cm of ribbon for each ribbon, place them in front of the fork, the piece on the right side I pass it behind, that same piece I make a bow and the tip I will take it back through the space in the middle of the fork, that same piece, I return it to the top of the fork and put it through the bow that I left at the beginning and pull to tie and tie the knot, and thus I get the bow. I sweat and I got tangled writing haha ... but I assure you it is much easier to do it than writing it, I know that with the images will be easier to understand 😅
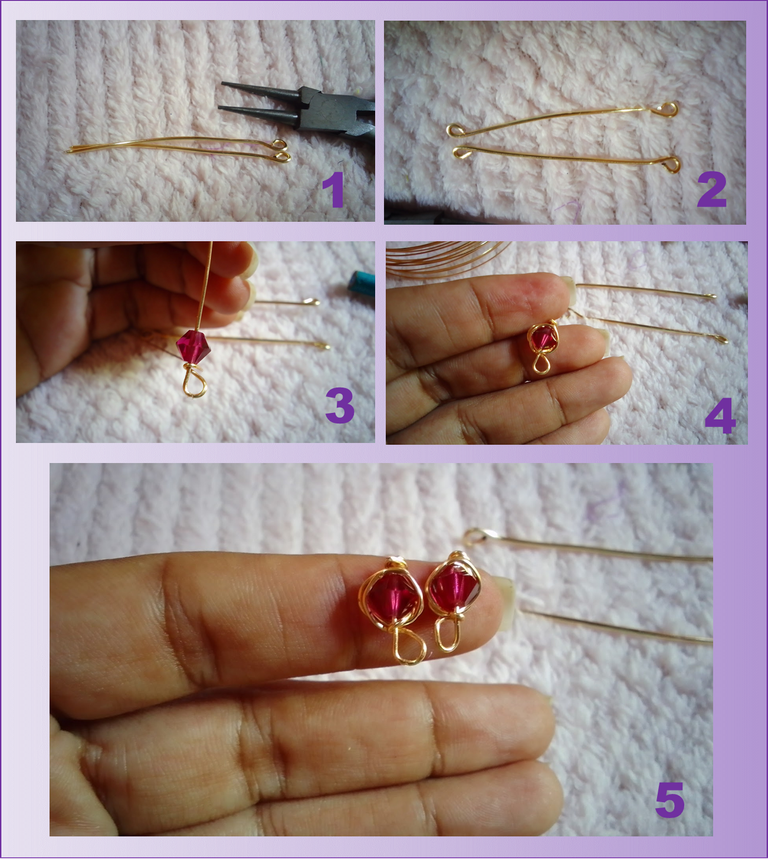
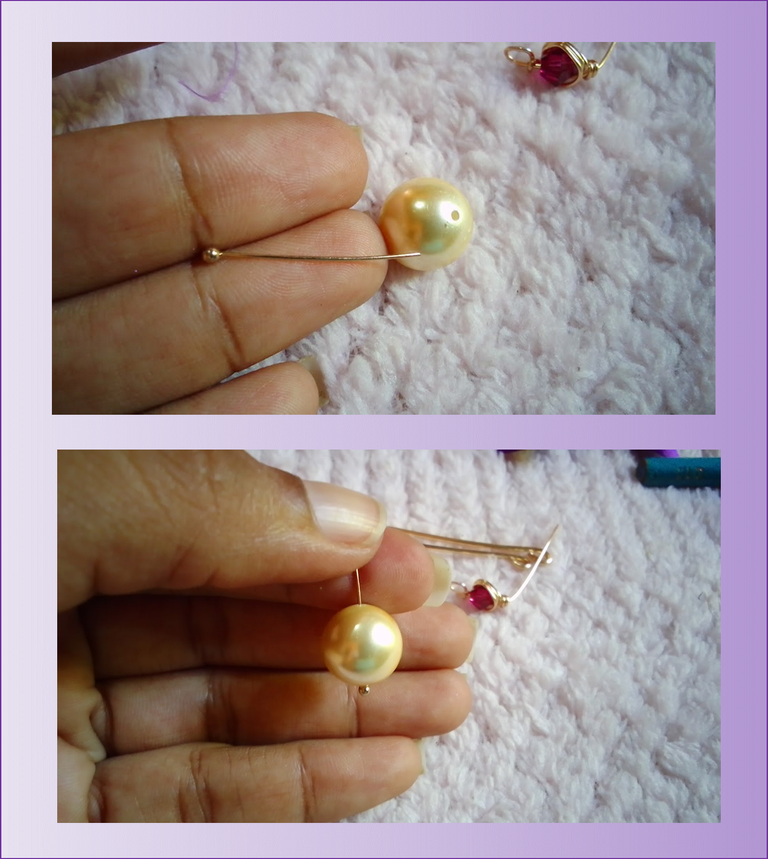
2- Con el alambre de calibre 18 corte 7cm y le hice un arito en los extremos, luego en el alambre calibre 20 introduje uno de los cristales, deje 2cm aproximadamente en uno de los extremos y por el otro, con la pinza redonda, le hice un aro, entorche en el alambre y luego le di tres vueltas alrededor del cristal, entorche en los 2 cm que había dejado y corte del mazo, esos 2 cm serian el pin del zarcillo.
2- With the 18 gauge wire cut 7cm and I made a ring at the ends, then in the 20 gauge wire I introduced one of the crystals, I left 2cm approximately in one of the ends and on the other, with the round pliers, I made a ring, twist in the wire and then I gave three turns around the crystal, twist in the 2 cm I had left and cut the mallet, those 2 cm would be the pin of the earring.
3- Luego, con las bases de zarcillos las coloque en las perlas de nácar y le realice un arito en el otro extremo
3- Then, with the earring bases, place them on the mother-of-pearl beads and make a small ring at the other end.
4- Ensamblaje 🎀, una vez lista todas las piezas, comencé a unir las piezas, en los extremos de la parte del medio del lacito, le coloque unos aros y en la parte de abajo coloque la perla de nácar, luego en la de arriba la base de alambre calibre 18 y la parte del pin del zarcillo la del cristal, y así quedaron listos estos zarcillos
4- Assembly 🎀, once all the pieces were ready, I began to join the pieces, at the ends of the middle part of the bow, I placed some rings and at the bottom I placed the mother-of-pearl pearl, then at the top the 18 gauge wire base and the pin part of the earring the crystal, and so these earrings were ready.
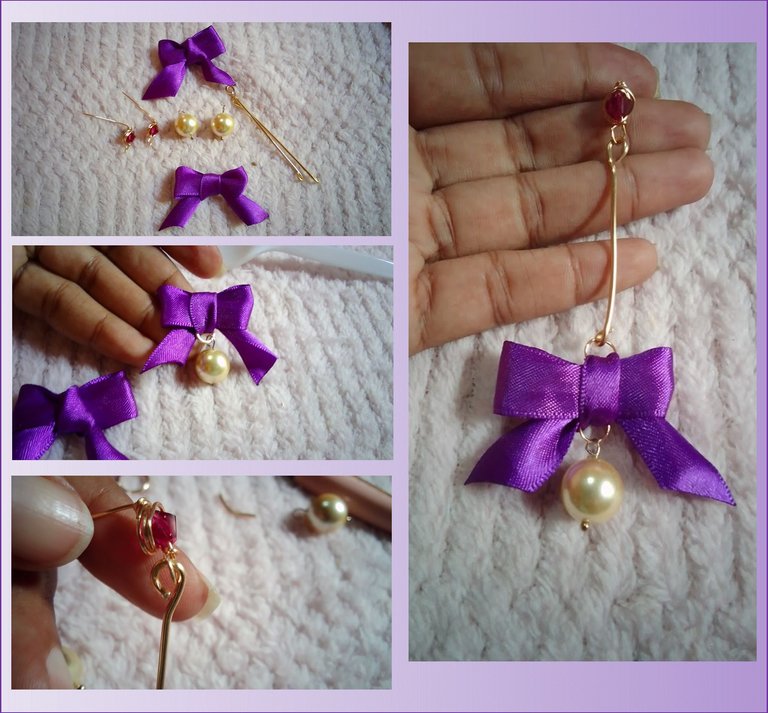
Quedaron hermosos y este color que elegí me encanto, espero puedan seguir el paso a paso, son fáciles de hacer, pero se escribe medio enredado, lo que si es que quedan muy bonitos, pueden ser tan largos como lo deseen, a mi me gustaron muchísimo..
They were beautiful and this color that I chose I love, I hope you can follow the step by step, they are easy to make, but it is written half tangled, what if it is that they are very nice, they can be as long as you want, I liked them very much.

Espero les haya gustado, este tutorial, gracias a todos por su apoyo.. abrazos..
I hope you liked this tutorial, thank you all for your support... hugs...

Recursos/Resources
| Portada, banner e imagen / Cover, banner and image | canva |
|---|---|
| fotos/ pictures | own photos, realme c11 device |
| Collage | PowerPoint |

Muy hermosos te quedaron amiga .. bendiciones para ti
Gracias amiga bella
Quedaron hermosos amiga te lucen muy bien feliz día.
Gracias amiga..
Muy lindo tus zarcillos , me encantó el color . Se ven cuchi
Me alegra te hayan gustado, muchas gracias
Buenas noches amiga me gustó mucho el paso a paso y lo delicado que se ven los zarcillos
Muchaaaas gracias me alegra le haya gustado 💗
Gracias a ti amiga por compartir
que hermoso lacito morado, me encantan estos zarcillos!