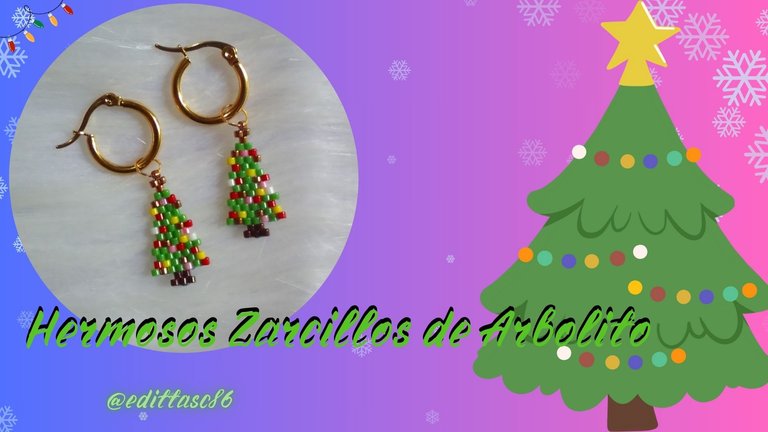
Hola amigos esta hermosa comunidad de artesanos, ¿cómo están? espero se encuentren muy, muy bien en esta oportunidad le voy a mostrar cómo realizar unos lindos zarcillos de arbolito para lucir en esta Navidad. 🎄
Los materiales que voy a utilizar es hilo para mostacillas Miyuki, mostacilla Miyuki 11/0, y aguja mostacilla.
Previo a realizar este lindo arbolito lo hice el patrón en el programa BeadTool4, es una herramienta que te permite realizar la figura y colocarle el color deseado. super útil para este tipo de trabajo.
Hello friends this beautiful community of crafters, how are you? I hope you are very, very well in this opportunity I am going to show you how to make some cute little tree tendrils to show off this Christmas.
The materials I am going to use are Miyuki beading thread, Miyuki 11/0 beads, and beading needle.
Before making this cute little tree I made the pattern in the BeadTool4 program, it is a tool that allows you to make the figure and place the desired color. super useful for this type of work.
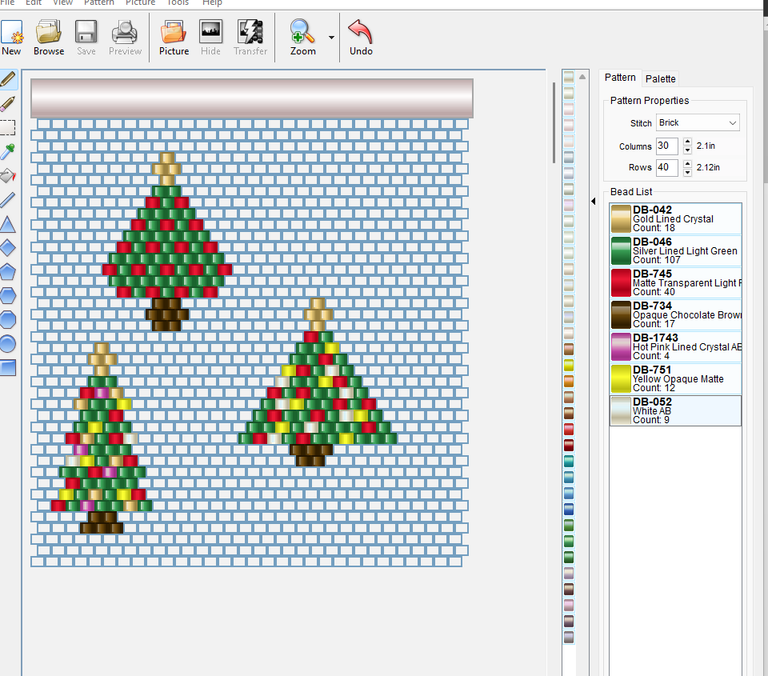
Elaborando mi arbolito 🎄 || Making my tree🎄
| Paso 1 | Step 1 |
|---|---|
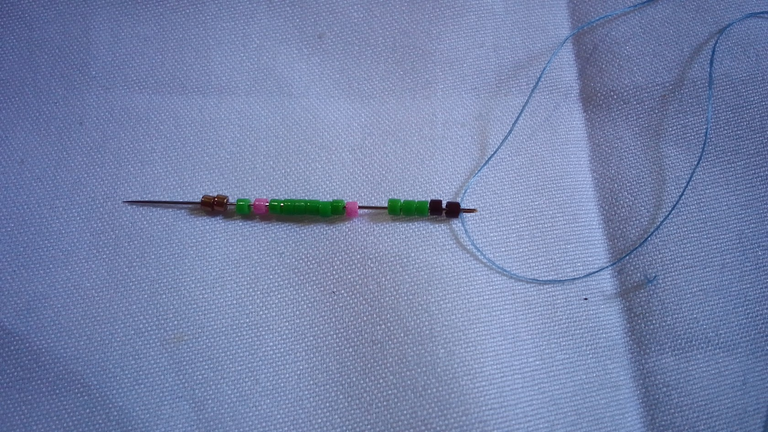
| Iniciamos colocando en nuestra aguja 16 mostacillas Miyuki 11/0 como lo muestro en la imagen en esa distribución, depende de como deseen ustedes su arbolito. | Start by placing on our needle 16 Miyuki 11/0 beads as shown in the picture in that distribution, it depends on how you want your tree. |
| Paso 2 | Step 2 |
|---|---|
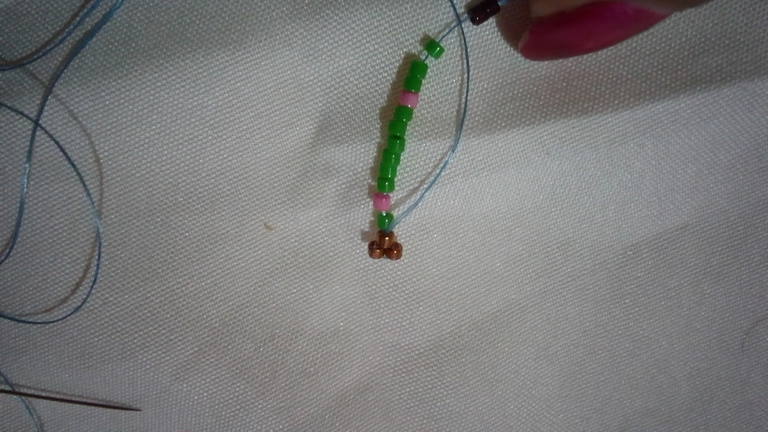
| Para comenzar el tejido agregó una mostacilla dejo pasar la mostacilla que está de primera y paso la aguja por la mostacilla siguiente hasta hacer esta pequeña (t) que muestro en la imagen. | To start the weaving I add a bead and let the first bead go through and pass the needle through the next bead until I make this small (t) that I show in the image. |
| Paso 3 | Step 3 |
|---|---|
| La técnica que estoy utilizando para realizar este tejido se llama peyote es una técnica muy fácil, como les expliqué en un post anterior lo más difícil, es hacer la basecita, el inicio porque el resto siempre va a ser rellenar los espacios que van quedando. | The technique I am using to make this weaving is called peyote is a very easy technique, as I explained in a previous post the most difficult thing is to make the base, the beginning because the rest will always be to fill the spaces that are left. |
| Paso 4 | Step 4 |
|---|---|
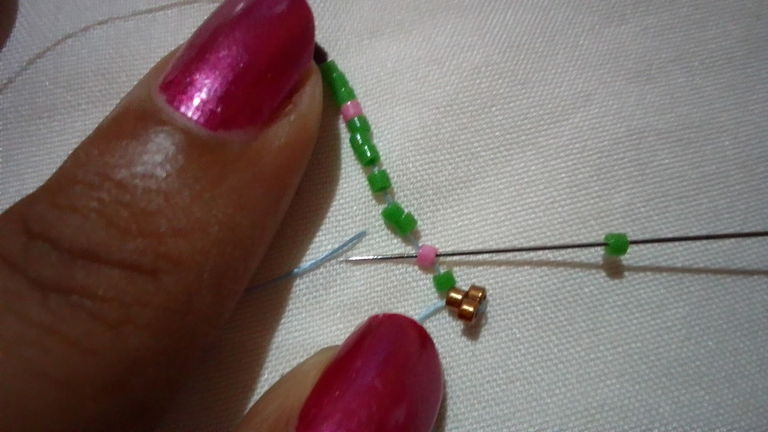
| Para continuar con este tejido lo que hago es agregar otra mostacilla dejo pasar la mostacilla verde y paso la aguja por la mostacilla siguiente que en este caso es de color rosada cómo muestro en la imagen. | To continue with this weaving, what I do is to add another bead, I let the green bead go through and pass the needle through the next bead, which in this case is pink, as I show in the image. |
| Paso 5 | Step 5 |
|---|---|
| Y me va quedando así, como muestro, los siguientes pasos serán iguales, agregó una mostacilla dejo pasar una y paso por la mostacilla siguiente. | And it will be like this, as I show, the following steps will be the same, added a bead I let pass one and pass through the next bead. |
| Paso 6 | Step 6 |
|---|---|
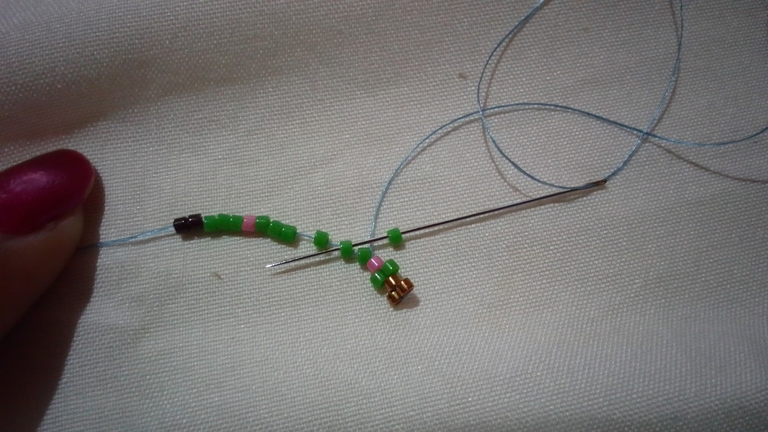
| Continúo siguiendo estos pasos hasta que complete la parte central de la figura que deseo realizar como pueden ver en la imagen el siguiente tejido es agregar una mostacilla marrón y rellenando los espacios, pasando por la mostacilla marrón siguiente la aguja, luego coloco otra mostacilla y paso por el siguiente que es verde y así hasta completar toda esa hilera cómo muestro en la imagen. | I continue following these steps until I complete the central part of the figure that I want to make as you can see in the picture the next weaving is to add a brown bead and filling in the spaces, passing through the next brown bead the needle, then I place another bead and pass through the next one which is green and so on until completing all that row as I show in the picture. |
| Paso 7 | Step 7 |
|---|---|
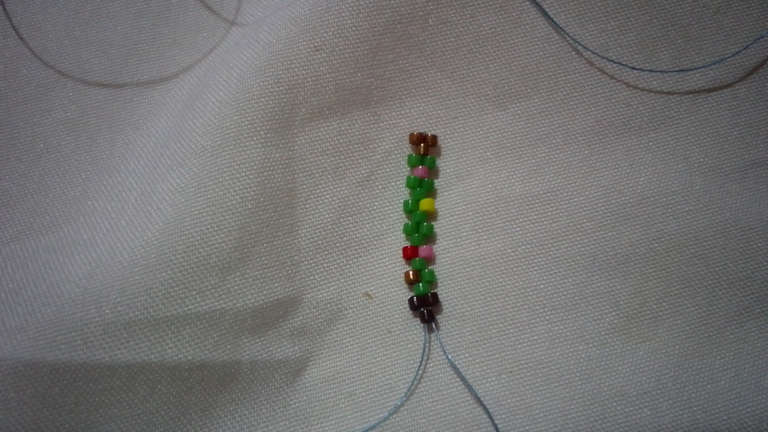
| Luego que llegamos y rellenamos ese espacio nos devolvemos y rellenamos los otros espacios y así vamos a hacer durante todo el proceso. | After we arrive and fill that space we go back and fill the other spaces and so we are going to do throughout the process. |
| Paso 8 | Step 8 |
|---|---|
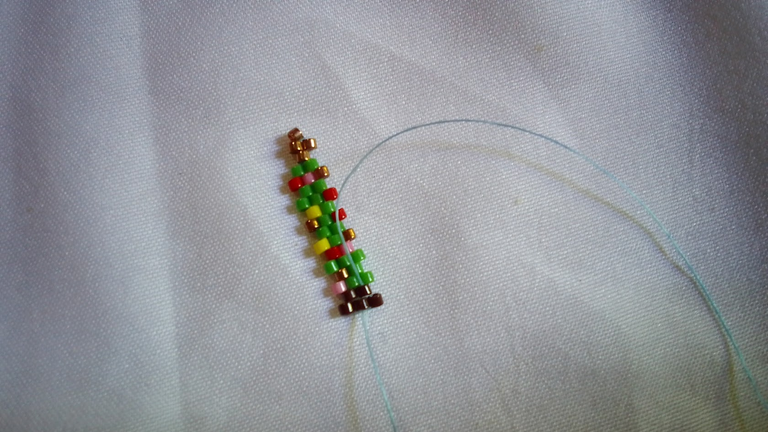
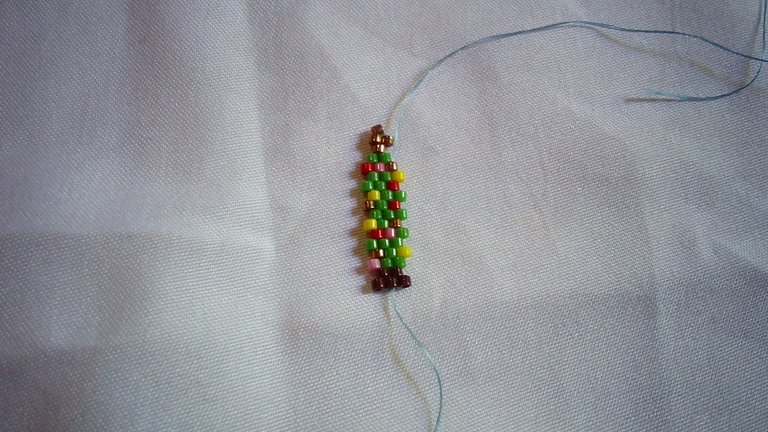
| Cómo se muestra en la imagen nos regresamos y vamos rellenando los espacios esta técnica es muy fácil, muy sencilla lo que consiste en ir rellenando espacio todo el proceso hasta que tenemos formado nuestra figura y en este caso el arbolito. | As shown in the image we go back and fill in the spaces, this technique is very easy, very simple which is to go filling space throughout the process until we have formed our figure and in this case the tree. |
| Paso 9 | Step 9 |
|---|---|
| Para para hacerlos los decrementos lo que hacemos es regresarnos entre las mostacillas hasta posicionarnos en la mostacilla, donde seguiremos el tejido. | To make the decreases what we do is to go back between the beads until we are positioned in the bead, where we will continue weaving. |
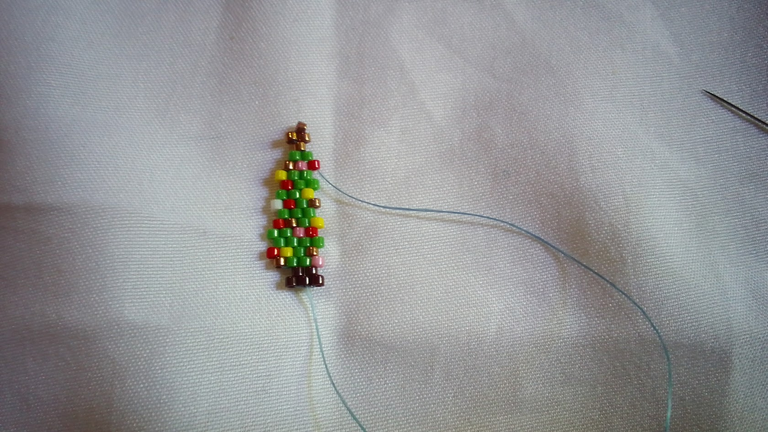
| Y así queda nuestro arbolito hermoso. | And so is our beautiful tree. |
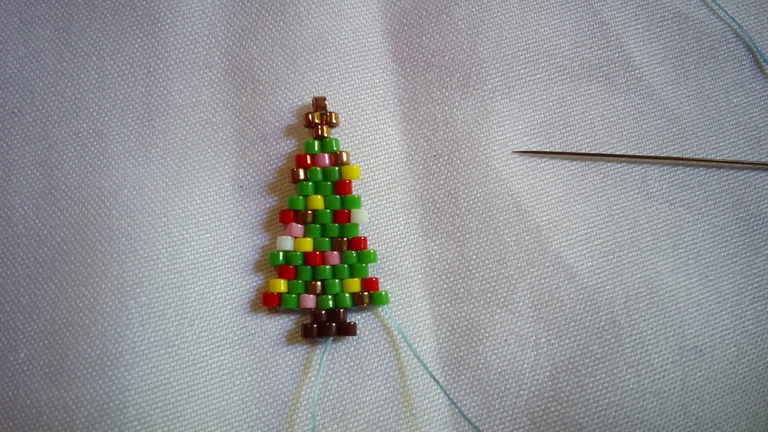
| Estos zarcillos de arbolitos van a decorar unas hermosas argollas pequeñas, para ensamblarlas yo utilicé aritos que realice con alambre y con mi herramienta redonda, le coloque el arito y luego se los coloque a las argollitas y así de lindas quedaron, espero que les haya gustado. | These tendrils of trees are going to decorate beautiful small rings, to assemble them I used that I made with wire and with my round tool, I put the ring and then I put them to the rings and this is how beautiful they were, I hope you liked it. |
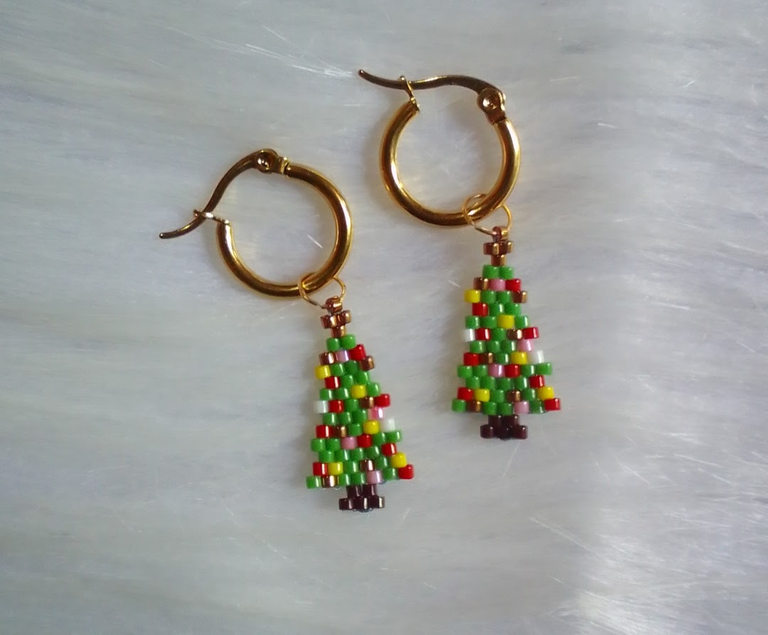
| Gracias a todos por su valioso apoyo. Espero puedan hacer sus arbolitos y lucirlos esta hermosa navidad. | Thank you all for your valuable support. I hope you can make your trees and show them off this beautiful Christmas. |

Recursos/Resources
| Portada, banner e imagen / Cover, banner and image | canva |
|---|---|
| fotos/ pictures | own photos, realme c11 device |
| Collage | PowerPoint |
| font image | Freestyle Script- PowerPoint |

Lindos, gracias por el tutorial 🎄
Thank you for your witness vote!
Have a !BEER on me!
To Opt-Out of my witness beer program just comment STOP below
View or trade
BEER.BEERHey @marile21, here is a little bit of from @isnochys for you. Enjoy it!Learn how to earn FREE BEER each day by staking your
BEER.Muchas gracias ❤️
Wow
This is so creative ❤️
A Christmas tree design
I love it
Thanks You ❤️❤️❤️
Te quedó hermoso amiga, bello trabajo.
Gracias amiga me alegra mucho te haya gustado ❤️
This is so beautiful and colorful, you did a nice design, have not seen a Christmas tree beaded design before, thanks for sharing.
Waaoo... I'm glad this was the first one and that you like it... thanks ❤️
Una hermosa creación para estas navidades, un diseño 👏 maravilloso nos encanta como lo has creado, felicidades 👏
Muchas gracias ❤️ por su apoyo 🤍
Christmas tree, wow, this is so beautiful, I love the design, thanks for sharing.
I'm so glad you liked it ❤️ thank you for visiting.
Muy bonitos @editasc86 ya tienen el olor a navidad 😄 en serio que te quedaron lindos, saluditos 🎈
Gracias amiga me alegra le haya gustado ❤️
Están bellísimos, me encantan 😄
Gracias bella ❤️
Omggg!!! Me encantaron super bellos🥰🥰🥰
Gracias mi corazón.. me alegra te haya gustado ❤️
Congratulations @edittasc86! You have completed the following achievement on the Hive blockchain And have been rewarded with New badge(s)
Your next payout target is 4000 HP.
The unit is Hive Power equivalent because post and comment rewards can be split into HP and HBD
You can view your badges on your board and compare yourself to others in the Ranking
If you no longer want to receive notifications, reply to this comment with the word
STOPThanks You ❤️