Hola amigos espero se encuentren muy bien hoy, bienvenido diciembre🎆🎇, para mí una fecha especial no solo, porque me gusta la navidad y esta época del año, sino además el cumpleaños de mi hijo, que fue el día de ayer 1ro de diciembre, así que es de celebración sí o sí.. 🎁
Bueno y como he realizado casi que últimamente accesorios navideños hoy no se escapan de eso. así que les mostrare como realice unos lindos zarcillos de muñequito de nieve.
Yo trabajo normalmente con mostacillas Miyuki así que utilizaremos este material, además de aplicar la técnica brick stitch, para su elaboración.
Hello friends I hope you are very well today, welcome December 🎆🎇, for me a special date not only because I like Christmas and this time of year, but also the birthday of my son, which was yesterday December 1st, so it is of celebration yes or yes ..🎁
Well and as I have been making Christmas accessories almost lately, today I will show you how to make some cute little snowman tendrils.
I usually work with Miyuki beads so we will use this material, as well as applying the brick stitch technique, to make them.
🎁🎁🎁🎁🎁🎁
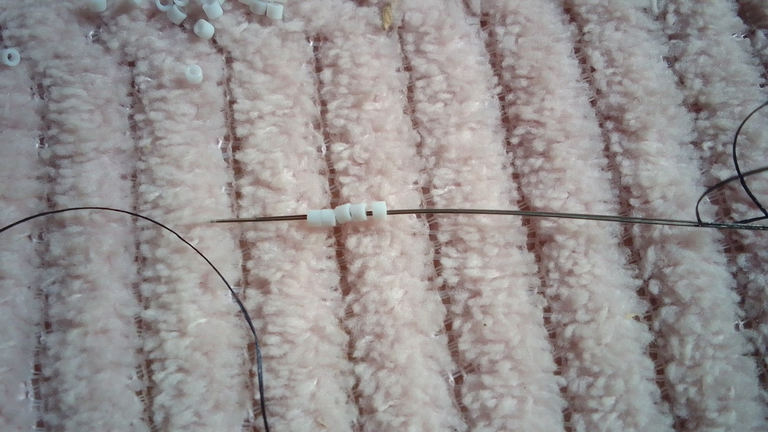
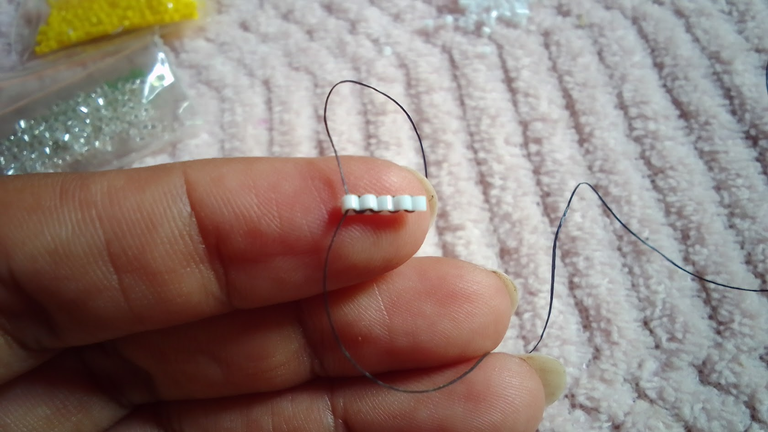
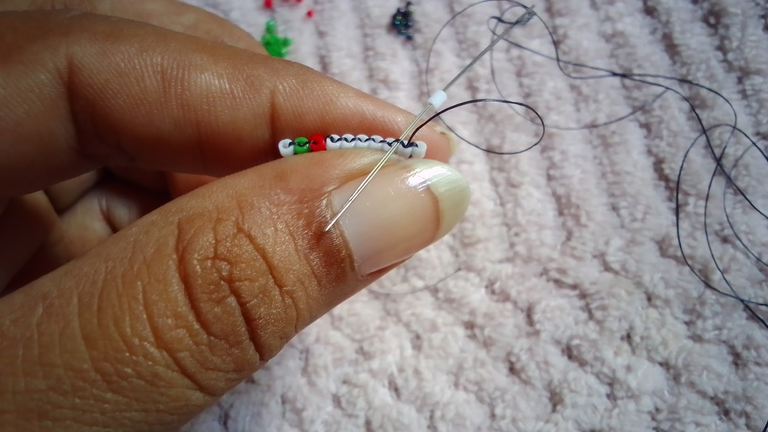
Paso 1:
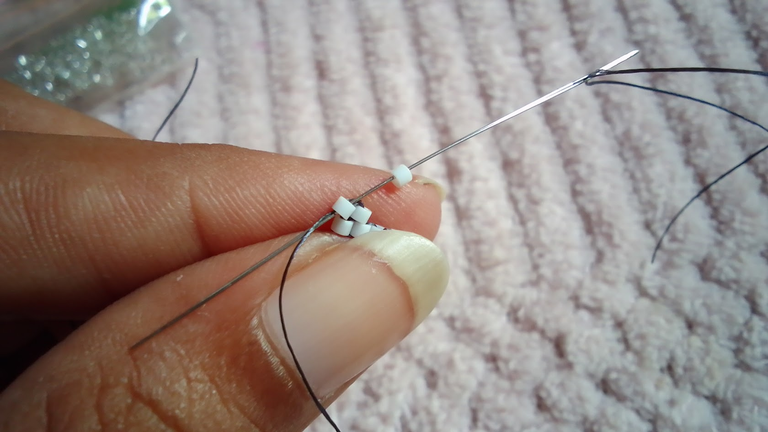
Iniciamos enfilando en nuestra aguja cinco mostacillas, estas mostacillas vamos a juntarlas, las colocaremos una del lado de la otra, para ello lo que hacemos es dejar pasar una mostacilla y pasamos la aguja de atrás hacia adelante por la mostacilla y vamos uniendo uno por uno hasta que tengamos todas juntas, esta sería nuestra primera hilera.
Step 1:
We start by threading in our needle five beads, these beads we are going to join them together, we will place them side by side, for this what we do is to let pass a bead and pass the needle back and forth through the bead and we will join one by one until we have all together, this would be our first row.
 |  |
|---|
🎁🎁🎁🎁🎁🎁
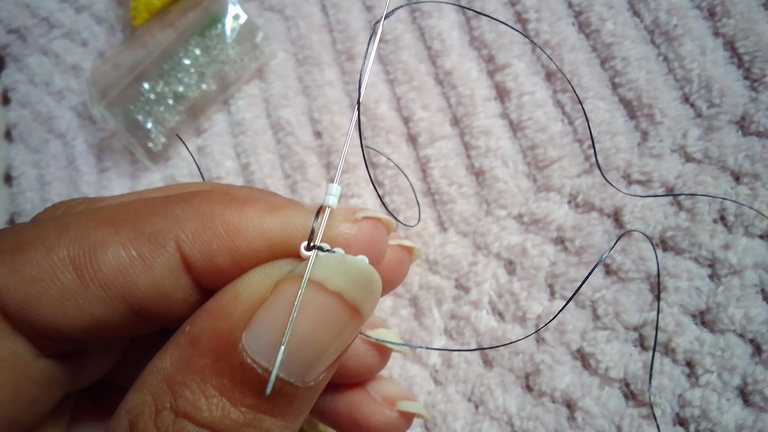
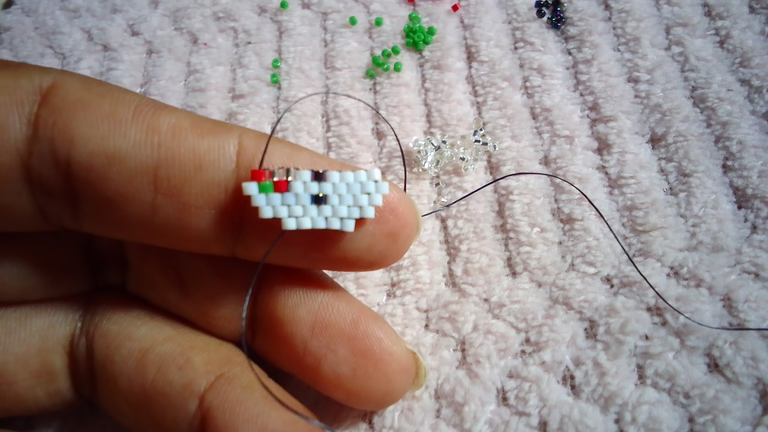
Paso 2:
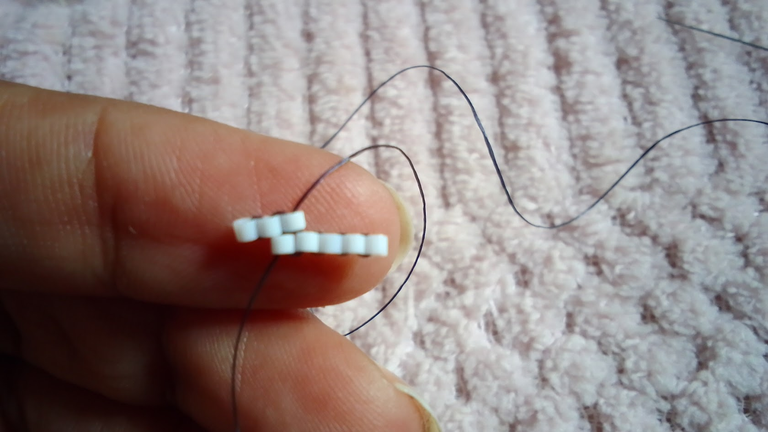
Ya tenemos esa hilera lista vamos a construir nuestra segunda hilera y hacemos un aumento para ello colocamos en nuestra aguja dos mostacillas pasamos la aguja por el hilito entre las dos primeras mostacillas como se ve en la foto, llevamos las mostacillas al final hasta que queden juntas a la fila de abajo, luego pasamos la aguja de abajo hacia arriba por la segunda mostacilla y la fijamos en nuestra base, seguido colocaremos una mostacilla más y para ello en la mostacilla anterior (de izquierda a derecha según mi posición), pasamos la aguja de abajo hacia arriba y luego la volvemos a pasar por la mostacillas que acabamos de colocar para fijar, colocamos una más repitiendo ese mismo proceso, nos regresamos y seguimos el tejido, colocando una nueva mostacilla como se muestra en la foto.
Continuamos con nuestro tejido habitual y terminamos esa hilera.
Step 2:
We already have that row ready we are going to build our second row and we make an increase for it we place on our needle two beads we pass the needle through the little thread between the first two beads as seen in the photo, we take the beads to the end until they are together to the bottom row, then we pass the needle from the bottom up through the second bead and we fix it on our base, then we will place one more bead and for this in the previous bead (from left to right according to my position), we pass the needle from bottom to top and then we pass it again through the bead we just placed to fix, we place one more repeating the same process, we go back and continue weaving, placing a new bead as shown in the photo.We continue with our usual weaving and finish that row.
 |  |
|---|---|
 |  |
🎁🎁🎁🎁🎁🎁
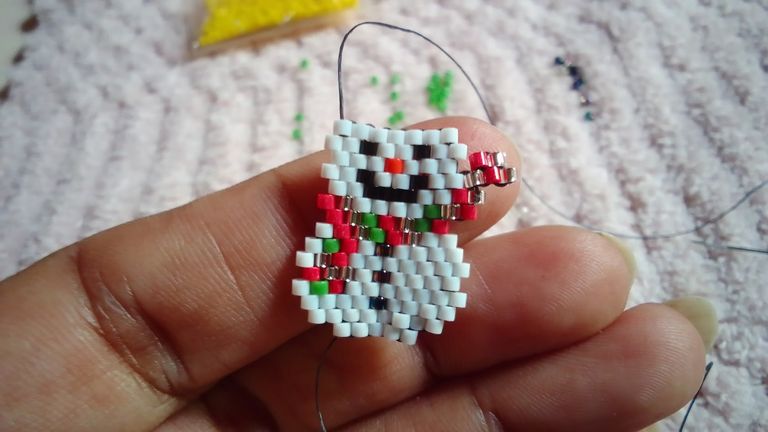
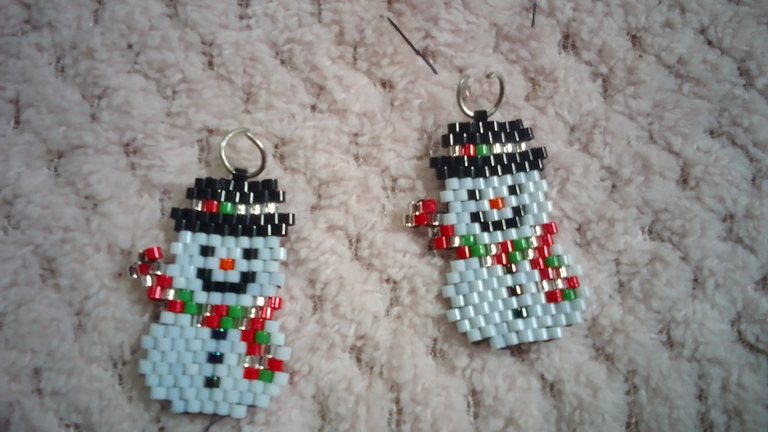
Paso 3:
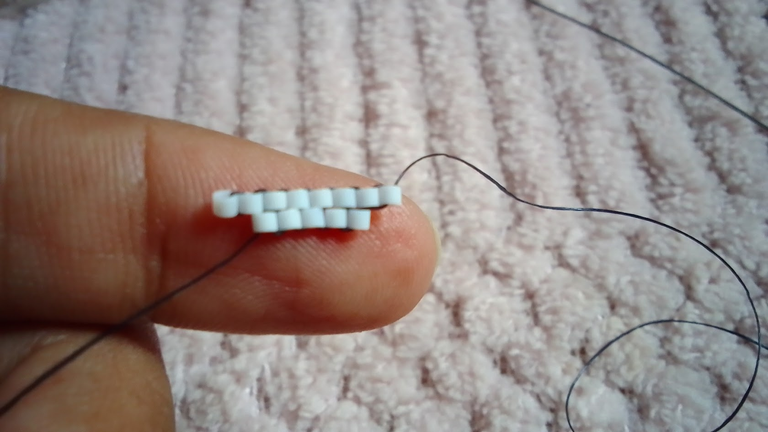
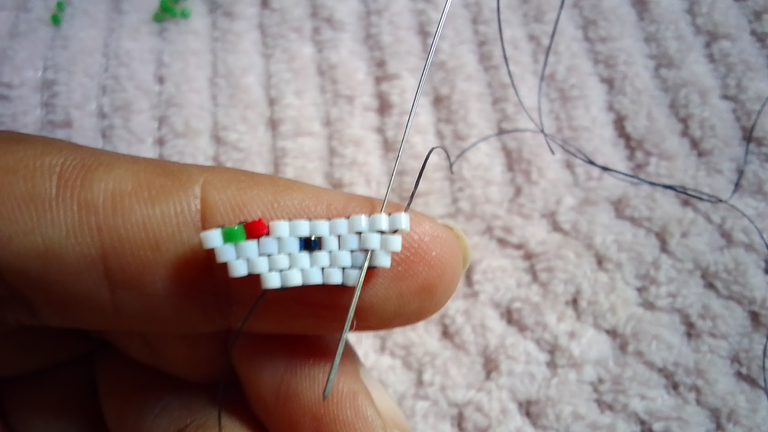
Seguimos tejiendo normalmente haciendo varios aumentos como muestro en la foto, Luego tenemos decrementos en este caso lo que tenemos que hacer es pasar entre las mostacillas, devolviéndonos a la anterior bajando por la mostacilla siguiendo y luego volviendo a subir por la misma mostacilla donde bajamos, y tenemos el decremento, seguimos con nuestro tejido colocamos dos mostacillas entre el hilo de la segunda y la tercera mostacilla de derecha izquierda en mi posición y repetimos el primer paso llevamos hasta el final hasta la base la mostacilla y luego pasamos de abajo hacia arriba por una de las mostacillas para fijarla y seguimos con nuestro tejido ese proceso lo vamos a repetir varias veces hasta que logremos formar nuestra linda figura así como lo vemos en las fotos.
Step 3:
We continue weaving normally making several increases as I show in the photo, Then we have decreases in this case what we have to do is to pass between the beads, returning to the previous one going down the bead following and then going back up the same bead where we went down, and we have the decrease, we continue with our weaving we place two beads between the thread of the second and the third bead from the right left in my position and repeat the first step we take to the end to the base of the bead and then pass from the bottom up through one of the beads to fix it and continue with our weaving that process we will repeat several times until we get to form our nice figure as we see in the photos.
 |  |
|---|---|
 |  |
🎁🎁🎁🎁🎁🎁
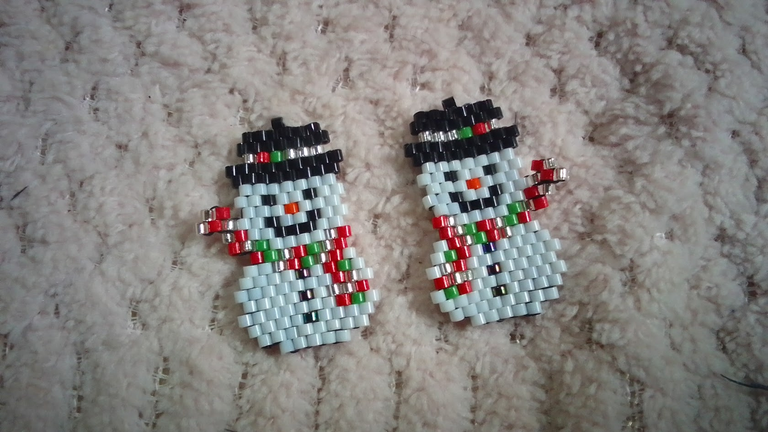
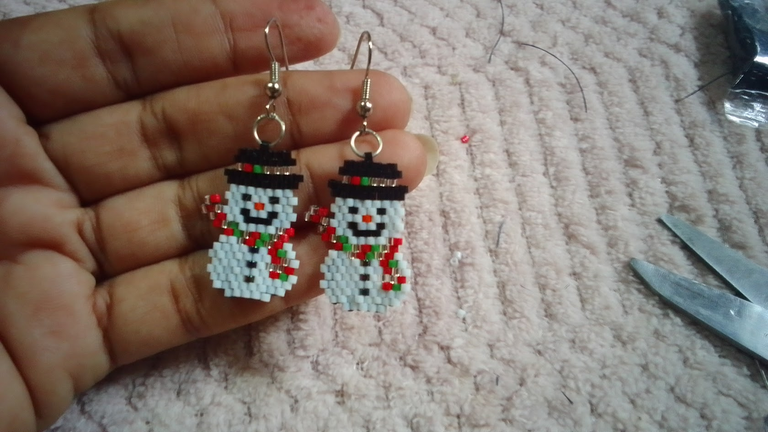
Paso 4:
Luego que tengamos nuestras figuritas listas lo que vamos a colocar en unos aritos que ya había hecho previamente y luego le coloco los anzuelos y tenemos nuestros zarcillos de hombre de nieve
¿qué les parece?
¿Les gusta cómo se ven? A mi sencillamente me encantan, estos muñecos de nieves
¿Hermosos cierto?
Step 4:
After we have our figurines ready we are going to place them in some earrings that we had already made previously and then we place the hooks and we have our snowman tendrils.What do you think?
Do you like how they look? I simply love them, these snowmen.
Beautiful, aren't they?
 |  |
|---|---|
 |  |
🎁🎁🎁🎁🎁🎁
Espero les guste mi post gracias por su apoyo, muchas bendiciones y que este mes sea maravilloso para ustedes...🎆🎇
I hope you like my post, thank you for your support, many blessings and may this month be wonderful for you...🎆🎇

Recursos/Resources
| Portada, banner e imagen / Cover, banner and image | canva |
|---|---|
| fotos/ pictures | own photos, realme c11 device |

This snowman earing is really cute. The beauty is in the details. This would look great with any clothes style. Great work
Thanks You 😍😍😍
This snowman earing is really cute. The beauty is in the details. This would look great with any clothes style. Great work
Bendiciones!! Muy bonitos quedaron tus zarcillos.
Excelente trabajo
Muchas gracias me alegro le haya gustado mi trabajo ❤️❤️
Trabajas muy bien está técnica, la haces ver hermosa y sencilla, hermoso trabajo navideño 😍
Gracias por su apoyo.. me alegro mucho que le haya gustado ☺️✨