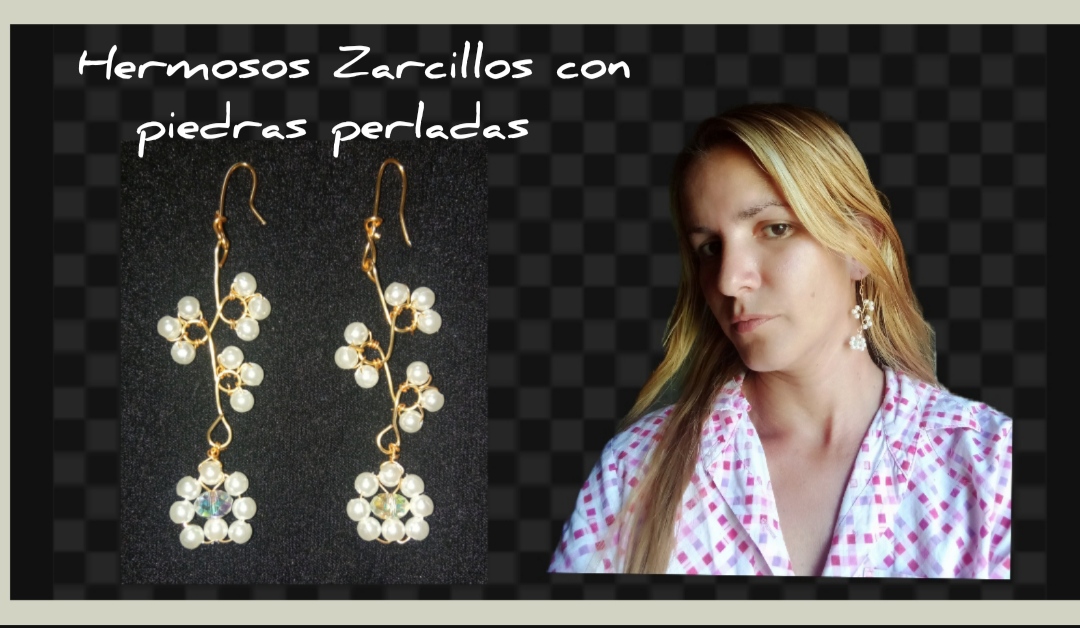
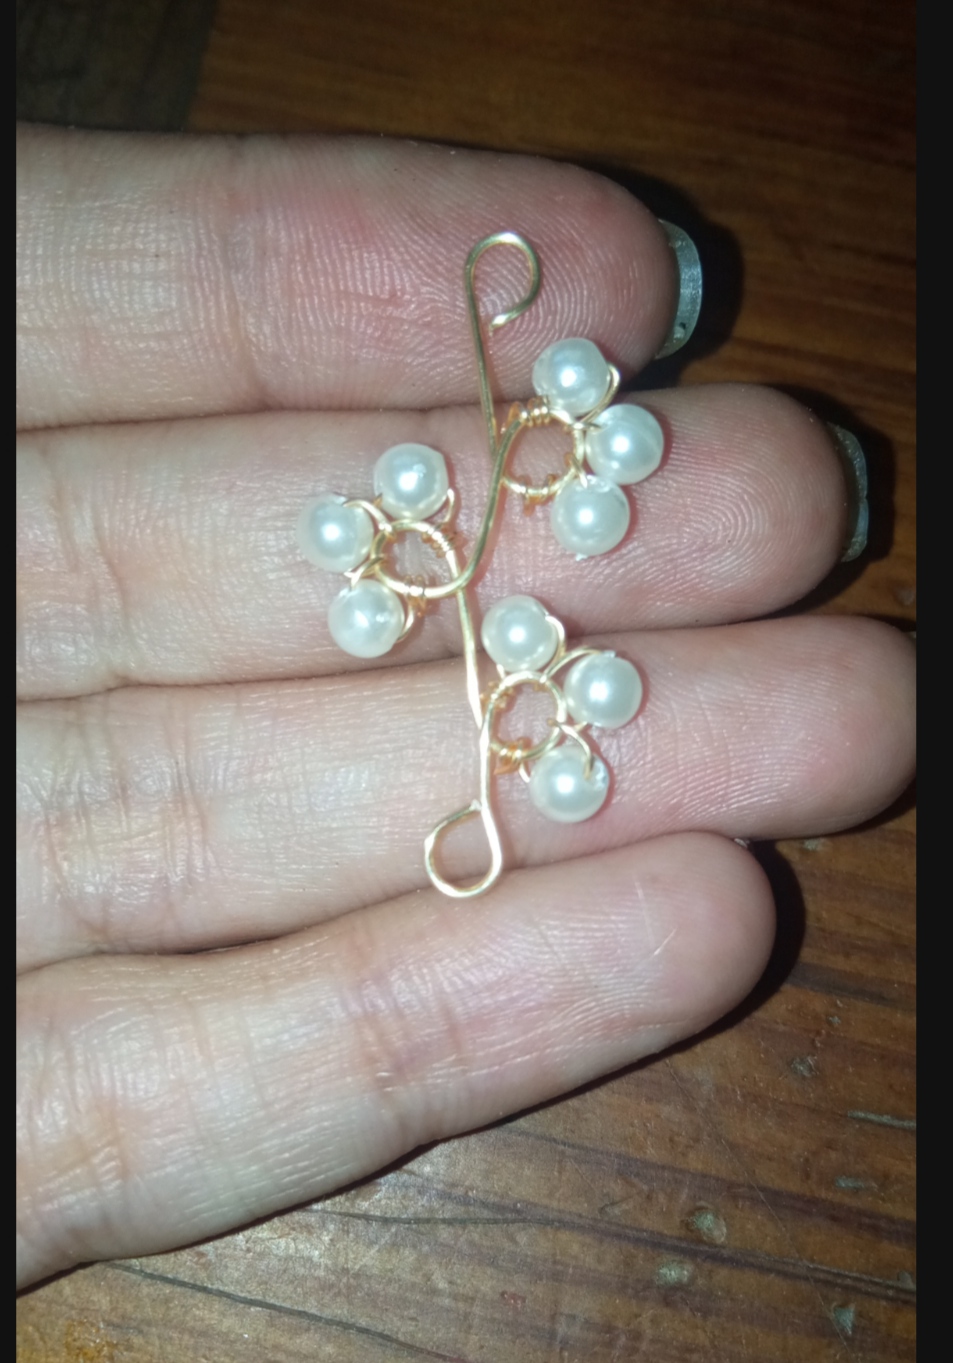
Saludos queridos amigos creativos miembros de esta bella comunidad, les envío un muy cariño saludo, esperando que su fin de semana les sea de provecho, hoy quiero compartir con ustedes unos muy hermosos zarcillos los cuales realice este fin de semana para todos ustedes, se trata de unos Zarcillos Elaborados en alambrismo y piedras blancas tipo perlas. Está creación es muy sencilla y económica de realizar, quise elaborarlos color blanco pues les da elegancia al alambre y además podemos combinarlo con cualquier vestimenta.
Greetings, dear creative friends, members of this beautiful community, I send you a very affectionate greeting, hoping that your weekend will be of benefit to you, today I want to share with you some very beautiful earrings that I will make this weekend for all of you , it is about tendrils made in wire mesh and pearl-like white stones.
This creation is very simple and cheap to make, I wanted to make them white because it gives elegance to the wire and we can also combine it with any outfit.
Para todos ustedes elaboré un muy sencillo tutorial para que juntos paso a paso podamos elaborar esta hermosa creación, sin más aca está presentación para todos ustedes.
For all of you I made a very simple tutorial so that together step by step we can make this beautiful creation, without further ado here is a presentation for all of you.
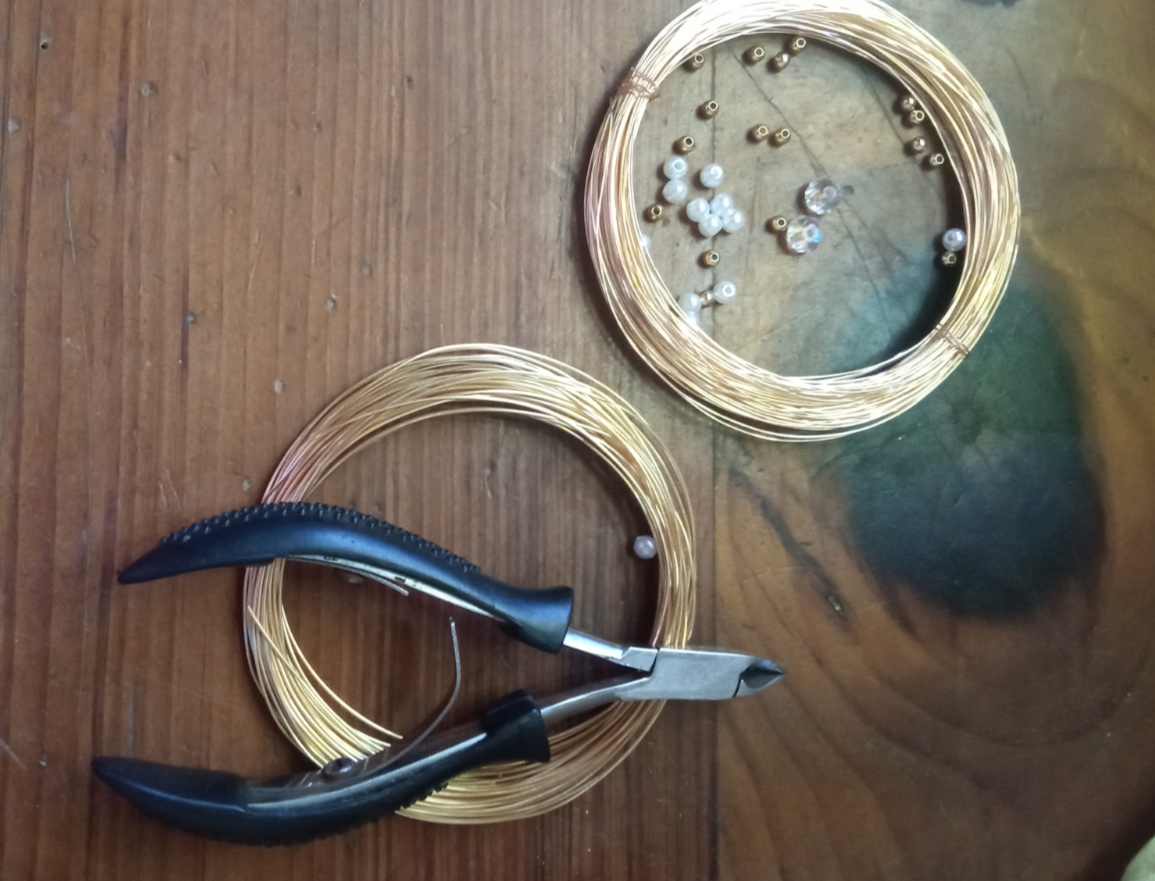
✴️ Que Materiales Necesitas:
- Alambre de bisutería calibre 22.
- Alambre de bisutería calibre 26.
- Piedritas de color blanco tipo perlas.
- dos piedritas medianas tornasol.
- clavo o pitillo delgado.
- Pinza de bisutería.
✴️ What Materials Do You Need:
- 22 gauge jewelry wire.
- 26 gauge jewelry wire.
- White pebbles type pearls.
- two medium litmus stones.
- clove or thin straw.
- Jewelry clip.
😊 paso a paso
😊 Step by step
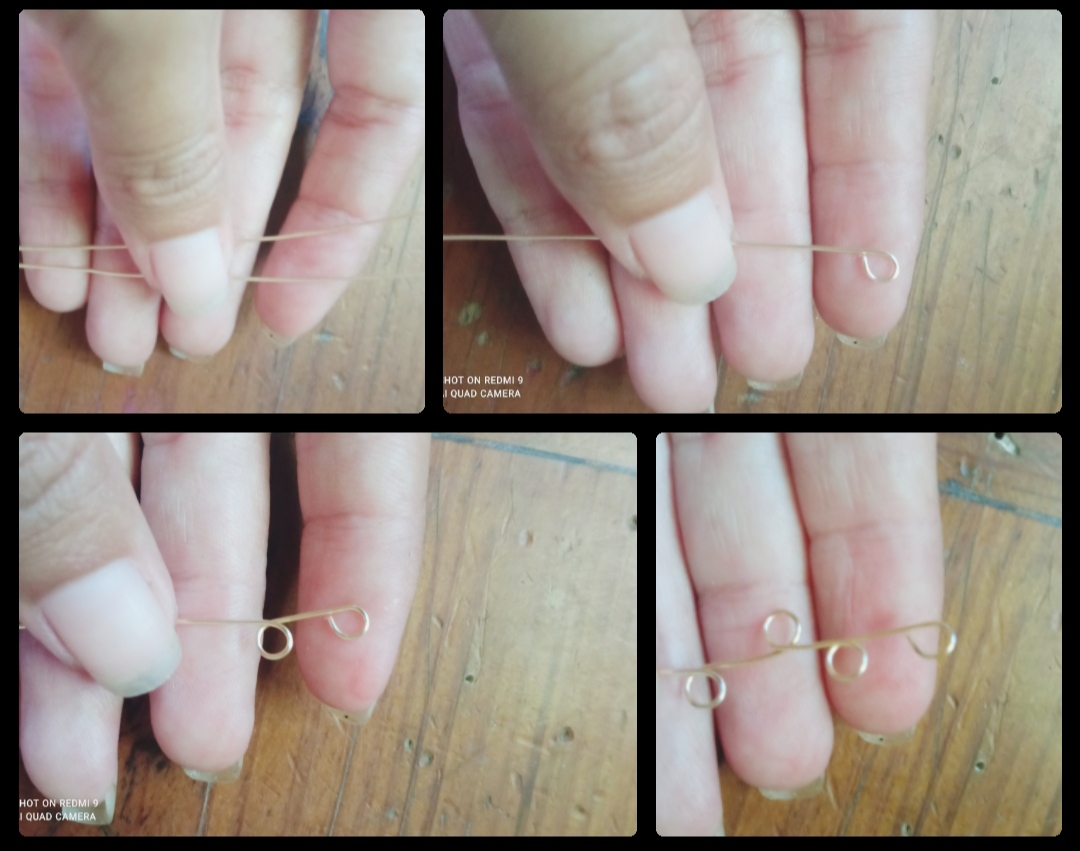
⭐ Paso 1: Para iniciar tomamos nuestro alambre de bisutería calibre 22 y cortamos dos pedazos de 10cm, para iniciar la elaboración tomamos uno de los pedazos y con ayuda de el clavo realizamos en la punta del alambre una vuelta que apoyándonos en el clavo nos quedara de forma circular, Seguidamente dejamos un espacio pequeño y realizamos otra vuelta en el alambre hacia un lado, lado derecho, dejamos otro espacio y realizamos otra vuelta del lado contrario lado izquierdo y cerramos con una última vuelta por ahora en el lado derecho.
En total tendremos la punta y tres pequeños círculos hacia abajo, y nos debe quedar un extremo liso que luego trabajaremos.
⭐ Step 1: To start we take our 22 caliber jewelry wire and cut two 10cm pieces, to start the elaboration we take one of the pieces and with the help of the nail we make a turn on the tip of the wire that, leaning on the nail, will remain in a circular way, then we leave a small space and make another turn in the wire to one side, right side, we leave another space and make another turn on the opposite side, left side and close with one last turn for now on the right side.
In total we will have the point and three small circles down, and we should have a smooth end that we will work on later.
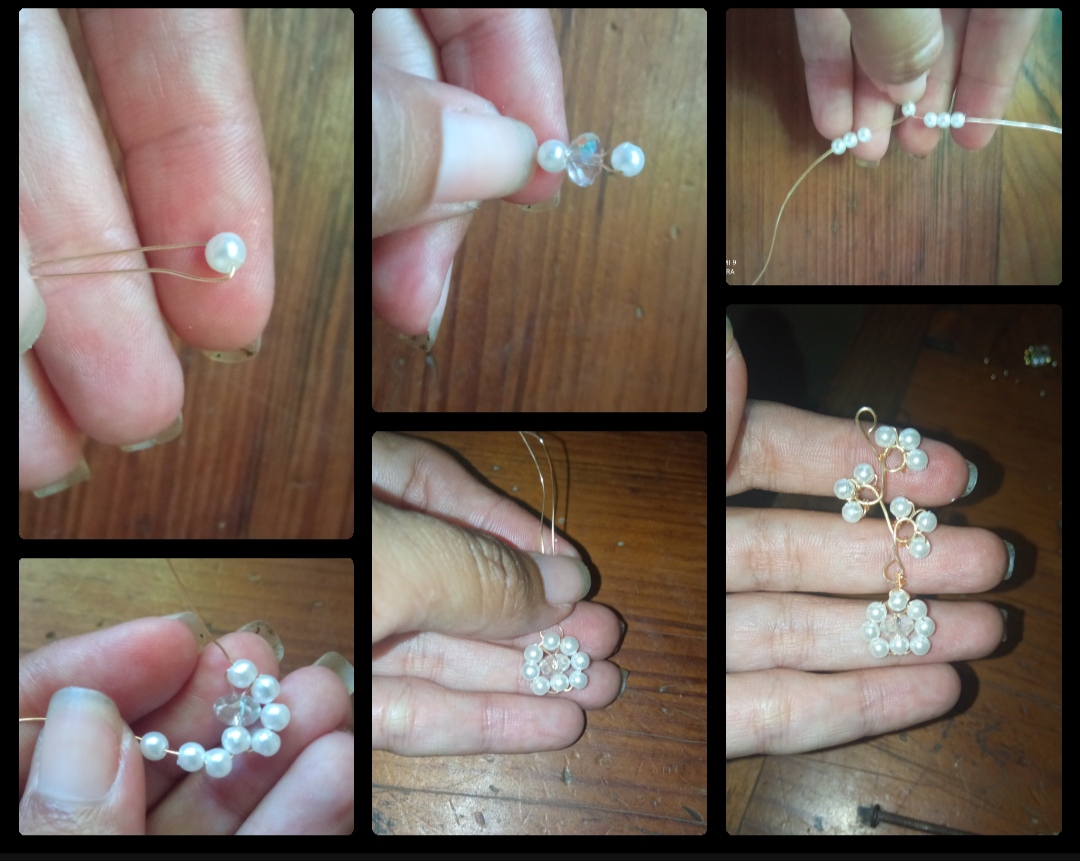
⭐ Paso 2: ahora tomamos un pedazo de alambre fino, calibre 26 y lo enrollamos en el primer círculo Dani dos pequeñas vueltas para que nos quede bien sujeto, Seguidamente Introducimos una piedra blanca por el alambre la llevamos hasta el círculo y tomamos el alambre fino y le damos una vuelta en el círculo, sujetándo así la primera piedra blanca, así Introducimos la segunda e igual sujetamos con dos vueltas del alambre fino en el círculo y por último Introducimos la tercera piedra, sujetamos y cortamos el exceso de alambre.
⭐ Step 2: now we take a piece of fine wire, 26 caliber, and wrap it around the first Dani circle two small turns so that it fits well, then we introduce a white stone through the wire, we take it to the circle and we take the fine wire and we give it a turn in the circle, thus holding the first white stone, thus we introduce the second and the same we hold with two turns of the fine wire in the circle and finally we introduce the third stone, we hold and cut the excess wire.
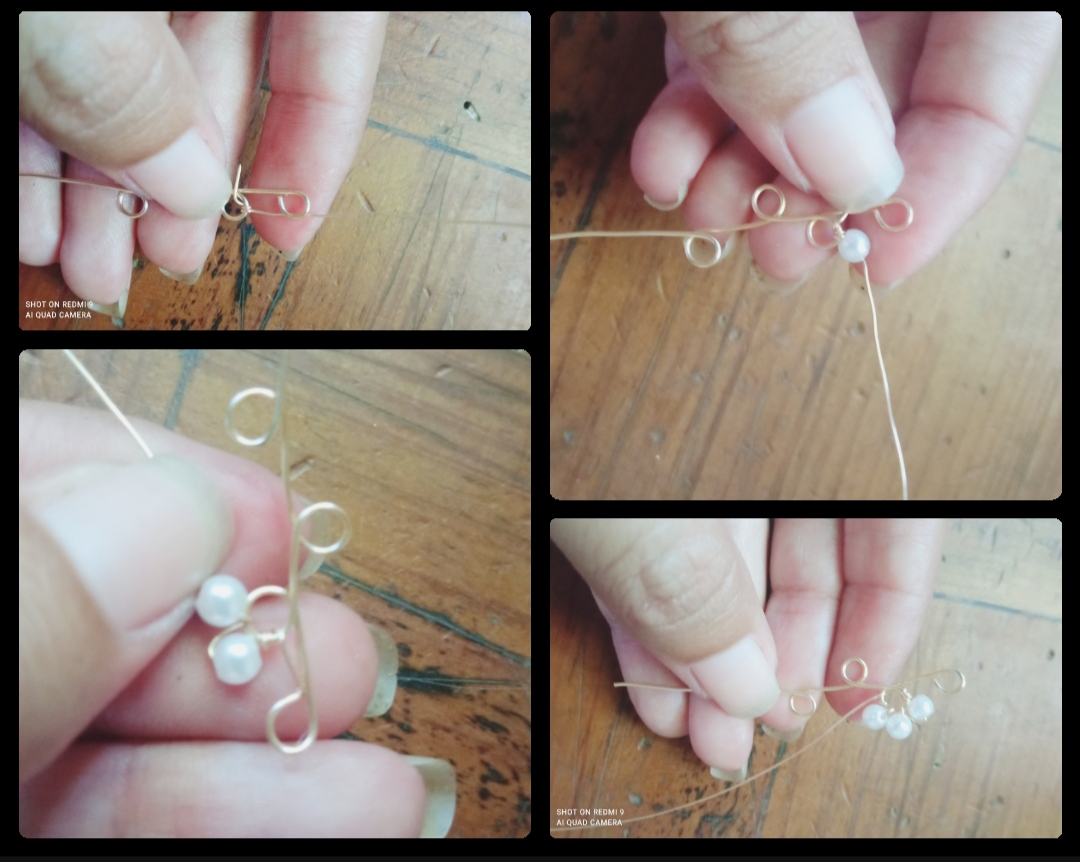
⭐ Paso 3: el paso número dos, lo repetiremos en los otros dos pequeños círculos de la parte de adebajo quedándonos tres medias flores lindas y delicadas, como pueden observar a continuacion.
⭐ Step 3: step number two, we will repeat it in the other two small circles at the bottom, leaving us with three beautiful and delicate half flowers, as you can see below.

⭐ Paso 4: Después con el extremo del alambre que nos sobra de la base de nuestro zarcillo realizamos un último círculo del mismo tamaño de los anteriores y cortamos el exceso.
⭐ Step 4: Then, with the end of the wire that is left over from the base of our earring, we make a last circle of the same size as the previous ones and cut the excess.
⭐ Paso 5: tomamos 10 cm de alambre fino calibre 26 e introducimos una piedrita blanca y la llevamos al centro del alambre, luego doblamos el alambre hacia adebajo e Introducimos la piedra mediana tornasol y otra blanca por ambos extremos del alambre, después separamos las puntas del los dos alambre e Introducimos 3 Pichitas blancas por cada lado, tomamos las puntas y la doblamos hacia arriba e Introducimos el alambre por la primera piedra blanca encima de la tornasol de forma cruzada.
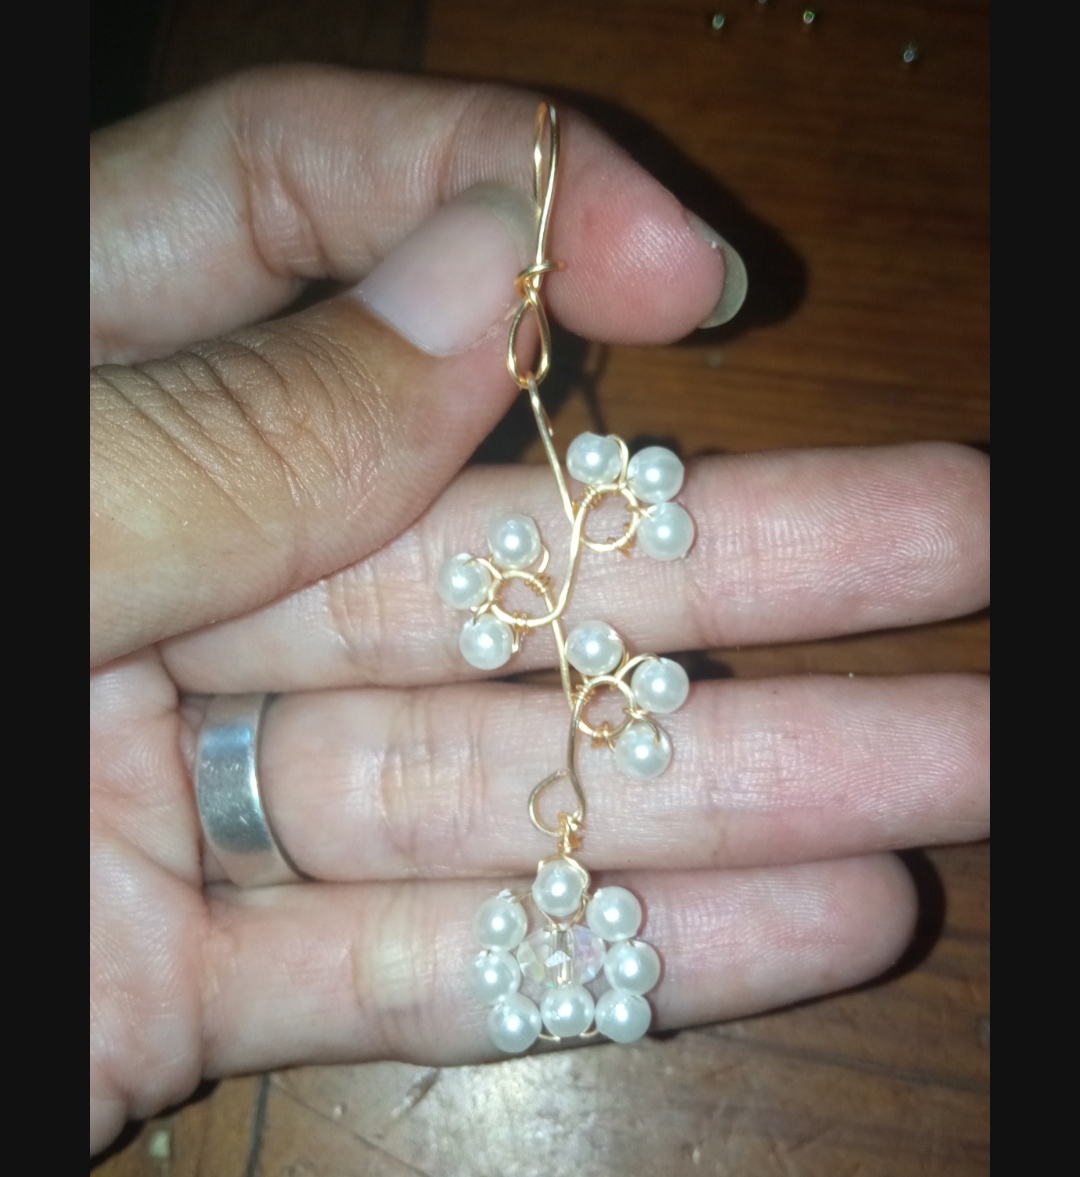
Con el alambre que nos sobra realizamos dos vueltas en la parte superior y la llevamos hasta nuestro zarcillo y la sujetamos al último círculo de nuestro zarcillo.
⭐ Step 5: we take 10 cm of fine 26-gauge wire and we introduce a white stone and we take it to the center of the wire, then we bend the wire downwards and we introduce the medium litmus stone and another white stone at both ends of the wire, then we separate the ends of the two wires and introduce 3 white Pichitas on each side, take the ends and bend it upwards and introduce the wire through the first white stone on top of the litmus in a cross way.
With the remaining wire we make two turns at the top and take it to our earring and attach it to the last circle of our earring.
⭐ Paso 6: para culminar Introducimos el anzuelo para zarcillos por el primer círculo de nuestro pendiente y listo.
⭐ Step 6: To finish, we introduce the hook for earrings through the first circle of our earring and that's it.
⭐ Hermosos Zarcillos con piedras perladas ⭐
⭐ Beautiful tendrils with pearl stones ⭐
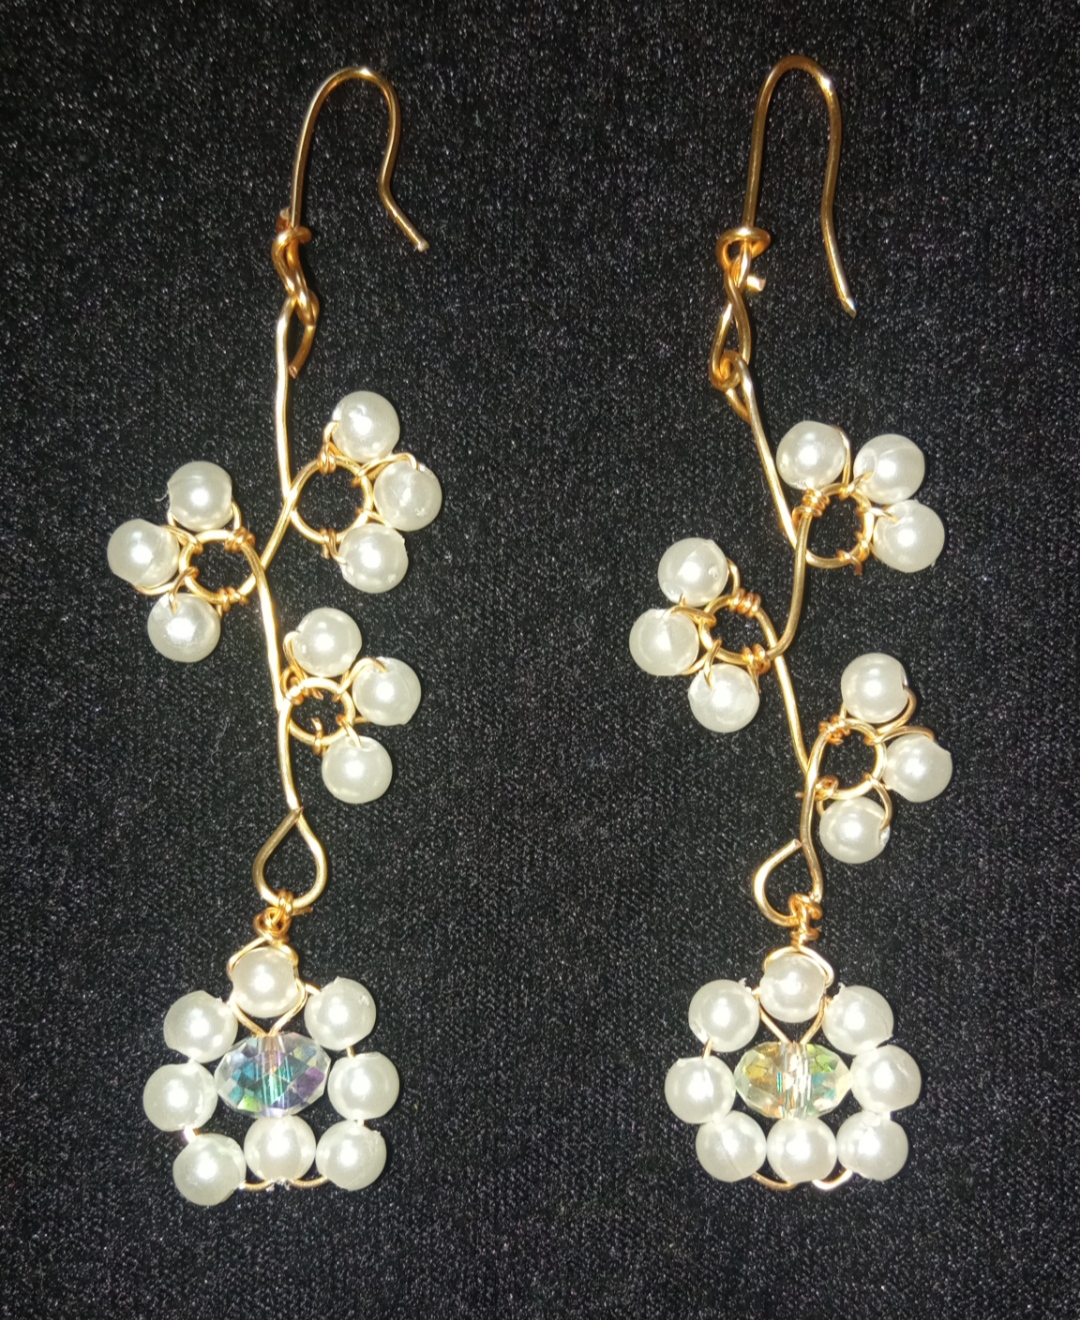
Con estos simples pasos y pocos materiales Queridos amigos lograremos crear y lucir unos hermosos y elegantes zarcillos para ocasiones especiales. Si es de su gusto pueden elaborarlos de colores pues también deben quedar preciosos.
With these simple steps and few materials, Dear friends, we will be able to create and wear beautiful and elegant earrings for special occasions. If you like, you can make them in colors because they should also be beautiful.
Queridos Amigos me despido deseosa de que está sencilla creación sea del agrado de todos ustedes.
Les agradezco por su visita y apoyo, próximamente estaré publicando mi participación en la iniciativa, lamentablemente me gustan tantas creaciones que no me decido.
Saludos y bendiciones para ustedes.
Dear Friends, I say goodbye hoping that this simple creation is to the liking of all of you.
I thank you for your visit and support, soon I will be publishing my participation in the initiative, unfortunately I like so many creations that I can't decide.
Greetings and blessings to you.
las fotos fueron tomadas con mi teléfono Redmi 9, contenido exclusivo para Hive. Y la traducción fue realizada a través de Google.
photos were taken with my Redmi 9 phone, exclusive content for Hive. And the translation was done through Google.
The rewards earned on this comment will go directly to the people( @mariajcastro28, @afterglow ) sharing the post on Twitter as long as they are registered with @poshtoken. Sign up at https://hiveposh.com.
Me encantan los pasos que proporcionaste para el arete y el producto final del trabajo se ve increíble.
@emmaris amiga,hermosos 🥰,muy sutiles y originales, saludos 🤗
Gracias amiga, que bueno saber que son de tu agrado.
Que lindos zarcillos amiga @emmaris nos encanta todo, desde las hojas hasta la flor, te quedo muy bien realizó este proyecto, gran trabajo.
Muchas gracias, me alegra mucho que le gusten, 🥰
Que lindos, delicados y sencillos y el blanco con el dorado es una combinación hermosa y elegante ♥️
Me alegra mucho que te haya gustado amiga.
Gracias y saludos.
El alambrismo es un arte hermoso y nada sencillo, al menos a mí me cuesta bastante creo que requiero de más práctica, excelente post.
Si amiga con práctica es que se logra manejar y ver la facilidad de esta técnica, me alegra mucho que le sea de su agrado.
Saludos.
Hola @emmaris me encantan las prendas con la técnica de alambrismo se ven muy delicadas y es todo un arte moldear cada pieza cuidando cada detalle hasta lograr el diseño que nos hemos propuesto. Te felicito 😊 me encantó tu trabajo muy hermoso. Gracias por compartir.
Me alegra mucho que le haya gustado ☺️.
Gracias por su visita y comentario