ENGLISH
ESPAÑOL
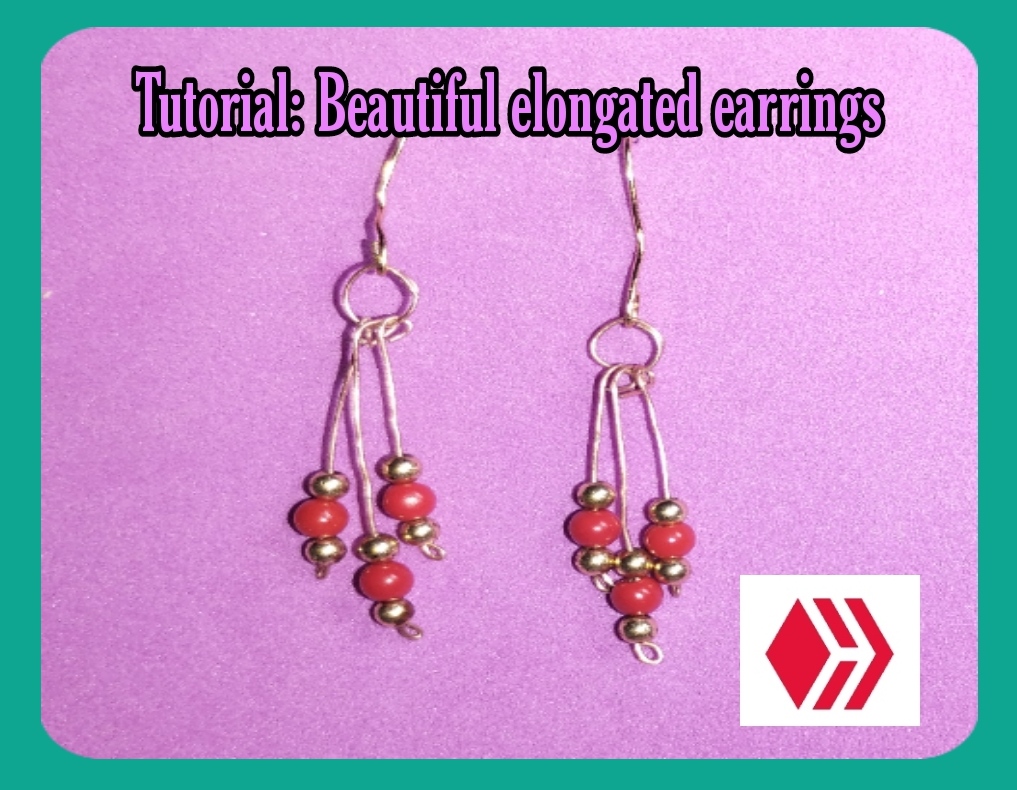
Hola queridos amigos de #jewelry, los invito a que me acompañarme a crear una nueva nueva joya ☺ Deseando por supuesto que se encuentren bien con la bendición de Dios. El la de hoy les he traído mi más reciente creación, la cual es unos hermosos zarcillos alargados con piedras rojas y doradas.
Hello dear #jewelry friends, I invite you to join me in creating a new jewelry ☺ Wishing you of course well with God's blessing. On today's I have brought you my newest creation, which is beautiful elongated earrings with red and gold stones.
Su elaboración de muy fácil y de seguro les gustará el resultado final pues quedan muy hermosos, les cuento que estoy trabajando con alambre reciclado pues aún no he podido adquirir el alambre para bisutería pero espero Dios mediante pronto poder hacerlo, ya saben yo use alambre reciclado pero si ustedes usan alambre para bisutería de seguro quedarán más bellos. Sin más que agregar, a continuación les mostraré el paso a paso para elaborar estos hermosos y creativos zarcillos:
I am working with recycled wire because I have not yet been able to acquire the wire for costume jewelry but I hope to God I can do it soon, you know I use recycled wire but if you use wire for costume jewelry they will be more beautiful for sure. Without further ado, I will now show you the step by step to make these beautiful and creative tendrils:
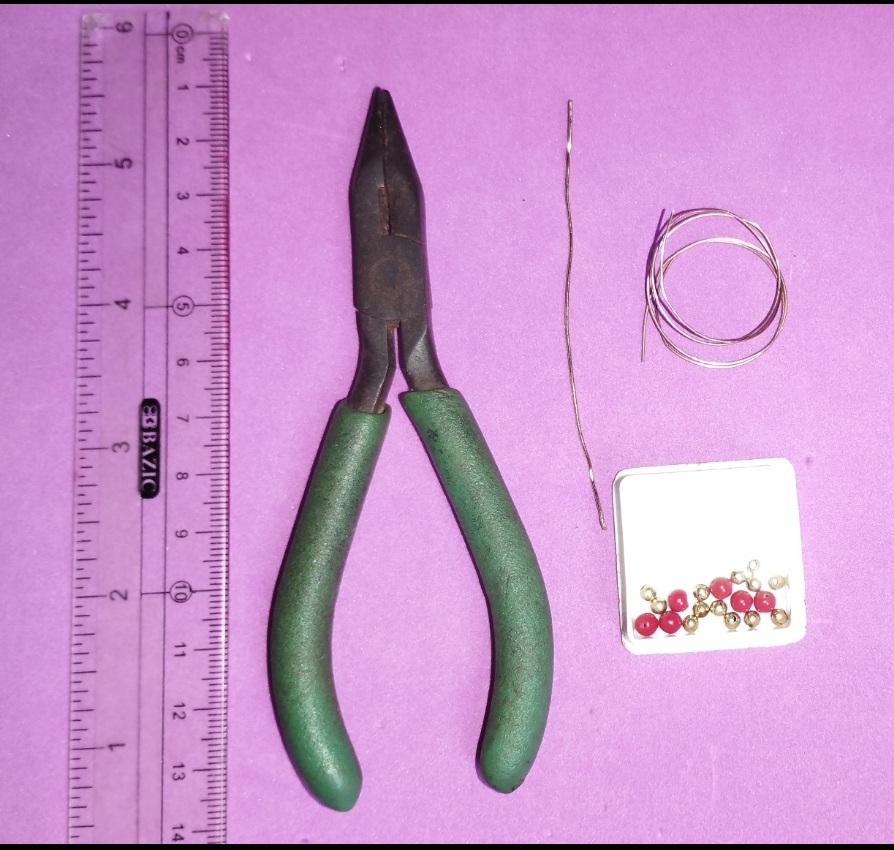
Materiales que utilice:
Materials used:
Alambre de Cobre reciclado fino y alambre de cobre un poco más grueso o alambre para bisutería calibre 18 y 25, piedras rojas pequeñas, piedras doradas pequeñas, regla y pinzas.
Fine recycled copper wire and slightly thicker copper wire or 18 and 25 gauge costume jewelry wire, small red stones, small gold stones, ruler and tweezers.
Procedimiento a realizar:
Procedure to be followed:
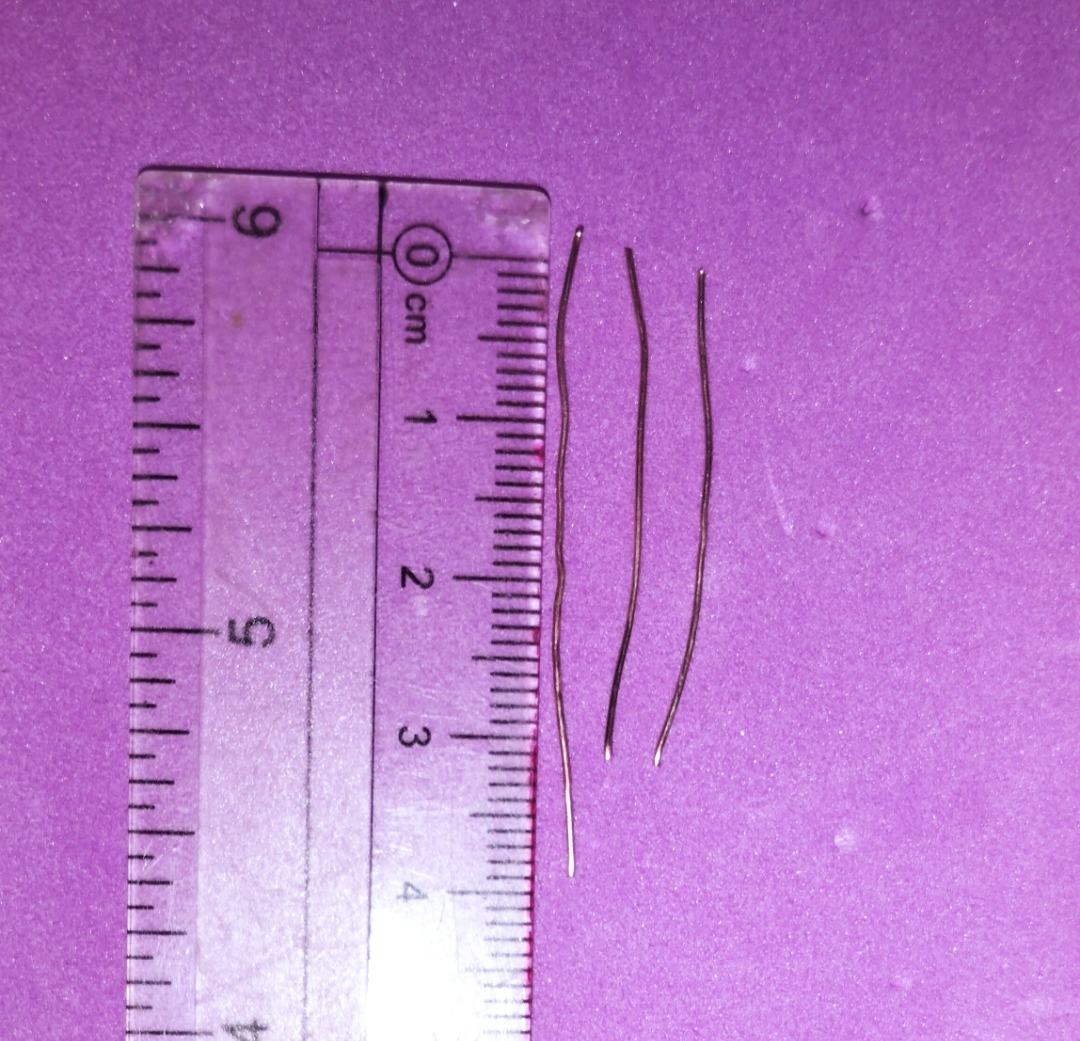
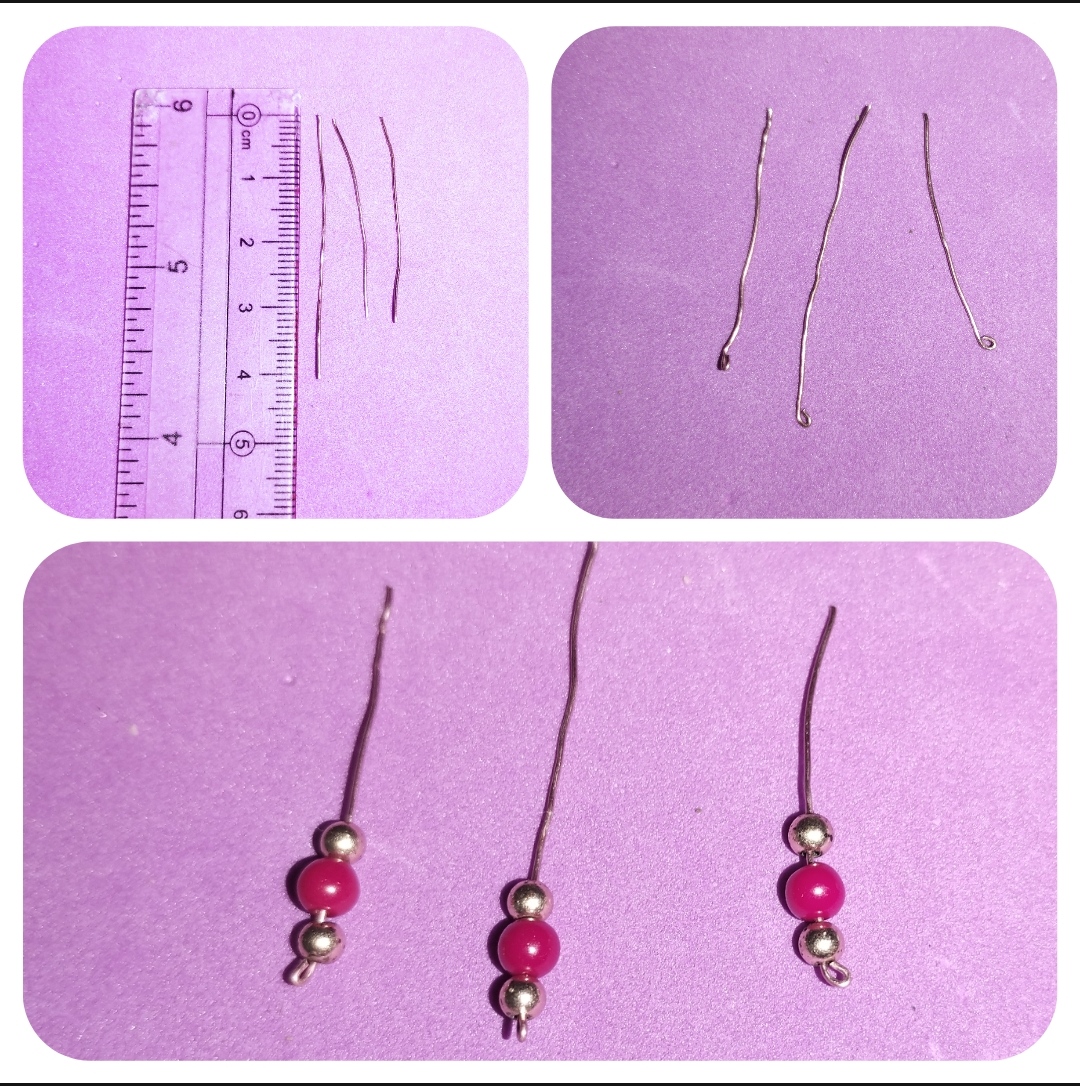
Paso #1: Para comenzar a elaborar estos lindos zarcillos lo primero que realice fue medir y cortar tres trozos de alambre fino, uno de 4cm de largo y dos de 3cm de largo.
Step #1: To start making these beautiful tendrils, the first thing I did was to measure and cut three pieces of thin wire, one 4cm long and two 3cm long.
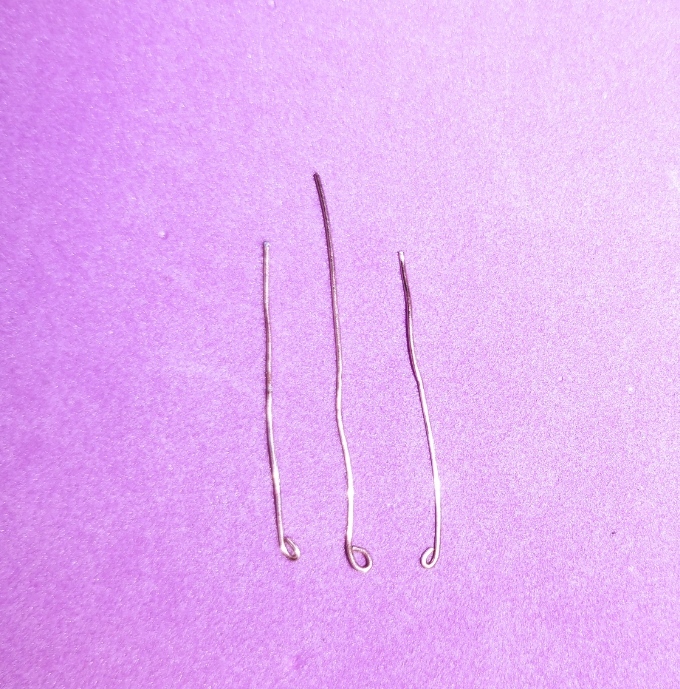
Paso #2: Seguidamente realice una pequeña argolla en un extremo de cada trozo de alambre obtenido en el paso anterior. Está argolla servirá para que al colocar las piedras estás no se salga.
Step #2: Next, make a small ring at one end of each piece of wire obtained in the previous step. This ring will be used so that when placing the stones they do not come out.
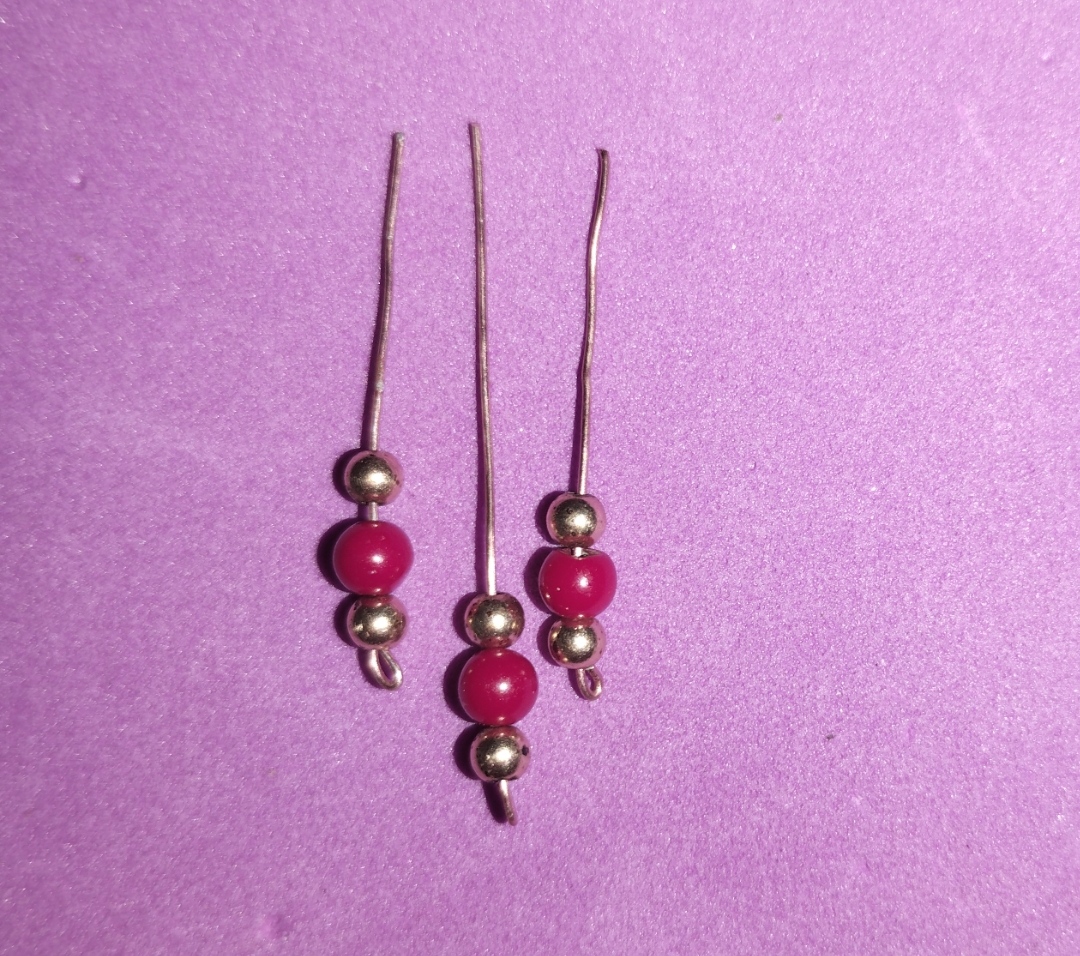
Paso #3: Inmediatamente coloque las piedras en cada trozo de alambre alternando de la siguiente manera: primero colocamos una piedra dorada luego una piedra roja y finalmente otra piedra dorada. Haremos lo mismo con los tres trozos de alambre.
Step #3: Immediately place the stones on each piece of wire alternating as follows: first place a golden stone, then a red stone and finally another golden stone. We will do the same with the three pieces of wire.
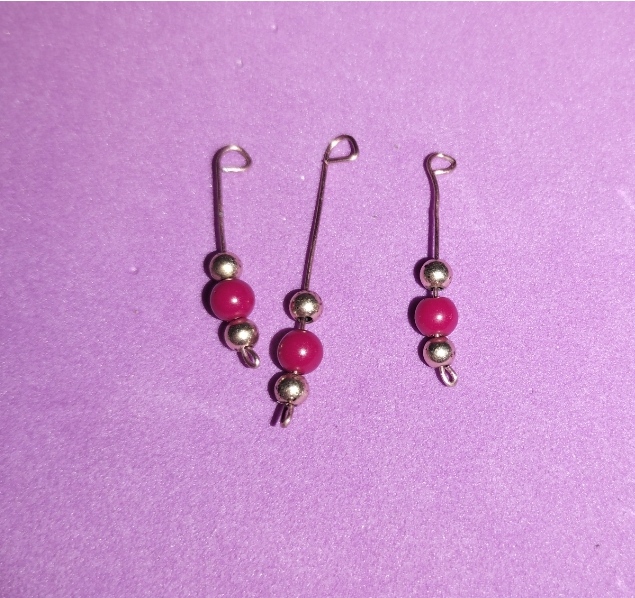
Paso #4: A continuación realice otra argolla en la parte superior de cada trozo de alambre, esto con la finalidad de poder unir las tres piezas en una sola.
Step #4: Then make another ring at the top of each piece of wire, in order to be able to join the three pieces into one.
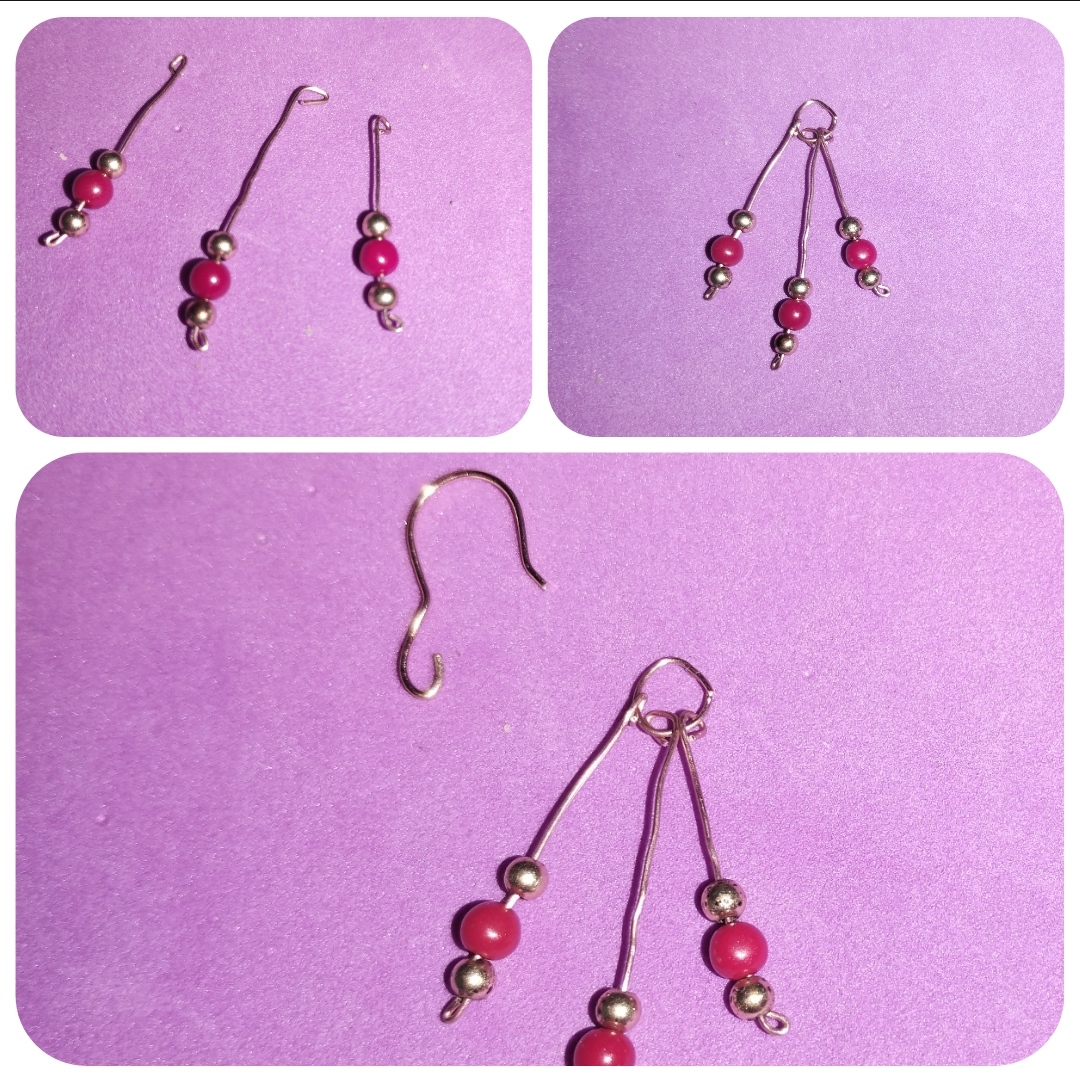
Paso #5: Ahora procedi a realizar una pequeño aro que permitirá unir la pieza completa. Pueden ver qué introduje primero uno de los trozos de alambre de 3cm luego el de 4cm y para finalizar coloque el otro de 3cm.
Step #5: Now I proceeded to make a small ring that will allow to join the whole piece. You can see that I first introduced one of the 3cm pieces of wire, then the 4cm piece and finally I placed the other 3cm piece.
 |  |
|---|
Paso #6: Finalmente medi un trozo de 4cm de alambre grueso para realizar la pieza en forma de anzuelo que permitirá guindar el zarcillo.
Step #6: Finally, measure a 4 cm piece of thick wire to make the hook-shaped piece that will allow you to hang the tendril.
 |  |
|---|
Paso #7: Ya solo queda unir las dos piezas y obtendremos nuestros lindo zarcillo 🤩 .
Step #7: Now all that remains is to join the two pieces and we will obtain our beautiful tendril 🤩 .

Paso #8: Ahora debemos realizar el otro zarcillo para tener el par, comencé midiendo los tres trozos de alambre recuerden un trozo de 4 cm y dos de 3cm. Luego realice la argolla al final e introduje las piedras tal como explique en pasos anteriores, recuerden que debemos procurar que queden iguales.
Step #8: Now we must make the other tendril to have the pair, I started by measuring the three pieces of wire, remember a piece of 4 cm and two of 3cm. Then I made the ring at the end and introduced the stones as I explained in previous steps, remember that we must ensure that they are equal.
Paso #9: Continúe realizando la argolla al otro extremo y realice un pequeño aro para unir las piezas en una sola. Recuerden que debemos colocar las piezas en un orden específico, para finalmente realizar la pieza con forma de anzuelo y unir las piezas en un linda joya.
Step #9: Continue making the ring at the other end and make a small ring to join the pieces into one. Remember that we must place the pieces in a specific order, to finally make the hook-shaped piece and join the pieces into a nice piece of jewelry.
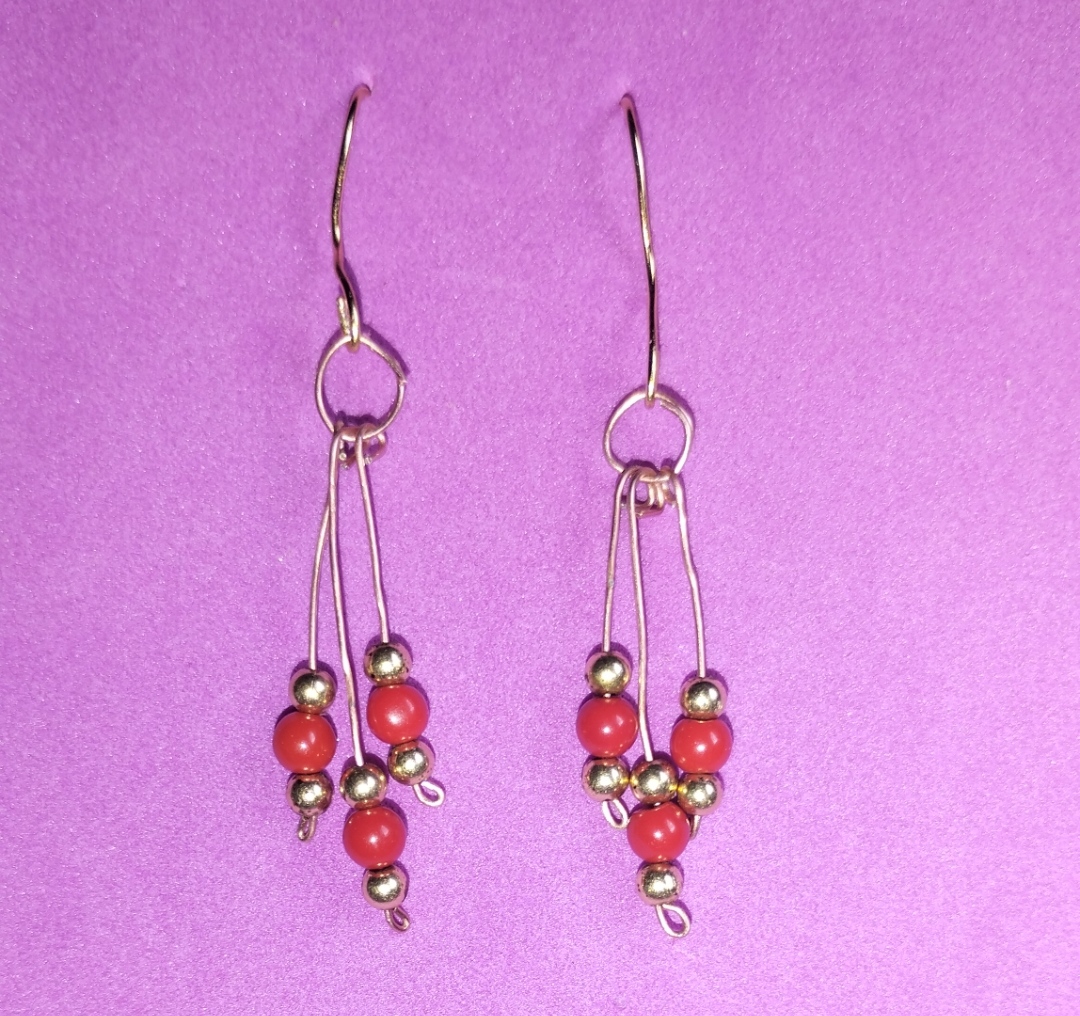
Ahora si pueden observar Mis Zarcillos Listo 😍
Now you can see My Ready tendrils 😍.
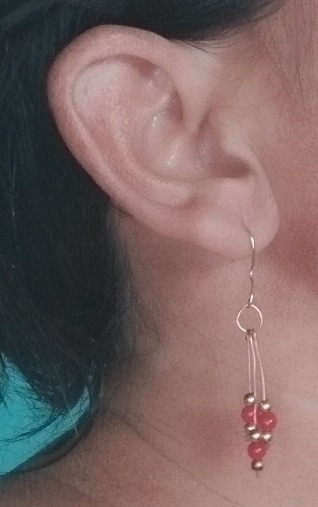
Luciendo mis Zarcillos 🤩
Wearing my tendrils 🤩
Espero haya sído de su agrado este sencillo tutorial para la elaboración de estos lindos y creativos zarcillos que les he compartido el día de hoy. Estoy segura de que tú también puedes crear los tuyos y lucirás hermosa 😃 Antes de despedirme quiero agradecerles cómo siempre por apoyar mis publicaciones, ha Sido un gusto compartir con ustedes mis creaciones, espero sus críticas constructivas 😉 Bendiciones para todos 😘
I hope you liked this simple tutorial for making these cute and creative tendrils that I have shared with you today. I'm sure you can also create your own and you will look beautiful 😃 Before I say goodbye I want to thank you as always for supporting my publications, it has been a pleasure to share with you my creations, I hope your constructive criticism 😉 Blessings to all 😘
Gracias por apoyar y visitar mi publicación, nos vemos en una próxima oportunidad 💝
Thank you for supporting and visiting my publication, see you in a future opportunity 💝
Imágenes propias tomadas con mi Celular Redmi Note 11. Traducciones realizadas con Deepl.com.
Own images taken with my Redmi Note 11 cell phone. Translations made with Deepl.com.
Me ha gustado mucho tu proyecto de hoy,mucha suerte y éxito.
Hola amiga 👋
Me alegra que te haya gustado, saludos 🤗
Saludos amiga @eumelysm te quedaron muy lindos tus zarcillos, si imagino que deben quedan aún mejor con alambre no reciclado, pero te felicito por la iniciativa 😉, gracias por traer unos zarcillos muy bonitos y con poco material, éxitos 🙌
Hola 👋
Me alegra que haya sido de su agrado este sencillo tutorial ☺️ saludos
The color of the bead you applied in making the earrings suit it well. Thanks for the recycling dear.