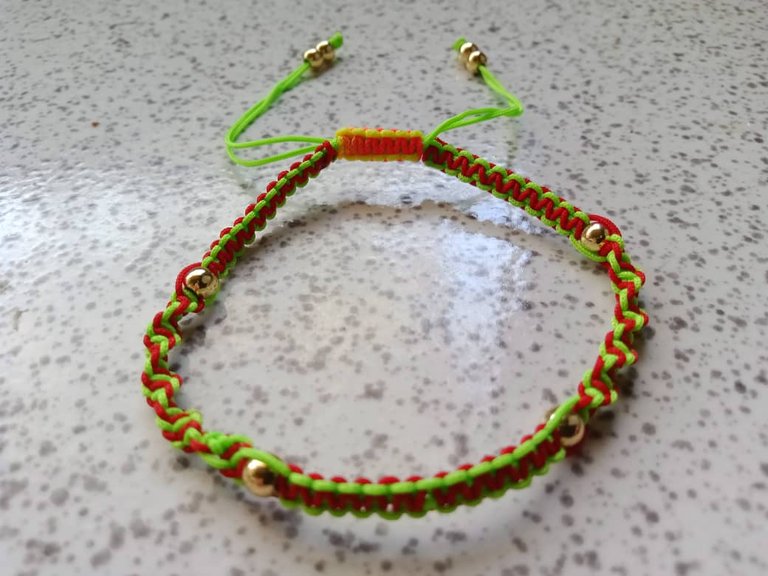
Saludos comunidad #jewelry, deseándoles un feliz y bendecido jueves a esta maravillosa comunidad de artesa|nos creativos. Hoy estoy feliz de compartir con ustedes mi nuevo proyecto creativo. Se trata de una delicada, atractiva y muy llamativa pulsera multicolor con tejido plano y espiral que hacen de ésta una pieza hermosa .
Es una joya muy sencilla de hacer pero el resultado final es asombroso. Esta pulsera es muy fácil de hacer y en pocos minutos la tenemos hecha. Es muy atractiva y me encantó el resultado final.
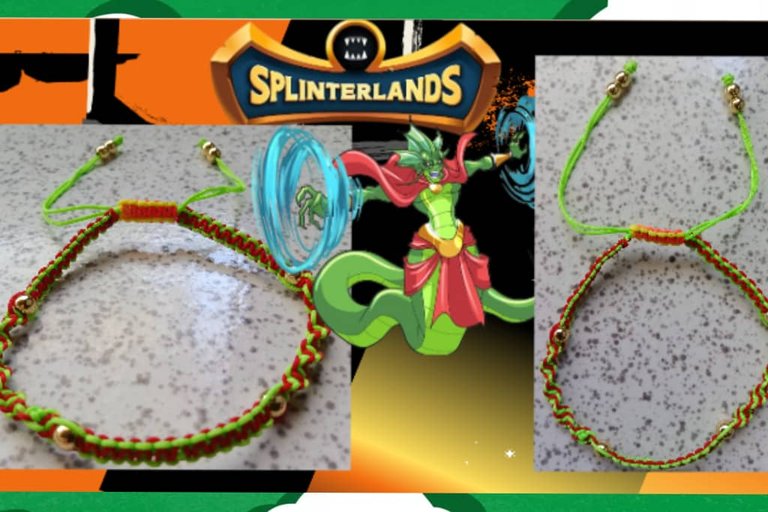
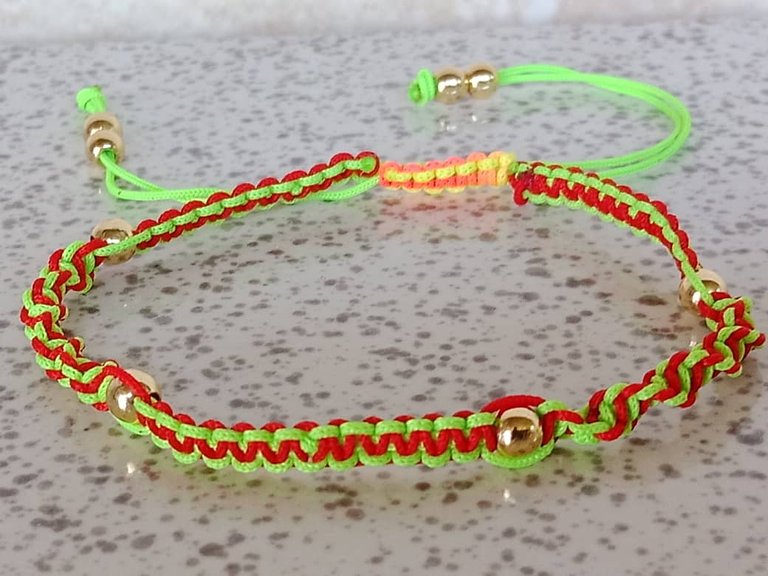
Esta vez comparto con vosotros un fan art inspirado en una de las cartas del juego splinterlands conocida como Naga Windmaster. Este guerrero usa como atuendo variedad de colores como el rojo, verde y dorado en los cuales decidí recrear e inspirarme en la elaboración de una pulsera con variedad de colores como la del personaje que le queda muy bien. Se trata de una pulsera con tejido plano y espiral.
Que Dios les bendiga y espero que les guste mi creación.
Greetings #jewelry community, wishing you a happy and blessed Thursday to this wonderful community of creative artisans. Today I am happy to share with you my new creative project. This is a delicate, attractive and very striking multicolored bracelet with flat weave and spiral that make this a beautiful piece .
It is a very simple jewelry to make but the final result is amazing. This bracelet is very easy to make and in a few minutes we have it done. It is very attractive and I loved the final result.
This time I share with you a fan art inspired by one of the splinterlands game cards known as Naga Windmaster. This warrior uses as attire a variety of colors like red, green and gold in which I decided to recreate and get inspired in making a bracelet with a variety of colors like the character that fits him very well. It is a bracelet with flat weave and spiral.
God bless you and I hope you like my creation.
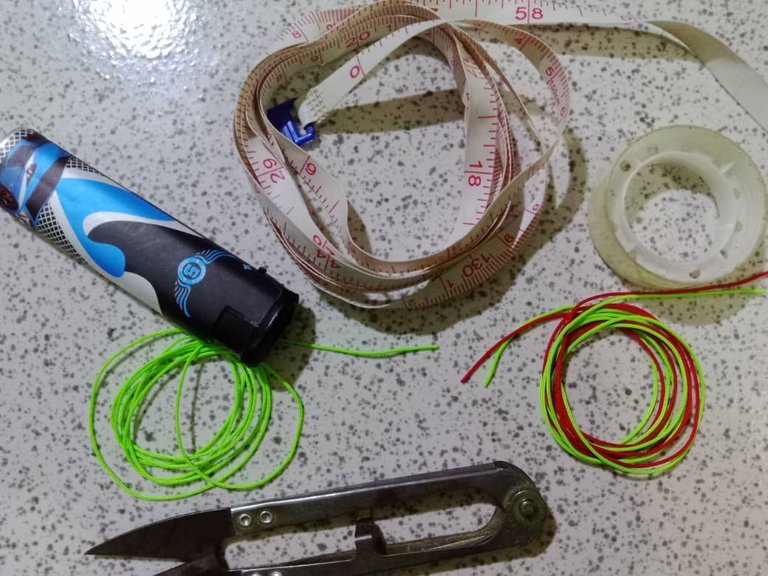
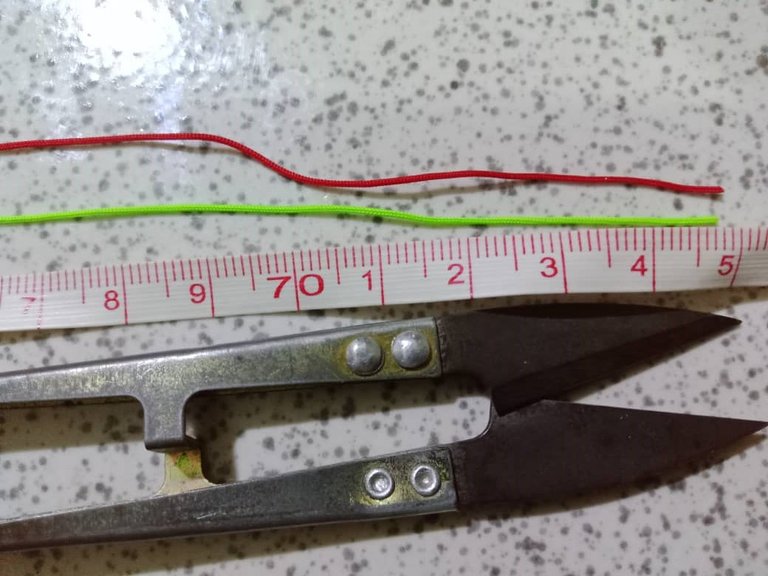
MATERIALES
Los materiales que utilizaremos para realizar esta hermosa pulsera son:
Hilo chino
Tijera
Encendedor
Cinta métrica
Cinta Adhesiva
Balines
MATERIALS
The materials we will use to make this beautiful bracelet are:
Chinese thread
Scissors
Lighter
Measuring tape
Adhesive Tape
Balinese pellets
ELABORACIÓN
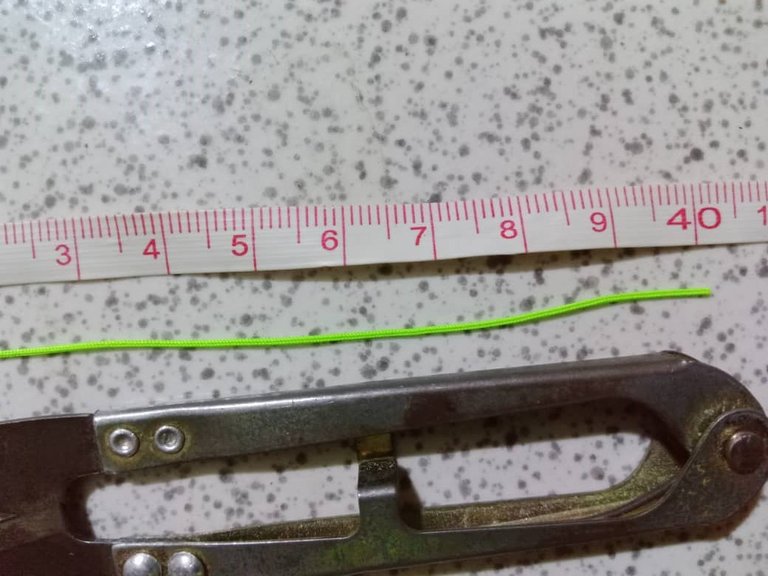
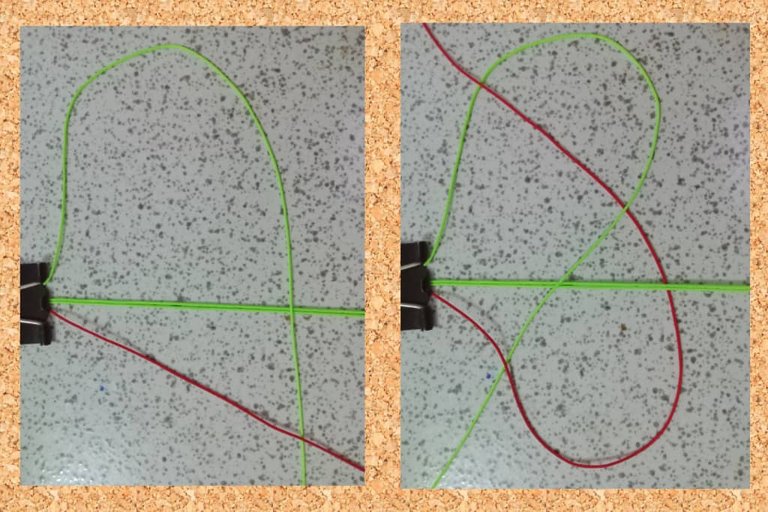
Para comenzar esta delicada pulsera vamos a cortar dos hebras de 40cm que usaremos como base de la pulsera y para introducir los balines
ELABORATION
To start this delicate bracelet we will cut two 40cm strands that we will use as the base of the bracelet and to introduce the pellets.
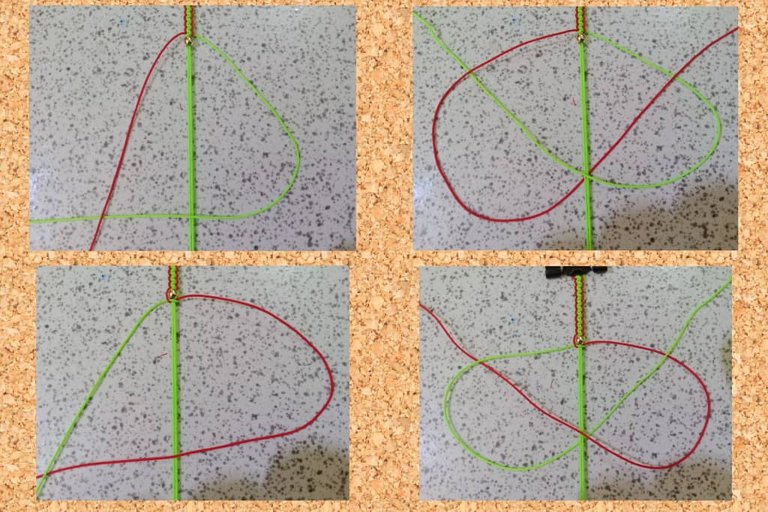
Luego el hilo de 75cm lo pasamos por debajo de los hilos base y hacemos un nudo sencillo, el hilo debe coincidir por las puntas. Después pasamos el hilo del lado derecho por encima de los hilos base en forma de P. Después pasamos el hilo del lado izquierdo por arriba del hilo derecho que se encuentra en el lado izquierdo y lo pasamos por debajo de los hilos base y lo sacamos por el interior o argolla del mismo como se muestra en la imagen, después presionamos y hacemos el nudo
Then we pass the 75cm yarn under the base yarns and make a simple knot, the yarn must match at the ends. Then we pass the thread on the right side over the base threads in the form of a P. Then we pass the thread on the left side over the right thread that is on the left side and pass it under the base threads and pull it through the inside or ring of the thread as shown in the image, then we press and tie the knot.
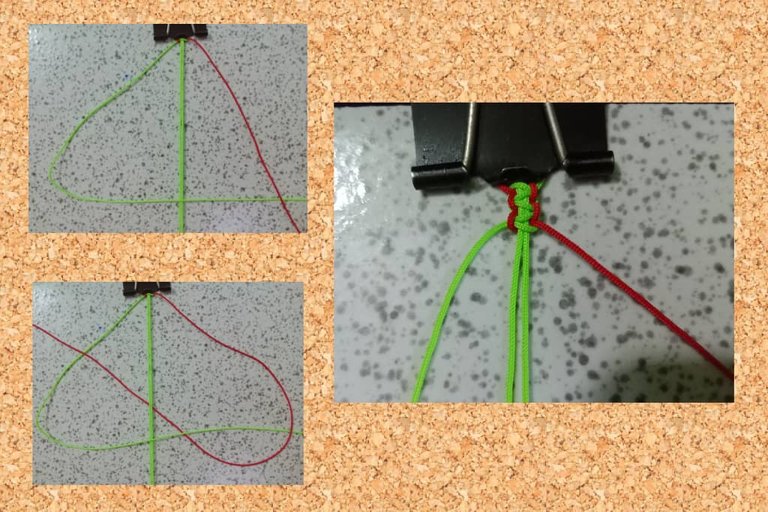
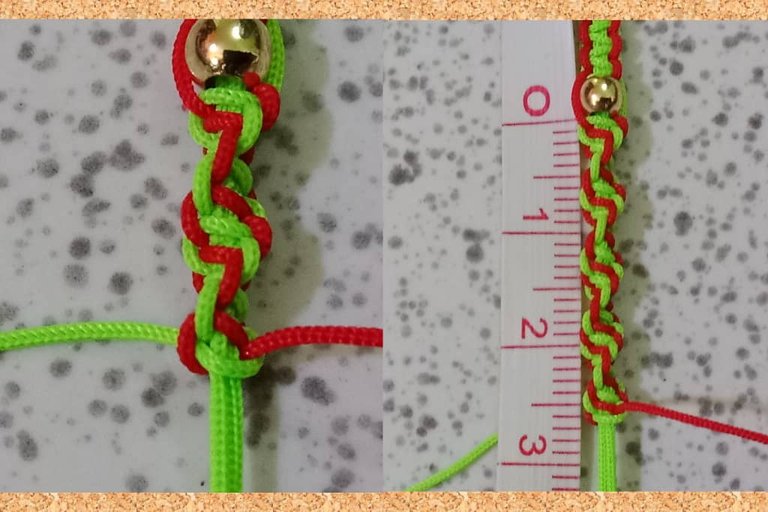
After making the flat knot at a distance of 2 cm, we introduce the pellet and then start with a spiral knot.
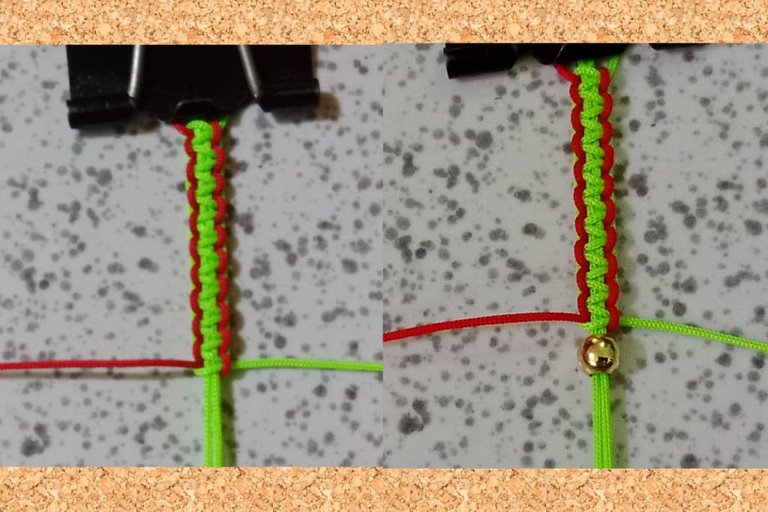
It is worth mentioning that this spiral weaving will be done in the same way from the beginning to the end. We always have to weave it from the right side over and over again until we reach the desired distance.
In my case I left it at a distance of 2.5cm from the ball downwards.
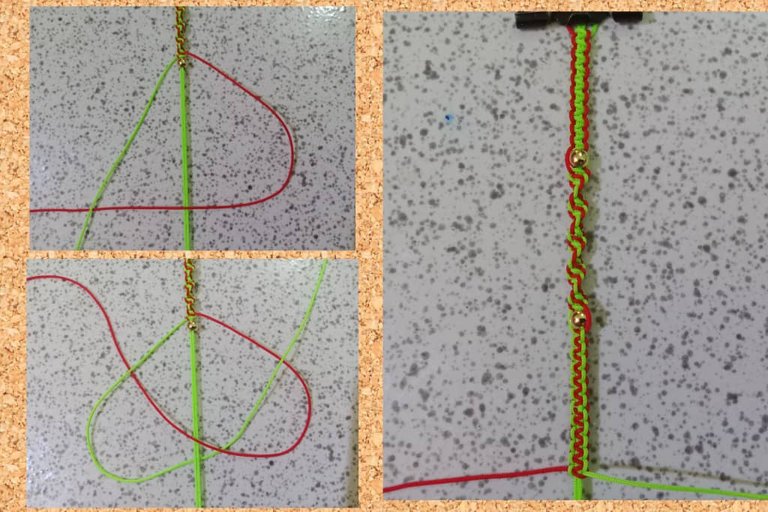
We continue with the same procedure until we reach the desired size.

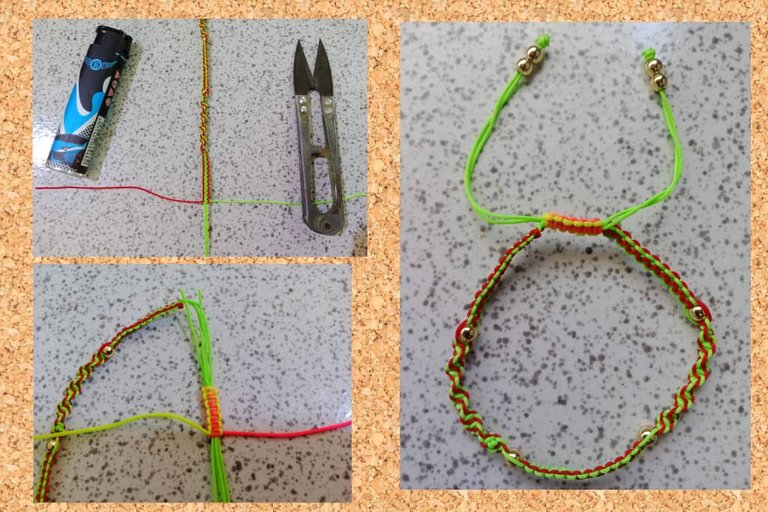
Así quedó nuestra hermosa pulsera
This is the result of our beautiful bracelet

Translated with https://www.deepl.com/translator
     Todas las imágenes son de mi autoría

      All the images are of my authorship
Nice one