
ENGLISH VERSION
Hello #Jewerly community, today I have the pleasure of posting again in this community. And this time I do it with a woven choker. Without further ado, I'll tell you how I did it.
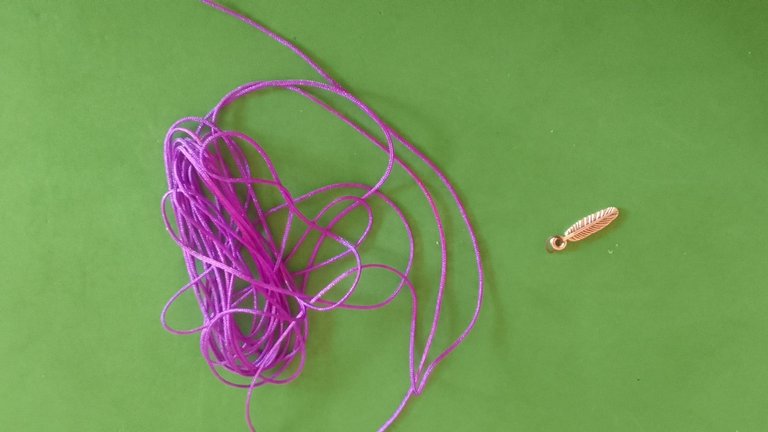
MATERIALS
- 3 meters of violet Chinese thread
- A feather-shaped pendant
FIRST STEP
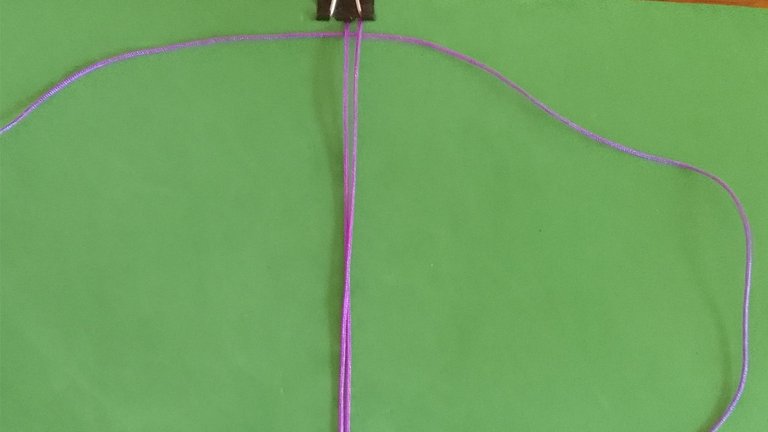
The first thing was to cut the Chinese thread into three pieces, the first piece will measure 120cm, which is what we will fold in half so that the two central threads are formed, the second piece of thread will measure 150cm and those will make the internal threads, the last piece will measure 25cm and is what we are going to use to make the closure. Now, let's get to work.
SECOND STEP
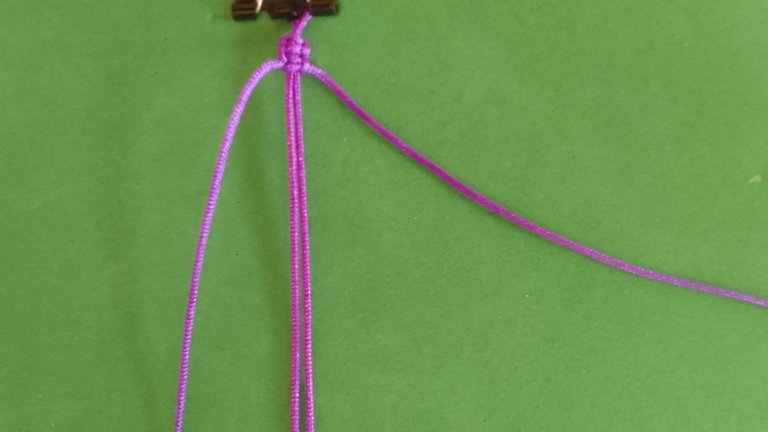
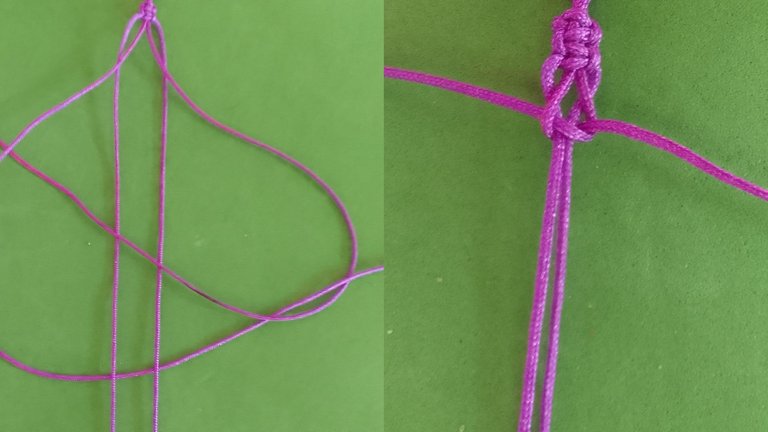
The next thing will be to fold the 120cm thread in half and on the double part we are going to make a knot, we will fix it in such a way that it is well stretched and we will begin to knit, leaving a space of 15 cm from where the knot is. With the 150 thread we will fold it in half and pass it under the central thread, leaving 75 cm for the left side and 75 cm for the right side as follows.
THIRD STEP
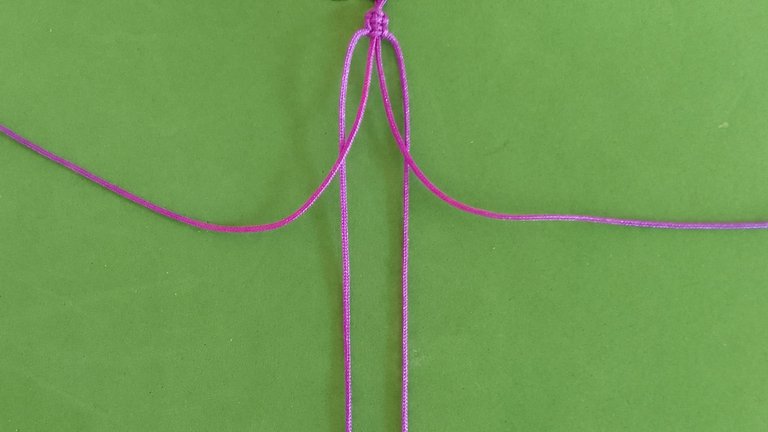
We will tie a knot. After the knot we will begin to weave with the macrame stitch. We will take the end of the alternating thread that is on the right and pass it over the central threads, with the left end of the internal thread, we pass it over the tip of the thread on the right side, then under the central threads and we take it out again through the space on the right side.
We do the same but this time with the left side. We take the end of the alternating thread that is on the left side and pass it over the central threads, with the right side we pass it over the left end that is on the right side, we pass it under the threads center and we take it out through the space left on the left side. We repeat this procedure one more time.

FOURTH STEP
We will take the central threads and we will open them and we will place the alternate threads in the center, leaving these as the new central threads. With the new internal threads we will take the one on the right side and pass it over the new central threads and the thread on the left side we will pass over the tip of the right side, then under the central threads and take it out. Through the space on the right side, we press slowly to leave a space and make it look the way we want. To close the knot, we will make a macrame stitch with the left side.
FIFTH STEP
And we repeat the procedure of opening the central threads and placing the internal threads in the middle, which will be the new central threads. With the new internal threads we will take the one on the right side and pass it over the new central threads and the thread on the left side we will pass over the tip of the right side, then under the central threads and take it out. Through the space on the right side, we press slowly to leave a space and make it look the way we want. To close the knot, we will make a macrame stitch with the left side.
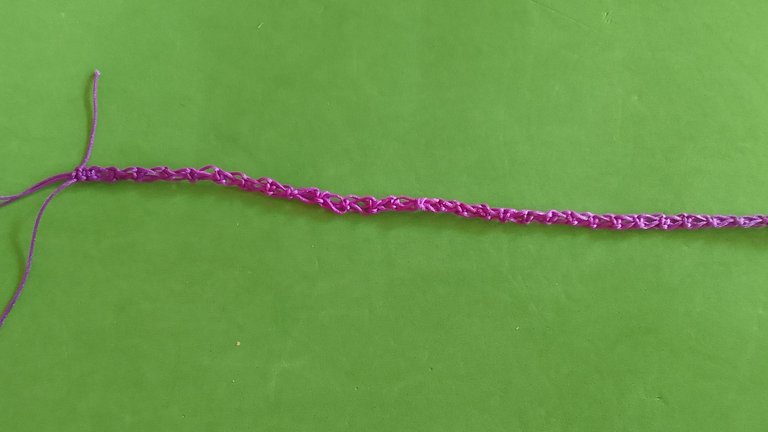
We will repeat this until we have knitted approximately 30 cm. And always make sure to leave the 15 cm at the other end that we left at the first end.
SIXTH STEP
Now we will close. We take the two ends without weaving and we will place them in the center, these being the central threads. With the 25 cm thread we will knit the closure. For this we will use the macrame stitch. The first thing will be to tie a knot. After the knot we will begin to knit with the macrame stitch. We will take the end of the alternating thread that is on the right and pass it over the central threads, with the left end of the internal thread, we pass it over the tip of the thread on the right side, then under the central threads and we take it out again through the space on the right side.
We do the same but this time with the left side. We take the end of the alternating thread that is on the left side and pass it over the central threads, with the right side we pass it over the left end that is on the right side, we pass it under the threads center and we take it out through the space left on the left side. We will repeat this procedure about two more times.
And we place the pendant in the center

This was the result of my work, I hope you like it. I just have to wish you all a happy day.
The photos were taken by my Samsung Galaxy A 03 Core phone and edited in canva
The text was translated by Deepl
VERSIÓN EN ESPAÑOL
Hola comunidad de #Jewerly hoy tengo el placer de publicar nuevamente en esta comunidad. Y esta vez lo hago con una gargantilla tejida. Sin mas preamnulos les cuento como lo hice.
MATERIALES
- 3 metros de hilo chino violeta
- Un dije en forma de pluma
PRIMER PASO
Lo primero fue cortar el hilo chino en tres pedazos, el primer pedazo va a medir 120cm que es el que doblaremos a la mitad para que se formen los dos hilos centrales, el segundo pedazo de hilo va a medir 150 cm y esos van hacer los hilos arternales, el último pedazo va a medir 25cm y es con el que vamos hacer el cierre. Ahora si, manos a la obra.
SEGUNDO PASO
Lo siguiente será doblar el hilo de 120cm a la mitad y por la parte de el dobles vamos a realizarle un nudo lo fijaremos de tal manera que quede bien estirado y comenzaremos a tejer dejando un espacio de 15 cm desde donde esta el nudo. Con el hilo de 150 lo doblaremos a la mitad y lo pasamos por debajo de el hilo central quedando de la siguiente forma 75 cm para el lado izquierdo y 75 cm para el lado derecho.
TERCER PASO
Haremos un nudo. Después de el nudo comenzaremos a tejer con el punto macrame. Tomaremos el extremo del hilo alternal que esta en la derecha y lo pasamos por encima de los hilos centrales, con el estremo izquierdo del hilo arternal, lo pasamos por encima de la punta de el hilo del lado derecho, luego por debajo de los hilos centrales y lo volvemos a sacar por el espacio que hay en el lado derecho.
Hacemos lo mismo pero esta vez con el lado izquierdo. Tomamos el extremo de el hilo alternal que esta en el lado izquierdo y lo pasamos por encima de los hilos centrales, con el lado derecho lo pasamos por encima de la punta izquierda que se encuentra en el lado derecho, lo pasamos por debajo de los hilos centrales y lo sacamos por el espacio que quedo del lado izquierdo. Repetimos este procedimiento una vez mas.
CUARTO PASO
Tomaremos los hilos centrales y lo vamos a abrir y los hilos alternales lo colocaremos en el centro, quedando estos como los nuevos hilos centrales. Con los nuevos hilos arternales tomaremos el de el lado derecho y lo pasamos por encima de los nuevos hilos centrales y el hilo de el lado izquierdo lo pasamos por encima de la punta de el lado derecho, luego por debajo de los hilos centrales y lo sacamos por el espacio que hay en el lado derecho, apretamos lentamente para dejar un espacio y quede como queremos. Para cerrar el nudo, aremos un punto macrame con el lado izquierdo.
QUINTO PASO
Y repetimos el procedimiento de abrir los hilos centrales y colocar en medio los hilos arternales que sera los nuevos hilos centrales. Con los nuevos hilos arternales tomaremos el de el lado derecho y lo pasamos por encima de los nuevos hilos centrales y el hilo de el lado izquierdo lo pasamos por encima de la punta de el lado derecho, luego por debajo de los hilos centrales y lo sacamos por el espacio que hay en el lado derecho, apretamos lentamente para dejar un espacio y quede como queremos. Para cerrar el nudo, aremos un punto macrame con el lado izquierdo.
Repetiremos esto hasta haber tejido aprocimadamente 30 cm. Y acegurandoce siempre de dejar del otro estremo los 15 cm que dejamos en el primer extremo.
SEXTO PASO
Ahora si haremos el cierre. Tomamos los dos extremos sin tejer y lo colocaremos en el centro siendo esto los hilos centrales . Con el hilo de 25 cm tejeremos el cierre. Para este utilizaremos el punto macrame.Lo primero sera hacer un nudo. Después de el nudo comenzaremos a tejer con el punto macrame. Tomaremos el extremo del hilo alternal que esta en la derecha y lo pasamos por encima de los hilos centrales, con el extremo izquierdo del hilo arternal, lo pasamos por encima de la punta de el hilo del lado derecho, luego por debajo de los hilos centrales y lo volvemos a sacar por el espacio que hay en el lado derecho.
Hacemos lo mismo pero esta vez con el lado izquierdo. Tomamos el estremo de el hilo alternal que esta en el lado izquierdo y lo pasamos por encima de los hilos centrales, con el lado derecho lo pasamos por encima de la punta izquierda que se encuentra en el lado derecho, lo pasamos por debajo de los hilos centrales y lo sacamos por el espacio que quedo del lado izquierdo. Repetiremos este procedimiento unas dos veces mas. Y le colocamos el dije en el centro
Este fue el resultado de mi trabajo espero que les guste. Solo me queda desearles a todos un feliz día.
Las fotos fueron tomadas por mi teléfono Samsung Galaxy A 03 Core y editadas en canva
El texto fue traducido por Deepl
Muy linda tu gargantilla tejida, me gusta ver como tu misma te elabora tus acsesorios 🌹🙏♥️🌈
Gracias mami 🥰🥰
Quedó linda y es de mi color favorito!
Siempre me ha llamado la atención las prendas hechas con nudos, gracias por explicar el paso a paso.
Gracias a usted por su hermoso comentario
Congratulations @heidy08! You have completed the following achievement on the Hive blockchain And have been rewarded with New badge(s)
Your next target is to reach 2000 upvotes.
You can view your badges on your board and compare yourself to others in the Ranking
If you no longer want to receive notifications, reply to this comment with the word
STOPThanks
Awesome work @heidy08! You're well on your way to reaching your Hive goals. Keep buzzing!
BTW, we noticed we miss your support for our proposal. Mays we ask you to check it out and consider supporting it?
All you need to do is to click on the "support" button on this page: https://peakd.com/proposals/248.
Thank you!