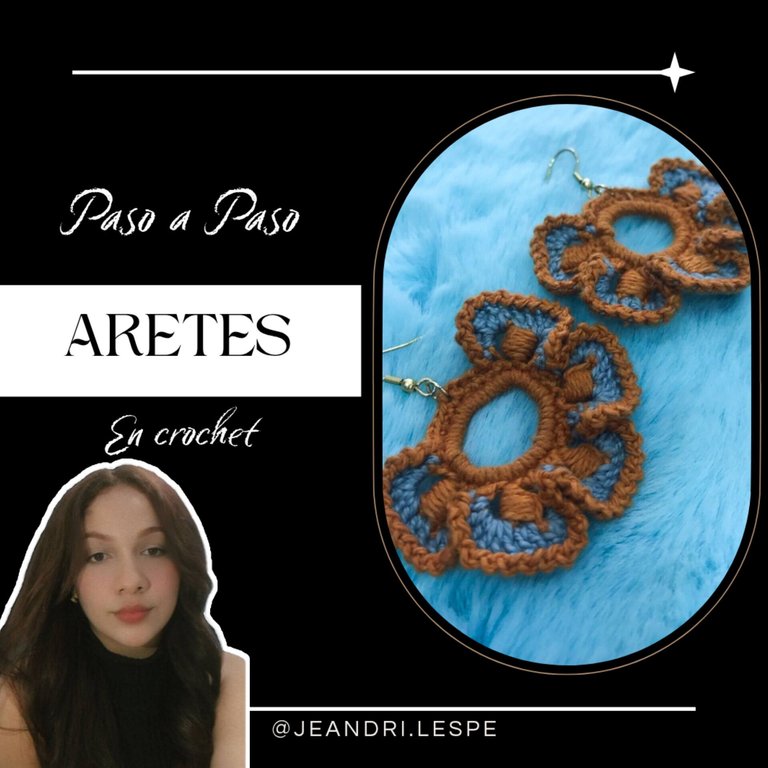
Hola mi gente linda, nuevamente estoy por acá trayéndoles un nuevo diseño de aretes en crochet, está vez volvimos con los diseños unicolor y un poco extravagantes, sinceramente disfruté muchísimo hacer estos aretes sobre todo con el contraste de los dos colores al unirlos, espero a ustedes también les guste ✨ Ahora sí, vamos con los materiales y el paso a paso ❤️
Hello my lovely people, I'm back again bringing you a new crochet earring design. This time we're back with the one-color, slightly extravagant designs. I honestly really enjoyed making these earrings, especially the contrast of the two colors when they're joined together. I hope you like them too. ✨ Now, let's get to the materials and the step-by-step instructions. ❤️
Materiales / Materials 🧡🩶✨
- Hilo colar (dos colores diferentes) / Double-stitch thread (two different colors) ✨
- Aguja (número 3) / Needle (size 3) ✨
- Anzuelos / Hooks ✨
- Argollas / Rings ✨
Paso 1️⃣ / Step 1️⃣
Lo primero que haremos, será ubicar nuestro dedo pulgar y tomamos el hilo haciendo 8 vueltas en el pulgar, sostenemos con una cadena y sacamos el hilo del dedo, ahora vamos a hacer 28 puntos bajos y cerraremos en el primer punto bajo con un punto deslizado. Acá utilizamos la técnica del dedo, pero si ustedes tienen un arito donde les quepan los 28 puntos, perfectamente lo pueden hacer ahí y les va a quedar estupendo, pero como no todos contamos con ese aro, les muestro está alternativa que a mí me funciona.
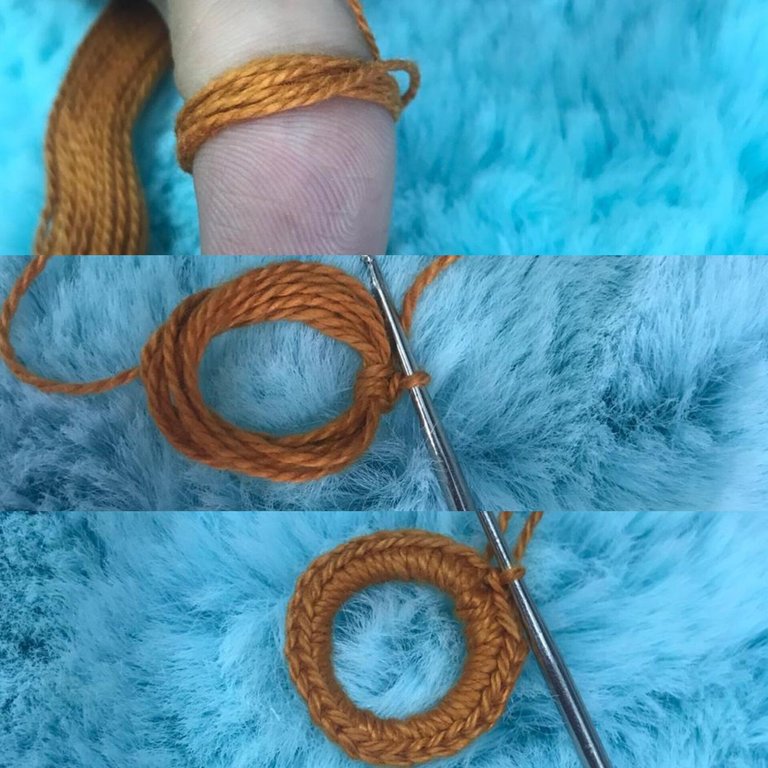
The first thing we'll do is place our thumb and take the thread, making 8 loops around the thumb. We'll hold it with a chain and pull the thread off the finger. Now we'll make 28 single crochet stitches and close the first single crochet with a slip stitch. Here we use the finger technique, but if you have a ring that fits all 28 stitches, you can do it perfectly and it will look great. But since not everyone has that ring, I'll show you this alternative that works for me.
Paso 2️⃣ / Step 2️⃣
Ahora vamos a proceder a levantar 4 cadenas, enlazamos y en el punto bajo siguiente vamos a hacer un punto alto, ahora vamos a enlazar nuestro hilo y pasamos por el centro del aro que acabamos de hacer, volvemos a tomar hebra como si fuéramos a realizar un punto alto, pero sin terminar, volvemos a enlazar y repetimos el mismo punto alto sin terminar 5 veces más, serían 6 en total, enlazamos y pasamos por el centro de los 6 puntos cerrando con una cadena, volvemos a levantar 4 cadenas y cerramos con un punto bajo en el siguiente punto bajo de la vuelta anterior, ahora en los siguientes dos puntos bajos aremos un punto bajo sobre cada uno, que serían de separación, y volvemos a repetir el mismo paso hasta que nos queden 5 diseños, después que tengamos los 5 diseños vamos a hacer 4 puntos bajos en los siguientes puntos, levantamos 2 cadenas que serán nuestro colgante y hacemos nuevamente 4 puntos bajos en los puntos restantes, ya nos quedaría lista la primera parte del tejido, vamos a tomar suficiente hilo y lo jalamos NO CORTAMOS, solo dejamos por ahora esa primera parte así.
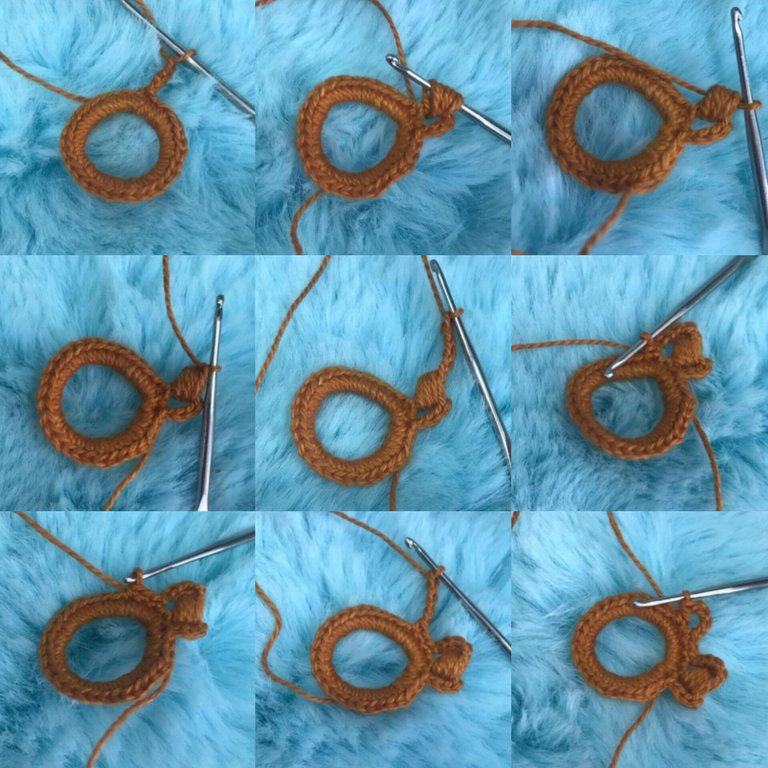
Now we're going to proceed to pick up 4 chains, we link and in the next single crochet we're going to make a double crochet, now we're going to link our thread and pass through the center of the ring we just made, we take the yarn again as if we were going to make a double crochet, but without finishing, we link again and repeat the same unfinished double crochet 5 more times, that would be 6 in total, we link and pass through the center of the 6 stitches closing with a chain, we pick up 4 chains again and close with a single crochet in the next single crochet of the previous round, now in the next two single crochets we will make a single crochet over each one, which would be separation, and we repeat the same step until we have 5 designs left, after we have the 5 designs we will make 4 single crochets in the following stitches, we pick up 2 chains that will be our pendant and make 4 single crochets again in the remaining stitches, we would now have the first part of the weave ready, we will take enough yarn and pull it through. DO NOT CUT, just leave that first part like that for now.
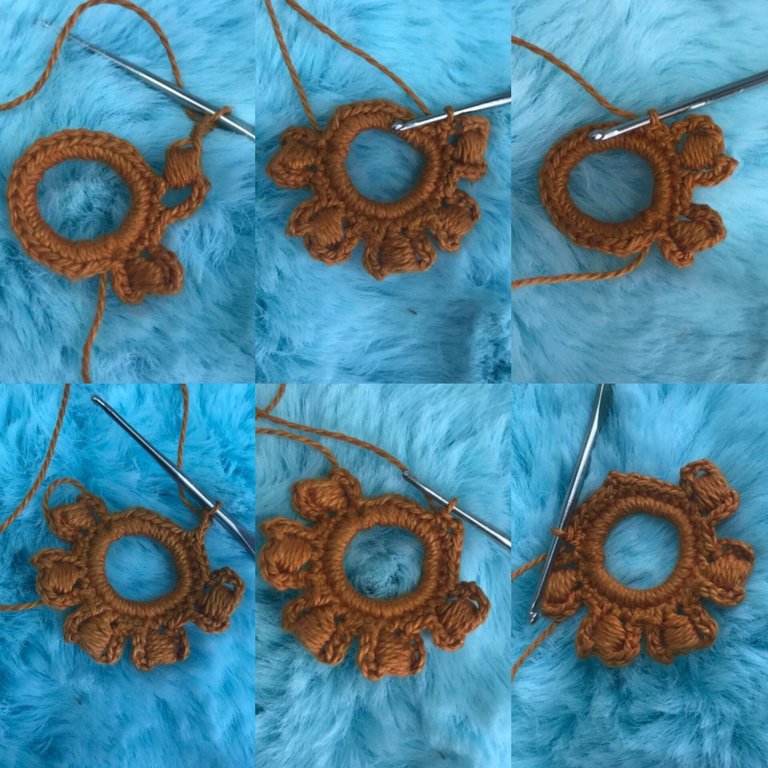
Paso 3️⃣ / Step 3️⃣
Ahora vamos con el cambio de color, vamos a ubicar el espacio de la primeras 4 cadenas que hicimos y pasamos el nuevo hilo asegurando con una cadena, ahora en el primer espacio de las 4 cadenas vamos a hacer 1 punto bajo, un punto medio y 4 puntos altos, ahora ubicamos el espacio que nos quedó en la parte de arriba de los 6 puntos altos sin terminar y haremos 2 puntos altos, ahora vamos al otro extremo y volvemos a repetir la secuencia del comienzo, pero de atrás hacia adelante, es decir, 4 puntos altos, 1 punto medio y un punto alto, ahora ubicamos el punto del centro de la separación que hicimos en la vuelta anterior y haremos un punto bajo y así sucesivamente hasta llegar al final, donde cerramos con un punto deslizado y está vez si cortamos el hilo.
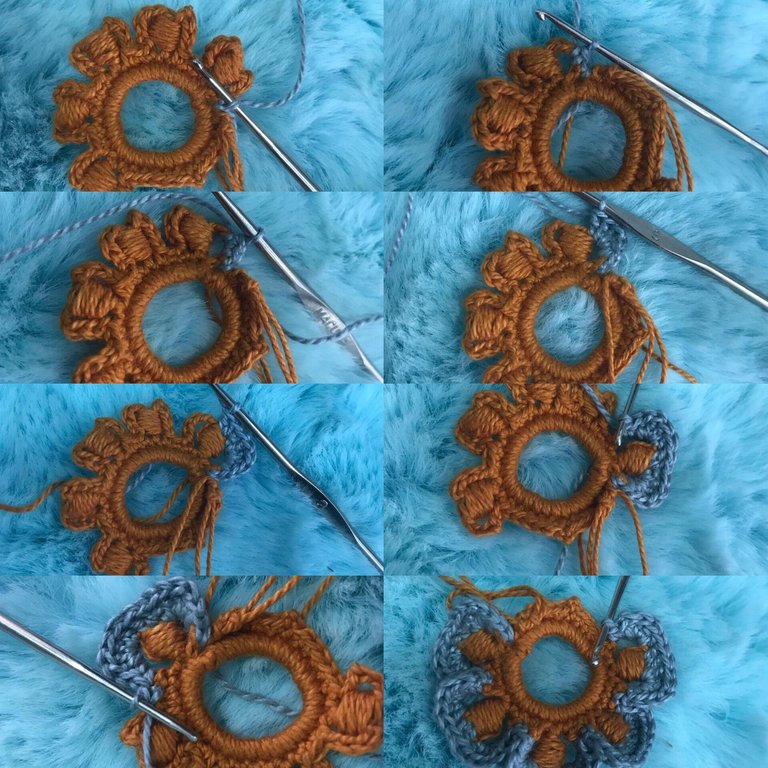
Now we move on to the color change. We'll locate the space between the first 4 chains we made and pass the new yarn through, securing it with a chain. Now, in the first space of the 4 chains, we'll make 1 single crochet, 1 half crochet, and 4 double crochets. Now, we locate the space we had left at the top of the 6 unfinished double crochets and make 2 double crochets. Now, we go to the other end and repeat the sequence from the beginning, but from back to front, that is, 4 double crochets, 1 half crochet, and 1 double crochet. Now, we locate the center stitch of the separation we made in the previous round and make a single crochet, and so on until we reach the end, where we close with a slip stitch and this time we cut the yarn.
Paso 4️⃣ / Step 4️⃣
Para el último paso vamos a retomar donde dejamos la primera parte del tejido y ahora haremos el borde de nuestro arete, vamos a pasar por cado punto del segundo color con un punto deslizado y luego una cadena, esto lo haremos sobre cada punto hasta llegar al final, donde ahora sí cortamos, escondemos las hebras y procedemos a poner la argolla y el anzuelo y así queda listo nuestro arete.
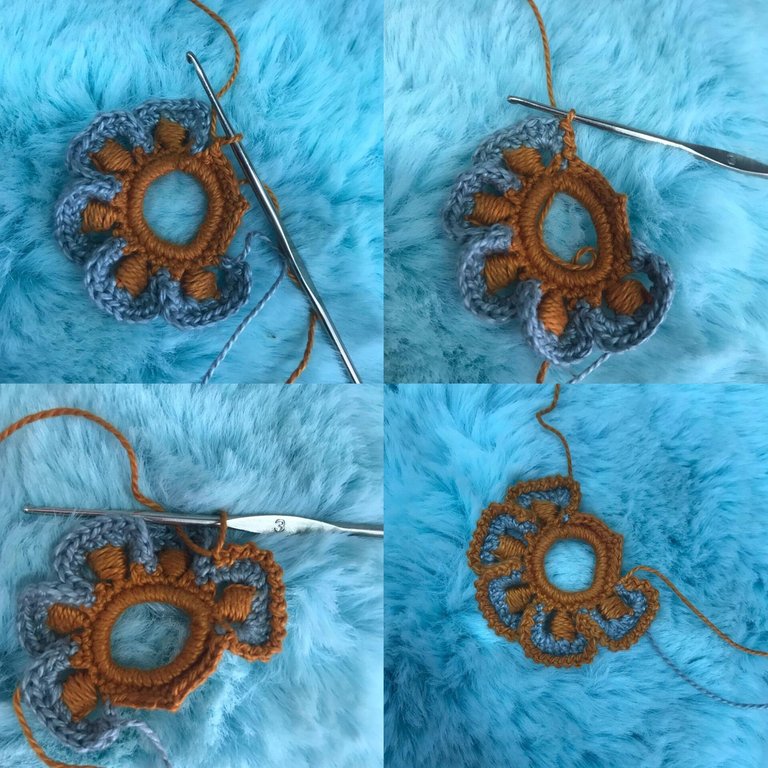

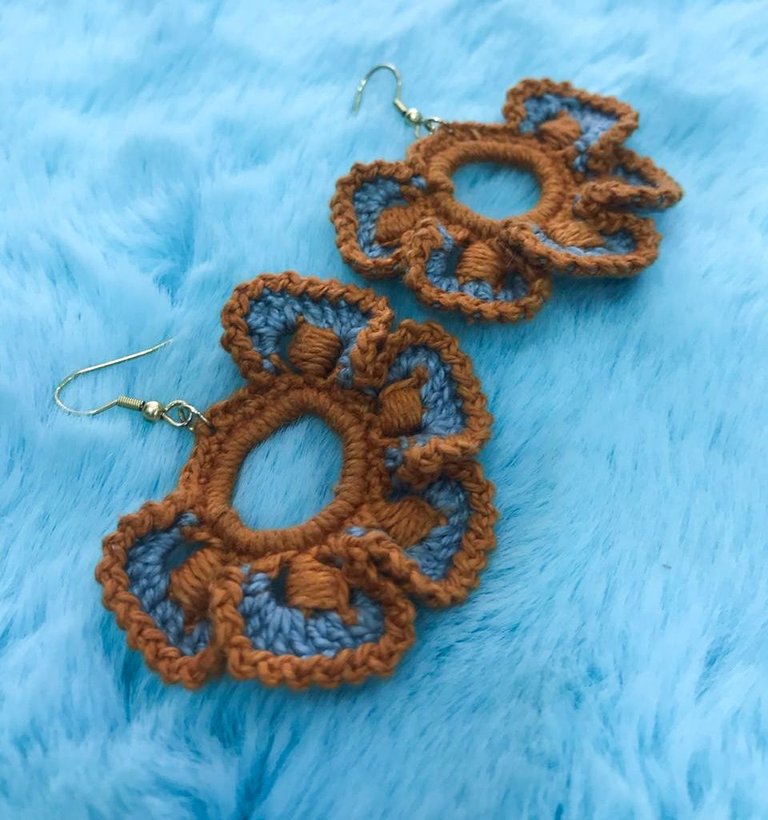
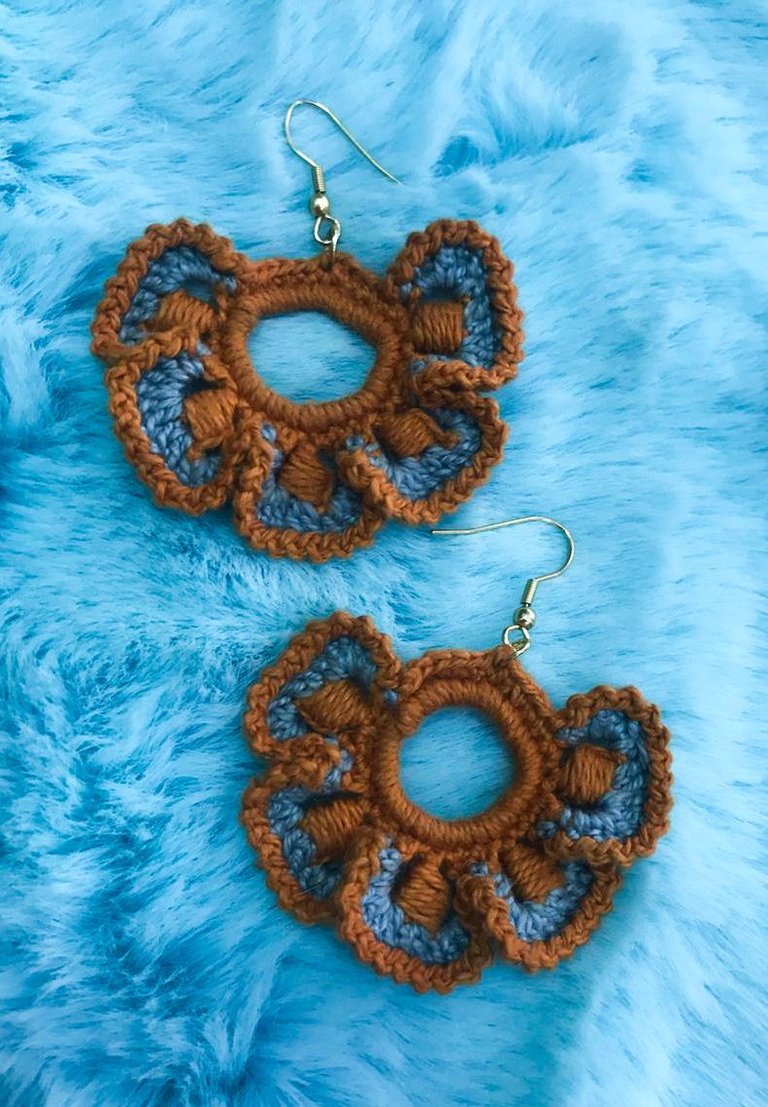
For the last step, we'll pick up where we left off in the first part of the weave and now we'll make the edge of our earring. We'll slip stitch through each stitch of the second color and then chain. We'll do this over each stitch until we reach the end, where we cut, tuck the strands, and proceed to add the jump ring and hook. Our earring is ready.
Espero les haya gustado y hayan entendido cada paso, seguire trabajando arduamente para mejorar aún más en cada uno de mis post, muchísimas Gracias por su apoyo siempre, les mando un abrazo 💗
I hope you liked it and understood each step. I will continue working hard to improve even more in each of my posts. Thank you so much for your support, always. I send you a hug 💗
Muy bonito y me encanta la combinación de colores.
Hermosos ❤️❤️❤️
Wow. It's a very unique design and also it looks fantastic. Color combination is also really pretty.
Wow, your knitted earrings are so pretty.
Great design, colour and choice of yarn. Well done and keep the hood work on.
Muy bonito y me gustó como explicas tan detallado el proceso