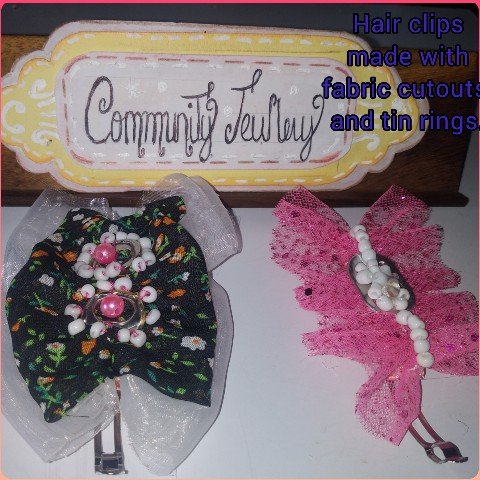
It is a pleasure to be with you again in this radiant community @jewelry, wishing you as always the greatest possible success and may it be a week full of great peace and tranquility and that my dear artist friends great and very profitable ideas flow in you, yovgistosa I will be here watching their posts and learning from them. Today I come to show you a very simple and practical tutorial, this time dedicated to the smallest of the house, to those princesses who always want to look cute and wear something new in their hair, for this, I show you how to make some cute accessories for the hair, it's about clips made with fabric cutouts, aluminum can rings ♻️ and a touch of @bisuteria, ideal to start the new school year flirty, I hope you like my demonstration and enjoy it. Follow me to the end.
Un gusto estar de nuevo con ustedes en esta radiante comunidad @jewelry, deseándoles como siempre el mayor éxito posible y que sea una semana llena de mucha paz tranquilidad y que fluyan en ustedes mis queridos amigos artistas grandes y muy provechosas ideas,yovgistosa estaré por aquí viendo, sus publicaciones y aprendiendo de ellas. Hoy paso para mostrarles yn muy sencillo y práctico tutorial, está vez dedicado a las más pequeñas de las casa, a esa princesas que siempre quieren lucir lindas y llevar en su cabello algo novedoso, para ello, les muestro cómo hacer unas lindos accesorios para el cabello, se trata unas pinzas hechas con recortes de tela, anillas de lata de alunio ♻️ y un toque de @bisuteria, ideales para iniciar coquetas el nuevo año escolar, espero les guste mí demostración y la disfrutes. Sigueme hasta el final.
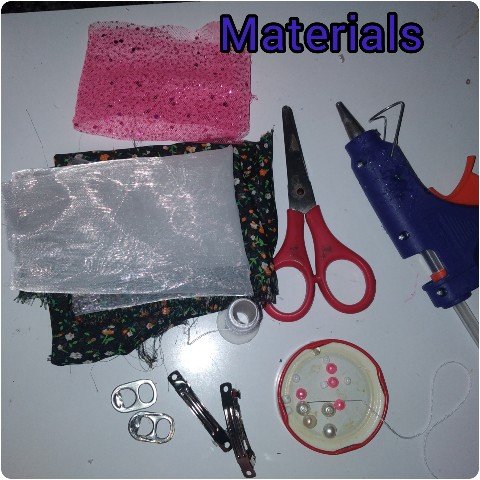
Materials/Materiales.
Cutout of frosty pink tulle fabric.♻️
. Bright white tulle fabric trimming.♻️
.black flower fabric cutout.♻️
. Needle and thread
. Scissors
. 2 pink pearls.
. beads
. 2 tin rings ♻️
. jewelry tweezers
. Two medium hair clips.
. Hot silicone.
. Pink silk ribbon with white dots./
. Recorte de Tela de tull rosada escarchada.♻️
. Recorte de Tela de tull color blanca brillante.♻️
.recorte de Tela color negra de flores.♻️
. Aguja e hilo
. Tijeras
. 2 perlitas rosadas.
. Mostacillas
. 2anillas de lata ♻️
. Pinzas de bisuteria
. Dos pinzas medianas para el cabello.
. Silicón caliente.
. Cinta de seda color rosada de puntos blancos.
Step/Paso
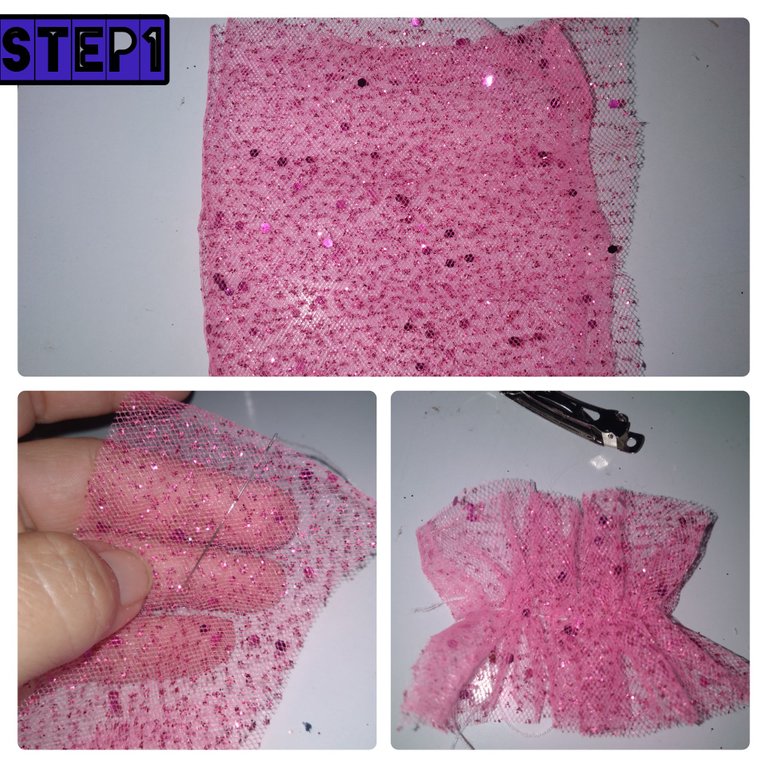
1.) I cut and fold, hiding the ends of the pink tulle fabric inside the folds, then with a needle and thread I sew through the middle part, with short stitches which I will unite by pulling the strand of the thread, I finish off to secure but not yet cut the thread./
1.) Corto y doblo, ocultando dentro de los dobles las puntas de la tela de tull color rosada, luego con aguja e hilo coso por la parce de el medio, con puntadas cortas las cuales unire tirando de la hebra de el hilo, remato para asegurar pero sin cortar aún el hilo.
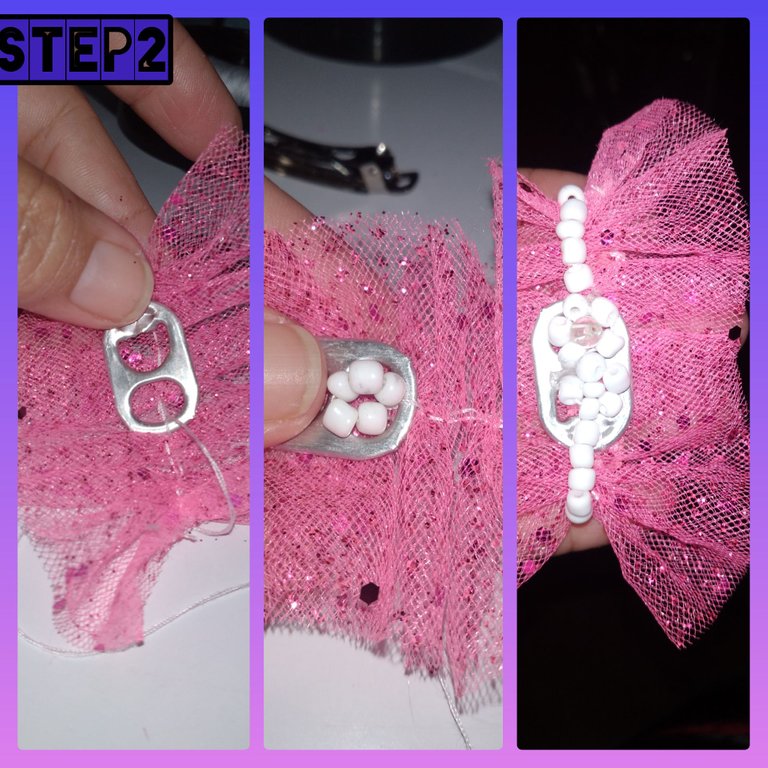
2.) In the center of the bow made in the previous step and glue with some stitches, the first tin ring, after that, I begin to glue white Beads, with the intention of doing in each of the holes of the rings a small flower, that's it, I continued the tour with beads from both sides of the bow.
2.) En el centro del moño hecho en el paso anterior y pego con algunas puntadas, la primera anilla de lata, luego de ello, comienzo a pegar Mostacillas color blanca, con la intensión de hacer en cada uno de los hoyos de las anillas una pequeña flor, listo eso continuo el recorrido con Mostacillas de embos lados de el moño.
3.) I cut a ribbon of pink ribbon and applying hot glue I line the top of the clip, after this, I glue the clip to the back of the bow. And so concluded my first girls hair accessory.
3.) Corto un listón de cinta rosada y aplicando pegamento caliente forro la parte superior de la pinza, luego de esto, pego por la parte de atrás de el moño la pinza. Y así concluyó mí primer accesorio para el cabello de niñas.

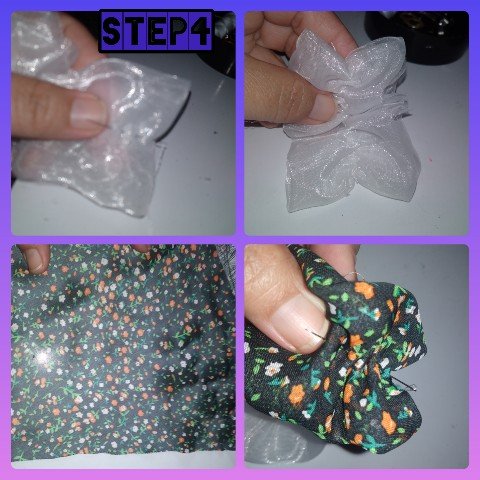
4.) For the next hair clip, I cut a piece of white tulle fabric, fold and sew through the center, gather the seam to form a nice bow, without cutting the thread yet, I repeat with the patterned fabric and glue on the white bow.
4.) Para la siguiente pinza para el cabello, corto un pedazo de tela de tull color blanca, doblo y paso costuras por el centro, recojo la costura para formar un lindo moño, sin cortar aún el hilo repito con la tela estampada y pego sobre el moño blanco.
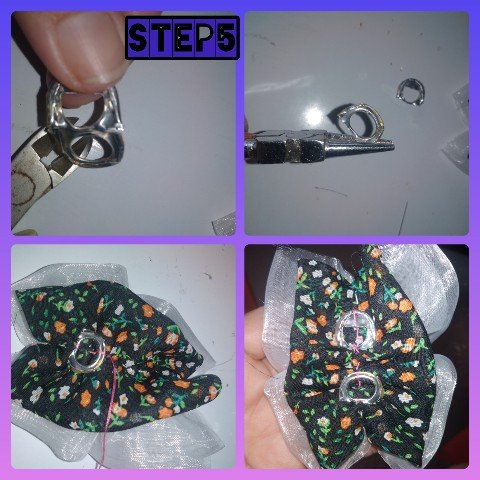
5.) With the jewelry cutting pliers, I make a cut to separate the holes of the aluminum tin ring, and with the round tip jewelry pliers, I round the ends to avoid any injury or cut to the hands, when worked, after this, I give some stitches to glue on the fabric bow made previously.
5.) Con la pinza de corte de bisutería, hago un corte para separar los hoyos de la anilla de lata de aluminio, y con la pinza de bisutería punta redonda, dondulo las puntas para evitar alguna herida o corte en las manos, al ser trabajadas, después de esto, doy algunas puntadas para pegar sobre el moño de tela hecho anteriormente.
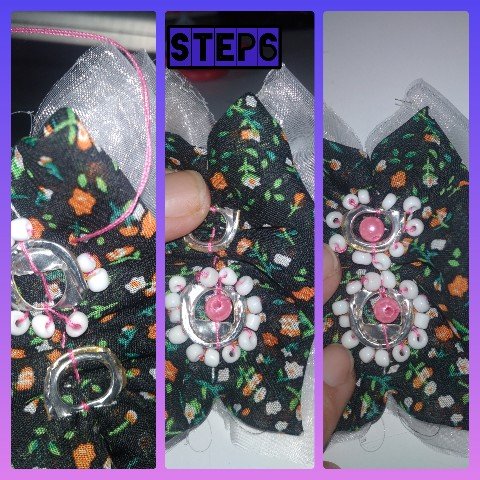
6.) Once the previous step is done, I begin to paste the Beads all around the ring and in the center I will paste a small pink pearl, continuous and in the same way I do with the second ring.
6.) Listo el anterior paso, comienzo a pegar las Mostacillas por todo el alrrededor de la anilla y en el centro pegare una perlita color rosada, continuo y de la misma manera hago con la segunda anillas.
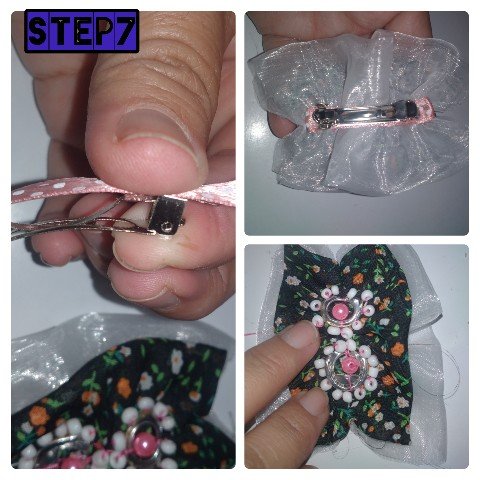
7.) To continue this second elaboration of accessories for girls' hair, I apply silicone and cover the clip, apply glue again and stick the clip to the bow from the back, and this way I'm done.
7.) Para continuar est segunda elaboración de accesorios para el cabello de las niñas, aplico silicón y forro la pinza, aplico nuevamente pegamento y pego la pinza al moño por la parte tracera, y de esta manera finalizó.
. All photos are my property, taken with my smartphone.
. Use InShot, for a clear step-by-step demonstration.
. Use google translate./
. Todas las fotos son de mí propiedad, tomadas con mí teléfono inteligente.
. Use InShot, para demostración clara de el paso a paso.
. Use traductor Google.
Es un gran gusto hayas venido y visitado mí blog, valoraria mucho su comentario, será hasta mañana si Dios me lo permite.
Your content has been voted as a part of Encouragement program. Keep up the good work!
Use Ecency daily to boost your growth on platform!
Support Ecency
Vote for new Proposal
Delegate HP and earn more
Que lindas y creativas amiga, me gusto mucho tu creatividad.
Saludos.
Gracias cariño igual a mi la tuya suerte con tu publicación de hoy.
Has sido curado por @visualblock / You've been curated by @visualblock
Bienvenidas delegaciones / Delegations welcome
Encuentra nuestra comunidad aquí / Find our community here
Trail de Curación / Curation Trail
Te quedaron muy lindas estas Pinzas, que bueno poder reusar esos pedazos de tela y las anillas, siempre trayendo buen material amiga excelente trabajo.
Agradecida, por sy apoyo constante..gracias @hive-189504