Hello my beautiful people, with brilliant wits like a great gem, who make life in this great Community @jewelry, I hope you are well in health and spirit, that the joy of living in harmony in this month, the last of the year that is already beginning, fill them with inspiration and great details in garments, jewelry and countless crafts. As always, it is a great pleasure to show you my recent project, this time, I am talking about a very easy and simple bracelet made for ladies, there are very few steps to follow and super easy, you could either make your own or give it to a loved one. Dear. Ideal to wear to any occasion and make them look like beautiful princesses, without further ado I invite you to follow me. I hope you enjoy it.//
Hola mí gente bonita,de ingenios brillantes como una gran gema, que hacen vida en esta gran Comunidad @jewelry, espero estén bien en salud y espíritu, que la alegría de vivir en armonía en este mes, el último del año que ya comienza, los llene de inspiración y grandes detalles en prendas, joyas e imnumerables manualidades. Como siempre es un gran placer, pasar a mostrarles mí reciente proyecto, en esta oportunidad, hablo de un muy fácil y sencillo brazalete hecho para damas, son muy pocos pasos a seguir y súper fáciles, bien podría hacer el suyo o regalar a un ser querido. Ideal para llevar puesto a cualquiera ocasión y hacerlas lucir como princesas hermosas, sin más les invito a seguirme.Espero lo disfruten.
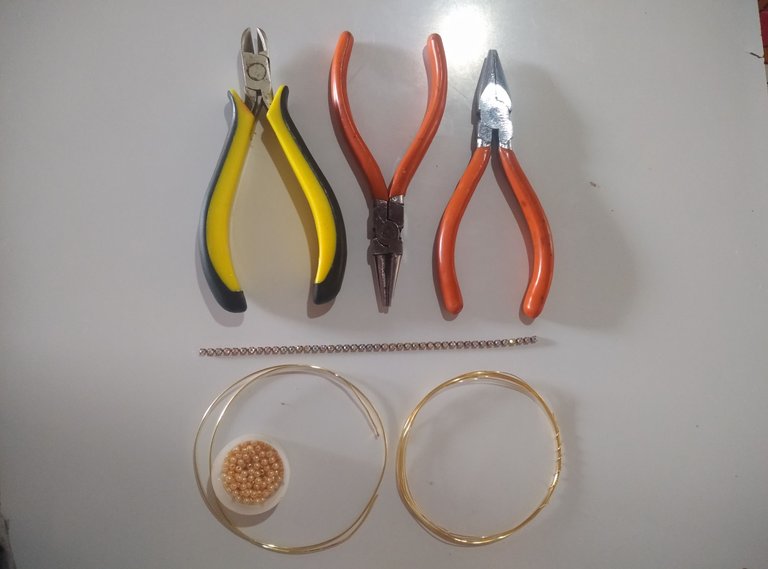
Materials/Materiales.
Wire n24 and n18
. Beige pearls.
. 15cm rhinestone chain
. Medium white pearl (1
. Pin (1)
. Jewelery tweezers, tips (round, flat and cutting).//
. Alambre n24 y n18
. Perlitas beige.
. 15cm de cadena de strass
. Perla mediana color blanca (1
. Alfiler (1)
. Pinzas para bisutería, puntas (redonda, plana y de corte)
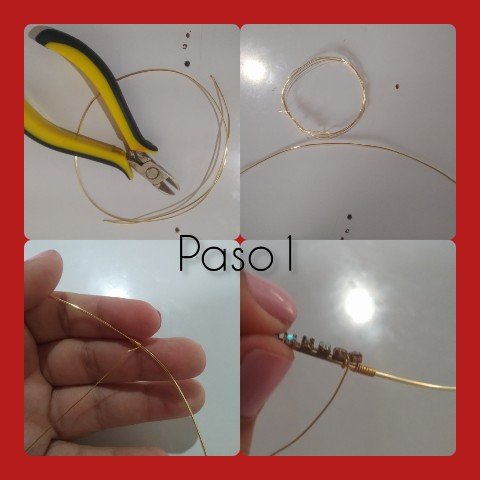
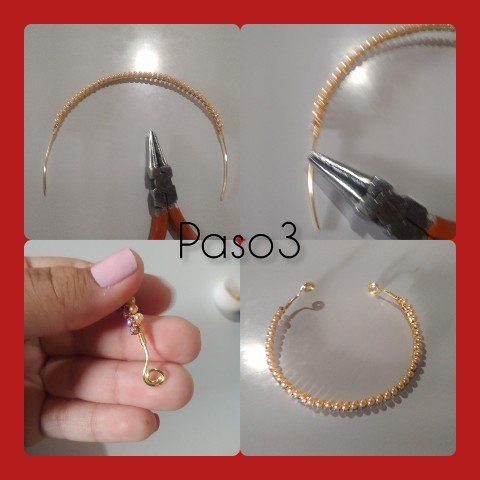
1.) I start by measuring 30cm of wire n18, at the wrist of my hand, to work more comfortably and only use what is necessary to make the bracelet, I start from one of the ends, and start by going around with the wire n16.
1.) Inicio midiendo 30cm de alambre n18, a la muñeca de mí mano, para trabajar con más comodidad y solo usar lo necesario para la elaboración de el brazalete, comienzo desde uno de los extremos,y comienzo dando vueltas con el alambre n16.
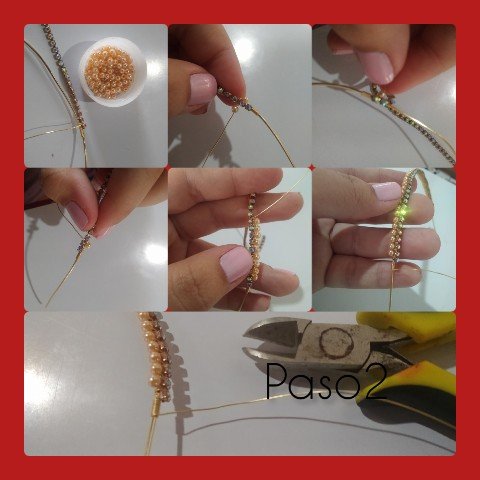
2.) Continue, placing the strass chain, and join the wire n.18, turning around with the thin wire n24, I make two turns, specifically in the space that separates each diamond, avoiding covering or leaving the wire on the , and I continue the next round tying the strass chain and inserting the pearls, the strass chain will remain fixed in the lower part of the bracelet and the pearls on the upper side, in this way I continue the route until reaching the total of the chain, I make ten (10) turns with the wire, like at the beginning and cut the n24 wire.
2.) Continuo,colocando la cadena strass,y unire a el alambre n.18, dando vueltas con el alambre delgado n24, doy dos vueltas, específicamente en el espacio que separa a cada brillante, evitando tapar o que el alambre quede sobre el, y continuo la siguiente vuelta atando la cadena de strass e intriduciendo las perlitas, la cadena de strass, me irán quedado fijadas en la parte inferior de el brazalete y las perlitas de el lado superior, de esta manera continuo el recorrido hasta alcanzar el total de la cadena, doy diez (10) vueltas con el alambre, cómo en el inicio y corto el alambre n24.
3.) Using the round tip pliers I wrap the ends of the bracelet twice, leaving a very delicate touch at the ends on the back.
3.) Usando la pinza punta aredonda doy dos vueltas en los extremos de el brazalete , quedando con un toque muy delicado en los extremos en su parte tracera.
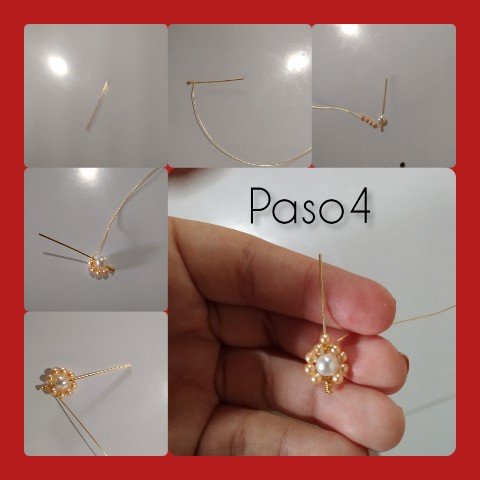
4.) I wrap the thin wire around the bottom of the pin, then insert the bright white pearl, then insert four (4) small beige pearls onto the thin wire and go up to surround the pearl on one side larger, leaving it in the center, then I repeat for the next side.
4.) Doy vueltas con el alambre delgado en la parte inferior de el alfiler, luego introduzco la perla de color blanca brillante, seguidamente introduzco en el alambre delgado cuatro (4), perlitas de color beige y subo para rodear en un lado la perla de mayor tamaño, quedando esta en el centro, seguidamente repito para el siguiente lado.
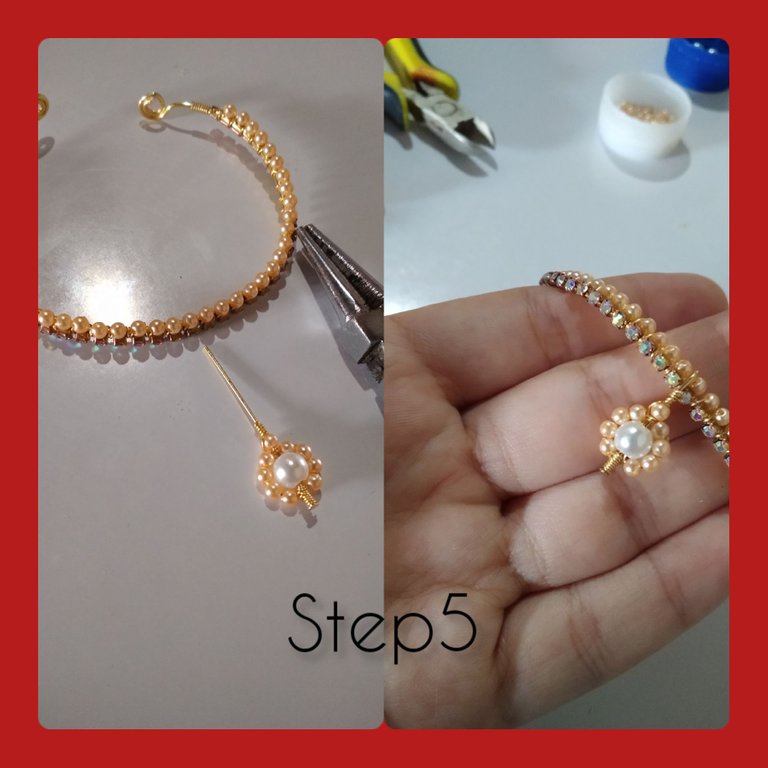
5.) Center the bracelet and place the piece made in the previous step, for it I will use the round nose pliers, and join the bracelet, making a small and delicate earring.
5.) Centro el brazalete y coloco la pieza hecha en el paso anterior,para ella usaré la pinza punta redonda, y unire a el brazalete,haciendo un pequeño y delicado arito.
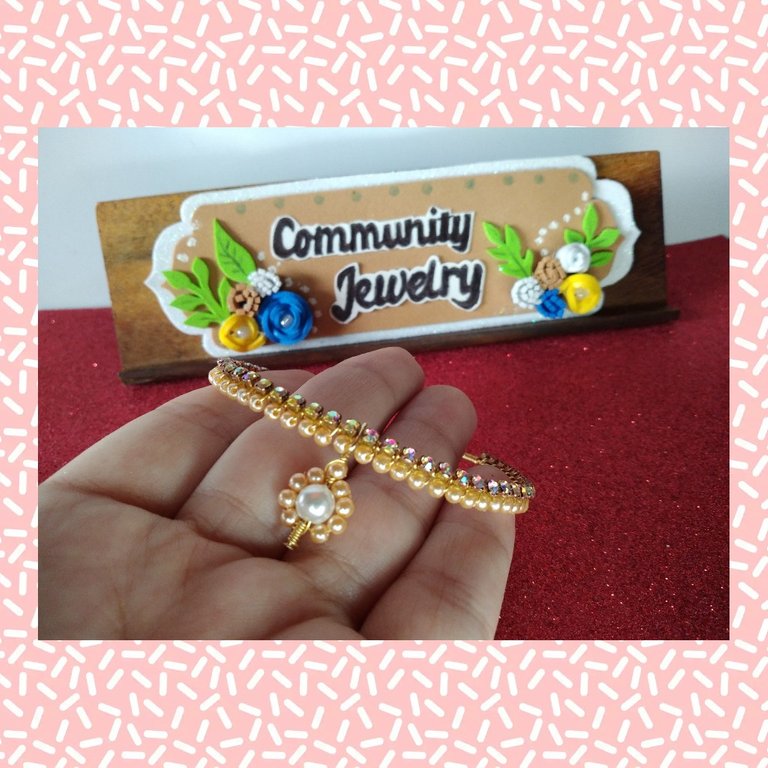
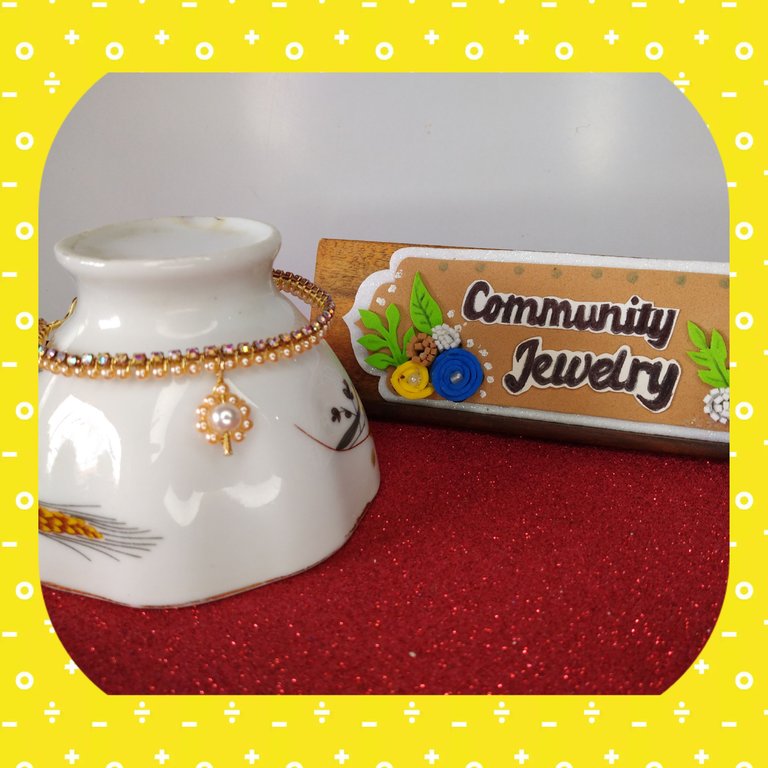
Finally, and very satisfied with the result, the Elegant Bracelet for Ladies was completed, inspired by that shine that we always want to wear on the wrist of our hands, being the initial presentation of our delicate, elegant and intelligent personality.//
Finalmente y muy satisfecha con el resultado, culminó el Elegante Brazalete para Damas, inspirado en ese brillo que siempre queremos llevar en la muñeca de nuestras manos, siendo la presentación inicial de nuestra delicada, elegante e inteligente personalidad.
All photos are my property, taken with my smartphone.
. Use the InShot app to show you step by step.
.use Google translate.
Grateful you have visited my blog, do not forget to accompany it with a comment, it is very important to me, it will be see you soon. Happy start of the month to all of you my dear artists.//
Todas las fotos son de mí propiedad, tomadas con mí teléfono inteligente.
. Use la aplicación InShot para mostrar el paso a paso.
.use traductor Google.
Agradecida hayas visistado mí blog, no olvides acompañarlo con algún comentario, es muy importante para mí, será hasta pronto. Feliz inicio de mes para todos ustedes mis queridos artistas.
¡Que hermosa y elegante! ¡Felicidades! excelente trabajo👏👏
Gracias querida @anaarevalo01. Abrazos cariño, gracias por comentar
Hermosamente delicada..!!
Gracias ☺️@leticiapereira por tu lindo comentario.
Amiga @katiuskamata, me gusta mucho tu brazalete ye quedo hermoso. Gracias por compartir tu paso a paso. Feliz dia
Thank you for sharing this post on HIVE!
Your content got selected by our fellow curator jasonmunapasee & you just received a little thank you upvote from us for your great work! Your post will be featured in one of our recurring compilations which are aiming to offer you a stage to widen your audience within the DIY scene of Hive. Next time make sure to post / cross-post your creation within the DIYHub community on HIVE and you will receive a higher upvote ;) Stay creative & HIVE ON!
Please vote for our hive witness <3
Un brazalete muy elegante y hermoso amiga @katiuskamata como siempre un buen tutorial, genial para estas navidades, sigue con el buen trabajo.
Está bellísimo, me encanta el diseño 🤩
Que linda y delicada se ve gran trabajo
Hermosa creación, sin duda me encantaría uno igual ✨✨✨