Hello 👋 my beautiful and brilliant people of this Jewelry hive and all the people who make up this nice platform many successes to all I send you a virtual hug, today is Sunday ending this great weekend and always enjoying being in this wonderful creative space that offers us the community, but I'm here again hoping you have a Happy day! and wishing you with all my heart good crops, love, peace, success, blessing, good health and pleasant moments💜✨. I want to show you step by step how to make this cute, delicate and elegant bow (bow 🎀 or bow tie) that I made for my magical princess because very soon begins the new school term, I hope you like it because it is an extremely simple work and you can make it in a few steps, with materials that are inexpensive and play with the colors that you like.
Hola 👋 mi Gente linda y brillante de esta colmena Jewelry y todas las personas que conforman esta agradable plataforma muchos éxitos a todos les envío un abrazo virtual, ya hoy es domingo terminando este grandioso fin de semana y siempre disfrutando estar en este maravilloso espacio creativo que nos ofrece la comunidad, pero estoy por aquí nuevamente esperando que tengan un ¡Feliz día! y deseando de todo corazón buenas cosechas, amor, paz, éxito, bendición, buena salud y gratos momentos💜✨. Paso por acá para mostrarles un poco más de lo que me gusta hacer. quiero enseñarles cómo realizar paso a paso este lindo, delicado y elegante (lazo 🎀 o moño) que e realizado para mí mágica princesa ya que muy pronto comienza el nuevo periodo escolar, espero les guste ya que es un trabajo sumamente sencillo y lo puedes elaborar en tan pocos pasos, con materiales que son económicos y jugar con los colores que más te gusten.
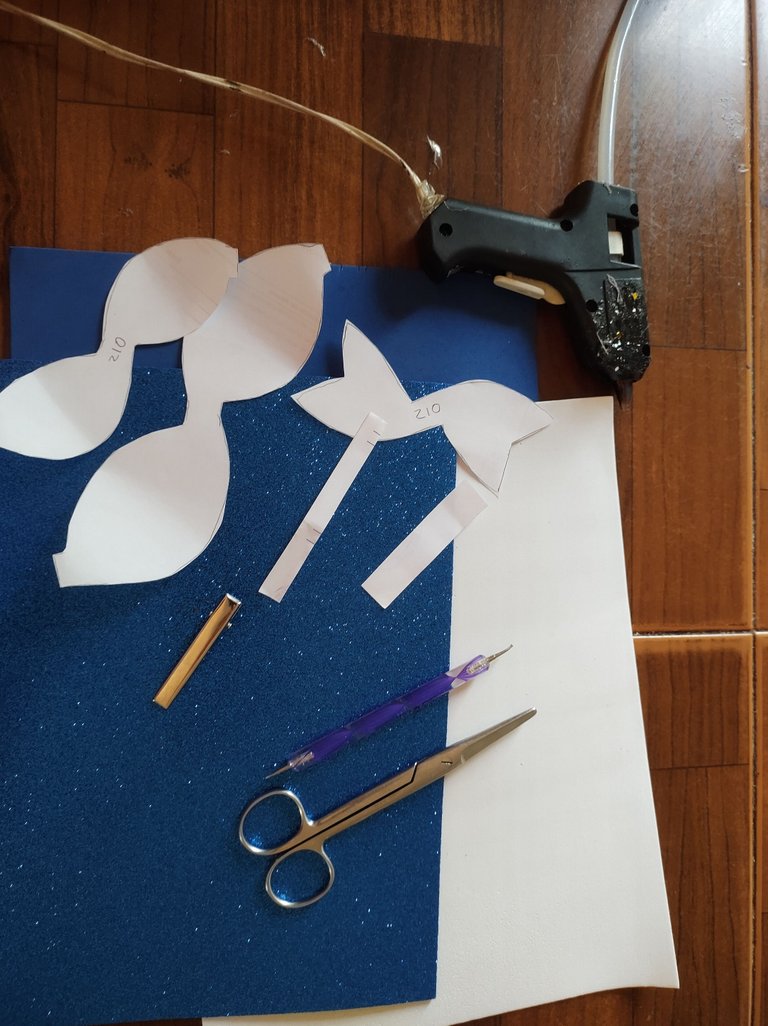
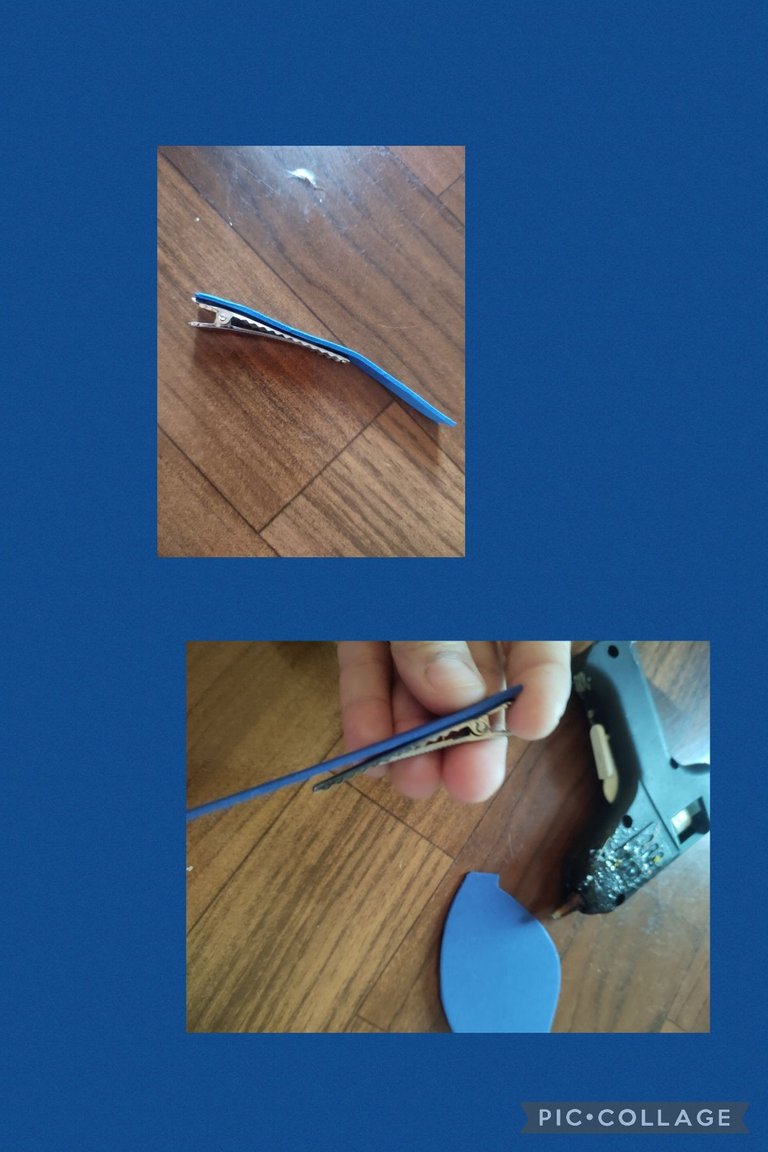
For this creation we will need:
- Foami or Eva rubber of the desired colors.
- Hook or clamp
- Scissors
- Hot silicone gun
- Embosser
- Molds
Para esta creación necesitaremos:
- Foami o goma Eva de los colores deseados
- Gancho o pinza
- Tijera
- pistola de silicón caliente
- Repujador
- Moldes
Now that we have all the materials we will get down to work.
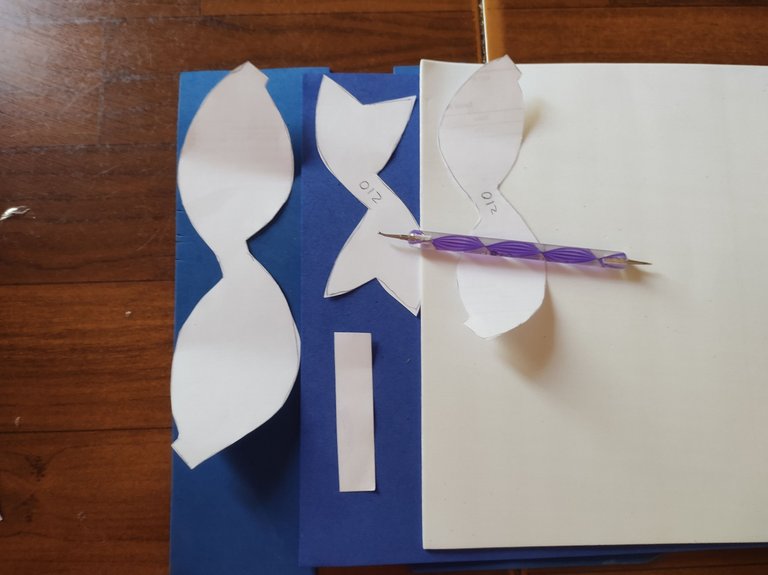
Piece 1: After finding the desired mold, the next thing I did was to fix it and mark it with the embosser to the foami or eva rubber of the corresponding color (when the foami is frosted I like to mark it on the back).
Ya teniendo todos los materiales pondremos manos a la obra.
Pazo 1: Después de encontrar el molde deseado, lo siguiente que hice fue fijarlo y marcar con el repujador al foami o goma Eva del color correspondido ( cuando el foami es escarchado a mi me gusta marcarlo por la parte de atrás).
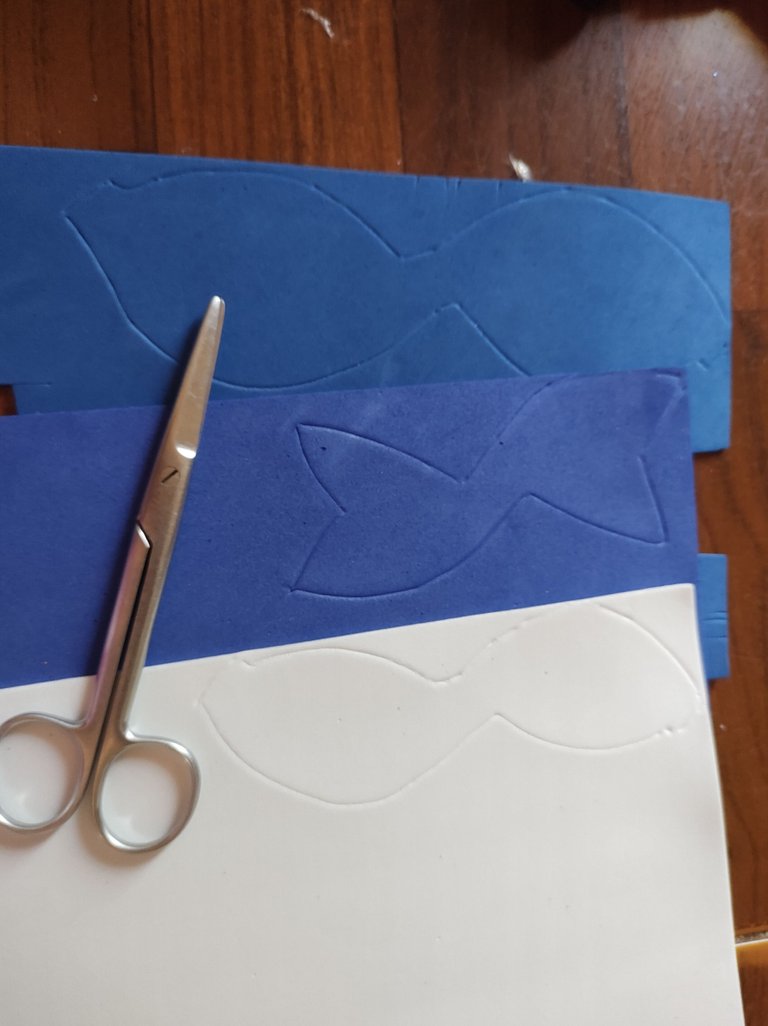
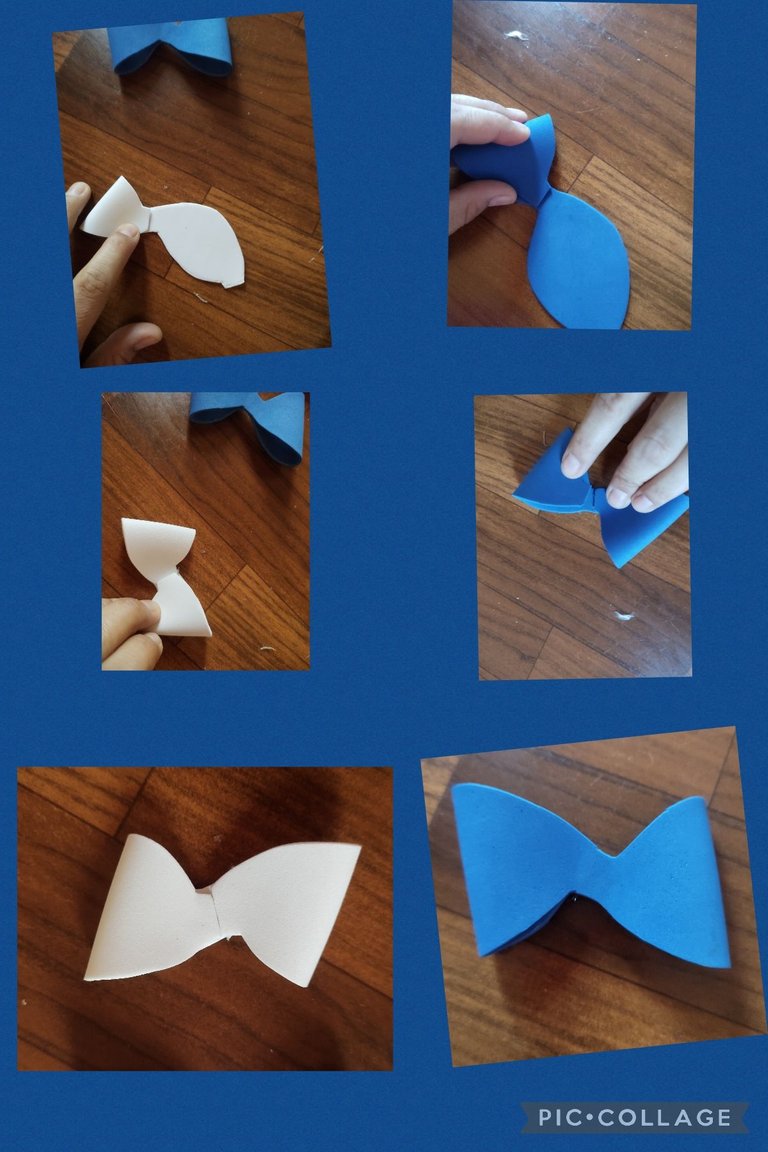
Step 2 : Once we have marked with the embosser the molds on the foami or Eva rubber bands, we are going to take our scissors and cut out each one of them, for the bow we will need one unit of each mold.
Paso 2 : Una vez que hayamos marcado con el repujador los moldes en el foami o gomas Eva, vamos a tomar nuestra tijera y recortar cada una de ellas, para el lazo necesitaremos una unidad de cada molde.
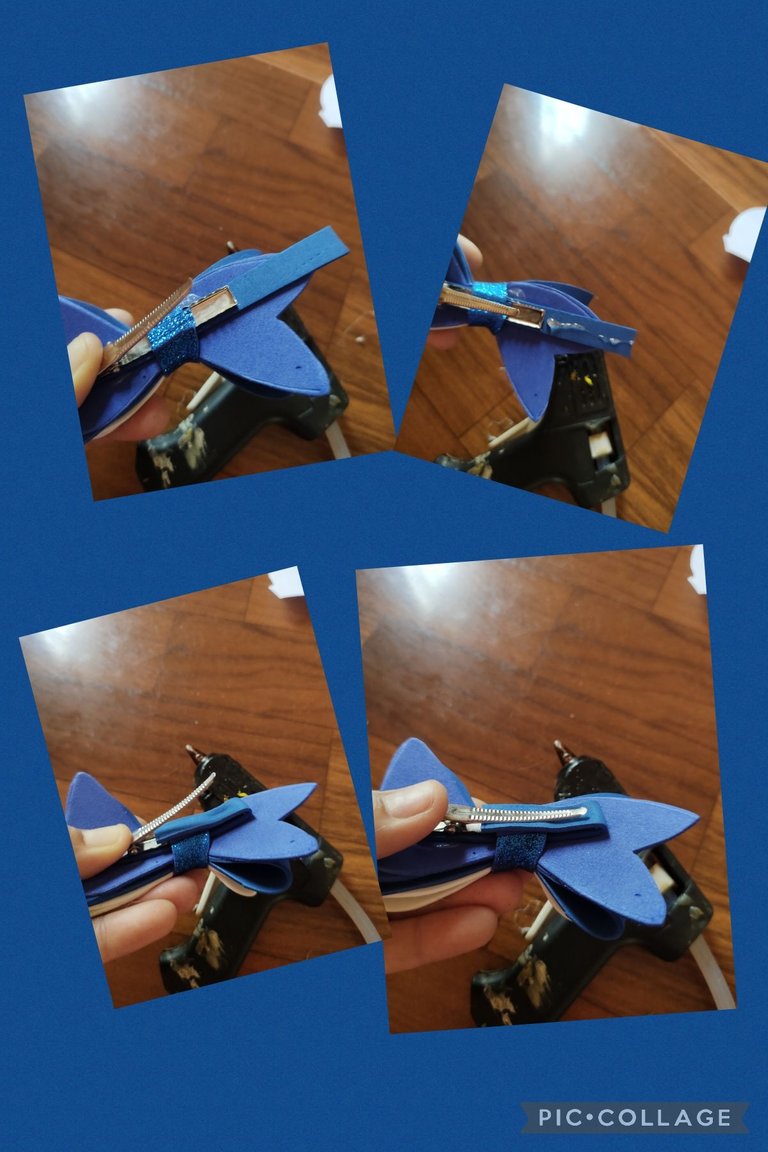
Step 3: we will take the longest strip and glue it over the hook or clamp as shown in the picture, then we assemble the loops 🎀 joining their ends at the center as shown in the picture and glue one on top of the other, according to its size and the model we chose.
Paso 3: tomaremos la tira mas larga y pegamos por encima del gancho o pinza como muestra en la foto, luego armamos los lazos 🎀 uniendo sus puntas al centro con se observa en la imágen y pegamos uno encima de otro, de acuerdo a su tamaño y modelo que escogimos.
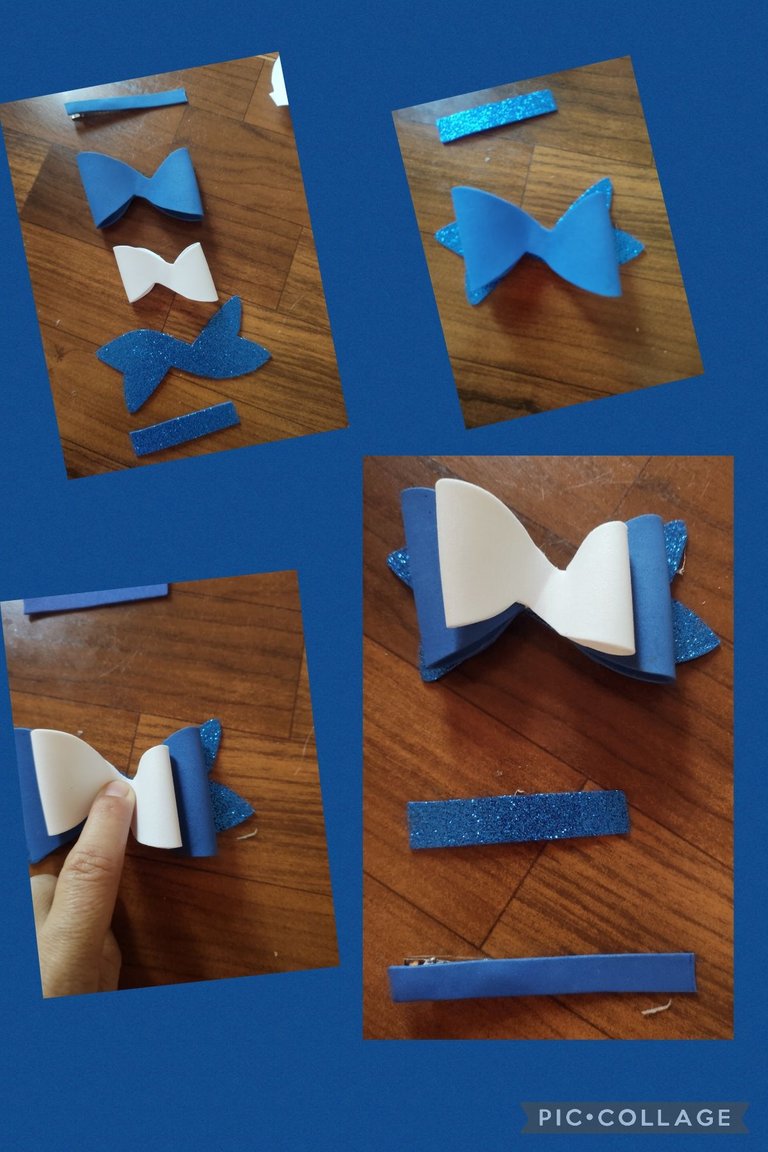
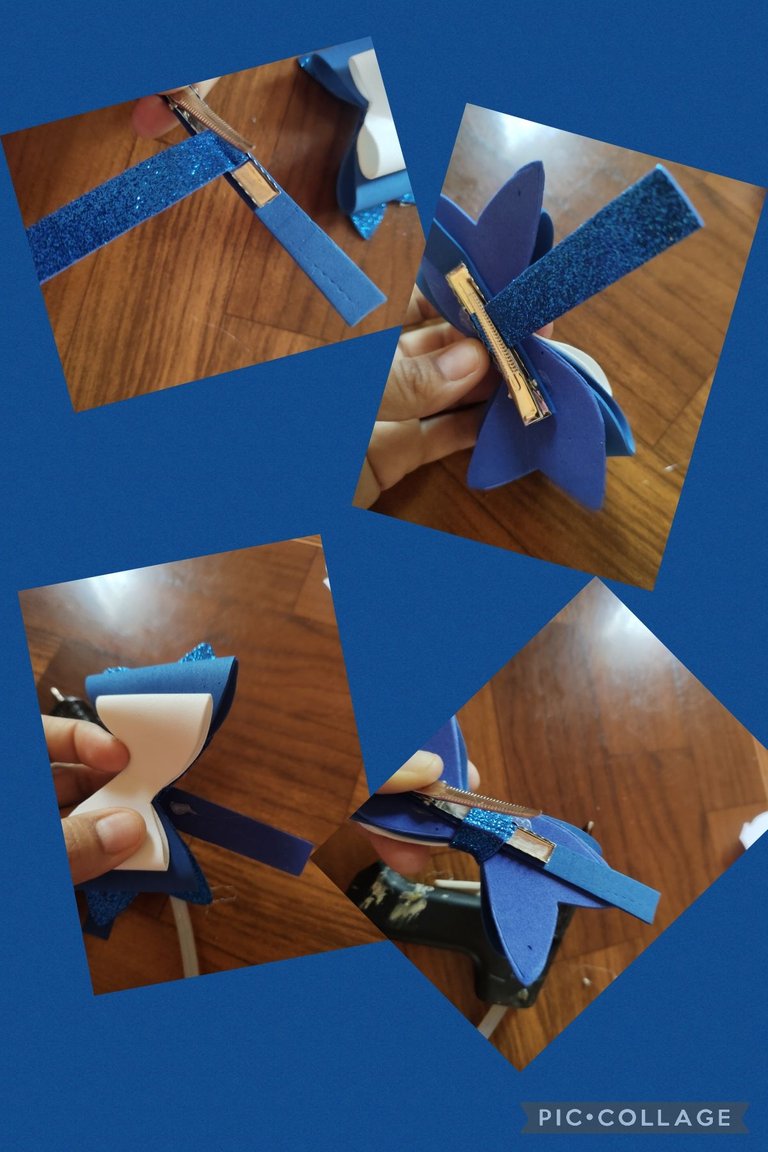
Step 4: Once we have the pieces ready and armed our bow 🎀 according to the model chosen, we continue gluing the foami or Eva rubber of one centimeter wide by 6 centimeters long we glue on the inside of the (hook or clamp), we pass to glue the bow or bow 🎀 on the (hook or clamp) centering very well as we observe in the image, we continue gluing the strip of one centimeter wide by six centimeters long surrounding the bow until its ends join, we finish by gluing the other part of the strip that we glued at the beginning on the (hook or clamp) this time towards the inside covering the union.
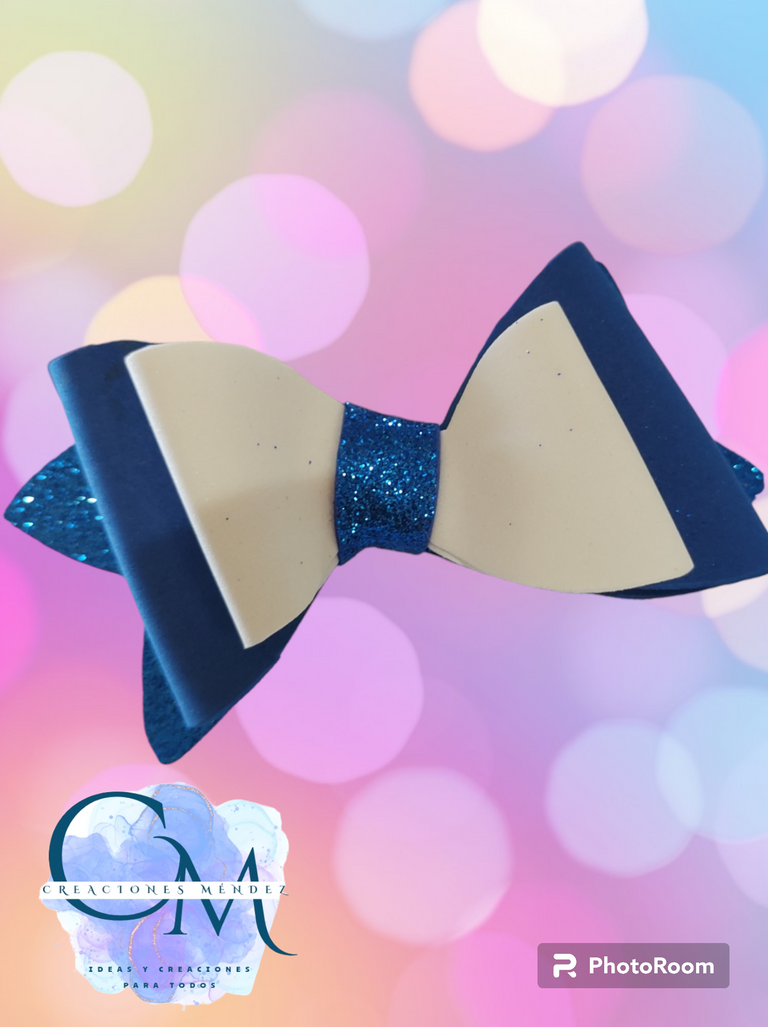
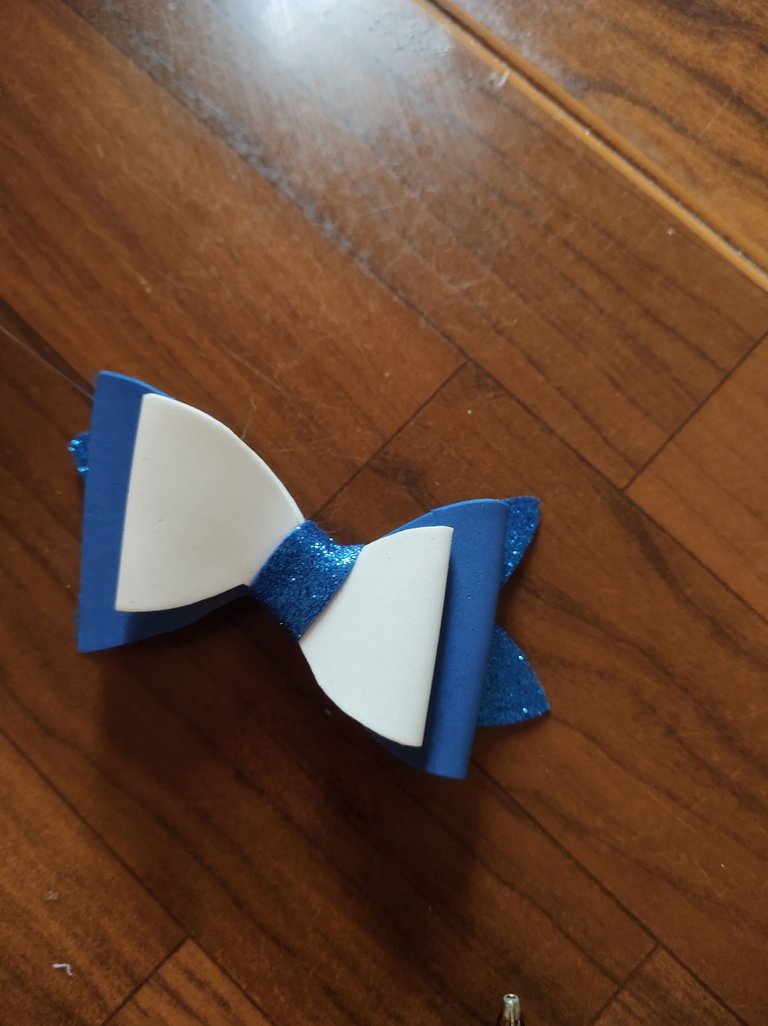
This way I got a nice, delicate and elegant (bow or bow tie) for a princess who will start the school year very soon, it is economical and easy to do with a few steps, both she and I were delighted with the results🥰 since she can wear this accessory at any time.
Paso 4: Una vez que tengamos listas las piezas y armado nuestro lazo 🎀 de acuerdo al modelo escojido, continuamos pegando el foami o goma Eva de un centímetro de ancho por 6 de largo pegamos por la parte de adentro del (gancho o pinza), pasamos a pegar el lazo o moño 🎀 en el (gancho o pinza) centrando muy bien como observamos en la imágen, seguimos pegando la tira de un centímetro de ancho por seis de largo rodeando el lazo hasta que sus puntas se unan, terminamos pegando la otra parte de la tira que pegamos al principio sobre el (gancho o pinza) está vez hacia adentro tapando la unión.
asi de esta forma obtuve un lindo, delicado y elegante (lazo o moño) para una princesa que comenzara puy pronto el año escolar, es económico y fácil de hacer cun unos pocos pasos, tanto ella como yo quedamos encantadas con los resultado🥰 ya que puede llevar este accesorios en cualquier momento.
That's all for now, I say goodbye 👋 to all of you. I hope you liked my post and it is to your liking, I also hope your nice and constructive comments, that help me to improve day by day, thank you all for reading and Thank you for getting this far I hope you enjoyed this post, We will continue reading in future publications..... Kisses🥰 and Hugs🤗 from this humble servant 😘.
Por ahora es todo, Me despido 👋 de todos ustedes. Espero que mi post les haya gustado y sea de su agrado, también espero sus comentarios bonitos y constructivos, que me ayuden a mejorar día a día, gracias a todos por leer y Gracias por llegar hasta aquí Espero que hayan disfrutado de esta publicación, Nos seguiremos leyendo en próximas publicaciones... Besos🥰 y Abrazos🤗 de esta humilde servidora 😘
The photographs 📸 are of my authorship captured with my cell phone Moto g9 plus, edited with the application InShot, picCollage ir photoroom, the translation of the text was done by deepl. you can reach me through my accoun quet of Instagram.
Las fotografías 📸 son de mi autoria capturadas con mi celular Moto g9 plus, editadas con la aplicacion InShot, picCollage o photoroom, la traducción del texto la realice mediante deepl. pueden ubicarme por medio de mi cuenta de Instagram.
Quedo muy lindo, así ando yo buscando accesorios para este nuevo año escolar, me gusta la forma del lazo.
Que bueno que te gustó, pronto estaré realizando con cintas 😊.
Congratulations @leslym! You have completed the following achievement on the Hive blockchain And have been rewarded with New badge(s)
You can view your badges on your board and compare yourself to others in the Ranking
If you no longer want to receive notifications, reply to this comment with the word
STOPCheck out our last posts:
Gracias
Nos alegra otorgarte la insignia por tus logros en Hive @leslym. Gracias por ser parte de la comunidad y por tu dedicación.