WELCOME TO MY BLOG
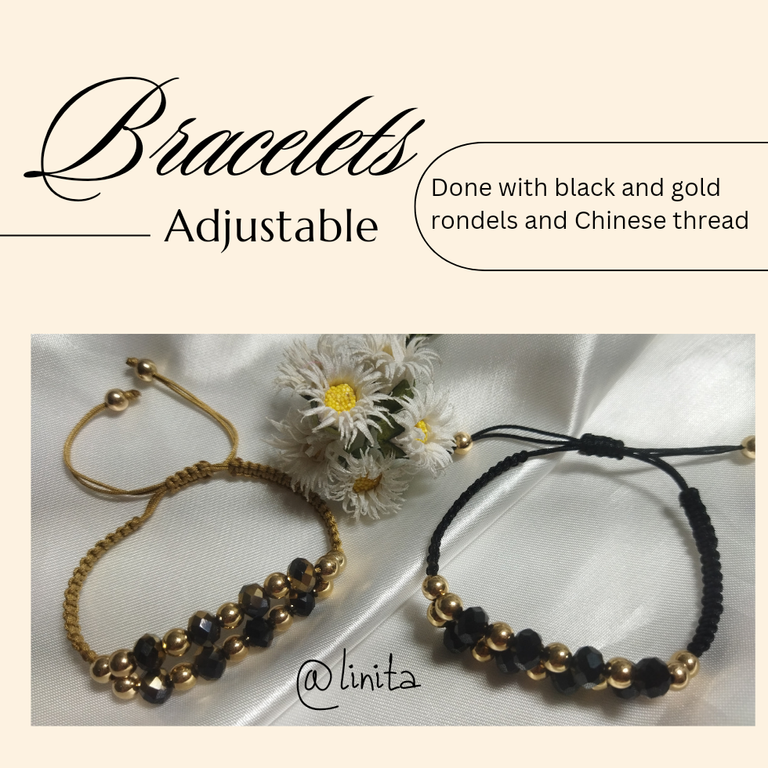
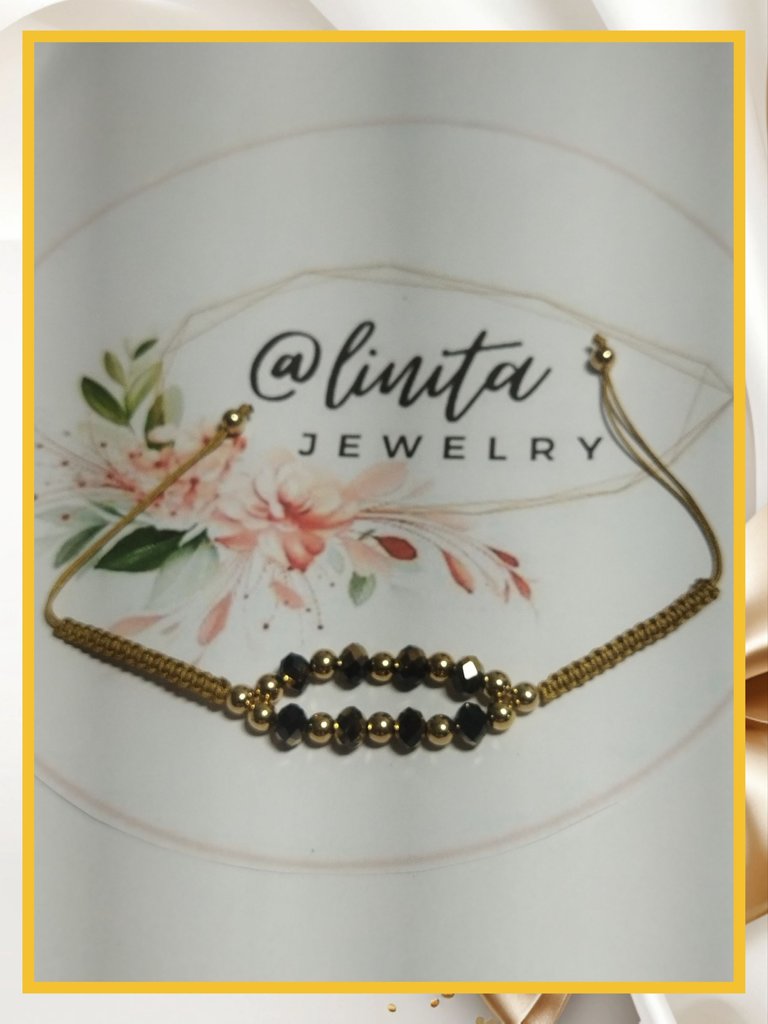
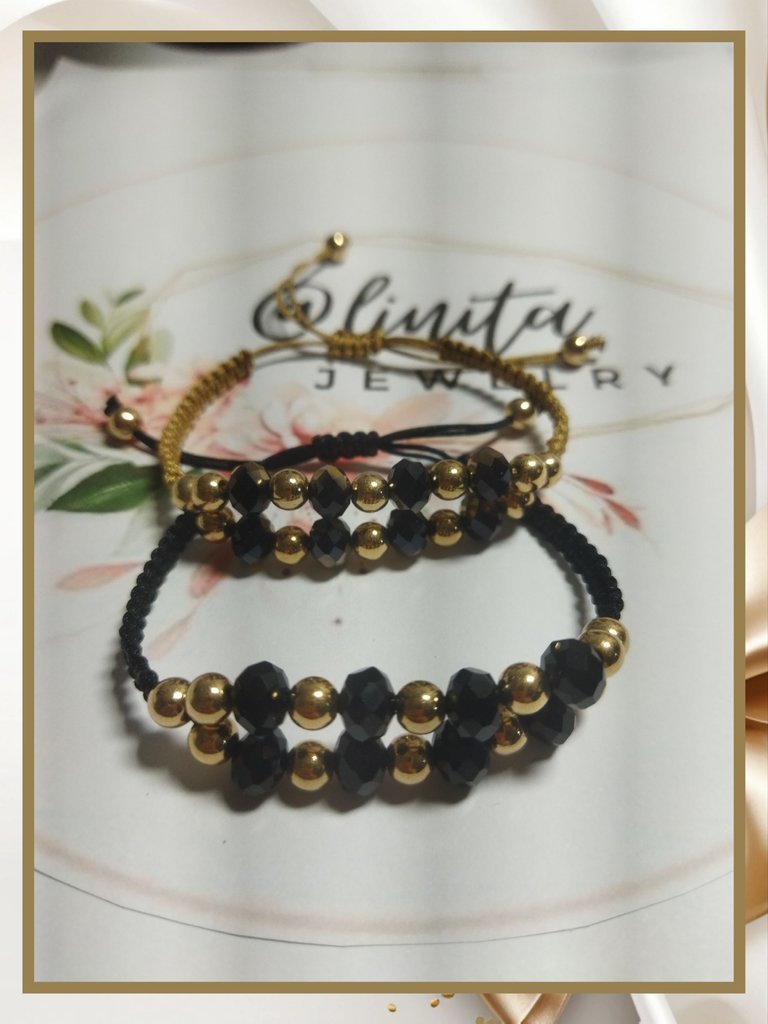
Hellooooo, hellooooooo! Greetings and my respects to the jewelry creators. Adjustable bracelets have become everyone's favorite, since they do not require the help of another person to close them and we can adapt them to the size of each wrist. Today I share with you this model made with the macramé technique and the elegance that the rondels and golden beads give it. I hope you like it.
BIENVENIDOS A MI BLOG
¡Holaaaa, holaaaaa! Saludos y mis respetos a los creadores de bisutería. Las pulseras ajustables se han convertido en las preferidas e todos, ya que no requiere de la ayuda de otra persona para cerrarlas y podemos amoldarlas al tamaño de cada muñeca. Hoy les comparto este modelo realizado con la técnica de macramé y la elegancia que le aportan los rondeles y los balines dorados. Espero les guste.
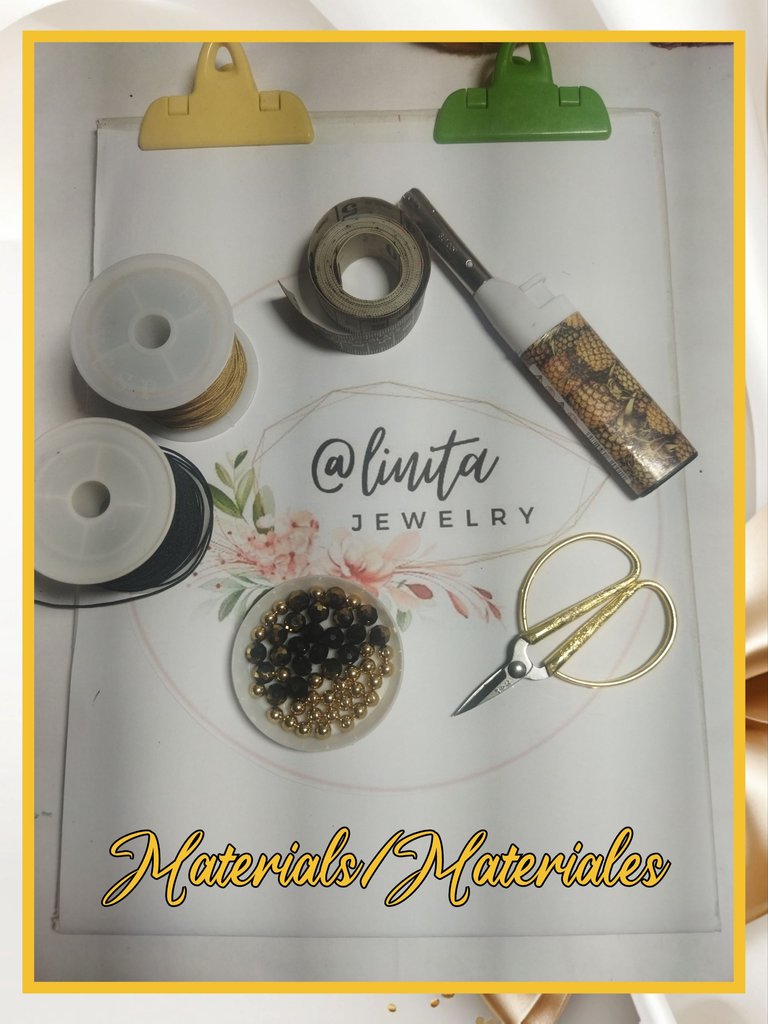
MATERIALS
- Chinese gold and black thread
- 8 mm rondels gold with black and black
- 6 mm pellets
- Measuring tape
- Scissors
- Lighter
- Work table and clamps
MATERIALES
- Hilo chino dorado y negro
- Rondeles de 8 mm dorados con negro y negro
- Balines de 6 mm
- Cinta métrica
- Tijera
- Encendedor
- Tabla de trabajo y pinzas sujetadoras
STEP BY STEP // PASO A PASO
BRACELET
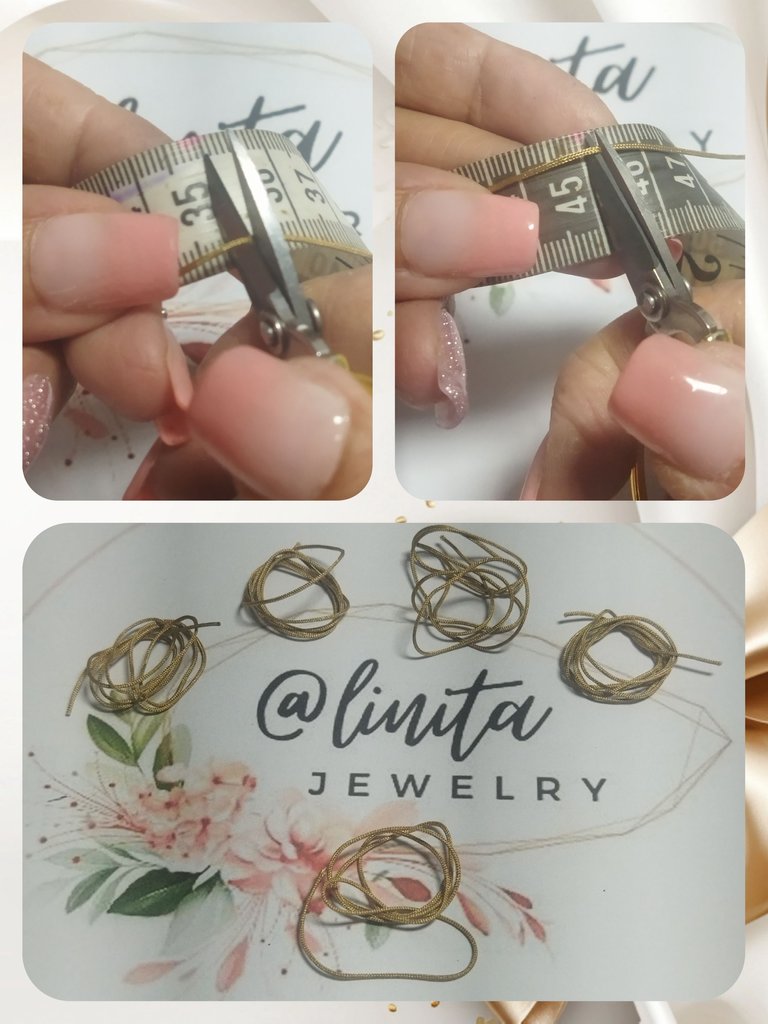
We start by cutting the threads necessary for the fabric:
4 strands of 45 cm or 50 cm if you want to work looser.
1 strand of 35 cm.
PULSERA
Comenzamos cortando lo hilos necesarios para el tejido:
4 hebras de 45 cm 0 50 cm si deseas trabajar más holgado.
1 hebra de 35 cm.
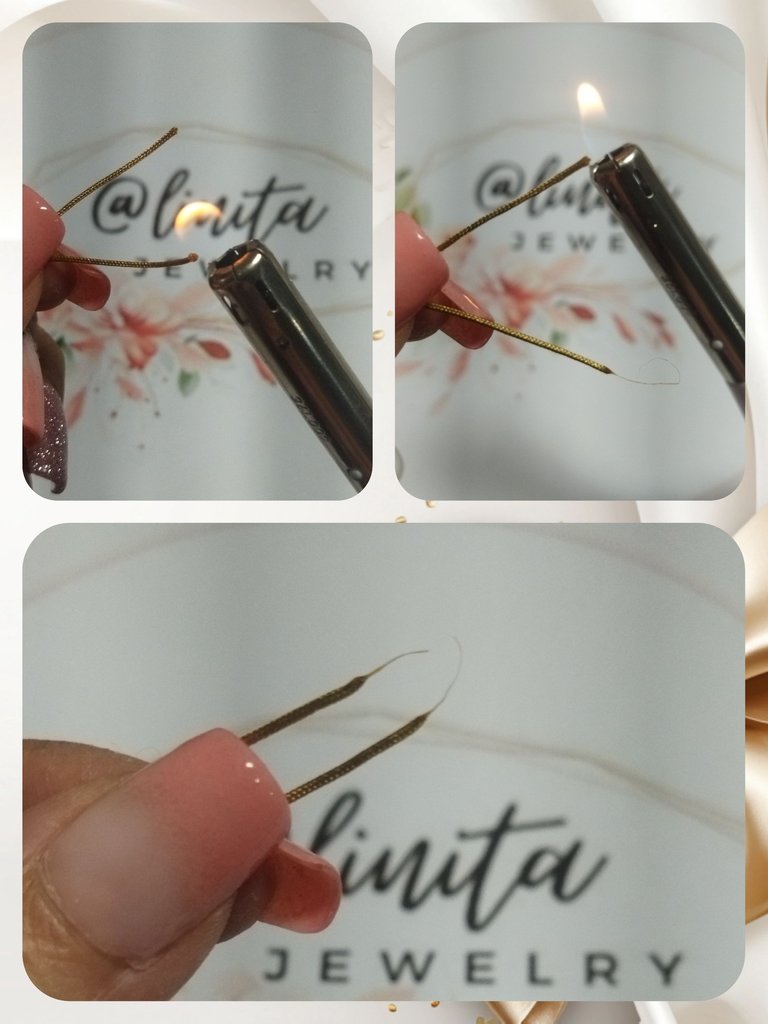
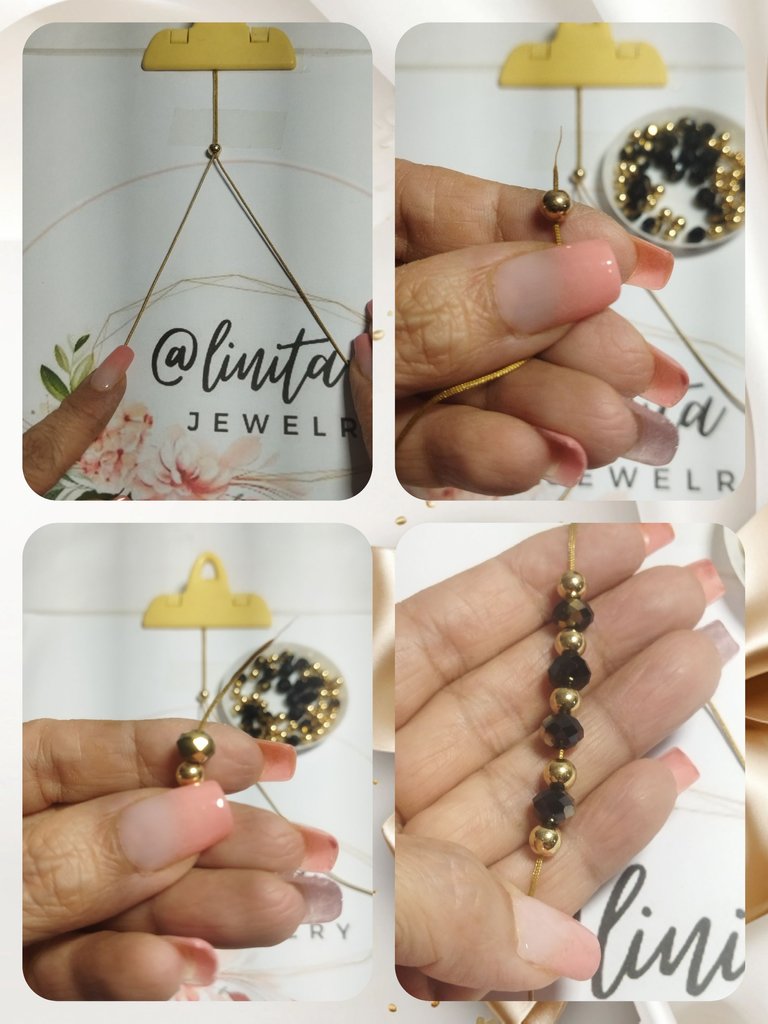
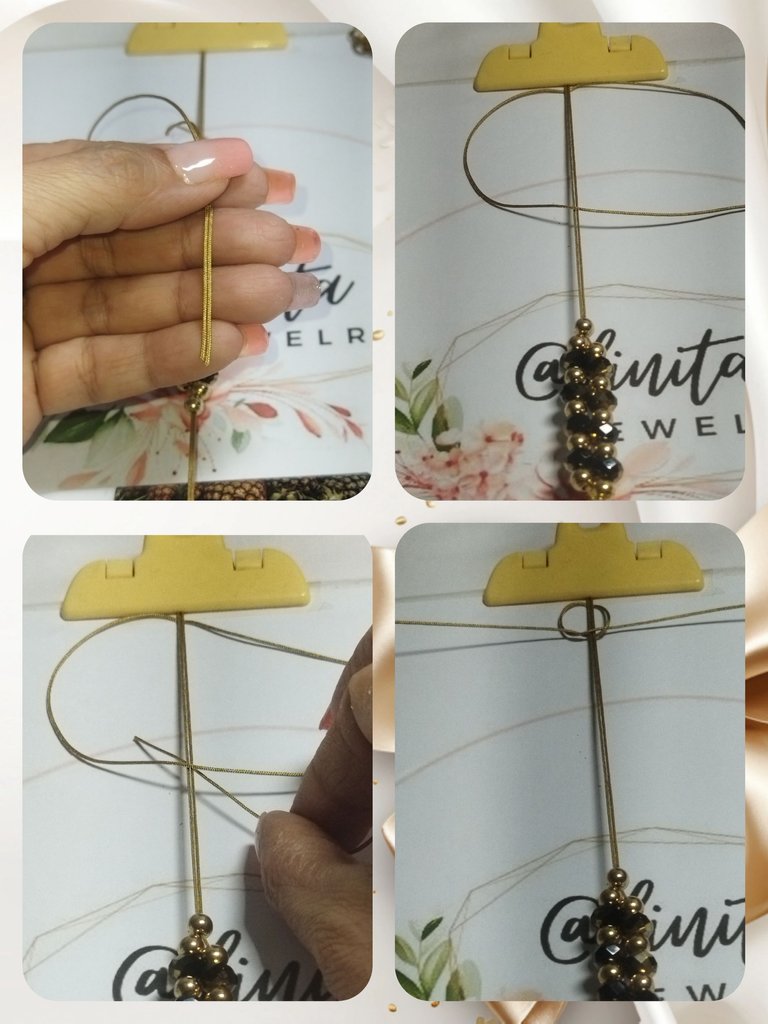
We take two of the 45 cm strands and with the lighter we join two of the ends.
Tomamos dos de las hebras de 45 cm y con el encendedor unimos dos de los extremos.
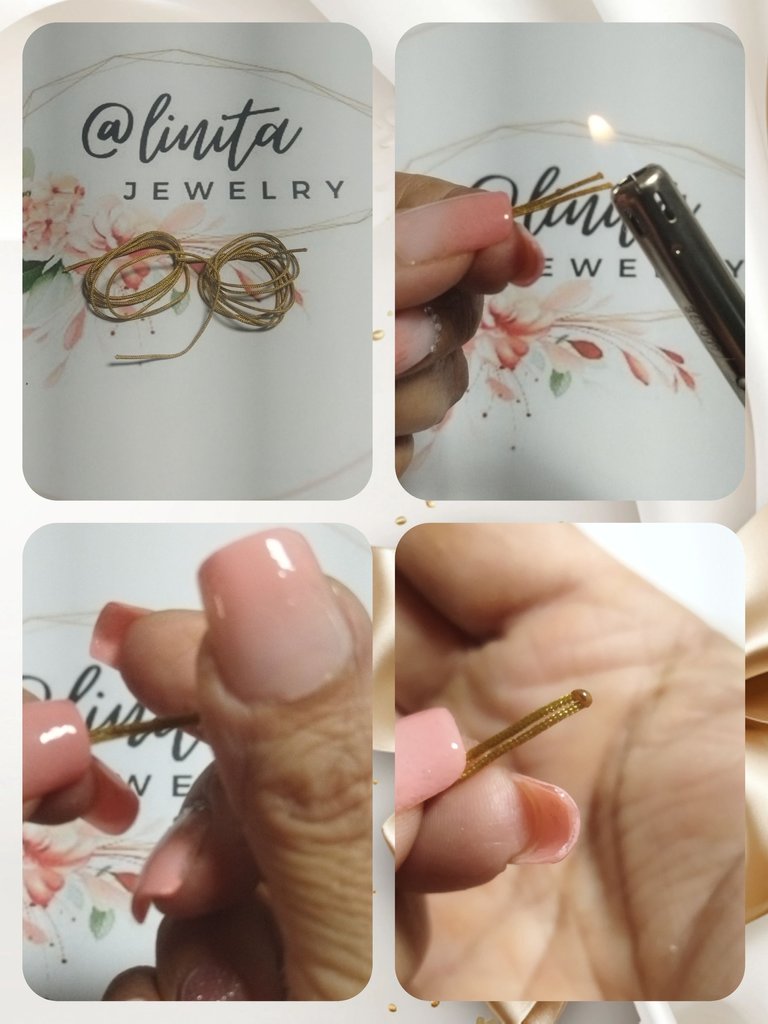
At the other two ends we are going to form the needle point to insert the beads.
En los otros dos extremos vamos a formar la punta aguja para introducir los abalorios.
We take a 6 mm pellet and introduce the two strands of thread and bring it to the union. We make a knot. We cut off the excess from the tip and seal with the lighter. Here we have already formed the beginning of the bracelet.
Tomamos un balín de 6 mm e introducimos las dos hebras de hilo y llevamos a la unión. Realizamos un nudo. Cortamos el sobrante de la punta y sellamos con el encendedor. Aquí ya hemos formado el inicio de la pulsera.
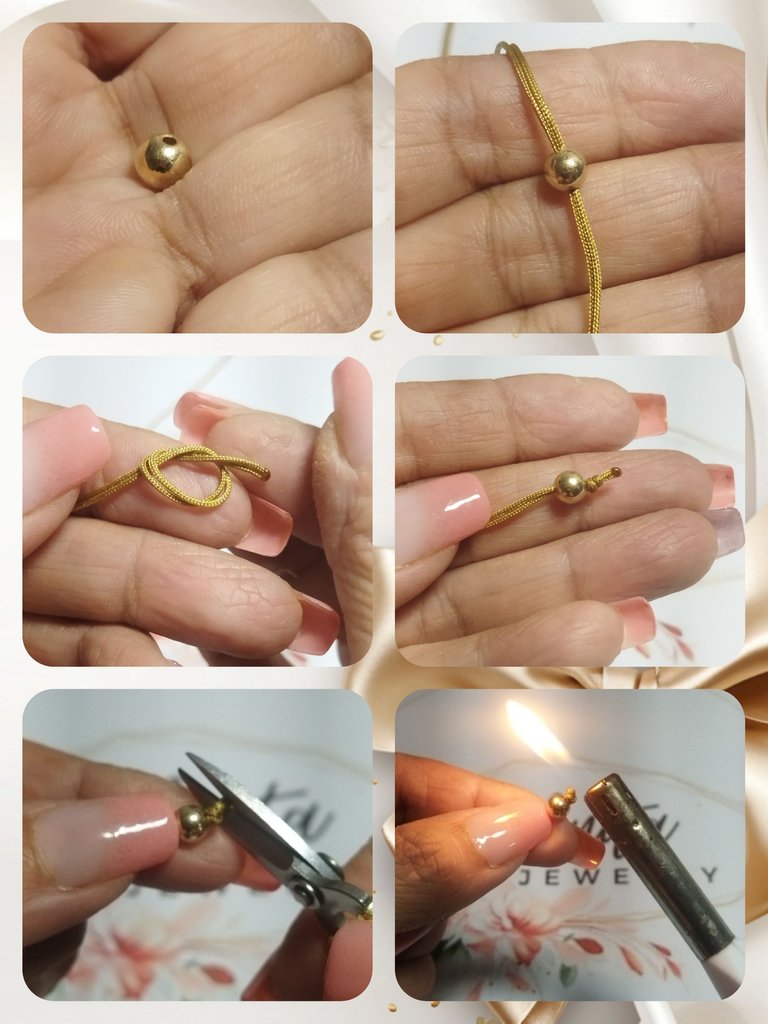
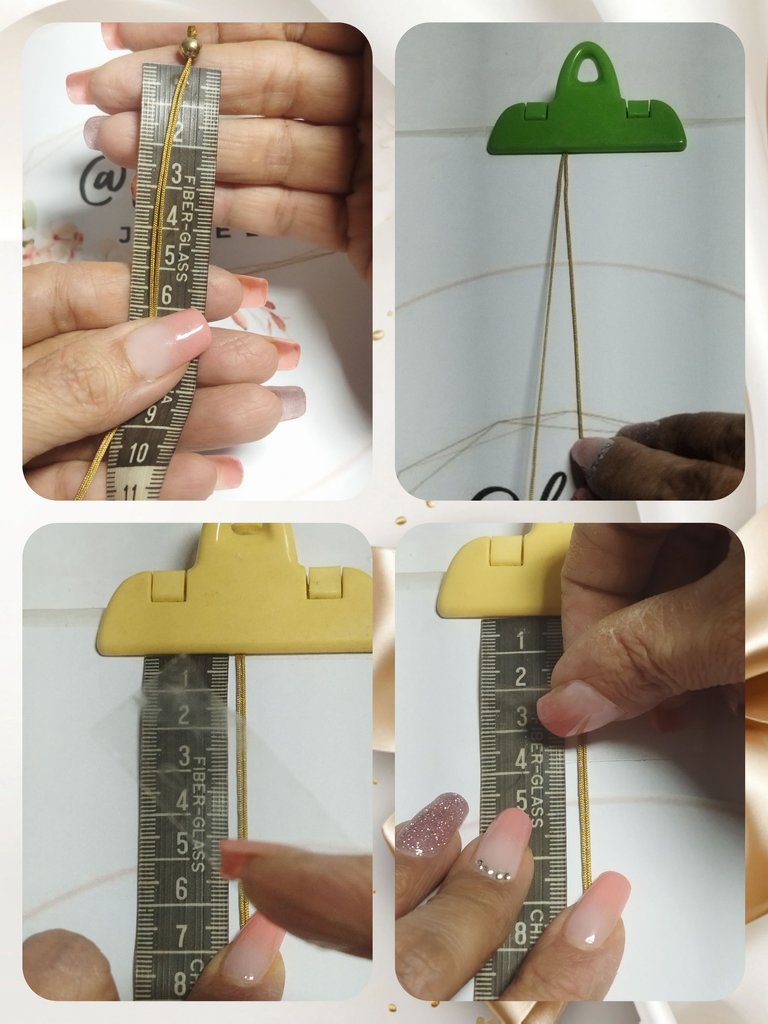
With the tape measure we measure 6 cm from the ball and take it to the work table and hold it from the measurement.
Then we measure 4 cm more and with an adhesive tape we mark the space for the macramé fabric.
Con la cinta métrica medimos 6 cm a partir del balín y llevamos a la tabla de trabajo y sujetamos a partir de la medida.
Luego medimos 4 cm más y con una cinta adhesiva marcamos el espacio para el tejido macramé.
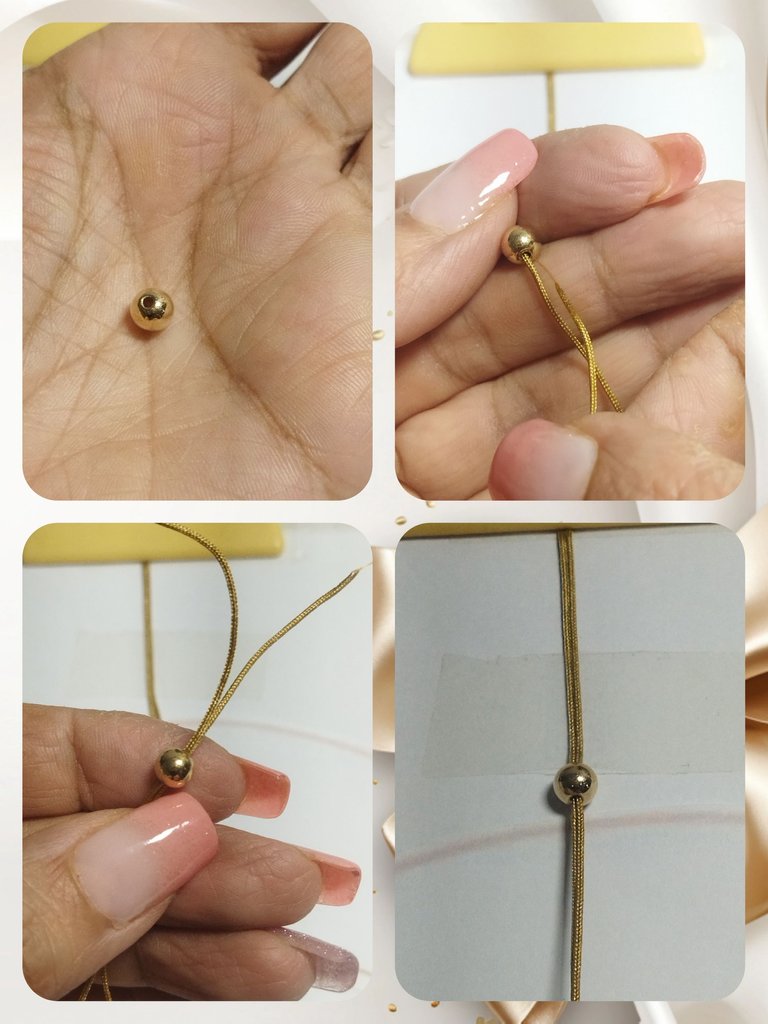
Next we introduce a 6 mm pellet through both strands and bring it up to the mark we made with the adhesive tape.
A continuación introducimos un balín de 6 mm por ambas hebras y llevamos hasta la marca que realizamos con la cinta adhesiva.
Now we separate the threads and start working on one of the strands. We will introduce 5 6 mm pellets and 4 8 mm gold and black rondels, interspersed with each other, starting with the pellets.
Ahora separamos los hilos y comenzamos a trabajar en una de las hebras. Introduciremos 5 balines de 6 mm y 4 rondeles dorado y negro de 8 mm, intercalados entre si, comenzando con los balines.
We repeat the previous step on the other strand and form two rows of 5 beads and 4 rondels on each side.
Repetimos el paso anterior en la otra hebra y formamos dos hileras de 5 balines y 4 rondeles de cada lado.
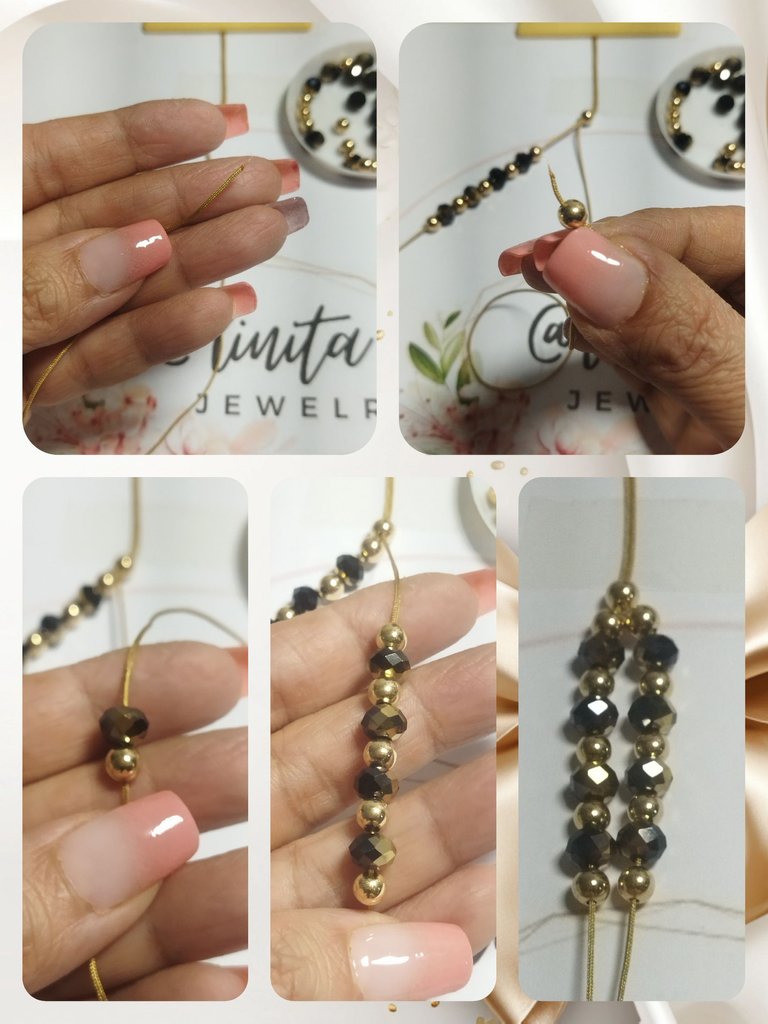
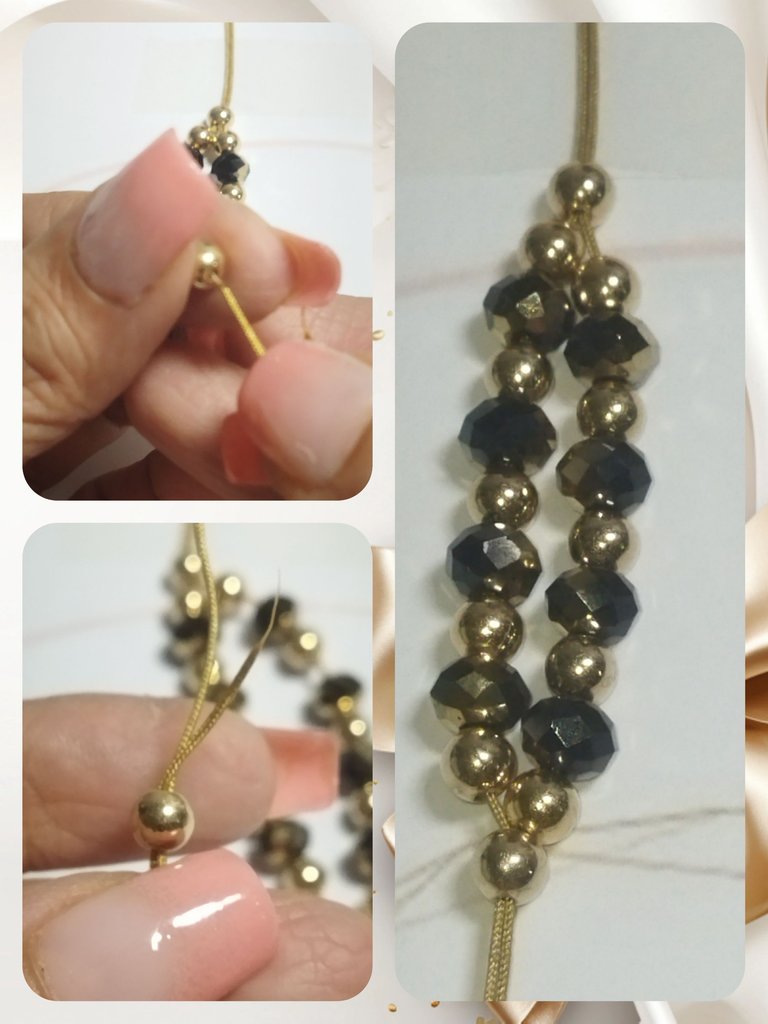
And to close the central design of the bracelet, we insert a ball through the two strands of thread.
Y para cerrar el diseño central de la pulsera, introducimos un balín por las dos hebras de hilo.
FABRIC
Now we are going to make the weaving. To do this we will use one of the two pieces of leftover thread, remove the adhesive tape and run the beads.
We prepare the work table to facilitate knitting by placing the lighter between the board and the threads.
TEJIDO
Ahora vamos a realizar el tejido. Para ello utilizaremos uno de los dos trozos de hilo sobrante, retiramos la cinta adhesiva y corremos los abalorios.
Preparamos la tabla de trabajo para facilitar el tejido colocando el encendedor entre la tabla y los hilos.
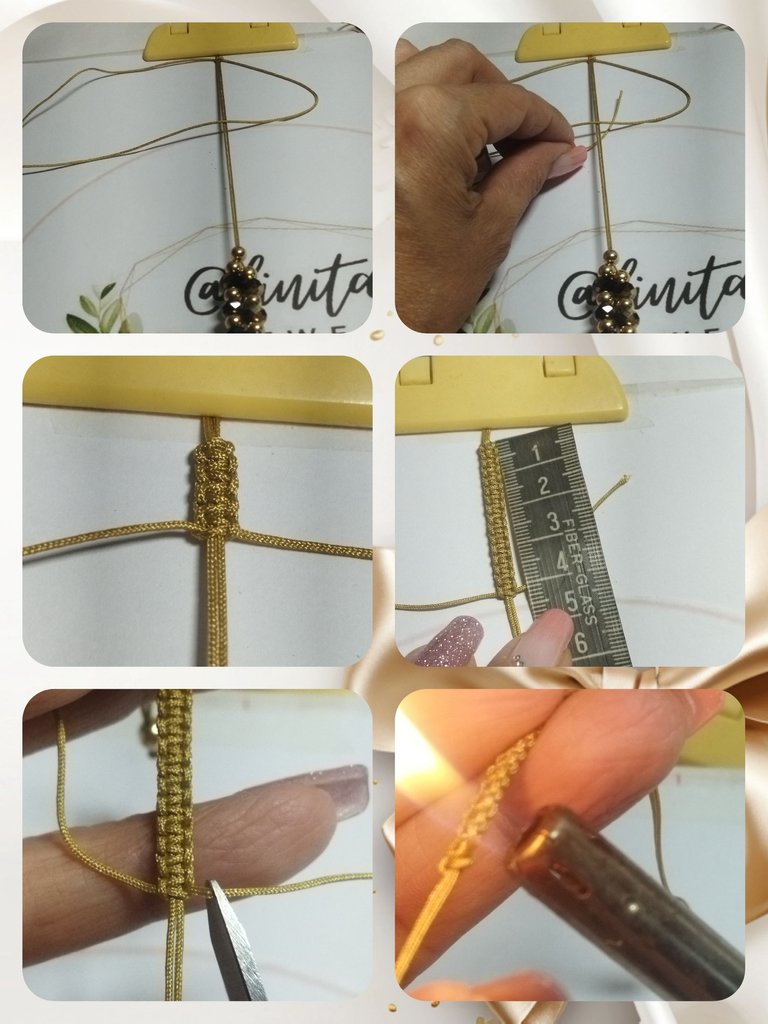
We begin the fabric at the top, taking into account that the fabric measurement is 4 cm. We place the thread and join it in equal parts and begin to weave the flat knot.
We form a 4 shape with the left side strand and then pass the right side strand through the intersection of the thread and under it. We adjust and take it to the fastening hook.
Comenzamos el tejido en la parte superior, tomando en cuenta que la medida de tejido es de 4 cm. Colocamos el hilo y juntamos en partes iguales y comenzamos a tejer el nudo plano.
Formamos una forma de 4 con la hebra del lado izquierdo y luego pasamos la hebra del lado derecho por la intersección del hilo y por debajo de éste. Ajustamos y llevamos hasta el gancho sujetador.
Now with the strand on the right side we form a D and pass the strand on the left side under the intersection of the threads and adjust.
We repeat both steps until we reach a measurement of 4 cm of fabric.
We cut the excess from each side and seal with the lighter.
Ahora con la hebra del lado derecho formamos una D y pasamos la hebra del lado izquierdo por debajo de la intersección de los hilos y ajustamos.
Repetimos ambos pasos hasta alcanzar una medida de 4 cm de tejido.
Cortamos el sobrante de cada lado y con el encendedor sellamos.
Now we are going to upload the beads that are aligned and glued to the fabric. We take the last strand of thread and place it just below the last ball and begin to knit in the same way as before, until reaching 4 cm.
Ahora vamos a subir los abalorios que queden alineados y pegados al tejido. Tomamos la última hebra de hilo y la colocamos justo debajo del último balín y comenzamos a realizar el tejido de la misma forma anterior, hasta alcanzar 4 cm.
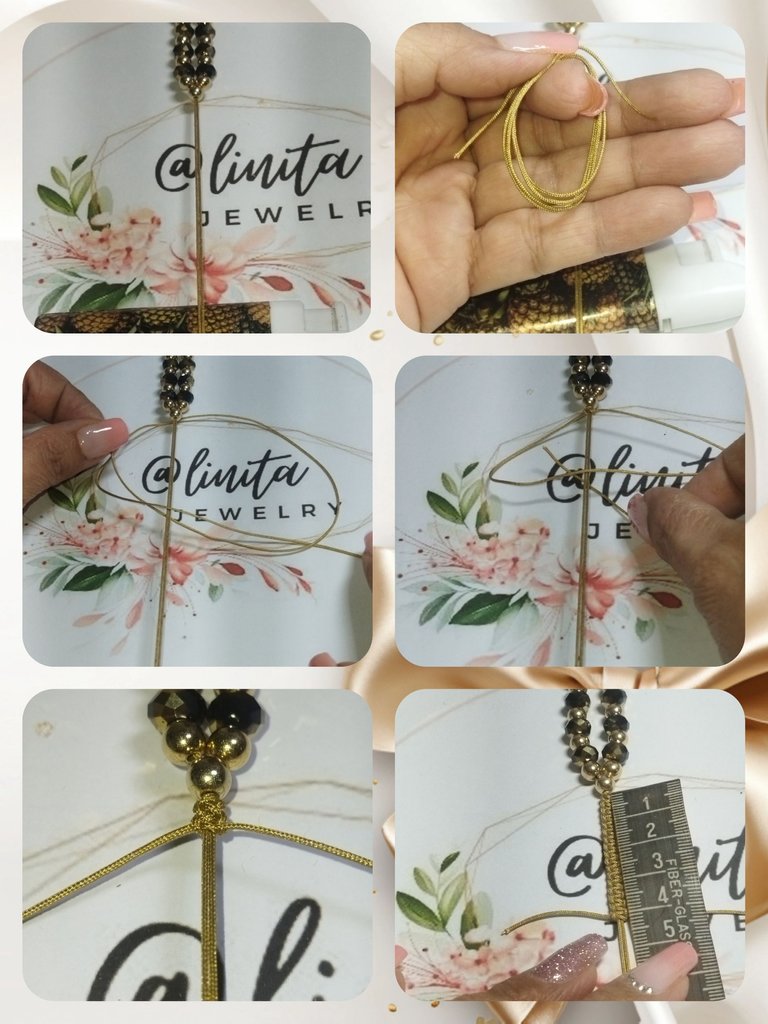
We cut off the excess and seal with the lighter.
Now we introduce a pellet through both threads. We try to make it the same size as the beginning of the bracelet and we tie a knot. We cut the rest of the thread and seal.
Cortamos los excesos y sellamos con el encendedor.
Ahora introducimos un balín por ambos hilos. Tratamos que quede a la misma medida del inicio de la pulsera y realizamos un nudo. Cortamos el resto del hilo y sellamos.
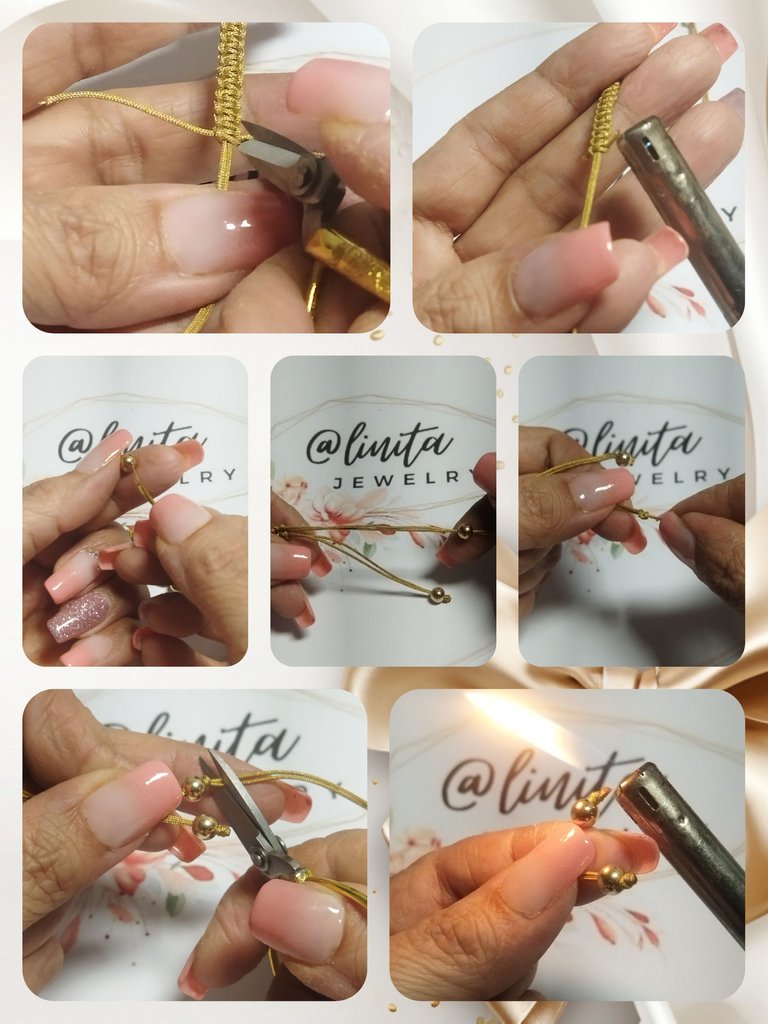
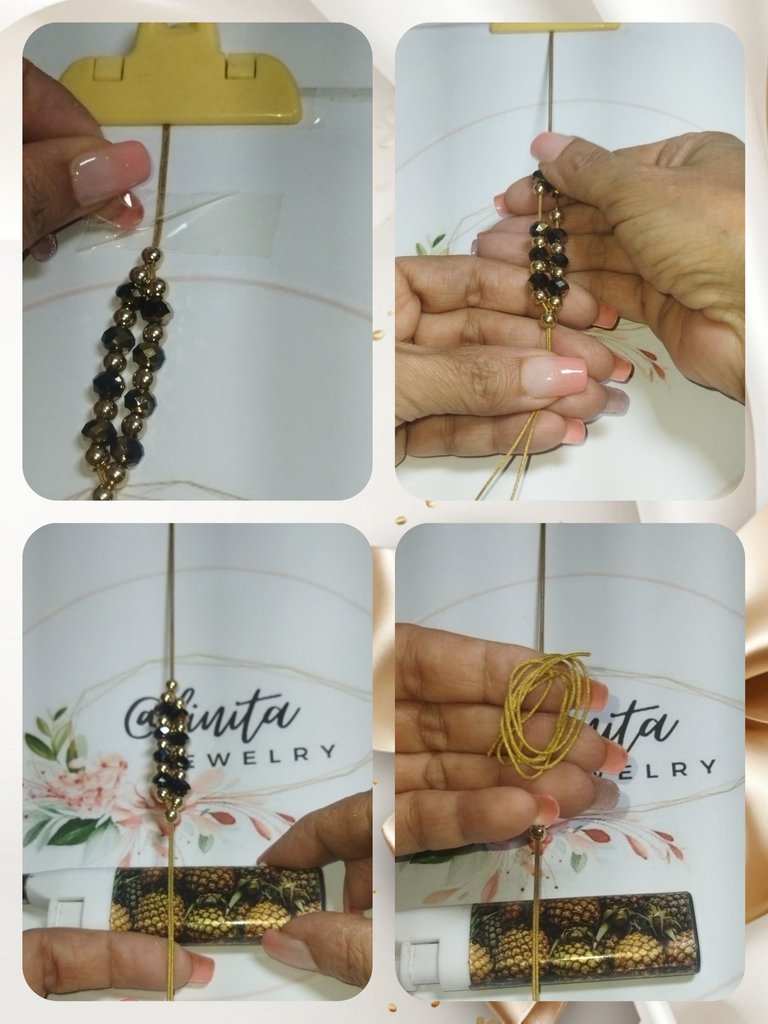
The bracelet is already formed, now we only have to make the adjustable knot.
Ya está formada la pulsera, ahora sólo nos queda realizar el nudo ajustable.
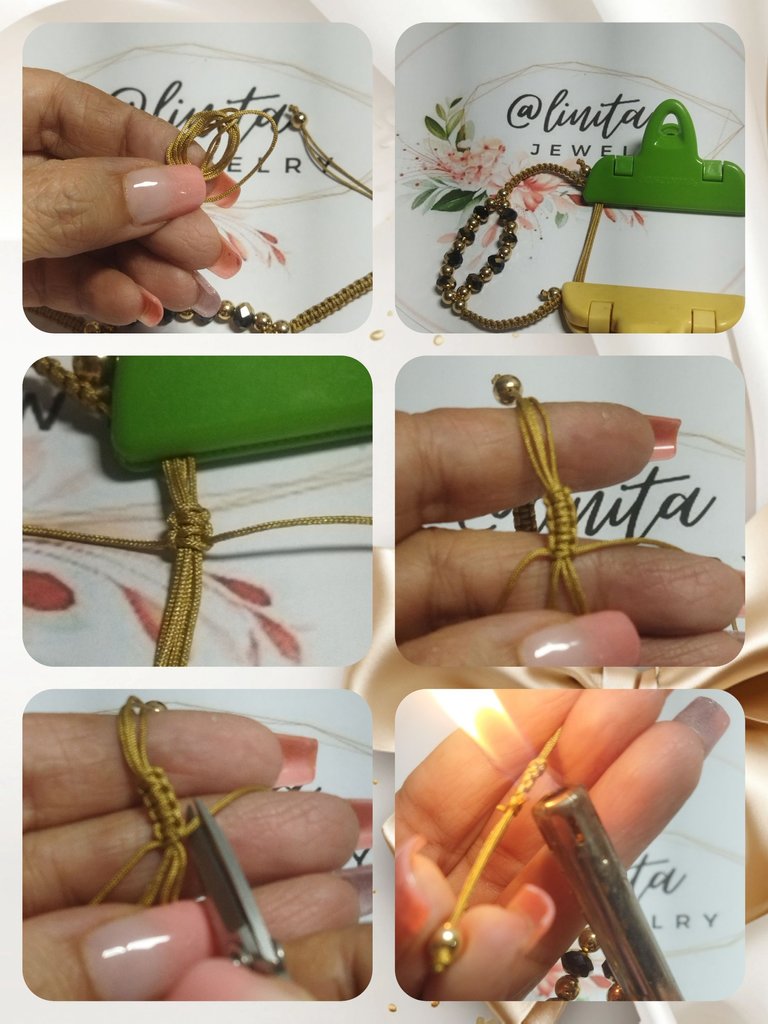
We take the 35 cm strand and join the ends of the bracelet, hold with the tweezers and weave a flat knot up to 1 cm.
We cut the excess thread and seal with the lighter.
Tomamos la hebra de 35 cm y unimos los extremos de la pulsera, sujetamos con las pinzas y realizamos el tejido de nudo plano hasta 1 cm.
Cortamos el hilo sobrante y sellamos con el encendedor.
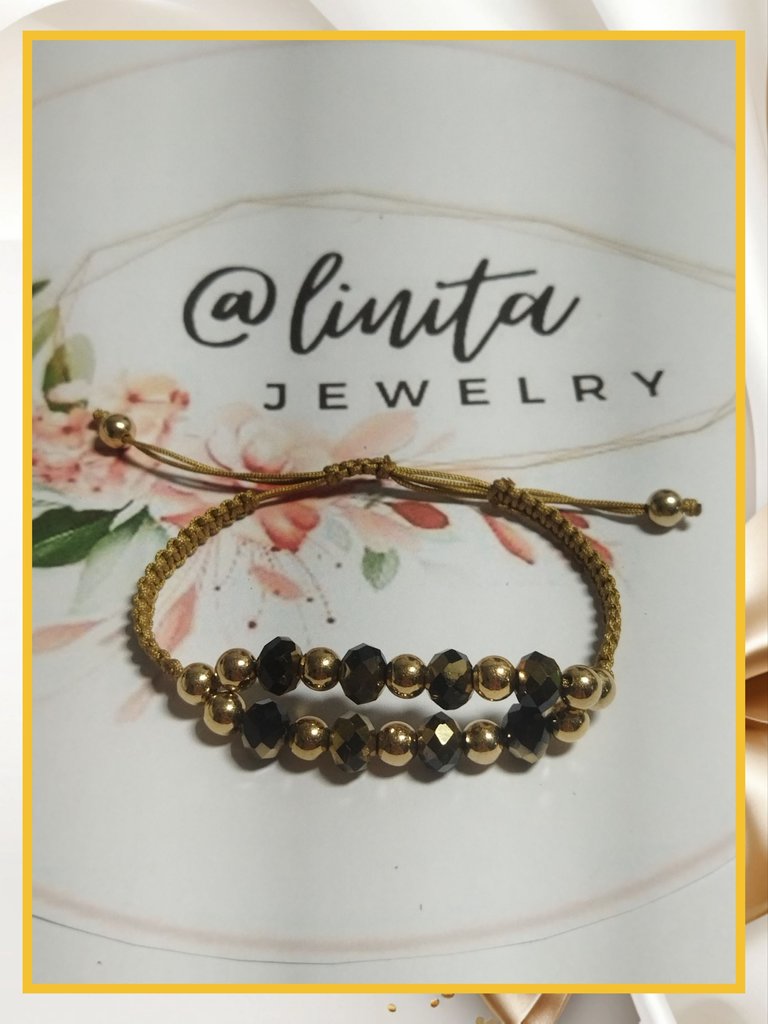
PROJECT COMPLETED
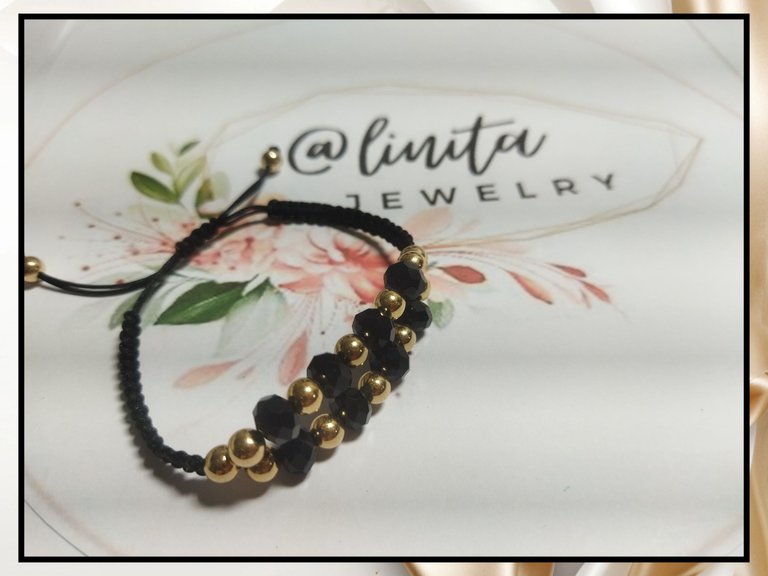
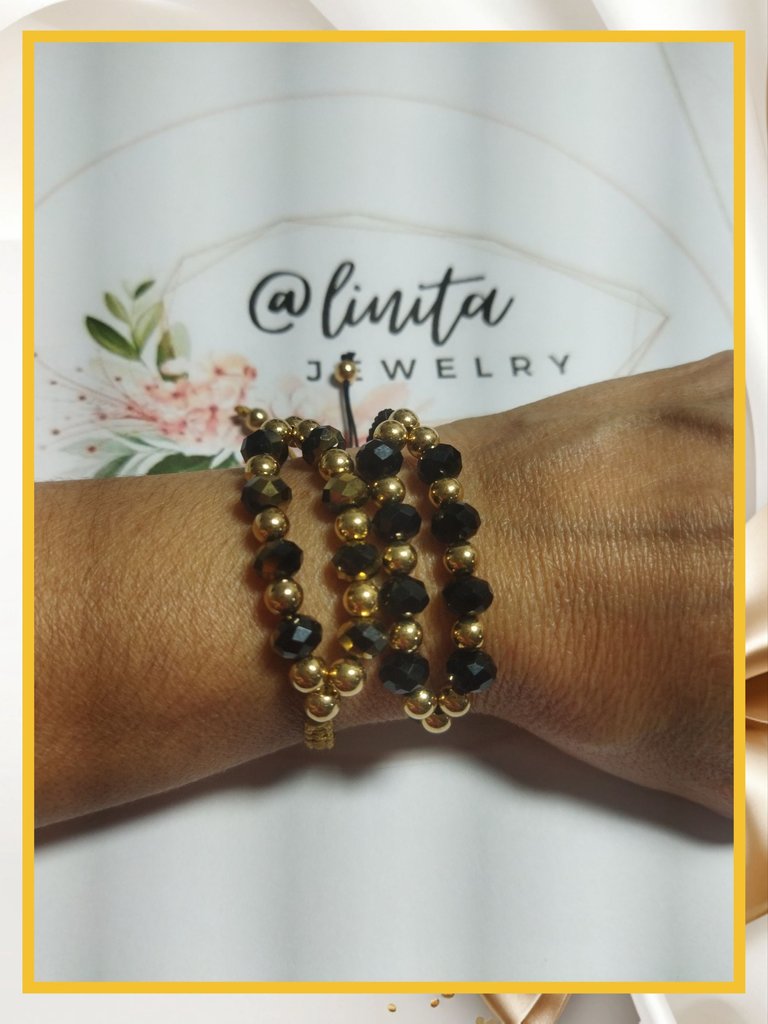
And this cute adjustable bracelet is ready. We can make them in different colors, changing the threads and beads that we want. They are very practical and look perfect with any outfit. I hope you like it.
PROYECTO FINALIZADO
Y ya está lista esta linda pulsera ajustable. Podemos hacerlas de diferentes colores, cambiando los hilos y los abalorios que deseemos. Son muy prácticas y lucen perfectas con cualquier atuendo. Espero les guste.
Se ven fácil, pero tiene su proceso.
Está muy bonito todo el proyecto. Se ve que te esmeras en cada paso.
Gracias por compartir tu creación 🙋🏾♀️
Muy hermosos estas pulseras ajustables, me gusta mucho el detalle dorado, las hacen lucir muy elegantes.
Saludos amiga. 🤗
It is elegant, stylish and charming. Love its design that can grab anyone's attention. Well done!
Hermanas pulseras nos encanta ver el tejido como la haces y la combinación tierra que has usado, un hermoso trabajo 😉
they are perfectly beautiful 🤩
!DIY !CTP
You can query your personal balance by
!DIYSTATS