WELCOME TO MY BLOG
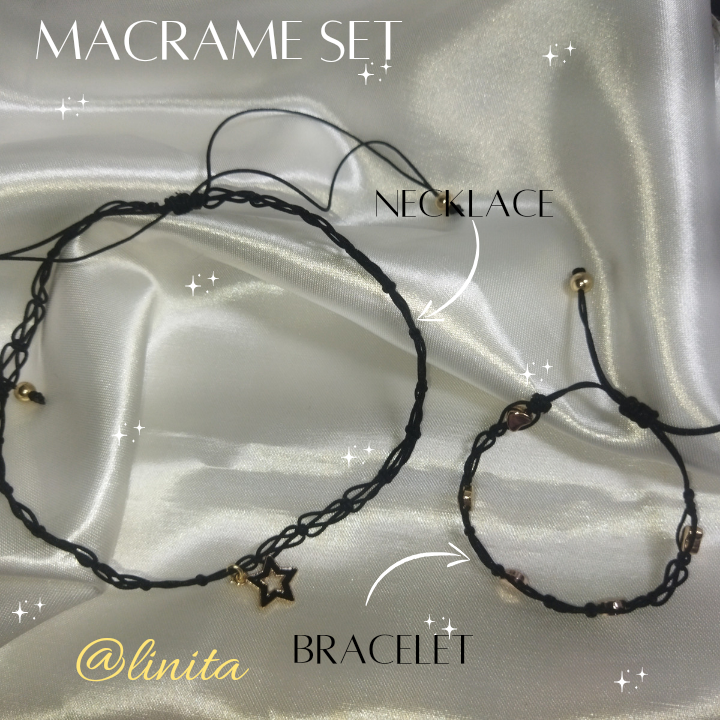
Hellooooo, hellooooooo! Greetings and my respects to the jewelry creators. Today I will be sharing with you how to make a set of choker necklace made in the macramé technique and a bracelet with the same fabric and steel separators inserted into the fabric. I hope you like it.
BIENVENIDOS A MI BLOG
¡Holaaaa, holaaaaa! Saludos y mis respetos a los creadores de bisutería. Hoy les estaré compartiendo cómo hacer un juego de collar tipo choker realizado en la técnica de macramé y una pulsera con el mismo tejido y separadores de acerina insertados en el tejido. Espero les guste.
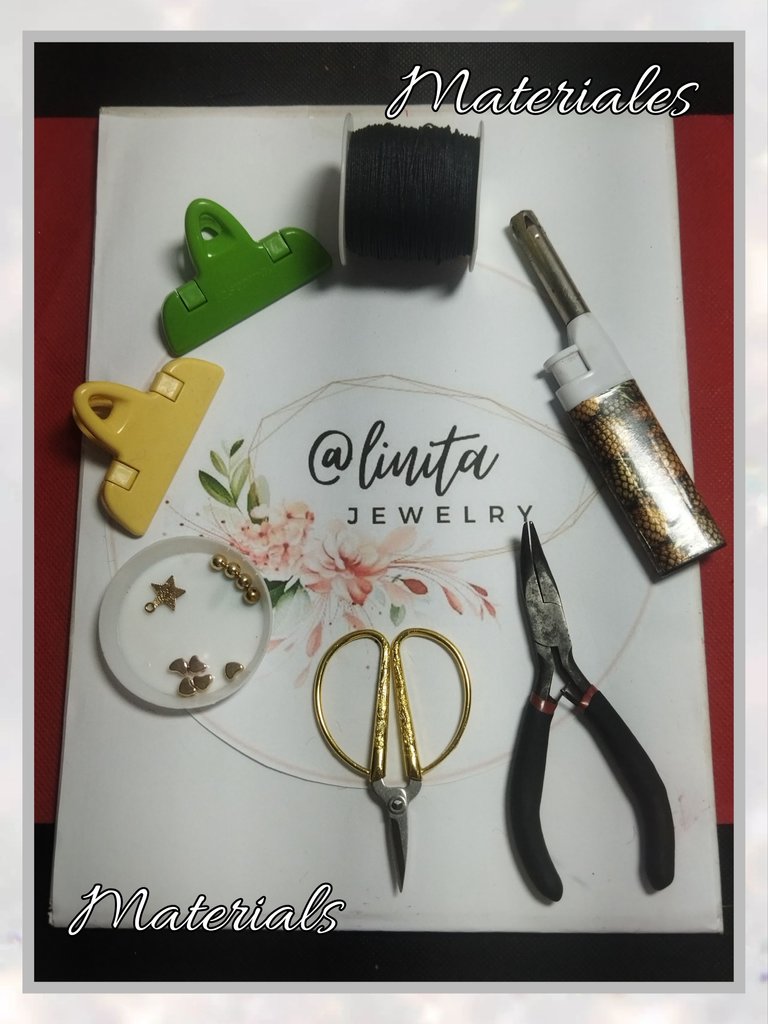
MATERIALS
- Black Chinese thread
- 6 mm pellets
- 6 mm heart separators
- Black star pendant
- Board and hooks for fabric
- Scissors
- Lighter
- Flat clamp
MATERIALES
- Hilo chino negro
- Balines de 6 mm
- Separadores corazón de 6 mm
- Dije estrella negro
- Tabla y ganchos para tejido
- Tijera
- Encendedor
- Pinza plana
STEP BY STEP // PASO A PASO
CHOKER
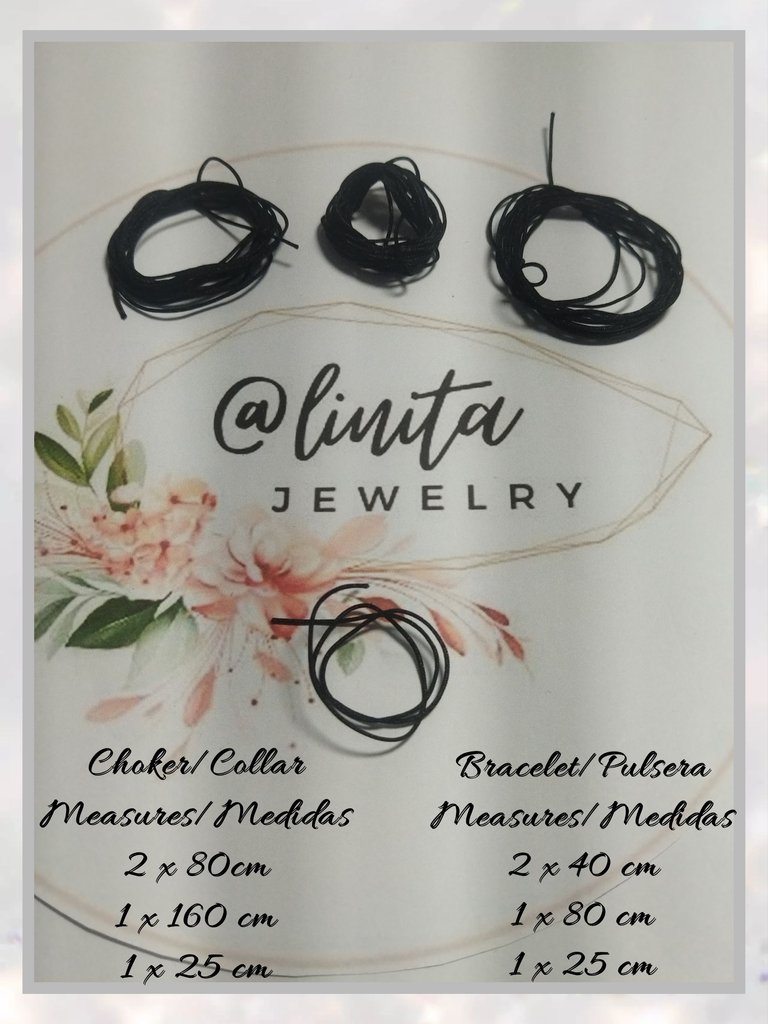
To make the macramé weaving we are going to use the following amounts of black Chinese thread:
- 2 x 80cm
- 1 x 160cm
- 1 x 25cm
COLLAR
Para realizar el tejido macramé vamos a utilizar las siguientes cantidades de hilo chino negro:
- 2 x 80 cm
- 1 x 160 cm
- 1 x 25 cm
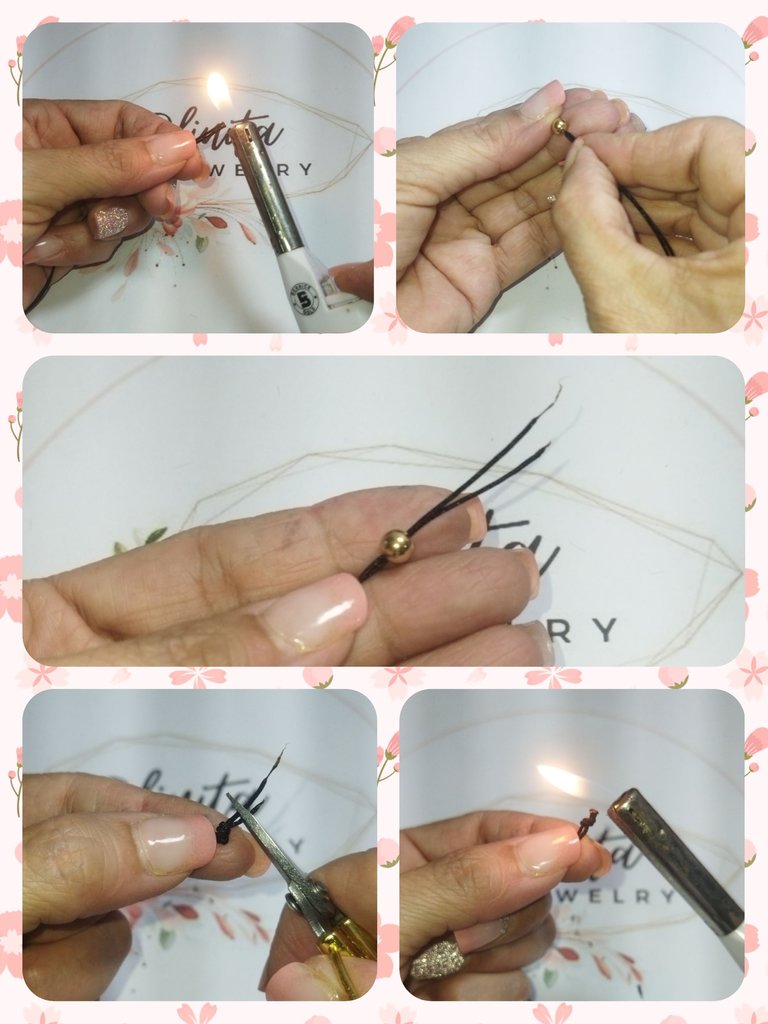
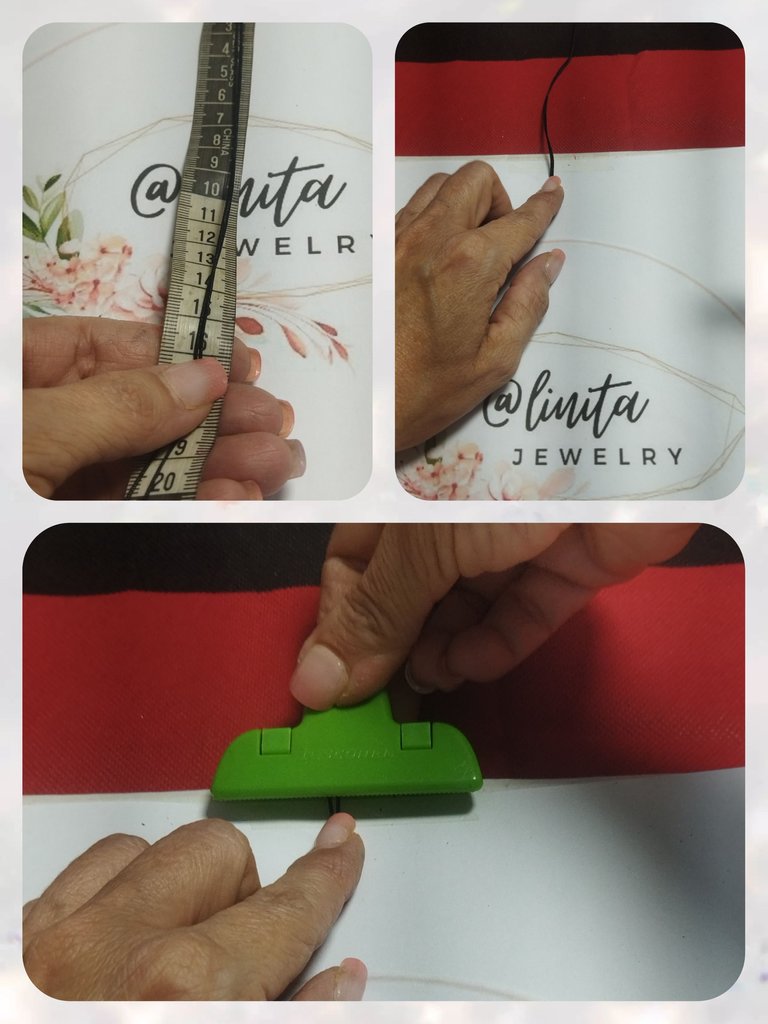
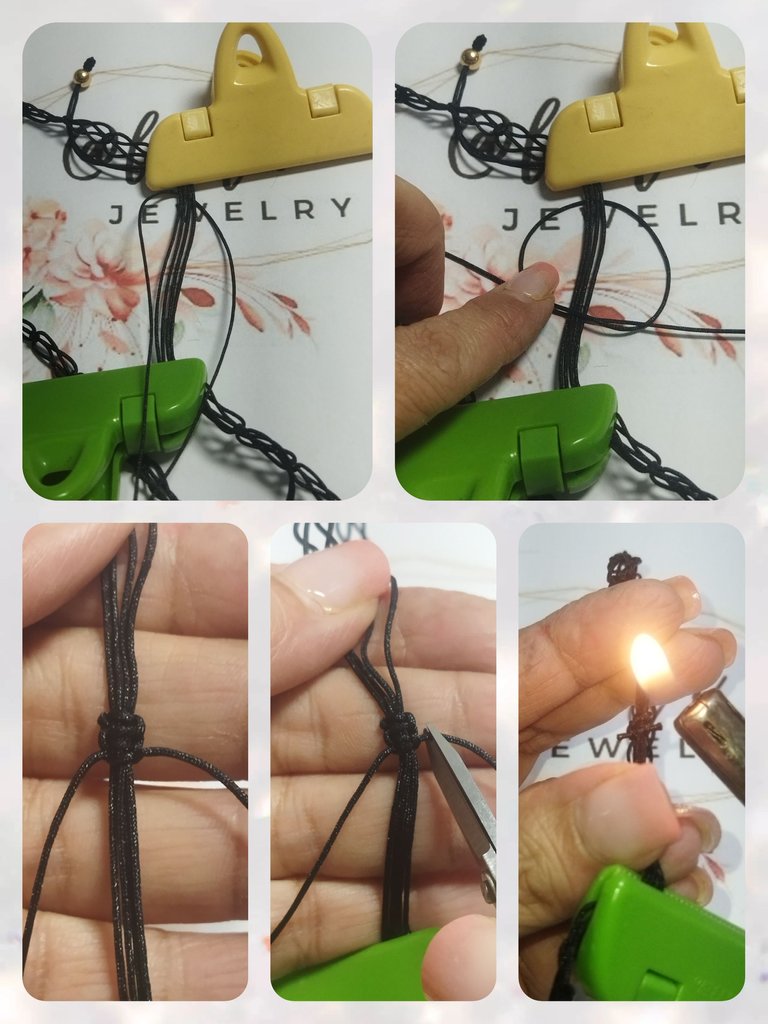
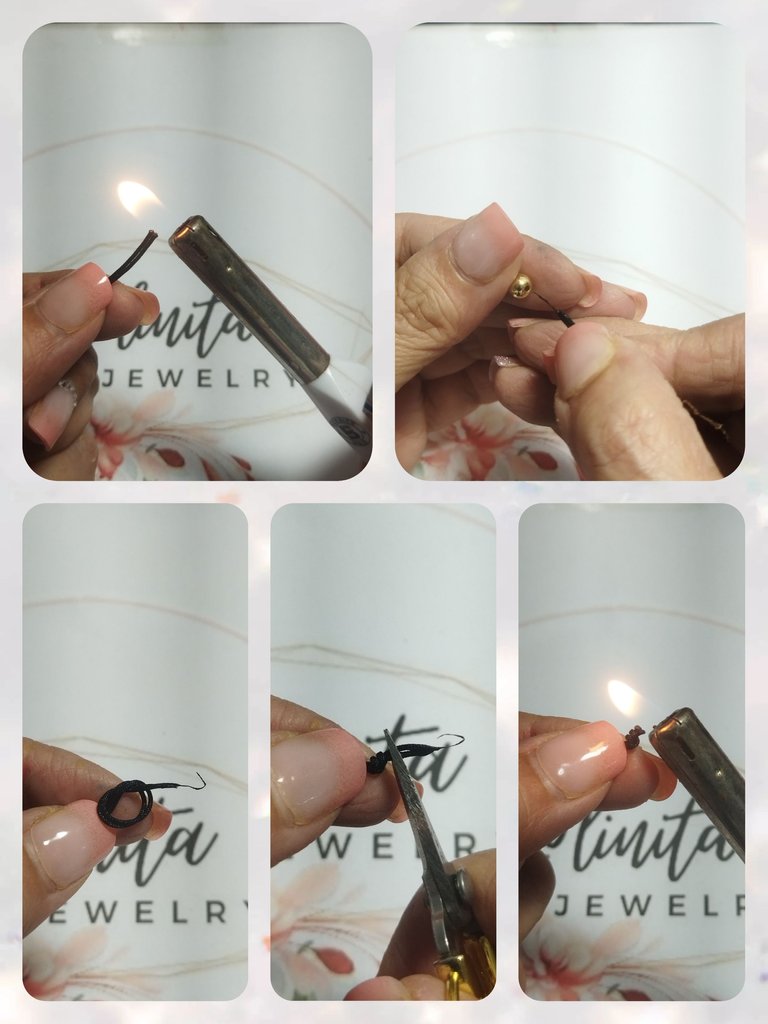
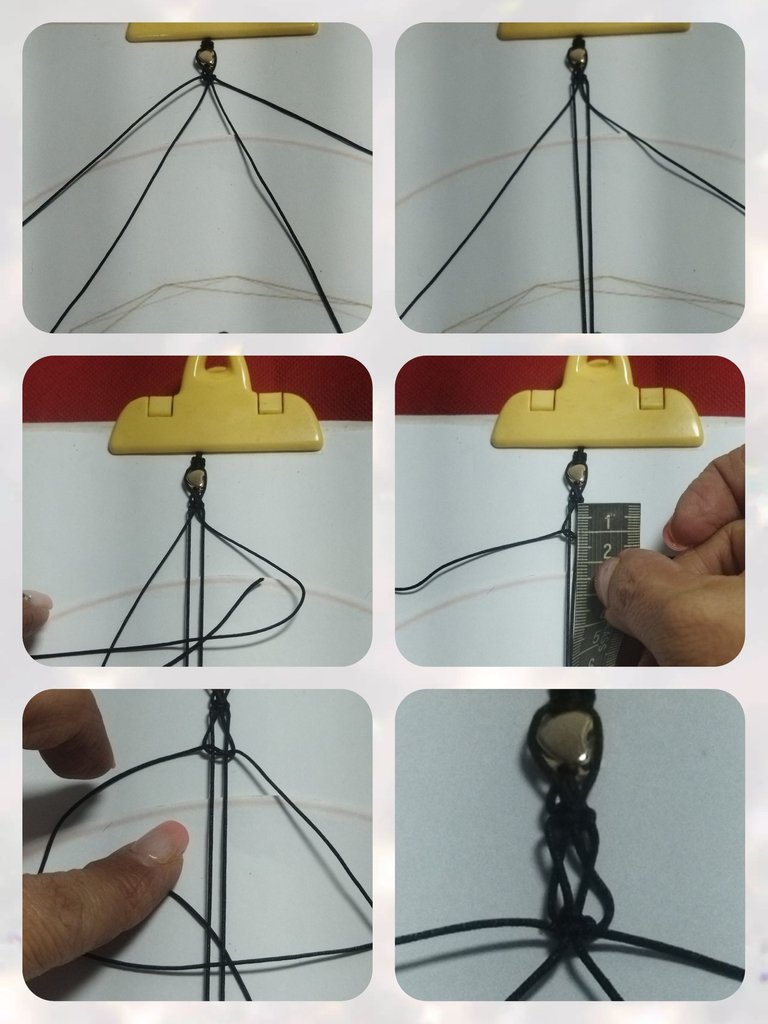
We take the two 80 cm strands and with the lighter we make the needle tip to insert a 6 mm pellet through both ends. Then we tie a knot at the tip, cut the excess thread and seal it with the lighter.
Tomamos las dos hebras de 80 cm y con el encendedor realizamos la punta aguja para introducir un balín de 6 mm por ambas puntas. Luego realizamos un nudo en la punta, cortamos el hilo sobrante y sellamos con el encendedor.
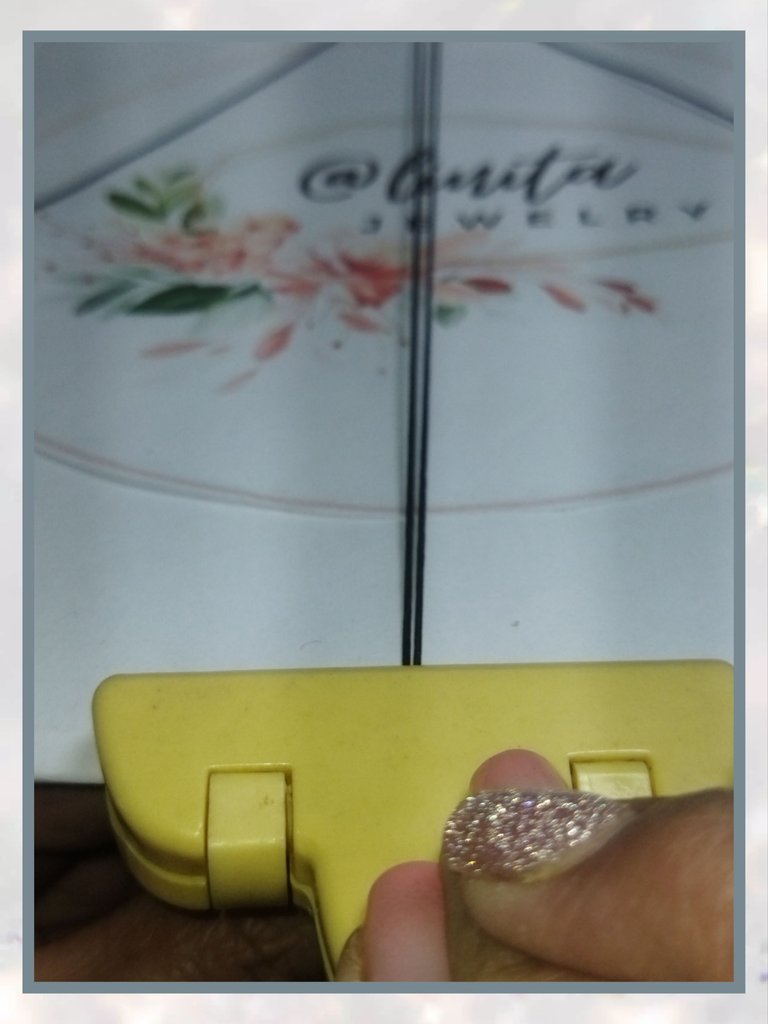
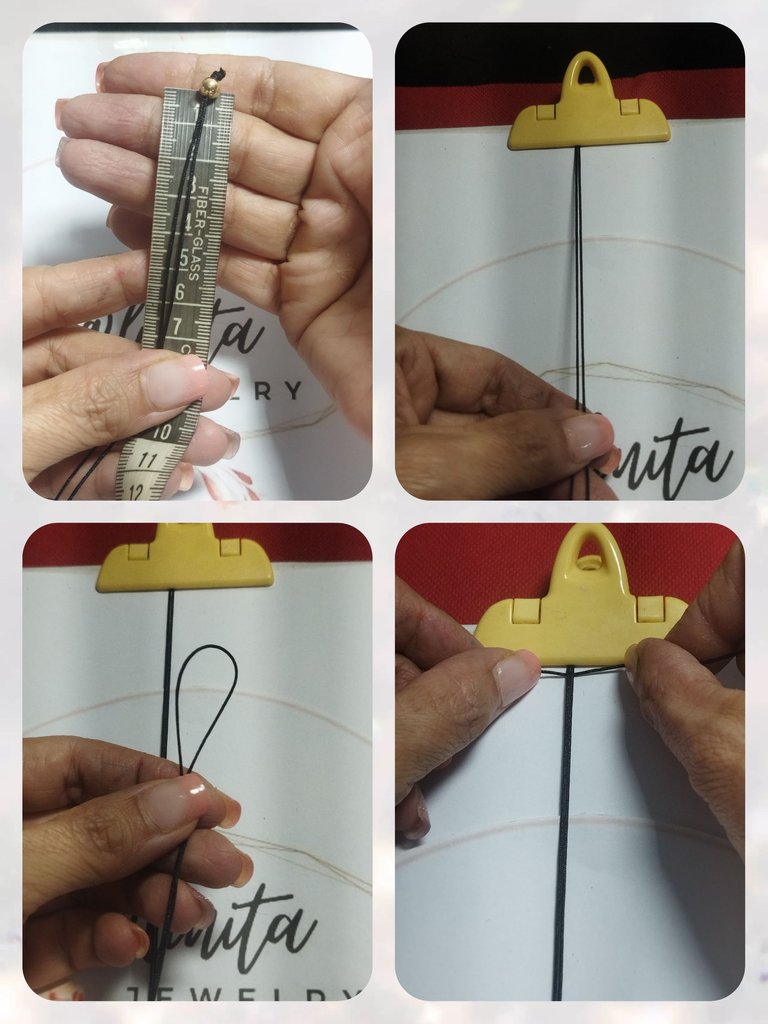
Now we measure 15 or 16 cm from the tip, place it on the board and secure with one of the hooks. This will be the base thread to begin weaving.
Ahora medimos 15 o 16 cm desde la punta, colocamos en la tabla y sujetamos con uno de los ganchos.Este será el hilo base para comenzar el tejido.
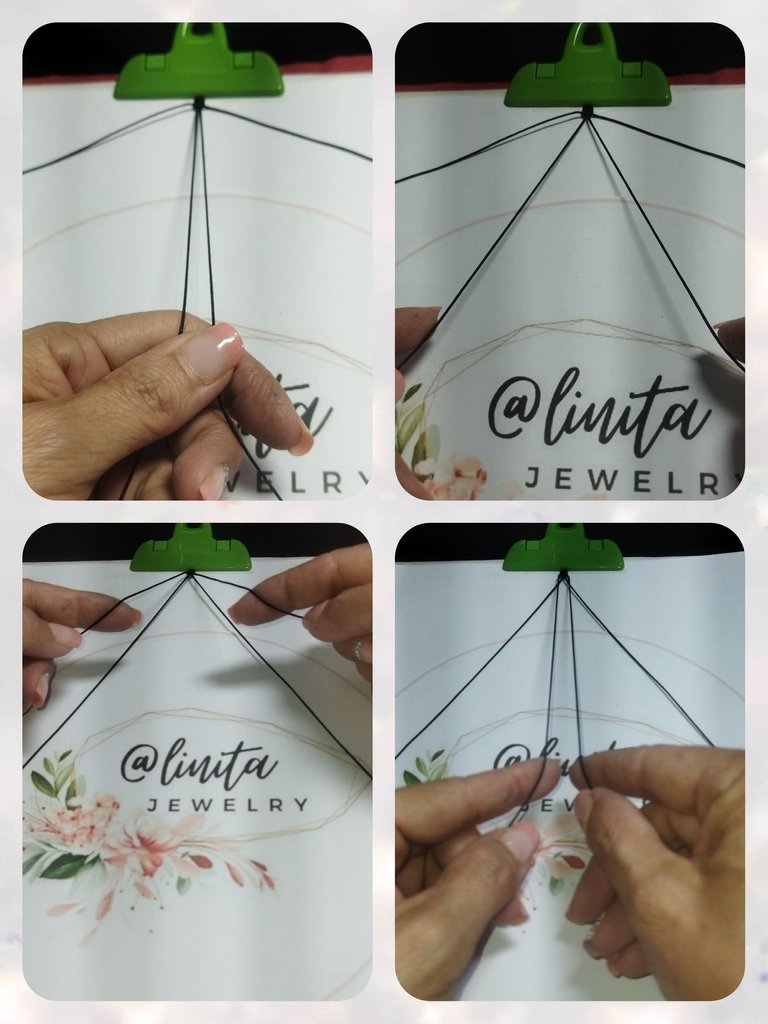
We take the 160 cm strand and fold it in half and place it at the beginning of the base thread attached to the hook.
Tomamos la hebra de 160 cm y doblamos a la mitad y lo colocamos al inicio del hilo base pegado del gancho.
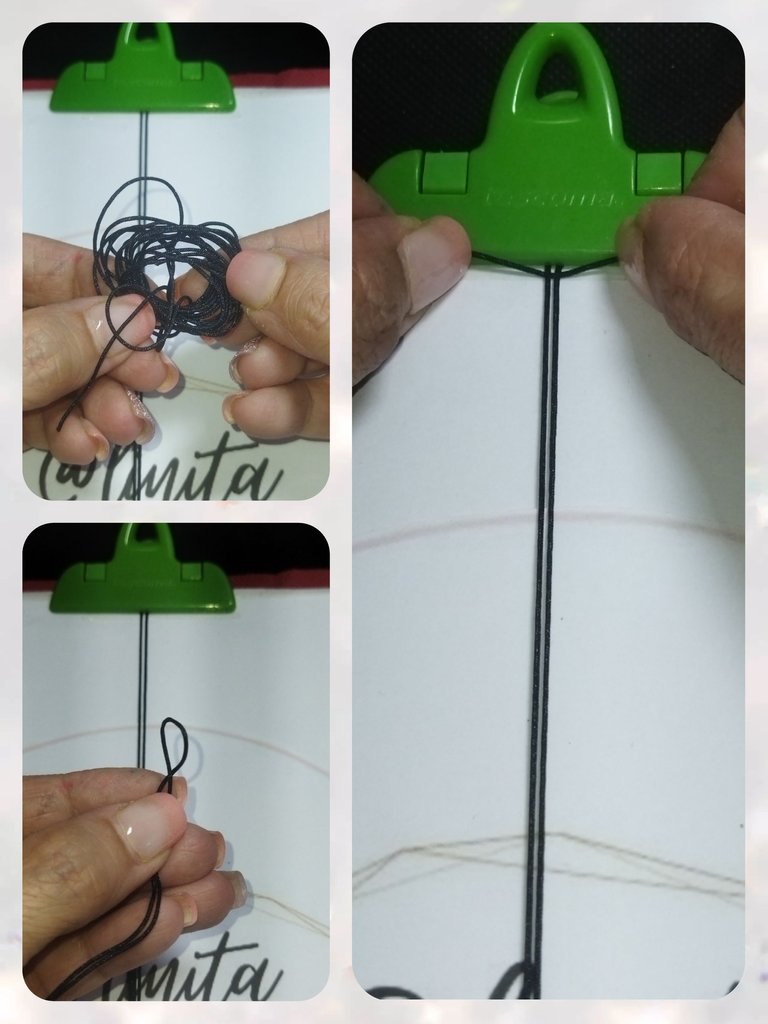
We start the weaving by making two complete flat knots.
To make a flat knot, we place the thread on the right side in a P shape and then pass the thread on the left side over the threads and then introduce the tip below the intersection formed. We perform the same operation with the strand on the left side to form the complete flat knot.
Iniciamos el tejido realizando dos nudos plano completos.
Para realizar un nudo plano colocamos el hilo de lado derecho en forma de P y luego el hilo del lado izquierdo lo pasamos por encima de los hilos y luego introducimos la punta por debajo de la intersección formada. Realizamos la misma operación con la hebra del lado izquierdo para formar el nudo plano completo.
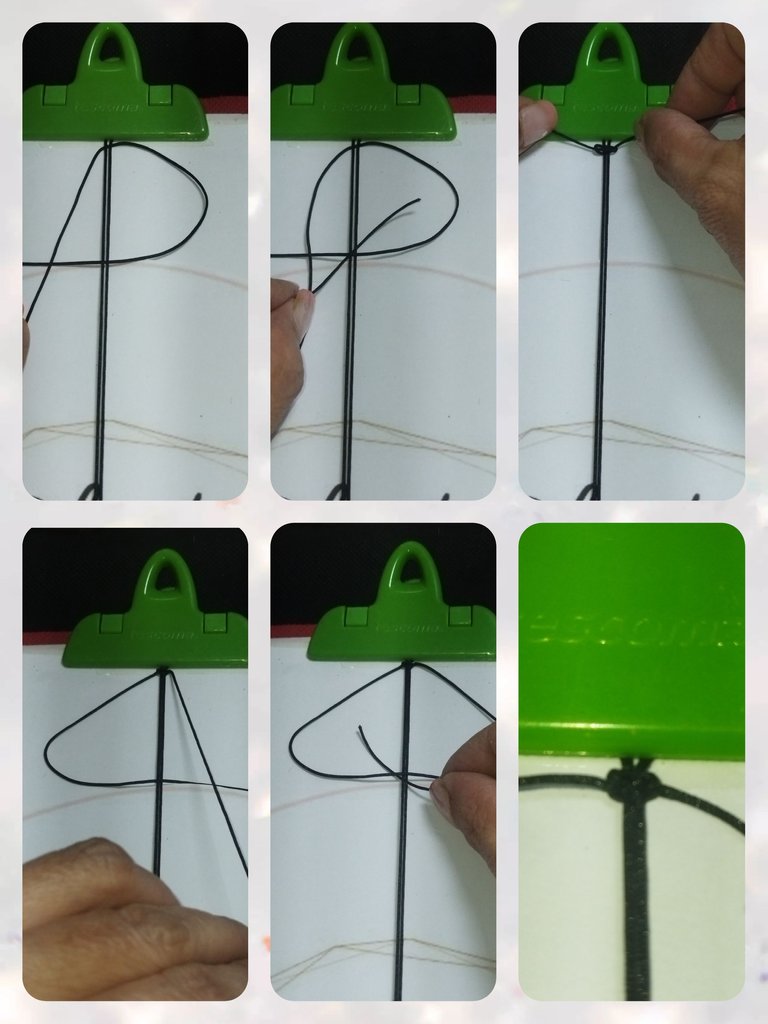
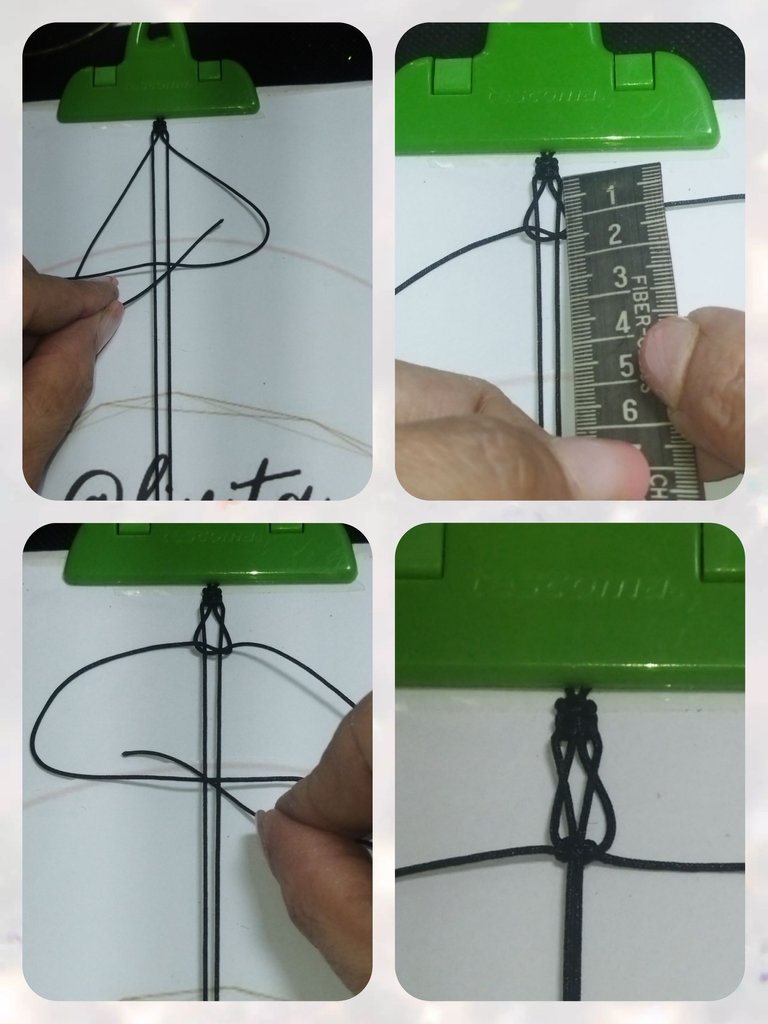
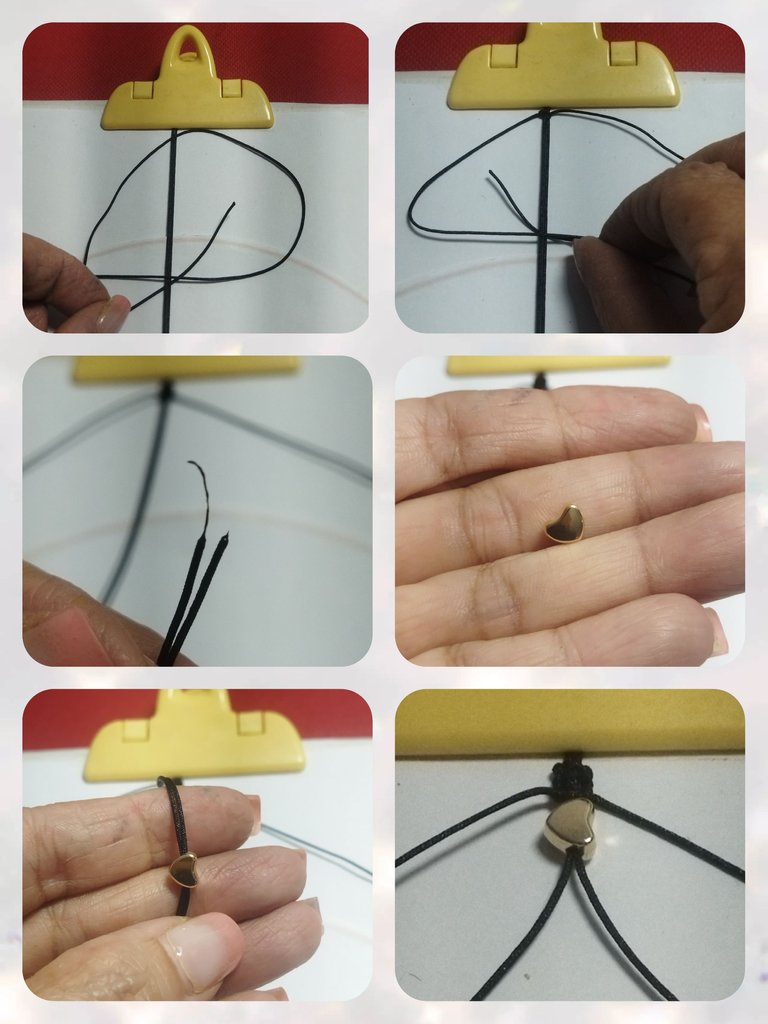
Now we are going to release the base thread from the bottom hook and open in a reverse "V" shape. Then we will pass the threads with which we wove the flat knots to the center of the reverse "V", becoming the base threads, and secure them again with the hook to tighten.
Ahora vamos a soltar el hilo base del gancho de abajo y abrimos en forma de "V" inversa. Luego los hilos con los que tejimos los nudos planos los pasaremos al centro de la "V" inversa, pasando a ser los hilos base, y sujetamos nuevamente con el gancho para tensar.
Again we will make a flat knot but we will not take it to the beginning of the weaving. We are going to measure 1.5 cm from the end of the flat knot and there we make the first knot, then we make the second for the complete knot. and we adjust hard.
Nuevamente realizaremos un nudo plano pero no lo llevaremos al inicio del tejido. Vamos a medir 1,5 cm desde el final del nudo plano y allí realizamos el primer nudo, luego realizamos el segundo para el nudo completo. y ajustamos fuerte.
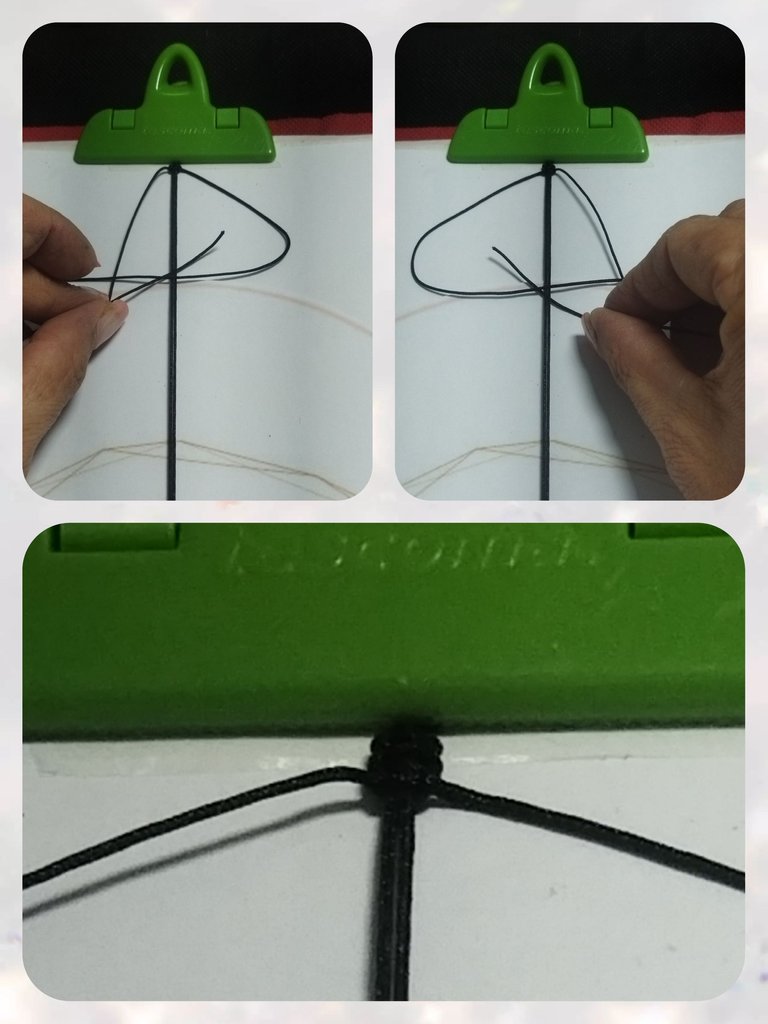
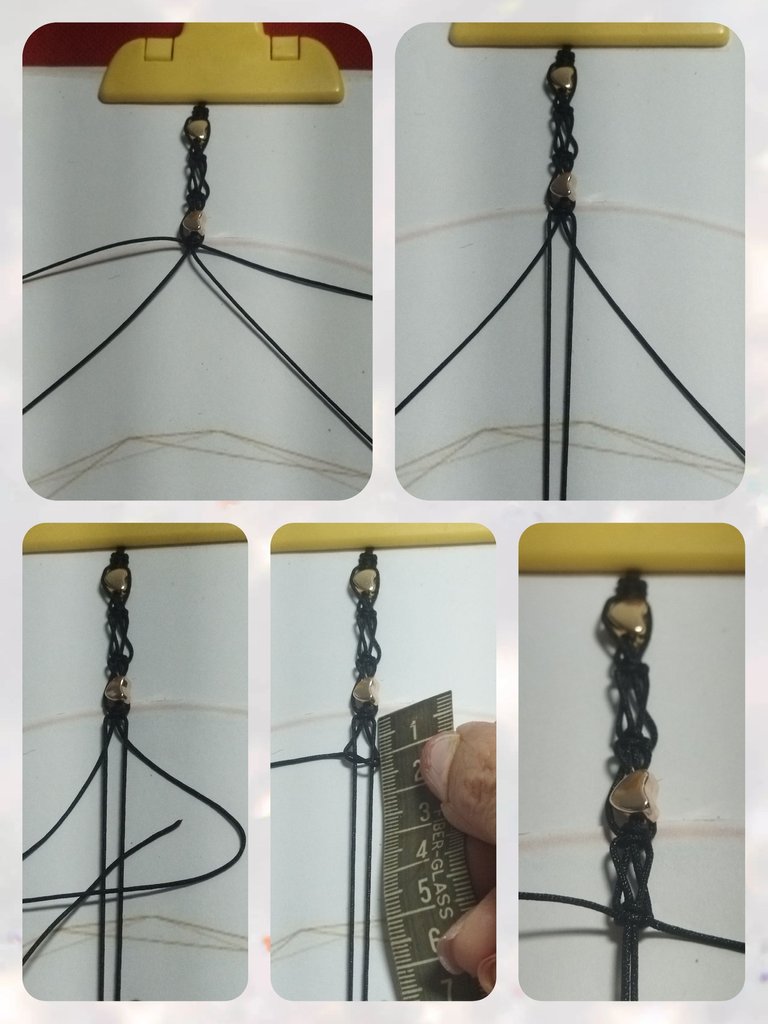
Again we are going to release the guide thread and form an inverse "V" and pass the fabric threads to the center and adjust with the hook.
Nuevamente vamos a soltar el hilo guía y formamos una "V" inversa y pasamos al centro los hilos del tejido y ajustamos con el gancho.
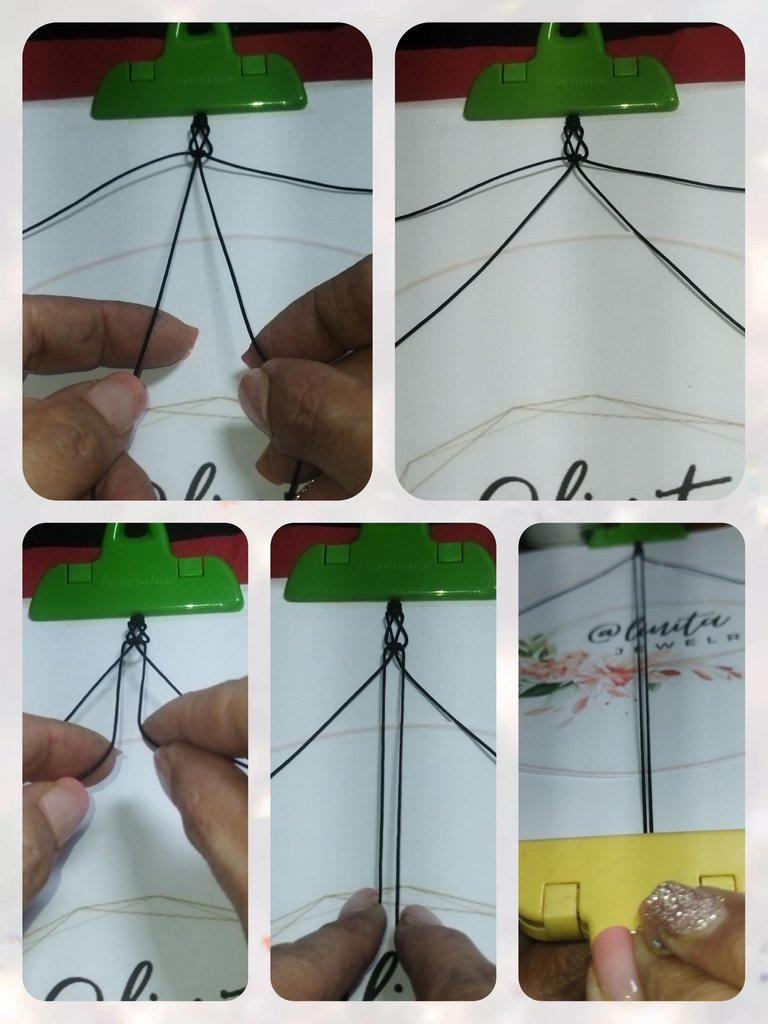
We make a complete flat knot, taking into account that we are going to leave 1.5 cm of distance from the last knot made.
Realizamos un nudo plano completo, tomando en cuenta que vamos a dejar 1,5 cm de distancia a partir del ultimo nudo realizado.
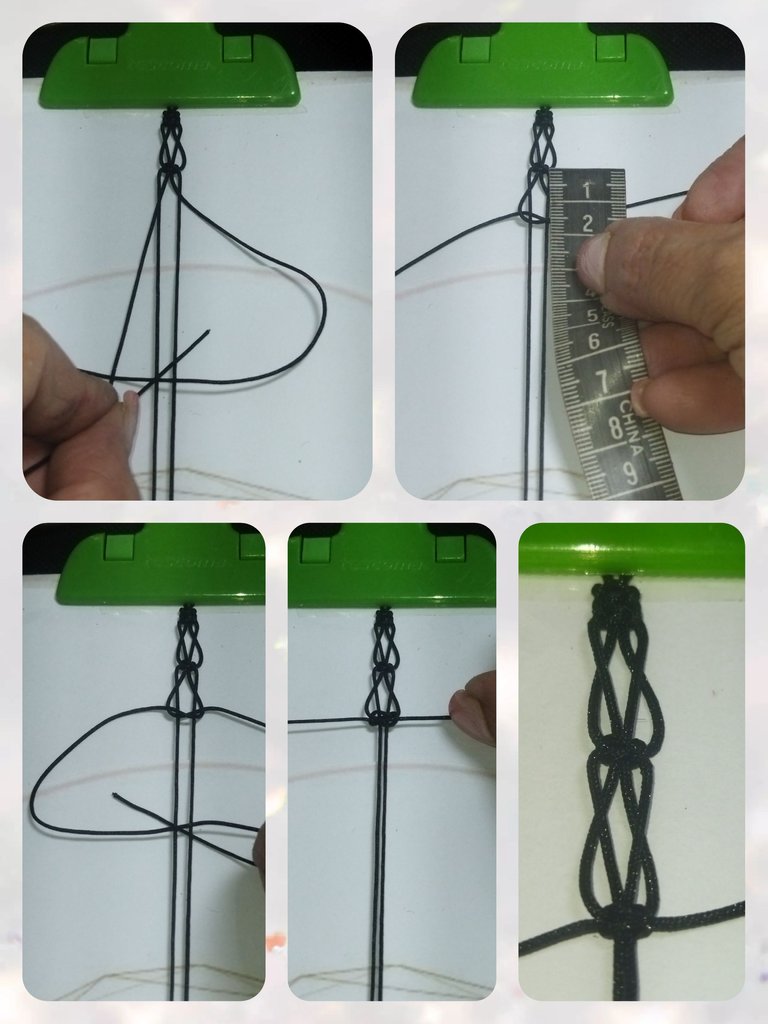
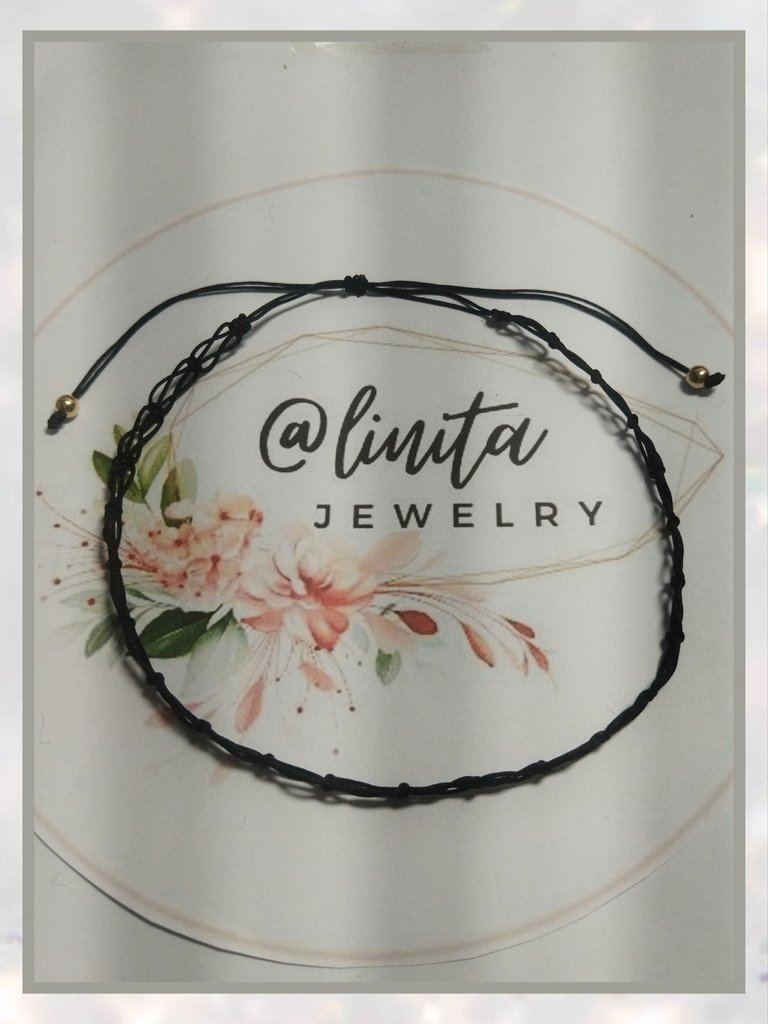
We continue the weaving by carrying out the previous steps until we reach 34 cm of fabric. As it is an adjustable choker, with this measurement we can show off a complete fabric on the neck.
Continuamos el tejido realizando los pasos anteriores hasta alcanzar 34 cm de tejido. Al ser un choker ajustable, con esta medida podemos lucir un tejido completo en el cuello.
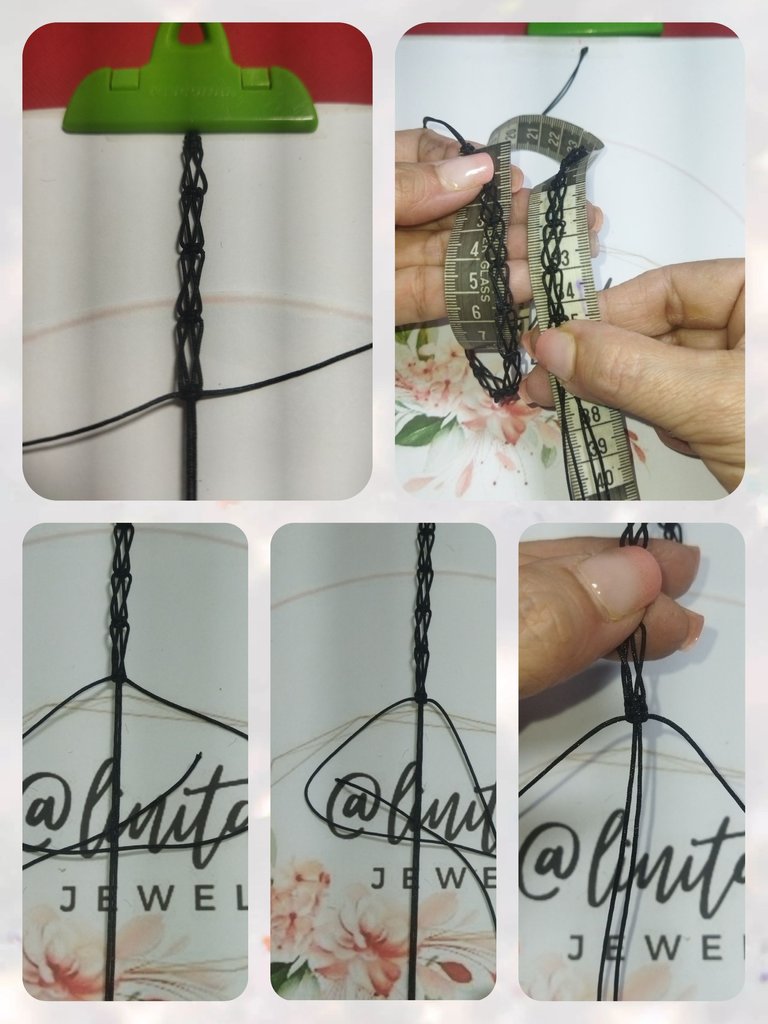
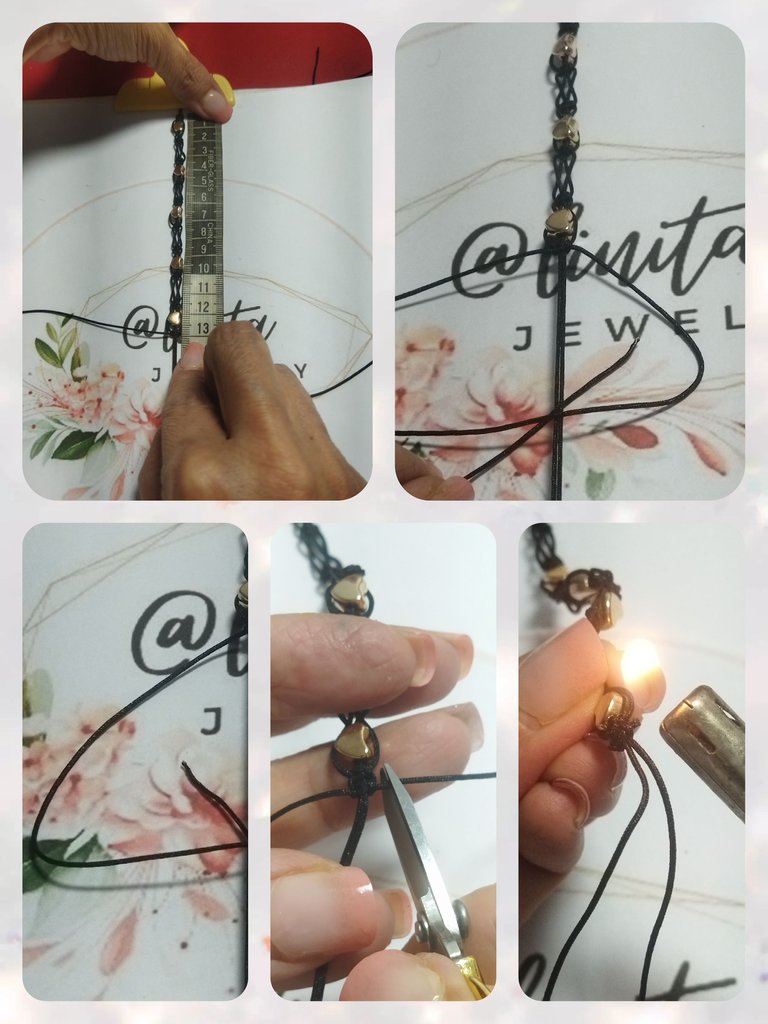
To finish the necklace, we make another complete flat knot to have two flat knots equal to the beginning of the necklace.
Para finalizar el acabado del collar, realizamos otro nudo plano completo para tener dos nudos planos igual al inicio del collar.
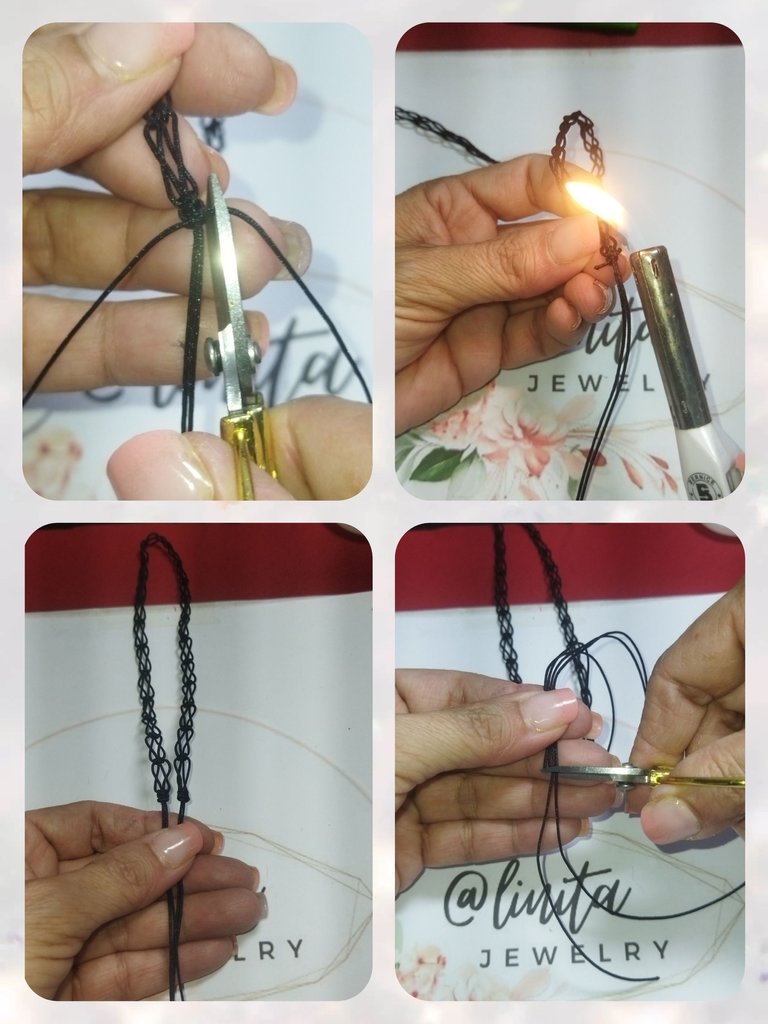
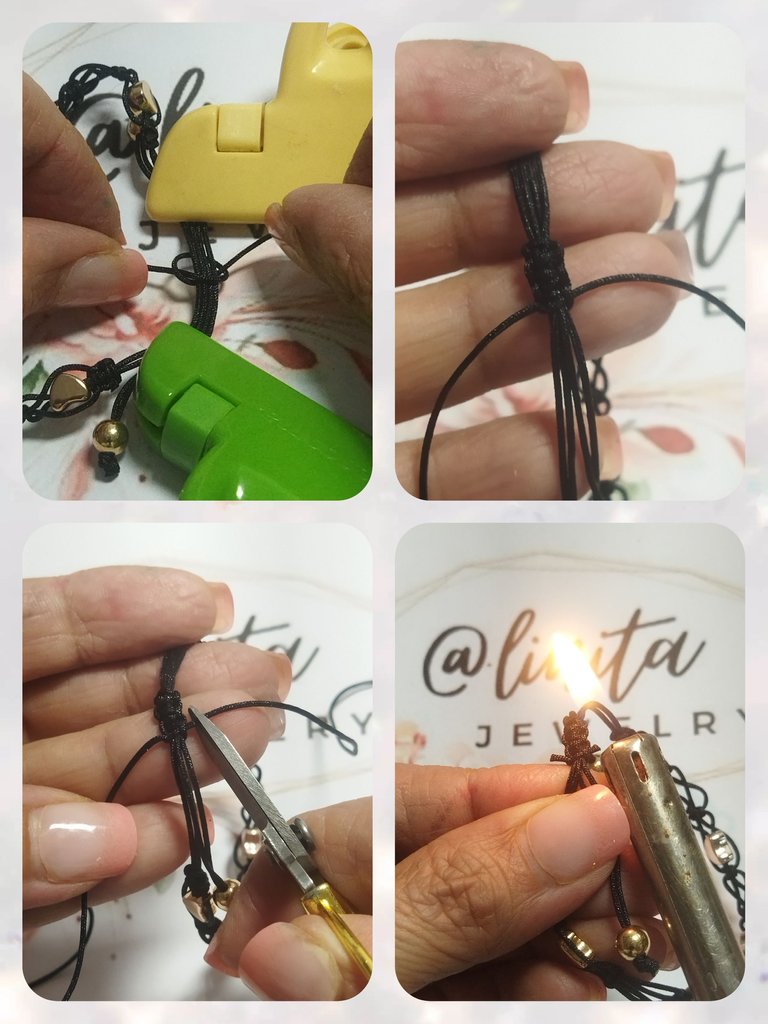
We cut the excess threads of the fabric, taking into account that we must preserve the two base threads.
We seal with the lighter.
Cortamos el exceso de los hilos del tejido, tomando en cuenta que debemos conservar los dos hilos base.
Sellamos con el encendedor.
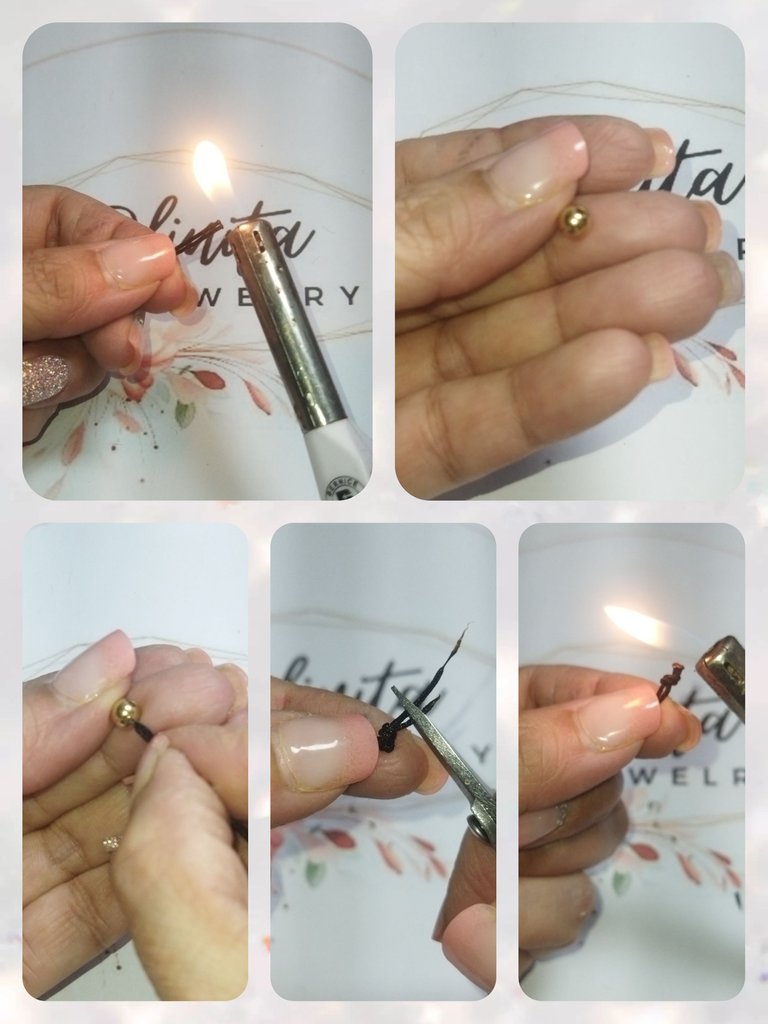
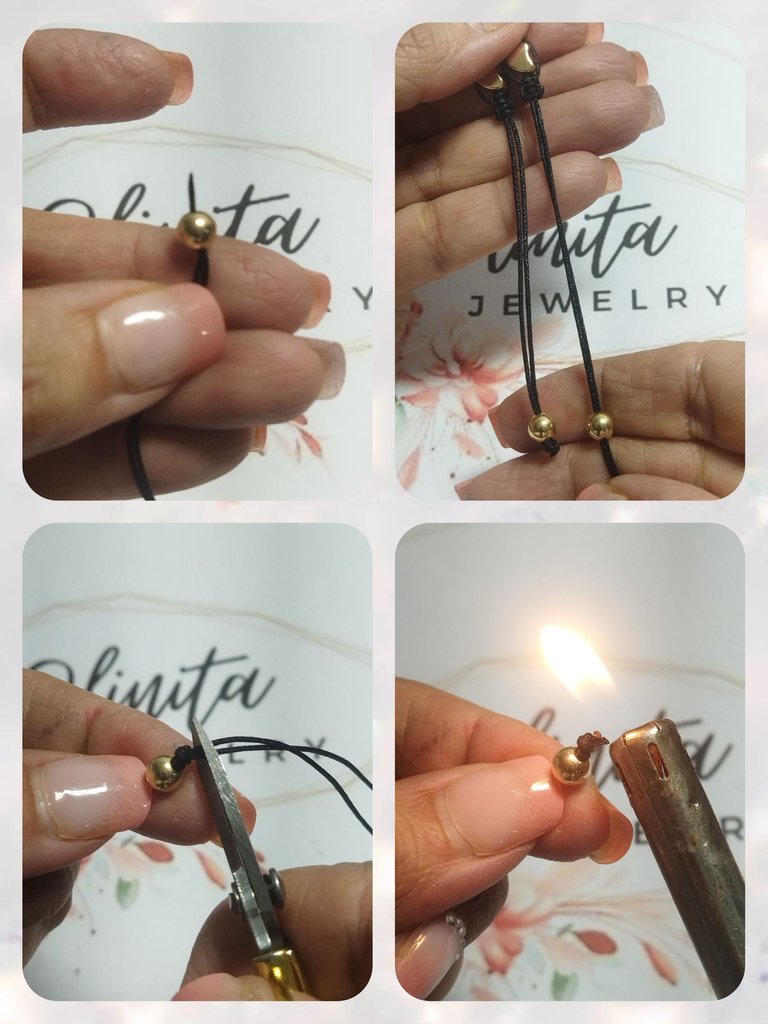
We make the needle point at the ends of the base threads, insert a 6 mm ball, take the measurement with the initial pendant and tie a knot. Cut the thread and seal.
Realizamos la punta aguja en los extremos de los hilos base, introducimos un balín de 6 mm, tomamos la medida con el colgante inicial y hacemos un nudo, Cortamos el hilo y sellamos.
To make the adjustable safety of the necklace, we take the 25 cm of Chinese thread and with the hooks we hold both pendants of the choker and make 3 complete flat knots. We cut the excess thread and seal.
Para realizar el seguro ajustable del collar, tomamos los 25 cm de hilo chino y con los ganchos sujetamos ambos colgantes del choker y realizamos 3 nudos planos completos. Cortamos el exceso de hilo y sellamos.
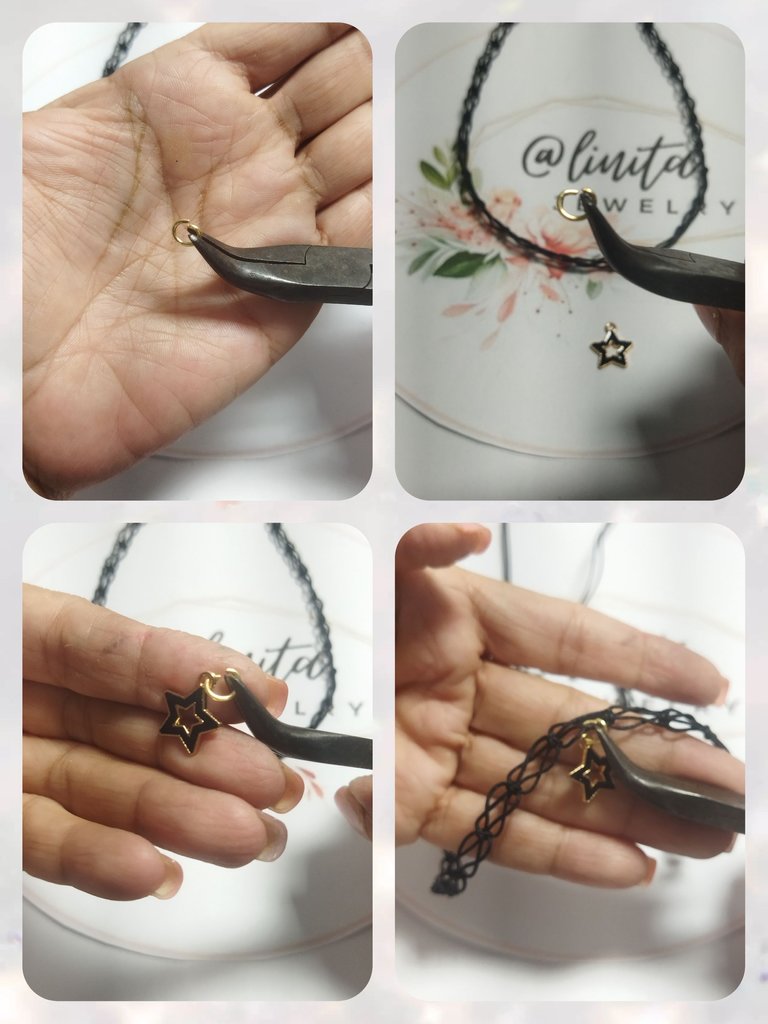
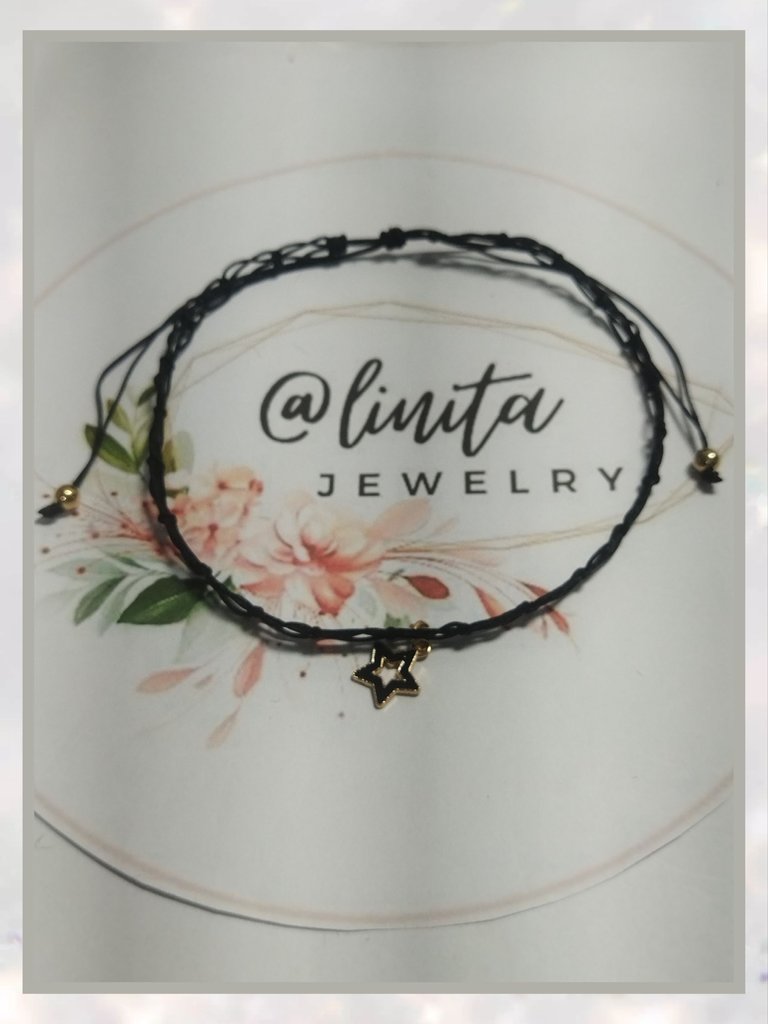
And to finish, we place the star pendant in a hoop and insert it into the central part of the choker.
Y para finalizar, colocamos el dije estrella en un aro y lo insertamos en en la parte central del choker.
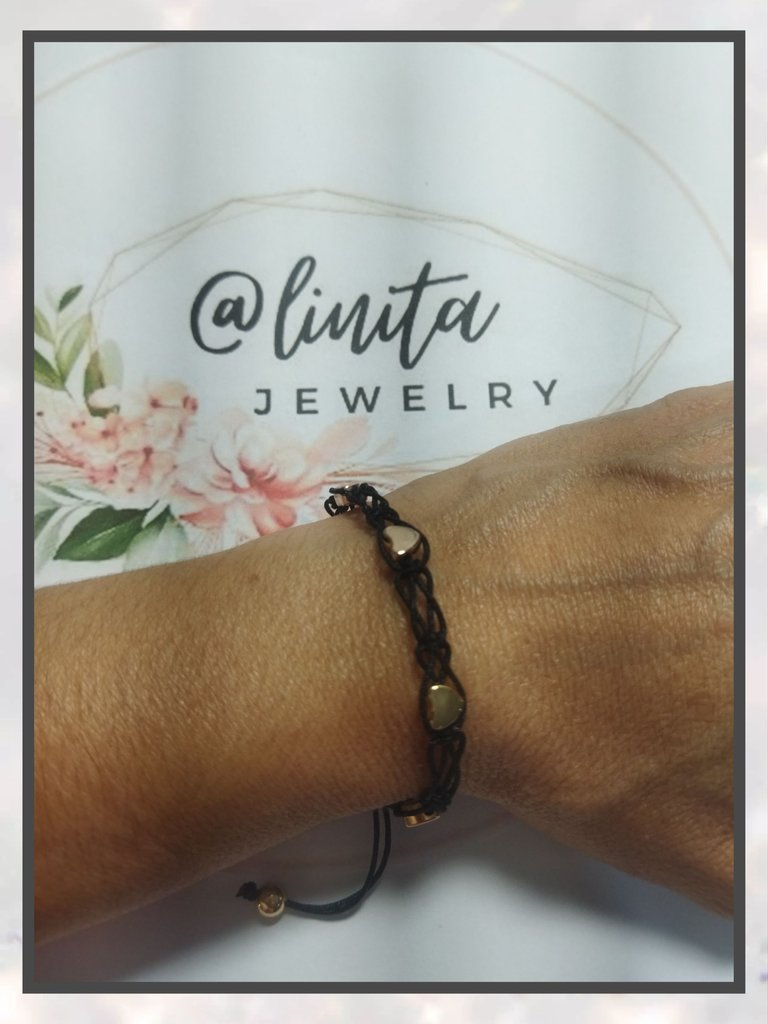
BRACELET
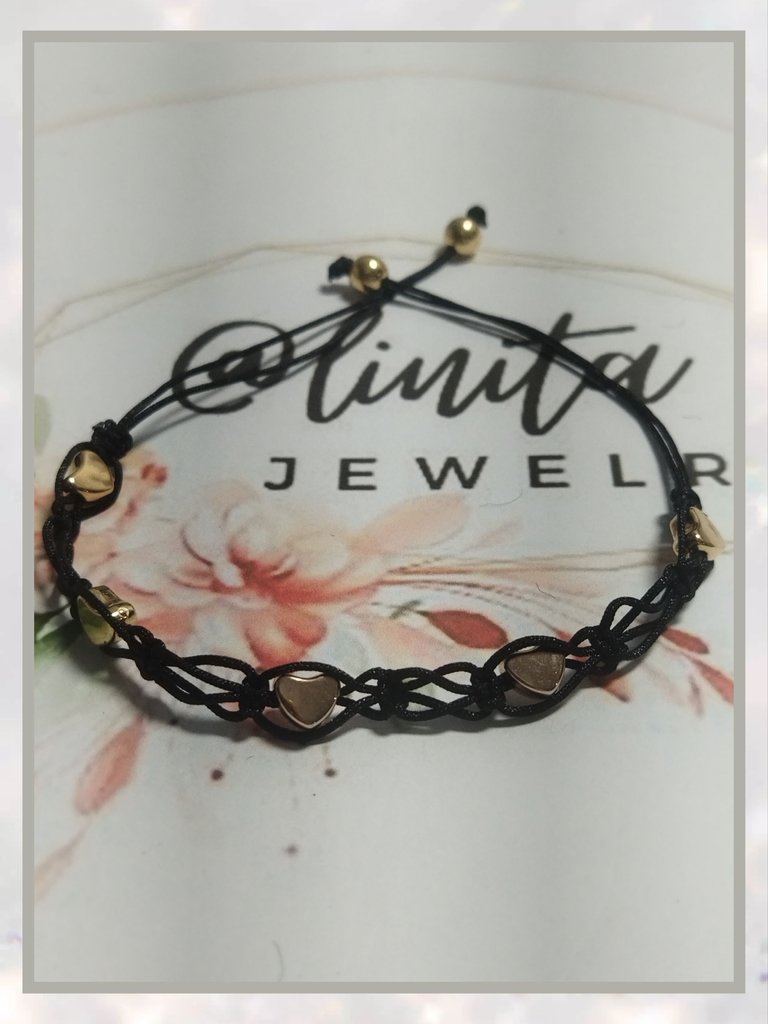
For the bracelet we are going to make the same fabric as the necklace but we will intersperse with steel hearts between the fabric.
We are going to use the following threads:
2 x 40cm
1 x 80cm
1 x 25cm
We begin by forming the needle tip, inserting a 6 mm ball, making a knot, cutting and sealing.
PULSERA
Para la pulsera vamos a realizar el mismo tejido del collar peri intercalaremos con corazones de acerina entre el tejido.
Vamos a utilizar los siguientes hilos:
2 x 40 cm
1 x 80 cm
1 x 25 cm
Con los dos hilos de 40 cm comenzamos formando la punta aguja en introducimos un balín de 6 mm, realizamos un nudo, cortamos y sellamos.
We measure 7 cm from the ball and attach it to the board. We take the 80 cm strand and fold it in half and place it under the base threads.
Medimos 7 cm a partir del balín y sujetamos a la tabla. Tomamos la hebra de 80 cm y doblamos a la mitad y la colocamos debajo de los hilos base.
We make 2 complete flat knots, in the same way as we made the necklace.
We loosen the base threads and make the needle point with the lighter and insert a heart of steel and place it close to the knots.
Realizamos 2 nudos planos completos, de la misma manera que realizamos el collar.
Soltamos los hilos base y realizamos la punta aguja con el encendedor e introducimos un corazón de acerina y lo colocamos pegado a los nudos.
We open the base threads in a reverse "V" shape and pass the fabric threads to the center. We secure with the hook and make a complete flat knot, close to the heart.
Abrimos los hilos base en forma de "V" inversa y pasamos al centro los hilos del tejido. Sujetamos con el gancho y realizamos un nudo plano completo, pegado al corazón.
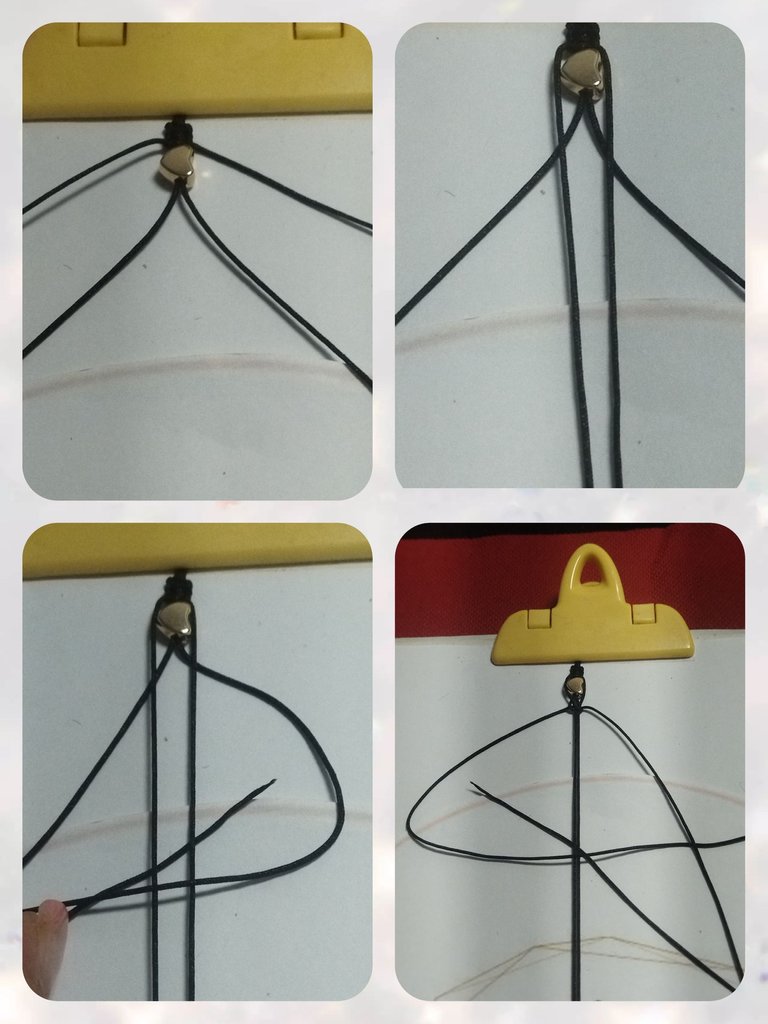
We release the base thread again and pass the fabric threads to the center. We hold with the hook.
We make a flat knot leaving 1 cm of distance from the previous knot and close with the next flat knot to complete.
Soltamos nuevamente el hilo base y pasamos al centro los hilos del tejido. Sujetamos con el gancho.
Realizamos un nudo plano dejando 1 cm de distancia a partir del nudo anterior y cerramos con el siguiente nudo plano para completar.
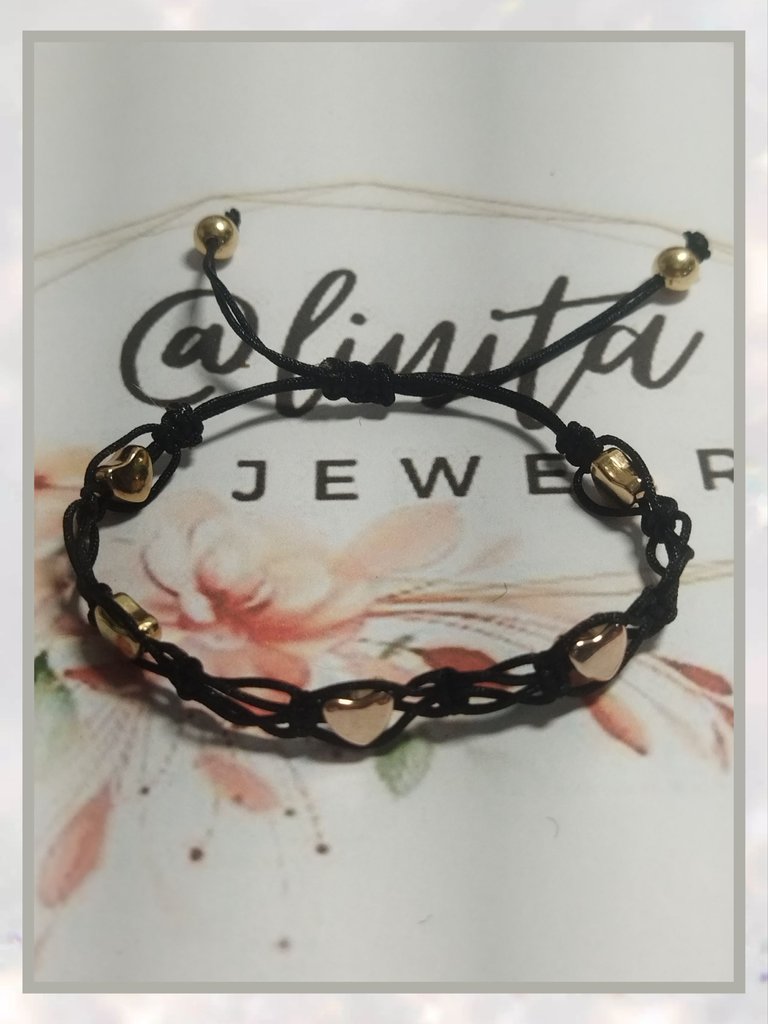
And so we form the fabric until we have 13 cm, taking into account that we are going to make a fabric with a heart and another without a heart. We finish with two complete flat knots. We cut the excess thread from the fabric and seal with the lighter.
Y así vamos formando el tejido hasta tener 13 cm, tomando en cuenta que vamos a realizar un tejido con corazón y otro sin corazón. Finalizamos con dos nudos planos completos. Cortamos el exceso del hilo del tejido y sellamos con el encendedor.
We place the 6 mm ball, measure with the thread at the other end, knot, cut off the excess and seal.
Colocamos el balín de 6 mm, medimos con el hilo del otro extremo, anudamos, cortamos el exceso y sellamos.
With the 25 cm thread we make the adjustable insurance, making 3 flat knots at the junction of the two ends of the bracelet. We cut off the excess and seal.
Con el hilo de 25 cm realizamos el seguro ajustable, realizando 3 nudos planos en la unión de los dos extremos de la pulsera. Cortamos el exceso y sellamos.
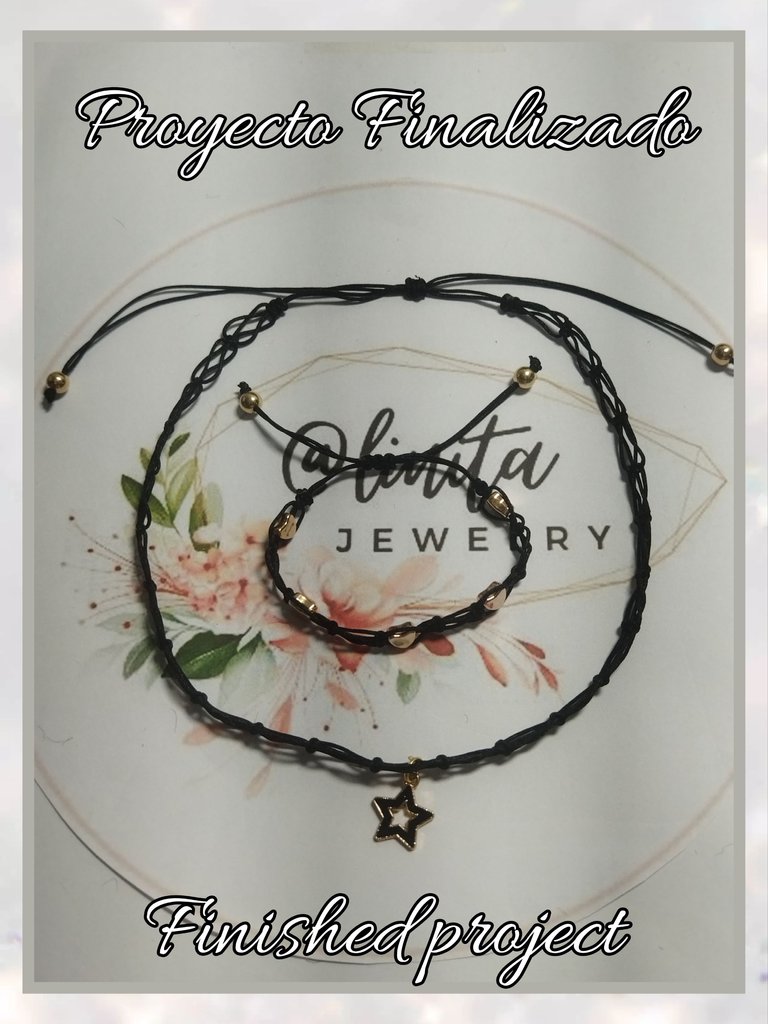
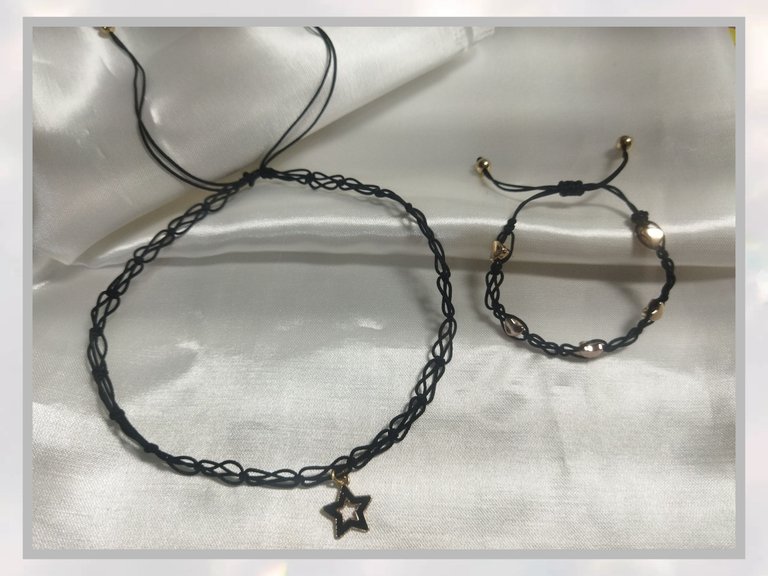
Thus we finished this project with a beautiful set of choker and bracelet made with the macramé technique, to wear with our casual outfit or on any occasion. I hope you like it. See you next time.
Así culminamos este proyecto con un lindo juego de choker y pulsera realizados con la técnica de macramé, para lucir con nuestro atuendo casual o en cualquier ocasión. Espero te guste. Nos vemos en la próxima.
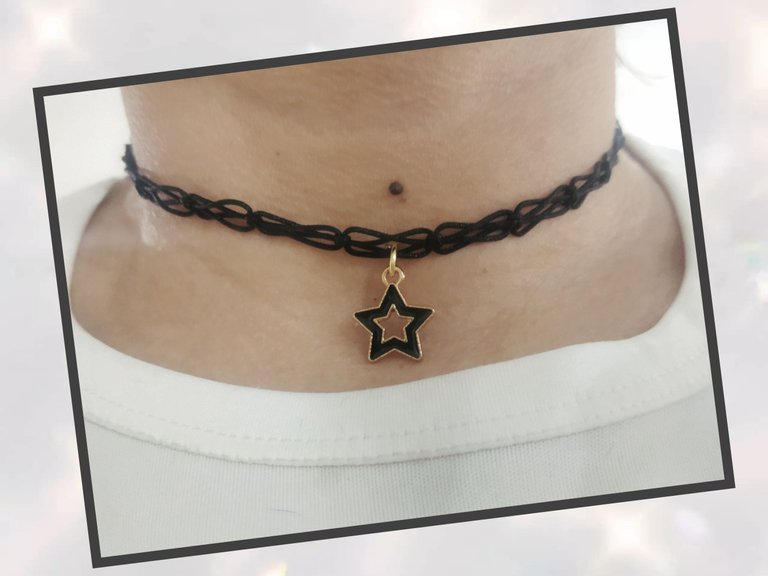
The choker necklace looks to perfectly fit here. Nice
Thank you 😊😊
Muy bonito trabajo , el tejido queso muy bien , te felicito.
Muchas gracias 😊
Simplemente hermoso . Excelente trabajo
Hola @linita, que lindo collar me encantó el tejido y el dije de estrella, un lindo accesorio para lucir bella.
Bendiciones!
Holaaaaa, me alegro que te haya gustado. Gracias por visitar mi contenido. Saludos.