WELCOME TO MY BLOG
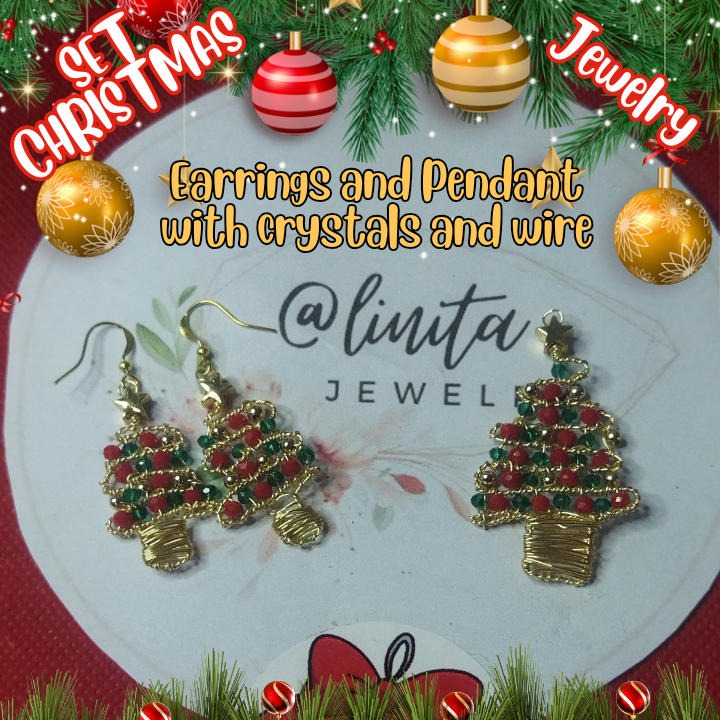
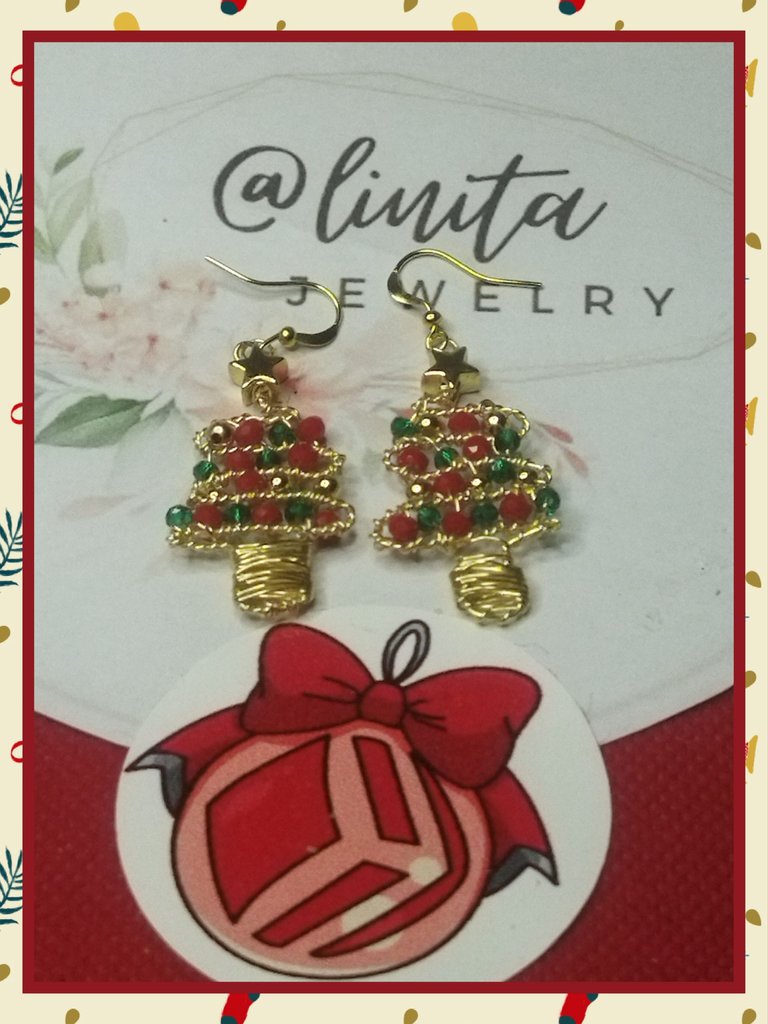
Hellooooo, hellooooooo! Greetings and my respects to the jewelry creators. Christmas is approaching and the ideal occasion to make an accessory representative of the season. Christmas is the time of year that I like the most and I couldn't miss the opportunity to commemorate this date in Jewelry and give everyone this step by step.
A few days ago my daughter @agathalara sent me some photos of some earrings that she saw online and she loved them, of course they are industrially manufactured accessories but I liked them so much that I wanted to make a replica but with my touch of wire and crystals. I'm also going to tell you how I did the winding manually. I hope you like it. Without further ado, let's get started.
BIENVENIDOS A MI BLOG
¡Holaaaa, holaaaaa! Saludos y mis respetos a los creadores de bisutería. Ya se acerca la Navidad y la ocasión ideal para realizar un accesorio representativo a la época. La Navida es lda época del año que más me gusta y no podía dejar pasar la oportunidad para conmemorar esta fecha en Jewelry y regalarles a todos este paso a paso.
Hace unos días mi hija @agathalara me envió unas fotos de unos aretes que vio por las redes y le encantaron, claro que son accesorios de fabricación industrial pero que me gustaron tanto que quise realizar una réplica pero con mi toque en alambrismo y cristales. También te voy a contar cómo realicé el entorchado de forma manual. Espero les guste. Sin más, comencemos.
MATERIALS
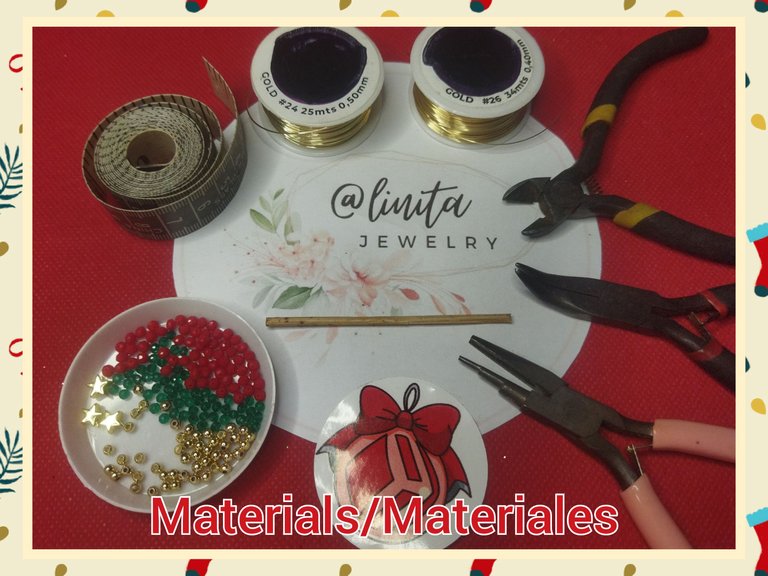
- Wires #24 and #26
- Star barrettes
- 2 mm red crystals (rondels)
- 2 mm green crystals (rondels)
- 2 mm pellets
- Chopstick
- Jewelry tweezers (cutting, flat, curved, conical)
- Measuring tape
MATERIALES
- Alambres #24 y #26
- Pasadores de estrellas
- Cristales (rondeles)rojos de 2 mm
- Cristales (rondeles)verdes de 2 mm
- Balines de 2 mm
- Palillo
- Pinzas de bisutería (corte, plana, curva, cónica)
- Cinta métrica
STEP BY STEP // PASO A PASO
WIRE WINDING
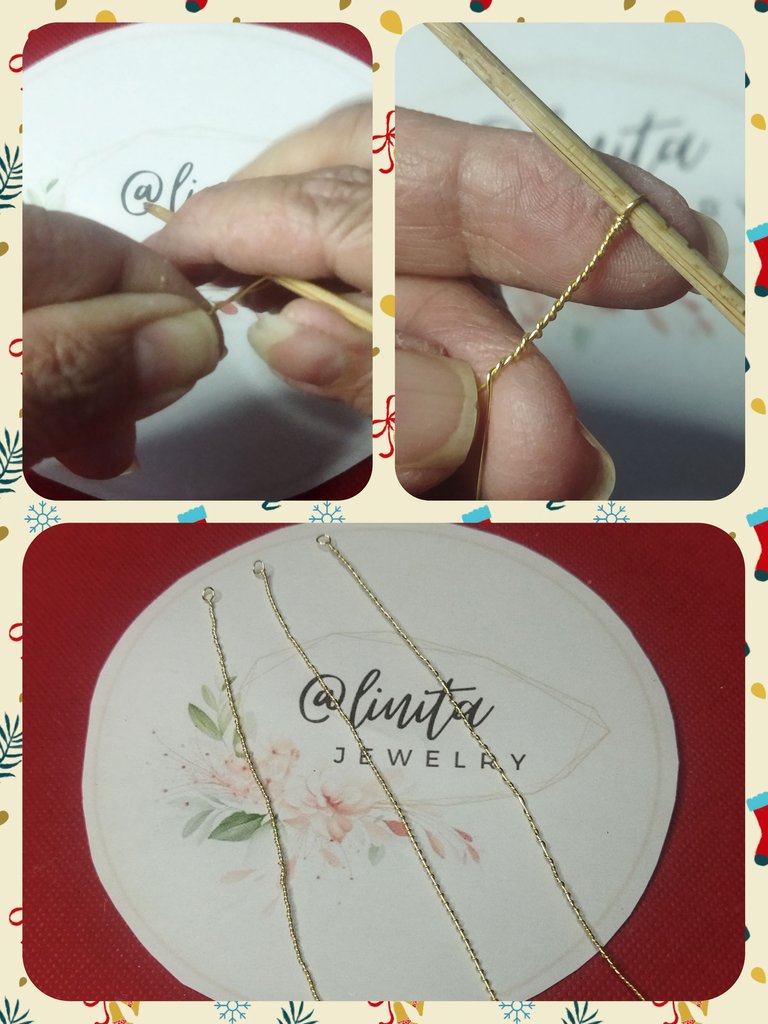
To make the base of the earrings and the pendant we are going to twist 2 pieces of #24 wire of 40 cm and 1 of 50 cm. We take one of the pieces and fold it in half. We place the toothpick in the bend, cross the wire on the toothpick and begin to twist until the end.
ENTORCHADO DE ALAMBRE
Para realizar la base de los aretes y el dije vamos a entorchar 2 trozos de alambre #24 de 40 cm y 1 de 50 cm. Tomamos uno de los trozos y lo doblamos a la mitad. Colocamos el palillo en el doblez, cruzamos el alambre en el palillo y comenzamos a girar hasta el final.
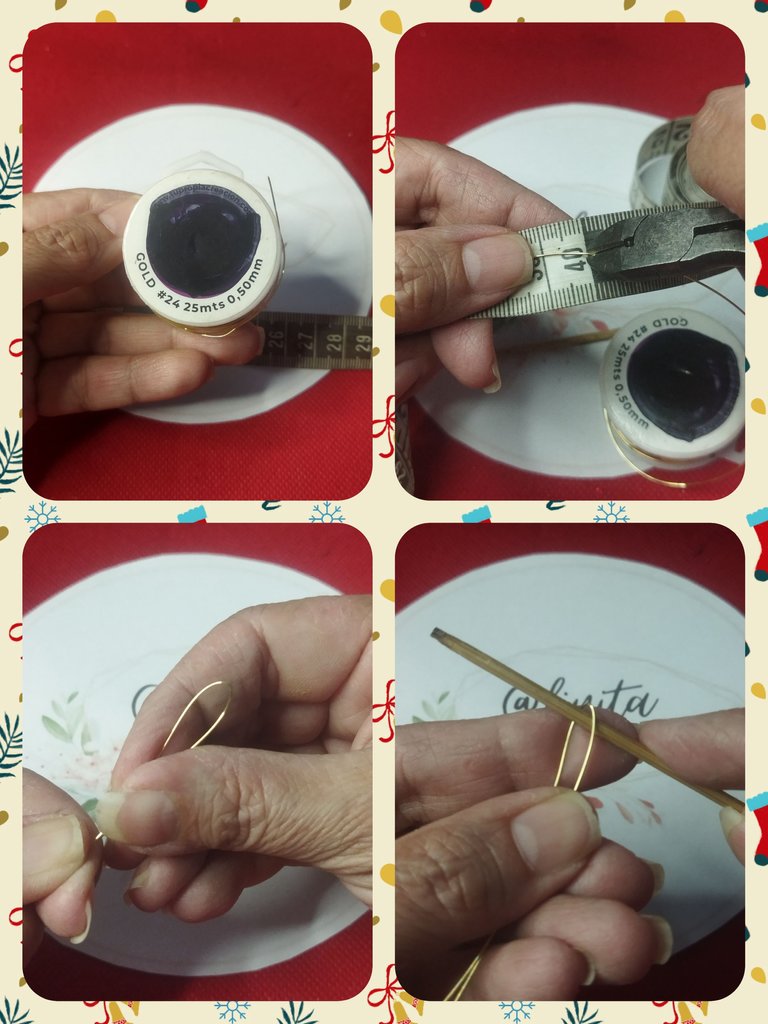
The toothpick allows us to make the twists for the winding and at the same time we make the ring for the pendant. We repeat the process with the two remaining wires.
El palillo nos permite realizar los giros para el entorchado y a la vez realizamos la argolla para el colgante. Repetimos el proceso con los dos alambres restantes.
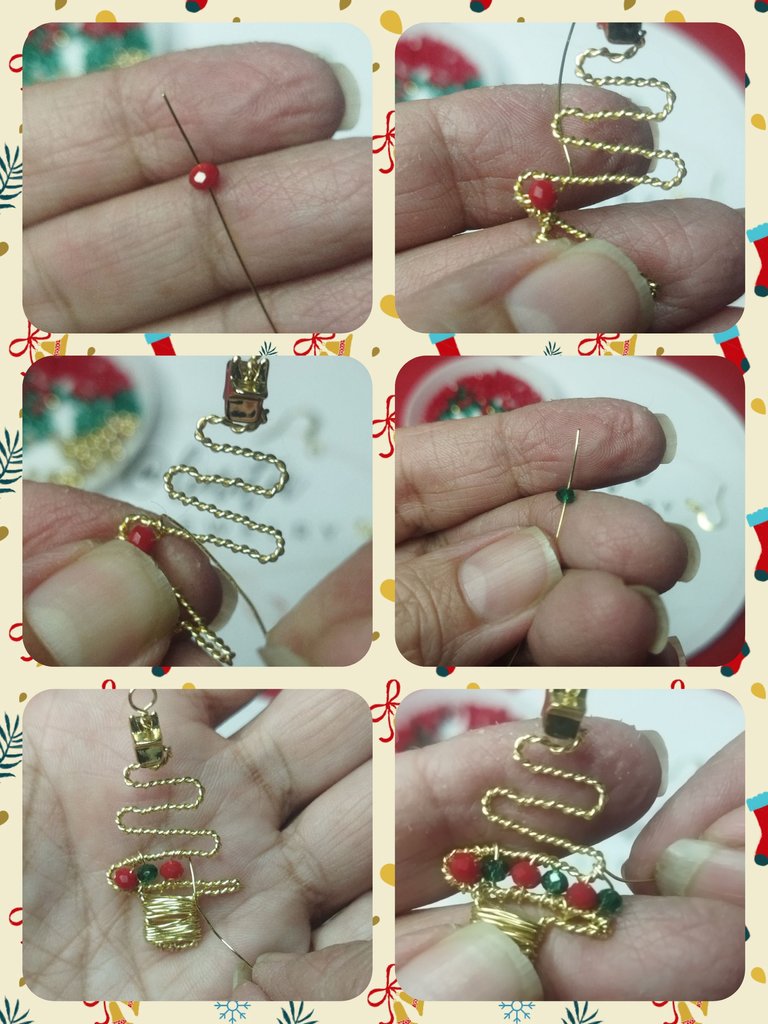
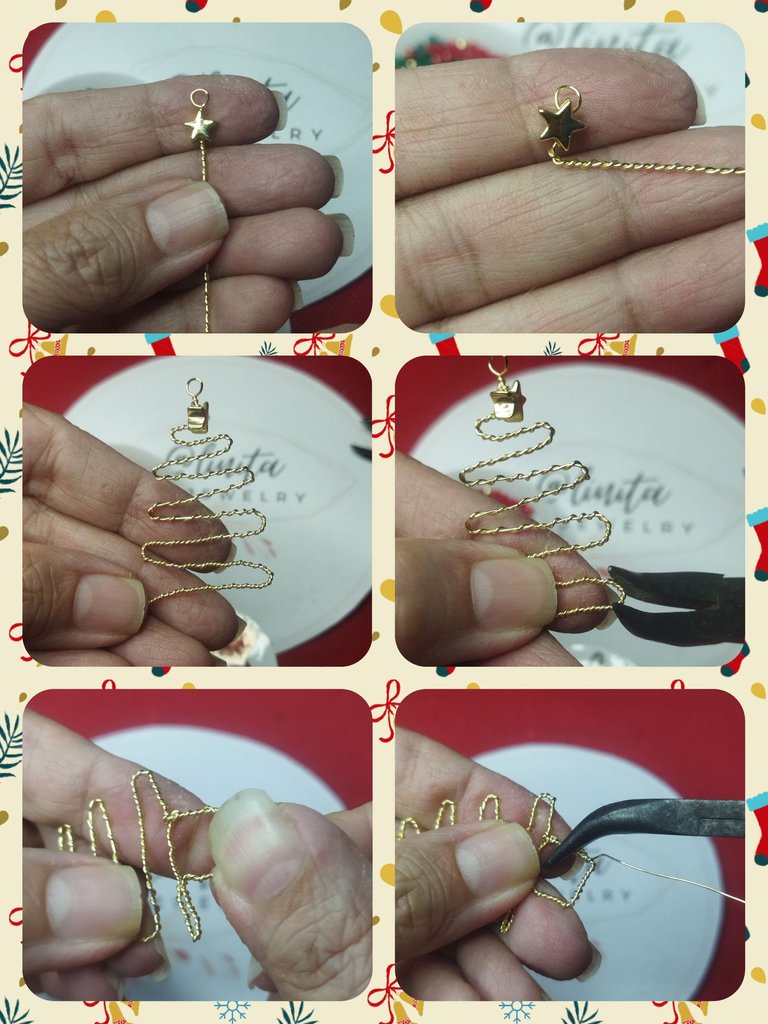
Now with our twisted wire we begin to make the base of our earrings. We begin by inserting a star pin into one of the 40 cm wires.
Ya con nuestro alambre entorchado comenzamos a hacer la base de nuestros aretes. Comenzamos introduciendo en uno de los alambres de 40 cm un pasador de estrella.
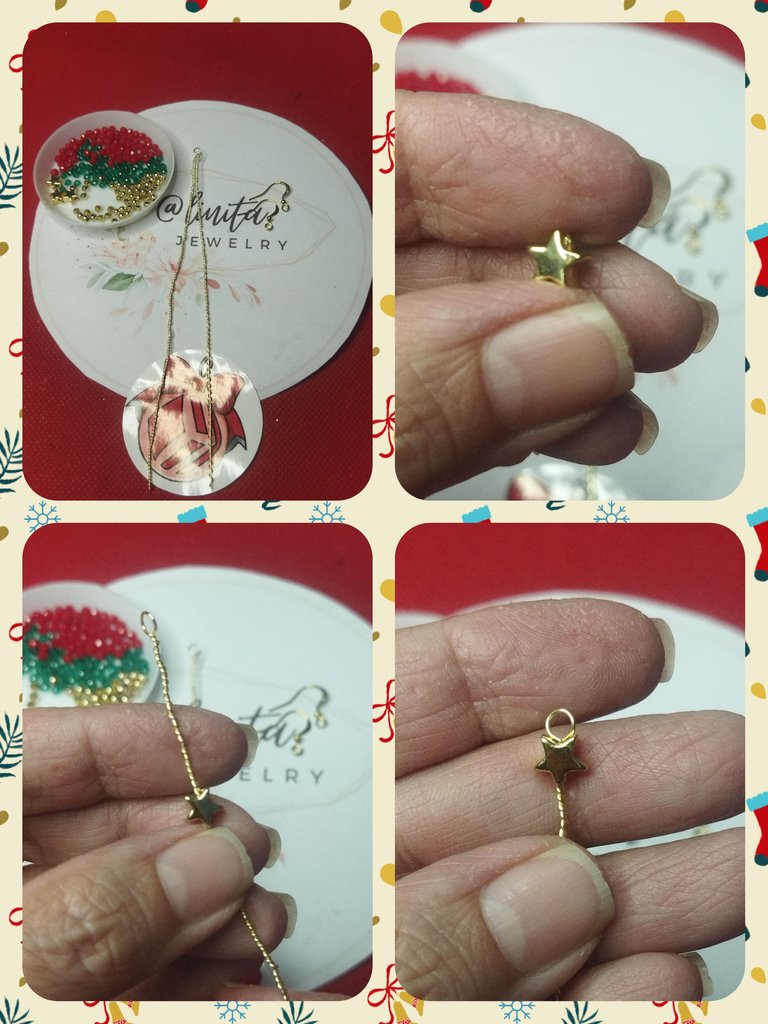
Then we are going to make the silhouette of a Christmas tree. We place the cutting pliers under the star that must be well attached to the ring, we make a 90º bend. We take the conical clamp and make the folds and give the shape of the tree. We will make 6 folds.
Luego vamos a realizar la silueta de un árbol de navidad. Colocamos la pinza de corte debajo de la estrella que debe estar bien pegada del aro, hacemos un doblez de 90º. Tomamos la pinza cónica y realizamos los dobleces y vamos dando la forma del árbol. Haremos 6 dobleces.

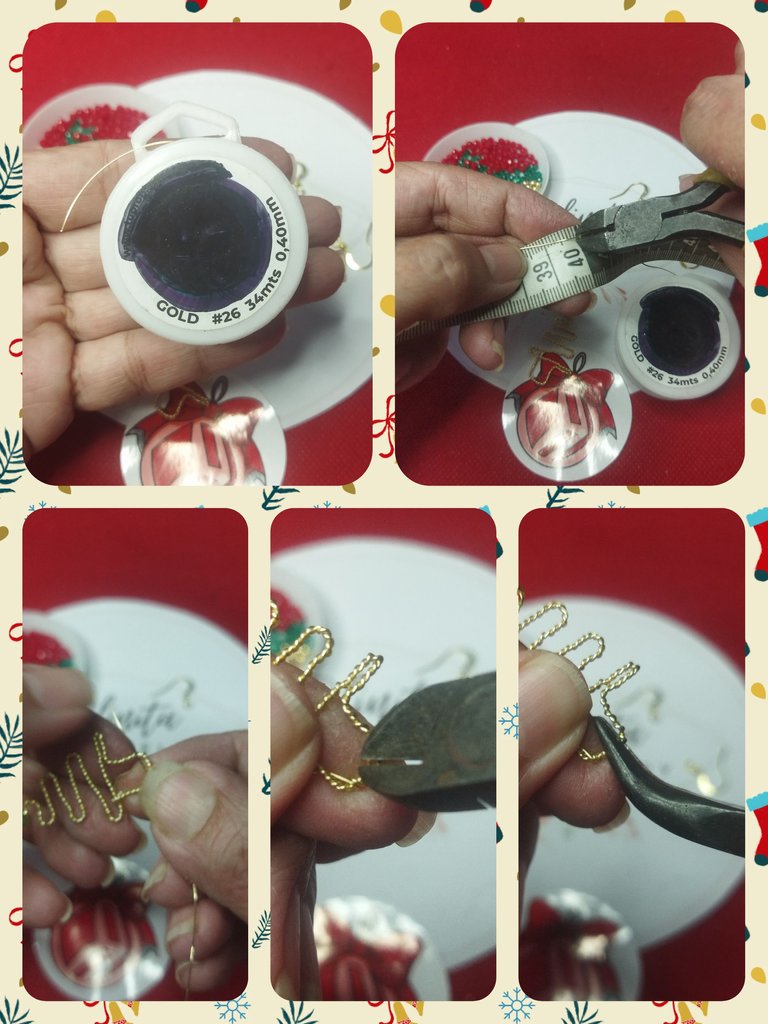
In the last bend we join the two wires with the flat clamp. To make the base of the tree we make a rectangle trying to make it as centered as possible. We cut the excess wire and polish it with the flat tweezers.
En el último doblez unimos los dos alambres con la pinza plana. Para realizar la base del árbol realizamos un rectángulo tratando que quede los más centrado posible. Cortamos el sobrante de alambre y pulimos con la pinza plana.

DECORATION
To decorate the tree we are going to use #26 wire, 2 mm red and green crystals and 2 mm pellets. We cut 40 cm of wire or more. We wound at the base of the tree. We cut and polish the excess.
DECORACIÓN
Para realizar la decoración del árbol vamos a utilizar alambre #26, los cristales de 2 mm rojos y verdes y los balines de 2 mm. Cortamos 40 cm de alambre o más. Entorchamos en la base del árbol. Cortamos y pulimos el sobrante.
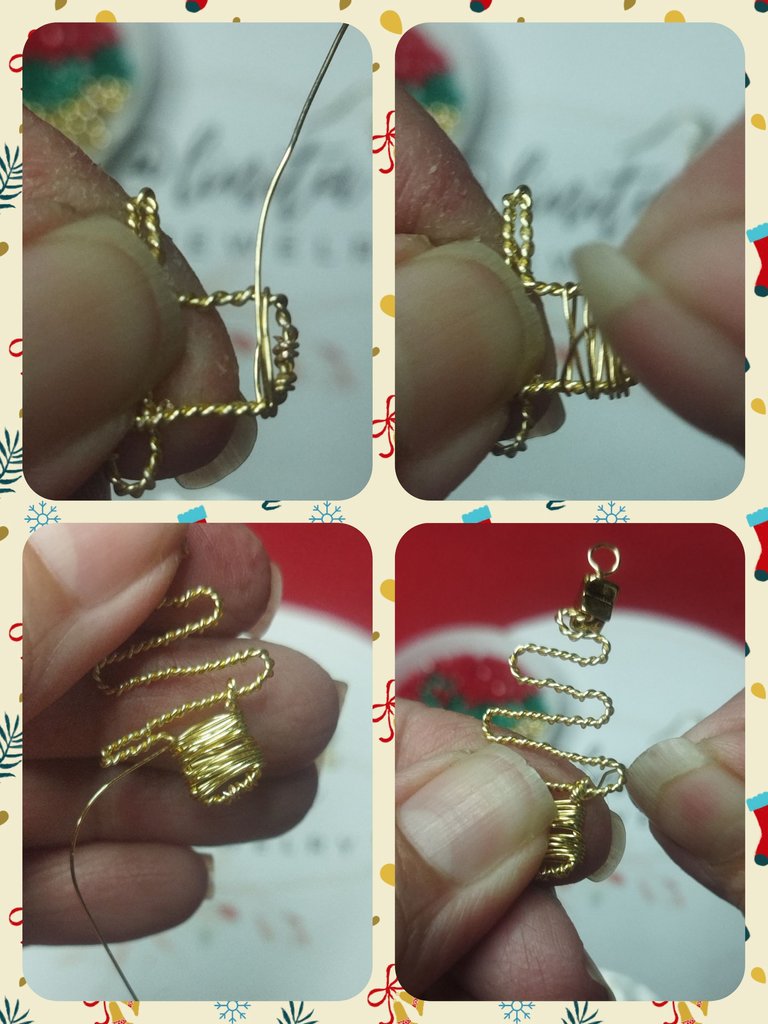
We fill the base of the tree with the wire and when we reach the base we twist it and take it to the arch to begin inserting the crystals.
Rellenamos la base del árbol con el alambre y al llegar a la base entorchamos hacer llevarlo al arco para comenzar a introducir los cristales.
We take a red crystal with the wire and place it in the space between the shape of the tree and make two twists on the top. We introduce a green crystal and twist it at the base and continue alternating between red and green crystals until the line is completed.
We twist until we locate the wire at the base of the next turn.
Tomamos con el alambre un cristal rojo y lo colocamos en el espacio que hay entre la forma del árbol y realizamos dos giros de entorchado en la parte superior. Introducimos un cristal verde y lo entorchamos en la base y seguimos alternando entre cristales rojos y verdes hasta completar la línea.
Entorchamos hasta ubicar el alambre en la base de la siguiente vuelta.
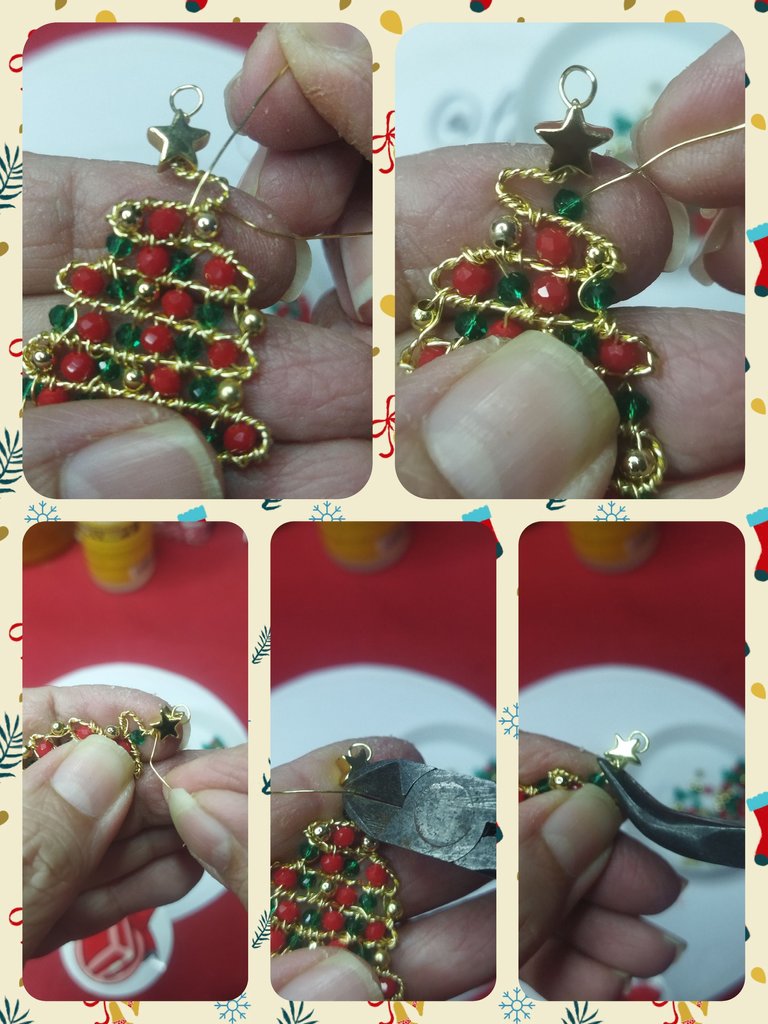
In this round we are going to alternate with pellets and crystals. We place a ball attached to the bow and wound it. We continue with a red crystal, then another pellet, a green crystal and we finish with a pellet.
En esta vuelta vamos a alternar con balines y cristales. Ubicamos un balín pegado del arco y entorchamos. Continuamos con un cristal rojo, luego otro balín, un cristal verde y finalizamos con un balín.
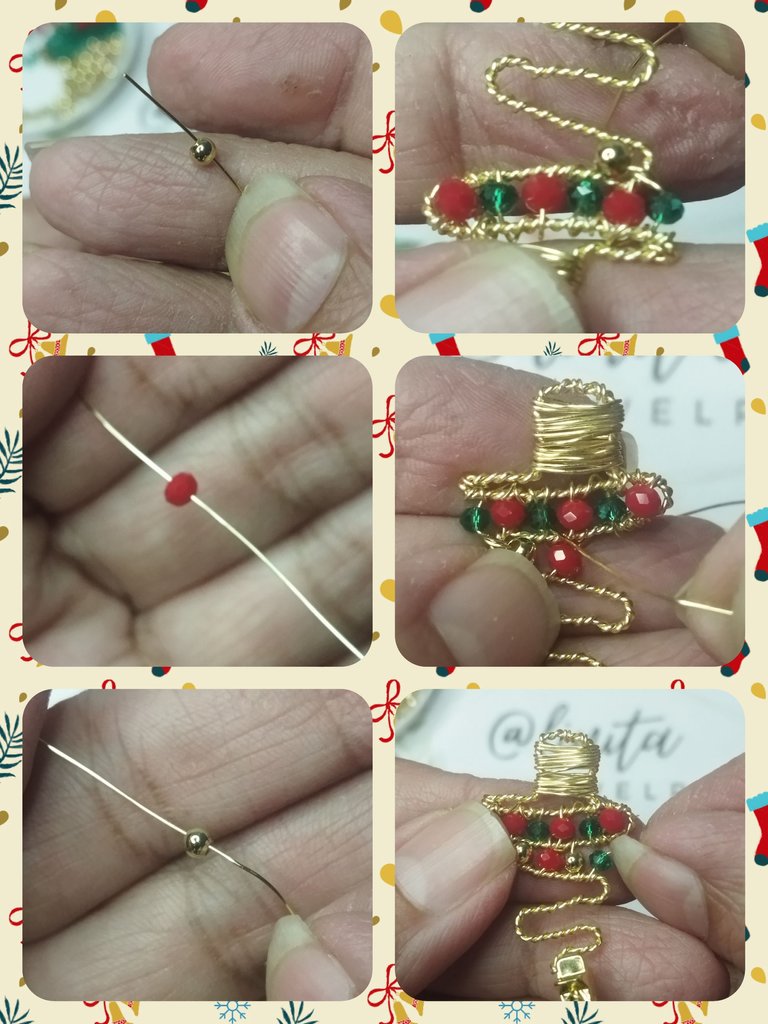
We continue the same procedure in each of the rounds of the tree, alternating with crystals in one and the next round with crystals and pellets.
At the end of the last round we are going to make a few turns with the wire at the base of the star to fix it and prevent it from moving. We cut and polish.
Continuamos el mismo procedimiento en cada una de las vueltas del árbol alternando con cristales en una y el la siguiente vuelta con cristales y balines.
Al finalizar la última vuelta vamos a realizar unos giros con el alambre en la base de la estrella para fijarla y evitar que se mueva. Cortamos y pulimos.
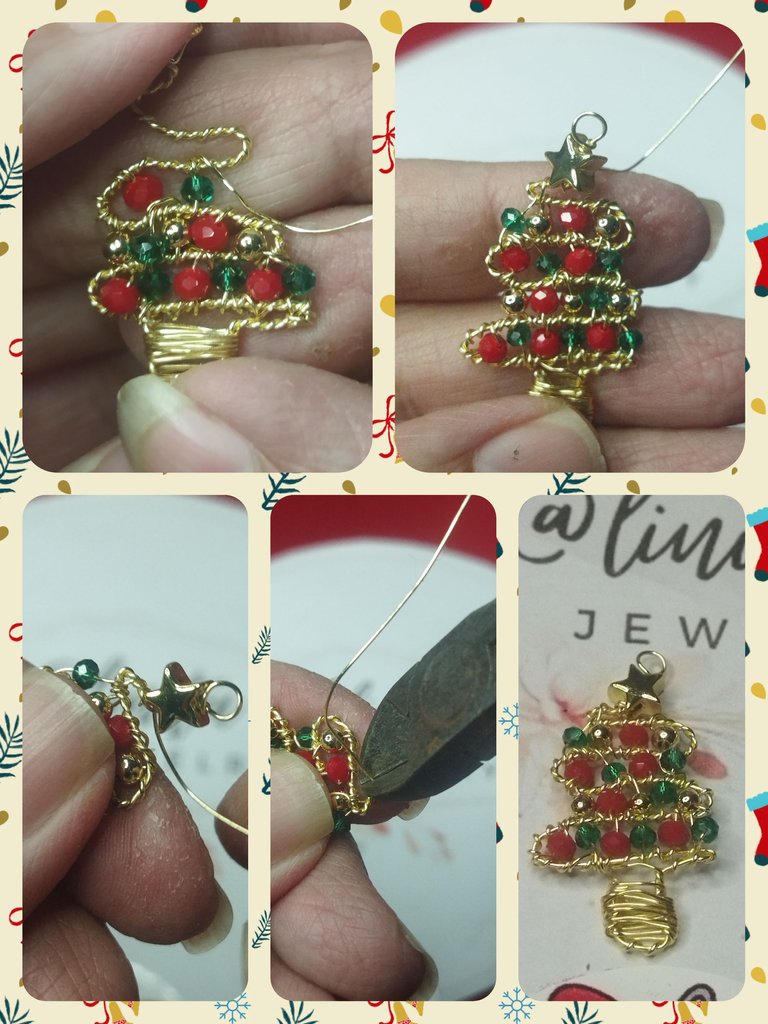
With the tree ready, we take the earring hook, open it with the tweezers and place the tree.
Ya con el árbol listo, tomamos el anzuelo para aretes abrimos con la pinza y colocamos el arbolito.
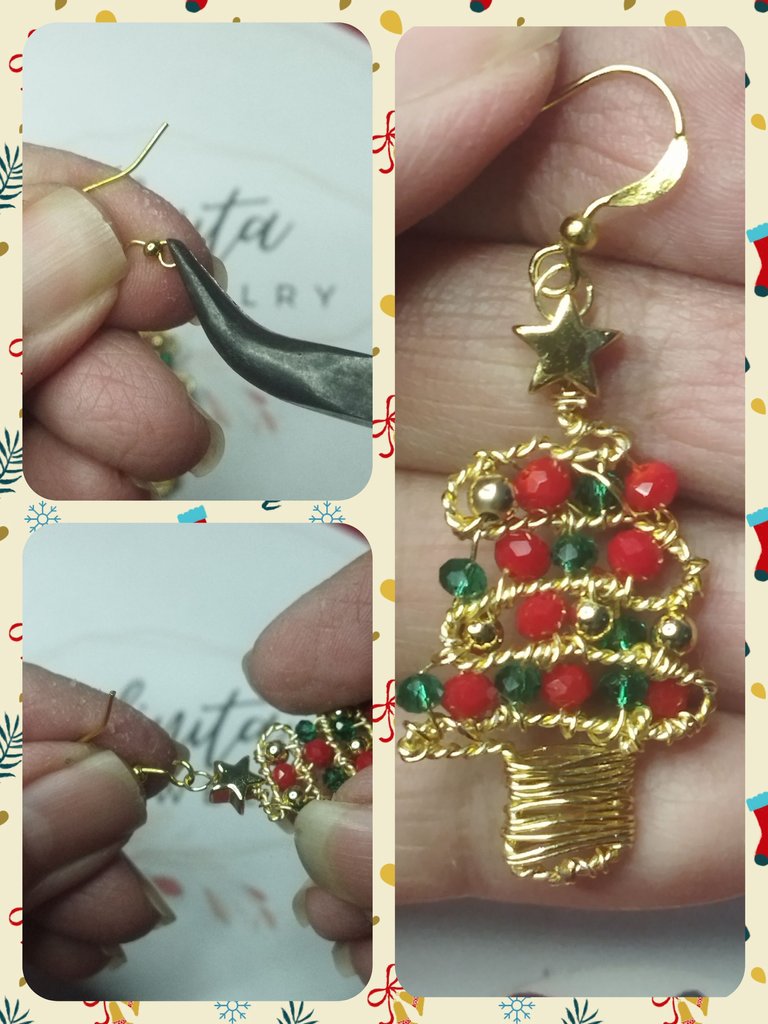
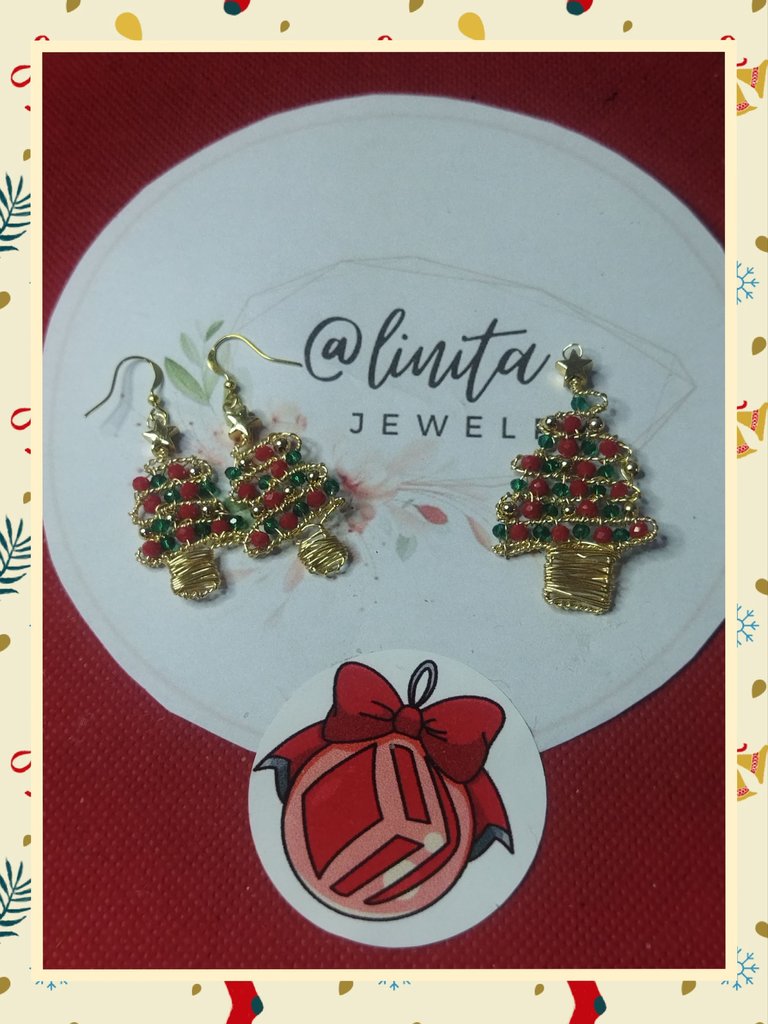
We made the second earring and we already formed our Christmas pair.
Realizamos el segundo arete y ya formamos nuestro par navideño.
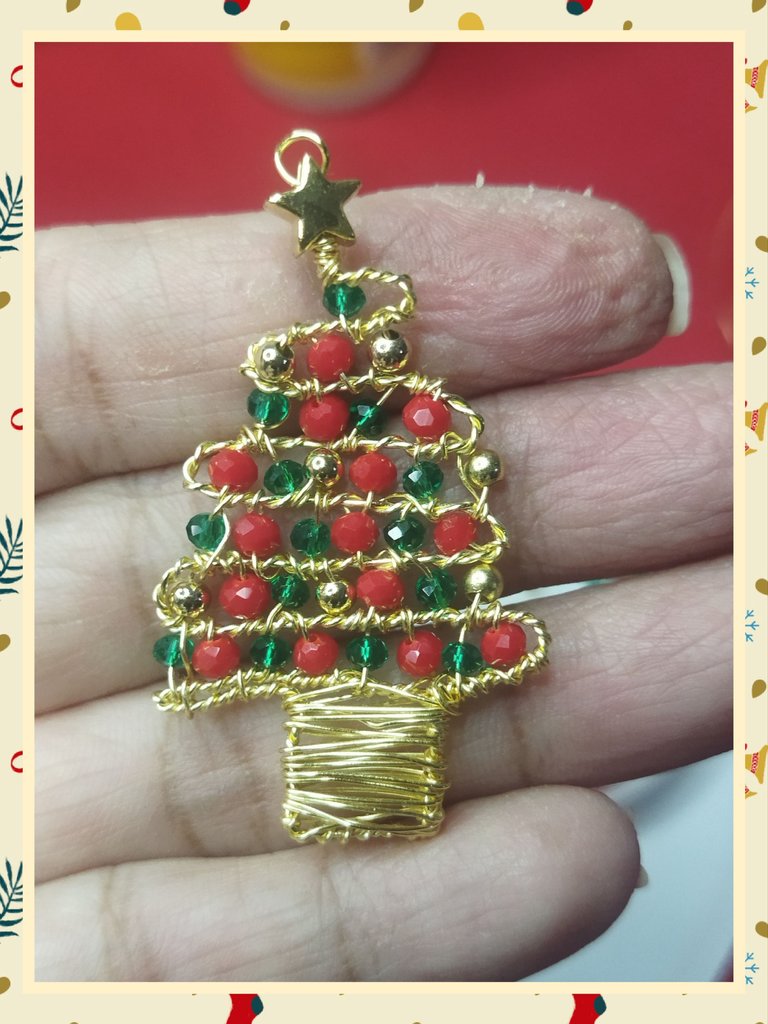
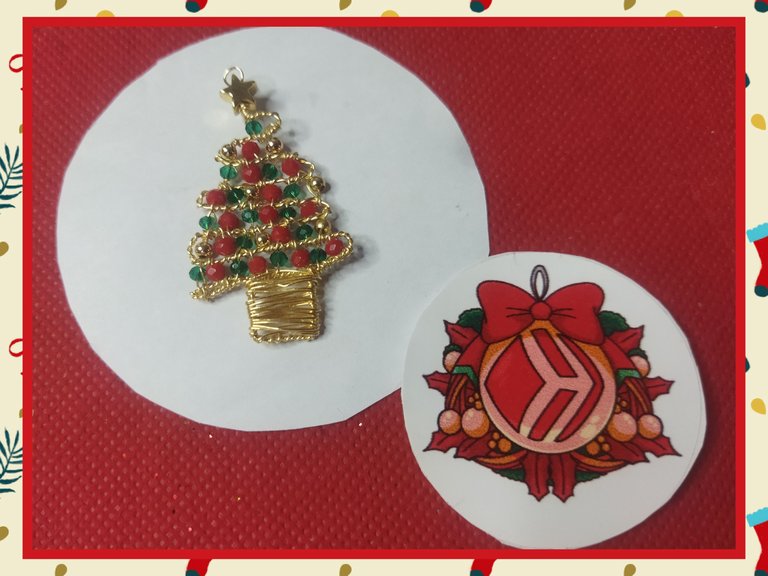
CHRISTMAS PENDANT
To make the pendant we will repeat the arts procedure with the difference that the base of the pendant will be larger than the base of the earrings. For this one we are going to use the 50 cm wire that we have twisted previously.
We make 8 turns with the wire to then make the base of the tree. We cut off the excess and polish with the flat tweezers.
DIJE NAVIDEÑO
Para realizar el dije repetiremos el procedimiento de los artes con la diferencia que la base del dije será más grande que el de los aretes. Para éste vamos a utilizar el alambre de 50 cm que hemos entorchado anteriormente.
Realizamos 8 giros con el alambre para luego realizar la base del árbol. Cortamos el exceso y pulimos con la pinza plana.
With the #26 wire and the red and green crystals, we fill the tree in the same way as the earrings using the amount of crystals and beads corresponding to the filling of each round.
Con el alambre #26 y los cristales rojos y verdes, rellenamos el árbol de la misma manera que los aretes utilizando la cantidad de cristales y balines correspondientes al relleno de cada vuelta.

When we reach the last turn of the tree, we finish with a green crystal and make 5 turns under the star. We cut the wire and polish.
Al llegar a la última vuelta del árbol, finalizamos con un cristal verde y realizamos 5 giros debajo de la estrella, Cortamos el alambre y pulimos.
PROJECT COMPLETED
I loved this Christmas set. Christmas definitely moves a sensitive part of me. Every thing he makes is loaded with feelings. This is a sample of it. I hope you like it. Greetings. See you next time.
I take this opportunity to thank @lqch for the Christmas stickers he gave us from the Caracas Blockchain Week event
PROYECTO FINALIZADO
Me encantó este set navideño. Definitivamente la navidad mueve una parte de sensible de mi. Cada cosa que elabora está cargada de sentimientos. Esto es una muestra de ello. Espero te guste. Saludos. Nos vemos en la próxima.
Aprovecho la ocasión para agradecerle a @lqch por los stickers navideños que nos obsequió del evento Caracas Blockchain Week

 o.
o.
Sin palabras 😍 me quedé anonadada con tanta belleza.
Me encantaron estos zarcillos navideños 🎄 como siempre el paso a paso impecable y muy comprensible. Felicidades 🎉 el resultado es espectacular 👏😊👏
😂😂😂 tan graciosa. Me alegro que te haya gustado 😊
🤣🤣🤣🤣
Waooo te quedaron espectaculares amiga te felicito el paso a paso impecable gracias por compartir feliz tarde.
Muchas gracias, me alegro que te haya gustado. Feliz tarde para ti también.
Fue un placer visitarte y gracias a ti por compartir ese hermoso tutorial saludos y bendiciones.
Que belleza amiga, te felicito, buen trecho y delicado, saludos.
Muchas gracias, hecho con mucho cariño. Saludos.
Demasiado bellos @linita. Espléndidos..
Gracias chama. Especialmente para todos los integrantes de #jewelry
It is stylish, elegant and beautiful. Love its design and color combination that looks charming. Well done!
Thank you very much, all the accessories made of wire are beautiful. I'm glad you liked it.
Hermosos amiga gracias por compartir el tutorial ☺️ saludos
Un placer compartir mi trabajo con gente que lo aprecian. Gracias por comentar. Saludos.
Esos aretes en forma de arbolito me encantan, me encanta el alambrismo!
Gracias, a mí también me encanta el alambrismo. Me alegro que te guste. Saludos.
Congratulations @linita! You have completed the following achievement on the Hive blockchain And have been rewarded with New badge(s)
Your next target is to reach 1000 comments.
You can view your badges on your board and compare yourself to others in the Ranking
If you no longer want to receive notifications, reply to this comment with the word
STOPTo support your work, I also upvoted your post!
Check out our last posts:
@linita Me enamoré 😻, hermosos ! Felicidades 💐, excelente set para navidad 😊.
No creo que tengan algo que envidiarles a los aretes que inspiraron, están realmente hermosos, no sé por qué, pero te imagino haciéndolos con una gran sonrisa ajjaja, te envío un saludo.
Jajajajajaja podría decirte que cuando comencé tenia la sonrisa porque la verdad que me gusta mucho trabajar con alambre pero me destroza los dedos, así que termino pero llorando aunque me consuela ver el resultado. Gracias por pasarte, Un abrazo para ti.
Que belleza de trabajo! Mil felicidades! ❤️
Muchas gracias. Me alegra mucho que te haya gustado. Saludos.