WELCOME TO MY BLOG
Hellooooo, hellooooooo! Greetings and my respects to the jewelry creators. Today I will be sharing with you
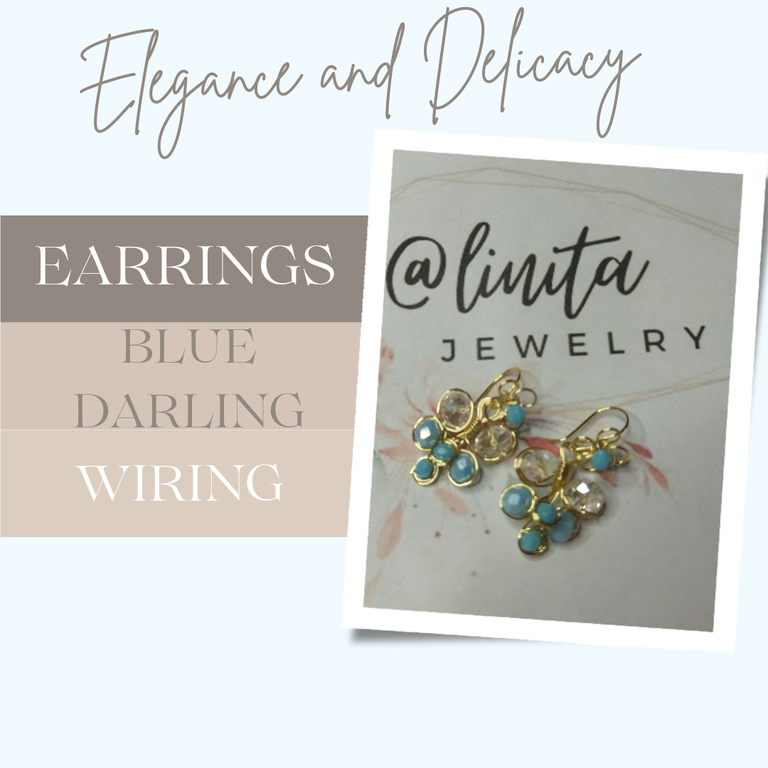
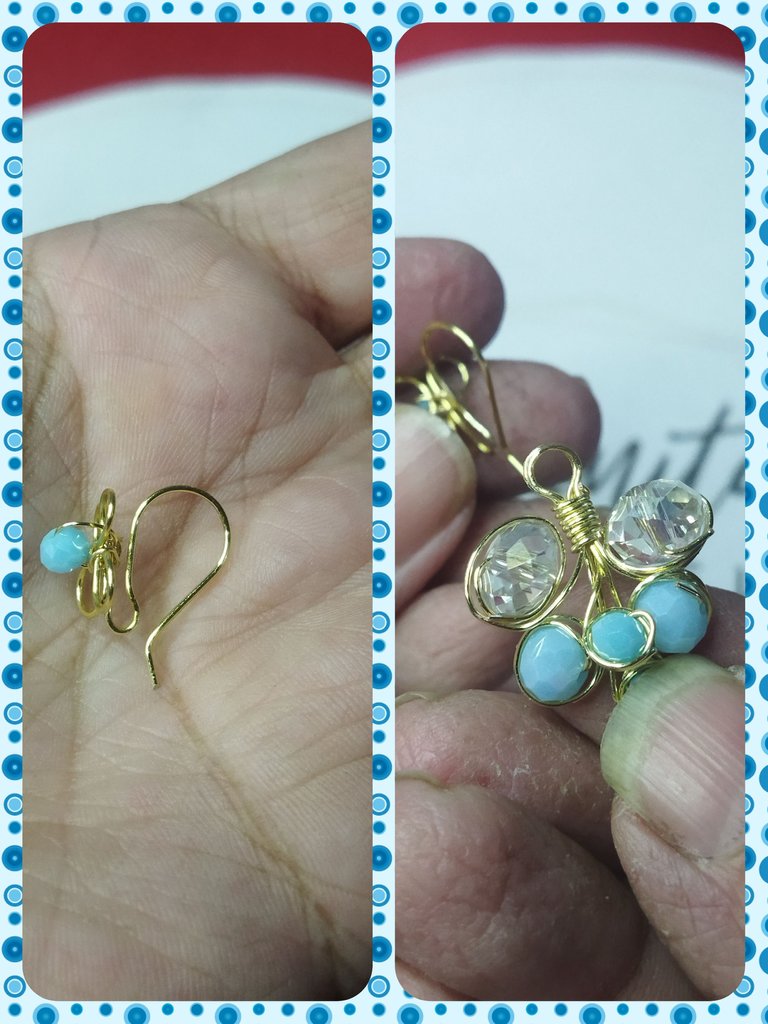
the step by step of these earrings in translucent and blue tones, with crystals, but what I am most interested in showing you is how to make the flower-shaped hooks. Whenever I have made earrings I use hooks that I have already bought ready to use, the basic ones, but for these I wanted to experiment by making them with a shape that would highlight their design. I will try to be as precise as possible in the explanation. Let's get started.
BIENVENIDOS A MI BLOG
¡Holaaaa, holaaaaa! Saludos y mis respetos a los creadores de bisutería. Hoy les estaré compartiendo
el paso a paso de estos aretes en tonos traslucidos y azules, con cristales, pero lo que más me interesa mostrarles es cómo hacer los anzuelos con forma de flor. Siempre que he realizado aretes utilizo anzuelos que ya he comprado listos de usar, los básicos, pero para éstos quise experimentar haciéndolos con una forma que resaltara el diseño del mismo. Trataré de ser lo más precisa en la explicación. Comencemos.
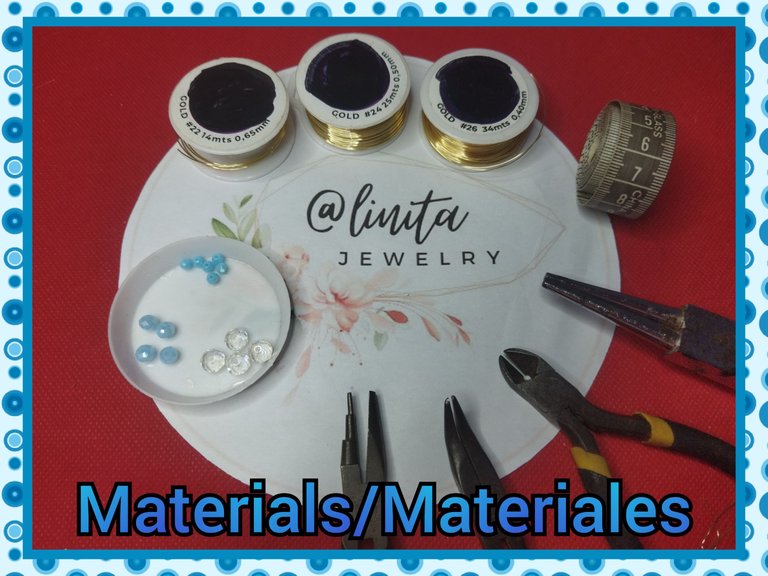
MATERIALS
- Wires #24, #22 and #26
- 4 8 mm translucent crystals
- 4 Crystals of 6 mm light blue
- 4 Crystals of 4 mm light blue
- Jewelry tweezers (cutting, flat, curved, conical.
- Measuring tape
MATERIALES
- Alambres #24, #22 y #26
- 4 Cristales de 8 mm traslúcidos
- 4 Cristales de 6 mm azul claro
- 4 Cristales de 4 mm azul claro
- Pinzas de bisutería (corte, plana, curva, cónica.
- Cinta métrica
STEP BY STEP // PASO A PASO
STEP Nº 1
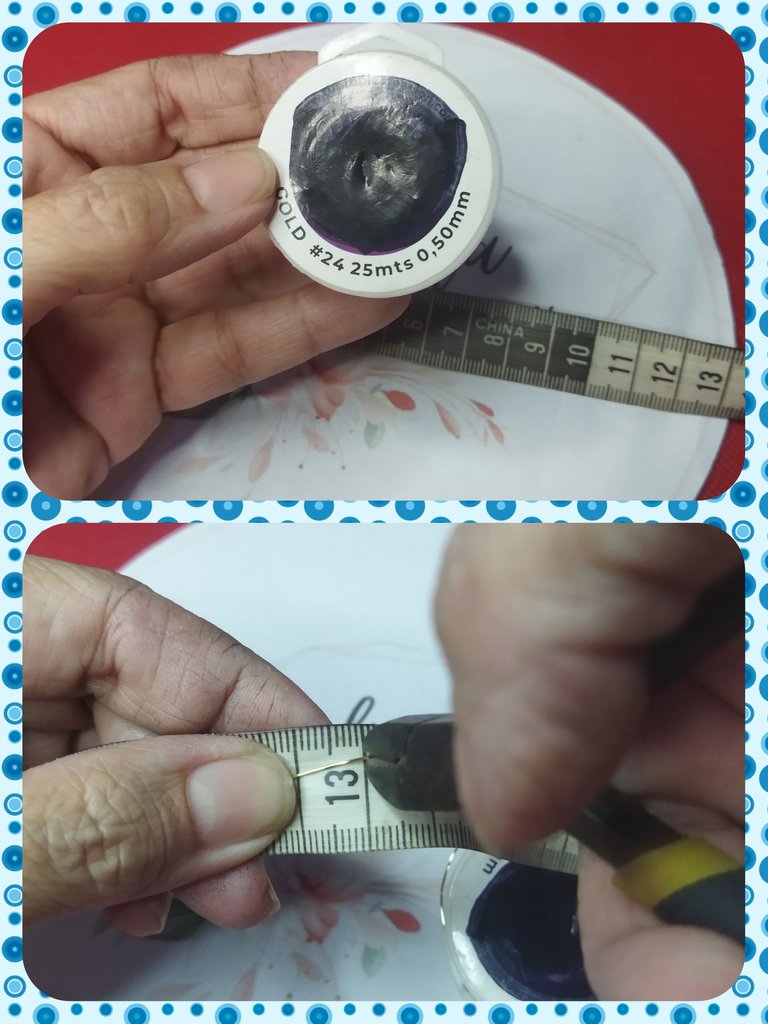
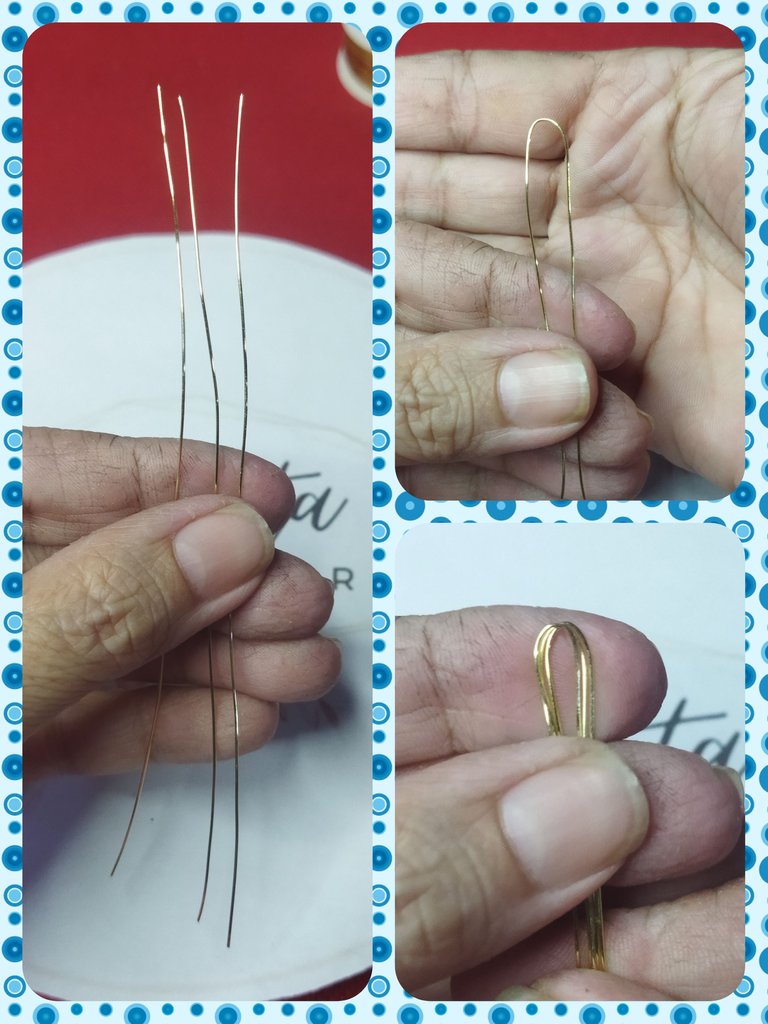
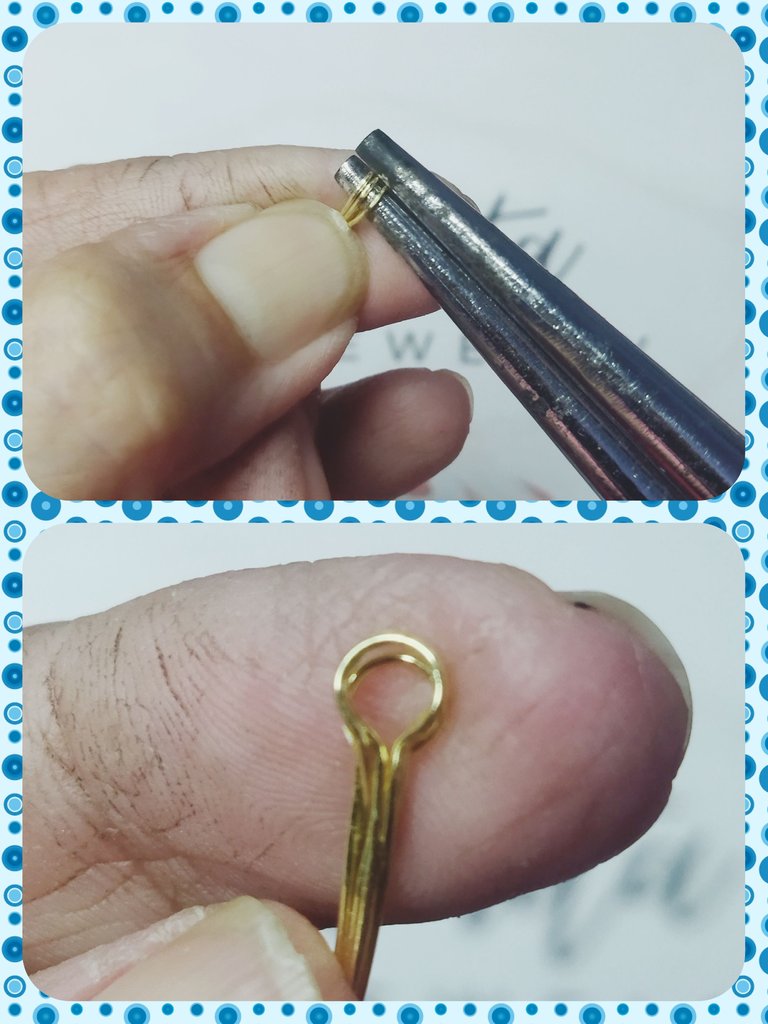
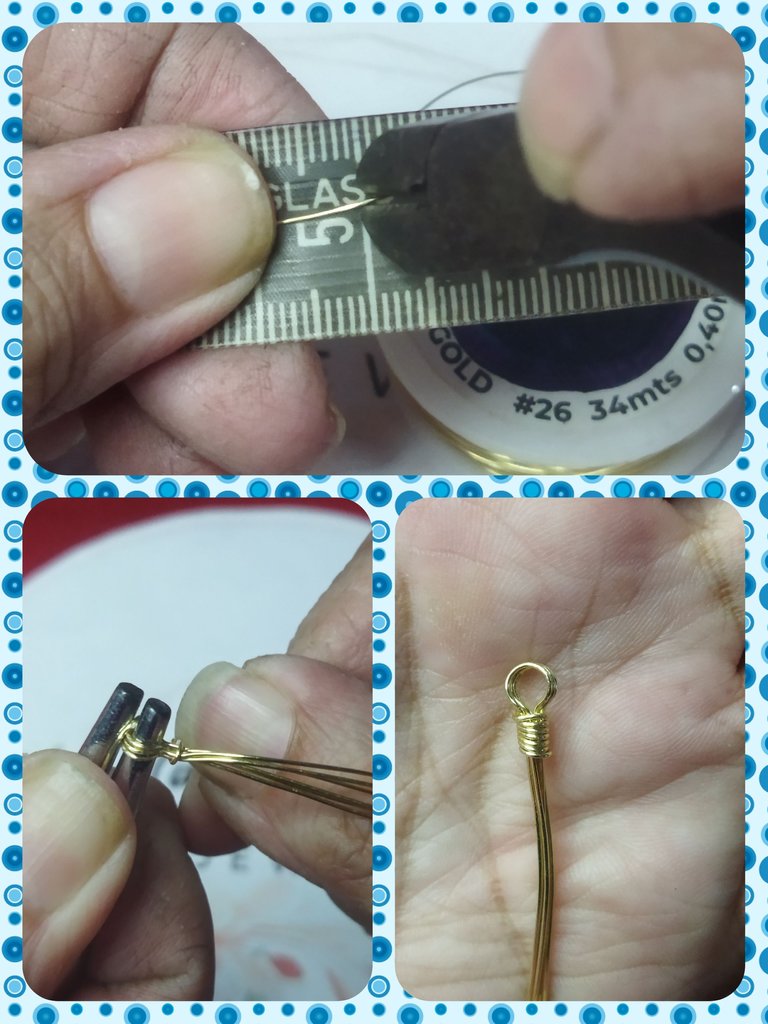
- For the base we need 3 pieces of #24 wire measuring 13 cm.
- We fold the 3 wires in half and put them together.
PASO Nº 1
- Para la base necesitamos 3 trozos alambre #24 de 13 cm.
- Doblamos los 3 alambres a la mitad y los juntamos.
STEP Nº 2
- With the conical tweezers we are going to form a 5 mm ring.
PASO Nº 2
- Con la pinza cónica vamos a formar un anillo de 5 mm.
STEP Nº 3
We cut 5 cm of #26 wire and with the ring inside the clamp we make a rosary knot around the ring, making 7 turns.
**PASO Nº 3 **
Cortamos 5 cm de alambre #26 y con al anillo dentro de la pinza realizamos un nudo de rosario alrededor del anillo, hacemos o 7 giros.
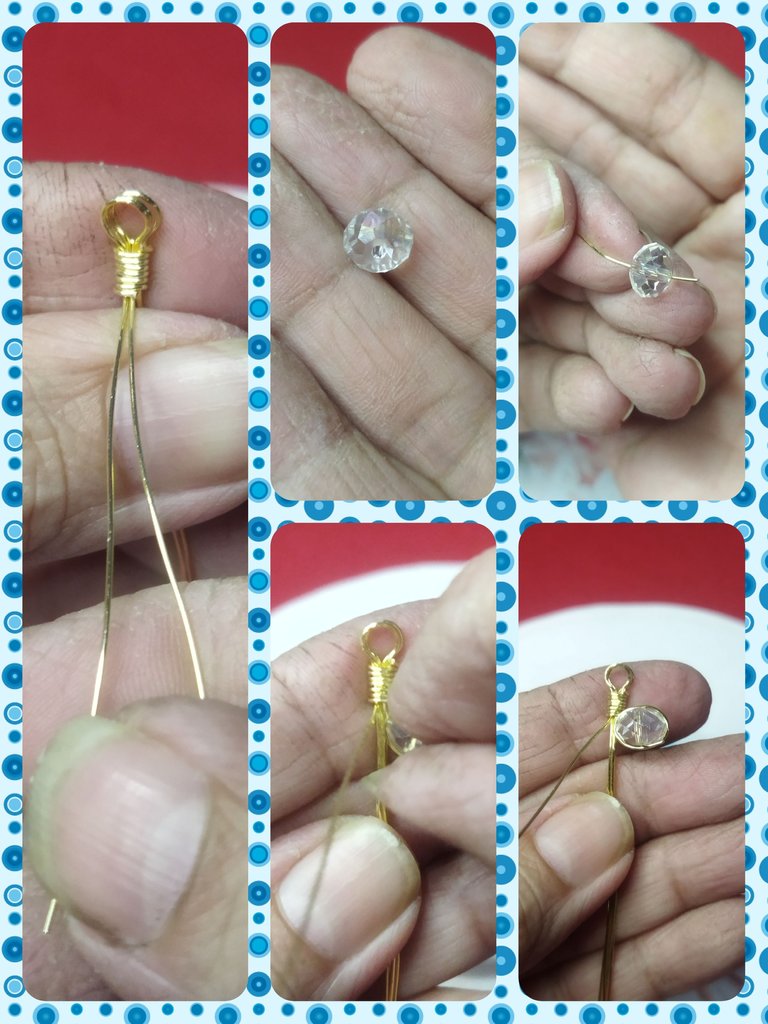
STEP Nº 4
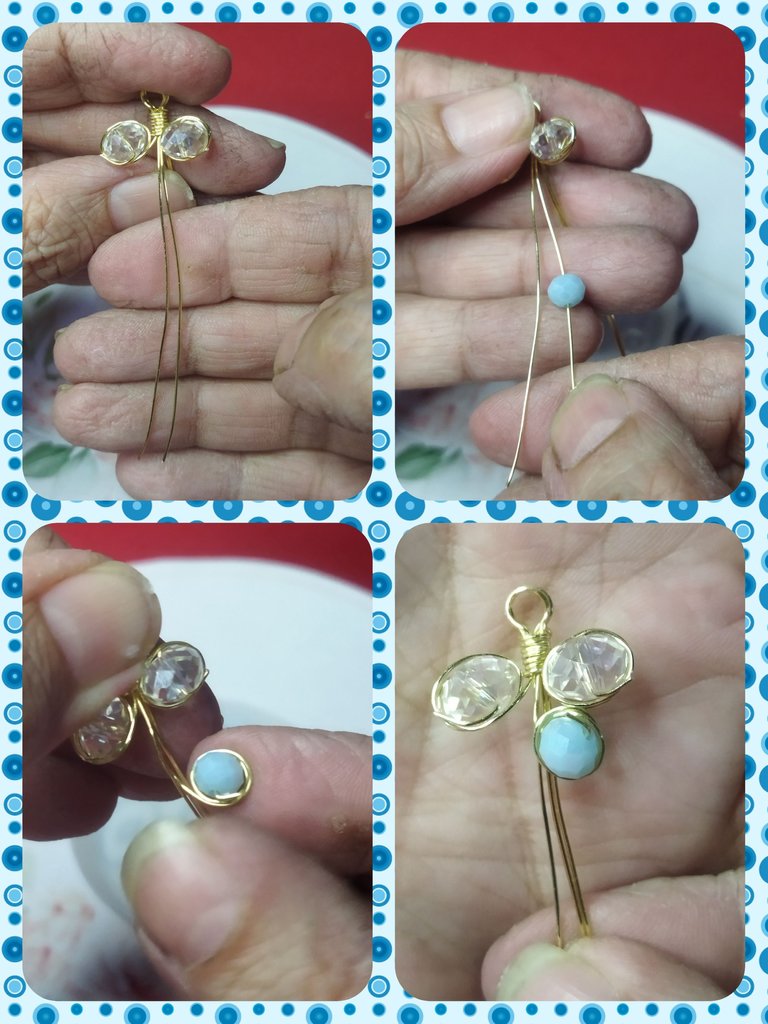
- We take the first two strands of wire and in one of them we insert an 8 mm translucent crystal and crimp until we reach the base of the ring.
- We carry out the same procedure with the other strand and another 8 mm translucent crystal and align them. Make sure both glasses are at the same height and face forward.
PASO Nº 4
- Tomamos las dos primeras hebras de alambre y en una de ellas introducimos un cristal traslúcido de 8 mm y engarzamos hasta llegar a la base del anillo.
- Realizamos el mismo procedimiento con la otra hebra y otro cristal traslucido de 8 mm y los alineamos. Que ambos cristales queden a la misma altura y con la cara al frente.
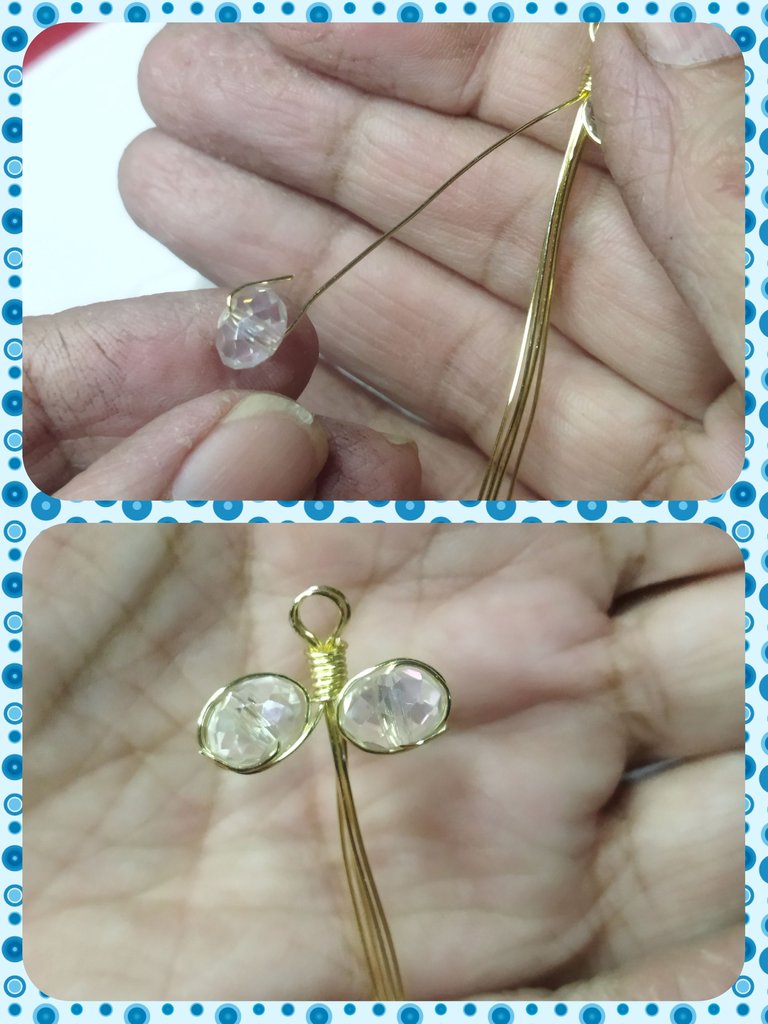
STEP Nº 5
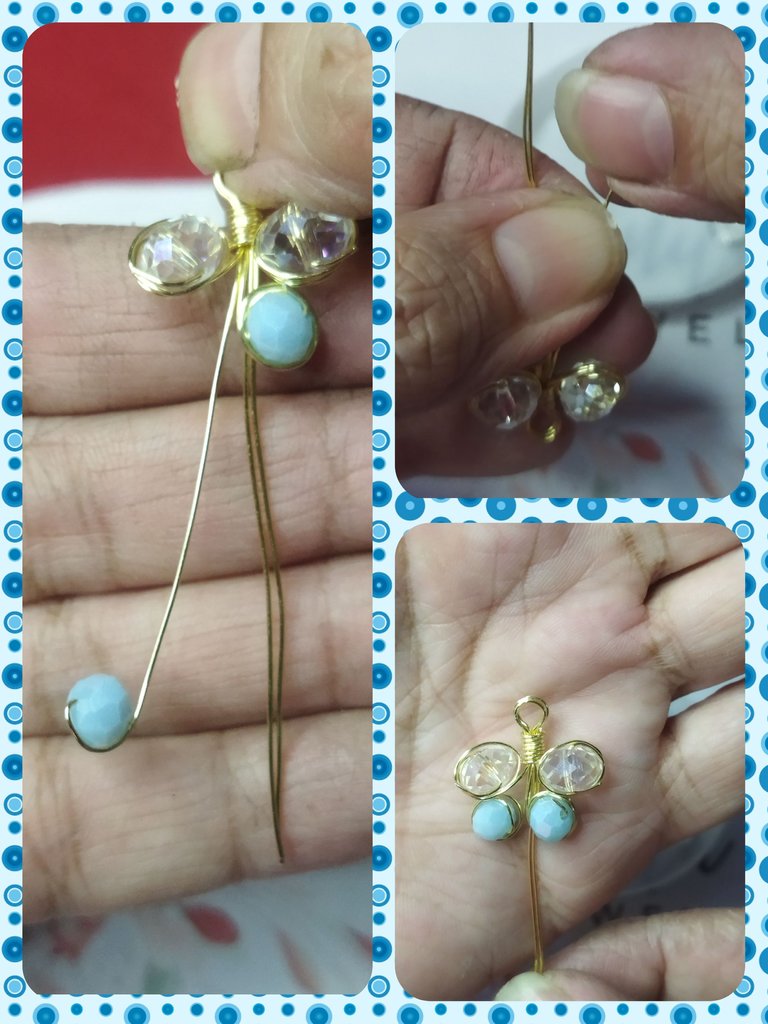
- We take the next two strands and carry out step No. 4 but we are going to use a 6 mm blue crystal in each strand. We crimp each one and place them under the translucent crystals.
PASO Nº 5
- Tomamos las dos hebras siguientes y realizamos el paso Nº 4 pero vamos a utilizar en cada hebra un cristal azul de 6 mm. Engarzamos cada uno y los vamos a situar debajo de los cristales tráslucidos.
STEP Nº 6
Now with the two remaining wires, we take the first one and place a 4 mm light blue crystal. We crimp and place it in the center and on top of the two 6 mm blue crystals.
PASO Nº 6
Ahora con los dos alambres restantes, tomamos el primero y colocamos un cristal de 4 mm azul claro. Engarzamos y lo colocamos en el centro y encima de los dos cristales azules de 6 mm.
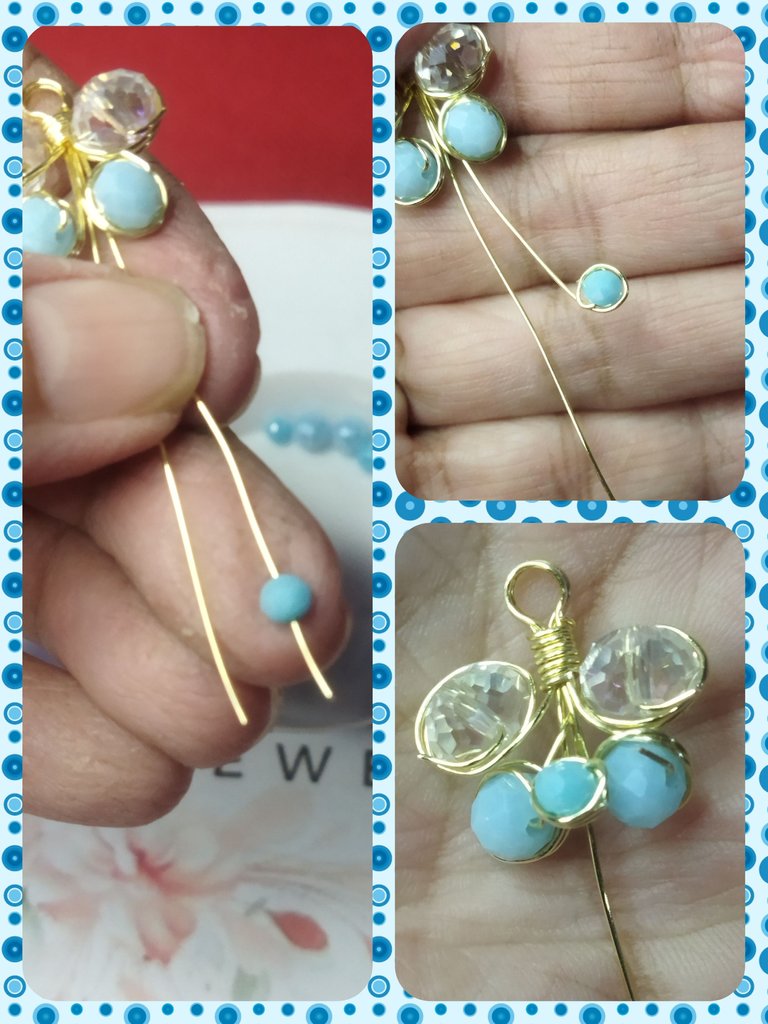
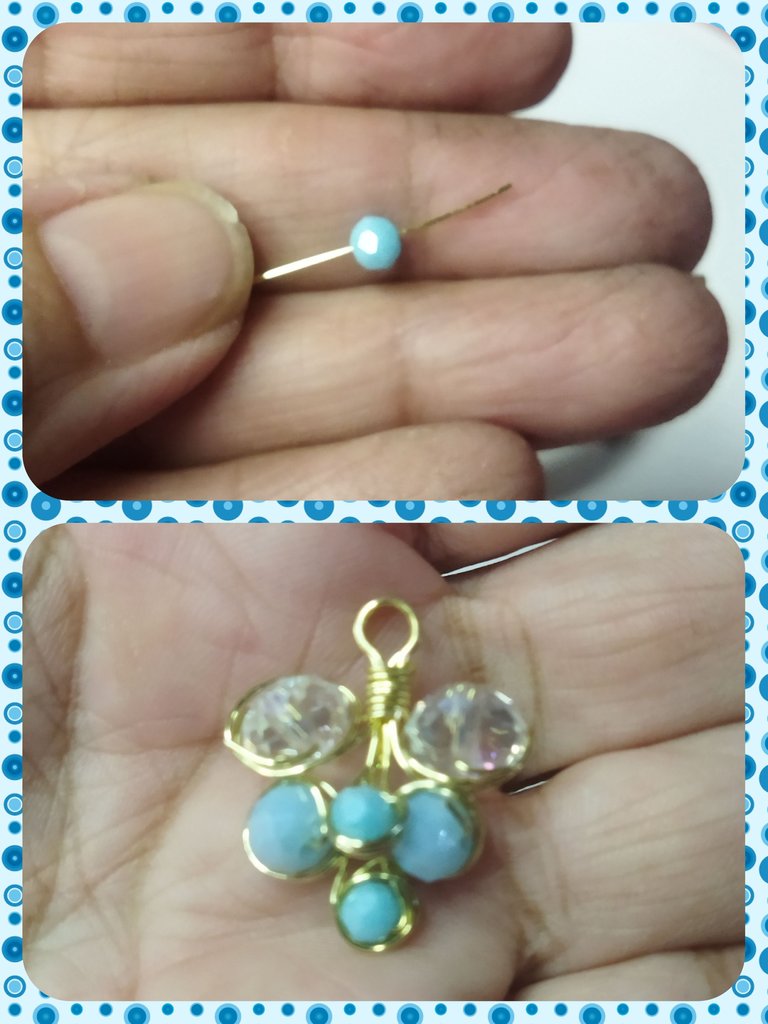
- We carry out the same process with the last wire and the 4 mm crystal, crimp and place under the 6 mm crystals in the central part, forming a kind of cluster with all the crystals.
- Realizamos el mismo proceso con el último alambre y el cristal de 4 mm, engarzamos y colocamos debajo de los cristales de 6 mm en la parte central, formando una especie de racimo con todos los cristales.
STEP Nº 7
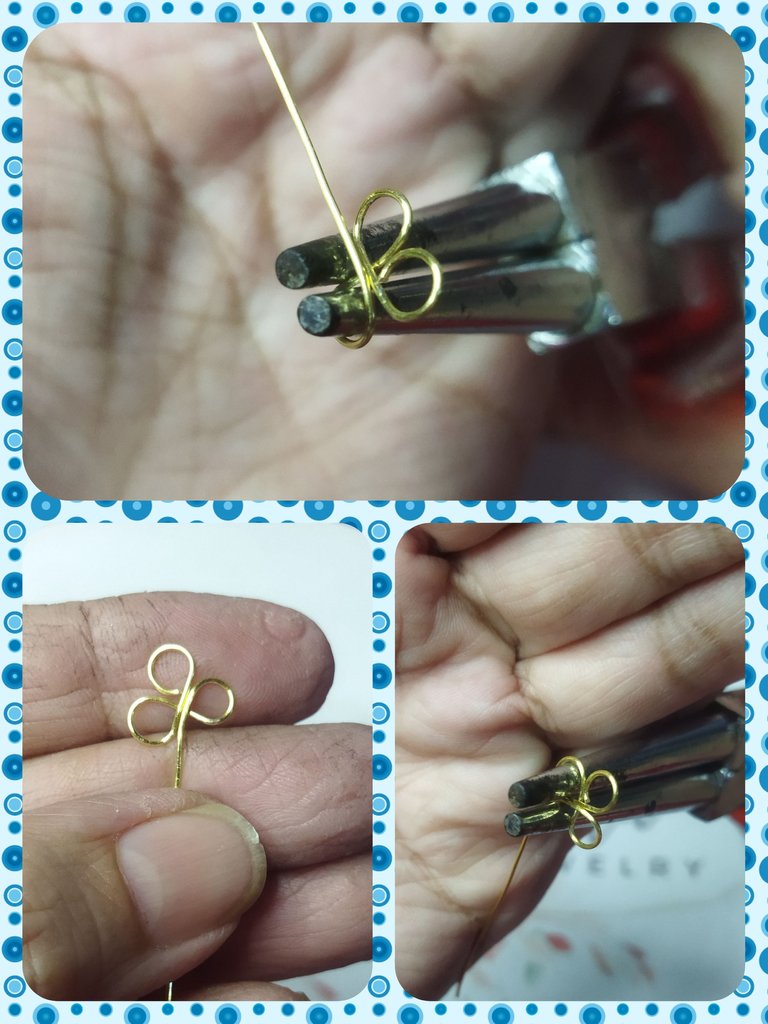
In this step we are going to form our flower-shaped hook. For this we are going to use 10 cm of #22 wire, if you want it firmer you can use #20 wire.
- With the conical clamp we make a ring of approximately 4 mm. We place the clamp next to the ring and make another one that will be next to us.
PASO Nº 7
En este paso vamos a formar nuestro anzuelo con forma de flor. Para ello vamos a utilizar 10 cm de alambre #22, si lo quieres más firme puedes usar alambre #20.
- Con la pinza cónica realizamos un aro de 4 mm aproximadamente.Ubicamos la pinza al lado del aro y realizamos otro que nos quedará al lado.
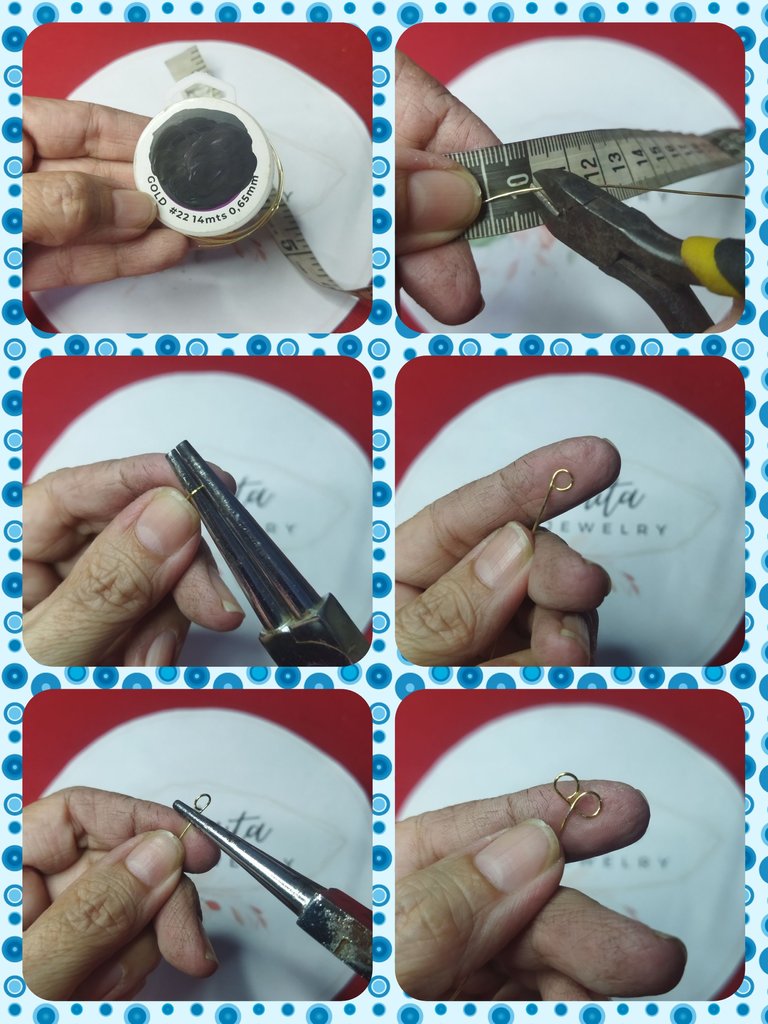
- We place the clamp so that it is below the first ring and we make another one at that same level, placing the wire straight and then make the next ring on the opposite side and form the 4 petal flower.
- Colocamos la pinza de manera que quede por debajo del primer aro y realizamos otro a ese mismo nivel, situando el alambre de forma recta para luego realizar el siguiente aro del lado contrario y formar la flor de 4 pétalos.
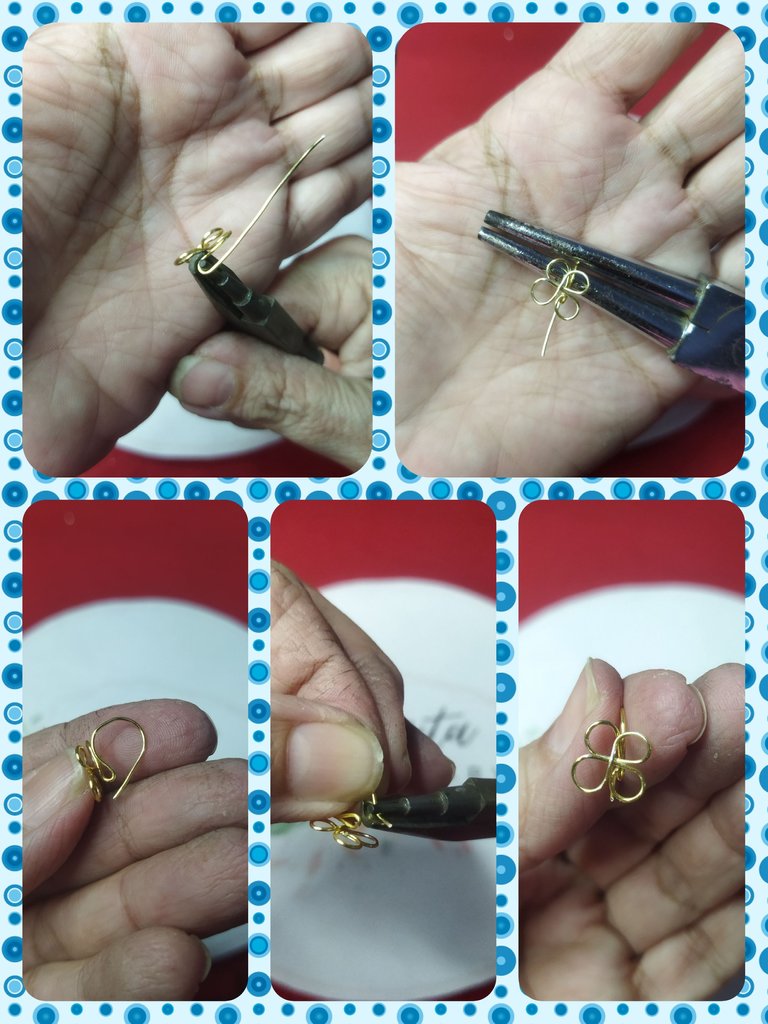
STEP Nº 8
Once the flower is formed, we make the hook. With the flat tweezers we make a 180º fold that is almost attached to the base of the flower.
Then with the conical tweezers we make the semi-circle of the desired size until the hook is formed and with the flat tweezers we make a small bend at the tip of the wire.
PASO Nº 8
Una vez formada la flor realizamos el anzuelo. Con la pinza plana realizamos un doblez de 180º que quede casi pegado a la base de la flor.
Luego con la pinza cónica realizamos el semi circulo del tamaño deseado hasta formar el anzuelo y con la pinza plana realizamos un pequeño doblez en la punta del alambre.
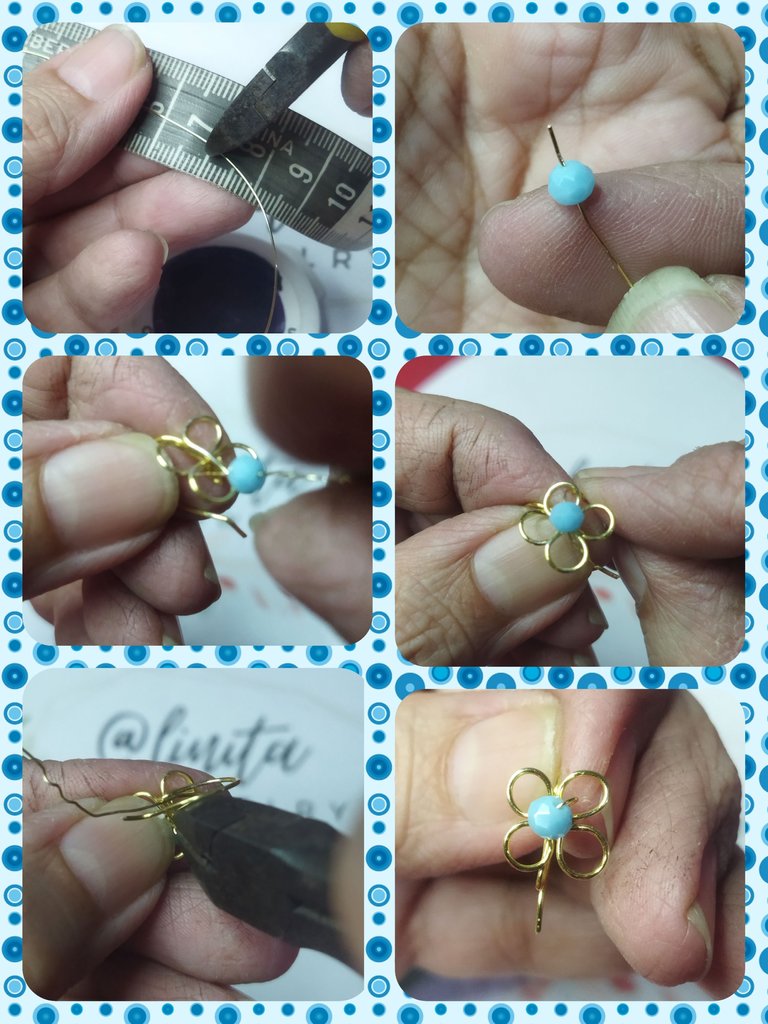
STEP Nº 9
- With 7 cm of #26 wire and a 4 mm blue crystal we decorate the center of the flower, making a two-turn crimp between the petals. Then we cut the excess wire. Thus forming a nice hook for our design.
PASO Nº 9
- Con 7 cm de alambre #26 y un cristal azul de 4 mm adornamos el centro de la flor, realizando un engarce de dos giros entre los pétalos. Luego cortamos el exceso de alambre. Formando así un lindo anzuelo para nuestro diseño.
STEP Nº 10
And finally we only have to insert the design into the hook to form our earring. We make the other pair and that's it.
PASO Nº 10
Y para finalizar solo nos queda introducir el diseño en el anzuelo para formar nuestro arete. Realizamos el otro par y listo.
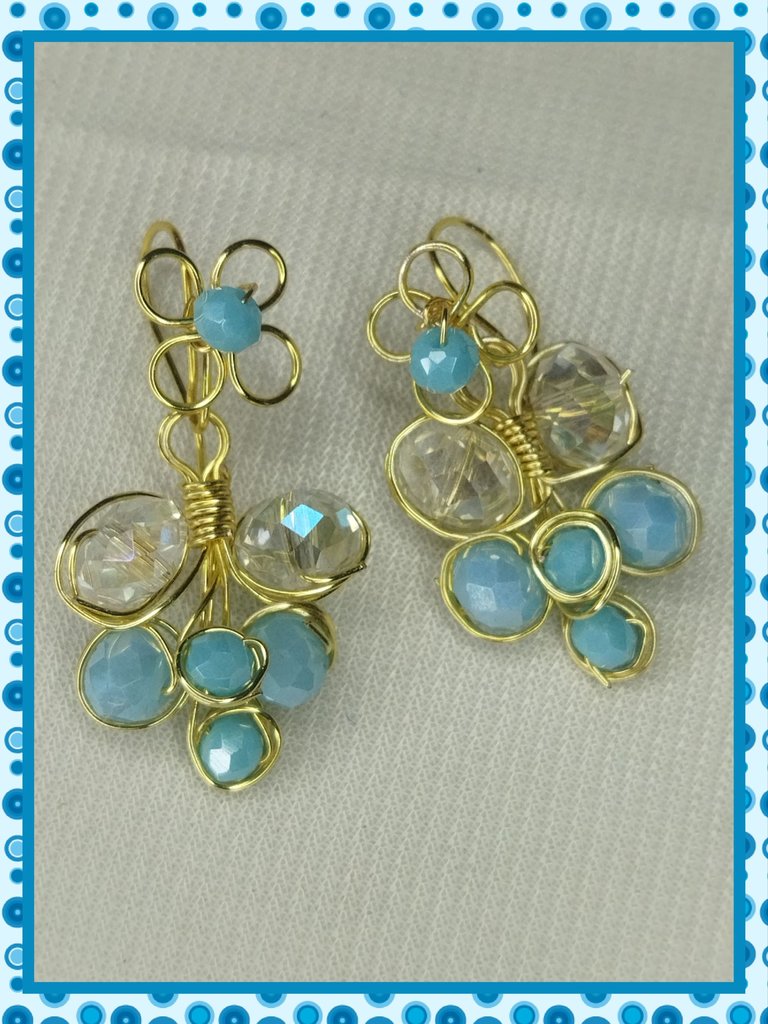
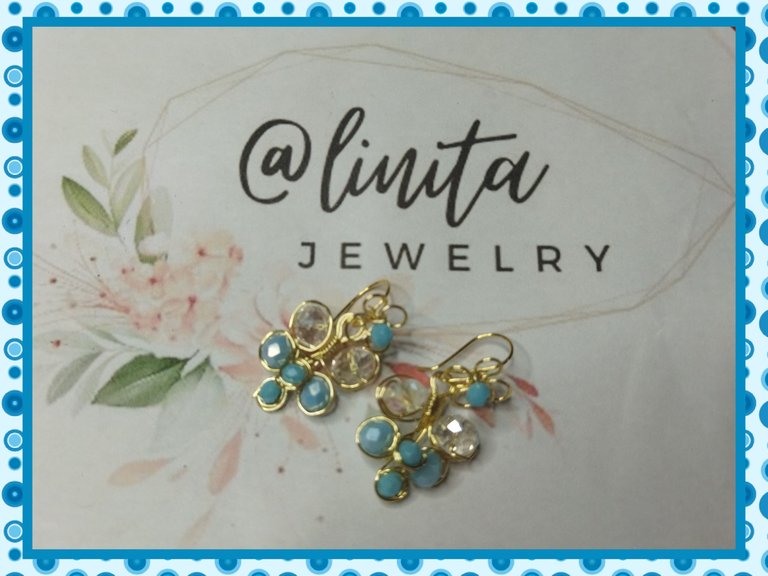
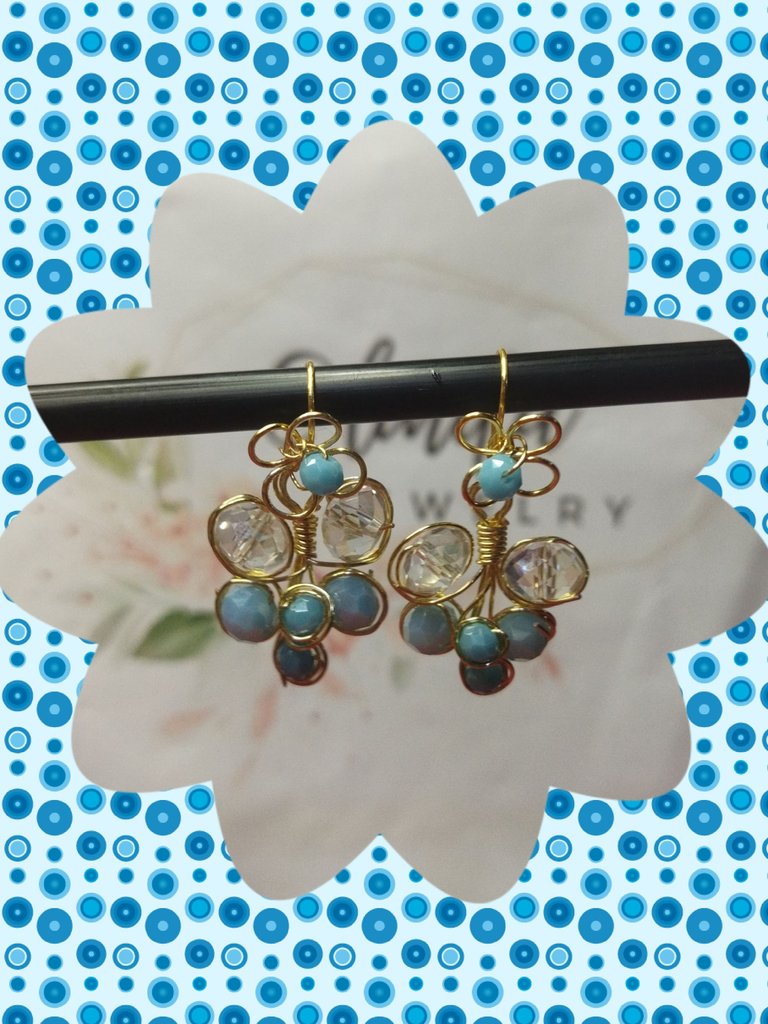
PROJECT COMPLETED
Elegant, delicate and with a spring touch provided by the flower-shaped hooks. I loved these earrings, especially going off the traditional hook. These hooks, in particular, give a different finish to the earring. I hope you like them as much as I do. See you next time.
PROYECTO FINALIZADO
Elegantes, delicados y con un toque primaveral que aportan los anzuelos con forma de flor. Me encantaron estos aretes, sobre todo salir del anzuelo tradicional. Estos anzuelos particularmente, le otorgan un acabado diferente al arete. Espero te gusten tanto como a mi. Nos vemos en la próxima.
Está precioso todo el diseño del arete. Tienes bastante destreza para usar el alambre. Te felicito.
El anzuelo en forma de flor me encantó. Le dió un toque de elegancia al arete que de por si ya está hermoso.
Muchas gracias por dejarnos ver tu creación 🙋🎉🎈🥳😃👍🙋
Si, definitivamente el anzuelo marca la diferencia. Me alegro que te guste. Saludos.
Congratulations @linita! You have completed the following achievement on the Hive blockchain And have been rewarded with New badge(s)
Your next target is to reach 400 posts.
You can view your badges on your board and compare yourself to others in the Ranking
If you no longer want to receive notifications, reply to this comment with the word
STOPTo support your work, I also upvoted your post!
Check out our last posts:
Such flower shape hook along with stones for the earring is very okay and charming.
Tal gancho en forma de flor junto con piedras para el pendiente es muy bien y encantador.
The design of the earrings is attractive and stylish. Love it. Keep up the good work!
Un diseño hermoso, estos aretes en forma de flor quedaron hermosos, los colores de los zarcillos y la combinación bellísima, gran trabajo.
Que bonitos aretes con cristales me encantaron 👍❤️
La forma de racimo es muy bonita. Me gusta todo en estos aretes. Los cristales y la flor en la parte superior. Todo armoniza muy bien. Precioso.
Felicidades