Saludos amigos de esta maravillosa comunidad de @jewelry, espero que estén súper bien y listos para disfrutar del fin de semana.
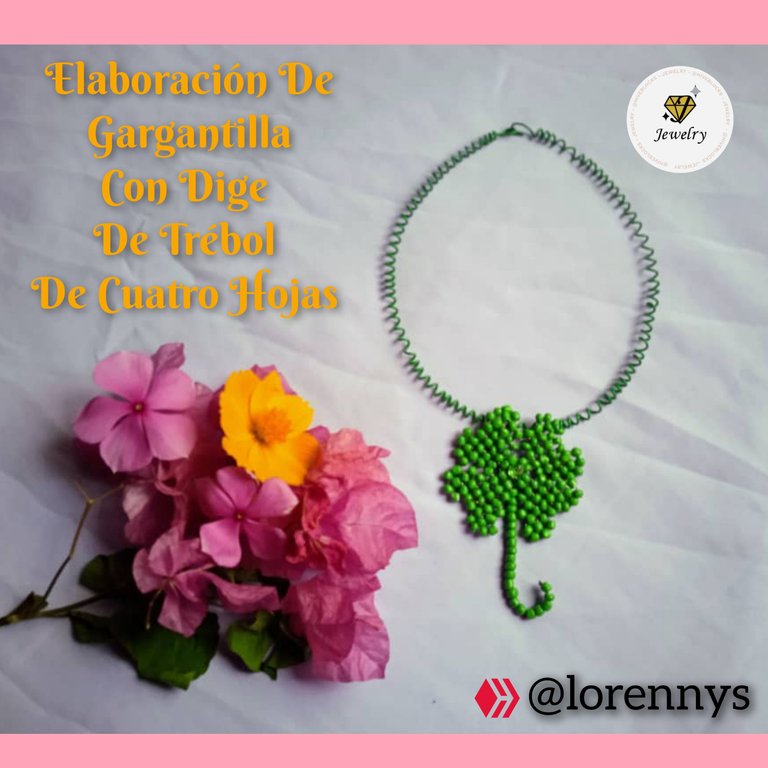
El proyecto de hoy es una hermosa gargantilla con un dije de trébol de cuatro hojas, para algunos representa suerte a mi simplemente me parece genial. Unos les gusta el de tres hojas a mi gusta más este de cuatro que les comparto.
Quédate conmigo hasta el final y verás lo fácil que puede ser tener tu propio trébol ☘️🍀☘️
English Version
Greetings friends of this wonderful community of @jewelry, I hope you are super well and ready to enjoy the weekend.
Today's project is a beautiful choker with a four-leaf clover charm, for some people it represents luck, for me I just think it's great. Some people like the three-leaf one, but I like this four-leaf one that I'm sharing with you.
Stay with me until the end and you will see how easy it can be to have your own clover ☘️🍀☘️
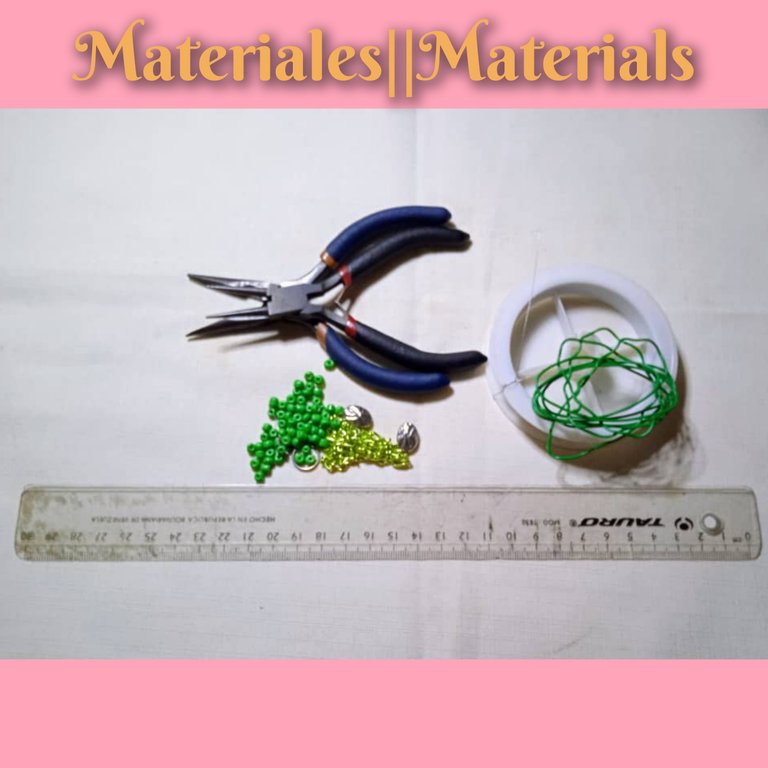
Materiales usados para elaborar una Gargantilla de la Suerte con dije trébol de cuatro hojas
✓Mostacillas verdes.
✓Alpaca de 26"
✓Un cristal verde número 4.
✓Alambre verde de bisutería de 24"
✓Un palito de altura.
✓Pinza punta redonda.
✓Pinza plana.
English Version
Materials used to make a Lucky Choker with a four-leaf clover charm Materials used to make a Lucky Choker with a four-leaf clover charm.
✓Green beads.
✓ 26" alpaca.
✓A number 4 green crystal.
✓24" green costume jewelry wire.
✓A height stick.
✓Round tip tweezers.
✓Flat tweezers.
Pasos que use para realizar este proyecto descrito en el Contenido
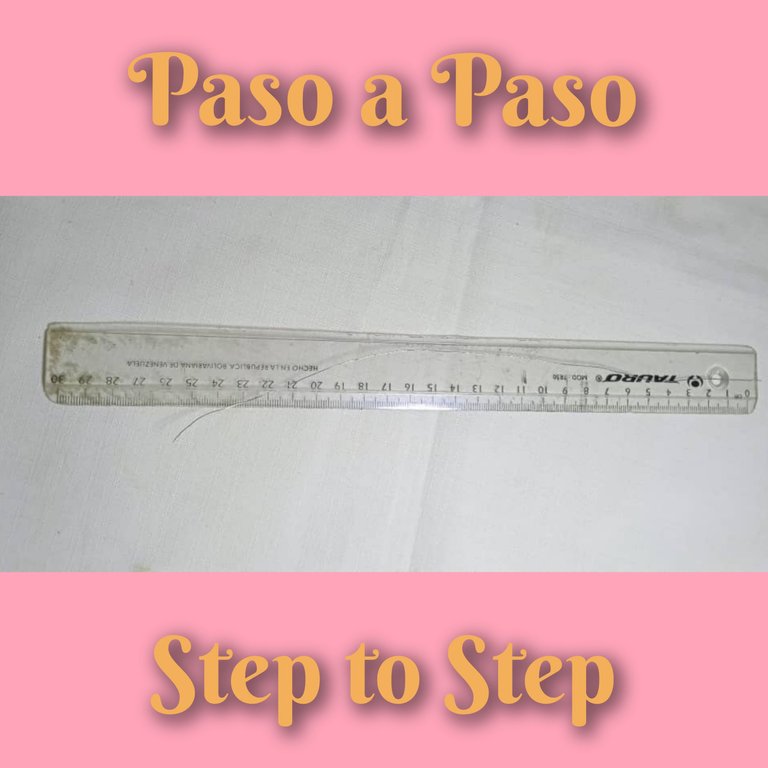
Primer Paso:
Para comenzar la elaboración de este paso, uso la regla y mido cuatro trozos de alpaca con medida de treinta centímetros cada uno.
English Version
Steps I used to carry out this project described in the Contents.
First Step:
To begin the elaboration of this step, I use the ruler and measure four pieces of alpaca measuring thirty centimeters each.
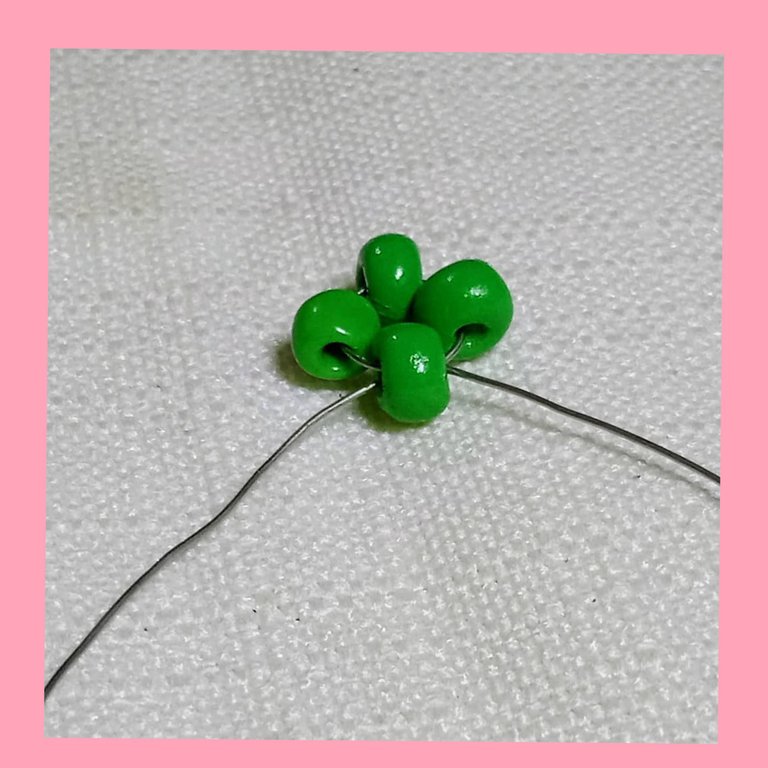
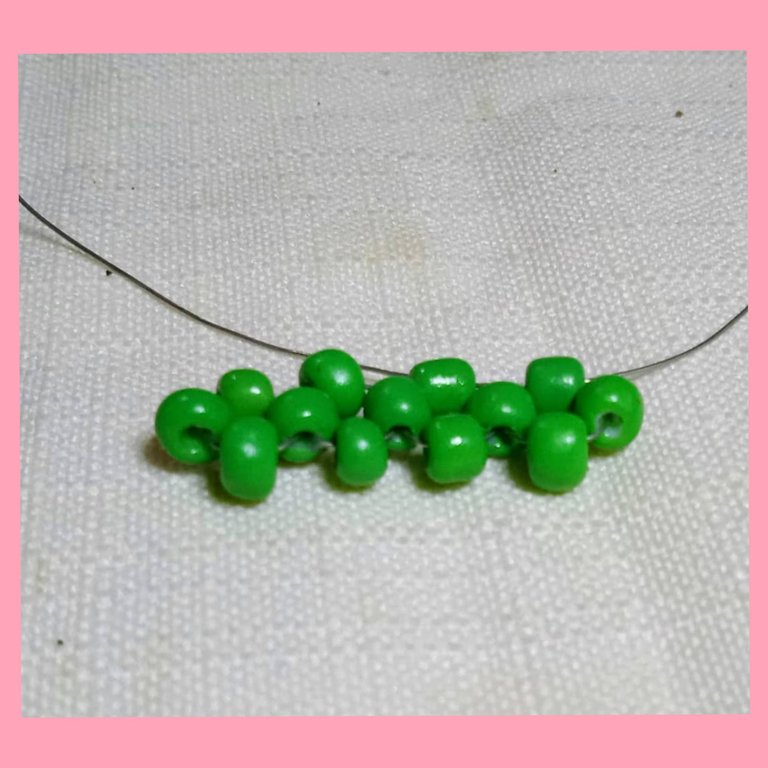
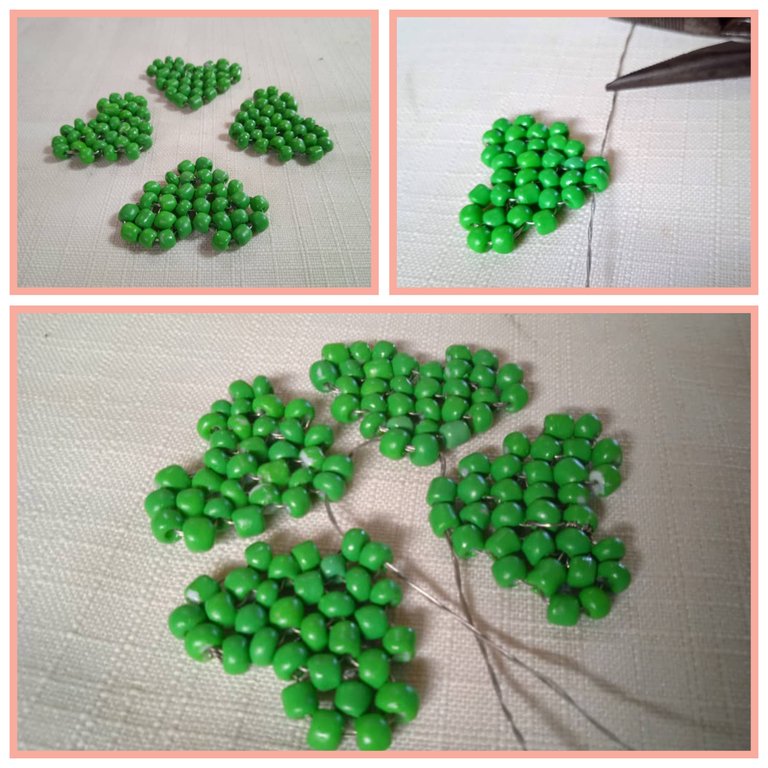
Segundo Paso:
Aquí voy a usar uno de los trozos de alpaca para elaborar la primera hoja del trébol, ya que como dije antes serán cuatro en total, empiezo colocando cuatro mostacillas verdes y cruzando en la última para formar una pequeña flor de cuatro pétalos.
English Version
Second step:
Here I am going to use one of the pieces of alpaca to elaborate the first leaf of the clover, since as I said before there will be four in total, I start by placing four green beads and crossing on the last one to form a small flower with four petals.
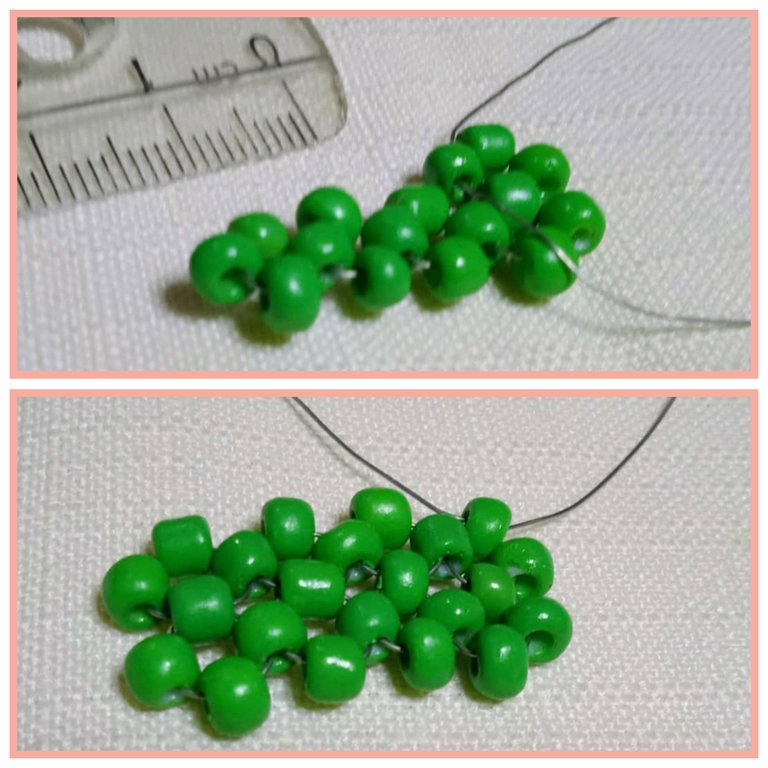
Tercer Paso:
Ahora inserto una mostacilla verde del lado izquierdo y dos del lado derecho, cruzo por la última del lado derecho y formo otra flor, así realizó cinco.
English Version
Step 3:
Now I insert one green bead on the left side and two on the right side, cross over the last one on the right side and form another flower, thus making five.
Cuarto Paso:
Realizado las cinco flores, subo por la última flor y como señaló en la imagen bajo pasando la alpaca por la segunda mostacilla y tengo dos coloco dos mostacillas más y cruzo en la segunda de forma lateral, de esta manera realizó otras cinco flores arriba de las cinco primeras.
English Version
Fourth step:
Made the five flowers, I go up by the last flower and as it pointed out in the image I go down passing the alpaca through the second bead and I have two I place two more beads and cross in the second one in a lateral way, in this way I made another five flowers above the first five.
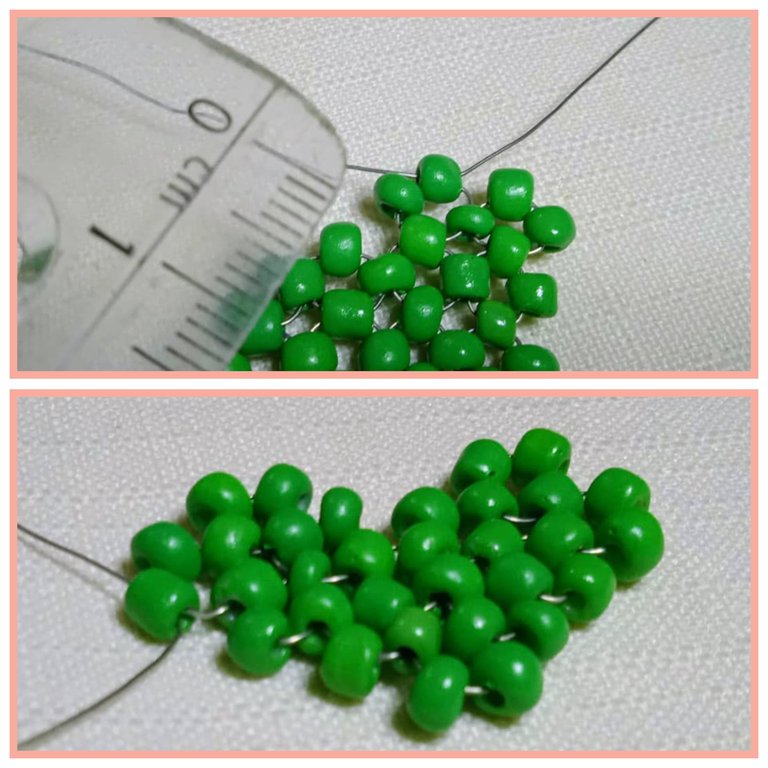
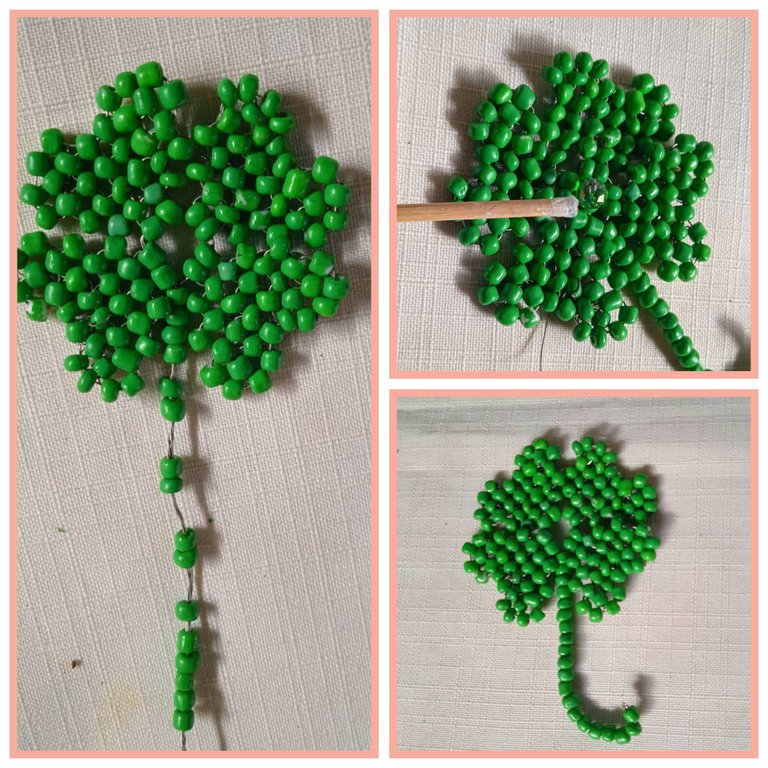
Quinto Paso:
Ahora realizaré encima de las dos últimas flores dos más, y encima de estás otras dos, así como se ve en la imagen se va formando el pétalo.
English Version
Fifth step:
Now I will make on top of the last two flowers two more, and on top of these other two, as you can see in the image the petal is being formed.
Sexto paso:
Cómo se ve en la imagen voy a moldear el pétalo, para ello paso la alpaca por las mostacillas del borde, halo y voy ajustando, ahora los voy pasando por las mostacillas del centro para fijarlos bien junto los hilos y los pierdo en la labor uso la pinza de corte para quitar los excesos y así queda .
English Version
Sixth step:
How it is seen in the image I am going to mold the petal, for it I pass the alpaca by the beads of the edge, halo and I am adjusting, now I am passing them by the beads of the center to fix them well together the threads and I lose them in the work I use the cutting pliers to remove the excesses and this way it is .
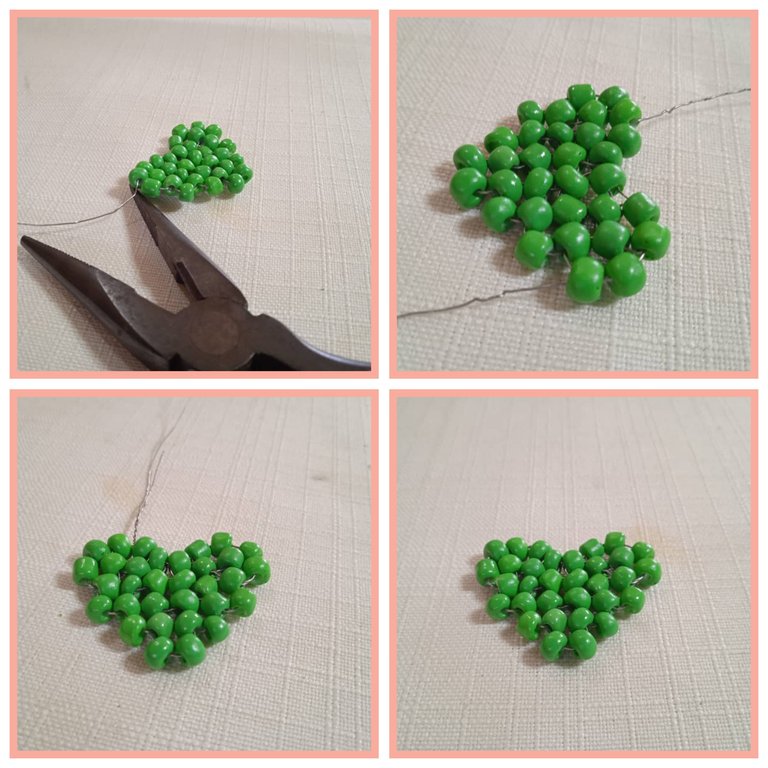
Séptimo Paso:
Usando el mismo procedimiento realicé los cuatro pétalos para formar el trébol.
Ahora de nuevo corto veinte centímetros de alpaca, lo doblo uniendo las puntas para igualar y entorcho, lo voy insertando por las dos últimas mostacillas de los pétalos para unirlas entre si, de esta manera.
English Version
Seventh Step:
Using the same procedure I made the four petals to form the clover.
Now again I cut twenty centimeters of alpaca, fold it joining the ends to equalize and twist it, inserting it through the last two beads of the petals to join them together, in this way.
Octavo Paso:
Una vez que uno los pétalos, ajusto bien y fijo entorchando el alambre de alpaca, luego voy a insertar en el dieciocho mostacillas verdes para así formar el tallo, ahora coloco en un alambre de tres centímetros el cristal verde y lo pongo en el centro de la figura, así queda.
English Version
Eighth step:
Once I join the petals, I adjust well and fix by twisting the alpaca wire, then I will insert in the eighteen green beads to form the stem, now I place in a wire of three centimeters the green crystal and put it in the center of the figure, so it remains.
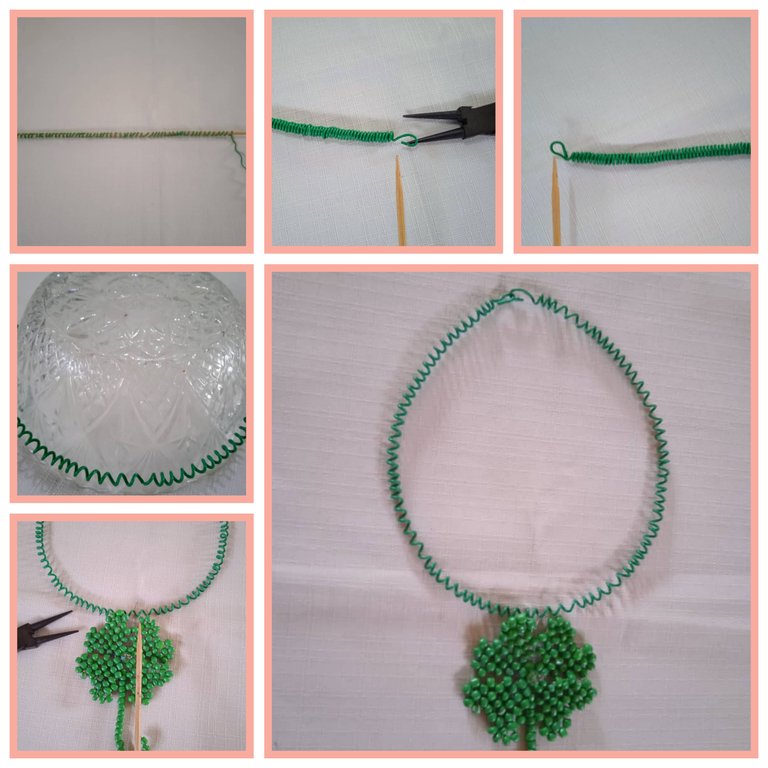
Noveno paso:
En este paso realizo una guaya con forma de resorte para colgar mi dije, en un palito de altura voy enrollando el alambre verde de bisutería, una vez que ya tengo lista la medida uso la pinza punta redonda y realizó los terminales, hago una argolla que pongo en el dije y lo coloco en la guaya para finalizar.
English Version
Ninth step:
In this step I make a spring shaped guaya to hang my pendant, in a stick of height I am winding the green wire of costume jewelry, once I have the measure ready I use the round tip tweezers and made the terminals, I make a ring that I put in the pendant and place it in the guaya to finish.
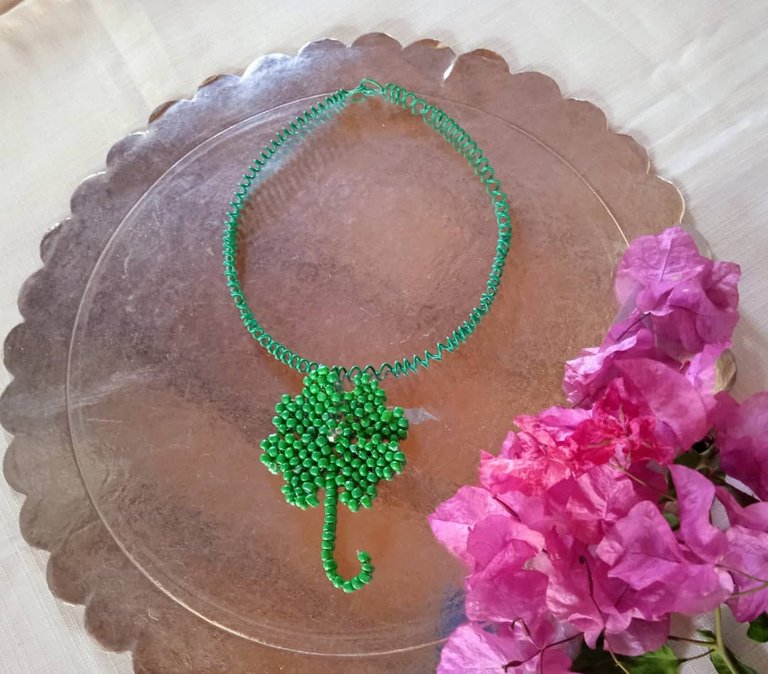
Así doy por terminada mi gargantilla de la suerte con el dije de cuatro hojas . Les confieso que una de las cosas que adore de este diseño fue el color. Aún no es mi favorito me encanta por el tema de mi emprendimiento Verde 🌿.
English Version
This is the end of my lucky choker with the four leaves charm. I confess that one of the things I loved about this design was the color. It's still not my favorite I love it because of the theme of my Green venture 🌿.
Todas las fotografías son de mi propiedad, capturadas con mi Tecno Spark 10 pro. Y editadas con GridArt versión libre. Banner final editado con Canva versión gratuita.
Deeptraductor fue utilizado para esta publicación.
Éxitos y bendiciones para todos 🙏🏻 hasta la próxima publicación.
¡Tengan una feliz noche!
¡Gracias por detenerte a leer!
English Version
All photos are my own, captured with my Tecno Spark 10 pro. And edited with GridArt free version. Final banner edited with Canva free version.
Deeptraductor was used for this publication.
Success and blessings to all 🙏🏻 until the next publication.
Have a happy evening!
Thanks for stopping by to
read!
Hermoso trébol , bellísimo
Gracias 😊
Simplemente perfecto y hermoso tu trabajo @lorennys ✨🥰
!discovery 39
Gracias amigae alegra haya sido de tu agrado. Saludos
This post was shared and voted inside the discord by the curators team of discovery-it
Join our Community and follow our Curation Trail
Discovery-it is also a Witness, vote for us here
Delegate to us for passive income. Check our 80% fee-back Program
Gracias por el apoyo
Amiga. Te quedó hermosa. Es perfecto. Me encanta que las mostacillas se ven perfectamente colocadas y luce súper dulce . Lo usaría con todo gusto.
Mi querida @artsugar que placer verte visitar mi publicación me alegra que te haya gustado. Gracias por la visita y buen comentario 😊 es un honor viniendo de alguien que realiza tan bellas artes .
Me gustó mucho la sencillez de tu tutorial para mostrar tan hermoso resultado, @lorennys te felicito , el verde que escogiste está precioso muy parecido por no decir igual al 🍀 de verdad, estoy muy contenta por esa inspiración y entusiasmo que te produce tu Emprendimiento Verde para realizar cosas tan lindas. Mucha Suerte.🥰
Gracias mi bella @nhaydu ,mi publicación está hoy visitado por puro talento.
Amiga @lorennys te quedo hermosa esa gargantilla, me gustan mucho los trébol, de echo he realizado 2, me encanto en este estilo se ve muy delicada. Gracias por regalarnos esta belleza...
!DIY
Saludos querida @dayadam me alegra mucho que te haya gustado gracias por la visita y buen comentario 😊
You can query your personal balance by
!DIYSTATSAmiga felicidades 🎉 te quedó hermoso