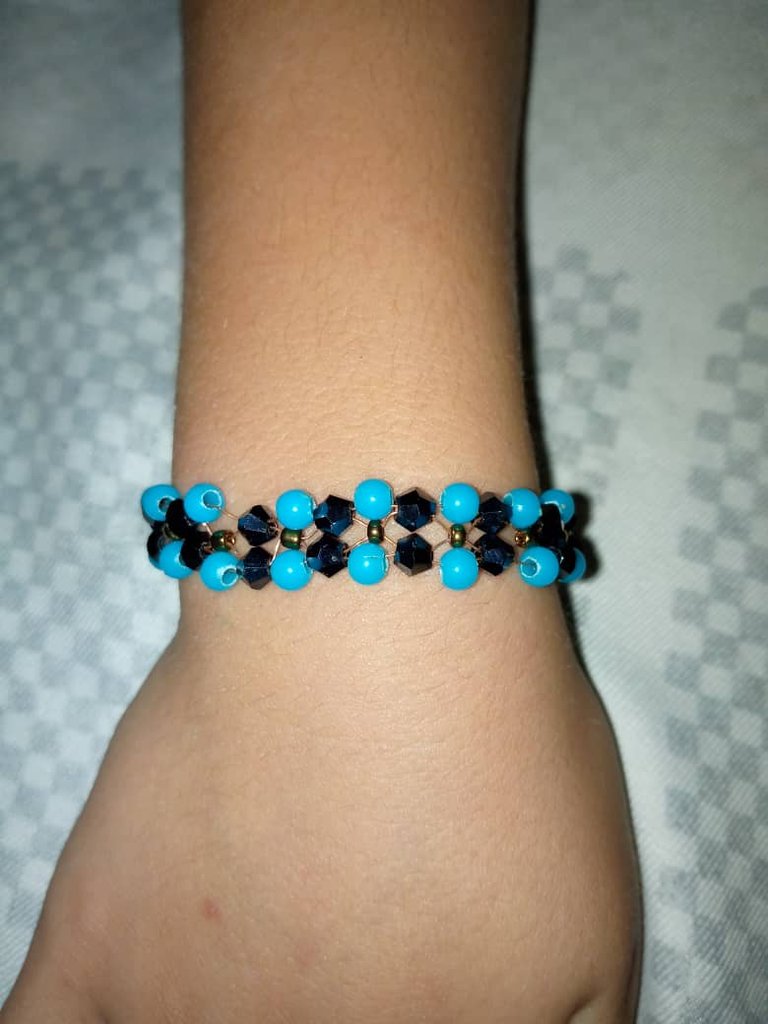
Esp-Eng Tutorial Pulsera de Perlas y Cristales un tejido de cuatro puntas.//Esp-Eng Tutorial Pearl and Crystal Bracelet a four-point weave.
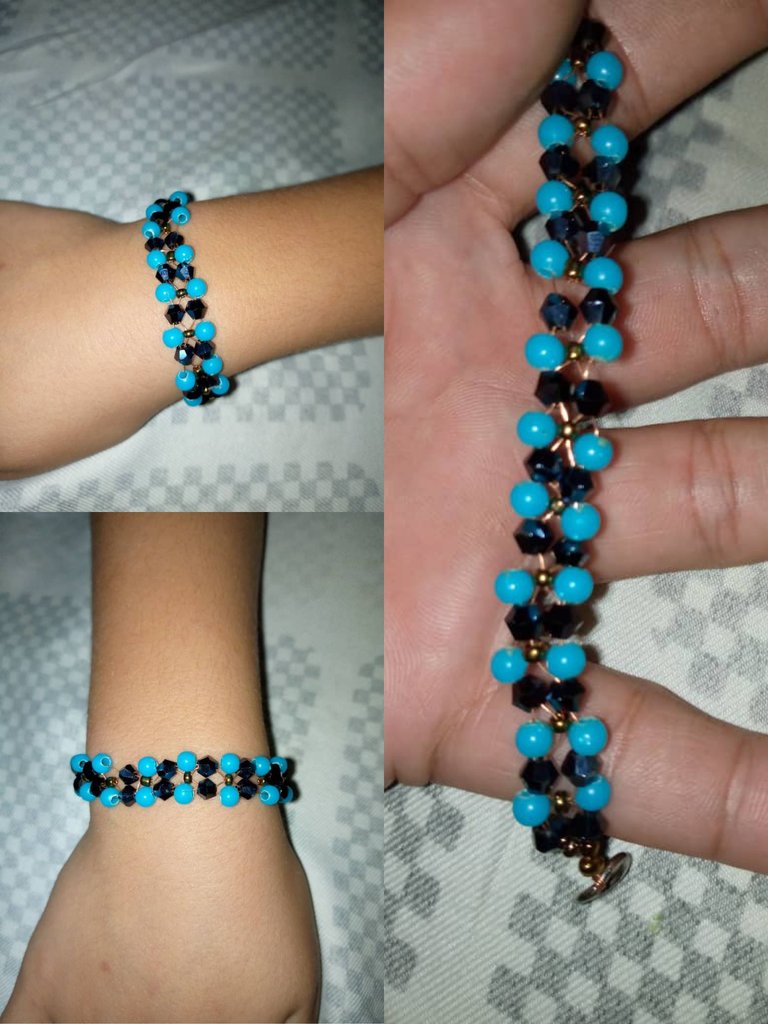
Hola que tal cómo están todos mis queridos amigos de esta hermosa comunidad creativa de #jewelry, feliz tarde para todos y feliz domingo espero que estén disfrutando de este día en compañía de sus familiares y amigos más queridos Yo me encuentro muy feliz de poder estar una vez más por acá por esta comunidad compartiendo con todos ustedes un tutorial más y en esta ocasión les traigo un paso a paso para realizar una hermosa pulsera de perlas y cristales utilizando un tejido de cuatro puntas se ve difícil pero es muy fácil de realizar espero que les guste esta técnica de tejido y el diseño de la pulsera así que sin más que decirles les diré a continuación los materiales que utilicé para esta hermosa creación.
Hello, how are all my dear friends from this beautiful creative #jewelry community, happy afternoon to all and happy Sunday, I hope you are enjoying this day in the company of your family and dearest friends. I am very happy to be able to be here once again here in this community sharing with all of you one more tutorial and this time I bring you a step by step to make a beautiful pearl and crystal bracelet using a four-point fabric, it looks difficult but it is very easy to make, I hope you like it. If you like this weaving technique and the design of the bracelet, so without further ado, I will tell you below the materials I used for this beautiful creation.
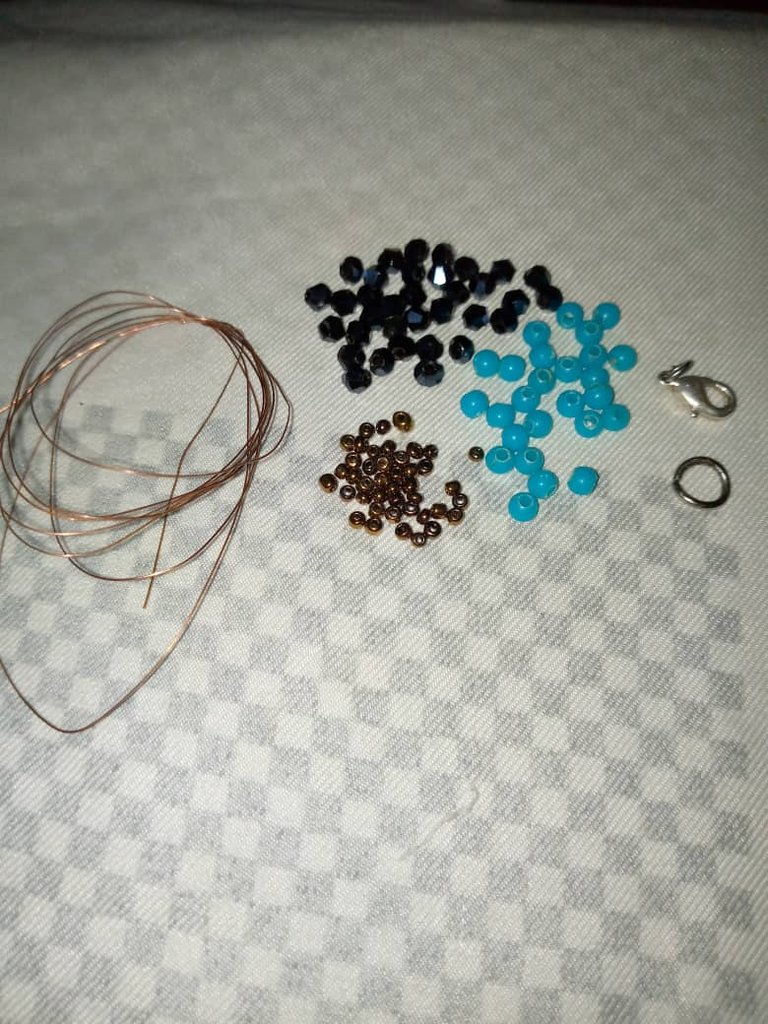
Materiales
💎 Perlas azules
💎 Cristales negros
💎 Mostacillas doradas
💎 Alambre de cobre
💎 Pasador
💎 Aro de metal.
Materials
💎 Blue pearls
💎 Black crystals
💎 Golden beads
💎 Copper wire
💎 Pin
💎 Metal ring.
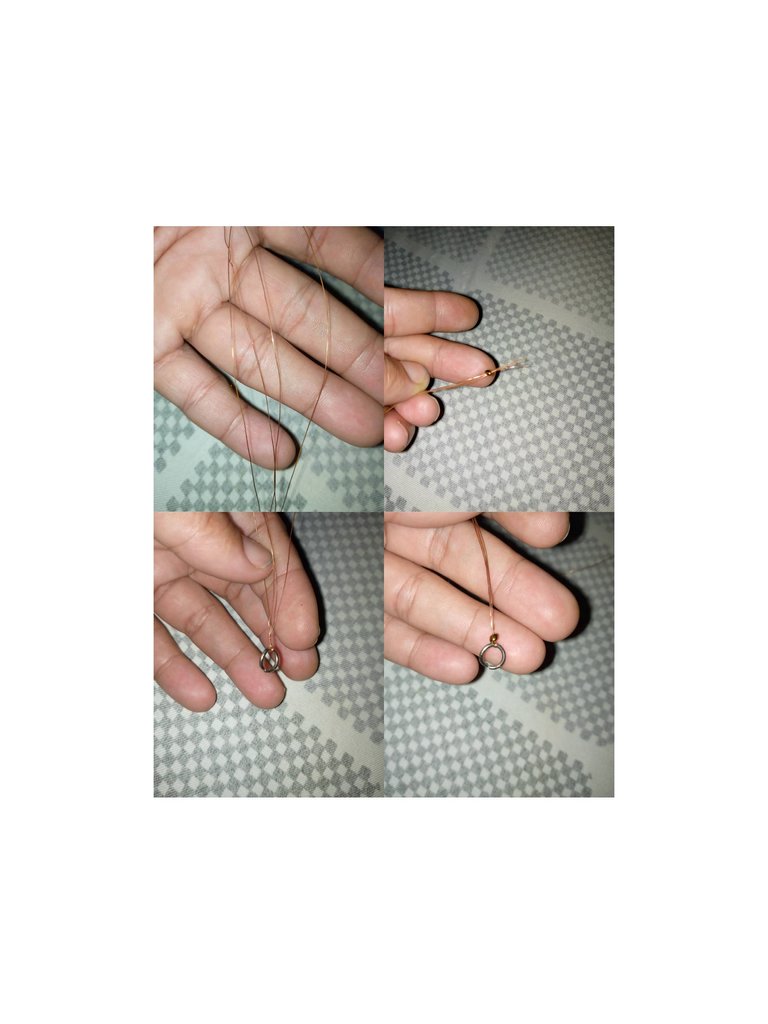
Paso a paso
comencemos!
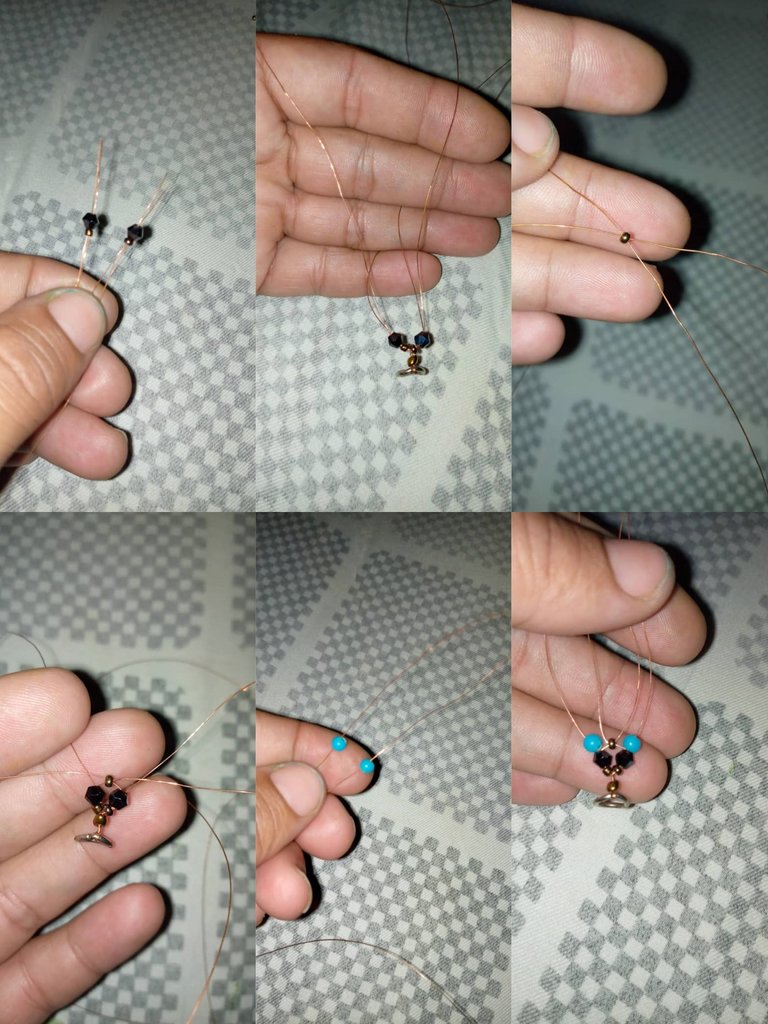
Bueno me queridos amigo para comenzar con la creación de hermosa pulsera lo primero que tenemos que hacer es cortar dos pedazos y alambre de un metro cada uno para esto doblar loza la mitad y pasaron por ello el aro de metal le damos para puerta para asegurar mejor y empezamos colocando por las cuatro puntaje quedan una moto silla dorado y la colocamos para que quede justo en los nudos que hice al lado del aro.
Step by Step
let's get started!
Well, dear friend, to start with the creation of a beautiful bracelet, the first thing we have to do is cut two pieces and wire one meter each. For this, fold the earthenware in half and pass through it the metal ring we give for the door to better secure it. and we start by placing a golden motorcycle chair for the four scores and we place it so that it is right in the knots that I made next to the ring.
El siguiente paso que realice fue separar y colocar dos puntas de cada lado para pasar por dos puntas una mostacilla dorada y un cristal negro esto lo hago de cada lado luego agarro una punta de cada lado y le coloco una mostacilla dorada cruzando esas dos puntas del alambre de cobre y las dos que dejé por fuera le coloqué una perla azul de cada lado y así terminamos este primer paso.
The next step I did was to separate and place two points on each side to pass through two points a golden bead and a black crystal. I do this on each side, then I take one point on each side and place a golden bead crossing those two points of the copper wire and the two that I left outside I placed a blue bead on each side and that's how we finished this first step
Ahora vuelvo a pasar por dos puntas de cada lado un cristal negro Y de igual manera agarró una punta del alambre de cada lado para colocar una mostacilla dorada cruzando ambas puntas del alambre y con las dos que queda de cada lado le coloco una perla azul.
Now I once again pass a black crystal through two ends of each side. And in the same way I grabbed one end of the wire on each side to place a golden bead crossing both ends of the wire and with the two that remain on each side I placed a blue pearl.
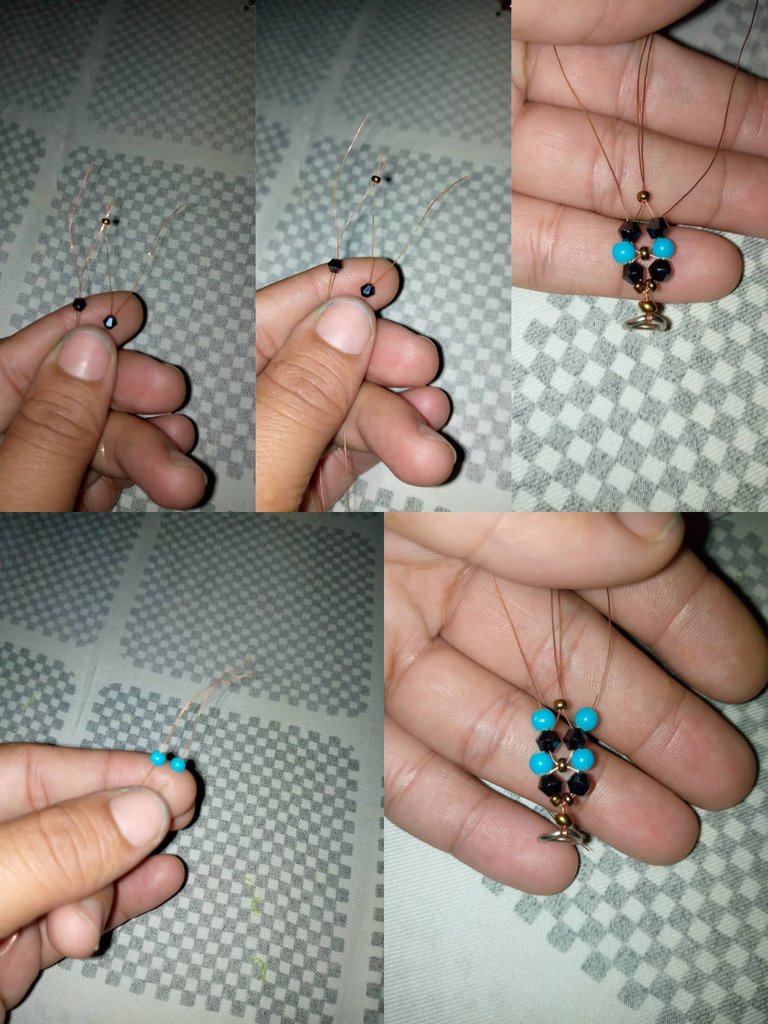
Aquí vuelvo a colocar nuevamente por dos puntas de cada lado el cristal negro agarro una punta de cada lado para colocarle la mostacilla que cruzará las dos puntas del medio y con las dos puntas que quedan de cada lado le coloco La perla azul y así este paso es el que iremos repitiendo hasta obtener el largo adecuado de la pulsera.
Here I place the black crystal again on two points on each side, I take one point on each side to place the bead that will cross the two points in the middle and with the two points that remain on each side I place the blue pearl and thus this step It is the one that we will repeat until we obtain the appropriate length of the bracelet.
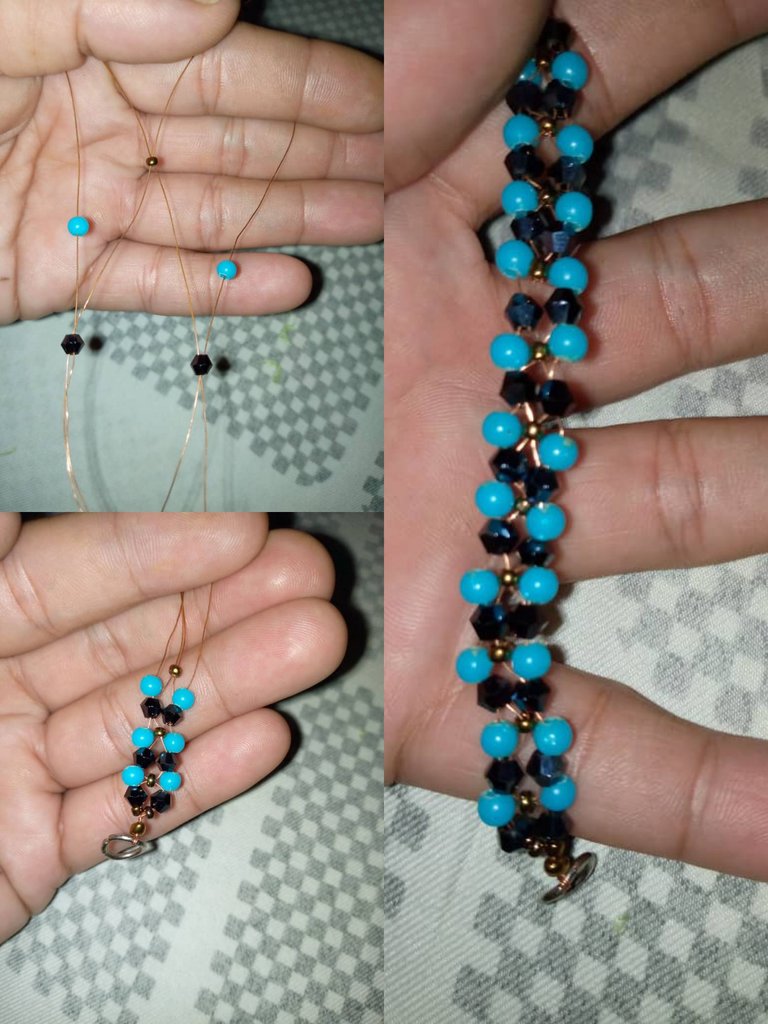
Ya con el largo listo y terminando con los cristales negros pasé por dos de un lado una mostacilla dorada y igual del otro lado luego uni las cuatro puntas y pasé una mostacilla dorada aproveché para colocarle el pasador y le di vuelta al alambre para sujetar lo mejor y listo.
With the length ready and finishing with the black crystals, I passed a golden bead on two of one side and the same on the other side, then I joined the four ends and passed a golden bead. I took the opportunity to place the pin and turned the wire to hold the best and ready.
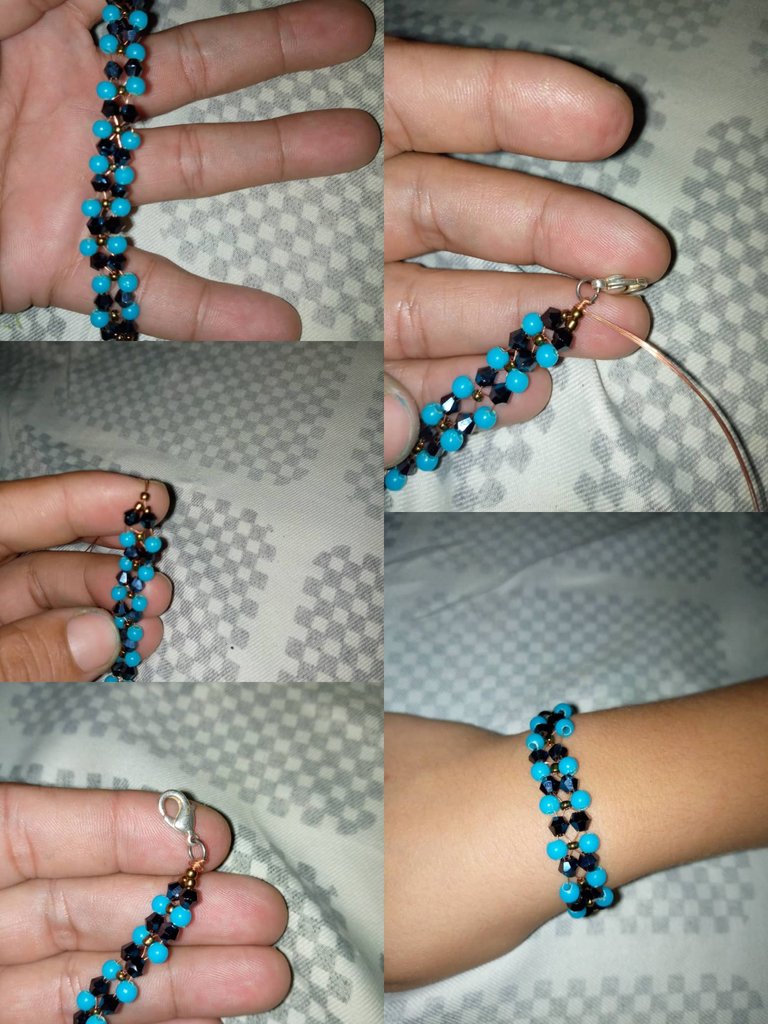
Bueno como pueden ver mis queridos amigos está pulsera es muy fácil de realizar además que queda muy linda al terminar el trabajo espero que les haya gustado este diseño me despido de ustedes hasta una próxima ocasión y muchas gracias a todos por visitar mi blog.
Well, as you can see, my dear friends, this bracelet is very easy to make and it looks very pretty when you finish the work. I hope you liked this design. I say goodbye to you until the next time and thank you all very much for visiting my blog.
Todas las fotos son de mi autoría
@mariaj151305
All photos are my author
@mariaj151305
Te ha quedado hermosa, me gusta mucho los colores que elegiste. 🤗
Gracias amiga @bayondalways1 me alegro mucho que te haya gustado.
The weaving technique added a beautiful style to the bracelet. Nice work.
Gracias colmena 🤗
La verdad es que si se ve complicado, pero tú lo has realizado maravillosamente. Te felicito.
Gracias amiga @artsugar, si se ve difícil pero si te das cuenta sus pasos son muy fácil de realizar. Gracias por comentar saludos
Hola amiga se ve muy bonita tu joya y la explicación está muy bien detallada que nos ayuda a entender como hacerla . Gracias por compartir
Gracias a ti amigo @virgilio07 por visitar y comentar saludos 🤗
👍
From Venezuela, our witness drives decentralization and the adoption of Web3 technology, creating opportunities for the local community and contributing to the global ecosystem. // Desde Venezuela, nuestro testigo impulsa la descentralización y la adopción de la tecnología Web3, generando oportunidades para la comunidad local y contribuyendo al ecosistema global.
Sigue, contacta y se parte del testigo en: // Follow, contact and be part of the witness in: