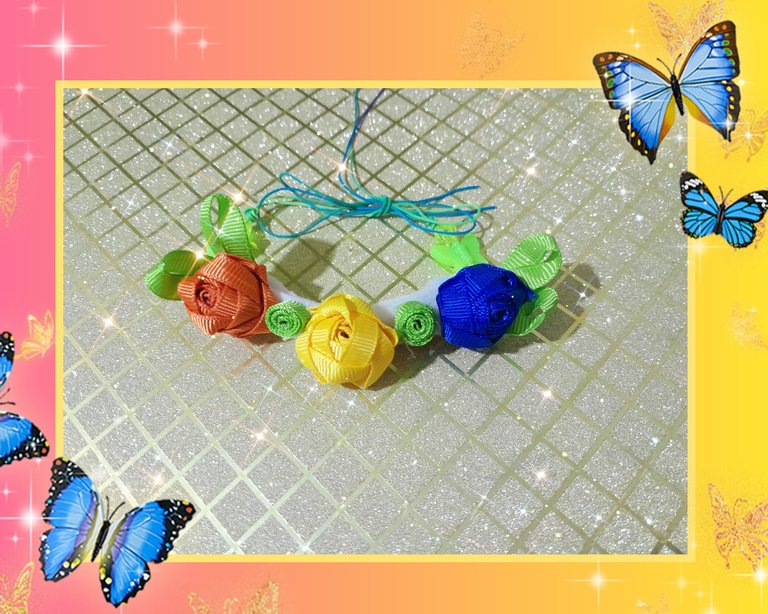
Hola amigos de Jewelry 💎, un cordial saludo para esta linda comunidad llena de creatividad y talento, siempre es un placer compartir con ustedes, hoy les traigo la elaboración de una diadema de flores, mi hija tenía un acto cultural y en su moño tenía que llevar flores, así que me puse manos a la obra con los materiales que tenia a la mano, los colores anaranjado, azul y amarillo, fueron los colores que debía utilizar acompáñame a elaborarla.
Hello friends of Jewelry 💎, a warm greeting for this beautiful community full of creativity and talent, it is always a pleasure to share with you, today I bring you the elaboration of a flower headband, my daughter had a cultural event and in her bow had to wear flowers, so I got down to work with the materials I had at hand, the colors orange, blue and yellow, were the colors I had to use accompany me to elaborate it.
Materiales| Materials
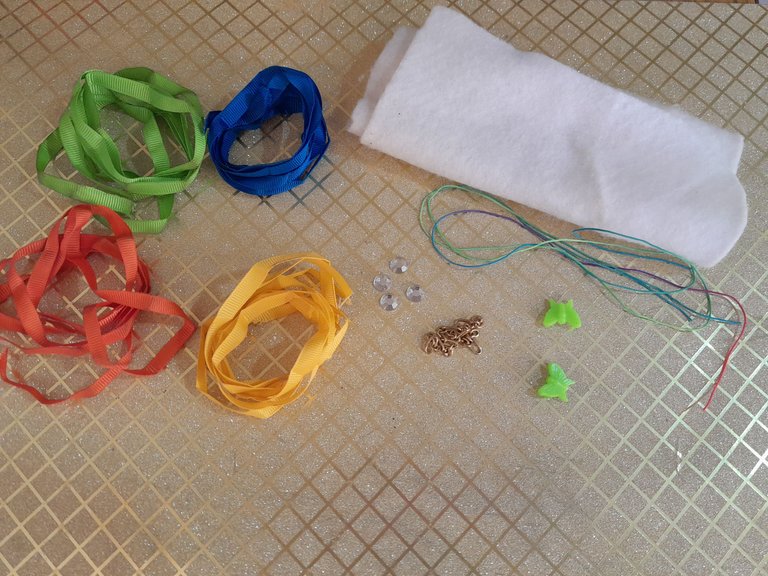
Para este trabajo necesitaremos los siguientes materiales 👇:
Cintas de tela, amarilla, azul marino, anaranjada y verde.
Hilo chino multi colores.
Fieltro blanco.
2 Mariposas.
Hilo y aguja.
Silicon.
For this work we will need the following materials 👇:
Fabric ribbons, yellow, navy blue, orange and green.
Multi-colored Chinese thread.
White felt.
2 butterflies.
Thread and needle.
Silicone.
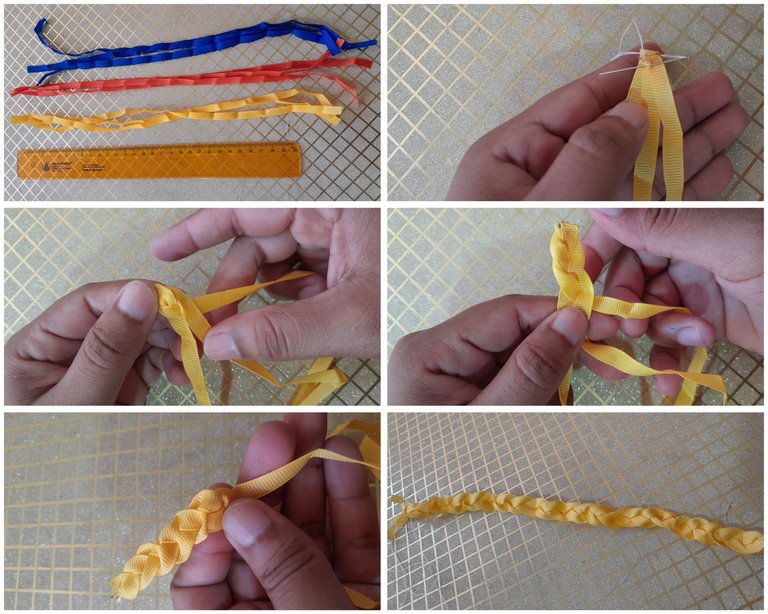
Paso 1| Step 1
Mido y corto las cintas, amarilla, roja y naranja, su medida es de 35 cm, la divido cada una en tres partes iguales. Con ayuda de hilo y agua uno la punta de las tres partes, en este caso la cinta amarilla, después de cocerlas comienzo con el tejido.
Paso la cinta de la izquierda por encima de la cinta del medio, luego paso la cinta de la derecha por encima de la cinta que acabo de cruzar, la cinta del medio la paso a la izquierda, y repito el mismo procedimiento hasta tener toda la cinta en un tejido, es muy fácil es el mismo tejido que hacemos en el cabello. Una vez tejido vuelvo a cocer la punta final para evitar que se deshaga el tejido y corto si queda algún exceso de cinta.
I measure and cut the ribbons, yellow, red and orange, their measure is 35 cm, I divide each one in three equal parts. With the help of thread and water I join the tip of the three parts, in this case the yellow ribbon, after cooking them I start with the weaving.
I pass the ribbon on the left over the middle ribbon, then I pass the ribbon on the right over the ribbon I just crossed, the middle ribbon I pass it to the left, and I repeat the same procedure until I have all the ribbon in one weave, it is very easy, it is the same weave we do in the hair. Once woven, I boil again the final end to prevent the weaving from unraveling and cut if there is any excess ribbon.
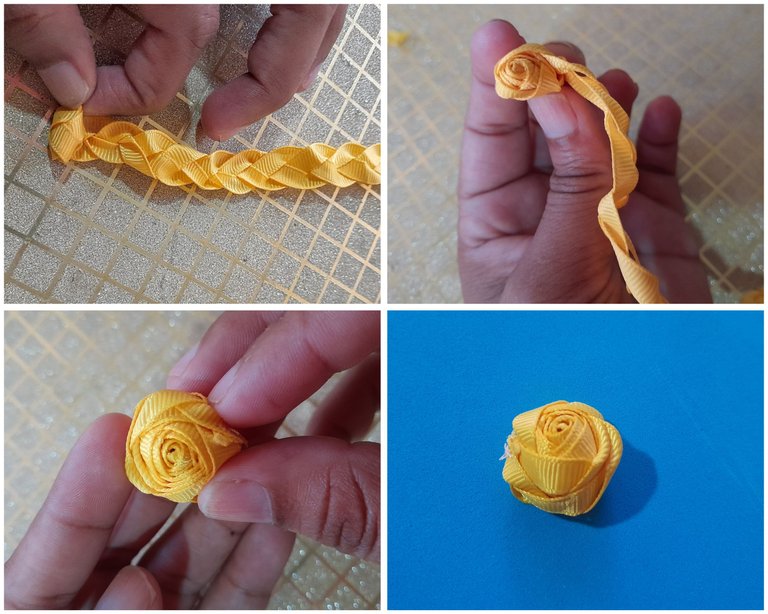
Paso 2| Step 2
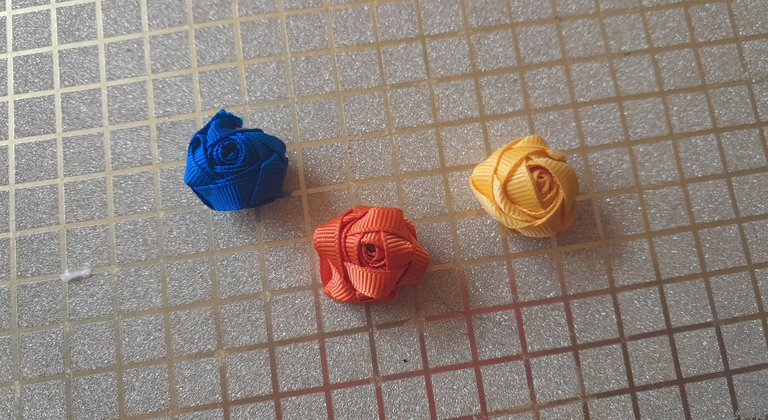
Para la elaboración de la rosa, agarro la cinta tejida desde la punta y voy enrollando hasta el final, pego con silicon y ajusto con la aguja, repito el mismo procedimiento con los demás colores y ya tengo lista mis tres rosas.
To make the rose, I take the woven ribbon from the tip and roll it up to the end, glue it with silicone and adjust it with the needle, repeat the same procedure with the other colors and I have my three roses ready.
Paso 3| Step 3
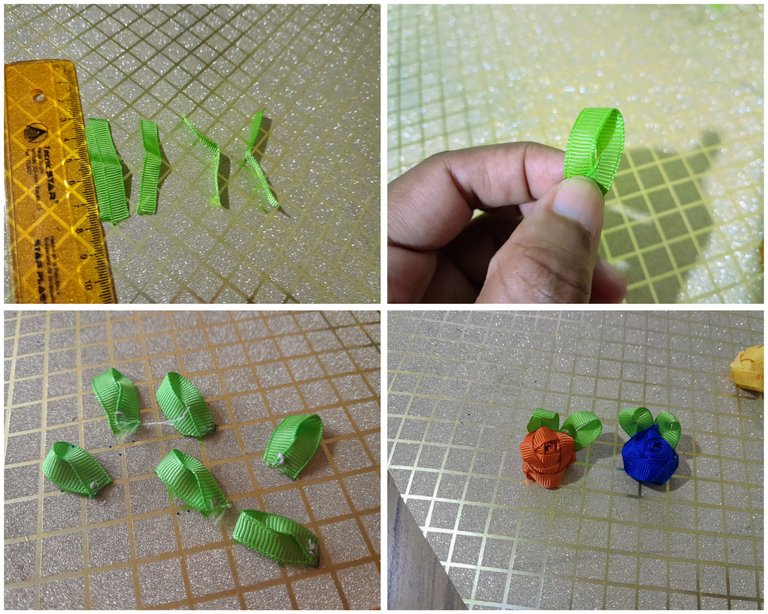
Es la hora de elaborar las hojas de nuestras rosas, de la cinta verde corto tiras de 5 cm, las Doblo por la mitad, paso la punta de la parte de abajo por la de arriba y ajusto con dos puntos de costura, ya tengo lista las hojas, y pego a las rosas con silicon por el lado donde hice la costura, excepto a la rosa amarilla.
It is time to make the leaves of our roses, from the green ribbon I cut strips of 5 cm, I fold them in half, I pass the tip of the bottom by the top and adjust with two stitches, I have the leaves ready, and glue the roses with silicone on the side where I made the seam, except the yellow rose.
Paso 4| Step 4
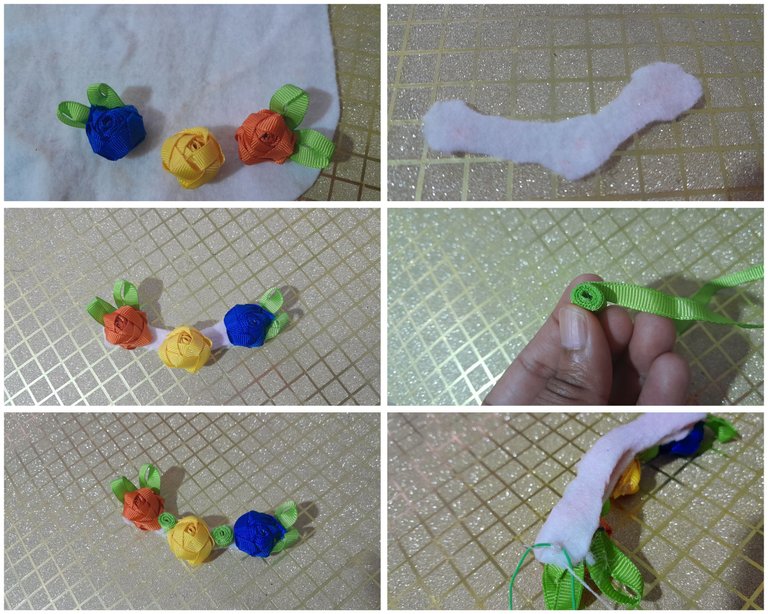
Pongo las rosas en el fieltro, para hacer la medida y la forma que tendrá la diadema, marco y corto, para que se mantenga más firme pego el fieltro en foami, tanto arriba como en la parte de abajo pego fieltro.
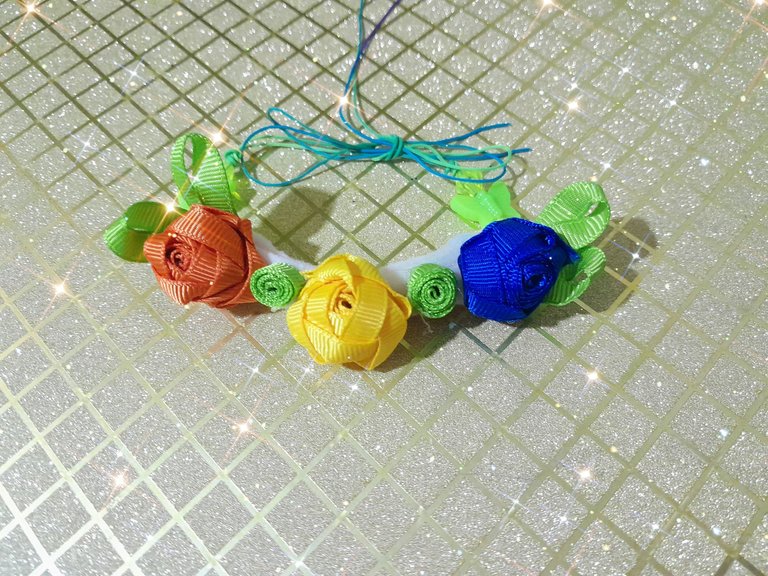
Pego las rosas en el fieltro, la azul, anaranjada en los laterales y la amarilla en el centro.
Corto la cinta verde en tiras de 20 cm enrollo y pego en el inicio, sigo enrollando toda la cinta y pego con silicon. Luego las pego en el fieltro de lado de la rosa amarilla.
El hilo chino lo corto a la mitad y lo pego de ambos lados de la diadema, introduzco las mariposas, ya tengo lista mi diadema.
I put the roses on the felt, to make the measure and the shape that the headband will have, I mark and cut, to keep it firmer I glue the felt on foami, both on the top and on the bottom I glue felt.
I glue the roses on the felt, the blue and orange on the sides and the yellow in the center.
I cut the green ribbon into 20 cm strips, roll them up and glue them at the beginning, continue rolling all the ribbon and glue with silicone. Then I glue them to the felt on the side of the yellow rose.
I cut the Chinese thread in half and glue it on both sides of the headband, I insert the butterflies, I have my headband ready.
Presentación final| Final presentation
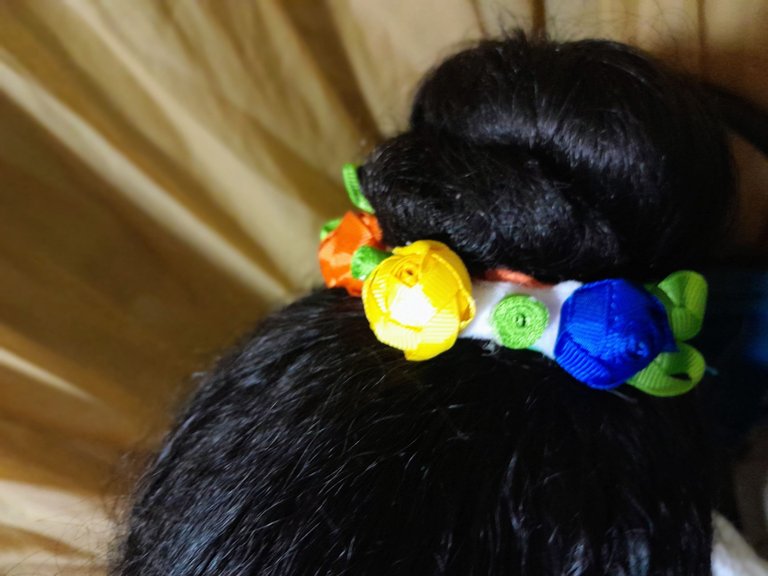
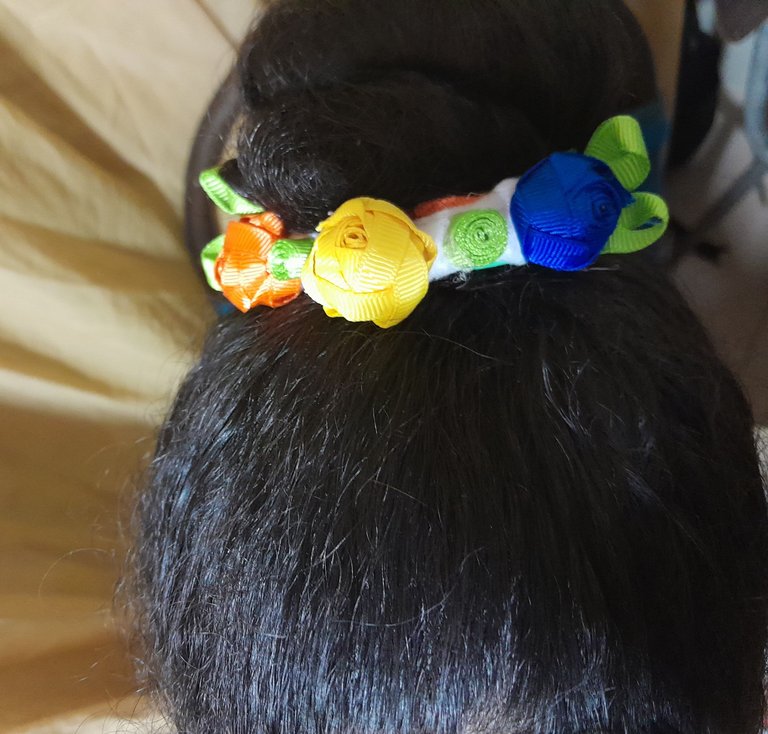
Muchas gracias por este lindo espacio, espero les haya gustado mi elaboración de hoy, mis mejores deseos, nos vemos pronto, saludos ☺️.
Thank you very much for this nice space, I hope you liked my elaboration today, best wishes, see you soon, greetings ☺️.
Fotos propias tomadas con mi teléfono Samsung A13, 50 mp. Edición de portada con Picsart collage en Gridart.
Own photos taken with my Samsung A13 phone, 50 mp. Cover editing with Picsart collage in Gridart.
Contenido exclusivo para hive. / Exclusive content for hive.
Traducción/ translation --->deepl
The rewards earned on this comment will go directly to the people( @meivys ) sharing the post on Twitter as long as they are registered with @poshtoken. Sign up at https://hiveposh.com.
¡Hermoso trabajo!😙💖
Muchas gracias 😊😊
Thank you for sharing this post on HIVE!
Your content got selected by our fellow curator rezoanulvibes & you just received a little thank you upvote from us for your great work! Your post will be featured in one of our recurring compilations which are aiming to offer you a stage to widen your audience within the DIY scene of Hive. Stay creative & HIVE ON!
Please vote for our hive witness <3
Super tiernas esas rositas! Quedó bello tu trabajo gracias por compartir el proceso @meivys
Muchas gracias a ti por tu linda visita, saludos.😊😊
Congratulations @meivys! You have completed the following achievement on the Hive blockchain And have been rewarded with New badge(s)
Your next target is to reach 500 replies.
You can view your badges on your board and compare yourself to others in the Ranking
If you no longer want to receive notifications, reply to this comment with the word
STOPCheck out our last posts:
Support the HiveBuzz project. Vote for our proposal!
Que lindo se ve y esos colores que combina con todo ideal para las princesitas de la casa.
Muchas gracias amiga 😊😊🥰🥰