Saluditos Artistas Creativos de las Manualidades y la Joyería como se encuentran todos? Espero que hayan disfrutado el fin de semana y se encuentren descansados para seguir cumpliendo con las labores de la faena diaria, muy festejado este 24 de junio en muchas comunidades se realizaron ferias y tómbolas en honor a San Juan ya que es el Santo Patrón de las mismas, y a pesar del tiempo la tradición es hacer esas celebraciones que tienen mucho que ver con el folklore, especialmente en las áreas educativas.
Y ayer también fue el Día del Abogado, esos seres que son artífice en ayudar que la justicia se cumpla.
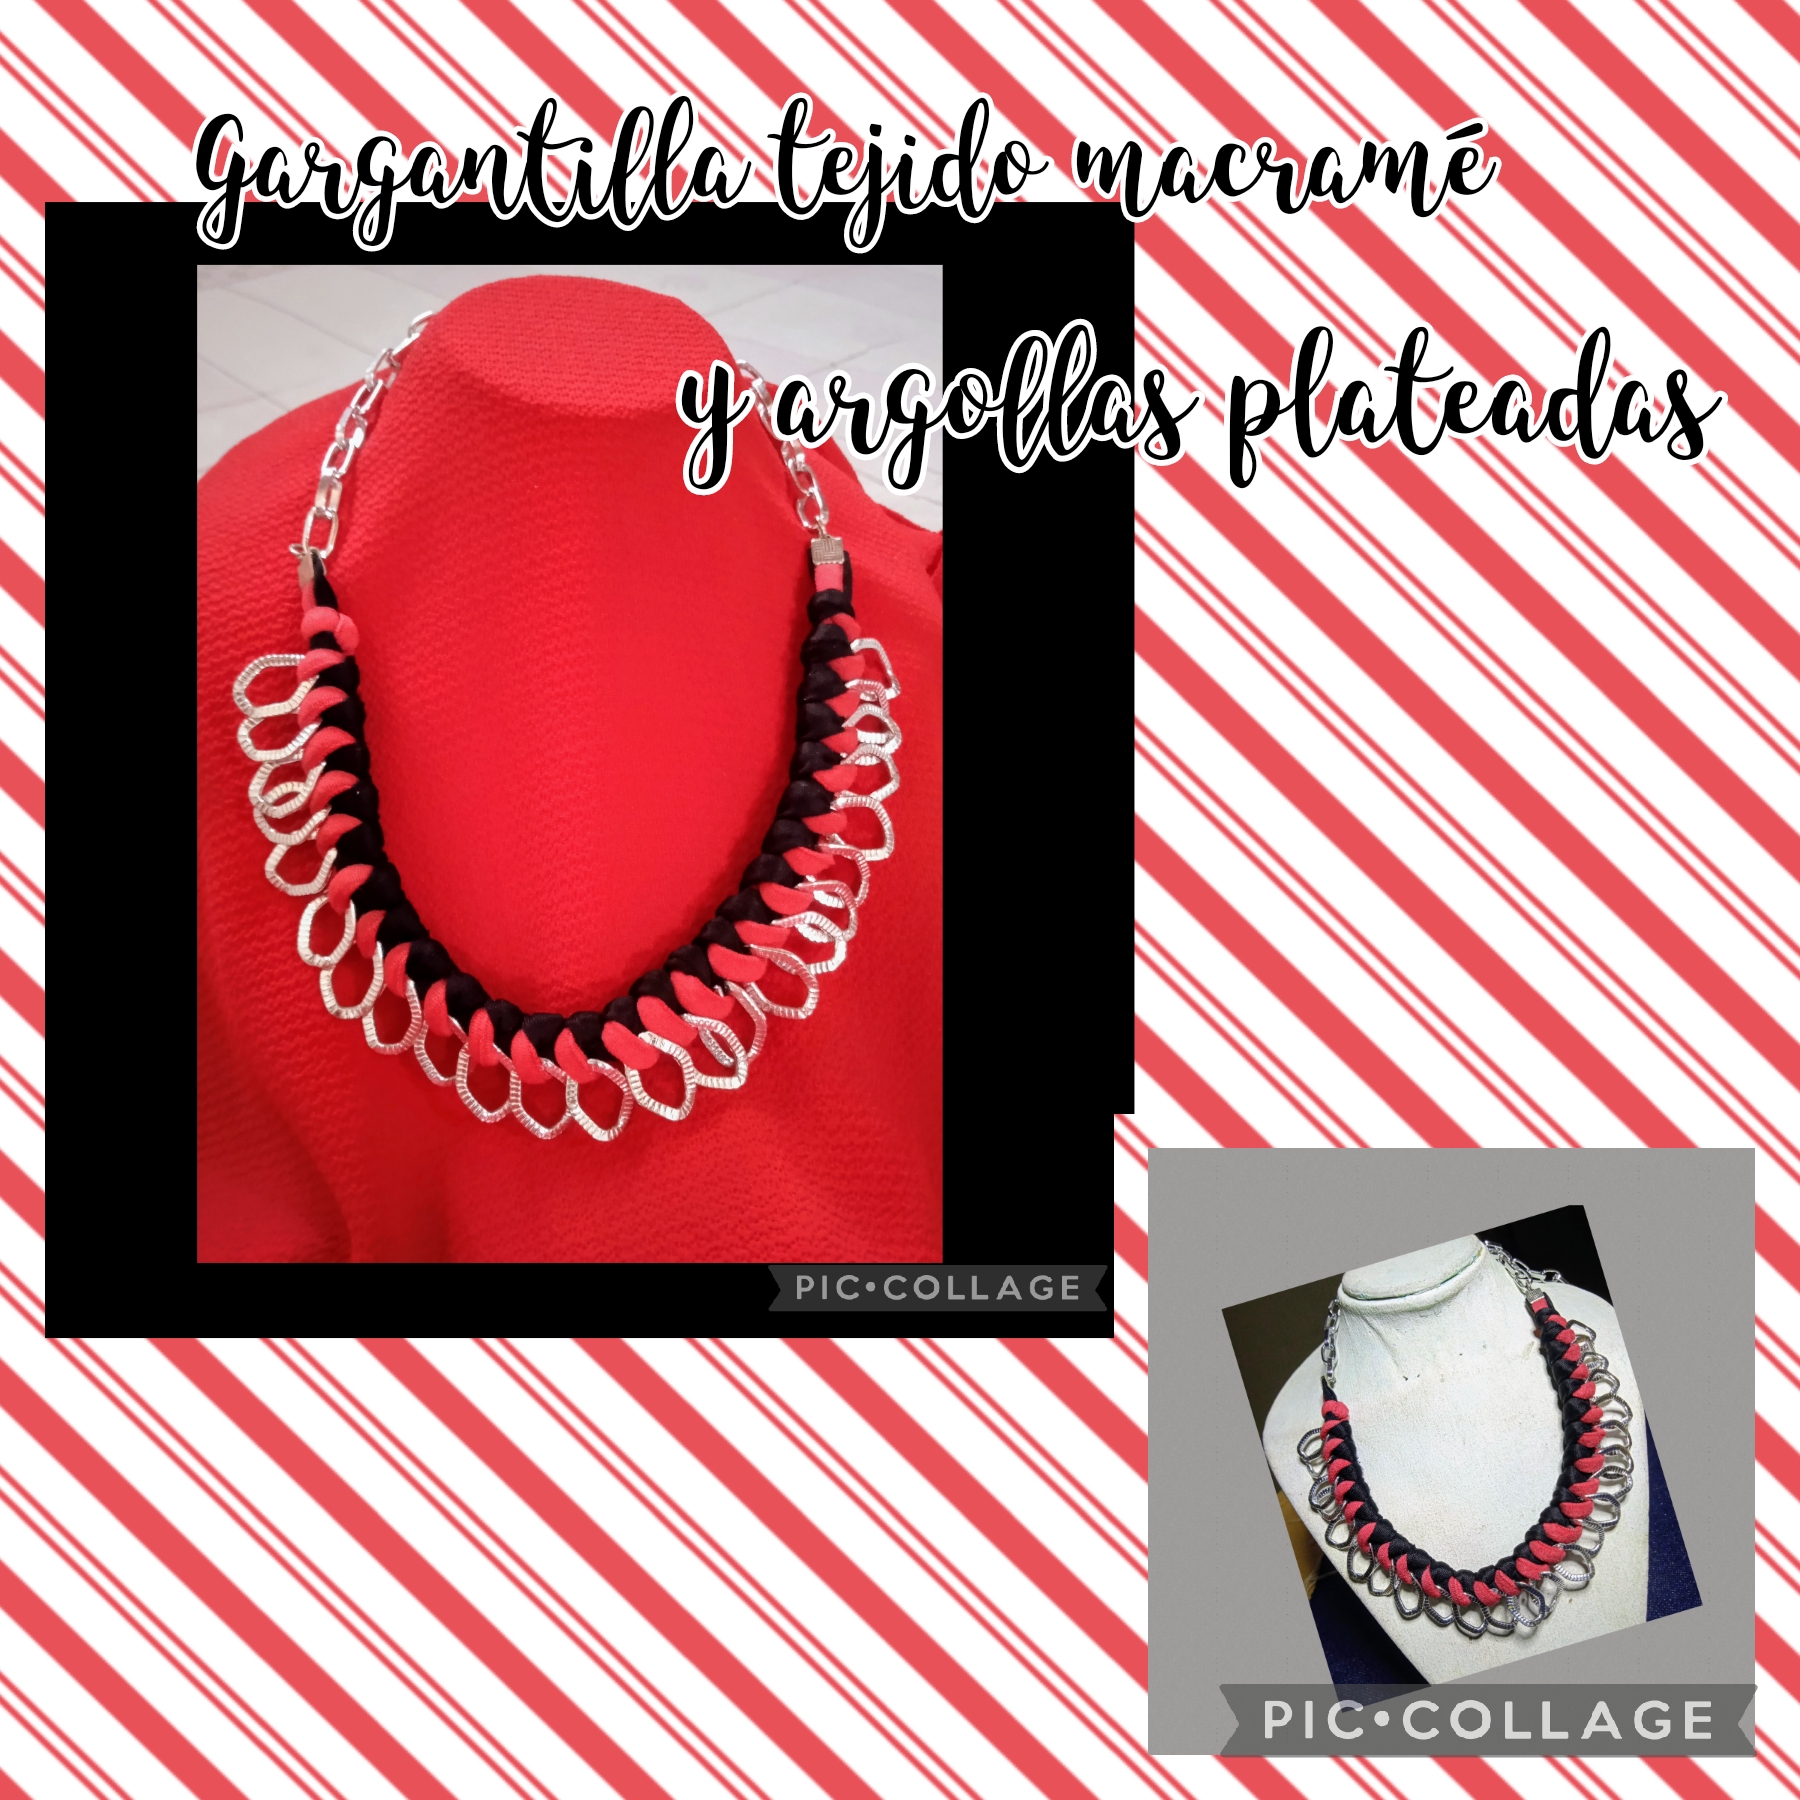
Hoy voy a compartirles un poco de la historia de este proyecto que realicé para una amiga, ella es precisamente una Licenciada del Derecho y hace unos siete años le hice una Gargantilla usando el nudo serpiente de la técnica macramé y adicional para hacerla más llamativa le coloque argollas plateadas, Me llamo y me comentó que se va hacia , Nueva York que todavía tiene esa gargantilla; pero que le gustaría llevarse una parecida en tonos rojo y negro, para su look en aquellos lados, por supuesto a esos pedidos nunca me niego y menos cuando pienso que mi diseño pronto se estará paseando por la quinta avenida🤣🤣.
Así que sigan leyendo para que vean el paso a paso de como la hice.
Greetings Creative Artists of Crafts and Jewelry, how are you all? I hope you have enjoyed the weekend and are rested to continue carrying out your daily tasks, this June 24th was very celebrated in many communities, fairs and raffles were held in honor of San Juan since he is the Patron Saint of the themselves, and despite time the tradition is to hold those celebrations that have a lot to do with folklore, especially in educational areas.
And yesterday was also Lawyer's Day, those beings who are responsible for helping justice be fulfilled.
Today I am going to share with you a little of the history of this project that I did for a friend, she is precisely a Law Graduate and about seven years ago I made her a Choker using the snake knot of the macramé technique and additionally to make it more striking I placed it silver hoops, he called me and told me that he was going to New York, that he still has that choker; but she would like to take a similar one in red and black tones, for her look in those parts, of course I never refuse those requests and even less so when I think that my design will soon be walking down Fifth Avenue🤣🤣.
So keep reading to see the step by step of how I made it.
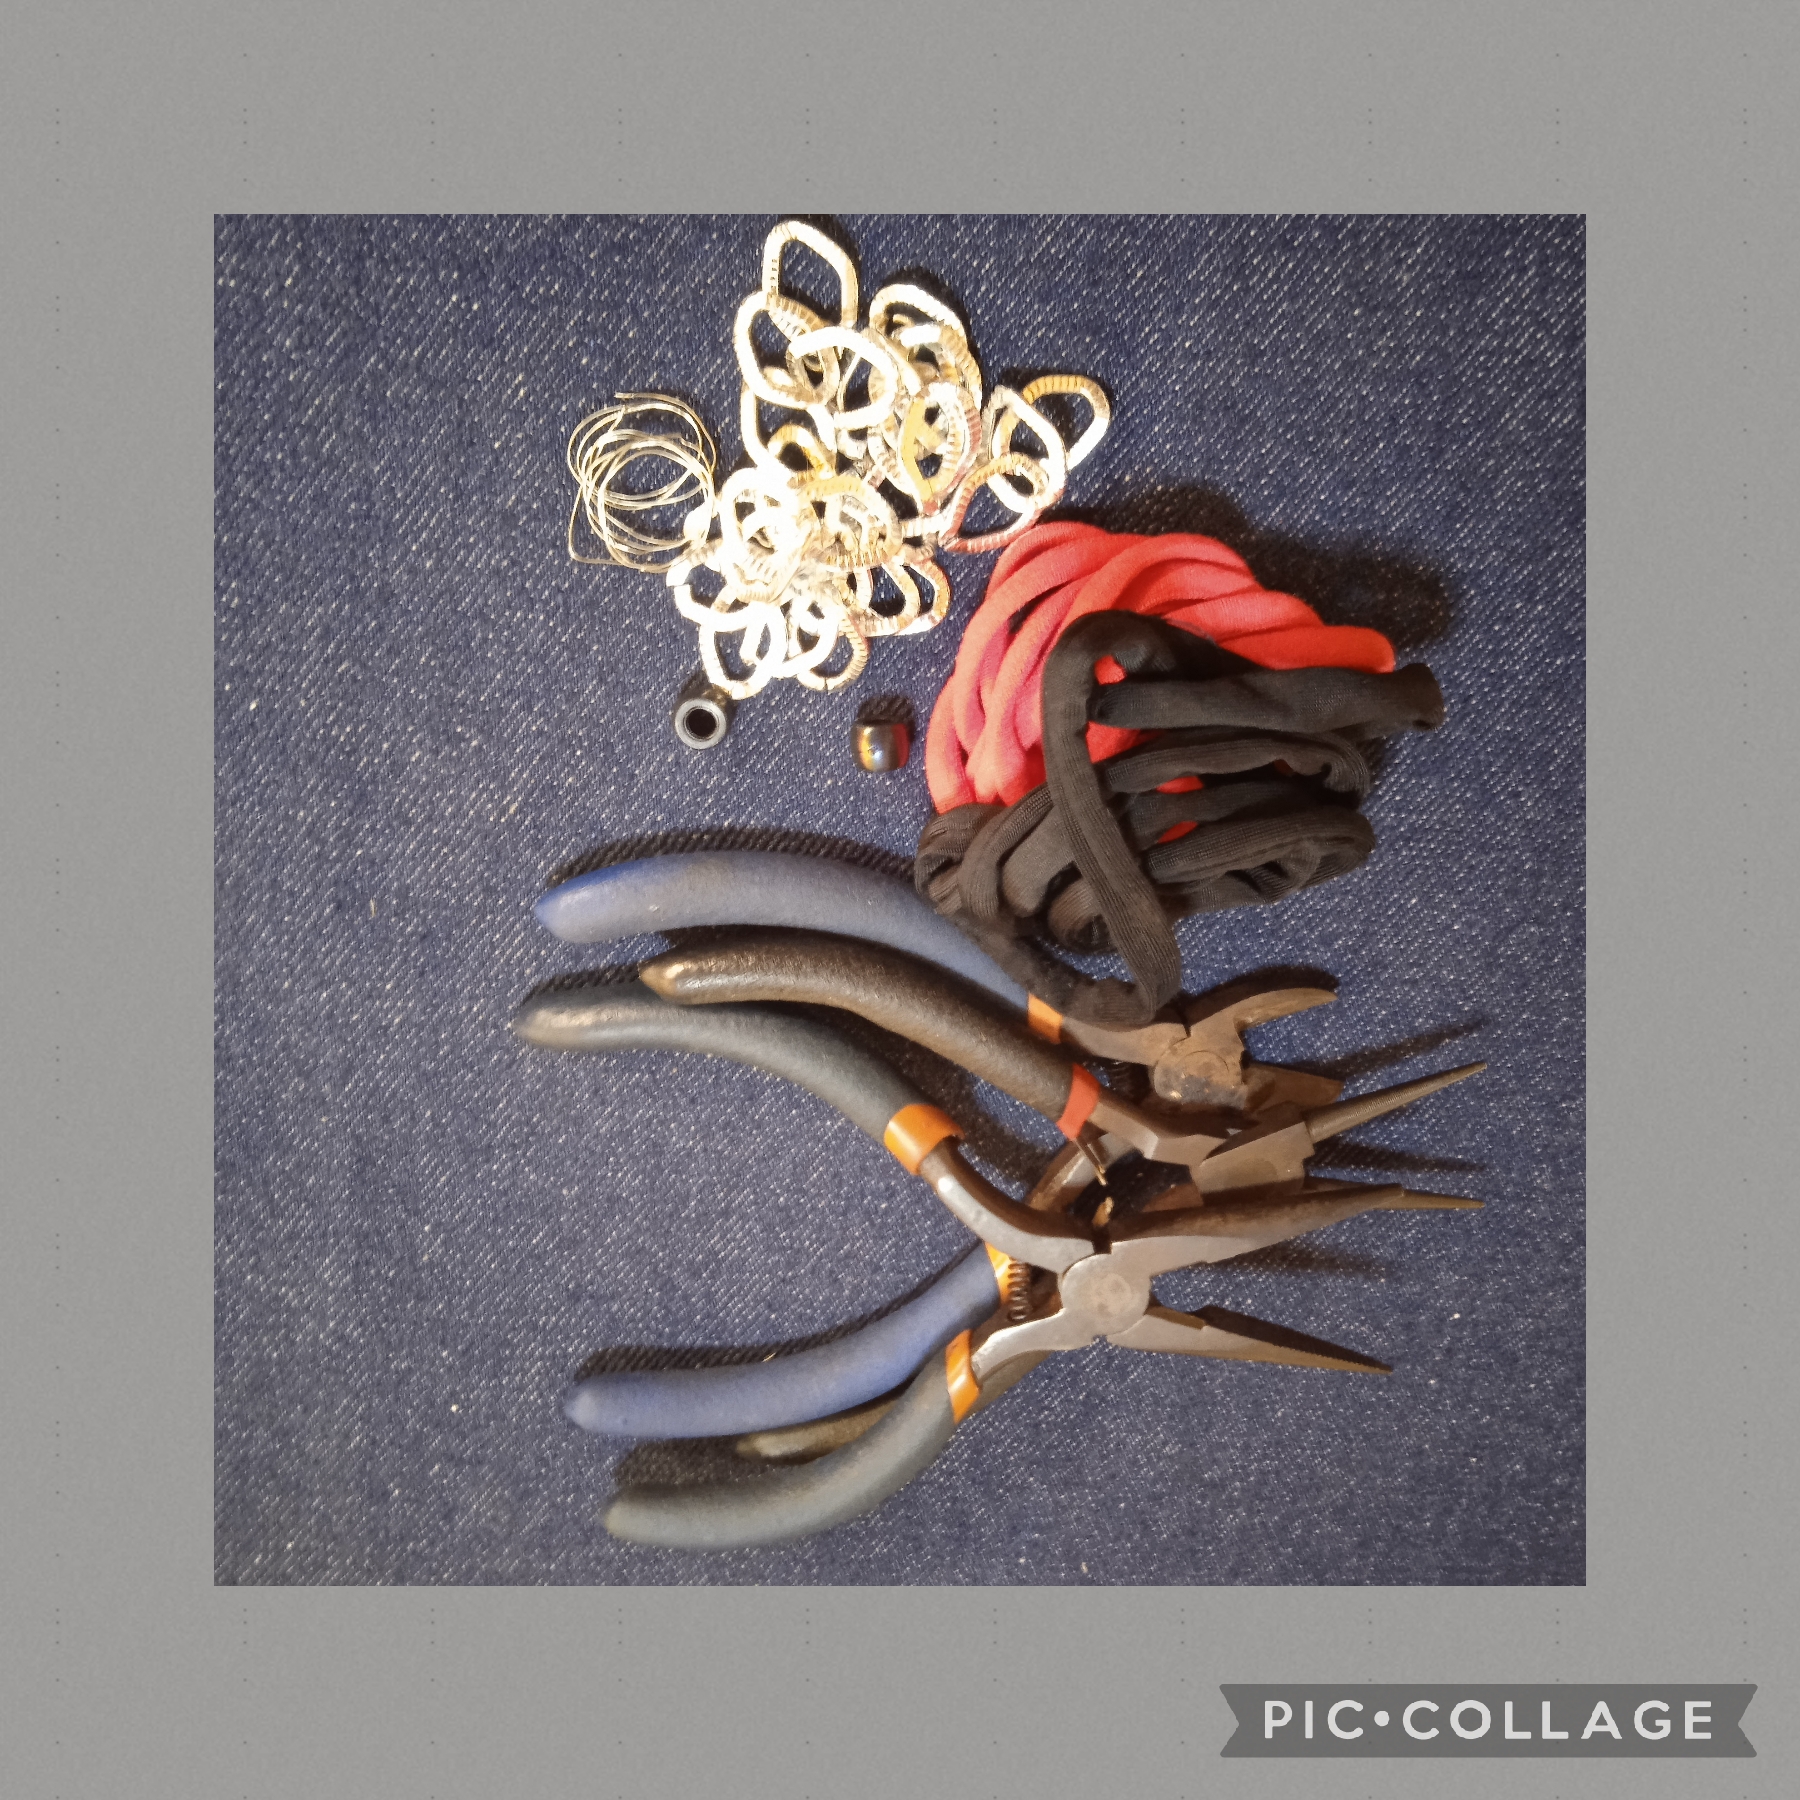
MATERIALES QUE USE PARA REALIZAR ÉSTA HERMOSA MANUALIDAD:
✓ Ochenta centímetros de cordón acrílico
negro.
✓ Ochenta centímetros de cordón
acrílico. rojo.
✓ Dos docenas de argollas ovaladas
plateadas .
✓ Dos terminales plateados.
✓ Tres Argollas pequeñas.
✓ Doce centímetros de cadena eslabones.
medianos plateada.
✓ Un cierre tipo caiman.
✓ Tijeras.
✓ Encendedor.
✓ Pinza de punta redonda.
√ Pinza plana.
✓MATERIALS USED TO MAKE THIS BEAUTIFUL CRAFTS:
✓ Eighty centimeters of acrylic cord
black.
✓ Eighty centimeters of cord
acrylic. red.
✓ Two dozen oval hoops
Plated .
✓ Two silver terminals.
✓ Three small rings.
✓ Twelve centimeters of chain links.
medium silver.
✓ An alligator type closure.
✓ Scissors.
✓ Lighter.
✓ Round nose tweezers.
√ Flat clamp.
SENCILLOS Y POCOS PASOS LOS USADOS EN LA ELABORACIÓN DÉ ESTA HERMOSA MANUALIDAD:
PRIMER PASO:
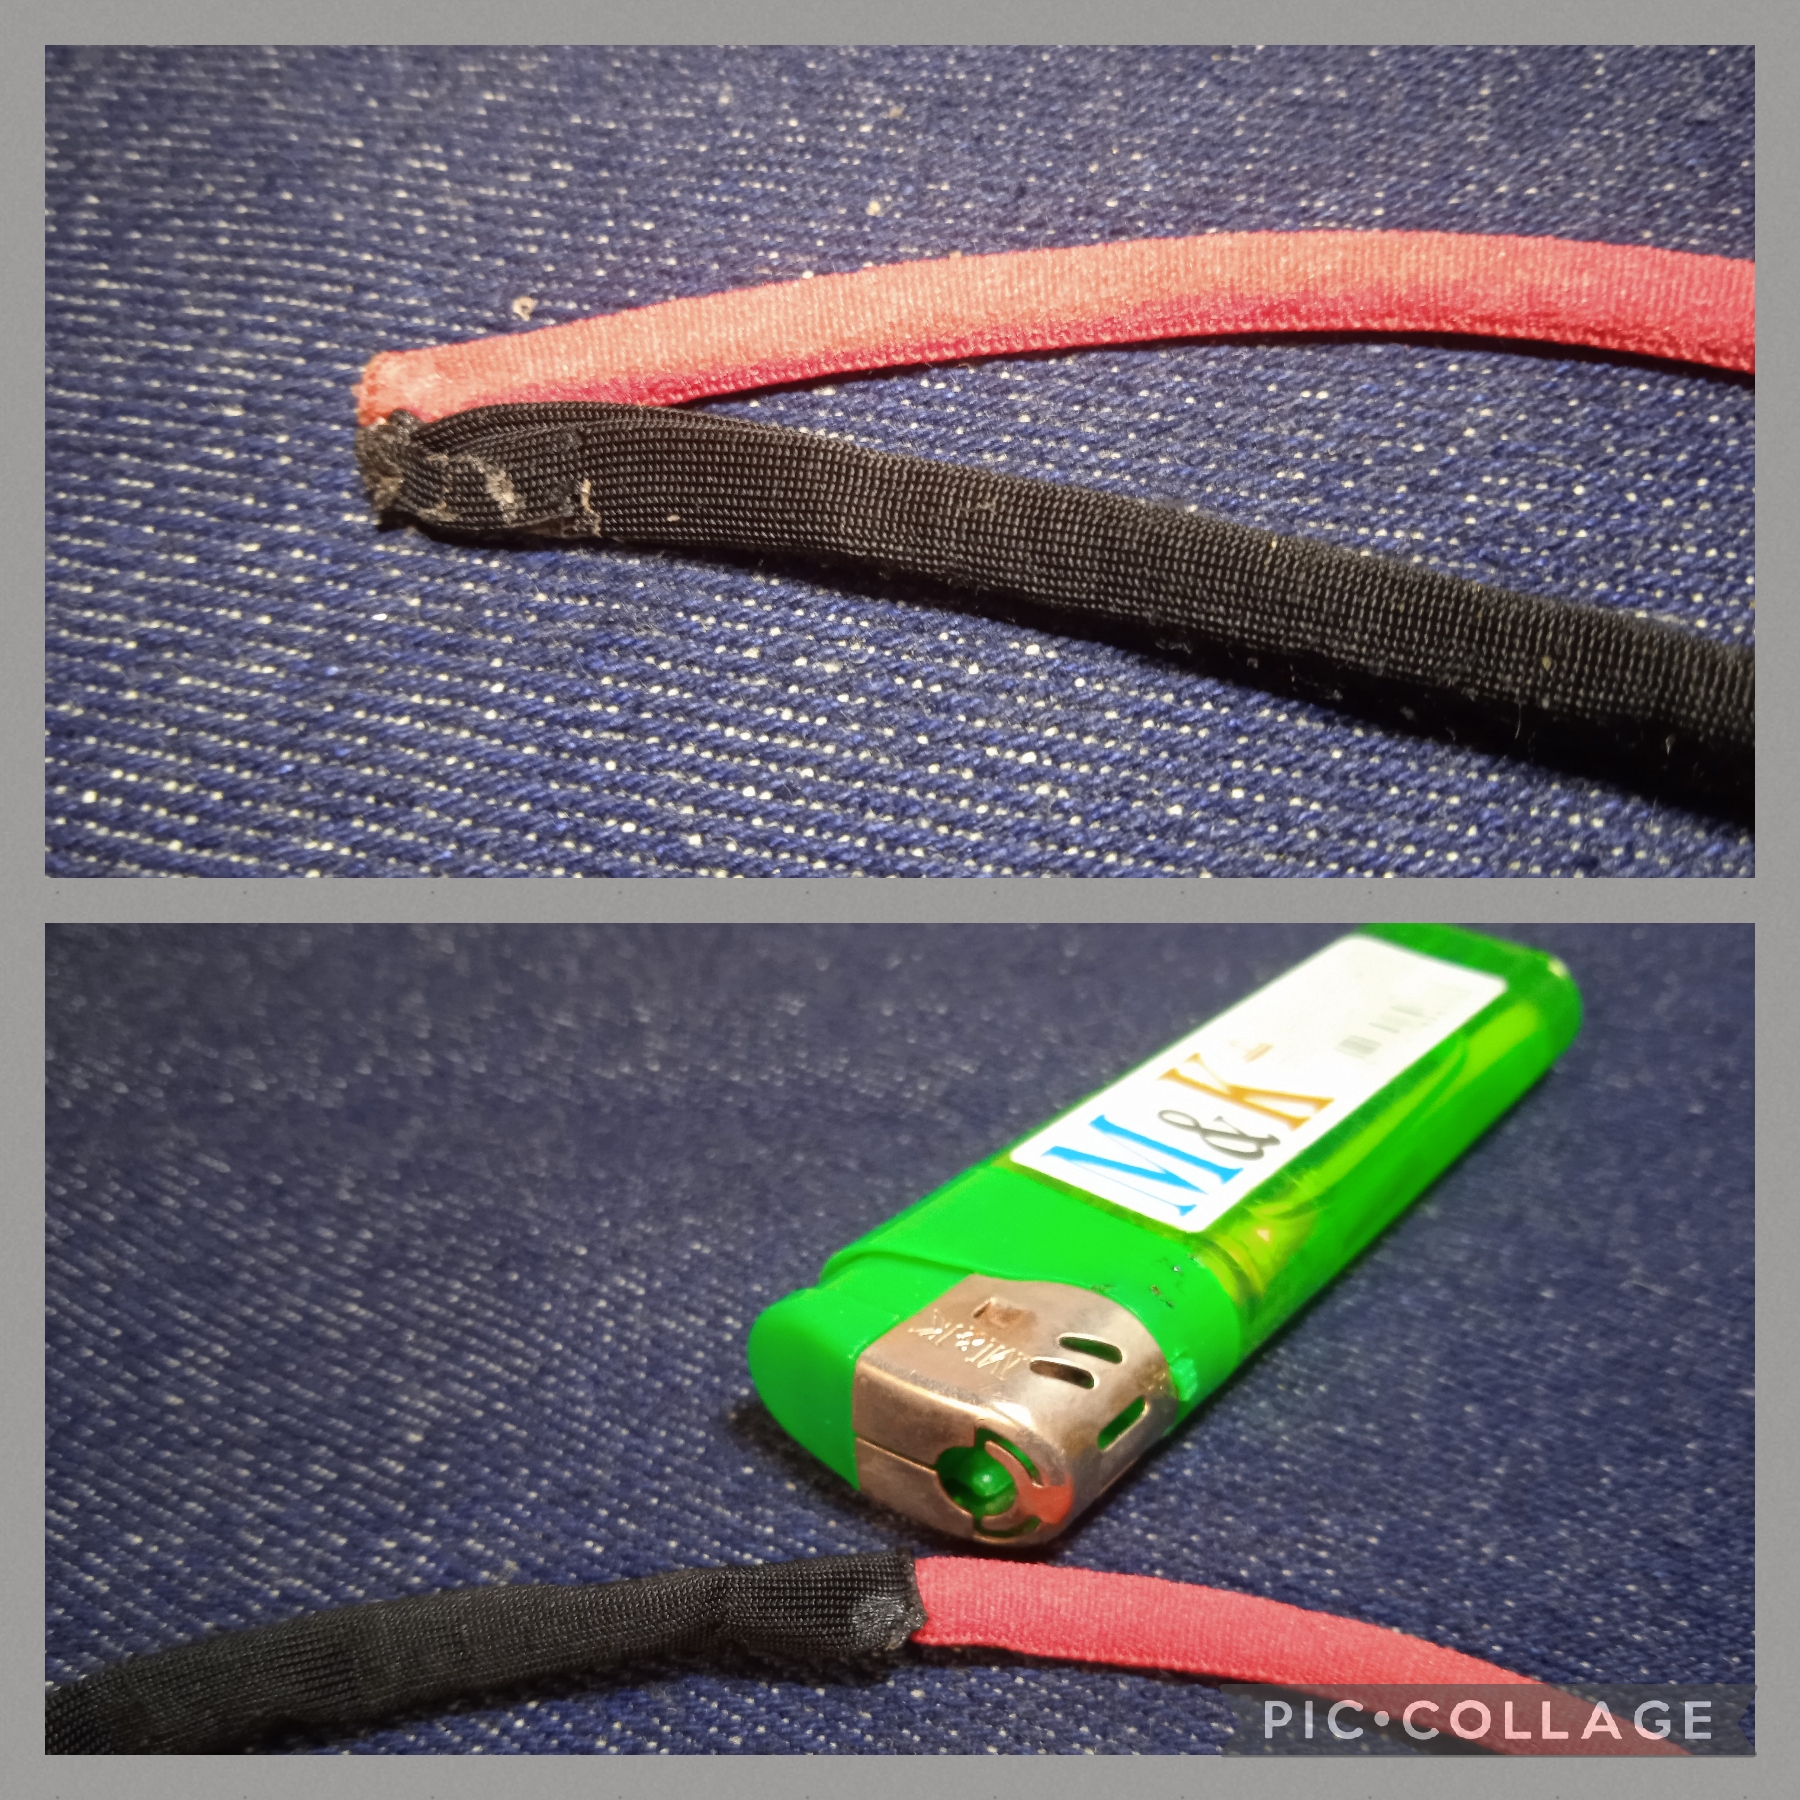
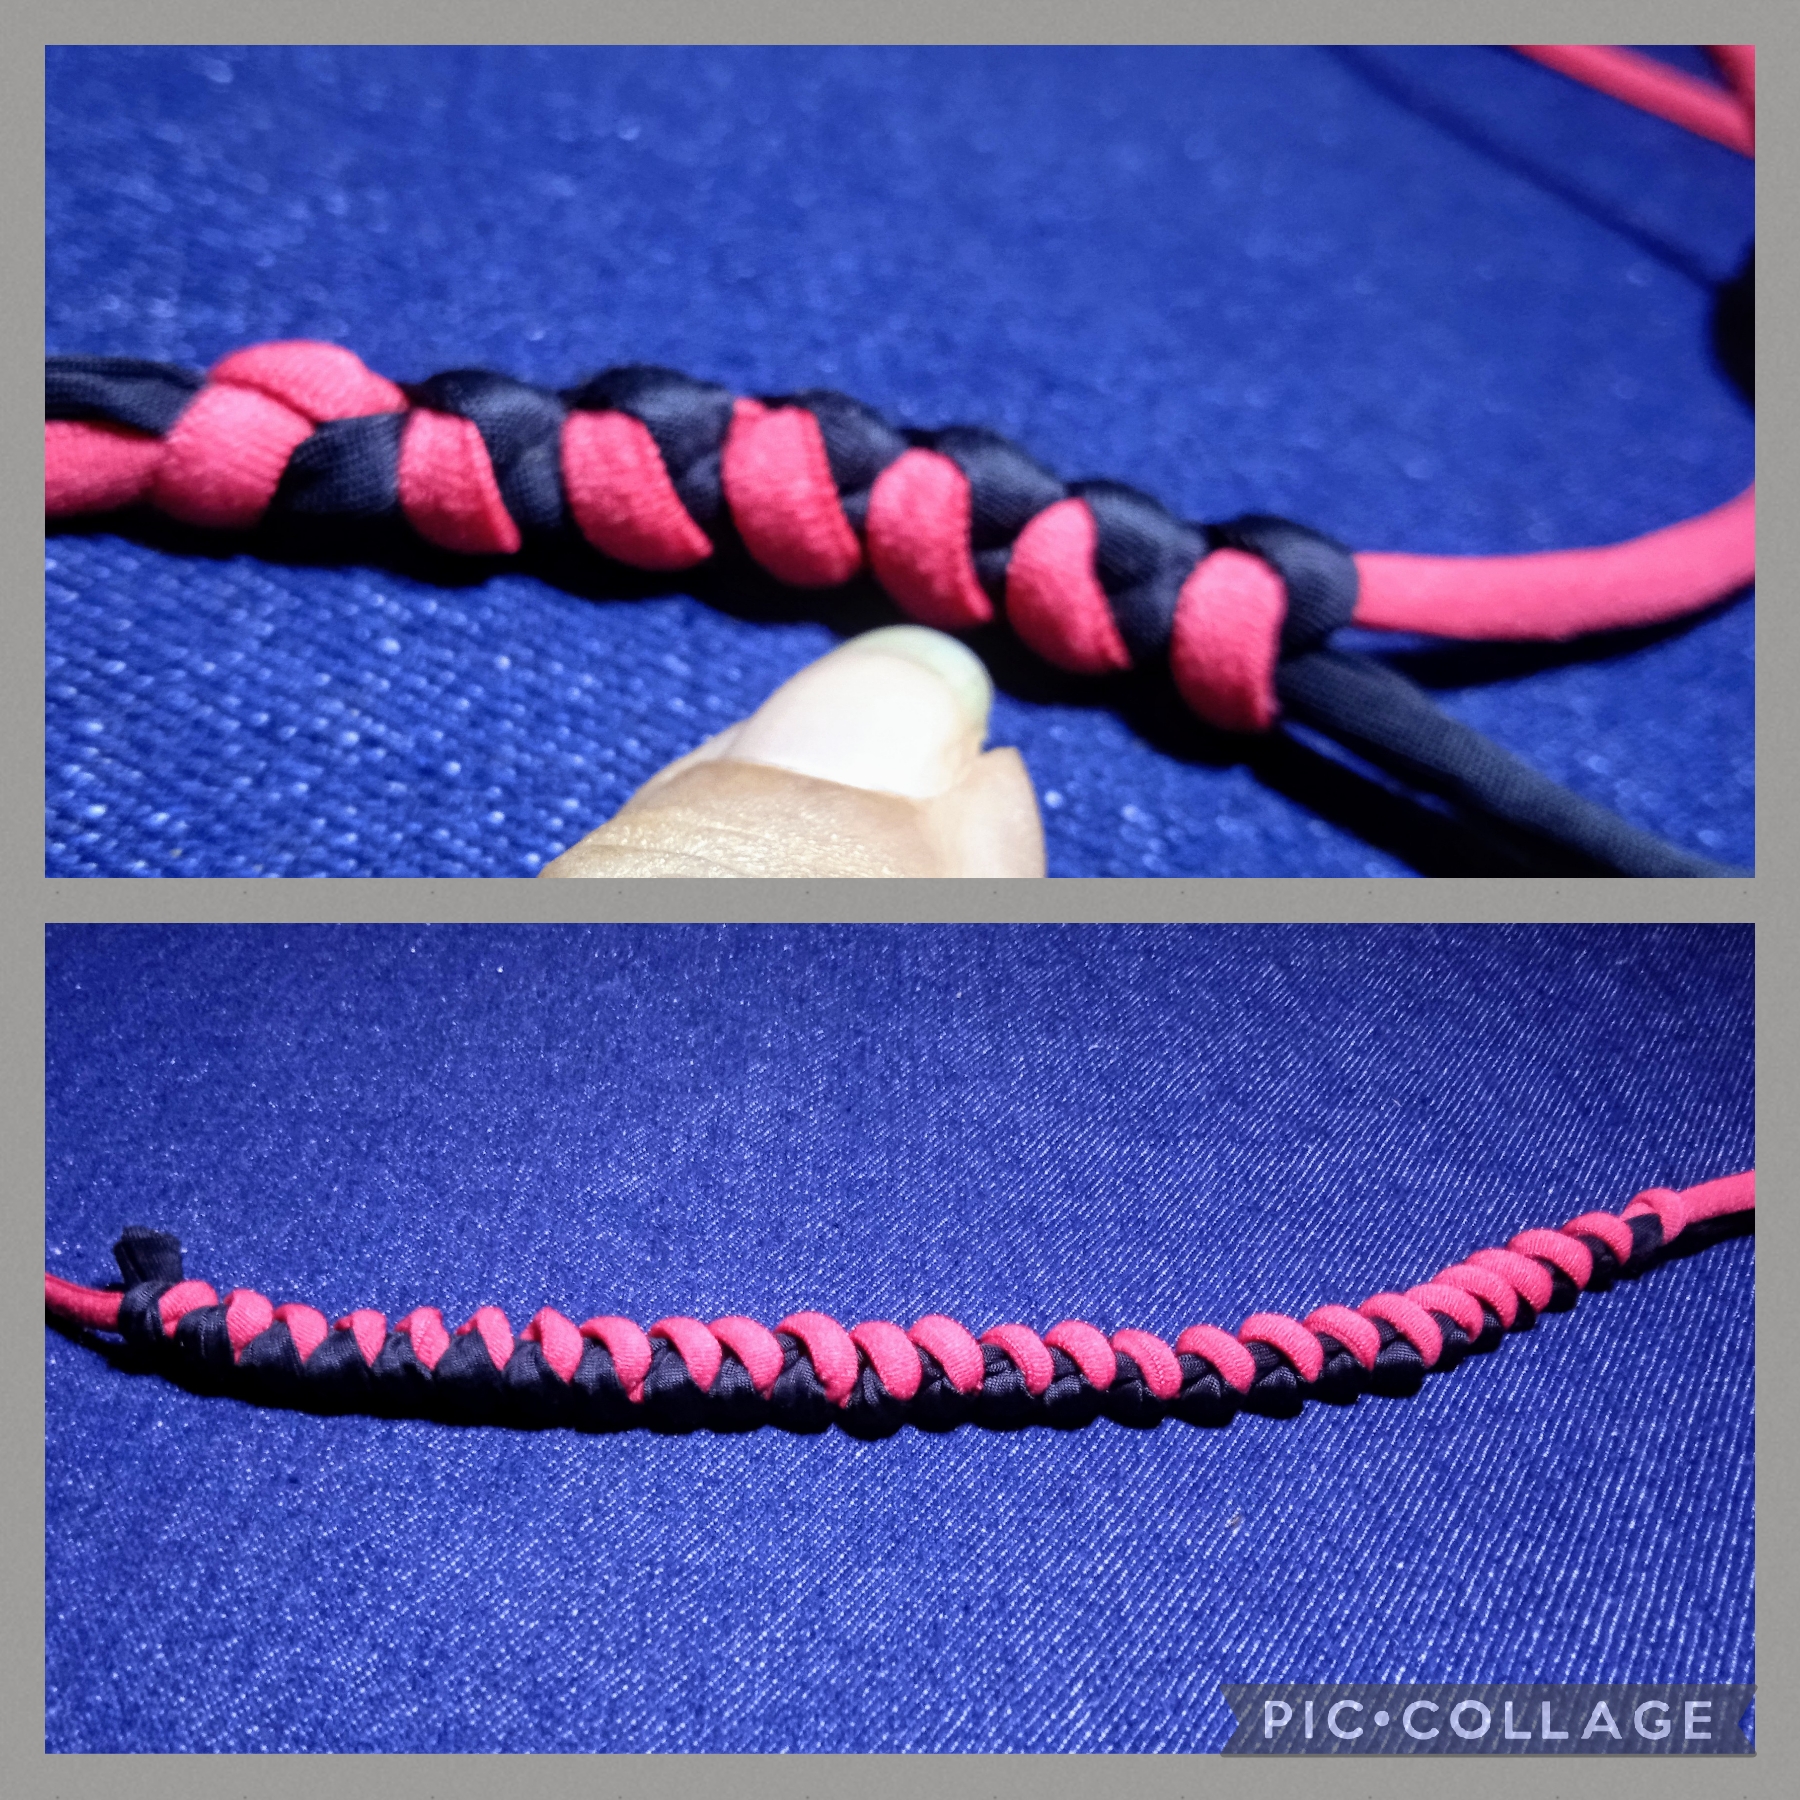
Voy a comenzar tomando el cordón acrílico negro y el cordón acrílico rojo, los uno y uso el encendedor para quemar las puntas y los igualó.
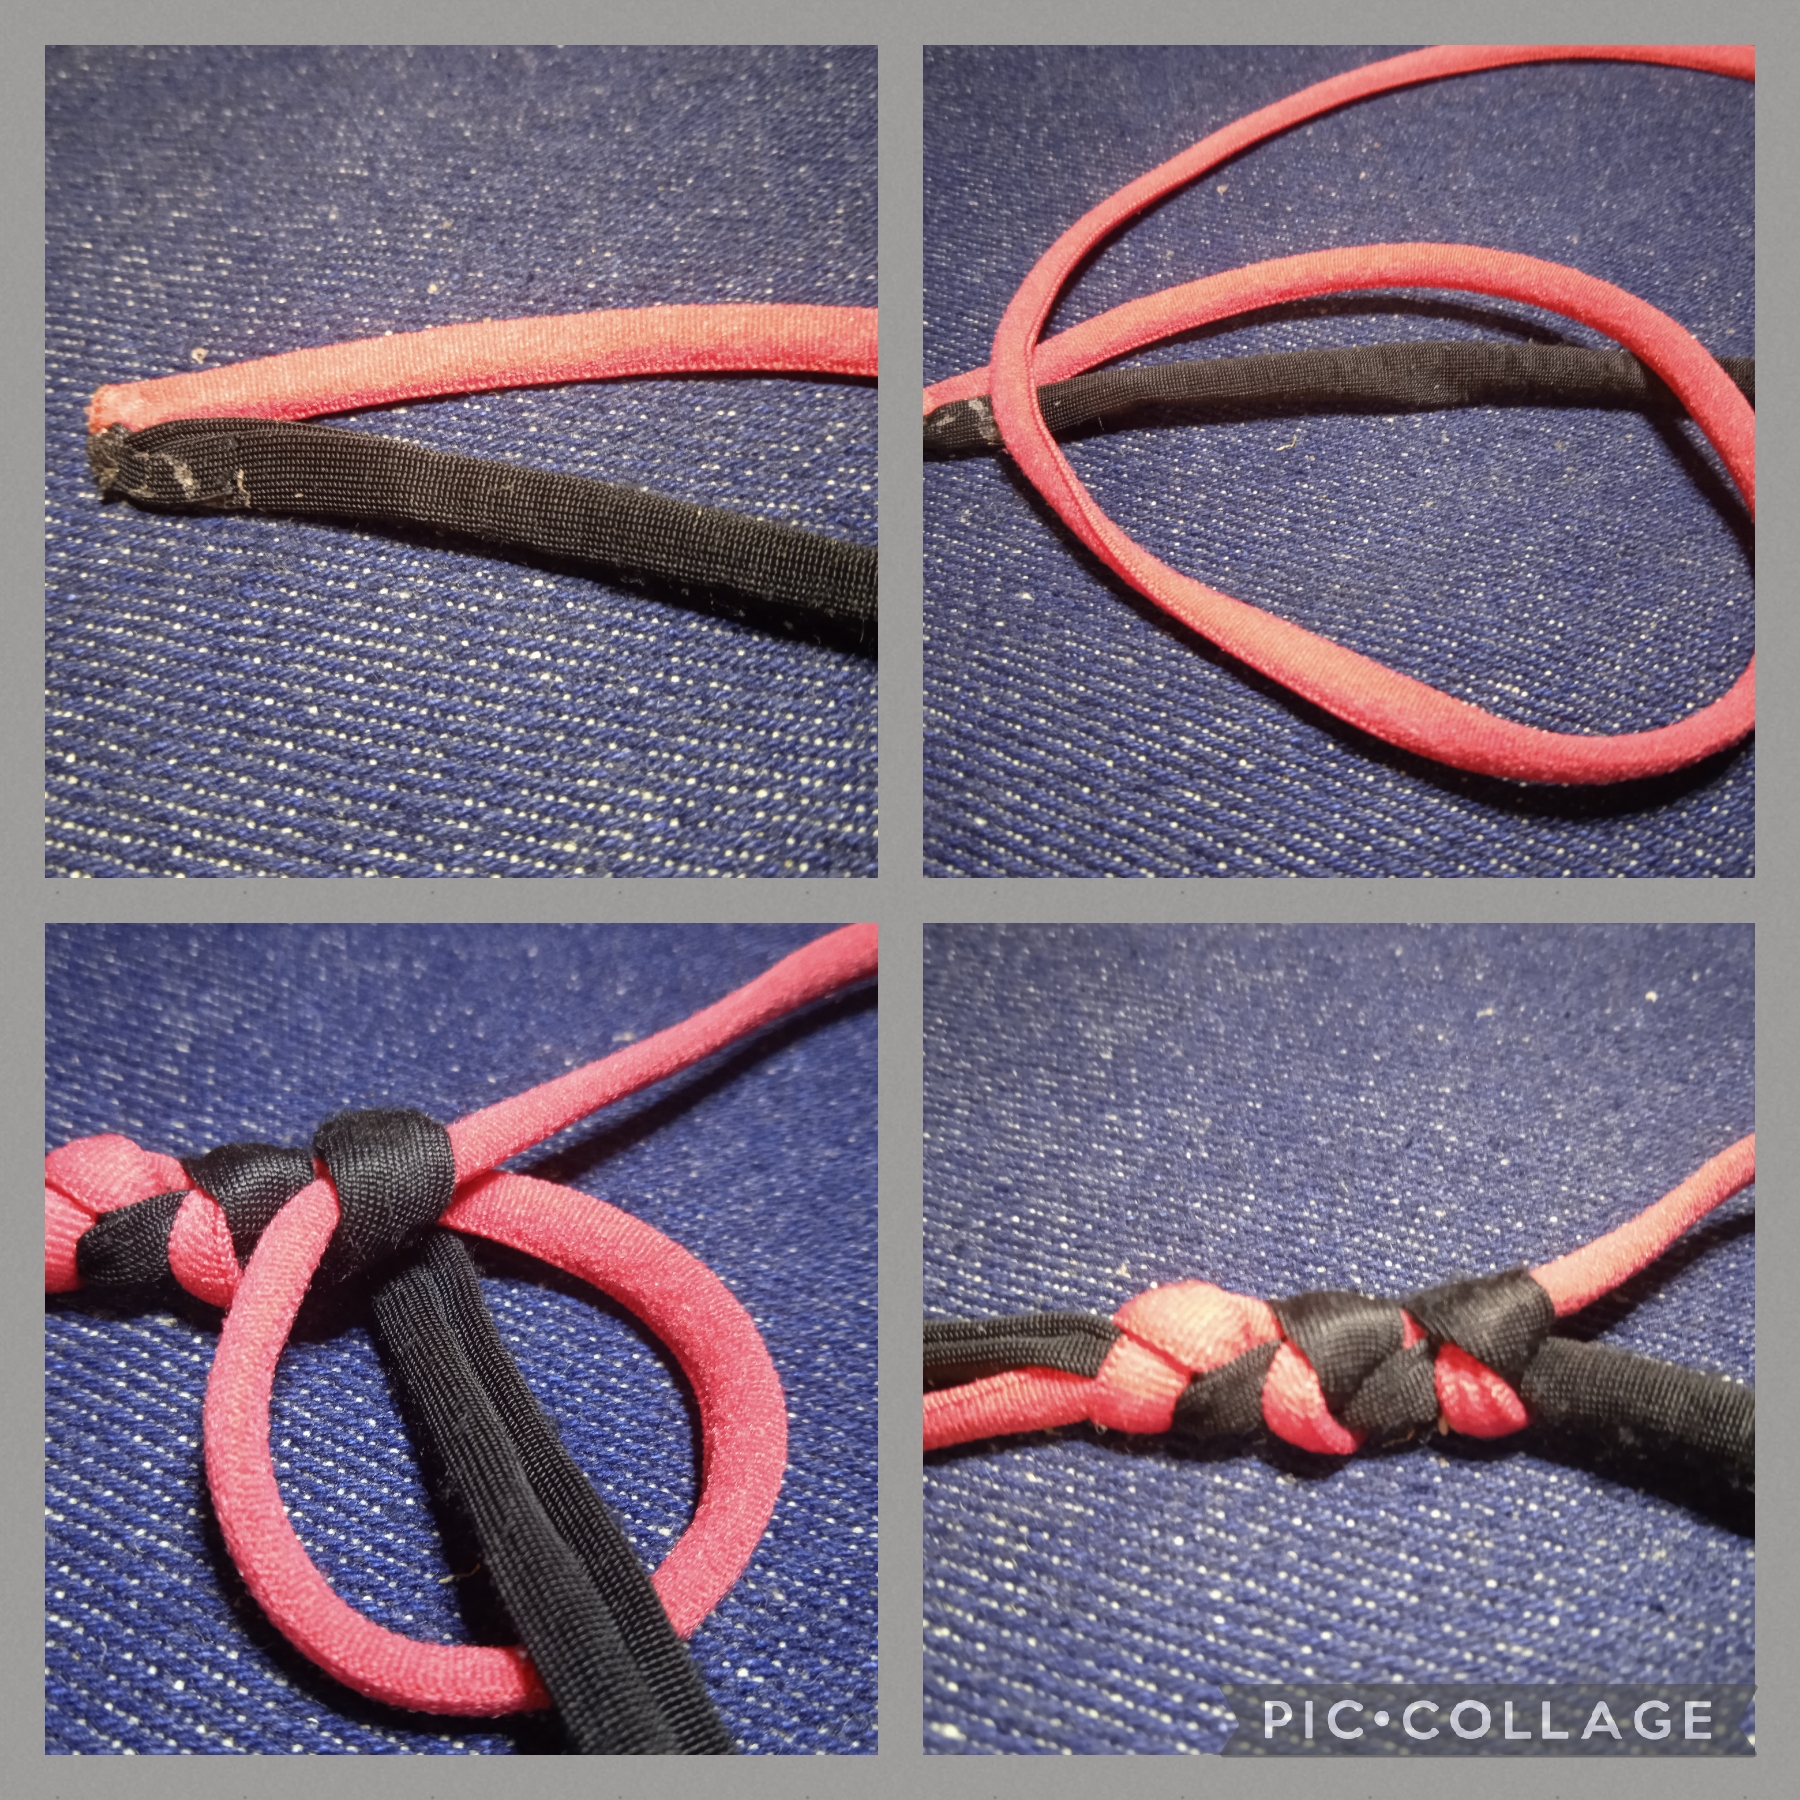
Ahora procedo a realizar el nudo serpiente, con el cordón rojo hago una especie de O encima del cordón negro, tomo la punta del cordon negro y abrazo el círculo que formé con el cordón rojo, ajusto y halo por el extremo del cordón acrílico rojo y ajusto también el cordón negro y así como muestra la imagen se realiza el nudo.
SIMPLE AND FEW STEPS USED IN THE PREPARATION OF THIS BEAUTIFUL CRAFTS:
FIRST STEP:
I'm going to start by taking the black acrylic bead and the red acrylic bead, put them together and use the lighter to burn the ends and even them out.
Now I proceed to make the snake knot, with the red cord I make a kind of O on top of the black cord, I take the tip of the black cord and hug the circle that I formed with the red cord, I adjust and pull it by the end of the red acrylic cord and I also adjust the black cord and, as shown in the image, the knot is made.
SEGUNDO PASO:
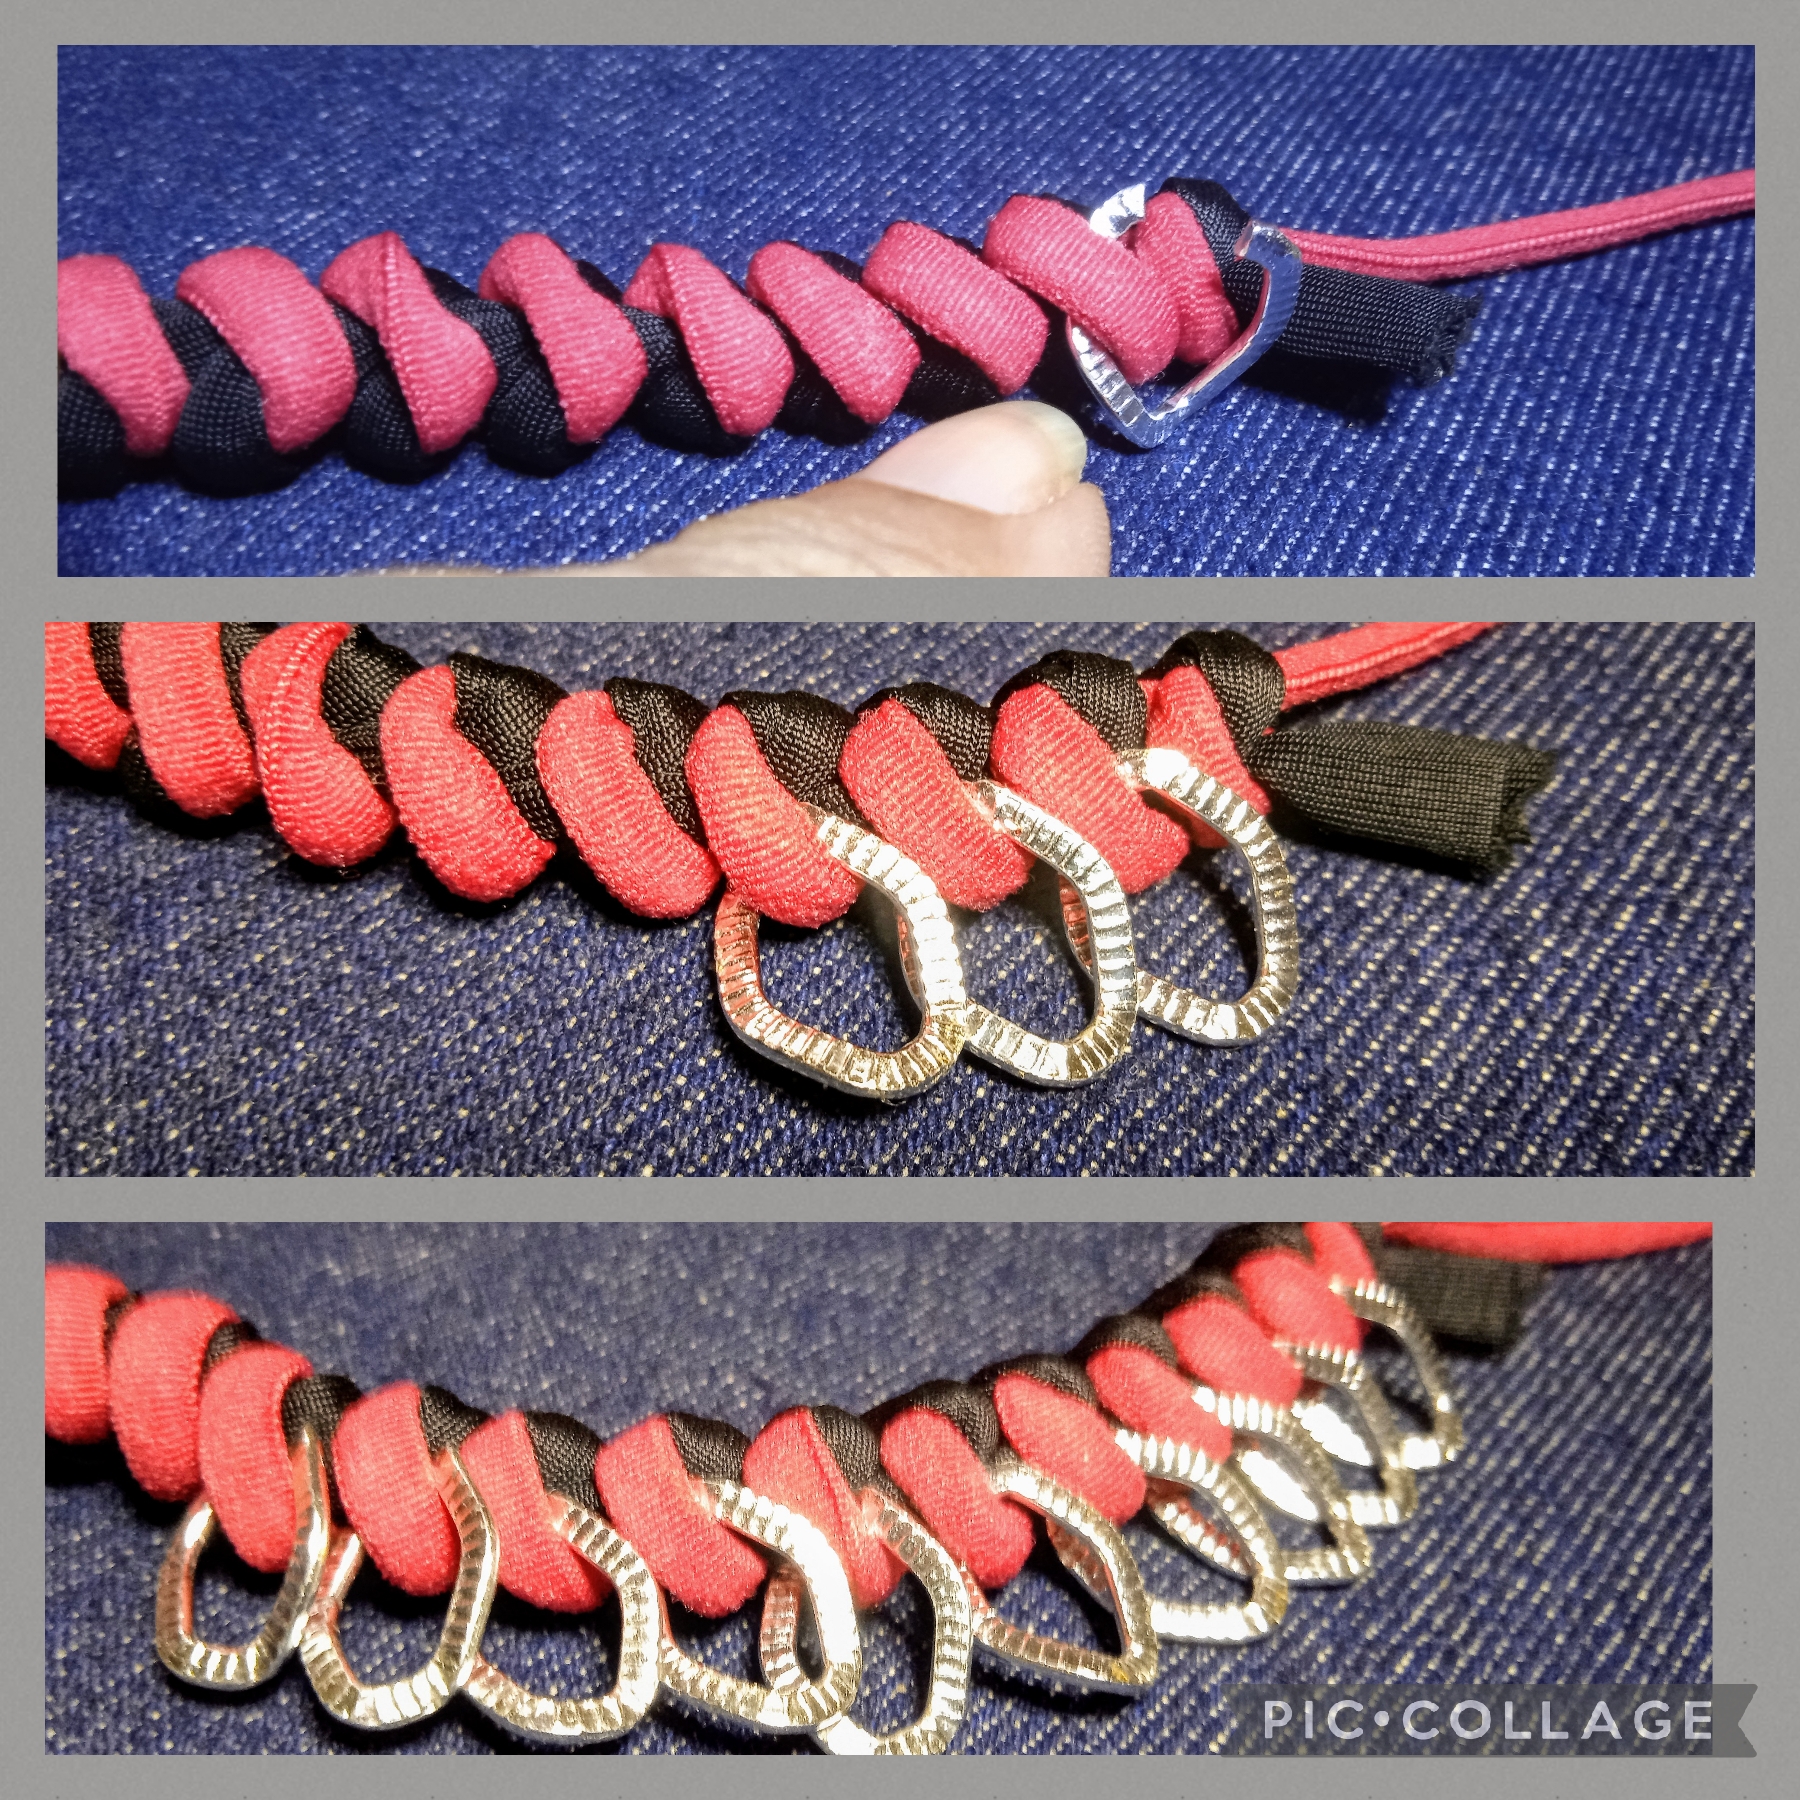
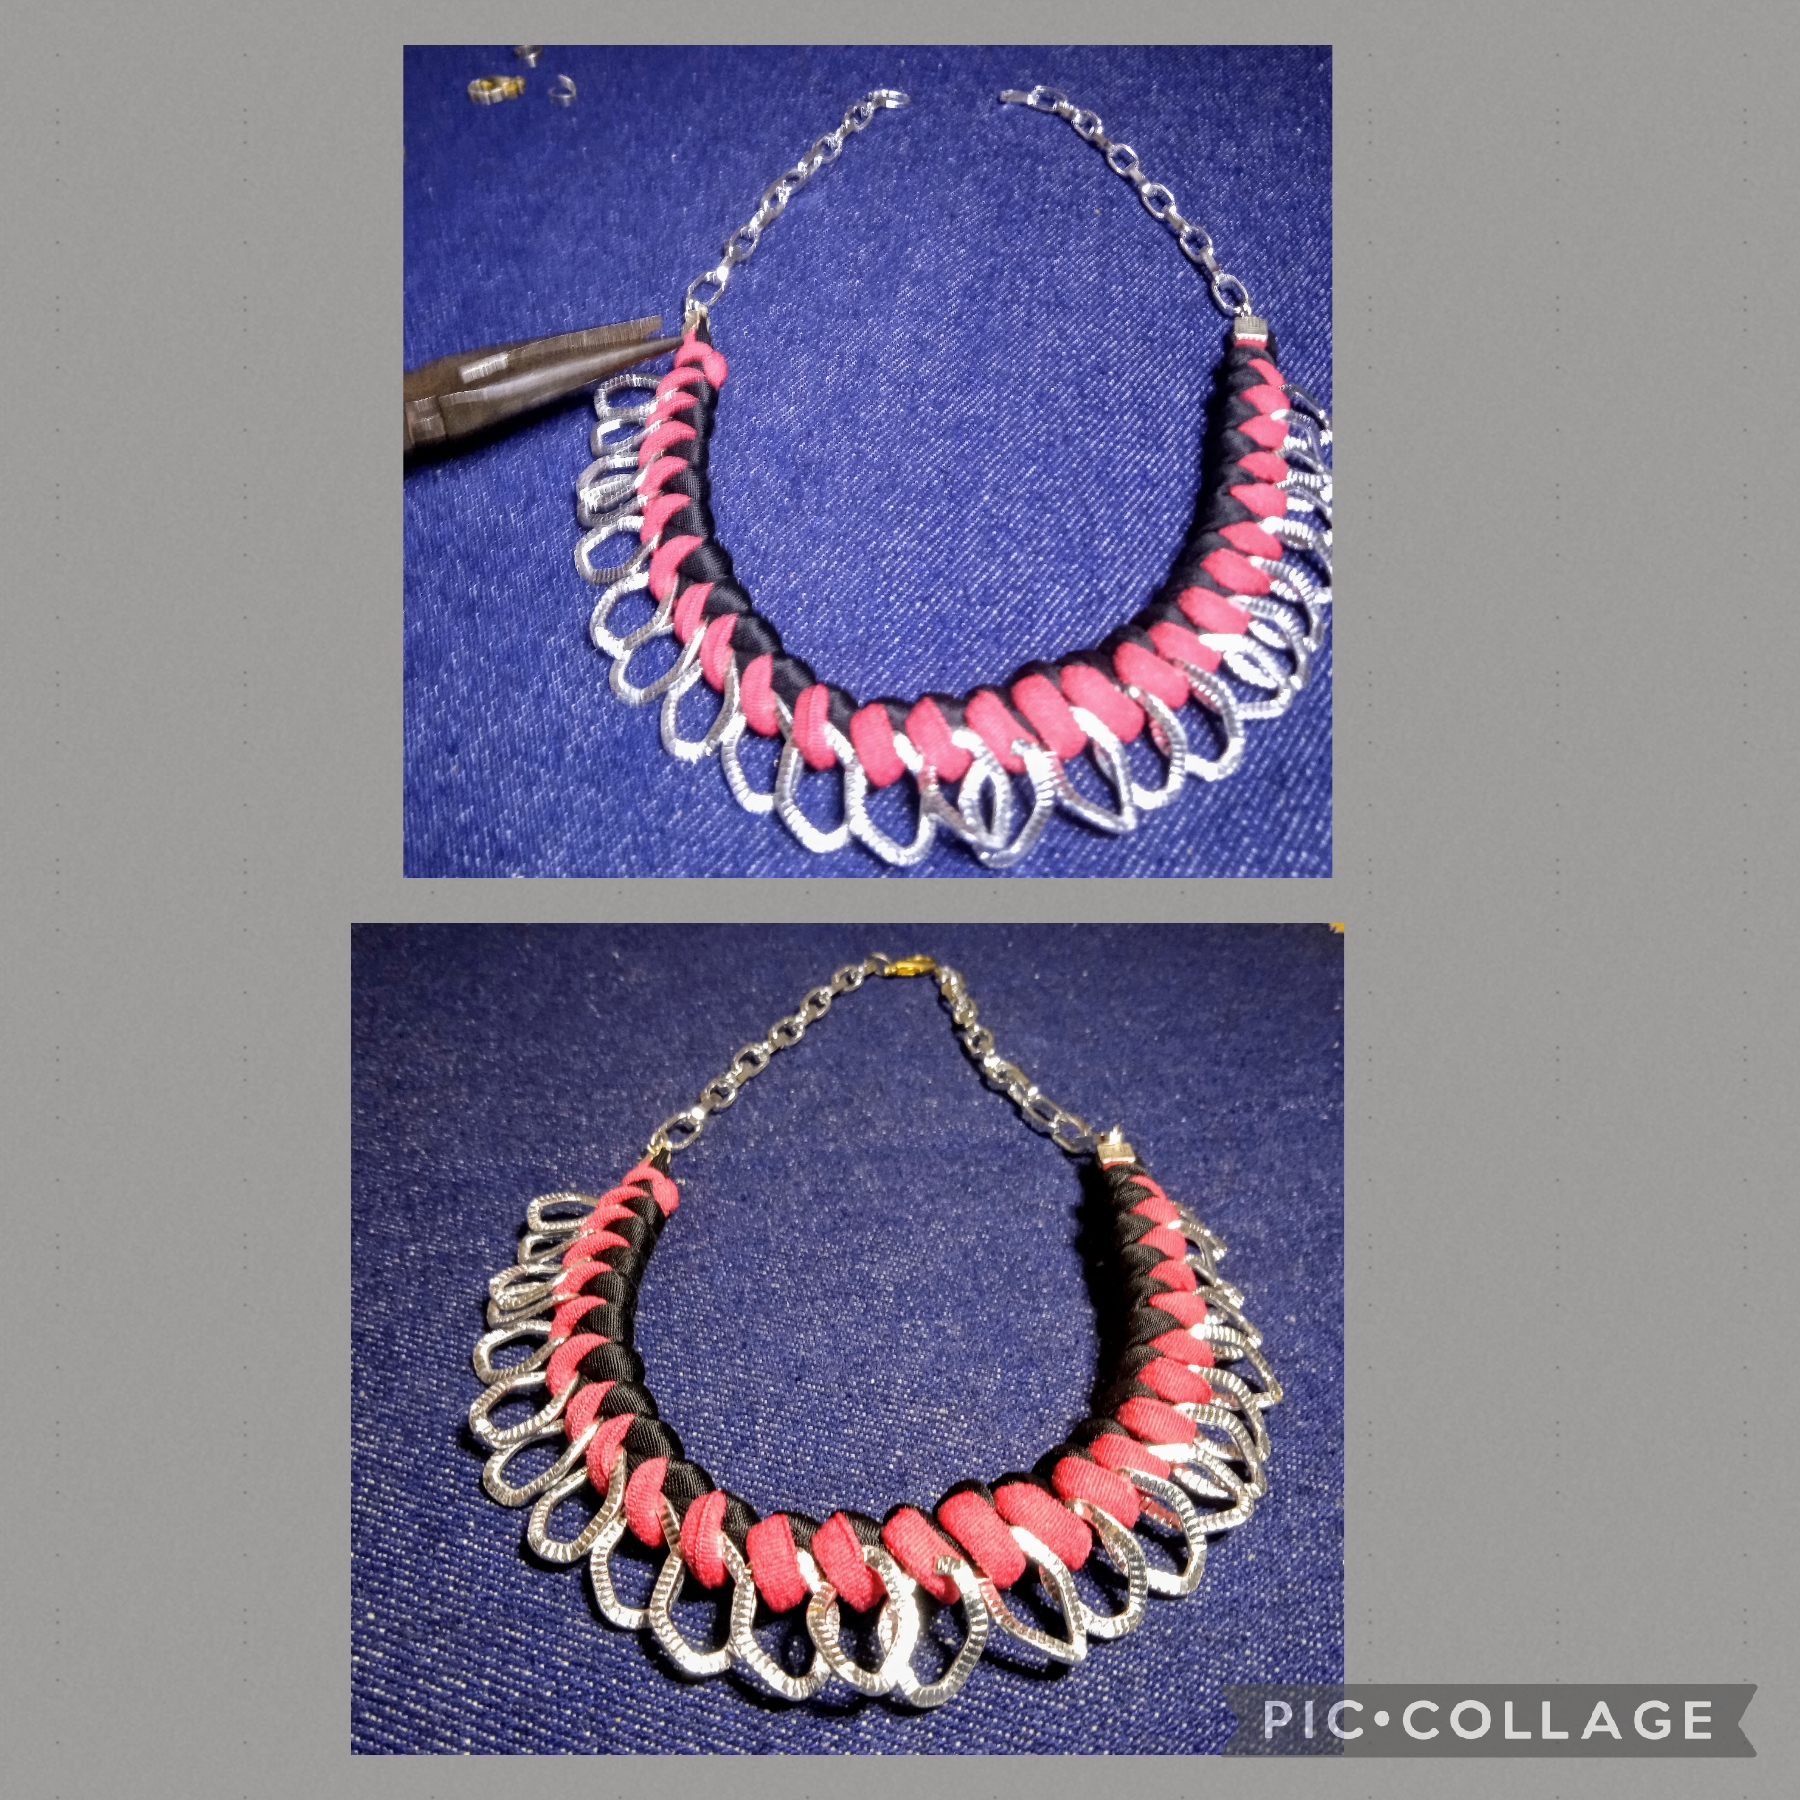
En este paso voy a continuar realizando el nudo serpiente hasta tener el largo deseado, para esta gargantilla use veinte centímetros; una vez que tengo listo este largo voy a comenzar a trabajar insertando las argollas ovaladas esto lo voy hacer en el lado donde quedó el cordón acrílico rojo, dejo el primer nudo sin trabajar, con la pinza plana abro la argolla y la coloco en el segundo nudo de nuevo la cierro y asi las inserto en todo el largo de nudos realizados dejando el último nudo sin trabajar como muestra las imágenes.
SECOND STEP:
In this step I will continue making the snake knot until I have the desired length, for this choker I used twenty centimeters; Once I have this length ready, I am going to start working by inserting the oval rings. I am going to do this on the side where the red acrylic cord was left. I leave the first knot without working, with the flat clamp I open the ring and place it on the second. I knot it again and close it and thus insert them along the entire length of the knots made, leaving the last knot unworked as shown in the images.
TERCER PASO:
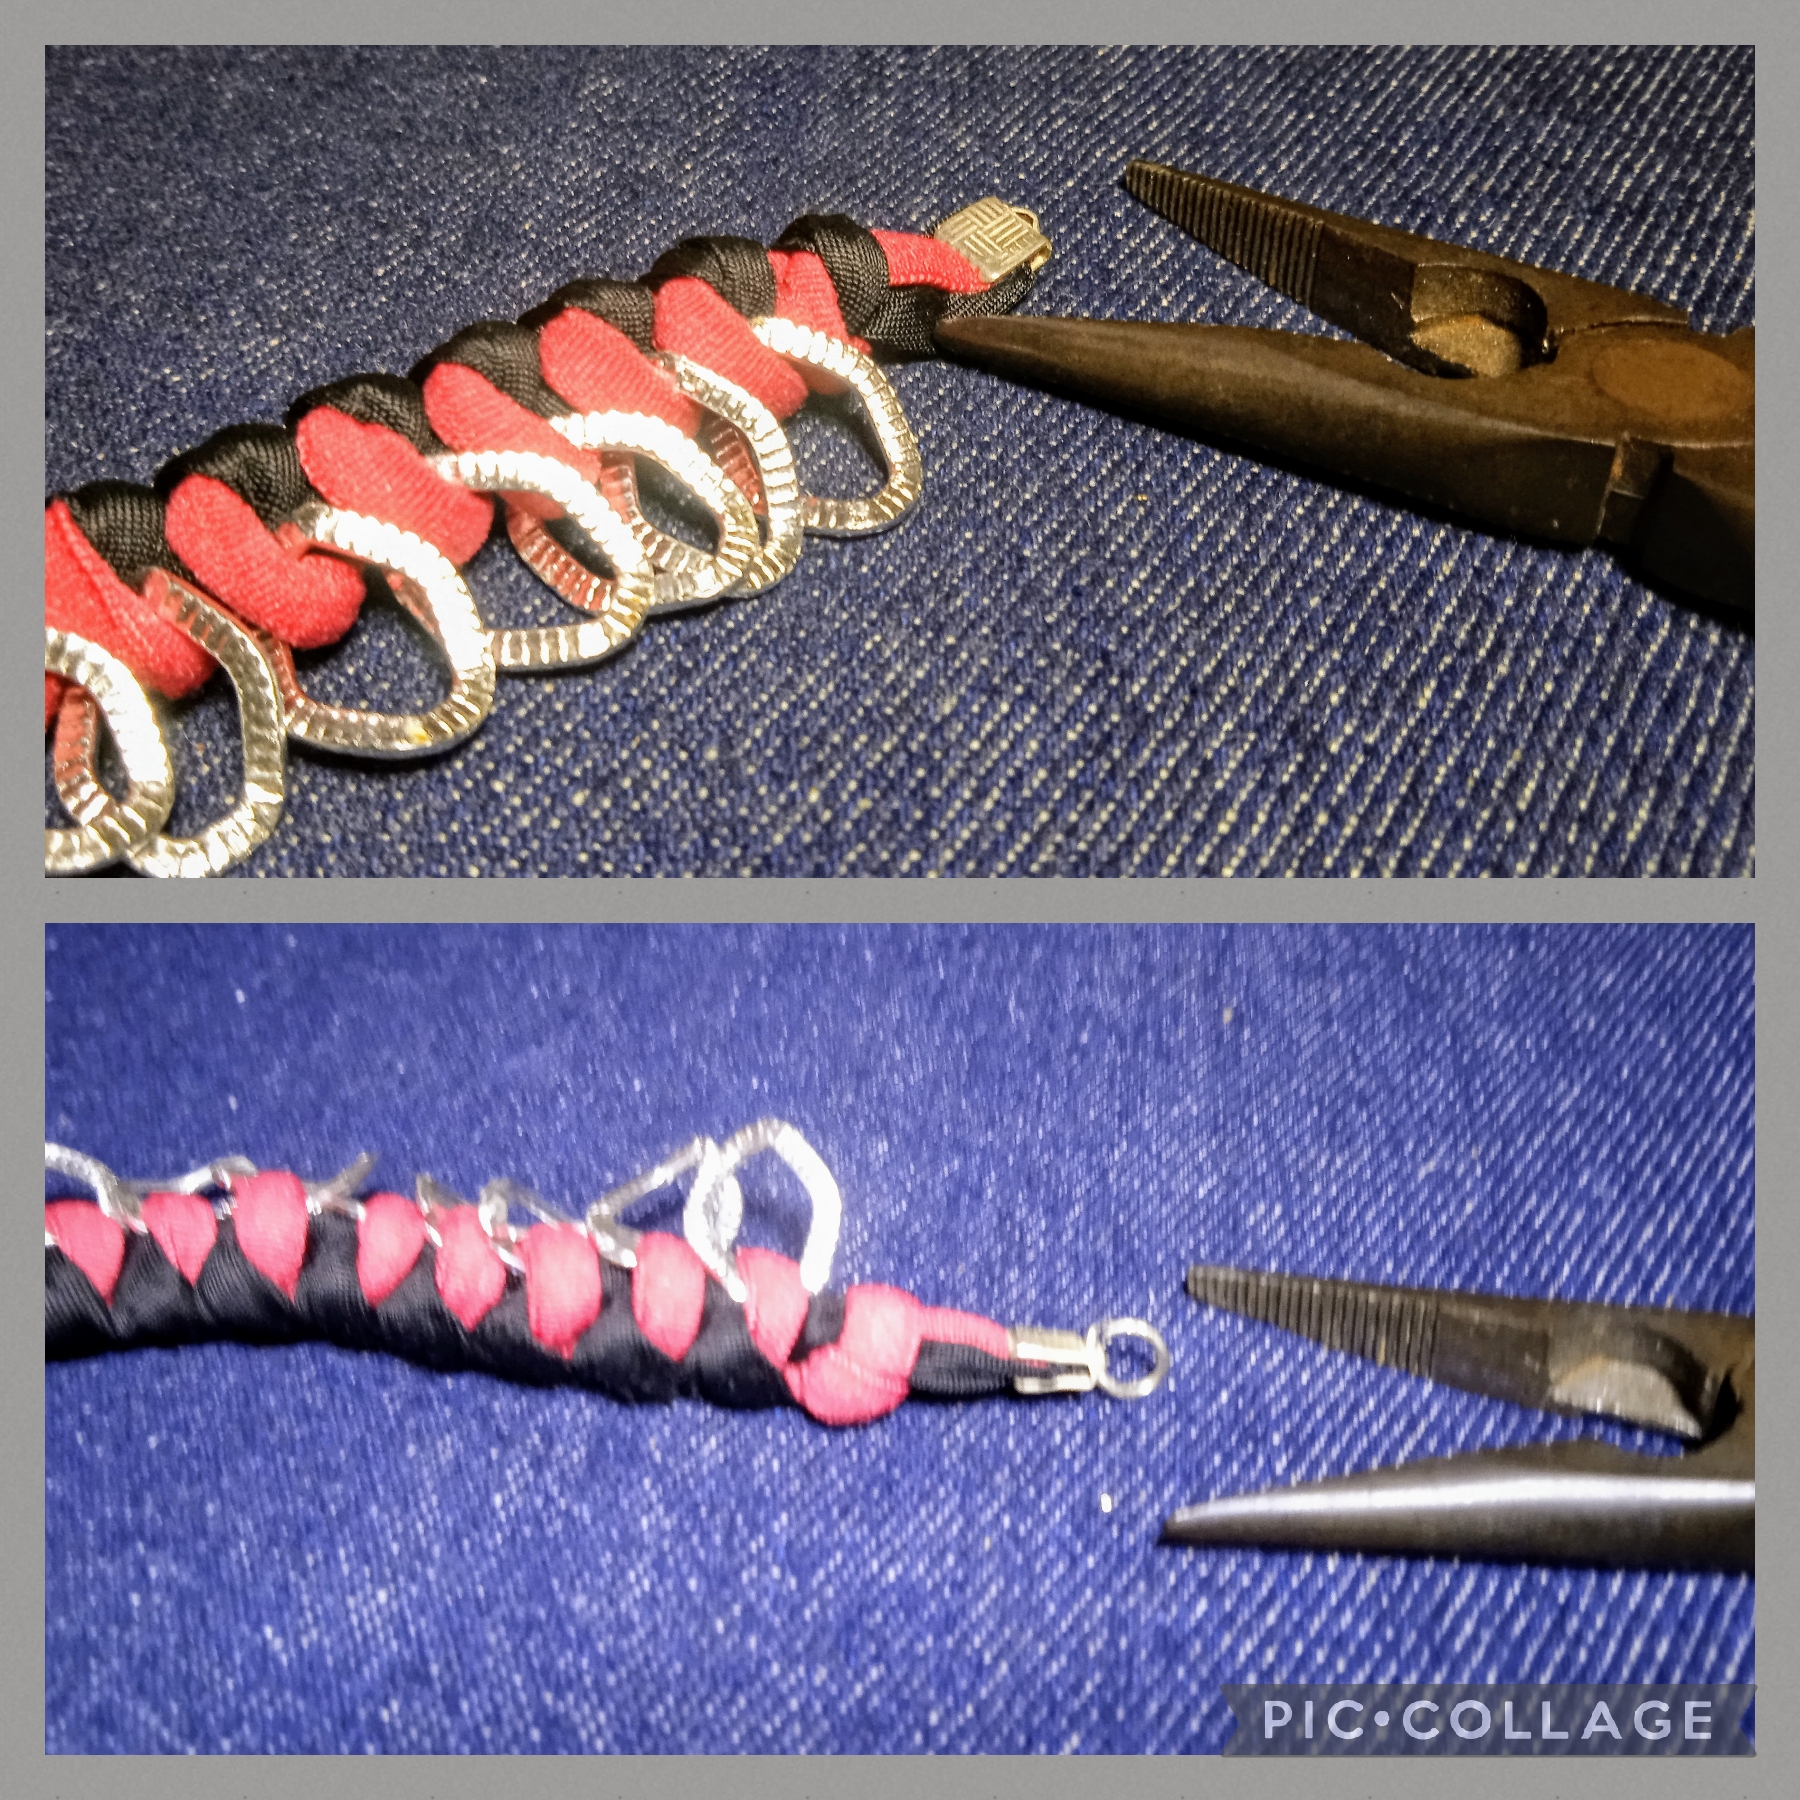
Realizado el segundo paso, tengo casi listo el diseño de la Gargantilla, ahora con la ayuda de las pinzas punta redonda y pinza plana, procedo a colocar los terminales, con las tijeras ✂️ corto los excedentes de los cordones y de nuevo uso el encendedor para sellar, coloco los terminales en cada extremo y ajusto pongo una argolla pequeña en cada terminal de esta manera como en las imágenes .
THIRD STEP:
Having completed the second step, I have almost ready the design of the Choker, now with the help of the round tip pliers and flat pliers, I proceed to place the terminals, with the scissors ✂️ I cut the excess cords and again use the lighter to seal, I place the terminals on each end and adjust, I put a small ring on each terminal in this way as in the images
CUARTO PASO:
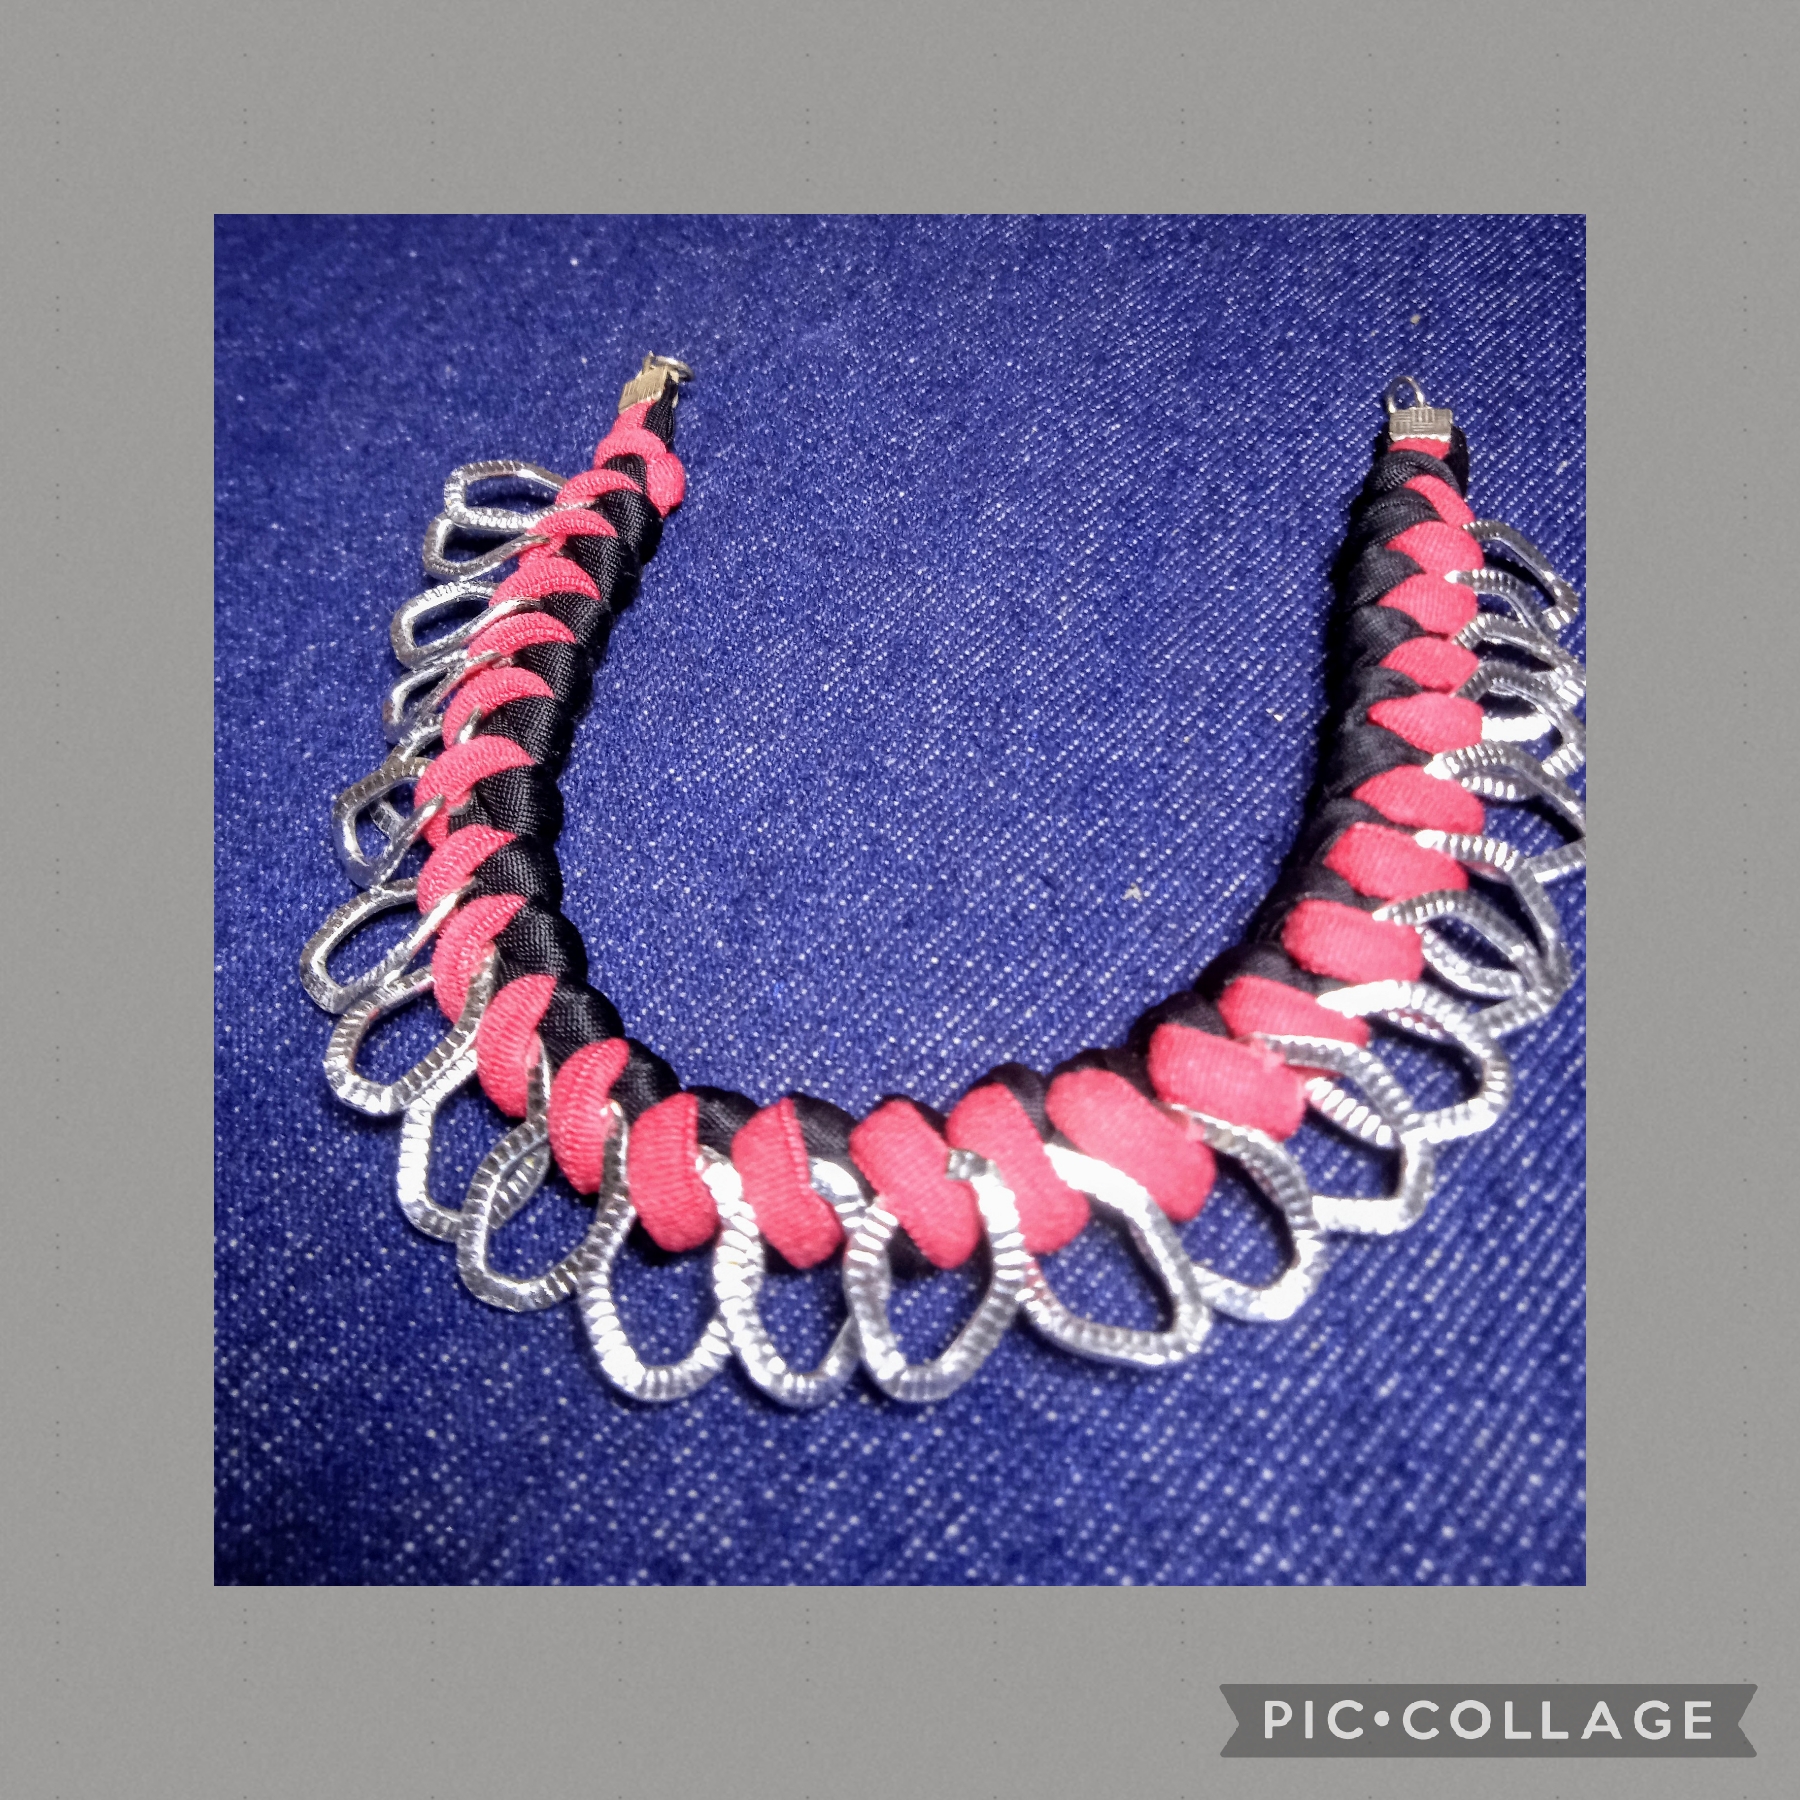
En este paso uso los doce centímetros de la cadena de eslabones y los divido en dos partes de seis centímetros cada uno los pongo en los terminales, coloco el cierre tipo caiman, y así queda realizada está manualidad
FOURTH STEP:
In this step I use the twelve centimeters of the link chain and divide them into two parts of six centimeters each, I put them on the terminals, I place the alligator-type closure, and thus this craft is done.
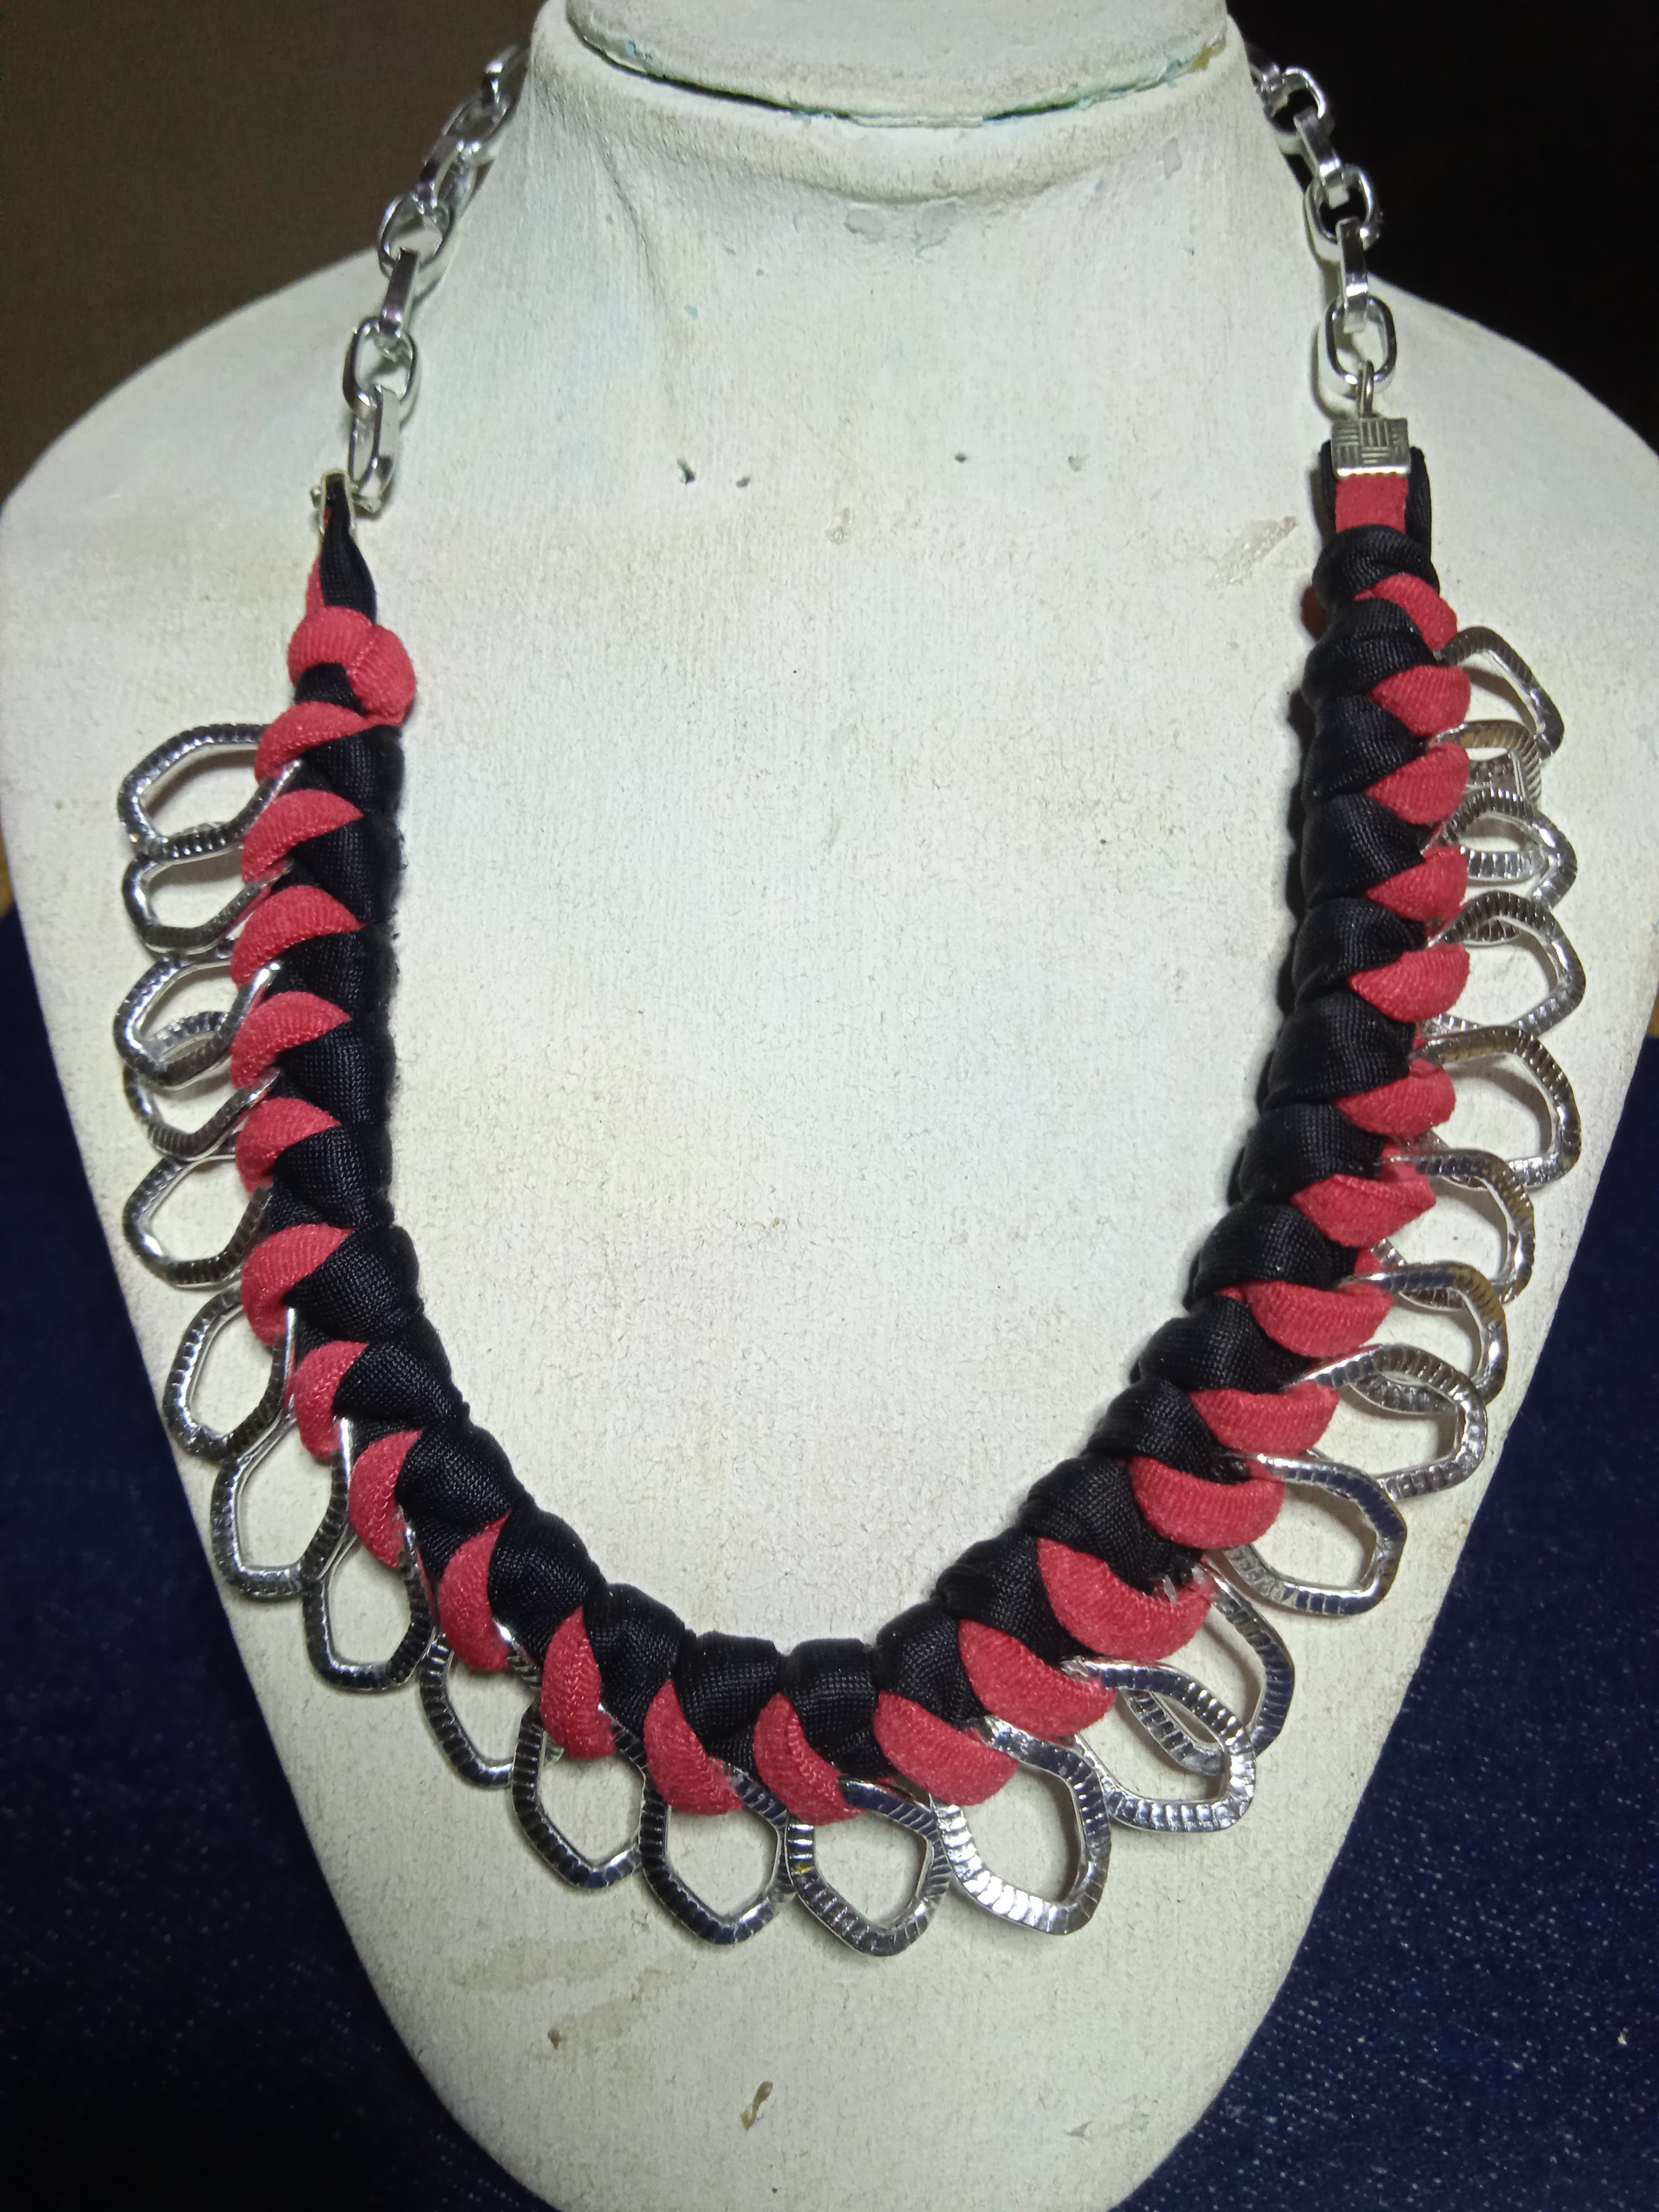
Artistas Creativos de las Manualidades y la Joyería, este es el resultado final de mi hermosa creación, una bonita gargantilla que puede usarse de forma casual y en ocasiones diversas, pero que siempre lucirá con un toque de elegancia; espero que les guste está idea y realicen sus accesorios poniendo en ellos su toque personal, gracias a todos por visitar mi blog y apoyarme con sus valiosos comentarios, feliz noche, nos vemos en la próxima manualidad, bye bye.
Creative Artists of Crafts and Jewelry, this is the final result of my beautiful creation, a beautiful choker that can be worn casually and on various occasions, but that will always look with a touch of elegance; I hope you like this idea and make your accessories putting your personal touch on them, thank you all for visiting my blog and supporting me with your valuable comments, happy night, see you in the next craft, bye bye.
Las imágenes y redacción de este tutorial son de mi propiedad, las fotos fueron tomadas con mi teléfono celular redmi 9 y las edité con una aplicación gratis del mismo.
Para traducir texto use Google traductor.
The images and writing in this tutorial are my property, the photos were taken with my Redmi 9 cell phone and I edited them with a free application.
To translate text use Google translator.

@nhaydu hermosa combinación de materiales, luce genial, saludos 🤗
Gracias @anamariag, tus comentarios me animan te siento muy especial. Me dió gusto saludarte un abrazo 🤗.
Congratulations @nhaydu! You have completed the following achievement on the Hive blockchain And have been rewarded with New badge(s)
Your next target is to reach 2250 replies.
You can view your badges on your board and compare yourself to others in the Ranking
If you no longer want to receive notifications, reply to this comment with the word
STOPCheck out our last posts: