Hola, holaaa!! Saludos a todos mis consecuentes Artistas Creativos de la joyería, como se encuentran? Hoy es una fecha muy especial y quiero enviarles a todos, toditos, TODOS, un gran abrazo virtual en la distancia. Es El Día Del Abrazo En Familia; siempre nos reunimos en la casa patrimon laio de los abuelos y aunque ellos ya no están, allí tenemos los tíos más viejitos; por eso primos, hermanos, cuñados , nueras, suegros, yernos, y asociados, nos damos citas para estar juntos este Día Especial.
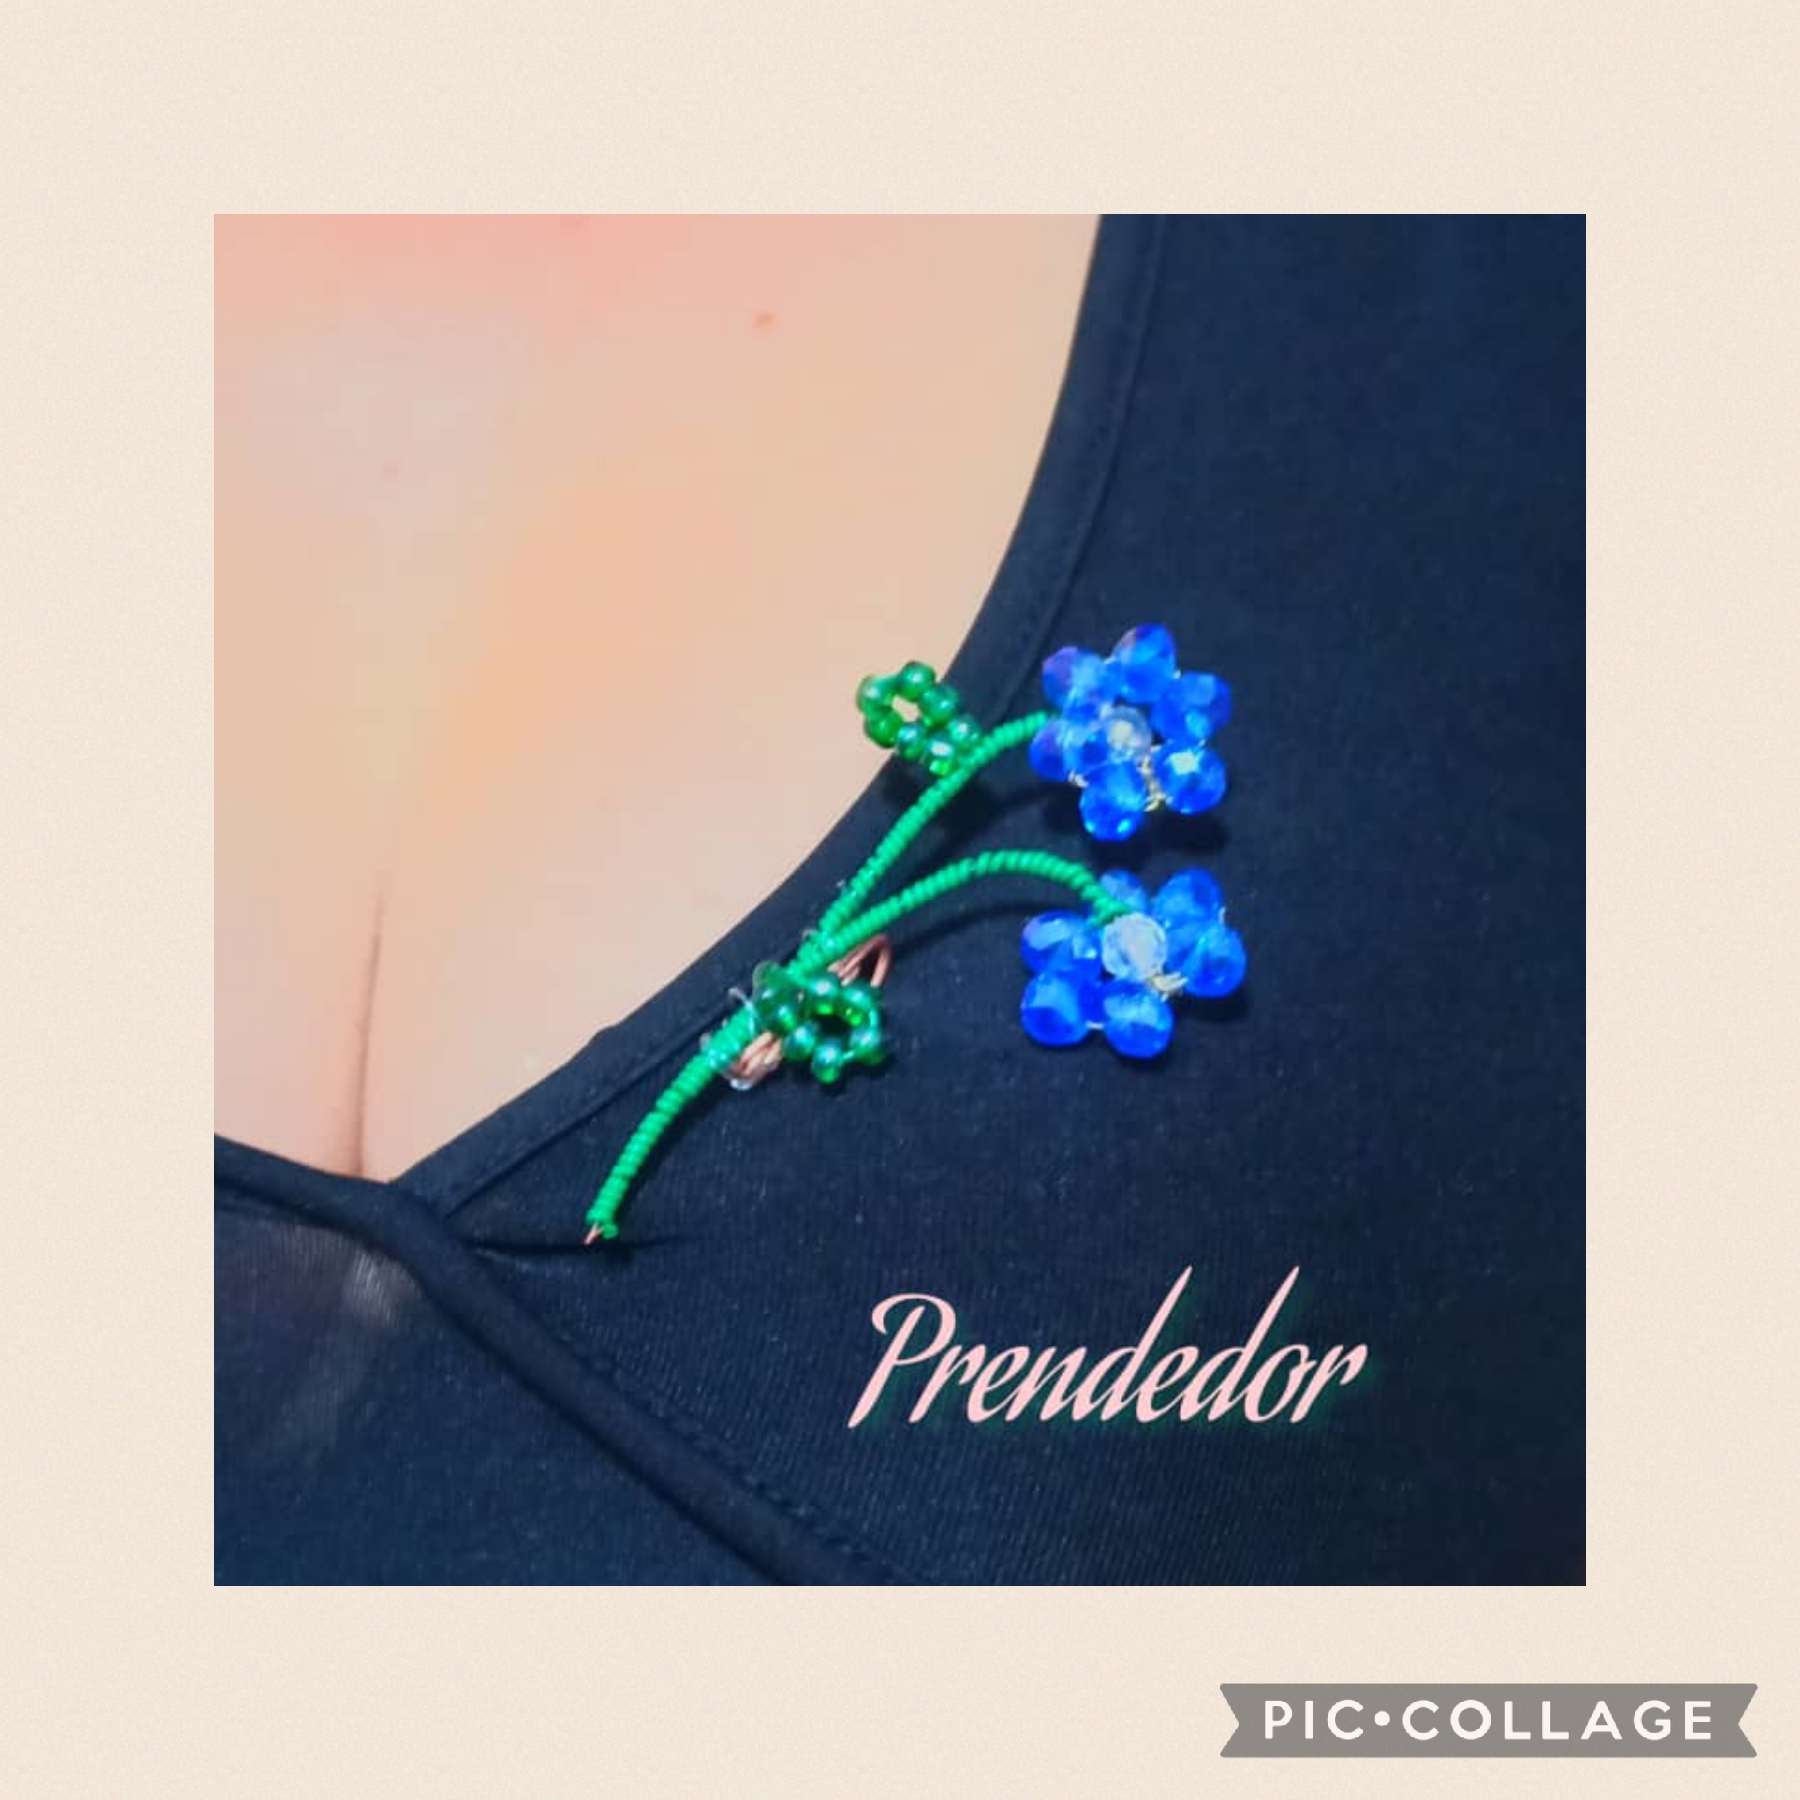
Bueno pasamos un rato como siempre que nos reunimos bastante agradable, unos días atrás mi tía abuela me había dado unos cristales azules de un collar que se le había desarmado según ella y me dijo "muchacha" (no se vayan a reír) pues ella me ve con esos ojos hazme un alfiler para ponerme en mi chaqueta y de vez en cuando en la bufanda; es mi tía abuela, la única que me queda del copioso árbol geneológico; por supuesto que como no complacerla? Así que sigan leyendo y vean como lo hice:
Hello, hello!! Greetings to all my consequent Creative Artists of jewelry, how are you? Today is a very special date and I want to send everyone, everyone, EVERYONE, a big virtual hug from afar. It's Family Hug Day; We always meet at the heritage house of the grandparents and although they are no longer there, we have the oldest uncles there; That's why cousins, brothers, brothers-in-law, daughters-in-law, fathers-in-law, sons-in-law, and associates, we make appointments to be together this Special Day.
Well, we had quite a nice time as always when we get together, a few days ago my great-aunt had given me some blue crystals from a necklace that had come apart, according to her, and she said "girl" (don't laugh) because she told me go with those eyes make me a pin to put on my jacket and occasionally on my scarf; she is my great-aunt, the only one left to me from the copious family tree; of course how not to please her? So read on and see how I did it:
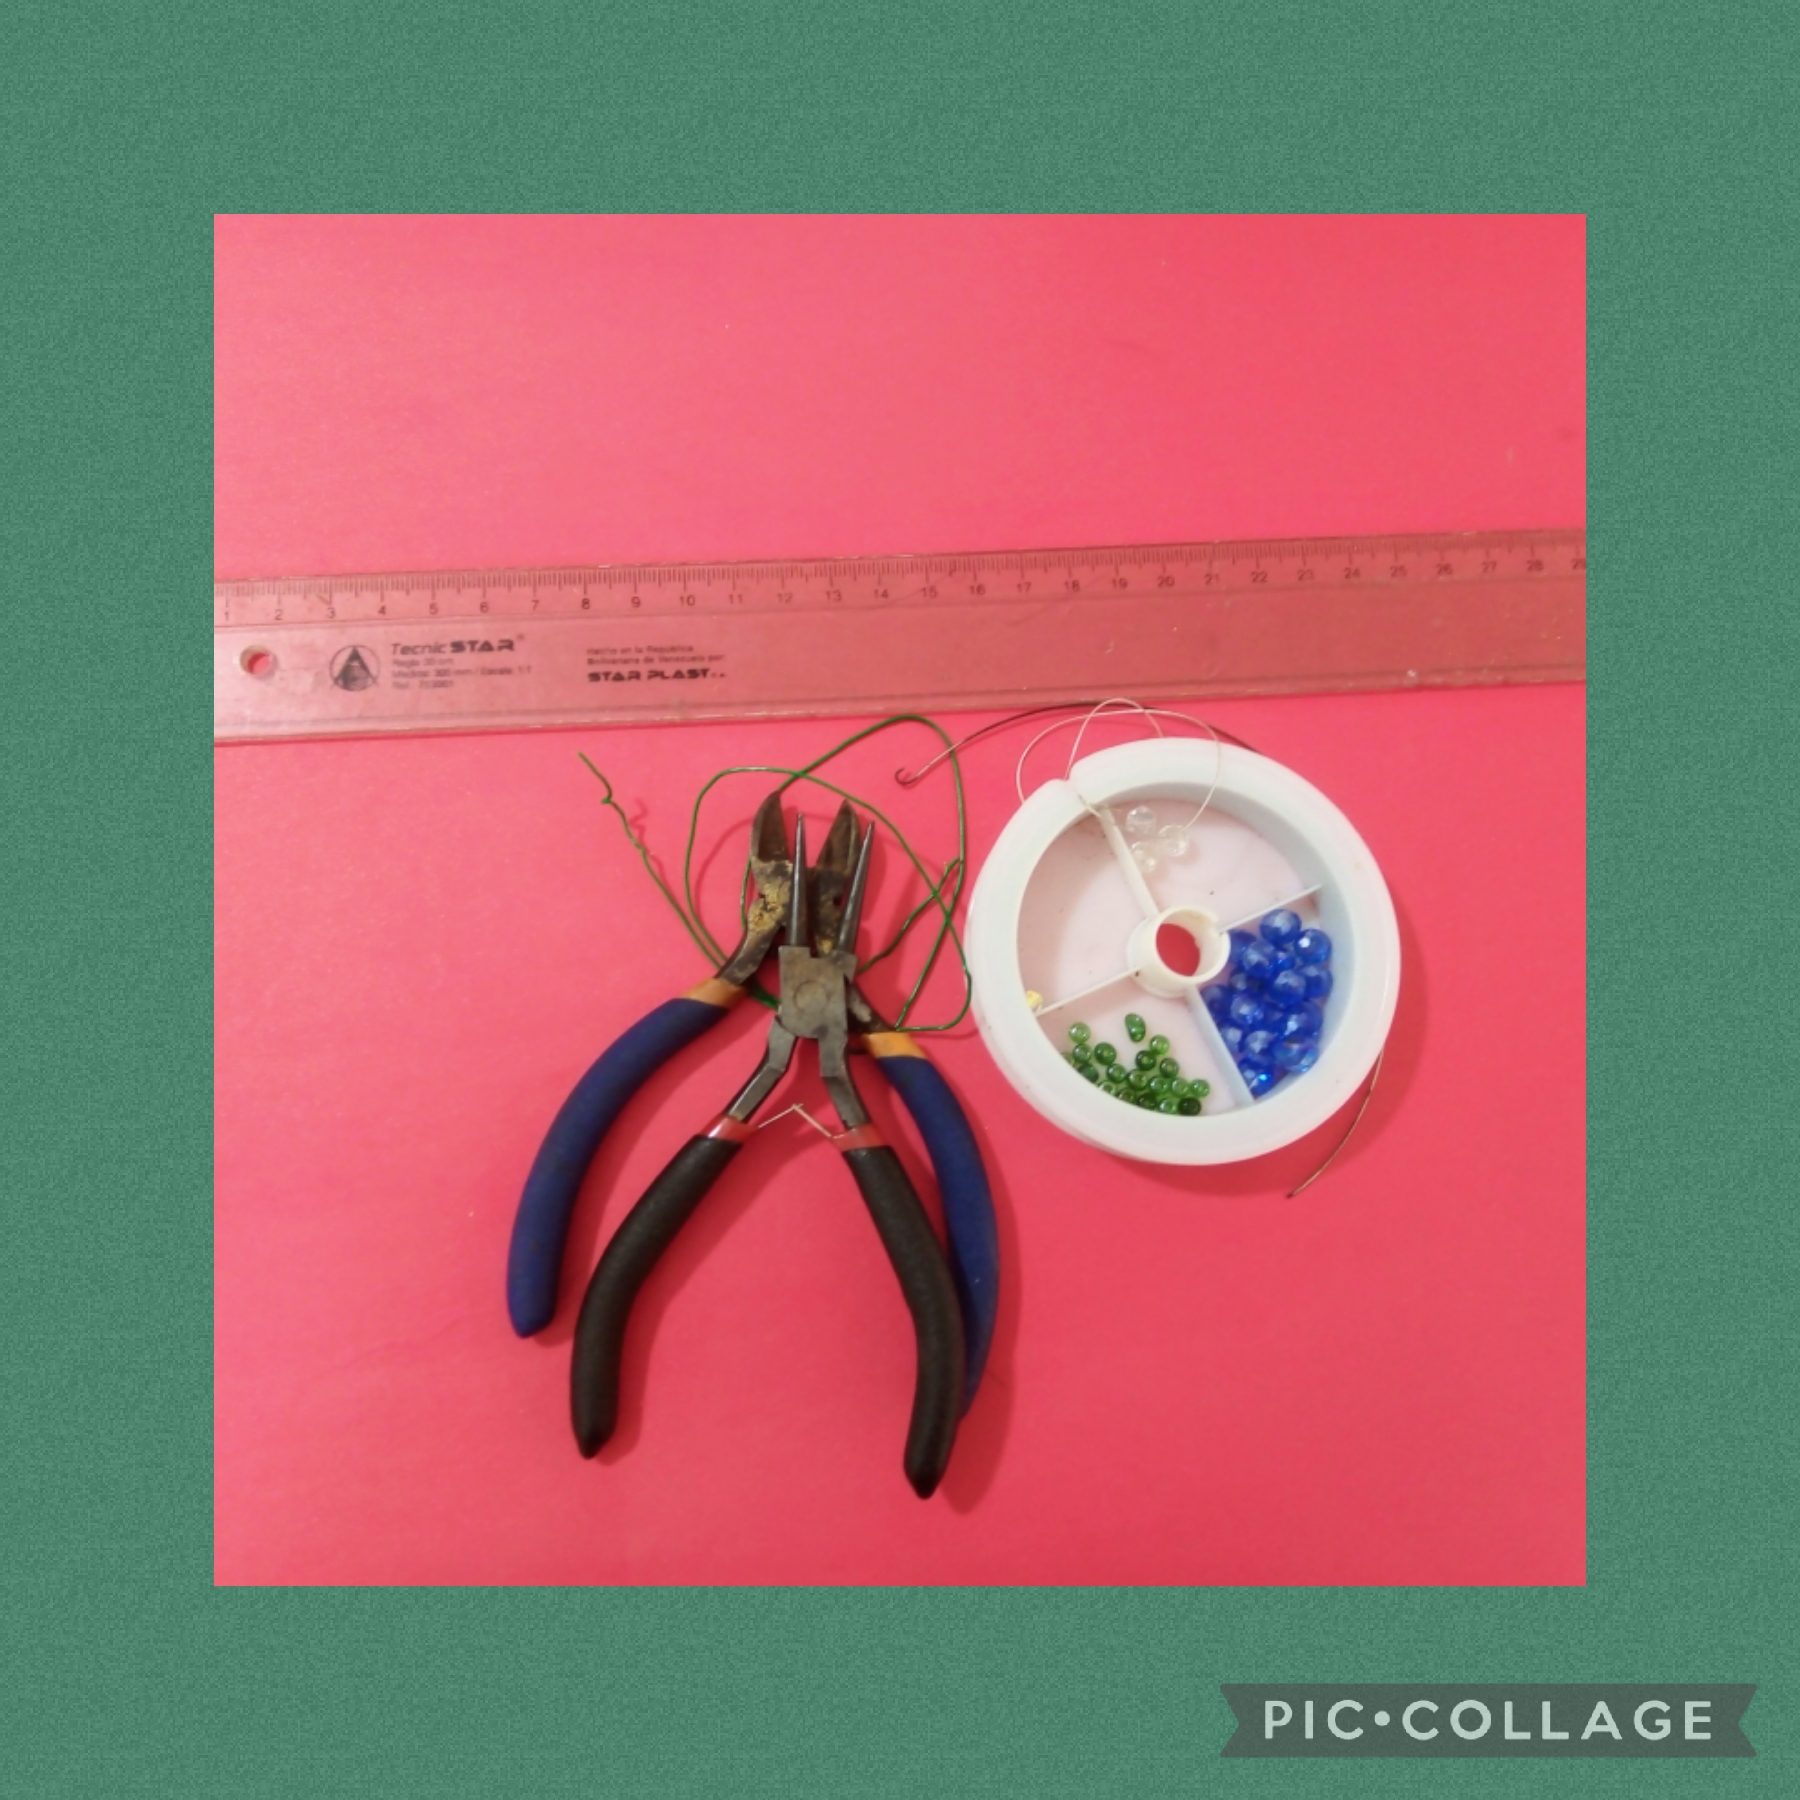
MATERIALES QUE USE PARA LA ELABORACIÓN DE ESTE HERMOSO PRENDEDOR:
*Cristales azules doce
*Cristales transparente tres.
*Mostacillas verde catorce.
*Alpaca quince centímetros.
*Transa gris doce
centímetros.
*Alambre verde (reciclado
de cable telefónico.)
*Alambre de cobre doce
centímetros.
- Pinza de corte.
*Pinza redonda.
*Pinza plana.
*Regla.
MATERIALS USED FOR THE ELABORATION OF THIS BEAUTIFUL PIN:
*Blue crystals twelve
*Three transparent crystals.
*Fourteen green mustards.
*Alpaca fifteen centimeters.
*Transa gray twelve
centimeters.
*Green wire (recycled
of telephone cable.)
*Twelve copper wire
centimeters.
- Cutting clamp.
*Round clamp.
*Flat clamp.
*Rule.
AHORA AQUÍ LOS PASOS QUÉ DETALLO PARA REALIZAR MI PROYECTO:
PRIMER PASO:
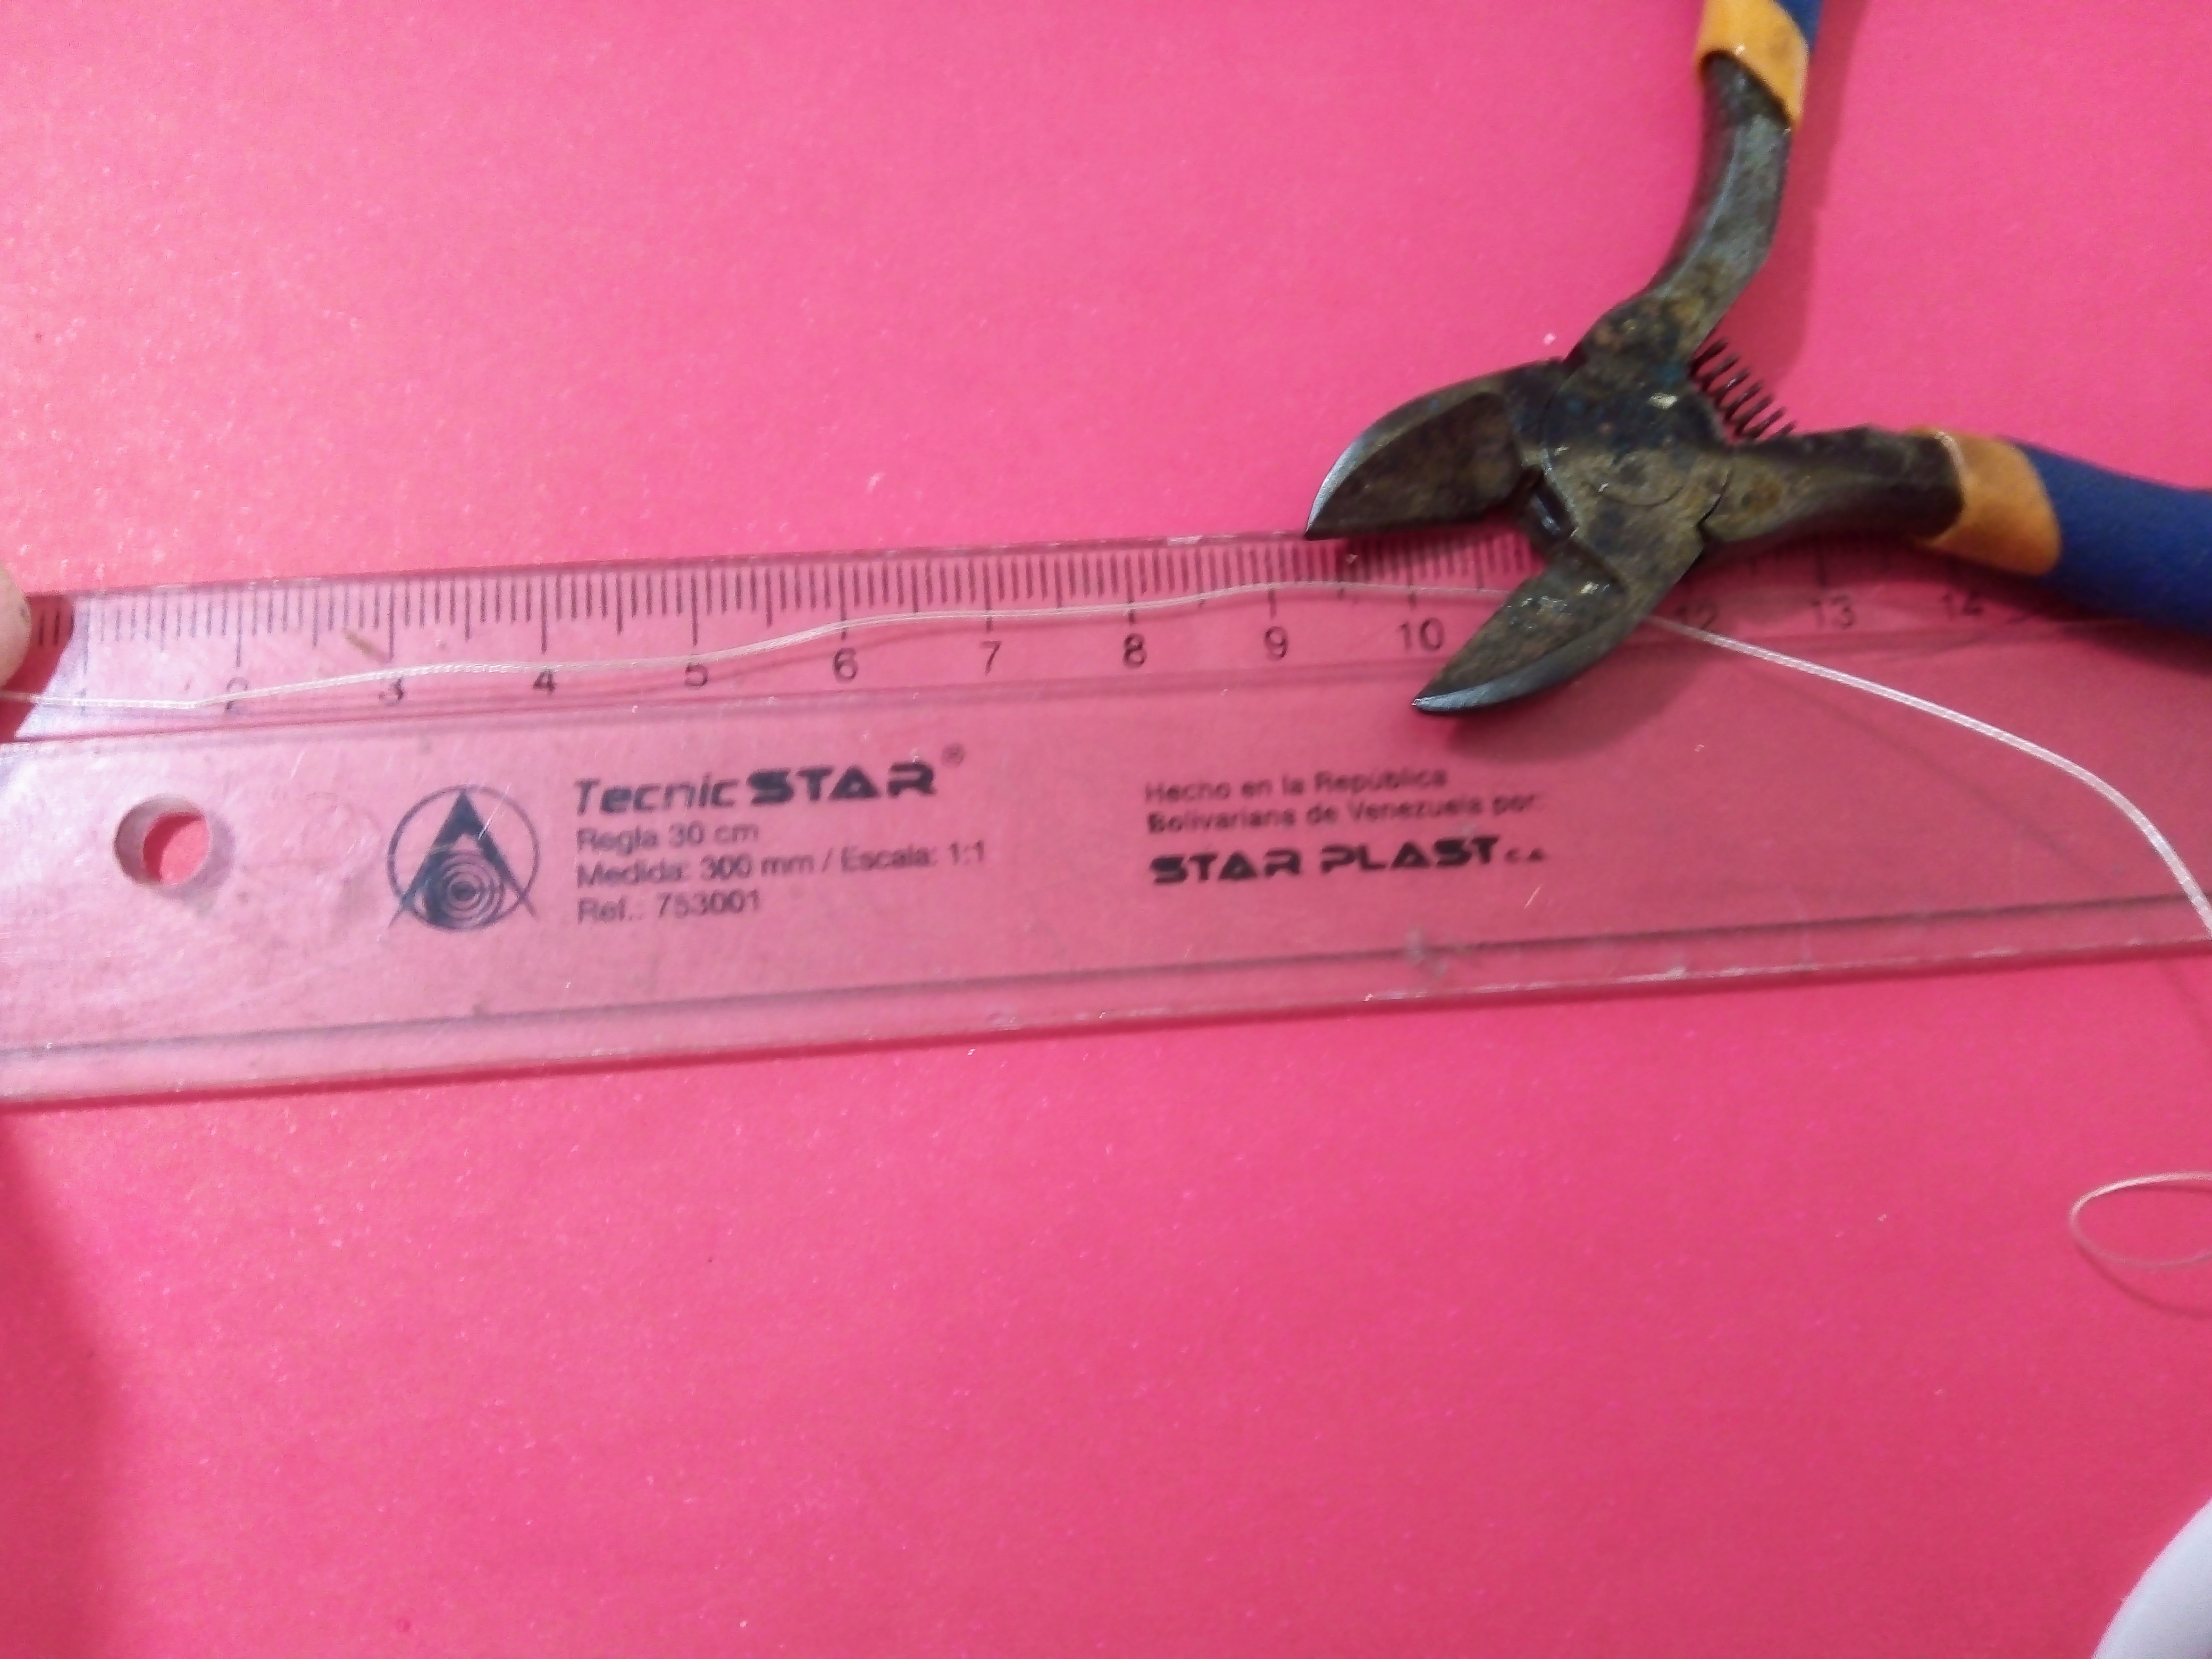
Lo primero que hice fue cortar catorce centímetros de la transa gris y luego lo divido en dos partes iguales de siete centímetros cada uno, como se ve en las fotos.
NOW HERE ARE THE STEPS THAT I DETAIL TO MAKE MY PROJECT:
FIRST STEP:
The first thing I did was cut fourteen centimeters of the gray transa and then I divided it into two equal parts of seven centimeters each, as seen in the photos.
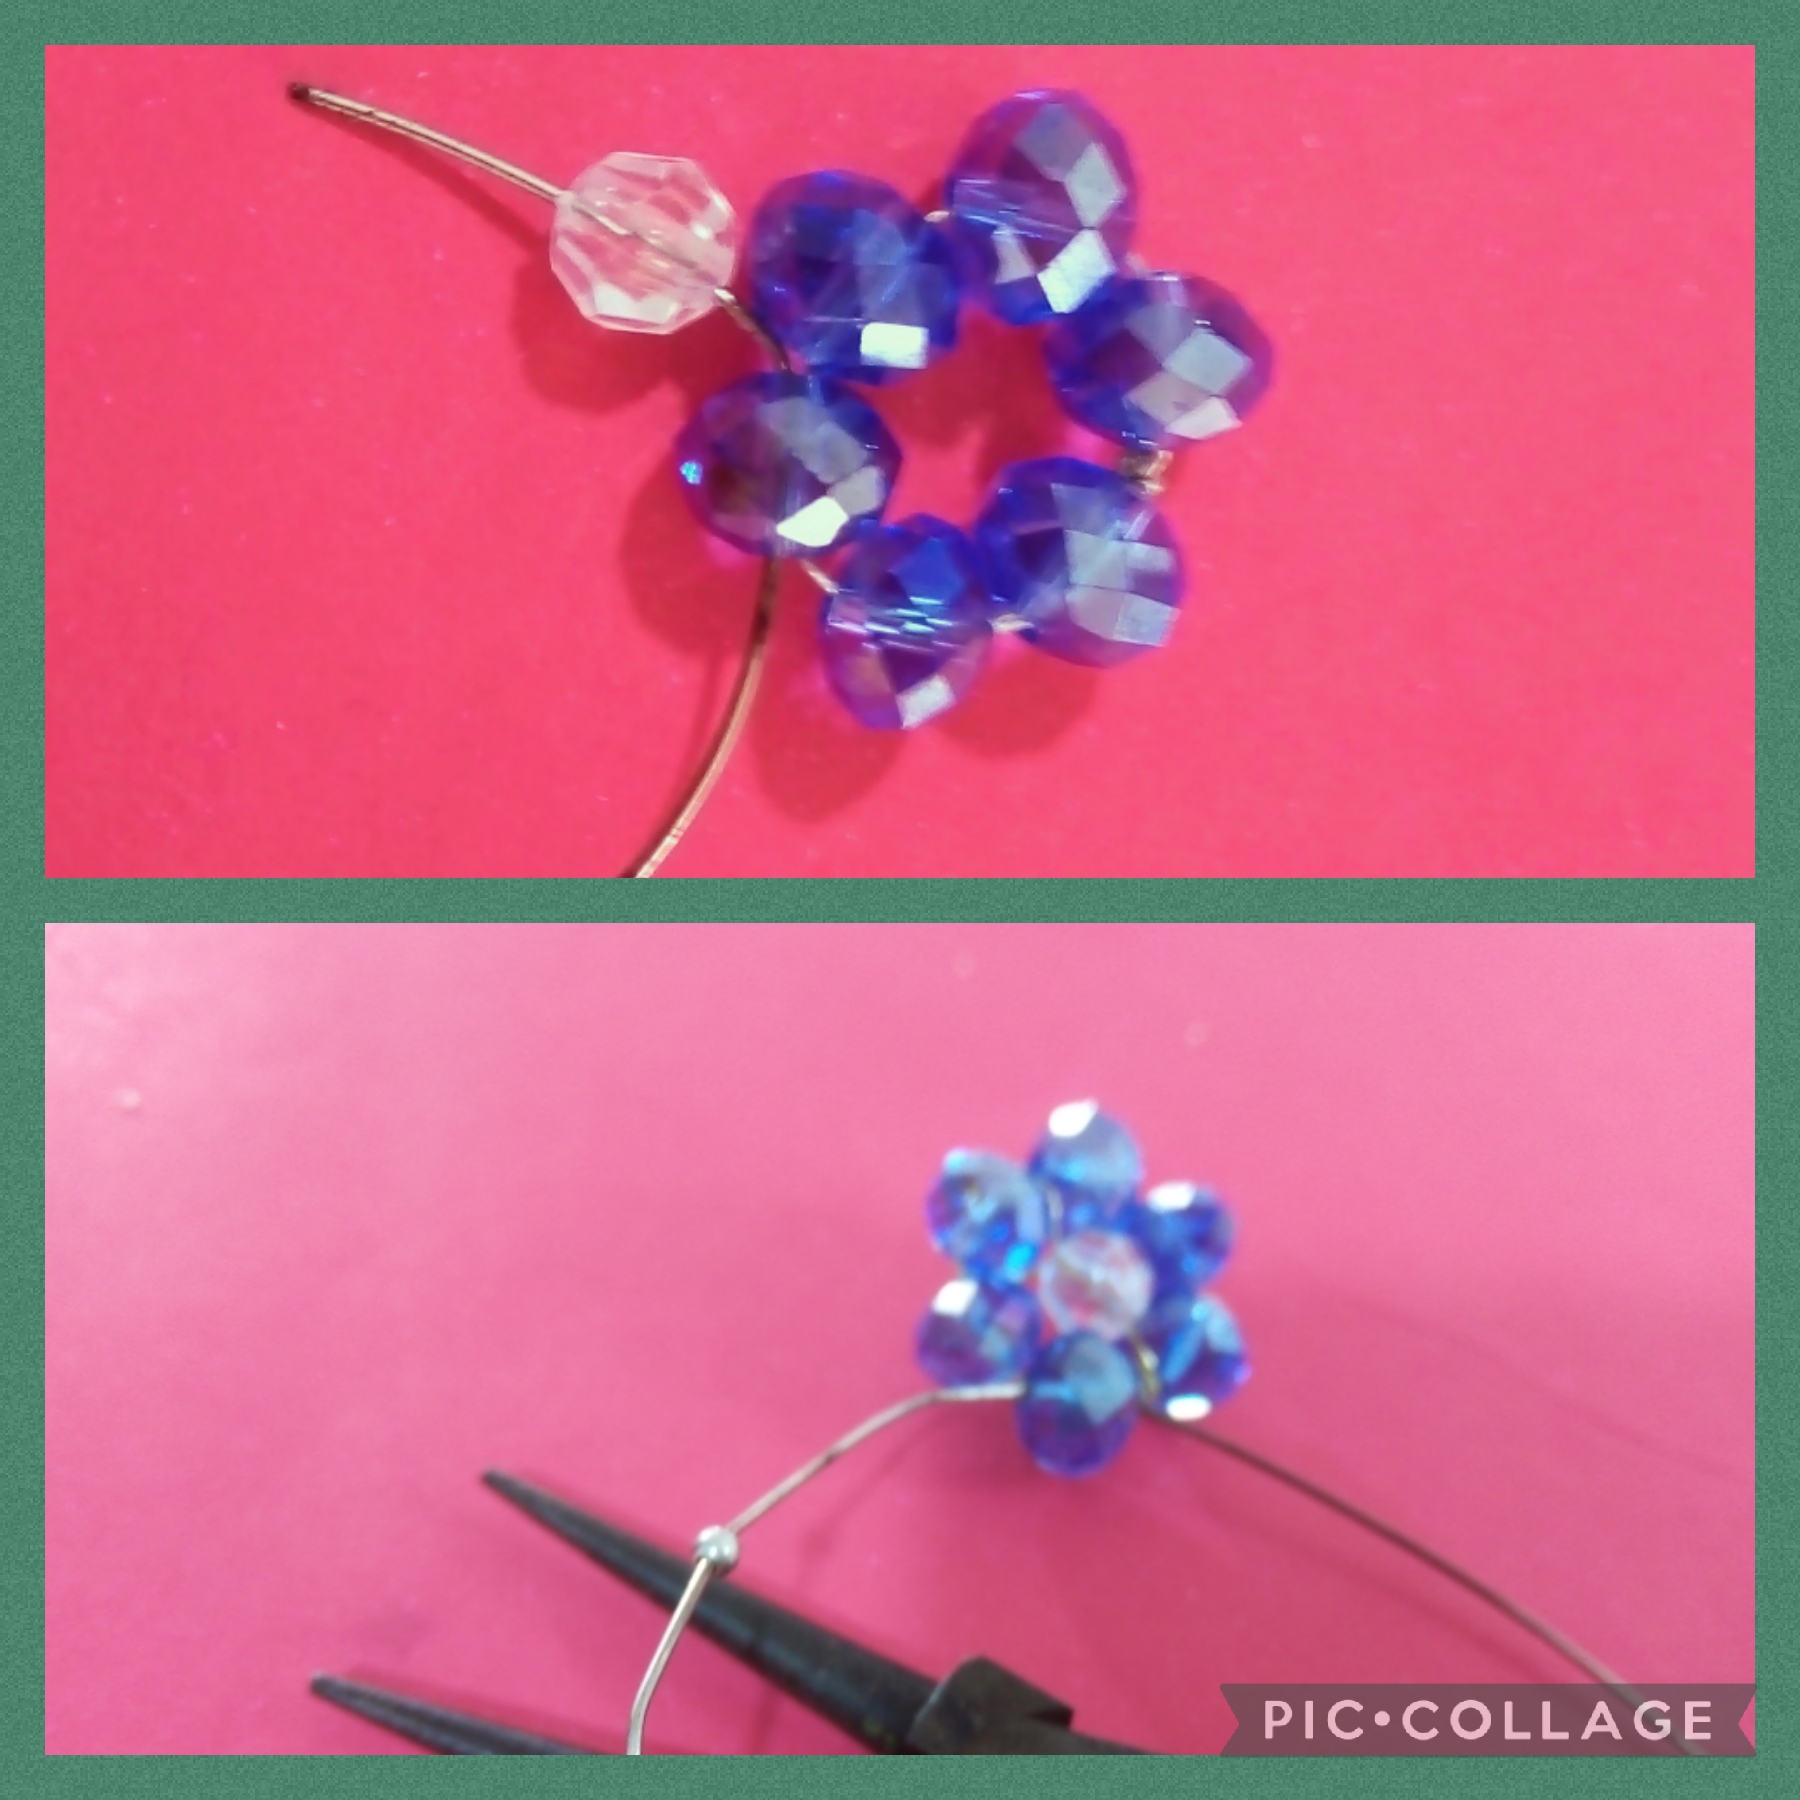
PASO DOS:
Ahora en este paso tomo una de las transas de siete centímetros, e introduzco seis cristales azules y cierro con un nudo y me queda en forma de anillo, así como se ve en las fotos.
STEP TWO:
Now in this step I take one of the seven centimeter transas, and insert six blue crystals and close with a knot and it remains in the shape of a ring, as seen in the photos.
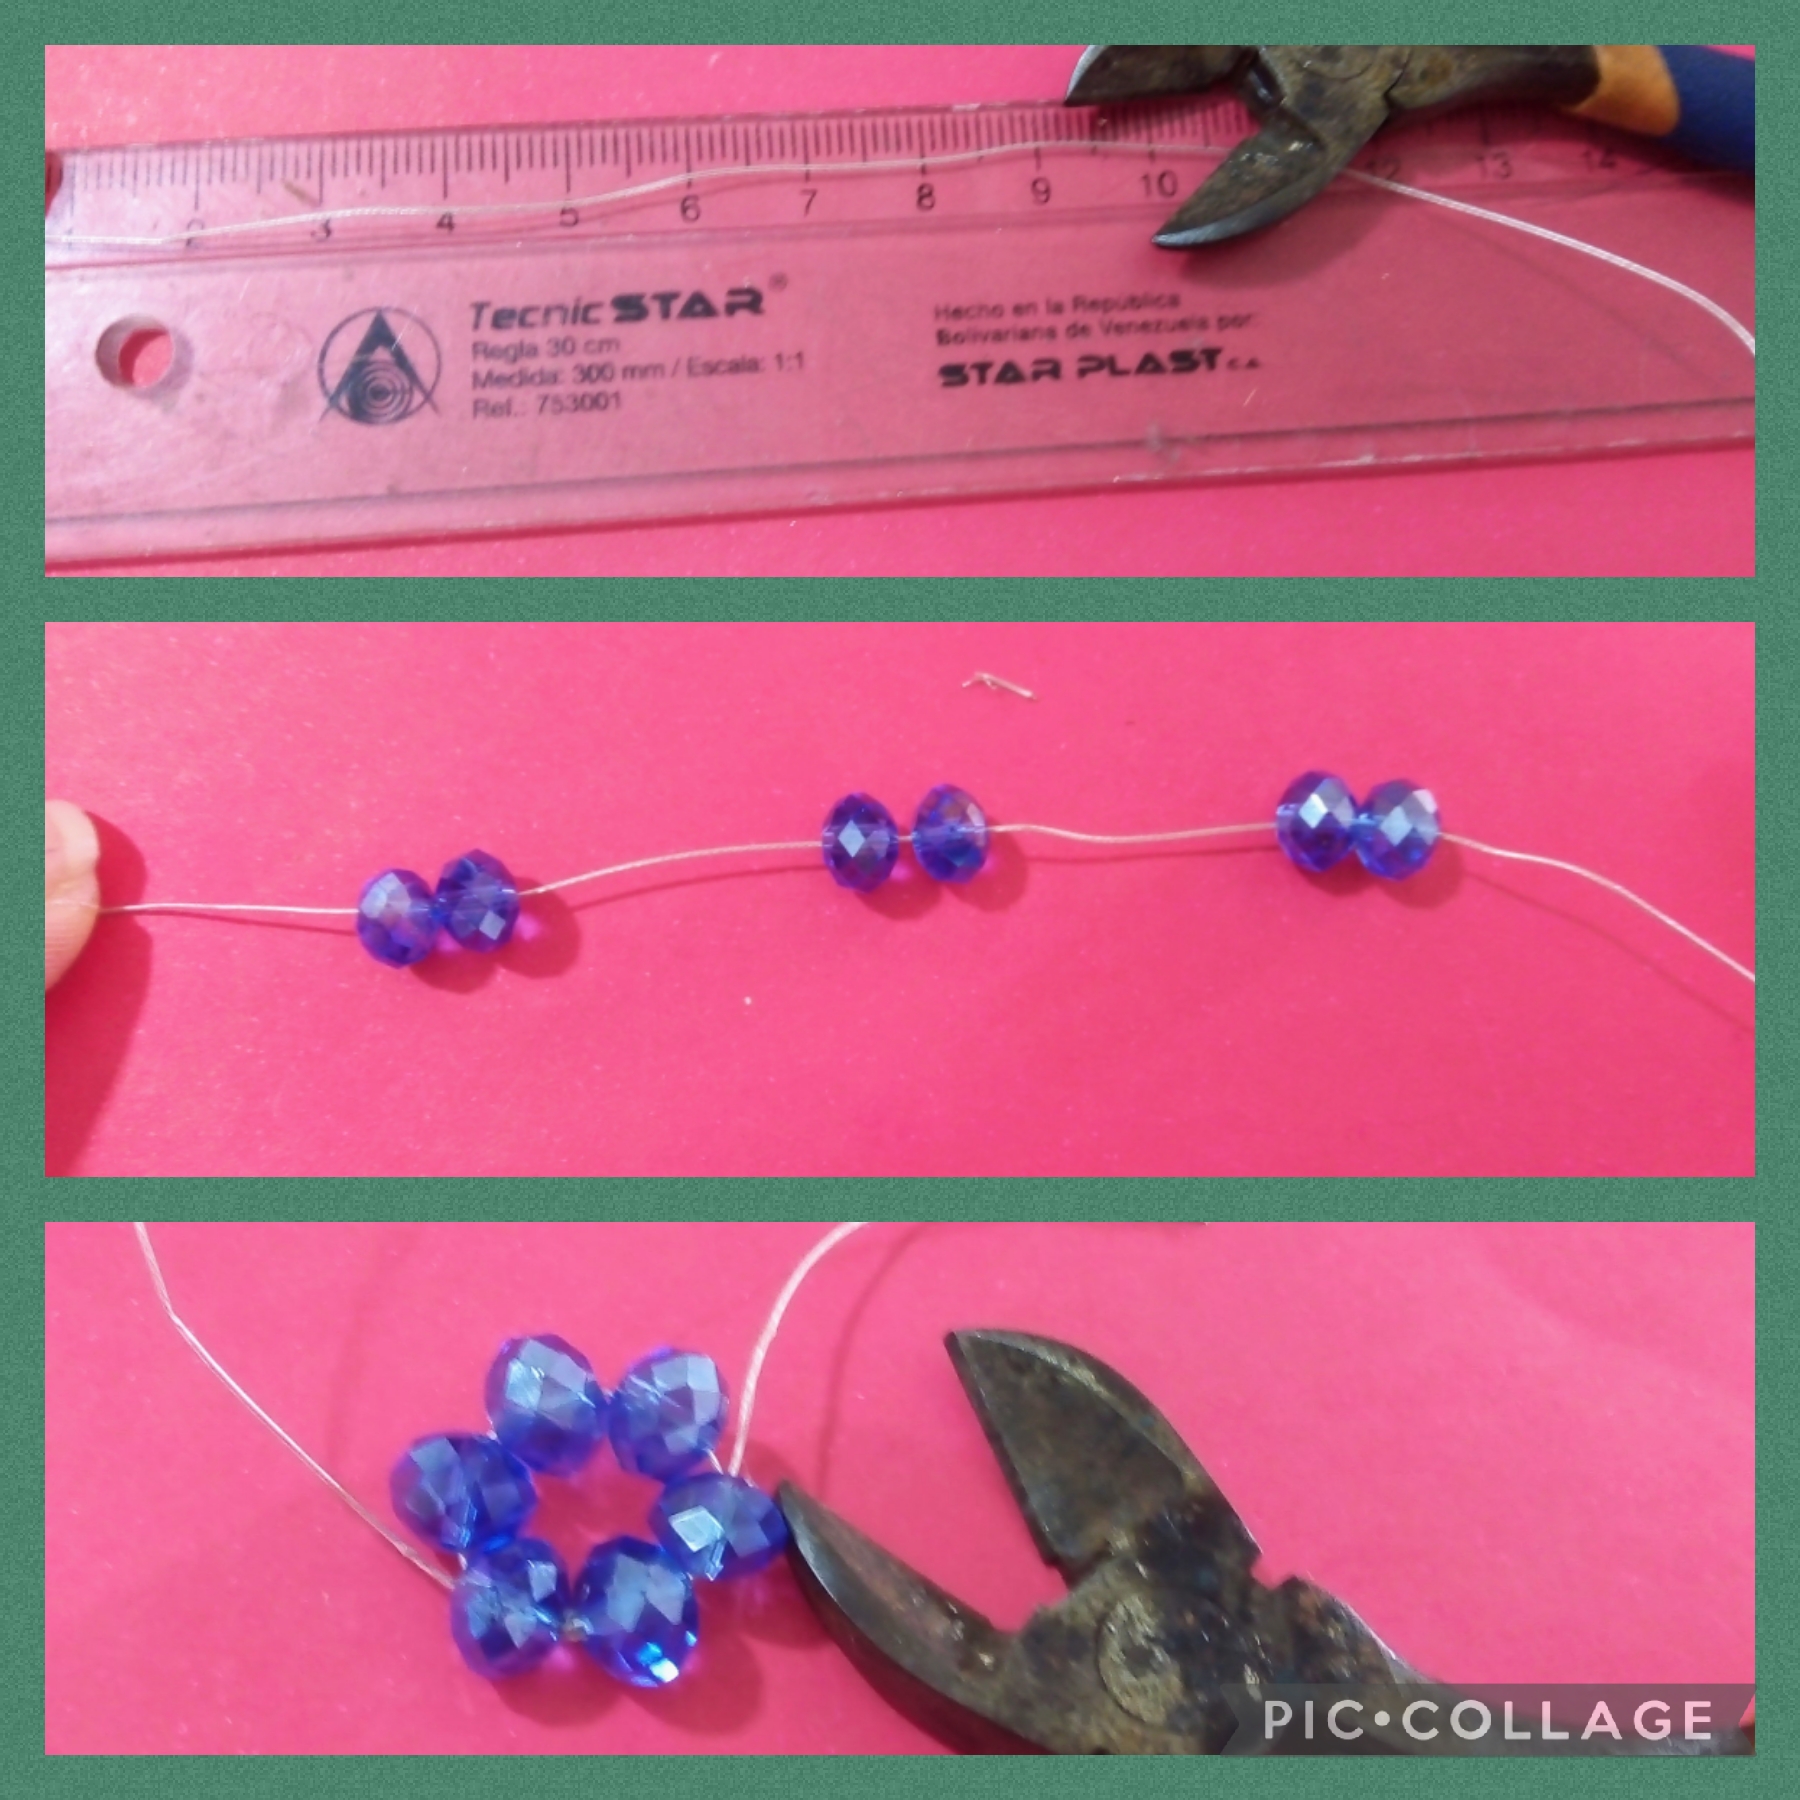
PASO TRES:
En este paso después de cerrar el anillo de los cristales azules, tomo un cristal transparente, uno las puntas de las transas e introduzco el cristal transparente y me queda en medio de dos cristales azules, ahora lo saco por el medio de los dos cristales azules de la parte superior, hago un nudo para fijar y escondo los sobrantes por los cristales azules laterales, halo y uso la pinza de corte para quitar los excedentes, como se ve en las fotos.
STEP THREE:
In this step, after closing the ring of blue crystals, I take a transparent crystal, join the ends of the transas and insert the transparent crystal and it remains in the middle of two blue crystals, now I take it out through the middle of the two blue crystals from the upper part, I make a knot to fix it and I hide the leftovers by the side blue crystals, pull it out and use the cutting pliers to remove the excesses, as seen in the photos.
PASO CUATRO:
Aquí corto cinco centímetros de alpaca, los vamos a introducir por el cristal transparente y fijamos con una minúscula grapita para que no se salga, así elaboramos otra flor y ya tenemos con las que formaré el prendedor.
STEP FOUR:
Here I cut five centimeters of alpaca, we are going to introduce them through the transparent glass and fix them with a tiny staple so that they do not come out, so we make another flower and we already have the ones with which I will make the pin.
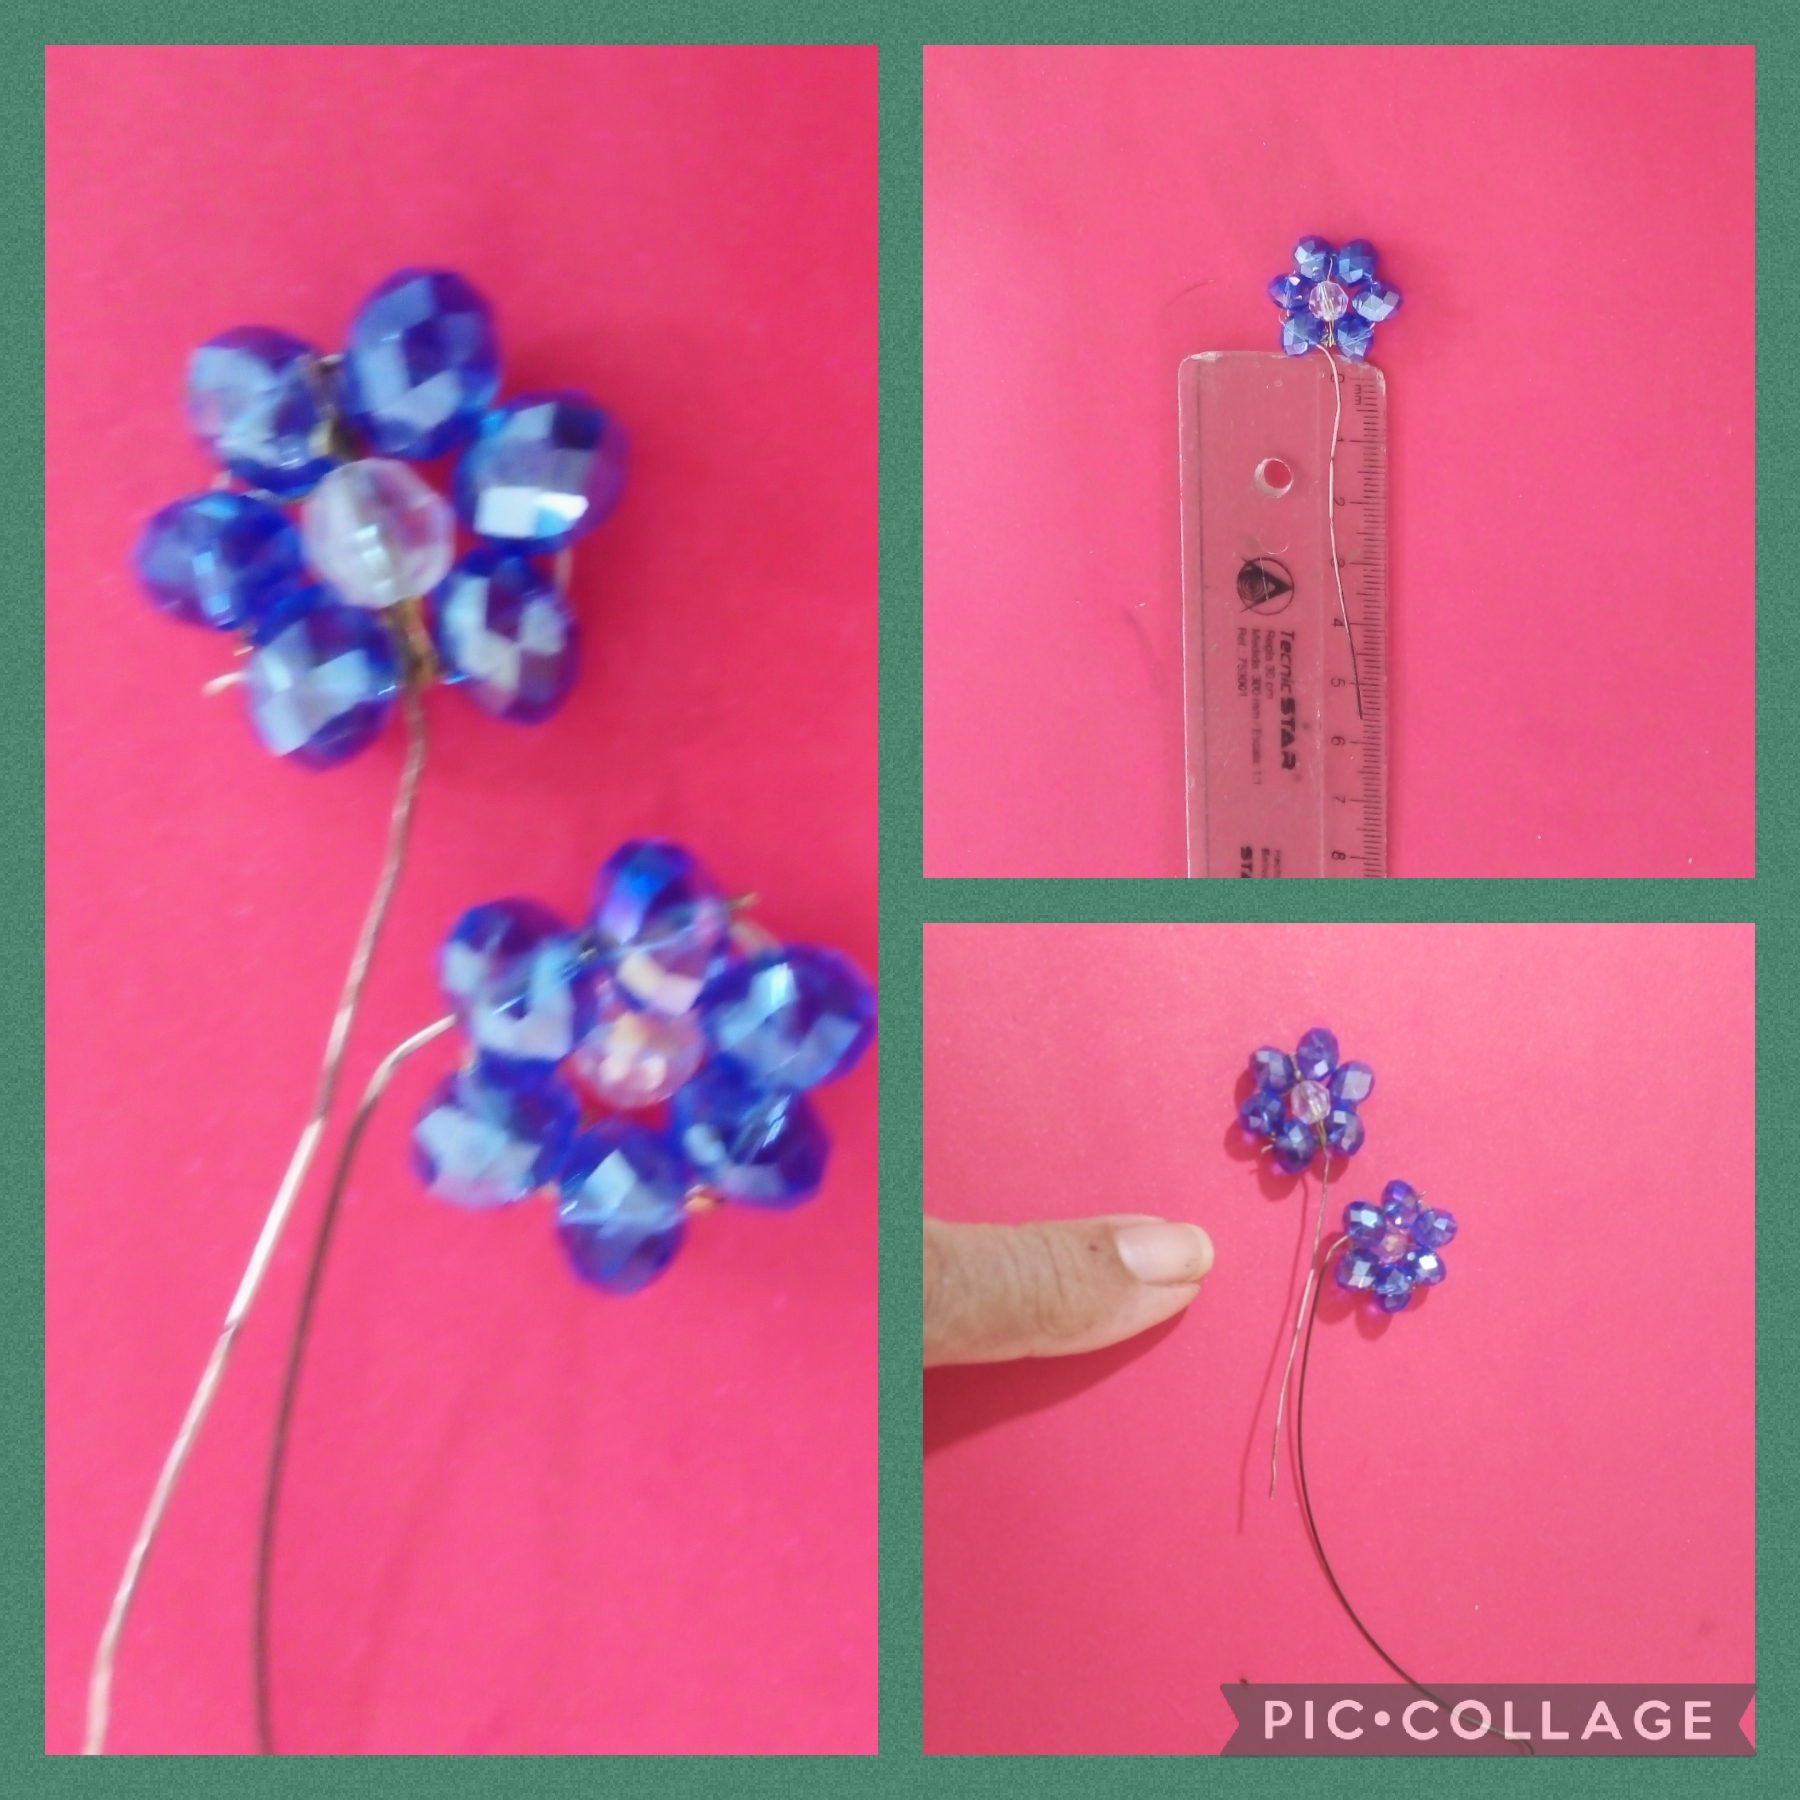
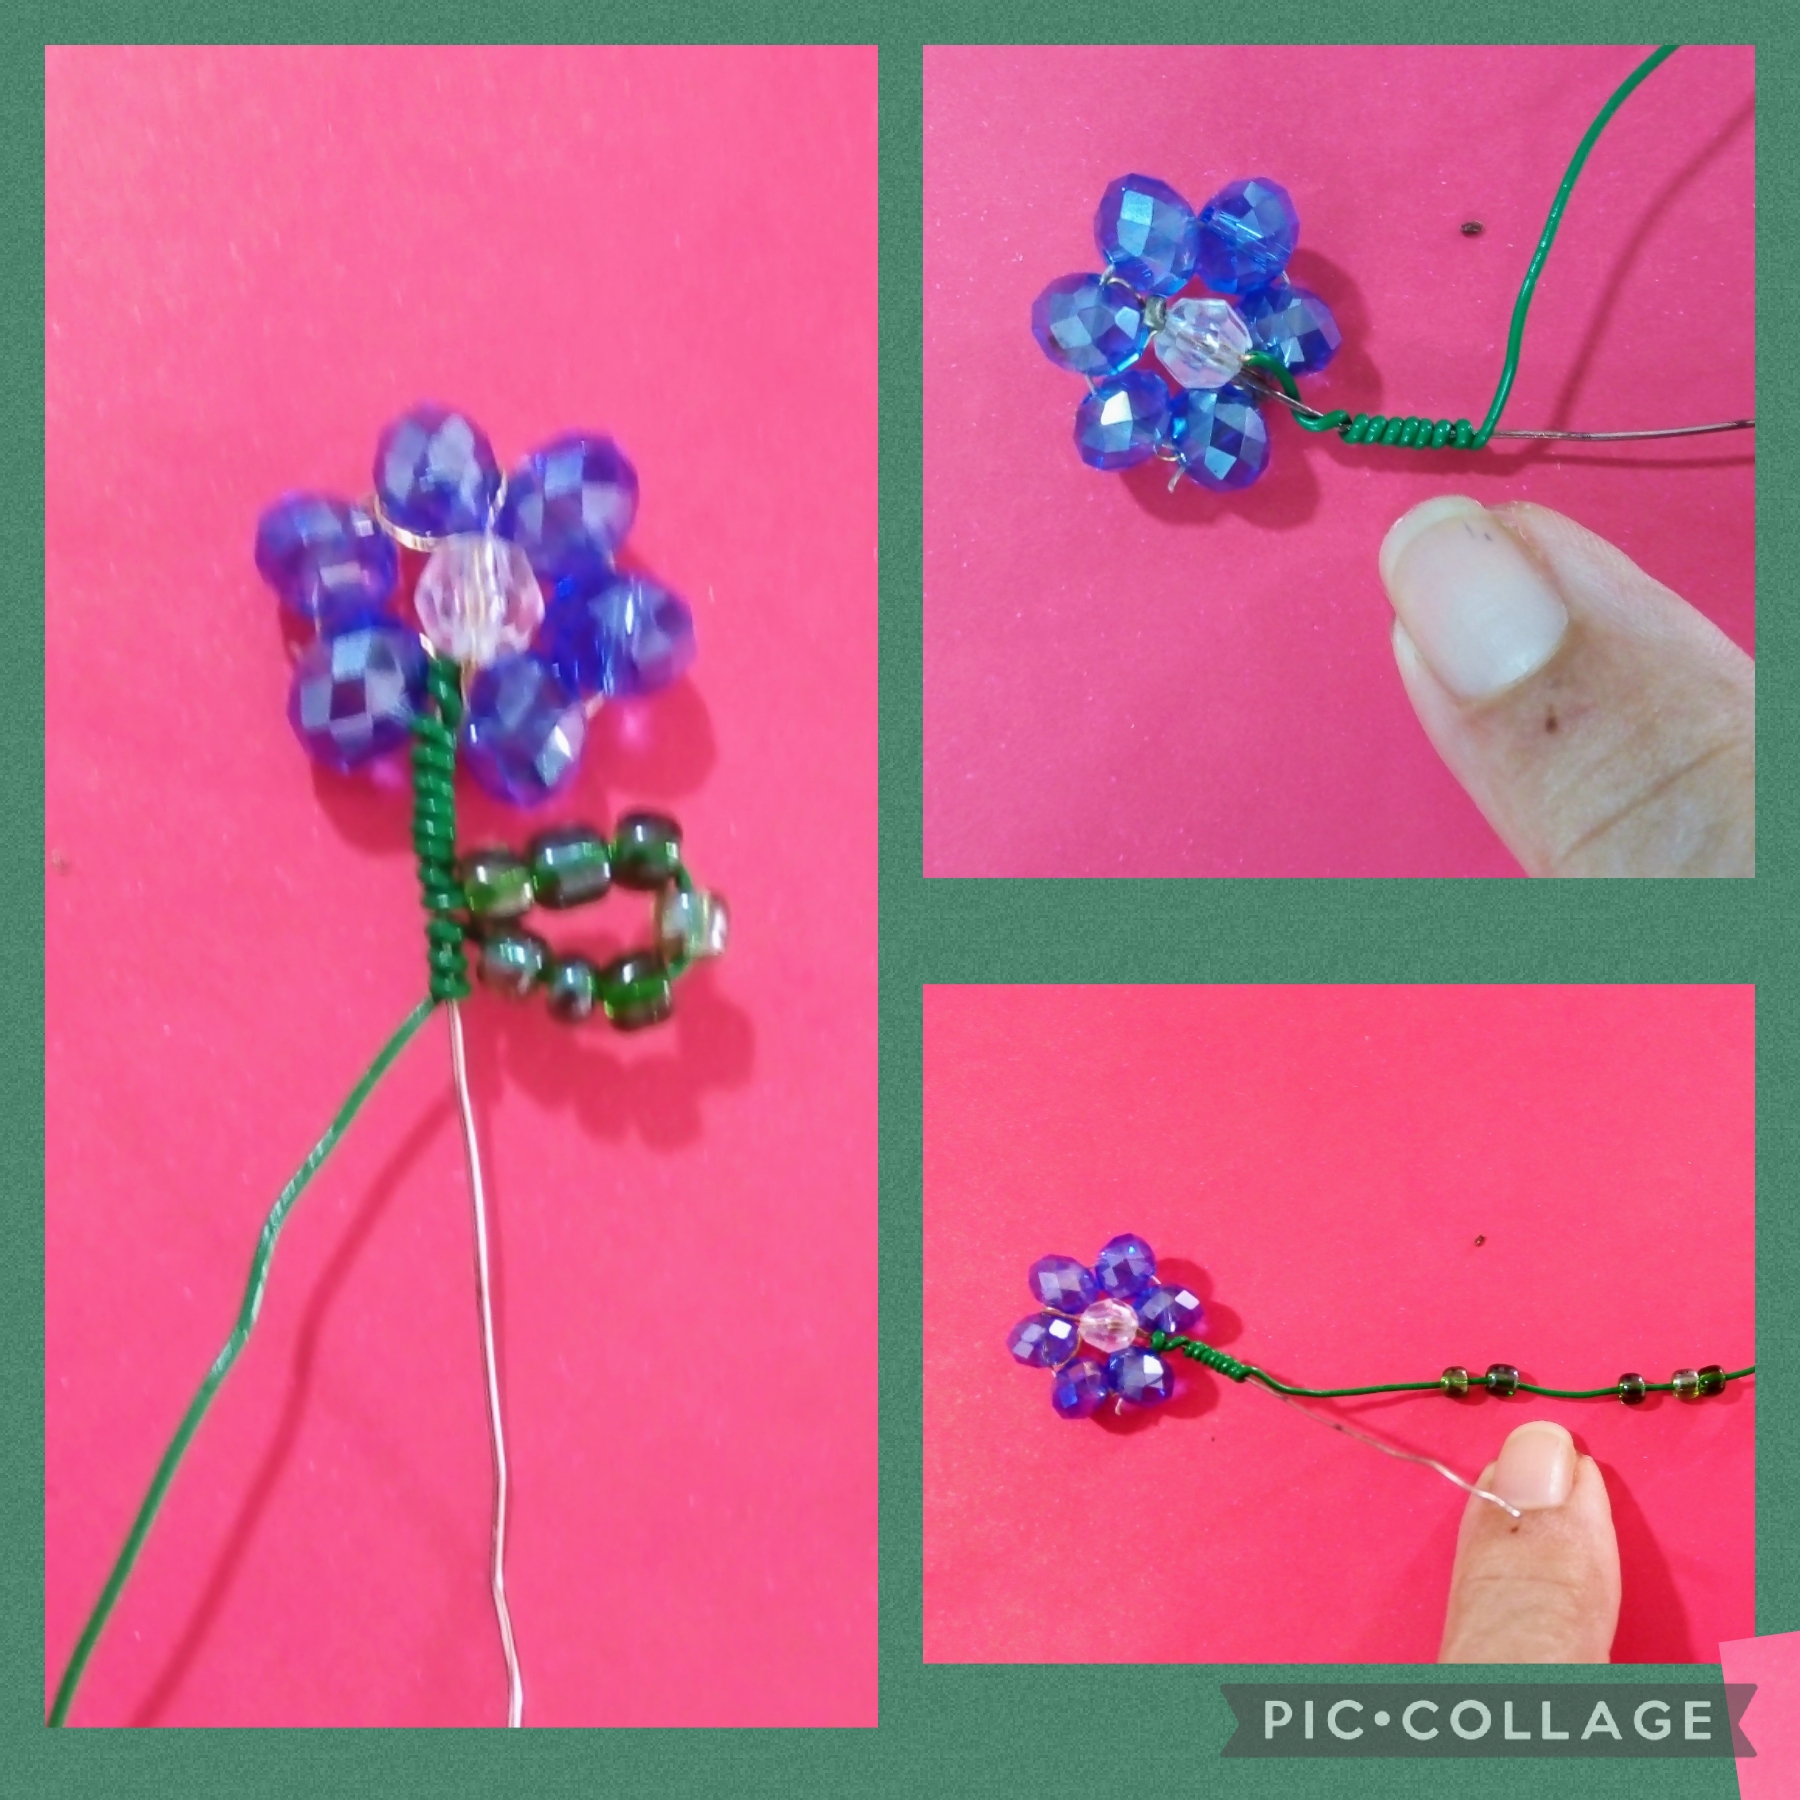
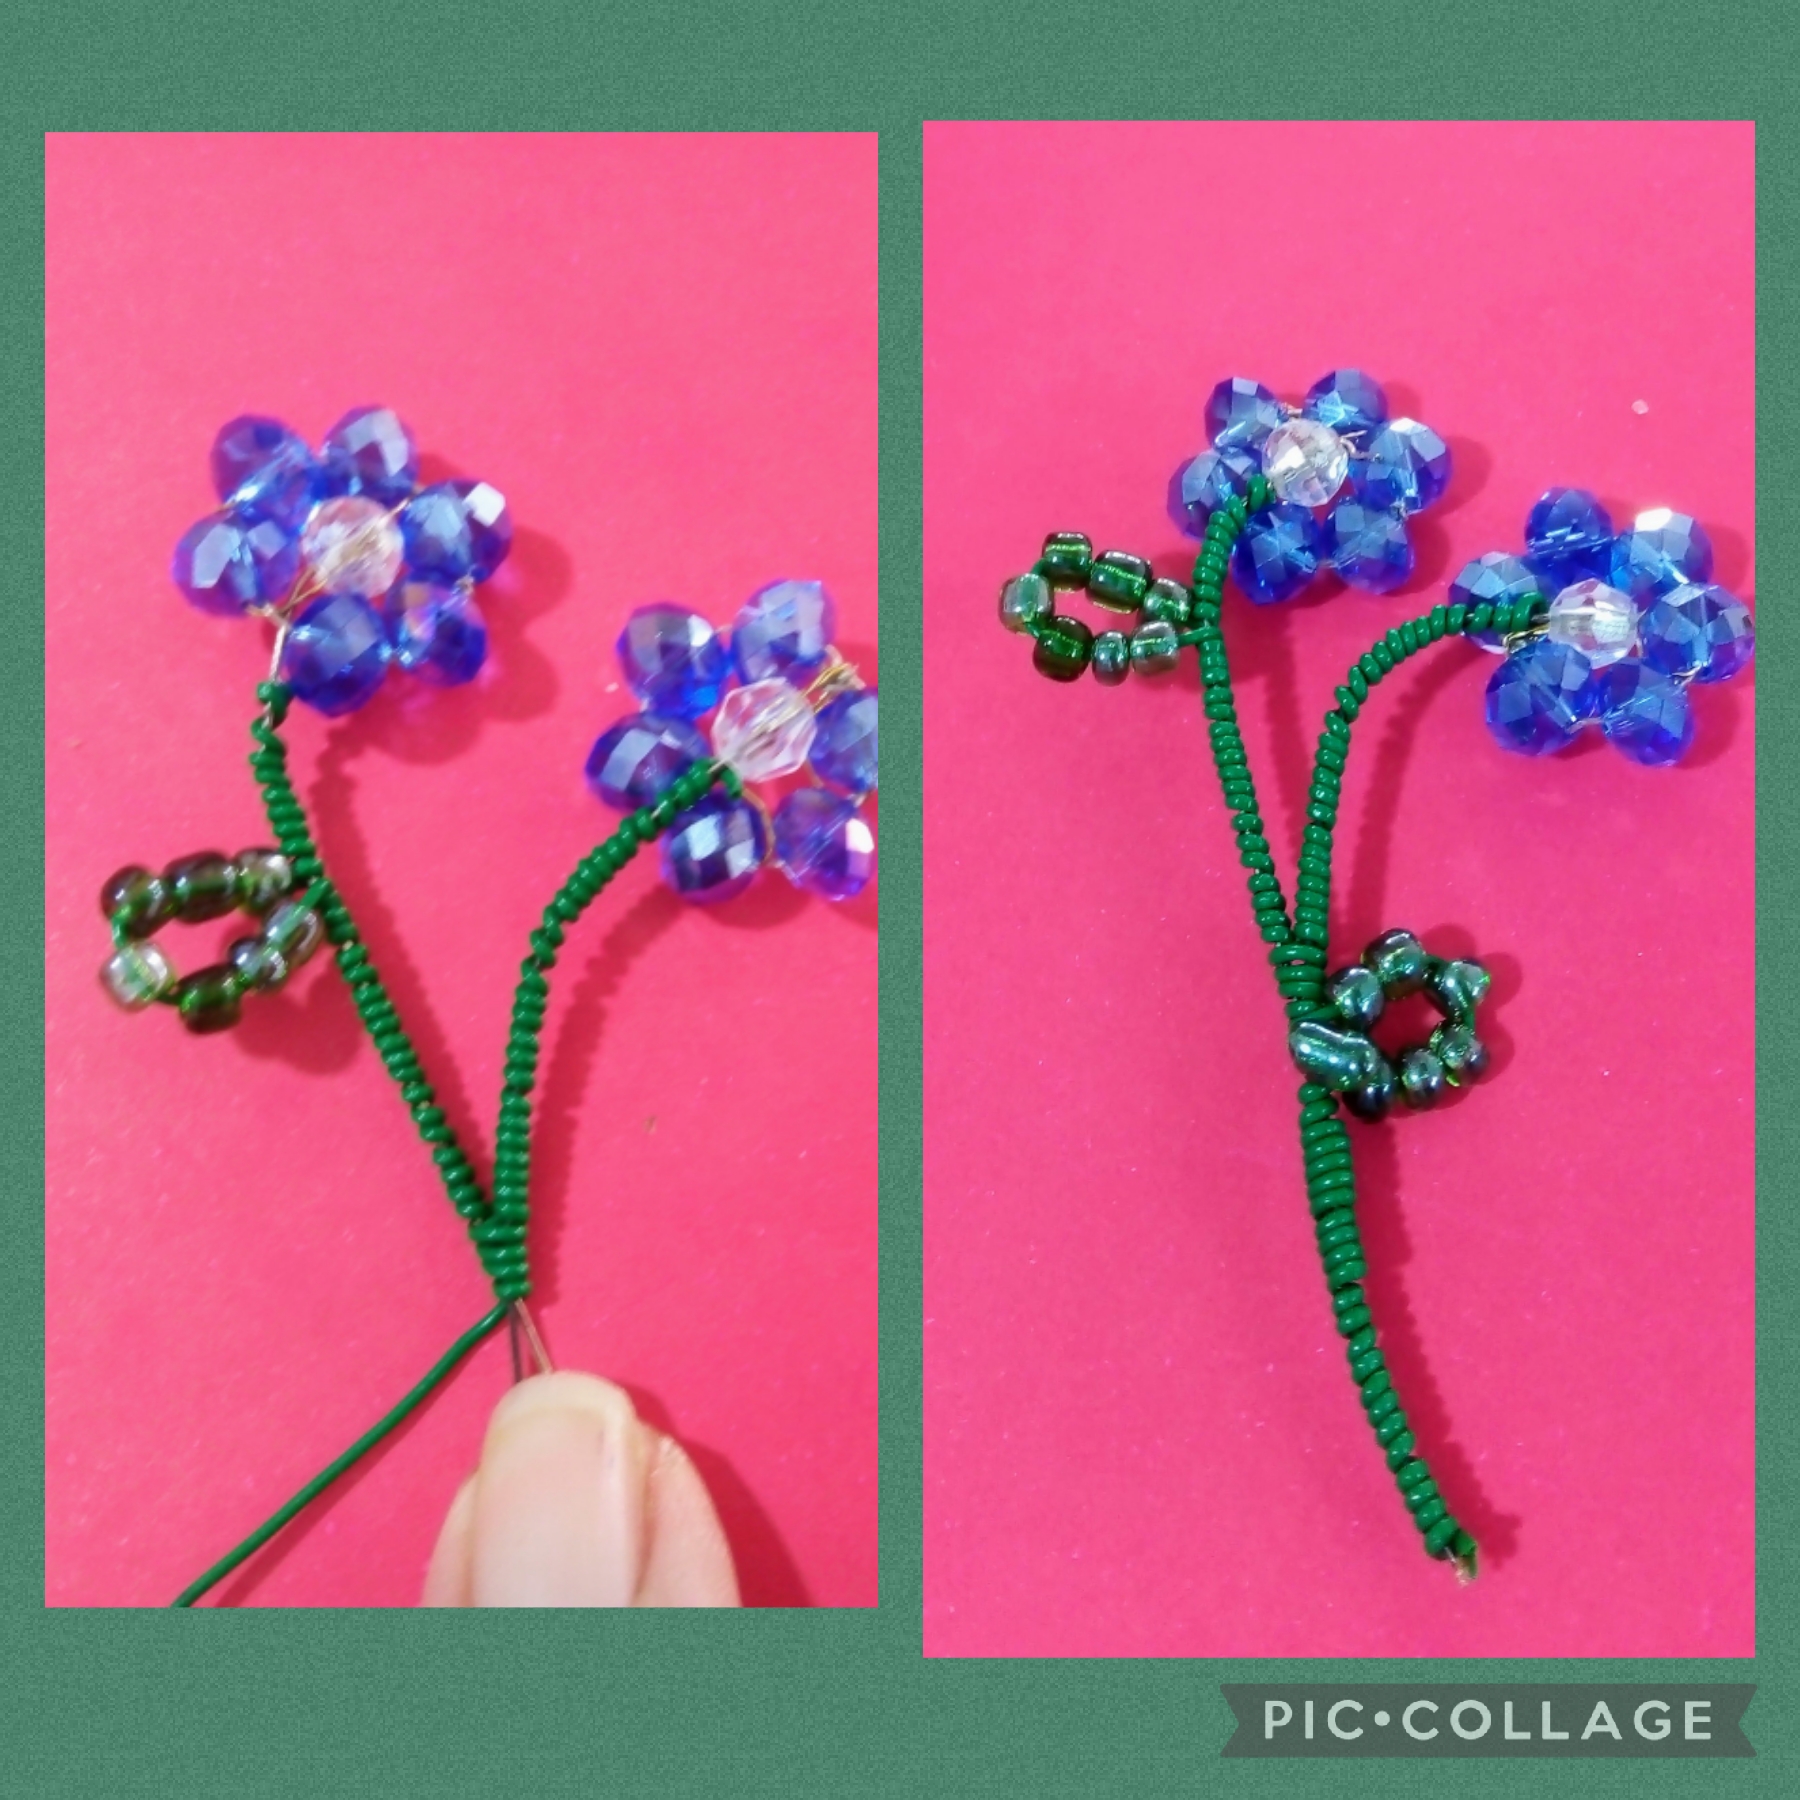
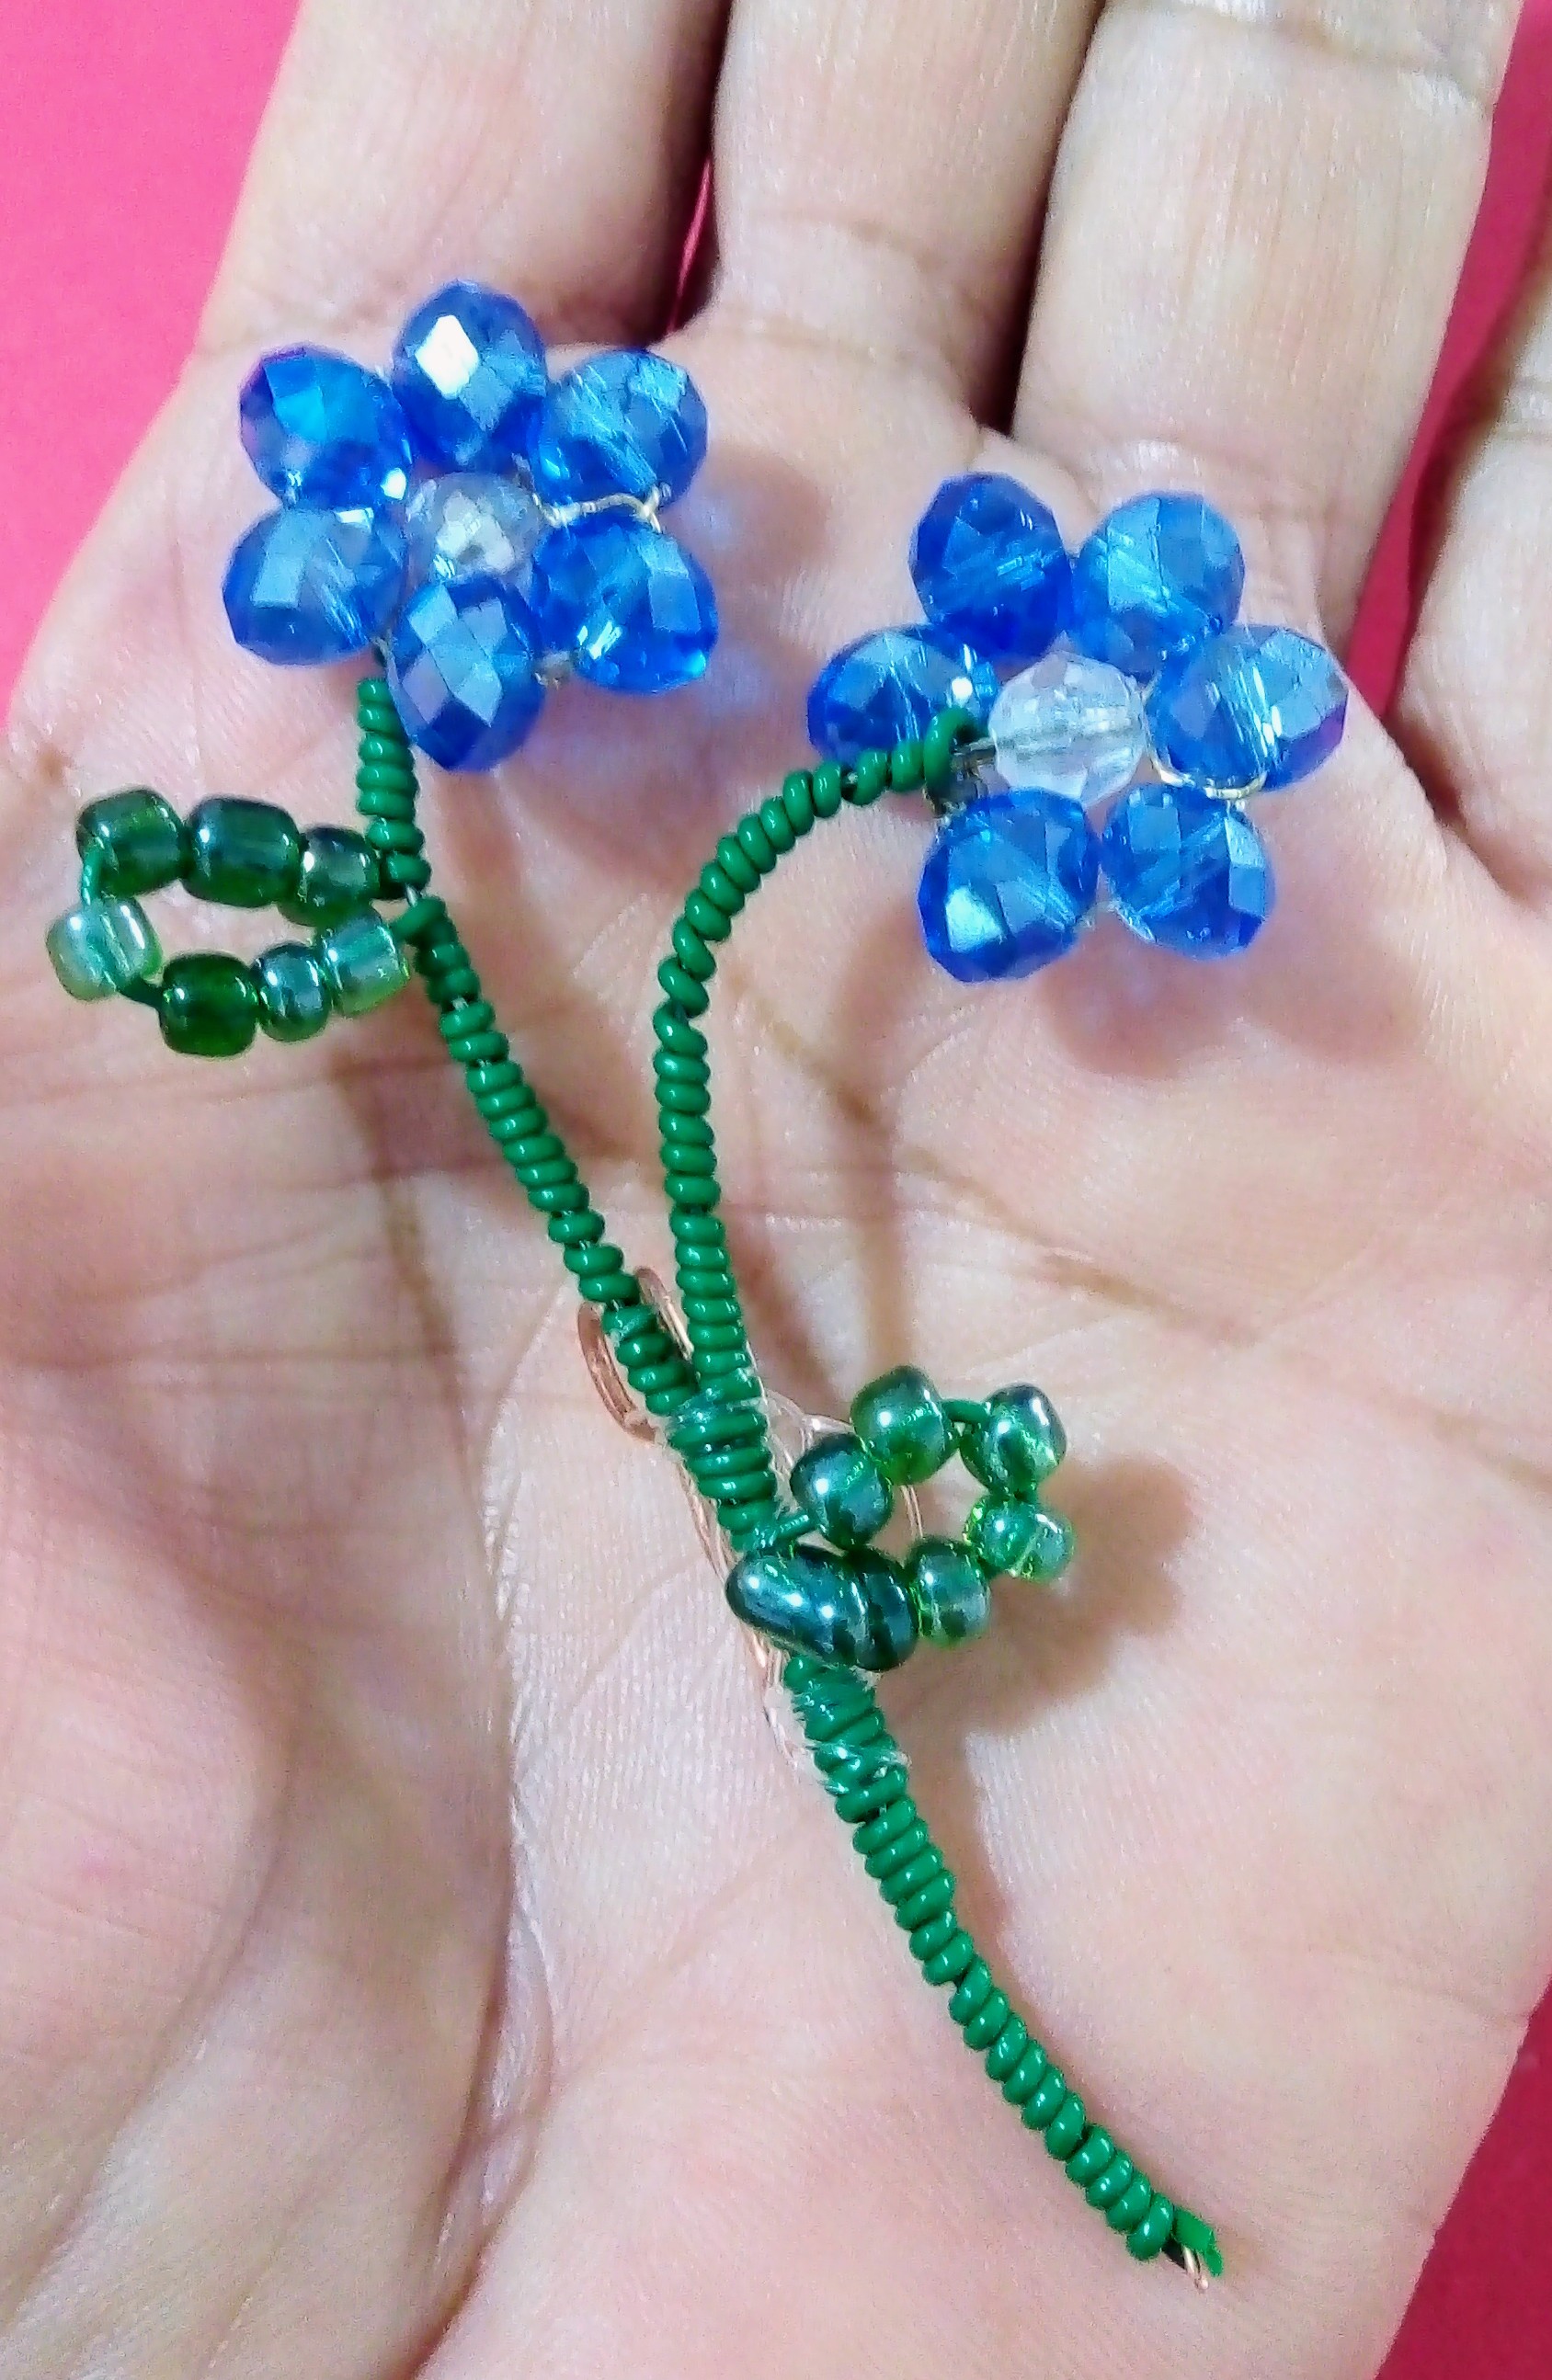
PASO CINCO:
Una vez que mido con la regla cinco centímetros para el largo de las flores; tomo el alambre verde que recicle del cable telefónico y empiezo a entorchar la alpaca de la primera flor, así como se ve en las fotos; entorcho hasta dos centímetros ; y empiezo a introducir por el alambre verde siete mostacillas verdes, le doy forma ovalada y vuelvo a entorchar la alpaca y así realizó una hoja, ahora hago lo mismo con la otra flor, las junto una más abajo que la otra y ahora las entorcho a las dos, y ayudada de las pinzas le doy una forma de medio abanico y ya está casi listo el prendedor.
STEP FIVE:
Once I measure with the ruler five centimeters for the length of the flowers; I take the green wire that I recycled from the telephone cable and I start to twist the alpaca of the first flower, just as you can see in the photos; I twist up to two centimeters; and I begin to introduce seven green beads through the green wire, I give it an oval shape and I twist the alpaca again and thus I made a leaf, now I do the same with the other flower, I join them one lower than the other and now I twist them to both, and with the help of the tweezers I give it a half-fan shape and the brooch is almost ready.
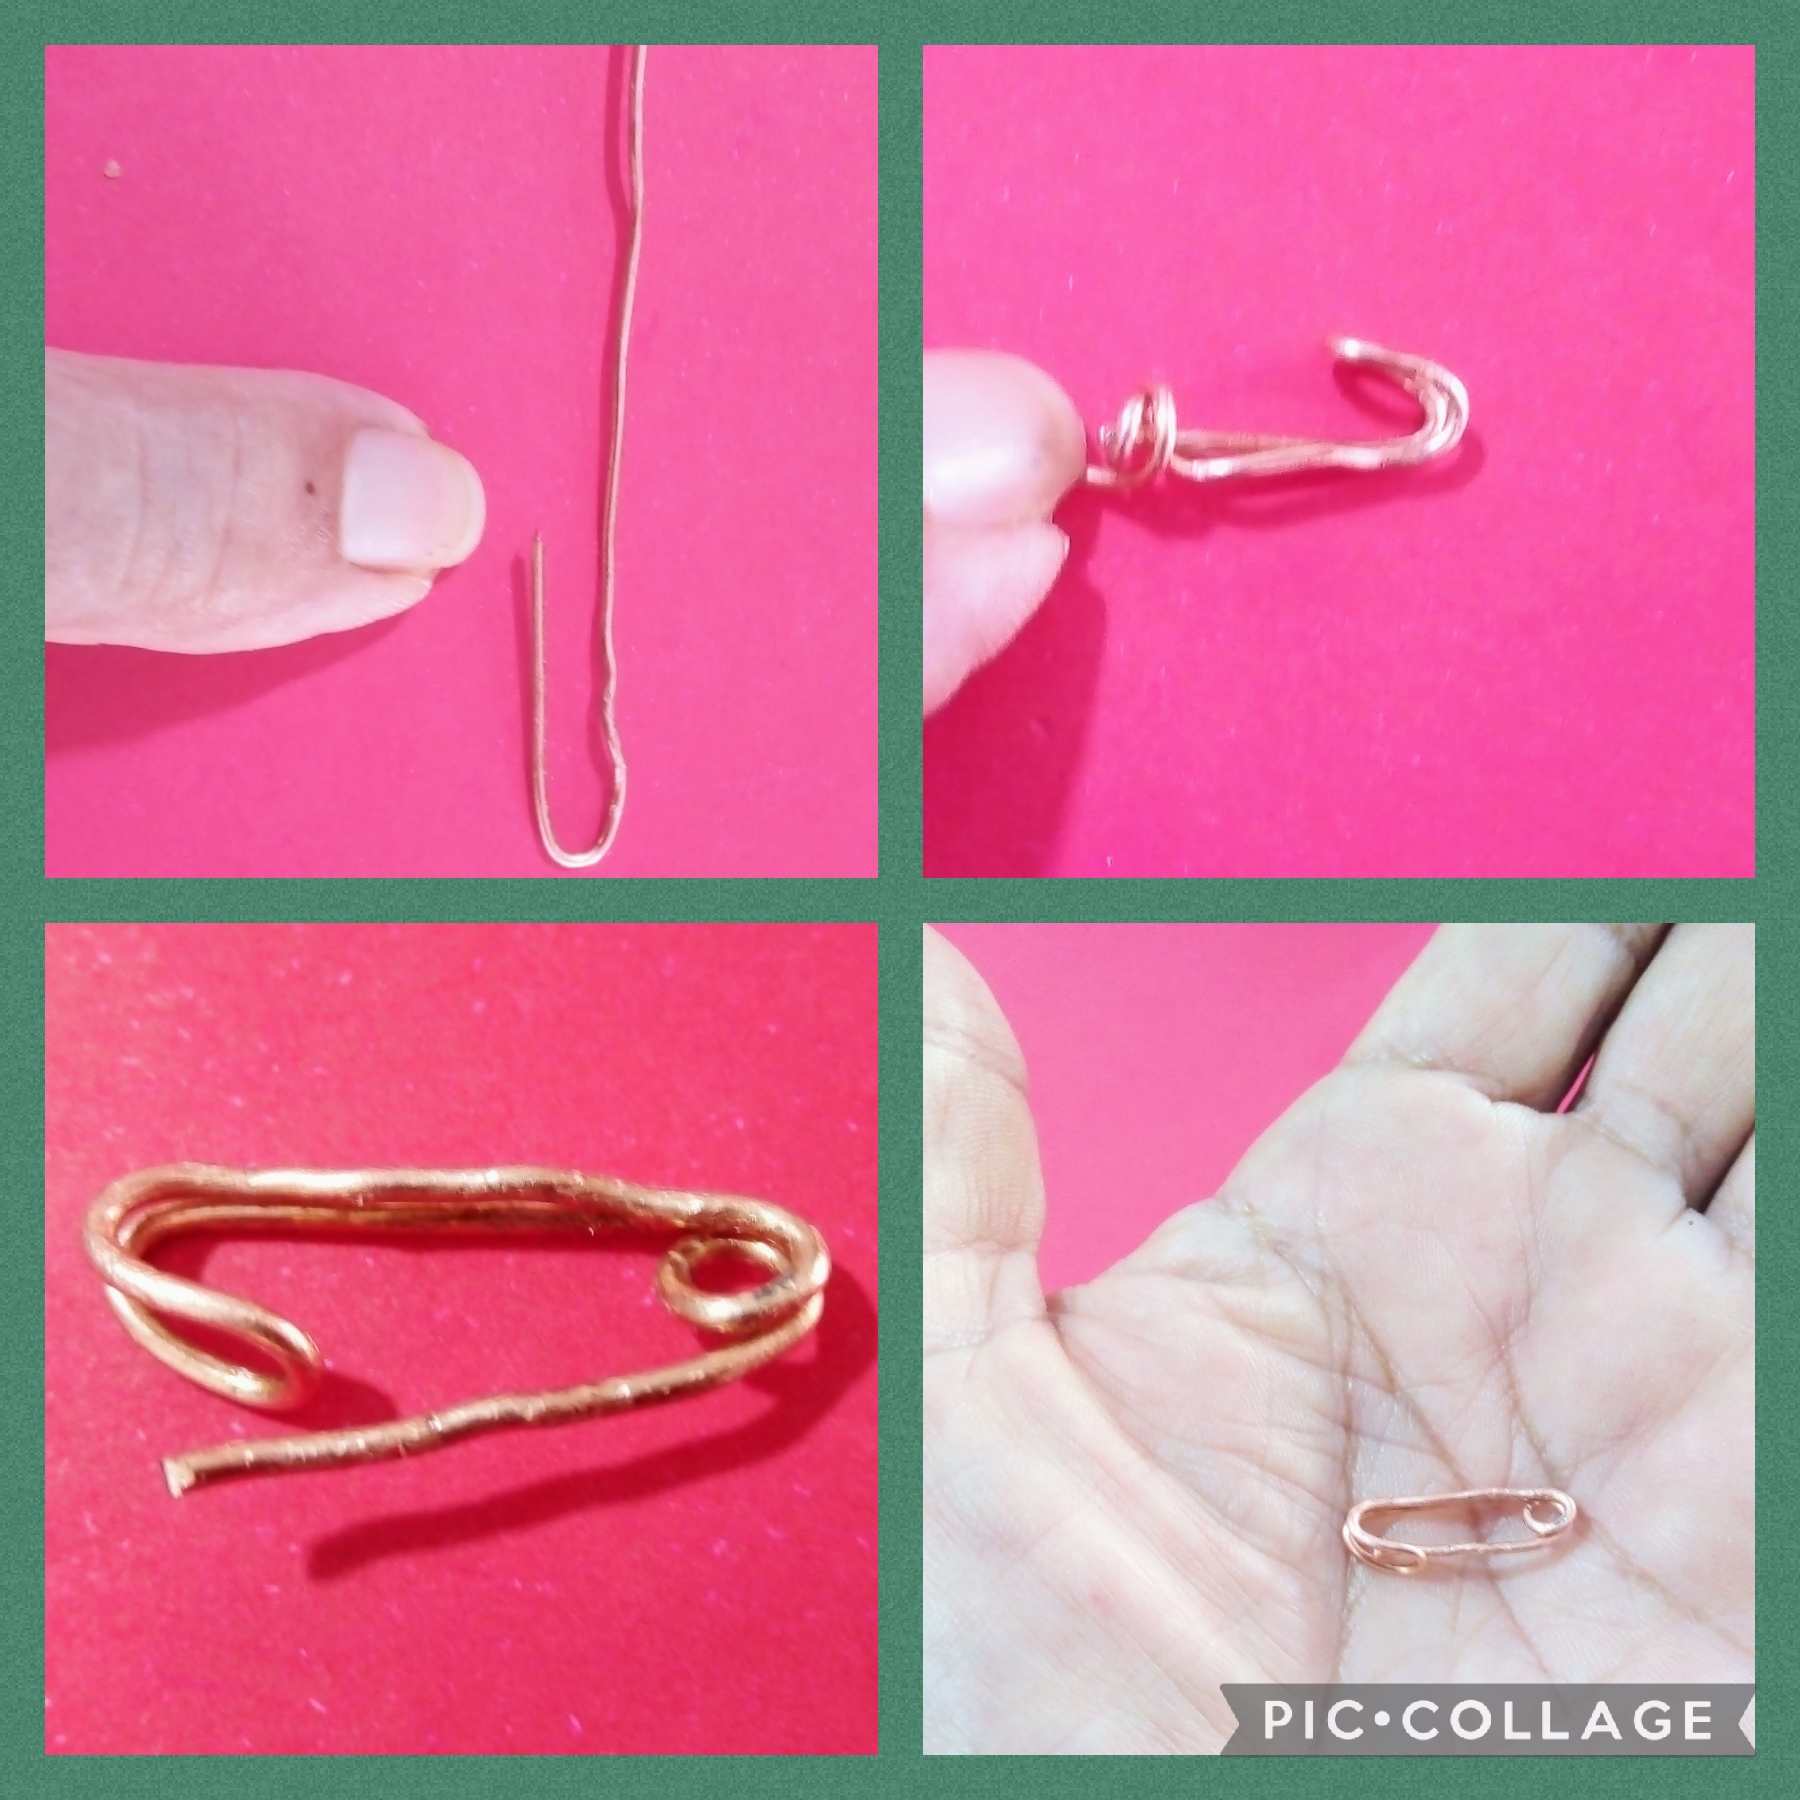
PASO SEIS:
Ahora voy a realizar un alfiler para mí prendedor, con un alambre de cobre de doce centímetros uso la pinza redonda y doblo a siete centimetros, luego con la pinza plana ajusto y aliso el alambre, ahora uso la pinza de corte y corto un extremo; con el otro alambre doy vuelta y media sobre el alambre que corté y hago un círculo, con la pinza redonda hago presión sobre el alambre doble a la altura de dos centímetros, como se ve en las fotos, y así queda mi alfiler; para evitar que nos haga daño, lijo bien la punta y con alambre muy fino de color verde fijo a las flores y así quedó mi bellísimo prendedor.
STEP SIX:
Now I am going to make a pin for my pin, with a twelve centimeter copper wire I use the round pliers and bend it to seven centimeters, then with the flat pliers I adjust and straighten the wire, now I use the cutting pliers and cut one end; With the other wire I turn and a half on the wire that I cut and make a circle, with the round clamp I press on the double wire at a height of two centimeters, as seen in the photos, and that is how my pin looks; To prevent it from hurting us, I sanded the tip well and fixed it to the flowers with very fine green wire, and that is how my beautiful brooch turned out.
Artistas Creativos de esta comunidad, jewerly, espero que lo hayan pasado de maravilla en familia, que como siempre Dios nos brinde esa armonia, alegría y mucha paz para que estemos siempre animados gozando de mucha salud.
También espero sus valiosos comentarios sobre el Prendedor de la Tía abuela, a ella le pareció muy elegante y quedó contentisima, gracias a ustedes los que siempre apoyan mi contenido, que Dios me los bendiga, que el inicio de semana sea de mucho éxito y nos vemos en la próxima manualidad.
Creative Artists of this community, jewerly, I hope you had a wonderful time with your family, that as always God gives us that harmony, joy and much peace so that we are always animated and enjoying great health.
I also hope your valuable comments about the Great Aunt Pin, she thought it was very elegant and she was very happy, thanks to you who always support my content, God bless you, may the start of the week be very successful and we see you in the next tutorial
Las imágenes de este tutorial son de mi propiedad las fotos fueron tomadas con mi celular Motorola E6 y las edite con una aplicación gratis del mismo.
Para traducir texto usé geogle traduuctor.
The images in this tutorial are my property, the photos were taken with my Motorola E6 cell phone and I edited them with a free application of the same.
To translate text I used geogle translator.

Congratulations @nhaydu! You have completed the following achievement on the Hive blockchain and have been rewarded with new badge(s):
Your next target is to reach 400 upvotes.
You can view your badges on your board and compare yourself to others in the Ranking
If you no longer want to receive notifications, reply to this comment with the word
STOPTo support your work, I also upvoted your post!
Support the HiveBuzz project. Vote for our proposal!
Thank you for sharing this post on HIVE!
Your content got selected by our fellow curator jasonmunapasee & you just received a little thank you upvote from us for your great work! Your post will be featured in one of our recurring compilations which are aiming to offer you a stage to widen your audience within the DIY scene of Hive. Next time make sure to post / cross-post your creation within the DIYHub community on HIVE and you will receive a higher upvote ;) Stay creative & HIVE ON!
Hermoso ver como formaste un prendedor amiga @nhaydu que gran creatividad la tuya, nos encanta el ramillete de flores les has dado una forma hermosa, felicidades 👏
Cuando leo estos comentarios donde se reconoce tu creatividad aún me da emoción hive-189504, gracias por ese apoyo que me anima a realizar nuevos contenidos, un abrazote.